Sentry II Remote Operating Instructions - Truth Hardware
Sentry II Remote Operating Instructions - Truth Hardware
Sentry II Remote Operating Instructions - Truth Hardware

Create successful ePaper yourself
Turn your PDF publications into a flip-book with our unique Google optimized e-Paper software.
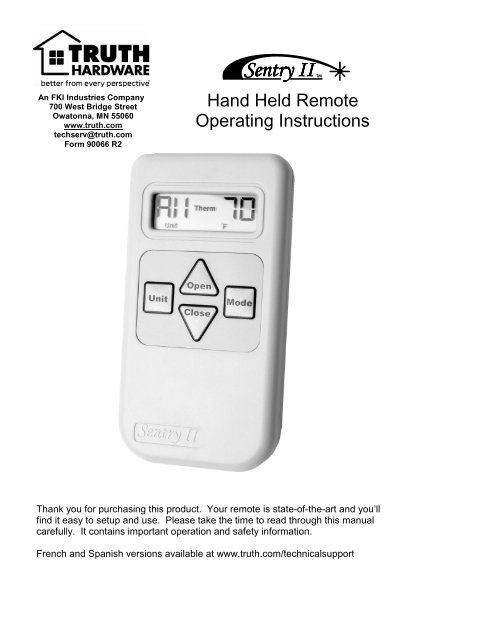
An FKI Industries Company<br />
700 West Bridge Street<br />
Owatonna, MN 55060<br />
www.truth.com<br />
techserv@truth.com<br />
Form 90066 R2<br />
<strong>Sentry</strong> <strong>II</strong> TM<br />
Hand Held <strong>Remote</strong><br />
<strong>Operating</strong> <strong>Instructions</strong><br />
Thank you for purchasing this product. Your remote is state-of-the-art and you’ll<br />
find it easy to setup and use. Please take the time to read through this manual<br />
carefully. It contains important operation and safety information.<br />
French and Spanish versions available at www.truth.com/technicalsupport
DANGER<br />
To help prevent severe personal injury or death:<br />
• Read and understand instructions completely before beginning<br />
installation.<br />
• Wiring must be installed by a qualified electrician according to local and<br />
National Electrical Codes (N.E.C.)<br />
• Disconnect main power before beginning installation! Verify that power is<br />
OFF at the main breaker or fuse panel by testing with a voltage meter that<br />
you know is working correctly.<br />
• Connect power only after motor connections and settings are verified.<br />
• This equipment does not provide a method to shut off power, and should<br />
be connected to a dedicated breaker or fused power circuit.<br />
• The screen interlock MUST be correctly mounted and is a required part of<br />
the installation. It is intended to help prevent injury that could result from<br />
reaching into the window or skylight area during operation. The correct<br />
installation of the screen interlock is the responsibility of the installer.<br />
• Do not allow children to operate the wall push buttons or remote control<br />
transmitter(s).<br />
Additional Safety Guidelines<br />
• The <strong>Sentry</strong> <strong>II</strong> system must not be used on windows that are intended to<br />
meet egress codes.<br />
• The <strong>Sentry</strong> <strong>II</strong> system is intended for indoor use only, with screens in place.<br />
• When connecting the <strong>Sentry</strong> <strong>II</strong> system to accessories, read the installation<br />
instructions supplied with each accessory before beginning installation.<br />
• Save ALL instructions.<br />
• Installer – please be sure to give ALL instructions to the homeowner once<br />
installation is complete.<br />
2
Table of Contents<br />
Getting Started<br />
Important information . . . . . . . . . . . . . . . . . 3<br />
Parts list . . . . . . . . . . . . . . . . . . . . . . . . . . . . 4<br />
<strong>Remote</strong> overview . . . . . . . . . . . . . . . . . . . . . 4<br />
Planning . . . . . . . . . . . . . . . . . . . . . . . . . . . . 5<br />
Set Up<br />
Operation<br />
<strong>Remote</strong> set up . . . . . . . . . . . . . . . . . . . . . . . 6-8<br />
Options for multiple units . . . . . . . . . . . . . . 9<br />
Normal operation . . . . . . . . . . . . . . . . . . . . . 10<br />
Thermostat operation . . . . . . . . . . . . . . . . . . 11<br />
Helpful<br />
Information<br />
This remote is compatible with all <strong>Sentry</strong> <strong>II</strong> window or skylight motorization<br />
systems. Setting up the remote first requires window system installation.<br />
About RF Devices<br />
• This remote control is an RF (radio frequency) device and therefore<br />
does not need to be pointed in any manner toward the intended<br />
window/skylight to be operated. The effective range for this remote is<br />
approximately 50ft, but this varies with application conditions such as:<br />
wall materials, mounting height of receiver and interference from other<br />
devices radiating on RF frequencies.<br />
• Devices which could be affected or cause interference can include the<br />
following: radio baby monitors, garage door openers and automotive<br />
keyless entry / security systems.<br />
Battery Information<br />
Troubleshooting . . . . . . . . . . . . . . . . . . . . . 12-13<br />
Switching between Fahrenheit & Celsius . . 13<br />
Forced re-initialization . . . . . . . . . . . . . . . . . 14<br />
Blind set up & control . . . . . . . . . . . . . . . . . 15-16<br />
Battery replacement . . . . . . . . . . . . . . . . . . . 16<br />
Regulatory compliance . . . . . . . . . . . . . . . . . 17<br />
Important information<br />
• This remote control uses 3 size “AAA” batteries (not included). Insert<br />
with the proper polarities (+ and -) aligned correctly. The use of<br />
alkaline batteries is recommended for best service life. Do not mix<br />
alkaline and manganese battery types, nor use old and new batteries<br />
together.<br />
• When the remote will not be used for a long time, remove the batteries<br />
to avoid damage caused by battery leakage and corrosion.<br />
A battery icon “ “ will become visible on the LCD when the<br />
batteries are down to 20% of usable life. When the battery icon “ “<br />
begins to flash the batteries no longer provide enough power to<br />
operate the remote consistently, and therefore should be replaced.<br />
3
Parts List<br />
• <strong>Sentry</strong> <strong>II</strong> remote unit<br />
• Standard remote battery cover<br />
• Wall mounting remote battery cover<br />
• Two wall mounting screws<br />
<strong>Remote</strong> Overview<br />
CONTROLS AND DISPLAY INDICATORS<br />
Mode indicator<br />
Unit indicator<br />
Unit<br />
Motor<br />
F° SET C°<br />
Room temperature<br />
with measurement system<br />
(F° or C°) indicated below<br />
Low battery indicator<br />
Unit button selects the<br />
window or group of<br />
windows. Unit choices<br />
are 1 through 9 or All.<br />
Unit<br />
Open<br />
Close<br />
Mode<br />
Open and Close buttons control<br />
windows or blinds. They will also stop<br />
the window or blind in a partial open<br />
position by pressing the button opposite<br />
window or blind travel<br />
SET indicator<br />
Set mode allows the<br />
remote to set up a wall<br />
mounted controller<br />
Mode button toggles between<br />
control modes:<br />
• Motor (windows)<br />
• Blind<br />
• Therm (temperature)<br />
Note: The buttons on the remote need to be held down for ½ second<br />
for the command to be accepted.<br />
The <strong>Sentry</strong> <strong>II</strong> system is designed to operate both windows and skylights. This<br />
manual refers to windows and skylights as “windows” and all skylight and window<br />
blinds as “blinds.”<br />
4
Planning<br />
If you have only one window you can skip ahead to the next<br />
step, “<strong>Remote</strong> Setup.”<br />
The <strong>Sentry</strong> <strong>II</strong> remote control has the ability to operate multiple power windows<br />
with a single command sequence. This is accomplished by assigning wall or<br />
skylight mounted controllers a unit number with the remote. Controllers with the<br />
same unit number make up a group. The remote can operate up to nine groups.<br />
◦°<br />
Unit #2<br />
Unit #3<br />
Unit #1<br />
In this illustration the two front windows are set to “Unit” #1. This allows<br />
the home owner to operate both windows with one command sequence<br />
from the remote. The side window and skylight are assigned their own<br />
“Unit” numbers. This allows each of these units to be controlled<br />
individually.<br />
Note<br />
• The remote has an “All” function that will open or close all<br />
windows or skylights regardless of which “Unit” or group<br />
each window belongs to.<br />
• If the remote is wall mounted, it should be placed so that it is<br />
within site of all windows and skylights it will control.<br />
• See “Options For Multiple Units” (page 9) for more details on<br />
this topic.<br />
Important: If you are not the homeowner, it is important to contact<br />
the homeowner and discuss which windows or skylights the<br />
homeowner would want to control as a group. It may be very<br />
inconvenient for the homeowner to reset these settings once<br />
installation and remote control set up are complete.<br />
5
<strong>Remote</strong> Control Set Up<br />
After installing window motors, blinds, and control systems set up the remote<br />
using the following steps:<br />
1. Place three “AAA” batteries into the remote.<br />
2. The display on the remote will be blank except for the word “SET.”<br />
<strong>Remote</strong> must be in “SET” mode to set up. If “SET” is not showing in<br />
the display or the remote is out of the “SET” mode, remove and reinstall<br />
the batteries. (Re-installing the batteries will refresh the<br />
remote and cause it to come up in the “SET” mode.) When reinserting<br />
the batteries be sure they are fresh and properly positioned with the<br />
cover in place.<br />
SET<br />
“SET” indicator<br />
is displayed after<br />
batteries are installed<br />
Unit<br />
Open<br />
Close<br />
Mode<br />
3. Press the “Learn” button once on the wall or skylight mounted<br />
control board.<br />
Remove cover if installed.<br />
“Learn” Button<br />
HS Controller<br />
“Learn” Button<br />
WLS Controller<br />
6
The RF <strong>Remote</strong> Status LED in the control box will light a steady red<br />
and the Motor Status LED (on control board for HS model and wall<br />
plate for WLS model) will begin to flash Green. This indicates that the<br />
controller is in “Learn” mode.<br />
Note: The control unit will stay in learn mode for 1 minute. If the<br />
setup has not been completed in that time, press the “Learn”<br />
button again and continue where you left off in the set up<br />
sequence.<br />
Important note: The “Learn” button electronically links the<br />
control unit to the remote. It will not help with other problems<br />
that exist between a control unit and window motor.<br />
4. Press the “Open” button on the remote once. The RF <strong>Remote</strong><br />
Status LED will flash then go out.<br />
Motor<br />
SET<br />
Unit<br />
F°<br />
Unit<br />
Open<br />
Close<br />
Mode<br />
Unit<br />
Open<br />
Close<br />
Mode<br />
Press the<br />
“Open”<br />
button<br />
The display on the remote should<br />
change to show both the unit as “All”<br />
and the room temperature. It will take<br />
several seconds for the display to<br />
change.<br />
5. Press the “Unit” button on the remote to select the desired Unit<br />
Code that will correspond to this window or skylight.<br />
Choose a unit<br />
Code (1-9)<br />
Unit<br />
+ Open<br />
1 2<br />
The first time the “Unit” button is pressed the remote displays 1 for the<br />
unit code. Each successive press will increase the unit code until it<br />
reaches 9.<br />
7
Note: Any number of windows can be put onto a single “Unit” code.<br />
6. Press the “Open” button on the remote once again.<br />
The RF <strong>Remote</strong> status LED should flash then go out and the Motor<br />
Status LED will go out. <strong>Remote</strong> control set up is now complete.<br />
7. Press “Open” button again. Observe Motor Status LED. (It will be<br />
on the control switch of a WLS system or on the motor itself for an HS<br />
system.)<br />
• A steady green LED (while opening/closing) means system<br />
set up is complete and fully functional<br />
• A red LED (while opening/closing) means the system is<br />
going through initialization. During initialization, the window<br />
will fully open then close once. Once initialization is<br />
complete, the system will function normally and a green LED<br />
will be visible while operating.<br />
Set up of multiple units: Each window must be added individually to a remote.<br />
Follow these abbreviated steps for each window:<br />
Set up Instruction Steps<br />
<strong>Remote</strong> Status<br />
LED Display<br />
Motor Status<br />
LED Display<br />
Comment<br />
1-2. Remove and re-install<br />
one battery in remote<br />
None None <strong>Remote</strong> will display “Set”<br />
3. Press “Learn” button on<br />
control unit<br />
Steady red<br />
Blinking green<br />
4. Press “Open” button on<br />
remote once<br />
Several red<br />
blinks<br />
Continues to<br />
blink green<br />
links remote to control unit<br />
5. Select “Unit” number on<br />
remote<br />
None<br />
Continues to<br />
blink green<br />
6. Press “Open” button on<br />
remote once<br />
7. Press “Open” button<br />
again<br />
3 red blinks None (Stops<br />
blinking green)<br />
3 red blinks Red or green<br />
(See<br />
comments)<br />
This step enters the unit<br />
number into the remote.<br />
Red means unit is being<br />
initialized – to be followed by<br />
green. Green means set up<br />
is successful and complete.<br />
Repeat for each window<br />
Using Unit Code “All”: Each control unit is designed to only respond to one<br />
“Unit” code and “All”. You can not set up a control unit to respond to more than<br />
one unit code.<br />
8
Options for multiple units<br />
There are a number of different programming possibilities provided by the “Unit”<br />
code function of the <strong>Sentry</strong> <strong>II</strong> remote. Here are a few:<br />
1. Grouped units on single “Unit” code: There is no limit to the<br />
number of windows that can be grouped on a single unit code. This<br />
feature can provide convenient control of a group of windows as long<br />
as they are within range of the remote control (approx. 100ft)<br />
2. Banked windows on single “Unit” code: By using the method<br />
described in #1 above you can also group windows on the same side<br />
of the room or “bank” allowing you to take advantage of prevailing wind<br />
conditions to make your home more comfortable. To further improve<br />
cross ventilation in a room, group windows on opposing walls.<br />
3. Ventilation using chimney effect: Combining an open skylight<br />
window and a ground floor window (preferably on the shady or cooler<br />
side of the house) will create a natural convection draft known as<br />
“chimney effect”. This helps to cool a room or house by allowing the<br />
hot air to escape out through the skylight and be replaced by cooler air<br />
drawn in through the ground floor window.<br />
4. All windows programmed to the remote control will respond when the<br />
“Unit” code is set to “All”.<br />
5. <strong>Sentry</strong> <strong>II</strong> system allows up to two remotes to be used to control a<br />
single window or group of windows. The set up process teaches wall<br />
mounted controllers to recognize the unique identity of individual<br />
remotes. Repeat set up steps 2 through 7 for each remote.<br />
9
Normal Operation<br />
OPEN A SELECTED WINDOW<br />
Choose Unit<br />
Number or All<br />
Choose<br />
“Motor”Function<br />
Stops Window<br />
In Place<br />
+<br />
Unit<br />
+<br />
Mode<br />
Open<br />
Optional<br />
Close<br />
1 2 3 4<br />
CLOSE A SELECTED WINDOW<br />
Choose Unit<br />
Number or All<br />
Choose<br />
“Motor”Function<br />
Stops Window<br />
In Place<br />
Unit<br />
+<br />
Close<br />
Mode<br />
Optional<br />
Open<br />
+<br />
1 2 3 4<br />
10
Thermostat Operation<br />
There is an internal thermostat built into the hand held remote control. The<br />
temperature is always displayed on the right hand side of the remote display.<br />
Since the thermostat is built into the remote, the remote will display the<br />
temperature for the area the remote is located in. The thermostat can be<br />
switched between Fahrenheit and Celsius (see the “Helpful Information” section<br />
of the manual).<br />
When controlling the windows using the Thermostat mode, be sure to place the<br />
remote where it will get the best temperature reading. Be careful not to place it<br />
where it will be affected by direct sunlight or other factors.<br />
To control a selected window via the remote’s internal thermostat<br />
Select the units<br />
to be controlled<br />
by the thermostat<br />
Select<br />
“Therm”<br />
Adjust the<br />
temperature<br />
“set point”<br />
Note:<br />
+<br />
Unit<br />
+ Mode Open<br />
Close<br />
1 2 3<br />
• When in “Therm” mode, pushing the open or close buttons will cause<br />
the set point temperature to be displayed. The “SET” indicator will be<br />
visible in the display along with the current set point temperature<br />
denoting the thermostat set point is being adjusted. After 5 seconds of<br />
inactivity the remote will accept the new temperature set point. At this<br />
time the ”SET” indicator disappears and the room temperature is<br />
displayed.<br />
• When the remote is in the “Therm” mode the motors programmed to<br />
the displayed “Unit” code will react to changes in room temperature.<br />
When the room temperature is above the set point temperature the<br />
windows will automatically open. When the temperature drops below<br />
the set point temperature by 5° F (2°C) the windows will automatically<br />
close.<br />
• The remote must be located no greater than 50-100 feet from the<br />
windows for reliable operation in most residential applications. It is a<br />
good idea to verify the remote will open and close the windows from<br />
the desired thermostat location before using this function.<br />
• To deactivate the thermostat function change the mode to either<br />
“Motor” or “Blind.”. The set point will be retained for future use.<br />
11
Helpful Information<br />
TROUBLE SHOOTING<br />
If the remote display is blank<br />
• Verify batteries are installed correctly<br />
• Change the batteries<br />
The windows open or close by themselves<br />
• Check the mode setting on the remote. If the remote is in the “Therm” or<br />
thermostat mode, the windows will open and close automatically based on<br />
temperature. To deactivate the thermostat function change the mode to<br />
either “Motor” or “Blind.” The set point will be retained for future use.<br />
Window does not open fully<br />
• The <strong>Sentry</strong> <strong>II</strong> system is intentionally programmed to stop windows and<br />
skylights from reaching full open to keep wear and tear on the hardware to<br />
a minimum. Skylights are programmed to open to 75% of full range.<br />
Casement and awning windows are programmed to open to 75% of full<br />
range.<br />
• Windows and skylights can be opened fully by pressing the open button<br />
multiple times once the window or skylight stops at its programmed full<br />
open position, The window or skylight will open a few degrees with each<br />
key press until a full open position is reached.<br />
The word “SET” appears after the batteries are replaced.<br />
• This is normal. Pressing the open or close button will return the remote to<br />
normal function. All previous setting are retained.<br />
• See “Replacing the Batteries” for more information.<br />
Windows don’t react when the remote buttons are pushed<br />
• Hold remote button down longer. It takes a ½ second button press for the<br />
remote to respond.<br />
• <strong>Remote</strong> out of range. Typical range is 50 feet depending on installation<br />
conditions.<br />
• Circuit breaker tripped (reset circuit breaker)<br />
• Screen interlock or jumper disconnected. Reconnect. (See installation<br />
instructions for <strong>Sentry</strong> <strong>II</strong> WLS or <strong>Sentry</strong> <strong>II</strong> HS.)<br />
12
<strong>Sentry</strong> <strong>II</strong> system allows up to two remotes to be used to control a single window or<br />
group of windows. The set up process teaches wall mounted controllers to recognize<br />
the unique identity of individual remotes. Repeat set up steps 2 through 7 for each<br />
remote.<br />
More information is available at www.truth.com Look for Technical Support<br />
On our web site you can find information on:<br />
• Installation <strong>Instructions</strong><br />
• Additional trouble shooting help<br />
• <strong>Hardware</strong> Maintenance<br />
• <strong>Hardware</strong> finish maintenance<br />
• Locate distributors<br />
SWITCHING BETWEEN FAHRENHEIT OR CELSUIS<br />
The temperature display can be switched to either Fahrenheit (F°) or Celsius (C°).<br />
To change the display:<br />
• Remove the batteries<br />
• Change the position of switch 2 located in the battery compartment of<br />
the remote (See diagram below)<br />
• Re-install batteries<br />
This Switch changes Temp. display<br />
from F to C.<br />
13
FORCED RE-INITIALIZATION<br />
Press and hold<br />
both buttons to reset<br />
Unit<br />
+ Mode<br />
1 1<br />
When an error is noted in the operation of the motor unit (indicated by a Flashing<br />
RED light on the wall plate or status indicator), the unit can be “Reset” by forcing<br />
a re-initialization via the remote control.<br />
1. Shut off the power* to the unit for 20 seconds. Upon reapplication of<br />
power the unit should automatically close and stop.<br />
2. Using the “Unit” key select the window or skylight.<br />
Note: A Reset cannot be activated in the “All” Unit setting.<br />
3. Using the “Mode” key select the “Motor” function.<br />
4. Press both the “Unit” and “Mode” keys down simultaneously and hold<br />
them until the “Motor” icon on the display blinks twice. Watch to be sure<br />
the Unit Code does not change during the button press. If it does you will<br />
have to return to step 3.<br />
5. The selected unit should begin to run through a full open and closed cycle<br />
during which a red light should be seen at the wall switch plate or status<br />
indicator.<br />
Important: Watch the unit for obstructions or other problems during this<br />
procedure. Take action to correct hardware or window/skylight related<br />
problems as necessary.<br />
6. Repeat this procedure (starting from step three) until the problem is<br />
resolved.<br />
*Power interruption is most easily accomplished by shutting off the specific<br />
breaker at the homes fuse or power distribution panel.<br />
14
BLIND SET UP & CONTROL<br />
Refer to the <strong>Sentry</strong> <strong>II</strong> WLS or <strong>Sentry</strong> <strong>II</strong> HS installation instructions for proper<br />
installation and wiring of the blind motor system to the control unit.<br />
After the <strong>Sentry</strong> <strong>II</strong> remote has been successfully set up to control a window motor<br />
and the blinds have been properly installed and wired to the control unit there is<br />
no further set up required for blinds.<br />
The blind(s) will have the same “Unit” code (or group number) as the window<br />
motor. For instance, if you have a pair of windows programmed to open and<br />
close from “Unit” code 1, the blinds will also open and close when the remote is<br />
set to unit code 1.<br />
Note: The <strong>Sentry</strong> <strong>II</strong> remote will not control a window with blinds only. The<br />
window must have a window motor installed in addition to a motorized blind for a<br />
blind to function from the remote.<br />
OPEN A SELECTED BLIND<br />
Choose Unit<br />
Number or All<br />
Choose<br />
“Blind” Function<br />
Stops Blind<br />
In Place<br />
+<br />
Unit<br />
+<br />
Mode<br />
Open<br />
Optional<br />
Close<br />
1 2 3 4<br />
15
CLOSE A SELECTED BLIND<br />
Choose Unit<br />
Number or All<br />
Choose<br />
“Blind”Function<br />
Stops Blind<br />
In Place<br />
Unit<br />
+<br />
Close<br />
Mode<br />
Optional<br />
Open<br />
+<br />
1 2 3 4<br />
REPLACING THE BATTERIES<br />
• Replace the batteries using 3 “AAA” size batteries.<br />
• Insert with the proper polarities (+ and -) aligned correctly. The use of<br />
alkaline batteries is recommended for best service life. Do not mix<br />
alkaline and manganese battery types, nor use old and new batteries<br />
together.<br />
• Once fresh batteries are in place, the word “SET” will appear in the<br />
display. This is normal. Pressing the open or close button will return the<br />
remote to normal function. All previous setting are retained.<br />
16
Regulatory Compliance<br />
United States of America<br />
Federal Communications Commission (FCC)<br />
Unintentional emitter per FCC Part 15<br />
Note: This equipment has been tested and found to comply with the limits for a Class B digital device,<br />
pursuant to part 15 of the FCC Rules. These limits are designed to provide reasonable protection against<br />
harmful interference in a residential installation. This equipment generates, uses, and can radiate radio<br />
frequency energy and, if not installed and used in accordance with the instructions may cause harmful<br />
interference to radio communications. However, there is no guarantee that interference will not occur in a<br />
particular installation. If this equipment does cause harmful interference to radio or television reception,<br />
which can be determined by turning the equipment off and on, the user is encouraged to try to correct the<br />
interference by one or more of the following measures:<br />
o Reorient or relocate the receiving antenna.<br />
o Increase the separation between the equipment and receiver.<br />
o Connect the equipment into an outlet on a circuit different from that to<br />
which the receiver is connected.<br />
o Consult the dealer or an experienced radio/TV technician for help.<br />
Warning: Changes or modifications not expressly approved by <strong>Truth</strong> <strong>Hardware</strong> could void the FCC<br />
compliance and negate your authority to operate the product.<br />
FCC Declaration of Conformity<br />
According to 47 CFR, Parts 15.107 and 15.109 Class B<br />
Responsible party: <strong>Truth</strong> <strong>Hardware</strong>, 700 West Bridge St., Owatonna, MN 55060<br />
www.truth.com or 1-800-324-4487<br />
Product: <strong>Sentry</strong> <strong>II</strong> Hand Held <strong>Remote</strong> (43.53)<br />
This device complies with part 15 of the FCC Rules. Operation is subject to the following two conditions: (1)<br />
This device may not cause harmful interference, and (2) this device must accept any interference received<br />
including interferences that may cause undesired operation.<br />
Canada<br />
Industry Canada (IC)<br />
Unintentional emitter per ICES-003<br />
This class B digital apparatus complies with Canadian ICES-003.<br />
Cet appareil numérique de la classe B est conforme á la norme NMB-003 du Canada.<br />
Operation is subject to the following two conditions: (1) this device may not cause interference, and (2) this<br />
device must accept any interference, including interference that may cause undesired operation of the<br />
device.<br />
Europe<br />
European Community EMC Directive (CE)<br />
Compliance with these directives implies conformity to the following<br />
European Norms or Regulations:<br />
Emissions<br />
Immunity<br />
ETSI EN 300-220-3 v1.1.1 (2000-09) ETSI EN 301 489-3 v1.4.1 (2000-04)<br />
ETSI EN 301 489-3 v1.4.1 (2000-04)<br />
17