MQ-Valve Assembly and Test Instructions - Mcarterbrown.com
MQ-Valve Assembly and Test Instructions - Mcarterbrown.com
MQ-Valve Assembly and Test Instructions - Mcarterbrown.com

You also want an ePaper? Increase the reach of your titles
YUMPU automatically turns print PDFs into web optimized ePapers that Google loves.
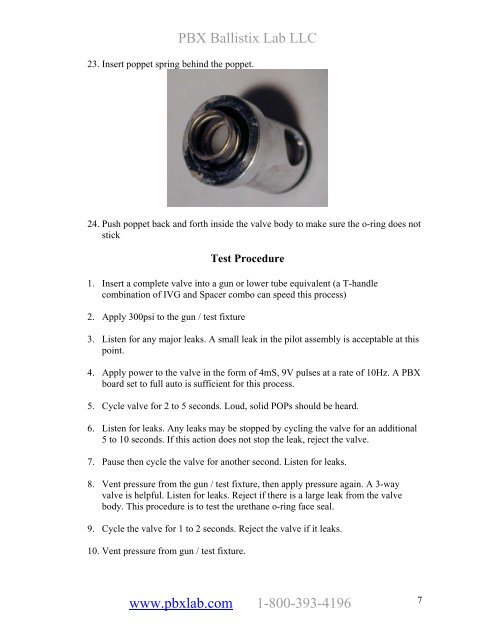
PBX Ballistix Lab LLC23. Insert poppet spring behind the poppet.24. Push poppet back <strong>and</strong> forth inside the valve body to make sure the o-ring does notstick<strong>Test</strong> Procedure1. Insert a <strong>com</strong>plete valve into a gun or lower tube equivalent (a T-h<strong>and</strong>le<strong>com</strong>bination of IVG <strong>and</strong> Spacer <strong>com</strong>bo can speed this process)2. Apply 300psi to the gun / test fixture3. Listen for any major leaks. A small leak in the pilot assembly is acceptable at thispoint.4. Apply power to the valve in the form of 4mS, 9V pulses at a rate of 10Hz. A PBXboard set to full auto is sufficient for this process.5. Cycle valve for 2 to 5 seconds. Loud, solid POPs should be heard.6. Listen for leaks. Any leaks may be stopped by cycling the valve for an additional5 to 10 seconds. If this action does not stop the leak, reject the valve.7. Pause then cycle the valve for another second. Listen for leaks.8. Vent pressure from the gun / test fixture, then apply pressure again. A 3-wayvalve is helpful. Listen for leaks. Reject if there is a large leak from the valvebody. This procedure is to test the urethane o-ring face seal.9. Cycle the valve for 1 to 2 seconds. Reject the valve if it leaks.10. Vent pressure from gun / test fixture.www.pbxlab.<strong>com</strong> 1-800-393-41967