

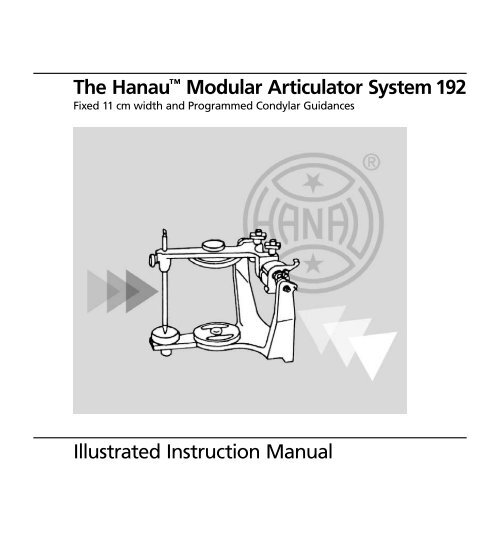
The Hanau™ Modular Articulator System 192 Illustrated ... - Whip Mix
The Hanau™ Modular Articulator System 192 Illustrated ... - Whip Mix
The Hanau™ Modular Articulator System 192 Illustrated ... - Whip Mix

Create successful ePaper yourself
Turn your PDF publications into a flip-book with our unique Google optimized e-Paper software.
<strong>The</strong> Hanau <strong>Modular</strong> <strong>Articulator</strong> <strong>System</strong> <strong>192</strong>Fixed 11 cm width and Programmed Condylar Guidances<strong>Illustrated</strong> Instruction Manual
A Study Case for Occlusal AnalysisThis instruction manual presents a study case for occlusal analysis usingthe HANAU <strong>Modular</strong> <strong>Articulator</strong>.<strong>The</strong> HANAU Spring-Bow is used in this text to record and transfer thepatient’s condyle/maxillary arch relation to the <strong>Modular</strong> <strong>Articulator</strong>.Hanau <strong>Modular</strong> <strong>Articulator</strong>Hanau Spring-Bow facebowTwo interocclusal relation records are required. One centric relation andone straight protrusive (approximately 6 mm protrusion). Casts of themaxillary and mandibular arch are required. <strong>The</strong>ir occluding surfaces mustbe dry and free of nodules. <strong>The</strong> casts must seat snugly in the cusp imprintsof the interocclusal records.Centric and ProtrusiveInterocclusal relationrecords.Lower CastUpper CastStone casts of the mandibular andmaxillary arch.3
<strong>Illustrated</strong> Procedure1 Cover bitefork for maxillary occlusal imprint.Wax or compound.Occlusal imprint.Bitefork stem.2 Spring-bow application.Earpiece.Orbitale.Bow.Bitefork stem.Transfer rod.3 Remove the Spring-bow from the patient.4
4 Separate transfer rod/bitefork index assembly from bow andsend to the lab.Locked and secure frompatient procedure.5 Release centric locknuts and disengage both centric latches, removingupper member.Rotate centric latch.Centric locknut.6 Set both condylar inclinations at zero degrees.Loosen thumbscrews and rotate both guidesto zero degrees and re-tighten.Rotate guidance.5
7 Set incisal pin at mid-line chisel end down as shown and attach amounting plate.Mid-line.Lock.Incisal pin.Mounting plate.Chisel end.8 Remove flat plastic anterior platform.Lift platform from keyways.Remove thumbscrew.9 Attach Spring-bow mounting platform.Dowel.Spring-bow mounting platform.Anterior stop screw.6
10 Attach accessory cast support.Cast support.Mounting platform.11 Insert transfer rod into mounting socket.12 Additional weight of stone cast is supported by cast support.Bitefork index.Support occlusal index.Lock.7
13 Replace upper member and lock in centric.Simultaneously lock both latches.Incisal pin on anterior stop .14 Swing upper member open to the stop. Seat and lute upper cast inocclusal index.Locked in centric.Stop.Upper cast seated in occlusal index.15 Close upper to push cast and mounting plate into stone.Close.Locked.Contact.8
16 Remove mounting platform. Replace with flat plastic anterior platform.Platform intokeyholes andattach withthumbscrew.17 Invert incisal pin, spherical end down. Set at mid-line.Mid-line.Tighten thumbscrew.Sperical end.18 Centric record compensation = thickness at third molar x 3.3 mm.Lower pin 3 mm.1mm at molar2mm at central3mm at incisal pin9
19 Turn articulator over, attach a mounting plate and position the upper/lower casts in centric.Mounting plate.Lubricate.Lower cast.Centric record.Upper cast.20 Use stone or plaster to mount the lower cast at this centric relation.Stone or plaster.Contact.Centric record.Check latches.21 Turn the articulator over, remove the luting and centric relation record.Incisal pin.Clean occlusion.Centric record.10
22 Loosen condylar guidance latches and right and left thumbscrews.Loosen right and left thumbscrews.Release both centric latches.23 Place the protrusive relation record between the upper and lower casts.Condylar inclination calibration.Upper cast.Protrusive record.Lower cast.24 Hold cast in record. Rotate both guidances until contact is made betweensuperior surface and condylar element.Push.Rotate both guidances.Record.11
25 In protrusive record the right and left guidance has been rotated to contactthe superior surface with the condyle. Lock thumbscrews.Tighten both thumbscrews.“Contact” superior surface with condyle.26 Remove protrusive record. Replace incisal pin and lock in centric.Latches locked.Casts in centric.Spherical end.Contact.27 Lubricate spherical end only. Anterior table dry and vinyl film betweencasts.4” square .0015” thick vinyl film.At Centric.Lubricate end only.Dry table.12
28 <strong>Mix</strong> accessory pantacrylic per separate instruction and spatulate ontodry platform.Acrylic2 ml &6 gm29 Close into centric and gently guide upper into straight protrusion. Returnto centric.Release centric latches.Guide with thumbs.Do not grasp incisal pin.30 Place the left lateral relation record between the upper and lower cast.Thumb pressure.Do not grasp incisal pin.13
31 Guide into left lateral and return to centric. Repeat all movements untilacrylic has set, approximately 5 minutes.Thumb pressure.This completes the articulator adjustment. Record all of the settings forfuture reference–horizontal condylar inclination, programmed CondylarGuidance (example 1.0-19C) and the articulator serial number.<strong>Articulator</strong> Care and MaintenanceYour <strong>Whip</strong> <strong>Mix</strong> articulator is a precision instrument and requires care andmaintenance. Periodic cleaning and lubricating as described below willassure prolonged life and dependable service from the instrument. Failureto follow these instructions will void your warranty.CleaningUse a mild soap and water solution with the aid of a brush to dissolveaccumulations of wax and to wash away carborundum grit. <strong>The</strong>n air dryand lubricate. DO NOT use strong detergents, alkalies, gasoline or naphthaas cleaning agents!14
LubricationLubricate the working and bearing components with a thin film of sewingmachine or high speed handpiece type oil. Wipe off excess oil to preventaccumulations of dust or grit. A thin coating of petroleum jelly must beapplied to all articulator surfaces that will be contacted by the gypsummounting material.OilDetail AOilDetail CDetail BABDetail DOilOilCOilDMounting Platethumbscrew, cleanas necessary.PullUnscrewRemoveClean andReplaceSTORAGEStore the articulator in a clean, dry atmosphere free of plaster and carborundumdust; away from acids, alkalies or corrosive medicaments. Wait a full dayafter mounting casts before storing the articulator in a carrying case or corrugatedcarton. Moisture dissipation from the stone in an enclosed area causesalkalinity of the stone mixture which can damage the articulator surface.15
Warranty<strong>Whip</strong> <strong>Mix</strong> Corporation warrants the articulator system to be free fromdefects in material and/or workmanship for a period of one year. In theevent of a defect, please notify the factory in writing of the defect priorto returning the instrument. <strong>Whip</strong> <strong>Mix</strong> Corporation will, at its option,either repair, replace or issue credit for such defects.Because <strong>Whip</strong> <strong>Mix</strong> Corporation is continually advancing the design of itsproducts and manufacturing methods, it reserves the right to improve,modify or discontinue products at any time, or to change specifications orprices without notice and without incurring obligations.<strong>Whip</strong> <strong>Mix</strong> Corporation - West1730 East Prospect Rd., Suite 101Fort Collins, CO 80525Toll-Free: 1-800-201-7286Fax: 1-970-472-1793www.whipmix.com<strong>Whip</strong> <strong>Mix</strong> and Hanau logo are registered trademarks and Hanau is atrademark of <strong>Whip</strong> <strong>Mix</strong> Corporation. ©2008 <strong>Whip</strong> <strong>Mix</strong> CorporationPN: 33962-9FN: 339629-F AD R0308


