Users Instructions for Rayburn Heatranger 368K Central
Users Instructions for Rayburn Heatranger 368K Central
Users Instructions for Rayburn Heatranger 368K Central

You also want an ePaper? Increase the reach of your titles
YUMPU automatically turns print PDFs into web optimized ePapers that Google loves.
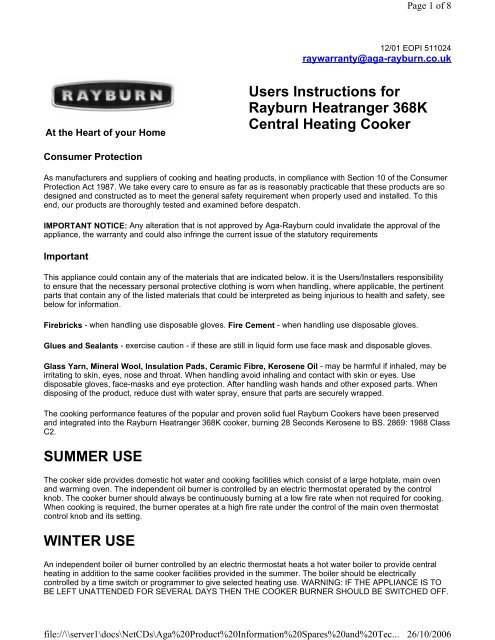
file://\\server1\docs\NetCDs\Aga%20Product%20In<strong>for</strong>mation%20Spares%20and%20Tec...Page 1 of 826/10/200612/01 EOPI 511024raywarranty@aga-rayburn.co.ukAt the Heart of your Home<strong>Users</strong> <strong>Instructions</strong> <strong>for</strong><strong>Rayburn</strong> <strong>Heatranger</strong> <strong>368K</strong><strong>Central</strong> Heating CookerConsumer ProtectionAs manufacturers and suppliers of cooking and heating products, in compliance with Section 10 of the ConsumerProtection Act 1987. We take every care to ensure as far as is reasonably practicable that these products are sodesigned and constructed as to meet the general safety requirement when properly used and installed. To thisend, our products are thoroughly tested and examined be<strong>for</strong>e despatch.IMPORTANT NOTICE: Any alteration that is not approved by Aga-<strong>Rayburn</strong> could invalidate the approval of theappliance, the warranty and could also infringe the current issue of the statutory requirementsImportantThis appliance could contain any of the materials that are indicated below. it is the <strong>Users</strong>/Installers responsibilityto ensure that the necessary personal protective clothing is worn when handling, where applicable, the pertinentparts that contain any of the listed materials that could be interpreted as being injurious to health and safety, seebelow <strong>for</strong> in<strong>for</strong>mation.Firebricks - when handling use disposable gloves. Fire Cement - when handling use disposable gloves.Glues and Sealants - exercise caution - if these are still in liquid <strong>for</strong>m use face mask and disposable gloves.Glass Yarn, Mineral Wool, Insulation Pads, Ceramic Fibre, Kerosene Oil - may be harmful if inhaled, may beirritating to skin, eyes, nose and throat. When handling avoid inhaling and contact with skin or eyes. Usedisposable gloves, face-masks and eye protection. After handling wash hands and other exposed parts. Whendisposing of the product, reduce dust with water spray, ensure that parts are securely wrapped.The cooking per<strong>for</strong>mance features of the popular and proven solid fuel <strong>Rayburn</strong> Cookers have been preservedand integrated into the <strong>Rayburn</strong> <strong>Heatranger</strong> <strong>368K</strong> cooker, burning 28 Seconds Kerosene to BS. 2869: 1988 ClassC2.SUMMER USEThe cooker side provides domestic hot water and cooking facilities which consist of a large hotplate, main ovenand warming oven. The independent oil burner is controlled by an electric thermostat operated by the controlknob. The cooker burner should always be continuously burning at a low fire rate when not required <strong>for</strong> cooking.When cooking is required, the burner operates at a high fire rate under the control of the main oven thermostatcontrol knob and its setting.WINTER USEAn independent boiler oil burner controlled by an electric thermostat heats a hot water boiler to provide centralheating in addition to the same cooker facilities provided in the summer. The boiler should be electricallycontrolled by a time switch or programmer to give selected heating use. WARNING: IF THE APPLIANCE IS TOBE LEFT UNATTENDED FOR SEVERAL DAYS THEN THE COOKER BURNER SHOULD BE SWITCHED OFF.
file://\\server1\docs\NetCDs\Aga%20Product%20In<strong>for</strong>mation%20Spares%20and%20Tec...Page 2 of 826/10/2006NOTE: SMOKE/SMELL EMITTED DURING INITIAL USAGESome parts of the cooker have been coated with a light covering of protective oil. During initial operation of thecooker, this may cause smoke/smell to be emitted and is normal and not a fault with the appliance, it is there<strong>for</strong>eit is advisable to open doors and or windows to allow <strong>for</strong> ventilation. Lift the lids to prevent staining the linings.Electrical SupplyWARNING: THIS APPLIANCE MUST BE EARTHED.A 220/240v 50Hz electrical supply with a fuse rating of 5 amps is required to the appliance.The appliance is designed to operate on fully pumped systems with a time switch, gravity domestic hot waterbeing provided by the cooker burner.UNDER NO CIRCUMSTANCES SHOULD THE BOILER BURNER OPERATE WITHOUT THE PUMP RUNNING.WHEN THE APPLIANCE IS BEING USED ON A TIME CLOCK IT MUST HAVE A FULLY PUMPED HEATINGSYSTEM.NOTE: HOT COOKER BURNER: DO NOT TURN OIL ON UNTIL BURNER IS COOL.BOILER BURNER: AN ILLUMINATED LOCK-OUT LAMP INDICATES A LOCK-OUT CONDITION. WAIT 3MINUTES, THEN TURN THE BOILER THERMOSTAT KNOB ‘OFF’ THEN ‘ON’ TO RESTART BOILER BURNERCYCLE.Cooking and Domestic Hot Water - Summer Use1. Depress the trip lever D - see Fig. 1 on the front of the oil control valve P and turn the cooker oil control valve
file://\\server1\docs\NetCDs\Aga%20Product%20In<strong>for</strong>mation%20Spares%20and%20Tec...Page 3 of 826/10/2006knob C to No.6 setting.2. Switch power ON and set cooker thermostat knob A to No.6 setting. Allow 15 minutes <strong>for</strong> oil to enter and settlein cooker burner base.3. Open outer burner door E adjacent to the bottom warming oven door. remove/lift outer inner cooker burnerdoor F.4. Open lighting cover G on the front of the burner shells, and expose the lighting port.5. Insert a lighted taper through the lighting port and light the front wick, then close the lighting cover G.6. Replace inner cooker burner door F and close outer burner door E.NOTE: ENSURE INNER COOKER BURNER DOOR F IS CORRECTLY LOCATED AND SEALED.7. Return thermostat knob A to its low setting <strong>for</strong> about 20 minutes, until burner is hot, then re-set to max. <strong>for</strong>cooking.8. The cooker burner will gradually increase its oil rate, and raise the temperature of the oven, taking about 2 1 / 2hours from cold to attain an oven temperature of 200°C (400°F), leaving the cooker thermostat knob A at its maxsetting.Re-set the cooker thermostat knob A to the desired setting and the oven temperature will continue to bethermostatically controlled.NOTE: SEE COOK BOOK FOR RECIPES.9. Set the cooker thermostat knob A to LOW which is the minimum setting when cooking is not required and idlingrate is needed.10.Ensure both hotplate insulating covers are closed down to conserve heat in hotplate.Oven Thermostat SettingsThe cooker thermostat control knob A is marked LOW, and with the main centre oven temperatures.Failure of Electrical PowerShould the failure of electrical power occur, it will not be possible to obtain thermostatic control over the cookingoven.However cooking can be continued by manual control as follows:1. High Fire rate can be obtained by engaging the actuating lever B on the top of the oil control valve P then pushit to the left to engage in the notch of the cover.Manual control can then be made by adjusting the cooker oil control valve knob C between the numbers 1 to 6and re-setting the knob to suit the temperature indicator on the oven door corresponding with chart below.2. Low Fire rate can be obtained by setting the cooker oil control valve knob C to No.1 setting where the oventemperature will be maintained at about 125°C (257°F). With the restoration of electrical power, remember toreset the actuating lever B by disengaging it from the cover notch and setting the cooker oil control valve knob Cto No.6 setting.
file://\\server1\docs\NetCDs\Aga%20Product%20In<strong>for</strong>mation%20Spares%20and%20Tec...Page 4 of 826/10/2006The thermostat will then control the oil rate.To Turn Off Cooker Burner(a) With boiler burner not in useLift the trip lever D on the front of the oil control valve P to shut off the oil supply to the burner.(b) With boiler in useTurn the cooker oil control valve knob C clockwise from No.6 setting to OFF.Cooker Oil Control ValveKnob SettingOven Temperature123456LOW185-215°C (365-419°F)215-240°C (419-464°F)235-260°C (455-500°F)255-280°C (491-536°F)275-310°C (527-590°F)WARNING: NEVER ATTEMPT TO RELIGHT A HOT BURNER. DO NOT TURN OIL ON UNTIL BURNER ISCOLD.To Heat the Top Main Oven and Increase Hotplate TemperatureTurn the cooker thermostat knob A to the required setting which will take up to 90 minutes to attain after initialwarm up from cold.When the top main oven temperature is reached, the required temperature will be maintained by the cookerthermostat.HINT: THE COLD SOLID PLAIN SHELF CAN BE USED AS A HEAT DEFLECTOR, (AS WELL AS A BAKINGSHEET), SLIDE ONTO THE RUNNERS TOWARDS THE TOP OF THE OVEN SO REDUCING TOP HEAT.THE HOTPLATEWhen the main oven is in use the hotplate will be hot enough <strong>for</strong> normal needs. The hotplate area above the mainoven is used <strong>for</strong> simmering with the opposite end being the hottest.At other times, increase the setting of the cooker thermostat knob A to increase the temperature of the hotplate.Pans and kettles must have flat machined bases. Use a wire brush to keep the hotplate clean.WARMING OVENThis is a low temperature suitable <strong>for</strong> warming serving plates and dishes. Although not intended as a cookingoven its temperature does vary with temperature of the main oven. As a guide, it is around a third the temperatureof the main oven.
file://\\server1\docs\NetCDs\Aga%20Product%20In<strong>for</strong>mation%20Spares%20and%20Tec...Page 5 of 826/10/2006DOMESTIC HOT WATER ONLY (DHW)The supply of domestic hot water to the cylinder is automatic and is at its maximum when the cooker thermostatknob A is on highest setting, reducing as the cooker thermostat knob setting is reduced. The amount of hot wateris increased if a considerable amount of cooking is per<strong>for</strong>med. If more hot water is required overnight, set thecooker thermostat knob A to a higher setting than LOW, which is normally sufficient.NOTE: IN THE CASE OF EXCEPTIONALLY HIGH DOMESTIC HOT WATER DEMANDS, IT ISRECOMMENDED THAT THE BOILER BURNER IS USED AND CONTROLLED VIA THE PROGRAMMER ANDTHERMOSTAT.When the Cooker is Not in UseDuring periods of the day when the cooker is not required the cooker thermostat knob A should be set at LOW togive the lowest burning rate which will in most cases give sufficient heat to the hotplate and hot water. Use thesetting that meets your needs.Fig.1.Overnight
file://\\server1\docs\NetCDs\Aga%20Product%20In<strong>for</strong>mation%20Spares%20and%20Tec...Page 6 of 826/10/2006Turn the cooker thermostat knob A to LOW which gives the lowest burning rate and will maintain an oventemperature of about 125°C (257°F). At a higher setting the oil consumption will be higher, but the main oven,hotplate and domestic hot water will all be hotter. Turn the cooker thermostat A to max setting in the morning toincrease the hotplate temperature and minimise the time to boil a kettle of water.The recommendations <strong>for</strong> the best use of the appliance are guidelines only and the respective setting of boilerand cooker thermostat knobs which suit your requirements will be apparent with experience.Cooking and <strong>Central</strong> Heating - Winter UseCooker Burner - Use as previously described.LIGHTING THE BOILER BURNERIf a programmer or clock control is fitted to the installation, read the control instructions be<strong>for</strong>e lighting the boiler.1. Ensure all oil valves are open and oil is in the oil control valve P.2. Depress the trip lever D on the front of the oil control valve P.3. Turn any time clock or programmer to ON and move any room temperature pointer to a higher setting.4. Switch ON the power supply and set the boiler thermostat knob H to a thermostat setting of 80°C (180°F) incold weather and 60°C (140°F) in mild weather. THE LIGHTING SEQUENCE WILL NOW COMMENCE.Lighting Sequence(i) Within 2 1 / 2minutes an ignited oil flame will be visible through the glass viewing window M.(ii) The flame will be confirmed and control passed to the boiler thermostat H until satisfied.(iii) The satisfied boiler thermostat will then shut-off the oil supply, but the fan remains energised on an overrunperiod of time 5-6 minutes and is then ready <strong>for</strong> the next cycle call.Boiler Lock-outShould this occur the boiler will cease to function and a lock-out light K will illuminate.WAIT 3 MINUTES, TURN THE BOILER THERMOSTAT KNOB H ‘OFF’ THEN ‘ON’.The lock-out light K will extinguish and the start-up cycle re-commence. Continued lock-out indicates amalfunction that requires qualified attention.6. Set any programmer or room thermostat to the required setting and the boiler burner will come ON and OFFautomatically upon heat demand.TO TURN THE BOILER OFFTurn OFF boiler thermostat H.To relight, turn the boiler thermostat knob H to the required setting.
file://\\server1\docs\NetCDs\Aga%20Product%20In<strong>for</strong>mation%20Spares%20and%20Tec...Page 7 of 826/10/2006WARNING: IF AN EMERGENCY OCCURS LIFT THE TRIP LEVER D OF THE CONSTANT LEVEL OIL VALVE,TO ISOLATE OIL FROM THE APPLIANCE.FROST PRECAUTIONSIn the event of the boiler being switched OFF <strong>for</strong> long periods during very cold weather, the advice of yourinstaller should be obtained.BI-ANNUAL SERVICINGWith normal use a boiler/cooker annual flueway clean and burner maintenance should be carried out immediatelybe<strong>for</strong>e and after the end of the heating season. An additional flueway clean half-way through the heating seasonmay be necessary in some cases - see Servicing <strong>Instructions</strong>.Both cooker A and boiler thermostat knobs H should be turned OFF by the User the night preceding the day ofservicing so that the appliance will have cooled down by the following morning. A hot appliance cannot beserviced.CLEANING*** AMENDMENT ***REMEMBER TO BE CAREFUL OF THE HOT APPLIANCE.To keep the vitreous enamelled surface bright and clean wipe over daily with a soapy damp cloth, followed by aclean dry duster.If milk, fruit juice or anything containing acid is spilt on the top plate, or down the cooker, be sure to wipe itimmediately or the vitreous enamel may be permanently discoloured.The lining of both insulating covers should be raised and allowed to cool be<strong>for</strong>e cleaning with a soapy damp cloth.NOTE: IT IS NOT ADVISABLE TO PUT VERY WETCLOTHES ON THE HANDRAIL, AS THIS MAY CRAZE THE ENAMEL.IMPORTANT: USE 28 SECONDS KEROSENE FUEL ONLY.DO NOT USE ABRASIVE PADS, OVEN CLEANER OR CLEANER CONTAINING CITRIC ACID ONENAMELLED SURFACES.IMPORTANT NOTE:Aga-<strong>Rayburn</strong> recommends the use of ‘Astonish’ <strong>for</strong> cleaning vitreous enamelled surfaces of this product, but it isunsuitable <strong>for</strong> use on chrome and stainless steel components.With Aga-<strong>Rayburn</strong>'s policy of continuous product improvement, the Company reserves the right to changespecifications and make modifications to the appliance described and illustrated at any time.
file://\\server1\docs\NetCDs\Aga%20Product%20In<strong>for</strong>mation%20Spares%20and%20Tec...Page 8 of 826/10/2006For further advice or in<strong>for</strong>mation contactyour local distributor/stockistManufactured ByAga-<strong>Rayburn</strong>