Dovre 550 Cast Iron Cleanburn Wood Stove - Harworth Heating Ltd
Dovre 550 Cast Iron Cleanburn Wood Stove - Harworth Heating Ltd
Dovre 550 Cast Iron Cleanburn Wood Stove - Harworth Heating Ltd

You also want an ePaper? Increase the reach of your titles
YUMPU automatically turns print PDFs into web optimized ePapers that Google loves.
<strong>Dovre</strong> <strong>550</strong> <strong>Cast</strong> <strong>Iron</strong><strong>Cleanburn</strong> <strong>Wood</strong> <strong>Stove</strong>INSTALLATION INSTRUCTIONS
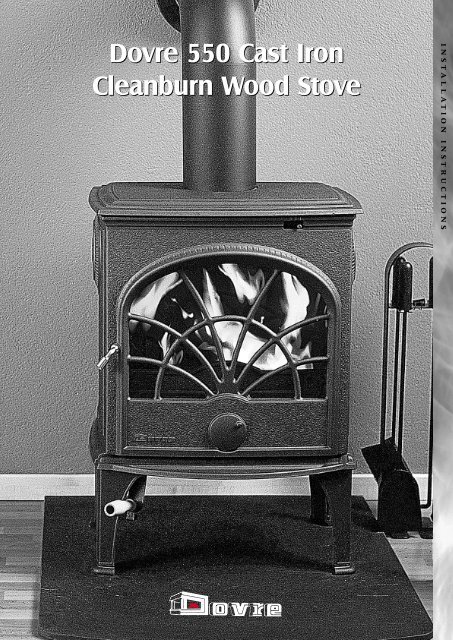
<strong>Dovre</strong> <strong>550</strong> <strong>Cast</strong> <strong>Iron</strong> <strong>Cleanburn</strong> <strong>Wood</strong> <strong>Stove</strong>Installation and Operating ManualThese instructions should be readcarefully and saved by theuser for future referenceCONTENTSINTRODUCTION TOYOUR DOVRE STOVE Page 2UNPACKING Page 3GETTING THE BEST FROM YOUR STOVE Page 3LOCATION FOR THE INSTALLATION Page 3ASSEMBLY Page 4INSTALLATION Page 5CHIMNEY CONNECTIONS Page 5-6THE CHIMNEY Page 6-7OPERATING YOUR DOVRE STOVE Page 7SERVICING & MAINTENANCE Page 6-7GUIDE TO BURNING WOOD Page 7TROUBLE-SHOOTING Page 7WARRANTY DETAILS Page 7INTRODUCTION TO YOUR NEWDOVRE <strong>550</strong>CBWe would like to thank you for purchasing a <strong>Dovre</strong>stove and we trust that it will provide you with manyyears of useful service.At <strong>Dovre</strong> we have been producing cast iron stoves forover 60 years and we strive to ensure that our productsmeet with the highest level of performance, efficiency,safety and quality. So much so that we guarantee all<strong>Dovre</strong> body castings for 10 years.Owning a stove might be a new experience for you.Therefore, to ensure that you get the best performancefrom your new <strong>Dovre</strong>, do please take a little time to readthrough this manual.The <strong>550</strong> CB is a specially designed stove for burningwood with clean emissions. It is essential that whenwood is used, it is well seasoned for a minimum of 2years and has maximum moisture content of 20%. Ifunseasoned wood is used, heat outputs will not beobtained and serious damage will occur in the chimneyand flueways.The dimensions of your new stove are illustrated in fig.1. Be careful to ensure that your fireplace is going toaccept the appliance and that you have allowed for atleast 225mm of hearth space in front of the stove.Your <strong>Dovre</strong> <strong>550</strong> CB is constructed from high-grade quality castiron and is therefore not light in weight. We recommend that twopeople are available to handle the unit.Before taking your <strong>Dovre</strong> to its installation location, remove theouter packing. Open the appliance door.Remove the following components:■ Ashpan■ Fixings pack■ <strong>Cast</strong> iron grate centre■ Ash rakeCheck that the following parts are in the Fixings Pack.■1 Tub 400 gm Fire Cement■ <strong>Cast</strong> <strong>Iron</strong> Flue Spigot (part number 003410)■ 2 Decorative Blanking Plates part number 153280)■ 1 Plain Blanking Plate (part number 153320)■ 3 Blanking Plate retaining bars (part number 072160)■ 4 Legs (part number 522190)■ 4 Leg extensions (part number 522200)■■■■■UNPACKING YOUR DOVRE <strong>550</strong>CBL shaped handle support bracketOperating Tool (part number SLT5/01)Pack containing over plate remover and instructionsheet. (Part number 72301.0)Miscellaneous fixing pack including fixing screws anddoor handleQuality control ticket (IMPORTANT TO RETAINTICKET IN CASE OF FUTURE CLAIMS)GETTING THE BEST FROM YOUR DOVRE 250There are 4 golden rules to follow:1 USE GOOD FUEL - NEVER BURN UNSEASONED OR DAMPWOOD2 YOU MUST HAVE A GOOD CHIMNEY DRAUGHT - NEVERUSE YOUR DOVRE STOVE WITH A POOR CHIMNEY3 AVOID OPERATING THE STOVE FOR LONG PERIODS ONCONTINUOUS LOW TEMPERATURE4 NEVER USE SOLID FUEL ON YOUR DOVRE <strong>550</strong>CBLOCATION FOR THE INSTALLATIONThe location in which your stove is to be installed will of coursedepend on the chimney available. If you do not have a chimney,there are a number of prefabricated flue systems available andyour <strong>Dovre</strong> Dealer will be pleased to offer guidance on the subject.Building Regulations must be observed when considering thelocation of your <strong>Dovre</strong>. More precise information can be foundlater in this manual but it is important to ensure that a suitablehearth, complying with Building Regulations, is available.NEVER ALLOW A MECHANICAL AIR EXTRACTOR TO BE USEDIN THE ROOM OR ADJOINING ROOMS AS THIS COULD CAUSETHE APPLIANCE TO EMIT SMOKE INTO THE ROOM.IMPORTANT - FLUE CLEANINGIt is essential that an access point for cleaning the chimneybe incorporated in the installation. This can normally becarried out by fitting an external soot door or access platein the flue pipe. Access for rear flue connections can bemade using a tee section soot trap at the base of the fluepipe. See fig.3 below.Your <strong>550</strong>CB is equipped with a special top baffle platedesigned to direct pre-heated secondary combustion air. Itis essential that access be allowed for cleaning the topsideof the baffle.<strong>550</strong>150WE DO RECOMMEND THAT WHEREVER POSSIBLE,YOUR DOVRE IS FITTED BY AN EXPERIENCEDINSTALLER ACCUSTOMED TO THE INSTALLATIONOF CLASS 1 SOLID FUEL BURNING APPLIANCES.Assemble the handle referring to fig.2 belowREAR FLUE CONNECTIONSOOT DOORTOP FLUE CONNECTIONSOOT DOOR765640If you are unsure about any aspect of the installation oroperation procedures, your <strong>Dovre</strong> dealer will be pleasedto help.SOOT DOORIt is important that the Installation is carried out incompliance with current Building Regulations.440FIG.1. STOVE DIMENSIONSFIG.2 HANDLE ASSEMBLYFIG.3 SOOT DOOR LOCATION23
REMOVE AND KEEP ON ONE SIDE, THE REAR SHEET METALHEAT SHIELD PLATE USING a 10mm SPANNER.Carefully lie the stove on its back. It will be helpful to lay the stoveon two wooden battens.Remove the wooden pallet.FIXING THE STOVE LEGSRemove the 4 nuts and washers, using a 13mm spanner, on eachof the 4 supporting threaded lugs located on each corner of thebase of the stove.Attach the 4 legs. Refit the 4 nuts and washers and tightensecurely.Fit the inner leg extension sections using the large black washersand hexagon headed 25mm x 8mm bolts. Using a 10mm spanner,tighten the bolts and adjust for height as necessary.Fit the L shaped handle support handle adjacent to the front leftleg using a 17mm x 8mm bolt and washer.Carefully stand the stove in the upright position.FITTING THE FLUE CONNECTORIf your <strong>Dovre</strong> is to be connected to the chimney via the rear flueconnector, proceed as follows.Remove the fixed circular flue cover plate on the rear of the stoveusing the kit supplied (part no 72301.0)Apply a thin and even coat of fire cement to the flange on the fluespigot. Fix the flue spigot in position using the 2 threaded hookbolts, nuts and washers and tighten using a 13mm spanner.If your <strong>Dovre</strong> is to be connected to the chimney via the top flueconnector, proceed as follows.Remove the fixed circular flue cover plate on the top of the stoveusing the kit supplied (part no 72301.0)Apply a thin and even coat of fire cement to the flange on the fluespigot. Fix the flue spigot in position using the 2 threaded hookbolts, nuts and washers and tighten using a 13mm spanner.FIXING THE SIDE COVER PLATESApply a thin coat of fire cement to one of the two side cover plates(part no 153280) and place in position over one of the holes in theside of the stove. Place a fixing bar (part 072160) using a bolt andwasher on the rear side of the circular plate (inside the stove).Ensure that the flat side of the bar is towards the side of the stove.Tighten securely using a 10mm spanner. Repeat process for theopposite side of the stove.REFIT THE REAR HEAT SHIELD (IF REAR FLUE CONNECTION ISUSED IT WILL BE NECESSARY TO KNOCK OUT THE CUT OUTFLUE SECTION ON THE HEAT SHIELD.NOTE: THE SPARE BLANKING PLATE (PART NO 153320)SHOULD BE KEPT FOR FUTURE USE IN CASE THE FLUEARRANGEMENT IS CHANGEDFit the grate centre grill (part no 56214.0) in the space on thehearth plate inside the stove.Place the ash pan in position.INSTALLATIONHEARTH & CLEARANCE REQUIREMENTSINSTALLATION AGAINST A WALLFor installation as a free standing unit e.g. against awall. (See fig.4)4The minimum hearth required is 840mm (33”) x 840mm (33”)and the unit must not be placed less than 150mm (6”) from theback and sides of the hearth. The wall must be constructed fromnon-combustible materials and must be a minimum height of1200mm (48”). The required wall thickness will depend on thedistance between the back of the stove and the wall. If thisdistance is less than 50mm (2”), the wall should be at least 200mm(8”) thick. If the distance from the back of the stove to the wall isbetween 50mm (2”) and 150mm (6”), the wall thickness must beat least 75mm (3”) thick. If single wall flue pipe is attached to theappliance, the pipe should be a minimum of three times itsdiameter from any combustible materials.FROM THE REAR OF THEAPPLIANCE (See fig.6)A non-combustible register plate should be fitted to thelower section of the chimney.150 mm diameter 316-grade 1mm thick stainless steel flue pipe orvitreous enamel pipe suitable for use with solid fuel appliancesINSTALLATION IN A FIREPLACE RECESSshould be used to connect the rear spigot of the stove to theFor installation in an fireplace recess or inglenook the hearth mustchimney or chimney liner. All connecting joints must be femaleextend 500mm (20”) in front of the recess and extend either sidepointing up and joints should be properly sealed with fire cement.of the recess by 150mm (6”)If the chimney is not immediately above the stove, off set bends ofThe distance the hearth must protrude in front of the applianceeither 30 degree or 15 degree angles may be used (see fig.7). Tryshould be a minimum of 300mm (9”)to avoid long runs of pipe that are not vertical. Start by connectinga 90-degree or 45 degree “T” section to the flue spigot at the rearThe minimum thickness of hearth should be 125mm (5”) and thisof the stove.may include the thickness of a concrete floor including hearthtiles. If a hearth is constructed and / or supported on timber, theNEVER INSTALL HORIZONTAL PIPE RUNS OVERtimber should be at least <strong>550</strong> mm (10”) away from the top surface150mm (6”) DIRECTLY OFF THE BACK OF THE STOVEof the hearth.If a timber mantel is installed, the distance from the stove bodyand / or any single skin flue pipe, if attached to the top of thestove, to the mantel must be a minimum of 450mm (18”).CHIMNEY CONNECTIONScleaningcleaningaccess dooraccess doornon combustablecombustibledebris spacemin100mm wideregister platemaximumhorizontalpipe lenth150mmCORRECTY3 x Ycombustible materialFIG.6Yconnection to an unlined chimneyconnection to a lined chimneywall thickerthan 100mmFIG.5cleaningaccess door150mm A300mmBdebris spaceminimum840mm Minimum840mm Minimum100mm wideFIG.4existingchimneyCORRECT INCORRECTFIG.7THE CHIMNEYTHE CHIMNEY(Minimum height requirement 4.5 metres (16 ft.)ACCESS FOR SWEEPING CHIMNEYCHIMNEY DRAUGHTCONNECTION FROM THE TOP OF THEDRAUGHT REQUIREMENT: 1.5 to 2mmAPPLIANCE (See fig.5)ASSEMBLYminimumwall height1200mmA non-combustible register plate should be fitted to thelower section of the chimney.150 mm diameter 316-grade 1mm thick stainless steel flue pipe orvitreous enamel pipe suitable for use with solid fuel appliancesshould be used to connect the top spigot of the stove to thechimney or chimney liner. All connecting joints must be femalepointing up and joints should be properly sealed with fire cement.If the chimney is not immediately above the stove, off set bends ofeither 30 degree or 15 degree angles may be used. Try to avoidlong runs of pipe that are not vertical.The chimney should be checked and swept at least once a year andit is important to allow provision for gaining access to thechimney. On masonry chimneys, a standard soot door, obtainablefrom your <strong>Dovre</strong> dealer, can be used. On other factory madechimneys, it is important to ensure an access-cleaning door isprovided. It is advisable to ensure that the connecting flue pipe tothe chimney has an access door fitted. An access door close to theappliance will also facilitate the use of a chimney vacuum cleanerto ensure clean appliance maintenance.AIR SUPPLYYour <strong>Dovre</strong> <strong>550</strong> CB requires an air supply to the room. The airvent should have a minimum air flow area of 220 sq. cms (4” sq.)5Too much draught will cause excessive heat outputs and fuelconsumption. Inadequate draught may cause smoke emission tothe room and poor combustion resulting a build up of tar andcreosote deposits on the glass, inside walls of the appliance and thechimney.FOR EXISTING CHIMNEYS, always ensure that the chimney ischecked and swept prior to the installation taking place.This is one of the most important aspects of the installation of your<strong>Dovre</strong> stove. It is important to ensure the following.
MASONRY CHIMNEYSThe chimney must be sound, in good condition and must not beshared with another appliance. In the event of the chimney beingunlined, it is advisable to have a survey carried out to check for thepresence of leakage and other defects. Lining the chimney with asuitable 150mm (6”) diameter liner for wood burning and solidfuel burning applications, will improve the performance andefficiency of the stove.THE ADVANTAGES OF A LINED CHIMNEYWith most unlined chimneys, the cross section of the chimney isexcessive as in the case of large old inglenook fireplaces. Becauseof the large volume of cold air in large chimneys, it is difficult forthe flue gases to rise easily through the chimney. This causes theunburned volatiles in the smoke to adhere to the chimney walls.The inner surfaces of some unlined chimneys are rough withjagged edges causing difficulties in obtaining a good draught.Unlined chimneys are often defective with cracks leaking fumesinto other parts of the house.Larger, unlined chimneys, being cold, encourage the formation oftars (wood smoke condensation), which can penetrate the walls ofthe chimney leaving unpleasant black stains on internal plasteredwalls.PREFABRICATED CHIMNEY SYSTEMSIf a masonry chimney is not available, there are a number ofproprietary brand prefabricated flue systems available. Your <strong>Dovre</strong>Dealer will be pleased to offer information and advise on thissubject.CHIMNEY TERMINALDown draught problems may be experienced if the top of thechimney is close to adjacent taller trees and / or buildings. Your<strong>Dovre</strong> Dealer will be pleased to advise on suitable antidowndraught cowls should these conditions prevail.OPERATING YOUR DOVRE <strong>550</strong>CBProvided that your <strong>Dovre</strong> stove has been installed in accordancewith the above installation procedures, you should now be readyto “light up”Your <strong>Dovre</strong> has been treated with a high temperature resistantprotective paint, which produces an odour when the stove is new.We recommend that you leave a window open during the first fewhours of use while the paint is curing.To light your DOVRE <strong>550</strong> CB:■ Open the lower air control wheel.■ Open the top air vent fully by sliding the lever to the left.■ Ensure that the ash grate grill is in the closed position by slidingto the right.■ Lay rolled up newspapers and small sections of wood (kindlingwood) on the base of the stove. Light the paper with a longtaper. If kindling wood is not available, firelighters may be usedwith small pieces of split wood laid on top of the firelighters.■ Close the door but do not fully lock at this stage. The fire shouldnow start to burn fiercely and brightly. If this does not happen,check for chimney blockage.■ As soon as the wood is burning with a well-established heat,add 2 or 3 logs and close the door tightly.■ After a further couple of minutes fully close the lower aircontrol.REMEMBEROPERATE YOUR DOVRE WITH THE BOTTOM AIR CONTROLCLOSEDCONTROL THE BURNING RATE BY ADJUSTING THE TOP AIRCONTROLOVERNIGHT BURNINGBefore retiring to bed:■ Ensure that there is a good hot base to your fire and fully loadthe fire with hardwood logs (ideally 40cms (16”) long with amaximum diameter of 150cms. (6”)■ Open the lower and upper air controls to allow the fire the fireto burn fiercely. After 2 or 3 minutes, close the lower air controlfully and close the upper air control to the “almost” fully closedposition.■ If you require your stove to be used the following morning,carry out the following procedure:■ Wipe the door glass clean using a damp cloth and polish off witha paper towel or clean cloth.■ Open the lower and upper air controls.After replacing the empty ashpan in the ashpit compartment,ensure the ashpit door is fully closed.DAILY MAINTENANCE■ Empty the ash pan■ Check and clean light stains from the glass. Wipe the door glassclean using a damp cloth and polish off with a paper towel orclean cloth.WEEKLY MAINTENANCE■ The fibre door gaskets around the inside edge of the doorsprovide an airtight seal. Check these regularly and remove anyash or wood particles gently with a soft brush.ANNUAL MAINTENANCEAt the end of the heating season, thoroughly clean the inside ofthe stove and adjoining flue pipe.Arrange for your chimney sweep to inspect and clean thechimney.Carry out the following checks:■ Replace the door and glass gaskets■ Check and replace any worn fire bricks as necessary■ Check and replace the cast iron grate if necessary■ Check, clean and replace the top baffle plate if necessarySTOVE BODYTo clean, use a soft brush. The stove body can be repainted ortouched up using <strong>Dovre</strong> high temperature resistant stove paint.GLASSYou may notice a build up of deposits on your glass, particularly ifthe stove has been used for long periods at low temperatures. Ahot brisk fire will normally cure this problem, but if the problempersists, check the quality of your wood and / or chimney. It isalways recommended to fire your stove hard after an overnightburn. From time to time, the glass can be cleaned using <strong>Dovre</strong>CERACLEAN glass cleaner. Never use water or abrasive pads toclean the glass especially whilst the glass is hot.MANAGING YOUR WOOD SUPPLIESIf you are buying wood from a log merchant, try to ensure that thewood has been seasoned for at least 2 years. 3 years is even better.The wood should preferably be cut to lengths of 40cms (16”) andsplit to a width of between 5 and l5cms (2-6”).Store your wood under cover to protect from rain but ideally thewood should be stored in. a place where the wind will be allowedto freely ventilate the stack.Try to obtain hardwoods such as oak, elm, beech or ash. Thesewoods will provide more calorific value per cubic meter thansoftwoods.TROUBLESHOOTINGSMOKE EMISSIONIf smoking occurs when the stove door is opened, it is a sign thatthe flue draught is inadequate. Mostly, burning unseasoned woodcauses this condition and it usually indicates that the combustiontemperature is too low. To overcome a weak draught, ensure yourwood is dry and build a hot fire, leaving both air controls in thefully open position. If the problem persists, arrange for yourchimney to be expertly checked for design and construction faults.In some instances, down draught conditions will exist and it maybe necessary to fit an anti down draught device to the top of thechimney.FIRE DOES NOT BURN FOR LONG PERIODS<strong>Wood</strong> can contain a number of variable factors related to species,weight, age and moisture content. It is therefore difficult to beprecise with regards to the length of burn time.If it is thought that the fuel is burning too quickly: -■ The diameter of the logs is too small■ If softwoods are used, change to using hardwoods■ Excessive chimney draught. If so, fit a draught stabiliser■ Worn out door and glass seals need replacing.Always try to avoid running your stove for long periods of timewith the air controls closed. This point is particularly important ifthe wood is not well seasoned. Failure to do so will cause the glass,stove walls and chimney to become soiled with tar deposits.CONTROLLING YOUR DOVRE <strong>550</strong> CBThere are two fundamental air controls on your <strong>Dovre</strong> <strong>550</strong> CB, thelower spin wheel air control and the top lever air control. Use thehandle tool to adjust settings.The top air control should be generally left in the fully openposition. If the top air control is left for long periods in the closedposition, the air wash system will not function and the glass willquickly discolour. The lower air control should only be openedwhen first lighting or re-fuelling with wood.Choose well seasoned hardwood logs 40cms (16”) in length andno greater than 75mm -150mm (3 to 6”) in diameter.REMEMBER: THE DRYER THE WOOD THE BETTERWET UNSEASONED WOOD PRODUCESCREOSOTE AND TAR IN THE CHIMNEY ANDCAUSES RAPID BLACKENING OF THE GLASSDOOR.■ Using the ash rake, lightly rake the ashes in the stove, bringingany hot embers to the centre of the grate.■ Place small sections of wood on the grate and close the stovedoor to the “almost” closed position.■ When the fire becomes established, add more fully and proceedas above (see section ‘To light Your <strong>Dovre</strong> <strong>550</strong>CB’ above)CARE & MAINTENANCE OF YOURDOVRE STOVECAUTIONIF THE APPLIANCE EMITS SMOKE INTO YOUR ROOM, IT ISNOT THE FAULT OF THE APPLIANCE. THERE WILL EITHERBE A STRUCTURAL FAULT OR DESIGN FAULT IN THECHIMNEY OR LACK OF VENTILATION IN THE ROOM.REMOVING ASHESSlide the centre grate grill to the open position. Using the raketool, slide some of the ashes to the centre grate allowing theashes to drop into the ash pan. It is not necessary to clear all theash from the grate area. A bed of ash up to 12mm deep can beleft on the grate area.TEN YEAR WARRANTYIf the castings on this appliance should prove to be defective withinten years of the purchase date, the faulty castings will be replacedfree of charge, subject to the following conditions.1 The purchaser shall complete the registration section..........herewith and return it within seven days of purchase...........Failure to return the registration could result in delays in..........processing any claims.2345The appliance shall have been installed in compliance withthe installation instructions.The appliance shall not have been used for the burning ofunseasoned wood and/or prohibited fuels.This warranty only applies to the appliance body castingsand does not include renewable components includinggrates, ashpans, and glass, seals and baffle plates.This warranty does not cover site visits and any claimsshould be notified to your dealer.This warranty does not affect the Statutory Rights of ConsumerPurchasersPlease complete and return this card within seven daysof purchase to:<strong>Dovre</strong> <strong>Cast</strong>ings <strong>Ltd</strong>., Weston Works, Weston Lane,Tyseley, Birmingham B11 3RPName: . . . . . . . . . . . . . . . . . . . . . . . . . . . . . . . . . . . . . . . . . . . . .Address:. . . . . . . . . . . . . . . . . . . . . . . . . . . . . . . . . . . . . . . . . . . .. . . . . . . . . . . . . . . . . . . . . . . . . . . . . . . . . . . . . . . . . . . . . . . . . .. . . . . . . . . . . . . . . . . . . . . . . . . . . . . . . . . . . . . . . . . . . . . . . . . .. . . . . . . . . . . . . . . . . . . . . . . . . . . . . . . . . . . . . . . . . . . . . . . . . .Telephone Number: . . . . . . . . . . . . . . . . . . . . . . . . . . . . . . . . . . .Model: . . . . . . . . . . . . . . . . . . . . . . . . . . . . . . . . . . . . . . . . . . . . .Date of Purchase:. . . . . . . . . . . . . . . . . . . . . . . . . . . . . . . . . . . . .Dealer:. . . . . . . . . . . . . . . . . . . . . . . . . . . . . . . . . . . . . . . . . . . . .67
Unit 1, Weston Works, Weston Lane, Tyseley, Birmingham B11 3RP.Tel: 0121 706 7600. Fax: 0121 706 9182.E-mail: enquiries@dovre.co.ukWeb site: www.dovre.co.uk