Fillets
Fillets
Fillets
- No tags were found...

You also want an ePaper? Increase the reach of your titles
YUMPU automatically turns print PDFs into web optimized ePapers that Google loves.
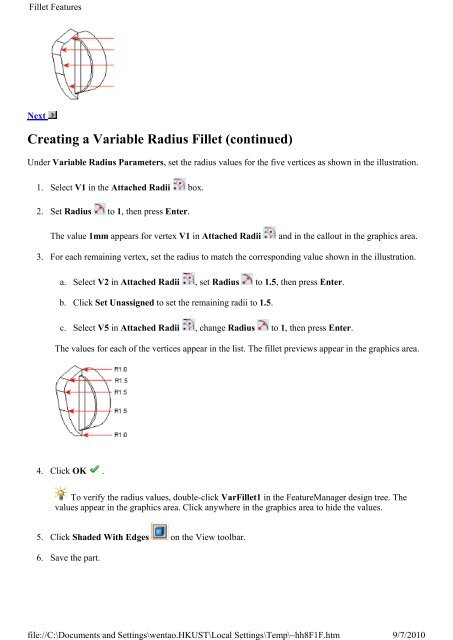
Fillet Featuresfile://C:\Documents and Settings\wentao.HKUST\Local Settings\Temp\~hh8F1F.htm9/7/2010NextCreating a Variable Radius Fillet (continued)Under Variable Radius Parameters, set the radius values for the five vertices as shown in the illustration.1. Select V1 in the Attached Radii box.2. Set Radius to 1, then press Enter.The value 1mm appears for vertex V1 in Attached Radiiand in the callout in the graphics area.3. For each remaining vertex, set the radius to match the corresponding value shown in the illustration.a. Select V2 in Attached Radii , set Radius to 1.5, then press Enter.b. Click Set Unassigned to set the remaining radii to 1.5.c. Select V5 in Attached Radii , change Radius to 1, then press Enter.The values for each of the vertices appear in the list. The fillet previews appear in the graphics area.4. Click OK .To verify the radius values, double-click VarFillet1 in the FeatureManager design tree. Thevalues appear in the graphics area. Click anywhere in the graphics area to hide the values.5. Click Shaded With Edges on the View toolbar.6. Save the part.