
Create successful ePaper yourself
Turn your PDF publications into a flip-book with our unique Google optimized e-Paper software.
Manual V1.00_2009_V5Page 1
Manual V1.00_2009_V5Page 2
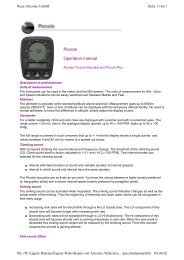
Manual V1.00_2009_V5Congratulations!With the AIRCOTEC XC-Trainer you have purchased a Swiss Qualityproduct that will put at your disposal not only the most advancedelectronics but also a revolutionising user-friendliness and a ruggednessthat all together will combine to make your flights more pleasurable.We hope it will accompany you on many great flights!AIRCOTEC XC-TrainerAll the information contained in this <strong>manual</strong> has been gathered withattention to detail and care. It is not however intended as acomprehensive product characteristics description, and AIRCOTEC isonly liable to the extent stipulated in the sales conditions.Copying or propagating this handbook, any of the associated software,or parts thereof, is only allowed with written consent from AIRCOTEC.Please note that changes in the name of technical progress may occur.XC-Trainer is a Registered Trademark of AIRCOTEC.Copyright 2009 AIRCOTECAuthor Helmut PölzlTranslated to English by Mads SyndergaardPage 3
Manual V1.00_2009_V5Safety informationThe XC-Trainer is equipped with an advanced 20 channel GPS receiver. With sufficientsatellite coverage this will guarantee very high position accuracy.Maps with inaccurate altitudes, incorrect altitude settings (pilot error) or simple instrumentdefects may lead to erroneous altitude indications. The pilot should always fly based ontheir own sound judgement and skills, and not rely solely on any instrument. This isparticularly the case when flying with reduced visibility or when landing.The manufacturer is not liable for damage incurred due to erroneous altitude or positionindication by the instrument.Consulting or even working with, the instrument should only be done when the situationallows it – otherwise please rely on the acoustic signals.The XC-Trainer must be mounted in a way that does not endanger neither pilot nortandem passenger (if applicable) in any way. Always make sure the XC-Trainer ismounted so that it does not impede the pilot’s movements in the air on whenlaunching/landing. Finally it is important to check that neither instrument nor part thereofmay come loose, fall down and possibly hurt someone during the flight.The XC-Trainer should always be secured using the safety lanyard,see illustration.Before launching the pilot should verify that the instrument is working and that therechargeable battery has sufficient power to last the entire flight.The XC-Trainer is spray-proof but not waterproof. Should water manage to find it’s wayinto the instrument we recommend opening the instrument and removing the batteriesimmediately. Then the innards may be dried carefully with a hair dryer (never attempt todry in a microwave oven!). Should the instrument become flooded with seawater it must bethoroughly rinsed with fresh water before drying. Following this a comprehensive check atAIRCOTEC is then required.You use the XC-Trainer at you own risk. The manufacturer is not liable for damage or lossresulting from the use of the instrument, or the software included in the package.Page 4
Manual V1.00_2009_V5Maintenance and careThe XC-Trainer is a technologically advanced and reliable instrument. With theproper maintenance and care it will give you many hours of trouble-free service. Notfollowing these simple guidelines may severely compromise you flight instrument:Never drop the XC-Trainer or expose it to hard shocks/impactsNever drop in water. Ensure that water does not penetrate the instrument cover.It is NOT waterproof, and particularly salt water may lead to extensive damageto the electronics. Protect from salt-water spray, rain and humidity. Should theinstrument get wet wipe it dry immediately? In case of water getting inside theinstrument we suggest you let us check it for you at AIRCOTEC.Protect the instrument from extreme temperatures. Both extreme highs and lowsadversely affect battery performance and lifespan, and high temperatures incombination with humidity will accelerate any corrosion.Page 5
Manual V1.00_2009_V5Include with your instrumentXC-trainerEasy_Basic or XC-trainerEasy+_BasicInstrumentQuick charger for the batteryManualUSB cable (only for XC-TrainerEasy+)Instrument in Set:XC-trainerEasy_BH or XC-trainerEasy_GZH or XC-trainerEasy_DHXC-trainerEasy+_BH or XC-trainerEasy+_GZH or XC-trainerEasy+_DHInstrumentQuick charger fort he batteryBagManualMounting system of your choiceSoftware TN-CompleteUSB cable over speedbord (for Easy)Leg fixationParaglider fixationHanggliding fixationPage 6
Manual V1.00_2009_V5Contents (page 10-16)1. XC-Trainer Technical SpecificationPage1.0 Instrument discrition 101.1 Altiude 111.2 Vario 111.3 Speed 111.4 Temperatur sensor (only for Easy+) 111.5 GPS receiver 111.6 Data transfer rotocol 111.7 Clock 111.8 Memory 111.9 Power supply 111.10 Dimension 112. XC-Trainer Firmware2.1 Firmware Version V1.00 122.2 Flight Recorder 122.3 Waypoints and routes 122.4 Available data in the display 122.4.1 Permanent displays 122.4.2 Additional information in the BaroKompass-Modus122.4.3 Additional information in the Thermal-Modus 122.4.4 Additional information in the Vario-Modus 123. Important Information 133.1 Charging the integrated battery 133.2 Auto OFF 134. Key function -overview 145. Switching the XC-Trainer ON/OFF 156. Flight recording menus6.1 List display overview 16Page 7
Manual V1.00_2009_V5Contents (page 17-27)7. Key function in flight recording modePage7.1 General 177.2 Setting a position Mark 177.3 Zoom-function 177.4 ALT 0 in VARIO display 177.5 Setting the volume level 177.6 Ending a Flight Recording 178. Flight Recording8.1 Automatic Start 188.1.1 Satellite search 188.1.2 Auto-Start flight recording 188.2 Manual Start 198.2.1 Manual start 198.2.2 Manual altitude setting 198.3 Ordinary flight recording 208.4 BaroCompass-Mode 218.5 Thermal Mode Windspeed curve 228.5.1 Basic wind curve display 228.5.2 Active wind curve 228.6 Thermal Help display 238.6.1 Thermal Help display 238.6.2 Visualised thermal 238.7 Vario display 248.7.1 Large VARIO display 249. Menu Screens Overview9.1 Menu Overview 259.2 Descriptions 2610. Setting Altitude 27Page 8
Manual V1.00_2009_V5Contents (page 27-40)Page11. Landing place12. Logbook11.1 Search landing place 2711.2 Save landing place 2712.1 Flight send to PC 2812.2 Flight delete or send to PC 2813. All Flight 2914. General Setting14.1 Vario menu 2914.2 UTC or LOCAL time 2914.3 Untis 2914.4 Contrast 2914.5 Factory Set 2915. Vario Settings15.1 Sinkacoustic ON / OFF 3015.2 Sink tone threshold 3015.3 Sink tone modulation 3015.4 Sink tone inversion 3015.5 Vario sensitivity 3015.6 Volume 3015.7 Vario Null 3015.8 Sound Setting 3015.9 Vario Frequency 3015.10 Sound check 3016. Coordinate16.1 Koordinate 3218. Flight send to PC over TN-Complete17.1 Connection with PC 3317.2 TN-Complete install 3317.3 TN-Complete setting 33, 34, 3517.4 Transfer the flight to TN-Complete 36, 37, 38, 3917. Accessories 40Page 9
Manual V1.00_2009_V51. XC-Trainer Technical Specifications1.0 Technical description XC-TrainerLoudspeakerXCT FixationIdentification platewith Serial numberKey (Key1- Key2 - Key3)Safety lanyardfixationSpeedboard USB andSpeed sensorCharger connectionPage 10
Manual V1.00_2009_V51. XC-Trainer Technical Specifications1.1 Altitude display-1000m to +8200m, resolution 1m1.2 Vario displayDigital indication from -90.0 m/s to +90.0 m/sAnalog indication from 0 – 5m/s and 5 – 9,5m/sAcoustic signal for climbing initiates at +0.1m/sAcoustic signal for sink can be set to initiatebetween –0.1m/s and –5m/s.sSettings in MENU/SETTINGS/VARIO From –5m/s a sink alarm will beheard regardless of settings1.3 Speed(Only with speed sensor connected) 0 – 160km/h1.4 TemperatureThe sensor is placed on the right hand side of the instrument. Itmeasures in centigrade from –25 to +75 degrees, resolution 0.1degrees1.5 GPS receiver20 channel parallel, 2D/3D position (WGS84), Altitude, speed,direction. Internal aerial1.6 Data transfer protocolsXCTrainerEasy: USB connection over SpeedbordXC-TrainerEasy+: USB connection1.7 Clock1.8 MemoryFlight recording in UTCDisplay shows local time and elapsed time since launchFlight data: 1MB flash, 184 in the circular buffer1.9 Power supplyRechargeable Li-Ion 3.7V/1800mAh. Operating time per chargingapp. 36 hours. The instrument is equipped with an “intellicharge”systemTo protect the Li-Ion battery the XC-Trainer will shut itself down beforethe battery is completely flat, saving all flight data beforehandPower consumption 50 mA1.10 Dimensions137x66x28mm, weight including battery 157gPage 11
2. XC-Trainer FirmwareManual V1.00_2009_V52.1 Firmware Version V1.00 -2009Info for version Firmware may be found at www.aircotec.com2.2 Flight RecorderThe integrated flight recorder saves position, altitude, climb/sinkrate,SOG, TAS (with speed sensor), heading and temperature (only XCT-Easy+) every second for up to 18 hours2.3 Waypoints3 Waypoint can be stored2.4 Available data in the display2.4.1 Permanent displaysSpeed SOG and TAS (TAS with sensor attached), altitude,climb/sinkrate and heading. Wind speed and –directionGraphical speed distribution curve with head- and tailwind indication,distance to turnpoint, local time and elapsed time since launch2.4.2 Additional information in the BaroCompass modeFlight direction in Track UP, distance and bearing to next waypoint orto a MARK. Glide angle from the last 5, 10 or 30sec.Show the Compass.2.4.3 Additional information in Thermal modeFlight direction in Track UP, distance and bearing to next waypoint orto a MARK. Graphic climb rate distribution with wind driftcompensation. Resolutions 1km x 1km, 2km x 2km2.4.4 Additional information in the Vario modeAnalogue vario bar with 0-5m/s and 5-9,5 m/s resolution, Digital Variofrom +-25 m over pressure sensor and +- 90m over GPS altitude.Distance and heading to next waypoint or Mark. Large Digital Variodisplay, large altitude display, null able altimeter ALT0 average variofor the last 10, 20 or 30 seconds, Glide angle for the last 10 sec.Page 12
Manual V1.00_2009_V53.Important InformationImportant!Please read before using the Instrument3.1 Charging the integrated batteryThe instrument must be charged before the first use. At the time of delivery, the battery ischarged to 50% (this is the ideal condition for a Li-Ion battery)Only charge using the charger delivered with your XC-Trainer. Charging is completedwhen the red light is extinguished. For your on-the-road needs we also provide a carcharger (parts number: XC-CAR-charger).3.2 Auto OffThe instrument will turn itself off after 8 minutes if no keys are activated. This feature willeliminate your risk of showing up on launch with an empty battery. During flight theautomatic shut-down function is deactivated.When the battery is almost empty the instrument will begin to turn itself off. Any runningflight recording will be duly saved.Page 13
Manual V1.00_2009_V54. Key function - overviewKey 1 K1 Key 2 K2 Key 3 K3Switch ON :By pressing for > 0,3sec----------------------------------In Start Menu:> OFF:Switch the instrument off----------------------------------In Flight mode:In BaroCompass Display:> select bearing pointIn Thermal Display:> Set MarksIn Vario Display> Set ALT0In Start Menu:> Manual startFlight recorder----------------------------------In Flight mode:In BaroCompass Display:> select bearing pointIn Thermal Display:> Zoom 1 and 2kmIn Vario Display:> adjust sound volumeIn Start Menu:> MENU:In main menu----------------------------------In Flight mode:> Toggle mode/screens----------------------------------In Menu :> Down / forwards----------------------------------In Menu :> Up / Backwards----------------------------------In Menu :> select> switch to other display> Back / ExitEnd of the flight recordingK1 Press both buttons about 3 sec. K3In certain cases all keys may have other functions as well, indicated by the text in the displayabove each key. As an example, if you’re about to delete a flight the XC-Trainer will ask youif this is really your intention, and you confirm by pressing Key 2 or deny by pressing Key 1NO YESK1 K2 K3Page 14
Manual V1.00_2009_V55.0 Switching the XC-Trainer ON/OFFTo switch on:Press Key1 for app. 0.3 seconds -> The SwitchOn display is shown for 4seconds, then it switches to the Start MenuSwitch ON DisplayStart Menu (B0)InstrumentTypeca.4secSoftwareVersionSerialNumberBatterieStatusDateTime(with GPS)AltitudeGPS AltitudeTemperature(only for XCT Easy+)INFO: Automatic switch OFFBar decreases in size from right to leftif no keys are activated the instrument Key3 >shuts off after 8 minutes.Switch OFF: Main menu (B10) see 9.1Press Key 1 brieflyINFO: Up until two seconds after thebattery indicator appears the instrumentmay be switched off.Starts a new flight recording:Press Key 2 brieflyBaroCompass mode appears in the displayPage 15
Manual V1.00_2009_V56. Flight recording menus6.1 Menus-displays overview:The flight mode contains 3 screens.NOTE: The following screenshots are examples from flight and do not match the screenat launch.BaroCompass Display (Ill. 1)(Details 8.4)The default screen to appear when a new flight is initiated is theBaroCompass screen. Press the Key3 briefly to toggle between theBaroCompass, the Thermal and the Vario screens. When theinstrument is set to <strong>manual</strong> in Settings, these three screens aredisplayed one after the other for each short click on Key3 . In Automode (recognised by the small A in the centre right) the instrumentautomatically switches between BaroCompass and Thermal mode,when climbing to Thermal, when gliding to BaroCompass. Toggle toVario to void the auto setting.Thermal Display (Ill. 2)(Details 8.6)In this screen the thermals are visualised as clouds of pixels on thescreen. After some thermalling the shape of the thermal shouldbecome apparent. The display is wind-drift compensated. After 1 fullcircle the wind distribution curve appears on the screen..VARIO Display (Ill. 3)(Details 8.7)Main information in Vario display.Large glide angle displayAnalog Vario, Digital Vario, Average VarioAltitude, Alt0Page 16
Manual V1.00_2009_V57. Key function in Flight Recording mode7.1 GeneralToggle between the available displays/screen by pressing Key3 .7.2 Set MARK only in the thermal displayAny interesting spot (thermals etc.) can be instantly marked using Key1 . The PositionMarks are consecutively marked from 1 through 3.Press the Mark key in Thermal mode to set a Mark and switch to the BaroCompassscreen, where the instrument will suggest ‘Mark1’. Use Key1 ↑ and Key2 ↓ to selectanother name (Mark 2, Mark3). Default is Mark1..7.3 ZOOM Function in the Thermal displayKey2 changes the resolution (zooms) in screens 1x1km 2x2km and A 1x1km A2x2km.The A is for automatic Display-switching between BaroCompass display and Thermaldisplay.7.4 Altitude null in VARIO display (screen 3)A short click on Key1always set to 0.in VARIO mode nulls the Altitude. When launching this value is7.5 Setting the volume level in Vario displayShort clicks on Key2 switch the volume from OFF ,1 ,2 and 3.The little symbol in the digital vario display indicates the current setting(OFF> , LOW> , MEDIUM> , LOUD> )7.6 Ending a Flight RecordingHolding down K3 and K1 for about 2sec ends the flight.- If no GPS position fix has been acquired:Using Key1 and Key3 to end results in the display text “OFF””, and no flight is recorded.- Once a GPS position fix has been acquired:Using Key1 and Key3 to end results in the display text “Storing flight”, then “AUTO OFF”,whereupon the instrument shuts down.All settings made during the flight, like volume, screen resolution etc. are stored as theinstrument shuts down.Page 17
Manual V1.00_2009_V58.2 Manual Start flight recordingThe flight recording may also be initiated <strong>manual</strong>ly from the Switch-On menu,8.2.1 Manual StartThe flight recording may also be initiated before theinstrument has acquired a position fixSTART flight recording:Click Key2to go to the flying screensThe actual recording will however only commence once theinstrument has acquired a position fix8.2.2 Setting the altitude <strong>manual</strong>lyIf the launch altitude is known it may be entered <strong>manual</strong>ly inMENU / ALTI SETUse Key1 to decrease, Key2 to increaseand Key3 to confirmQNH display:For the QNH display (in hPa) to be correct the currentinstrument altitude must be calibrated before the flight. Notethat QNH is only relevant below app. 200m and will only bedisplayed up to this altitude. As the barometric sensor ages,different instruments may show different altitudes – theaccuracy of the altitude measuring is not affected by this.Page 19
Manual V1.00_2009_V58.3 Ordinary Flight recordingThe top half of the displays 1, 2 and 3 has the following info:Speed Over Ground (SOG)Wind speedAlti (only screens 1 and 2)Wind directionNorth up(in this case SSE)Vario Digital(only screens 1 and 2)Volume indicator(only screens 1 and 2)The following symbols areused:( off , low , mean ,loud ) Details 7.5Flight direction (heading)Battery indicator in Flight mode:Only briefly visible after each screentoggle.Speed distribution curve, with windindicator and SOG bar( Details 8.5).In all flight screens a battery indicatorconsisting of 1 to 9 short bars,corresponding to a battery voltage of2.9 to 4.2V. Below 5 bars the ‘LowBat’ symbol appears, thiscorresponds to 3,4V and app.30minutes of remaining operation. At2.8V the flight is stored and theinstrument shuts down.Page 20
Manual V1.00_2009_V58.4 BaroCompass flying MODELower half of displayBaroCompass screen shot (Ill. 1)Barogram from the last 10 Minutes +/-500 m,L/DA visible ‘A’ here means the instrument is set toautomatically toggle between Thermal and BaroCompassscreens.Compass (flight direction oriented)Arrow pointing to launch or to the selected ‘Mark’ (flightdirection oriented)Symbols:Airplane > Points back to launchN > large arrow pointing North1,2 or 3> Marks from 1-3, may be set during flight andremain stored until they are overwritten.1, 2 or 3> Landings or waypoints stored before the flight.Distance to the selected Mark, waypoint or start.Local time in hours/minutesTAS (TRUE AIRSPEED > flight speed) only with speed probe connected.NOTE! Display only visible after app. 10s of speed probe activity.Page 21
Manual V1.00_2009_V58.5 Thermal flying Mode8.5.1 Wind distribution curveThe wind distribution curve only becomes visible in the display once the pilot has flown atleast a full circle, or a figure-eight. The instrument uses the SOG to calculate wind speedand –direction.8.5.1 Basic Wind distribution curveA thin vertical bar shows the compass direction stillneeded to calculate the wind direction. Fly in thisdirection to acquire the data needed.This line shows a compass that has been ‘opened up’. North is in the middle.'S--W--N--E--S'.8.6.2 Active Wind distribution curveThe wind curve is really a speed distribution curve. Itgives the average ground speed to be expected whengliding in any direction.Two thin lines intersecting the curve indicate Upwind /Downwind.The little lines crossing the thin lines indicate the meanTrue Air Speed (TAS), in this image app. 55km/hSOG-bar:The bar height is used to indicate the current Speed Over Ground (SOG), and the bar sitson the compass rose at the position of the current heading (COG – Course Over Ground)Scale:The full height of the coordinate system corresponds to 100km/h. Where the curve touchesthe bottom line the SOG is 0km/h, where it touches the top it is 100km/h SOG.In this example, flying NW will give a SOG of app. 75km/h (tailwind) whereas flying SO(headwind) will give 25km/HPage 22
Manual V1.00_2009_V58.6 Thermal flying MODE8.6.1 Thermal displayThe Thermal-display (Ill. 2)The cloud-map of the thermal and the active waypoint is always shown in track up.The lower half of the screen shows the flying arena as asquare of either 1x1km or 2x2km. Key2 toggles betweenthese resolutions. If an A is visible in the right side middledisplay the instrument automatically changes fromBaroCompass to Thermal mode whenever in lift, and backagain in sink.An A here means that the instrument will automaticallychange from BaroCompass to Thermal mode whenclimbing, and back again when gliding.Pilot position always in the centre of the screen (smallcircle)Thermal visualisationThe thermal is shown wind-drift compensated (see 8.6.2)Distance to selected waypoint, Mark or back to launch.Flight duration in hours and minutesFlashing bearing to next waypoint – in this case almostdue west.TAS/True Airspeed > Only with speed sensor connectedNOTE! Display only visible after app. 10s of speed probe activity.8.6.2 Thermal display Centring aidWind-drift compensated visualisation of the lift area. In this display the instrument draws atrack as soon as climb rates of more than 0m/s are encountered. Higher climb rates resultin larger pixel points. If the pilot falls out of the thermal it is <strong>easy</strong> to fly back into it bylooking at the display. This is particularly helpful on days with considerable wind drift, or forcentring weak Föehn waves. The resulting map of the thermal is wind drift compensated inan intuitively correct manner, and lift is only drawn up to 150m above or below the pilotaltitude from the last 5 minutes.Page 23
8.7 VARIO flying MODEManual V1.00_2009_V58.7.1 Large Vario display (B2)Flight direction depiction:Square = Bearing toeither Launch, Mark,WaypointALT in m orftAltimeterLarge Digital Vario to+/- 20m/sec using theDual sensor,+/- 20-99m/sec usingGPS calculationWind speed and -directionALT 0 in mor ftAuto-nulls atlaunch, may benulled in flightusing Key1Numeric L/DVario averager,may be set to10, 20 or 30secAnalog Varioto 5 m/sec the bargrows, from 5-9m/sthe bar decreases insize from behindDistance tolaunch, Markor WaypointClock with hoursand minutesPage 24
9. Menu DescriptionsManual V1.00_2009_V59.1 Menu screens overview Manual altitude set(Details 10.1)Select with Key1 or KEY2 confirm with, Key3Settings menuLanding search Store landing(Details 11.1) (Details 11.2)Emergency position Log book Send flight to PC(Details 17.0) (Details 12.1) (Details 12.2)Flights, including deleted Settings menu Vario-Menu(Details 16.0) (Details 14.0) (Details 15.0)Page 25
9. Menu Descriptions9.2 Text descriptionsKey functions:Manual V1.00_2009_V51. Use Key1 or Key2 to place Cursor2. Use Key3 to call a particular setting3. Use Key1 or Key2 to increase or reduce values, or for Y/N4. Use Key3 to confirm and activate changesMain Menu: Description Factory setting BACKBack to Init menuALTI SET Manual altitude settingLANDING . 11 LandingLANDING . 22 LandingLANDING . 33 LandingFLIGHTS ## Flight overviewALL FLIGHTSFlight overview including deleted flightsSETTINGS ## Settings-MenuEMERGENCYCOORDINATES Shows current coordinates and emergency numberSETTINGS Menu: Description Factory setting BACKBack to main menuVARIO ## Vario sub MenuUTC HH:MM Local time or UTC time UTCUNITS m km Units m/ft km/nm m kmCONTRAST 8 Screen contrast setting 1-19 8FACT SETReturn to Factory settingsSPEED SENSOR Y Switch off speed sensor NVARIO Menu:Factory setting BACKBack to SETTINGS MenuSINKTON Y Sink tone on/off YSINK -1.0m/s Sink tone on from 0 to-5m/sec -1.0 m/sSINK MOD N Sink tone modulation NoSINK INV N Sink ton Invert NoVAR TC .5 s Vario Time constant 0,5 – 4sec IntegraltimeVOLUME. 0 Acoustic volume from 0-3 2VARIONULLVario NullingSOUND Vario pitch from 0-9 5FREQUENZ Beeb frequency 0-9 7VAR AVG 20% Vario integrator from 10-30 20secSOUNDCHECKVARIO Sound checkPage 26
Manual V1.00_2009_V510. Setting altitude <strong>manual</strong>ly10.1 Alti-setProvided the launch altitude is known it may be calibrated beforelaunch in MENU / ALTI SETQNH display:For the QNH-display (in hPa) to be correct, the altitude must becalibrated before launch. QNH is only displayed up until app.2000m, as QNH per definition looses significance above thisaltitude. Due to ageing pressure sensors it is possible that differentinstruments show varying altitudes – the accuracy of the sensor ishowever not influenced by this.11. Landings11.1 LANDING search 1 – 33 landings may be entered before the launchSelect LANDING 1 – 3 to see the Menu.In the top 1/3 of the display the new coordinates will be displayed.As long as the GPS signal remains insufficient the text BADappears in the upper left screen corner. Below this the currentlystored landing or waypoint is shown.11.2 Storing LANDINGS 1 – 3Once the instrument has acquired satellite data to calculate aposition the current position coordinates will be displayed. The largearrow points towards the latest stored position, and shows thedistance to it. There is also a SAVE option, where the new positionmay be stored.Page 27
Manual V1.00_2009_V512.0 Log book12.1 Select flightGo to a flight using Key1 and Key2 select with Key3 .In the lower half of the display the key data of the flight are displayed.EXIT: Return to the main menu by moving the cursor to the top or the bottom of the list, orby holding Key3 for a few seconds.Upon entry into the FLIGHTS menu the latest 7 flights arelisted, with date, start time and duration. The instrumentstores up to 128 flights.In the lower half of the screen the following data is visiblefor the indicated flight:DateStart time and Land timeDurationmax. climb/ max. Sinkmax. altitudemax. speed SOG12.2 Delete or send flightOnce a flight is selected the following options becomeavailable at the bottom of the screen: „DEL SENDEXIT“DEL > Deletes the flightThe flight is deleted from the log book, but can stillbe found and restored under ALL FLIGHTS (aslong as it hasn’t been replaced by new flights inthe 18h circular memory)-SEND > to PC via:XC-TrainerEasy+ > USB connectionXC-TrainerEasy > via Speedboard USBClick on Key2 to view the Protocol Menu. Usethis menu to select transfer speed as well as theupload protocol used by the PC software.Two protocols are available:MXP > for the free program „MAX Punkte“TNC > <strong>Aircotec</strong> Software TN-CompleteDetails from page 33EXIT > Back to main menuPage 28
Manual V1.00_2009_V513.0 ALL FLIGHTS menuGo to this menu to view all flights, even those deleted from the log book. The flights remainvisible here until they are pushed out by new flights in an 18h circular storage. A maximumof 124 flights may be stored, after that the oldest ones are pushed out by new flights.14.0 SETTINGS Menu14.1 Vario MenuVario settings menu, Details 15.014.2 UTC or LOCAL TimeSet the Local time for the Display clock.Range is +/- 12 hours in either direction of the current settingThe internal clock and the data storage is always on UTC.If the GPS time is not actualised the display shows UTC xx:xxChanges to local time gives: LOCAL xx:xx14.3 Units „UNIT m Km“SETTINGS m KmFT KmM NMFT NMMeter / KmFeet / KmMeters / Nautical MilesFeet / Nautical Miles14.4 Contrast „CONTRAST 8“Setting the scrren contrast in increments of 0 – 19 (Factorysetting 8)14.4 Speed sensor „SPEED SENS N“If you have a speed sensor connected set to Y.14.5 Factory settingsInstrument asks if all flights should be deleted – select„EXIT YES NO“Select YES to reset the instrument to factory settings anddelete all flights. Select NO only reset to factory settingswithout deleting flights.Page 29
15.0 VARIO-SETTINGSGeneral SETTINGSManual V1.00_2009_V51. Bring the cursor to the desired position using Key1 or Key22. Use Key3 to call a particular field to set3. Use Key1 or Key2 to increase/decrease values or to confirm/ cancel (Y/N)4. Use Key3 to store and activate changes15.1 Sink acoustic ON / OFFThis is of particular relevance for acro pilots as the sink tone isset to commence at -5m/s. With this setting, this function maybe deactivated.„SINK TONE Y“ Sink tone active„SINK TONE N all Sink tones off15.2 Sink tone threshold „SINK – 1.0m/s“Use this function to set the sink tone threshold from 0,0 -5,0m/sec. When set to -5,0m/s the Sinktone is off, as from.-5 m/sec the sink alarm sets in.15.3 Sink tone modulation „SINK MOD N“If set to NIf set to Y15.4 Sink tone Invers „SINK INV N“If set to N – the greater the sink, the deeper the toneIf set to Y – the greater the sink, the higher the tone15.5 Vario sensitivity „VAR TC .5s“Adjustable from 0,5 – 4sec Integrated (cumulative Vario values as function of the time set).15.6 VOLUME „Volume 2“Adjustable from 0 – 3 , where 0 = OFF 1 = LOW 2 = MEAN 3 = LOUDMay also be set during flight by going to VARIO mode ( see 7.5 ).Page 30
Manual V1.00_2009_V515. VARIO-settings15.7 Vario- nullNOTE!Only perform the Vario Nulling in a closed room!Wait app. 5 minutes after switching the instrument on – this allows the instrument tostabilise.Analog display from +/- 0 – 1mDigital Vario with 1cm resolutionActual barometric altitudeVario correction value from 0-100VARIO NULLINGUse Key1 or Key2 to toggle the correction value until thevario value is close to 0,00.INFO:Back to INIT MenuThis display is often used to demonstrate the sensitivity of the instruments’ baro sensor.15.8 Sound setting „SOUND 5“Use this setting to adjust the sound pitch.Adjustable from 0 – 9 (Factory setting 5).15.9 Frequency setting „FREQUENCY 7“Use this setting to adjust the frequency of the vario beep (adjustable from 0–9, factorysetting 7).Example: Set to 7 > Vario beebs 6 times/sec when in 2m/s climbSet to 2 > Vario beebs 3 times/sec when in 2m/s climb15.10 Sound checkWith this function you may check that the new settings are satisfactory. Use Key1Key2 to test the new settings.andPage 31
Manual V1.00_2009_V516. Emergency Coordinates16.1 CoordinatesIn case of an emergency, or simply for information, theinstrument has the option to display coordinates to bepassed on via telephone.The same screen displays the joint European emergencytelephone number.NOTE!Only for emergencies!Page 32
Manual V1.00_2009_V517. Load flights to PC using <strong>Aircotec</strong> TN-Complete17.1 Step 1, establish connection to PC:Connect the cable to the Windows PCPC with serial port:The serial - RS232 cable is automatically detected.PC with USB-port:When using the USB cable (XC-TrainerEasy+ )or the Speedboard-USB cable(XC-TrainerEasy)please install the enclosed driver from the CD – you may also find the driverunder www.aircotec.com .17.2 Step 2, Install TN Complete:Initiate the Setup process by double clicking onSetupTNC2-6-0.exe .17.3 Step 3, setting up TN CompleteUse the MenuOptions-Settings to alter allsettings in TN_CompletePage 33
Manual V1.00_2009_V517. Load flights to PC using <strong>Aircotec</strong> TN-CompleteUse the menu General – Interface toenter the COM port allocated to thetransfer by your operating system.Find the Com Port for your cable Serial RS232 USB Speedboard-USBas follows:Right-click on the desktop and selectPropertiesPage 34
Manual V1.00_2009_V517. Load flights to PC using <strong>Aircotec</strong> TN-CompleteOpen the Device Manager in thepopup windowThe actual COM port may be found underUSB control units (laptops)The serial RS232 cableis generally allocated the COM 1.Try to disconnect, then reconnect the USBcable to see how a new connection appears inthe USB control units listEnter this new COM Port number into TN-CompletePage 35
Manual V1.00_2009_V517. Load flights to PC using <strong>Aircotec</strong> TN-CompleteNow the only thing missing is the ninedigitsoftware license number – enter thisnumber17.4 Step 4, transferring a flight to TN-Complete:Start the XC-TrainerGo to MENU/FLIGHTS and select the flight you wish toanalyse using SELThe screen shows DEL SEND EXITPage 36
Manual V1.00_2009_V517. Load flights to PC using <strong>Aircotec</strong> TN-Complete• Press SEND, the transfer protocol appears• To transfer to TN-Complete selectTNC 1s 57K.The format 9,6 K will also work, albeit slowerFor other software select theMXP-ProtocolIn TN-Complete, go to Data/ImportTN-Complete is now ready to receive the flightPage 37
Manual V1.00_2009_V517. Load flights to PC using <strong>Aircotec</strong> TN-CompleteUse Key3to initiate the transferThe system shows the transfer progress on the lowerscreen lineEnter a name for the flight data (for ex.. XCT-FLIGHT).Confirm with OKTN-Complete stores in the folder of your choice and addsthe following data to the flight name:092905_0948_XCT-FLIGHTDate 2009.29.05Time 09:48Flight name XC-FLIGHTIt is also possible to store using ONLY the name. Confirmwith SavePage 38
Manual V1.00_2009_V517. Load flights to PC using <strong>Aircotec</strong> TN-CompleteThe flight is loaded into TN-Complete and displayed.The exact descriptions of the many functions may be found in the software <strong>manual</strong>,accessible under Menu/Open Manual, or by pressing F1The flight may also be viewed in GoogleEarth (if installed), simply click on the GE iconPage 39
Manual V1.00_2009_V518. AccessoriesType:XC_BHDescription:XC-leg fixationXC_DHXC-hangglider fixationXC_GZHXC-pg harness fixationXC-EtuiXC-instrument bagTN-CompletelicenseXC-Speed-USB USB cable via SpeedboardXC-SS-DGH-KXC-SS-DGH-L Speed sensor with attachment forhang- and paragliderwith short cable K (50cm) or long cableL (120cm)XC-SS-mS200cm)Speed sensor with stabiliser (cableSS-DGHSpeed sensor-attachment for paragliderPage 40
Manual V1.00_2009_V5flight instruments<strong>Aircotec</strong> flight instruments GmbHAlteggerstr. 8A-8083 St.Stefan i/R AUSTRIA<strong>Aircotec</strong> GmbHPostfach 56CH-6048 Horw Schweizwww.aircotec.comPage 41