Rutland 500 Windcharger Owners Manual - Marlec Engineering Co ...
Rutland 500 Windcharger Owners Manual - Marlec Engineering Co ...
Rutland 500 Windcharger Owners Manual - Marlec Engineering Co ...
- No tags were found...

Create successful ePaper yourself
Turn your PDF publications into a flip-book with our unique Google optimized e-Paper software.
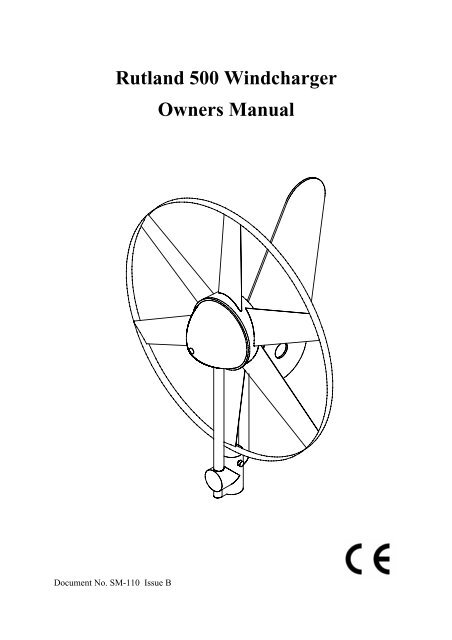
<strong>Rutland</strong> <strong>500</strong> <strong>Windcharger</strong><strong>Owners</strong> <strong>Manual</strong>Document No. SM-110 Issue B
<strong>Co</strong>ntentsINTRODUCTION................................................................................ 2CHECK YOU HAVE RECEIVED....................................................... 3WHAT YOU WILL NEED.................................................................. 3SITING THE WINDCHARGER.......................................................... 4General <strong>Co</strong>nsiderations........................................... 4On Board Systems.................................................. 5Land based Systems................................................ 6ASSEMBLY & INSTALLATION........................................................ 7Tail Assembly......................................................... 7Fitting Generator to the Tower................................ 8Final Mechanical Check.......................................... 8BATTERIES........................................................................................ 9CABLE SPECIFICATION................................................................... 10ELECTRICAL CONNECTION........................................................... 10BASIC WIRING DIAGRAMS............................................................ 11UP AND RUNNING........................................................................... 12SPECIFICATION AND PERFORMANCE......................................... 12INSPECTION AND MAINTENANCE............................................... 13TROUBLESHOOTING....................................................................... 14Page1
INTRODUCTIONThis manual contains important information concerning your <strong>Rutland</strong> <strong>500</strong><strong>Windcharger</strong> and its installation and operation.It is strongly recommended that you read this manual and familiarise yourselfwith its contents before installing and operating the <strong>Windcharger</strong> system.The <strong>Rutland</strong> <strong>500</strong> <strong>Windcharger</strong> is designed to provide a direct current (DC)power supply via a battery bank for 12V equipment, lighting, etc. It is ideal forleisure applications which require battery charging on non-mains sites.WARNING!• When turning, the <strong>Windcharger</strong> is capable of generating voltages in excess ofthe nominal voltage. Caution must be exercised at all times to avoid electricshock.• No attempt to repair the system should be made until the wind generator isrestrained from turning.• The <strong>Windcharger</strong> is fitted with ceramic magnets which can be damaged byheavy handling. The main generator assembly should be treated with careduring transit and assembly.• It is essential to observe the correct polarity when connecting the<strong>Windcharger</strong> and all other components into an electrical circuit. Reverseconnection will damage the <strong>Windcharger</strong> and incorrect installation willinvalidate the warranty.• The fuse supplied must be fitted to protect the system.• If in doubt, refer to your dealer, a competent electrical engineer or themanufacturer.2
CHECK YOU HAVE RECEIVED• 1 x fuse and fuse holder• 1 x main generator assembly• 2 x M8 x 12 Hex Head Bolts• 1 x Tail Fin• 1 x 2-way terminal blockIn the event of loss or damage, consult your dealer or the manufacturer.WHAT YOU WILL NEEDTools• Suitable wire stripper• Small terminal screwdriver• Large flat blade screwdriver• 13mm spannerOther Items You Will Need• Mounting pole• Cable• Batteries• Battery terminals• <strong>Co</strong>nnector blocks (as determined by your total system)Other Items You May Have Selected• SR60 Regulator or RWS60 Charge <strong>Co</strong>ntroller• Inter-connect unit• Cable kit• <strong>Rutland</strong> <strong>500</strong> mounting kit• Voltmeter & Ammeter3
SITING THE WINDCHARGERGeneral <strong>Co</strong>nsiderationsThe location and height of the mounting pole or tower for your wind turbine willbe the major factor in the overall performance of your system.The smooth flow of wind over land and water is often interrupted by a multitudeof obstructions causing wind sheer and turbulence.Wind sheer describes the interference between the fast moving upper air andthe slow moving air close to the ground and the resulting decrease in averagewind speed as one gets closer to the ground.Turbulence is caused by the wind passing over obstructions such as mooredboats, trees and buildings. Both wind sheer and turbulence diminish with heightand can be overcome simply by putting the machine sufficiently high abovethem.It is therefore essential that the wind generator should be located in an area asfree as possible from disturbed wind flow. Bear in mind that downwindobstructions can be as detrimental to performance as upwind obstructions(Fig.1).WIND DIRECTIONAREA OF TURBULENCEFig.12HH2H20H4
Fig.2On Board SystemsThe wind generator should be mounted in asafe position, a minimum of 2 metres (6.5feet) above the deck and away from otherobstacles which could interfere with theblades or tail assembly (Fig. 2).The <strong>Rutland</strong> <strong>500</strong> Mounting Kit(PartNo.CA-12/01) is available for deckmounting.Fig.3The <strong>Rutland</strong> <strong>500</strong> is designed to fit inside analuminium tube with an internal diameter of31.7mm (1 1 / 4 ”).Suitable tubes: Aluminium 1 1 / 2 “ 10 SWGWe suggest the following mountingsaccording to preference and siteconditions:-• Pushpit (Fig.3)Fig.4A suitable pole mounted to the deck withdeck plates and guy ropes is the mostpopular method of mounting the<strong>Windcharger</strong> on yachts, eg. <strong>Rutland</strong> <strong>500</strong>Mounting Kit.• Mizzen (Fig.4)Fig.5Mizzen mounting is suitable on largeryachts, taking advantage of greater windflow the higher the wind turbine ismounted.• River Boats (Fig.5)A pivot pole is ideal for river boats as the<strong>Windcharger</strong> can easily be raised andlowered5
Fig.6Land Based SystemsThe <strong>Rutland</strong> <strong>500</strong> is designed to fit inside analuminium tube with an internal diameter of31.7mm (1 1 / 4 ”).A suitable mounting pole can be erectedusing a 6.5 metre (21 feet) Aluminium tube.The tube must be supported by a minimumof four guy lines.Centre pivoted poleFig.7Base pivoted with gin poleThe attachment points for the guy lines tothe tower should be securely fixed to thetower.• The guy wires should be a minimum of3mm in diameter.• The shackles should be a minimum of5mm in diameter.• Rigging screws should be a minimum of5mm in diameter.• All items should be galvanised orstainless steel for protection againstcorrosion.• Where guy lines are looped, the loopmust incorporate a thimble and be fittedwith a minimum of three rope grips.• All ground fixings must be made suitableaccording to the terrain.We suggest pivot type towers as these allowfor easier installation and lowering foraccess to the wind generator. Two forms ofpivot tower are suggested in Figs 6 & 7.6
Fig.8ASSEMBLY AND INSTALLATION OFTHE WINDCHARGERTail Assembly (Fig.8)1. Place the generator assembly on a flatsoft surface, Nose <strong>Co</strong>ne down.2. Remove the 2 x M5 Pan head screws,washers and nut, one from the tail nutand the other from the support casting.3. Slot the tail into position in the tail nut,ensuring the hole in the tail nut and thehole in the support casting align with thecorresponding holes in the tail fin.4. Replace the screws, washers and nut andsecure in position.5. Check tightness of all screws. (Do notover-tighten).7
Fig.9Fitting Generator to the Tower (Fig.9)1. The post adapter fitted to the <strong>500</strong> isdesigned to fit inside a standard 31.7mminternal diameter tube2. Mark and centre-punch two positionsdiametrically opposite, at 90° to the pipeseam if necessary, 40mm from top of thetube.3. Drill two holes 8.5mm in diameter oncentre-punch positions.4. Position the <strong>Windcharger</strong> on the tower.Two M8 x 12mm screws and shakeproofwashers are provided for securing oncethe cables are installed.Note: When using the <strong>Rutland</strong> <strong>500</strong>Mounting Kit, items 2 and 3 can be ignoredas the unit is pre-drilled.Final Mechanical Check1. Check the tightness of Tail screws.2. Check the free rotation of the hub andyaw axis.Do not raise the <strong>Windcharger</strong> at this stage,the turbine must be connected to the batterybefore the blades are allowed to turn in thewind.8
Total = 12v120Ah1440Wh12v60Ah12v60AhTotal = 24v60Ah1440WhFig.10Fig.11BATTERIESLeisure/Deep Cycle batteries arespecifically designed for good performancein terms of charge/discharge cycles.Batteries are the most important part ofyour battery charging system and should besized according to your load requirementsand provide at least 3 days reserve capacity.This will reduce cycling, prolong the life ofthe battery and ensure system reliabilityduring periods of low wind.Permanent connections should always bemade to the battery terminals. Never usecrocodile clips or similar devices. Batteryterminals should be well greased withpetroleum jelly or similar.12v60Ah12v60AhWe strongly recommend the SR60 orRWS60 is fitted to prevent batteryovercharging in strong winds and isessential with gel/sealed batteries.Batteries may be linked as follows:• In parallel to increase amp hours(Fig.10).• In series to increase voltage (Fig.11).Red is + PositiveBlack is - Negative9
CABLE SPECIFICATIONCableRun (m)Cable Size(mm²)12 Volt0-20 2.521-30 431-45 646-80 10Table.1The cable used for connection of the<strong>Windcharger</strong> to the batteries should be inaccordance with table 1. The use of asmaller cable than recommended willreduce the performance of the chargingsystem.Cable kits are available from your dealer orthe manufacturer.10m x 2.5mm² including battery clips(CA-10/11)20m x 2.5mm² including battery clips(CA-10/12)ELECTRICAL CONNECTION1. Run the cable selected (see Table 1)down the inside of the pole.2. <strong>Co</strong>nnect the wind generator flying leadsto the cable using the connector blocksupplied, taking care to observe polarity.Red is + PositiveBlack is - NegativeWrap the connection with insulation tapeto secure/protect from environment.Alternatively join the cable using alatching-type plug and socket.3. Reposition and secure the wind generatorto the tower using the screws andshakeproof washers provided4. Final Electrical <strong>Co</strong>nnection:Select one of the following 2 basicsystems and follow the manual providedwith the SR60 or RWS60.10
SR60 Regulator and FuseWG<strong>500</strong> WINDGENERATORSR60 SHUNTREGULATORREDBLACKBROWNBLACKREDCHARGE FUSEBATTERYRWS60 <strong>Co</strong>ntrollerWG<strong>500</strong> WINDGENERATORREDBLACKBATTERY11
UP AND RUNNING• Before raising and securing the wind generator, check that:1. All final mechanical checks have been made.2. The cable is not trapped.3. All electrical connections are secure and safe.• The wind generator can now be raised into position.Take care to avoid all moving parts when raising and lowering the windgenerator.• When raised, secure the structure firmly in an upright position. Theperformance of your <strong>Windcharger</strong> can be impaired if the pole is not vertical .SPECIFICATION AND PERFORMANCECharge into 12v Battery (Amperes)4.03.53.02.5WINDSPEED CONVERSIONMPH = Knots x 1.15M/S = Knots x 0.5152.01.51.00.<strong>500</strong> 5 10 15 20 25 30 35 40Windspeed (Knots)12
INSPECTION AND MAINTENANCEThe <strong>Rutland</strong> <strong>500</strong> requires no scheduled maintenance but an annual inspectionshould be carried out to monitor the general condition of the system.• Before inspection, the turbine should either be lowered to the ground or tied toprevent the generator from turning. To stop the generator from turning proceedas follows:1) Turn the wind generator out of the wind (180°) using the tail. A hole isprovided in the tail fin to assist in this. The generator will eventually slowdown.2) Tie a blade to the mounting pole to prevent it from rotating.• Whilst the generator is stationary, the following routine checks should beperformed:1) Check all nuts, bolts and screws for tightness.2) Check the yaw axis for free rotation.3) Check tower assembly for condition.4) Check the tension of the guy wires if applicable. The tension of guy wiresshould be checked frequently during the first year.5) The unit can be wiped with a mild detergent and rinsed with water to removedirt and debris.13
TROUBLESHOOTINGIn the unlikely event that your <strong>Rutland</strong> <strong>500</strong> should develop a defect, the turbineshould either be lowered to the ground or tied to prevent the blades from turningbefore the following inspection is carried out.1. Read the Electrical <strong>Co</strong>nnection (page 10) and Up and Running (page 12) and besatisfied that your system complies.2. If your <strong>Rutland</strong> <strong>500</strong> fails to turn or produces low output, check the following:• Is there sufficient wind? The <strong>Rutland</strong> <strong>500</strong> needs 5 knots wind speed to startcharging. The wind speed across the turbine blades may be greatly reduced in amarina or built-up area compared with the reading on a mast-head anemometeror weather reports.• Is the battery in good condition? Check the voltage and electrolyte level ofeach battery.• Check electrical continuity throughout the system, especially corrosion andpoor connections in cable joins and connector blocks.• Check the brushes and slipring for wear or damage. To inspect the brushes,remove the round plastic cap on the front of the main casting. The brushes canbe inspected by removing the caps from the brush holders & withdrawing thebrushes. Damage to the brushes and reduced power indicate a possible reverseconnection to the battery (see Page 10).• Check hub for free rotation with generator disconnected from battery. Ifthe hub does not rotate freely, check for a possible short circuit in the wiring. Ifno wiring fault is found refer to your dealer or manufacturer.• Remove the SR60/RWS60 from the charging circuit and connect the<strong>Windcharger</strong> direct to the battery via an ammeter. If no charge current ismeasured and there is sufficient wind, contact your dealer or manufacturer. Ifcharge current is normal the battery is fully charged or regulator is faulty.If in doubt, refer to your dealer or manufacturer.14
Notes
Notes
L I M I T E D W A R R A N T YThe <strong>Marlec</strong> <strong>Engineering</strong> <strong>Co</strong>mpany Limited Warranty provides freereplacement cover for all defects in parts and workmanship for 12 monthsfrom the date of purchase. <strong>Marlec</strong>'s obligation in this respect is limited toreplacing parts which have been promptly reported to the seller as havingbeen in his opinion defective and are so found by <strong>Marlec</strong> upon inspection.Defective parts must be returned by prepaid post to <strong>Marlec</strong> <strong>Engineering</strong><strong>Co</strong>mpany Limited, <strong>Rutland</strong> House, Trevithick Road, <strong>Co</strong>rby,Northamptonshire, NN17 5XY, England, or to an authorised <strong>Marlec</strong> agent.This Warranty is void in the event of improper installation, owner neglect ornatural disasters and does not extend to support posts, inverters or batteries.No responsibility is assumed for incidental or consequential damage or loss,damage caused by the use of any unauthorised components.No responsibility is assumed for non "furling" versions of the <strong>Rutland</strong><strong>Windcharger</strong> (ie. the Standard and Marine generators) where <strong>Marlec</strong> or oneof its authorised agents finds that a generator incorporating a furling deviceshould have been used.Serial Number :