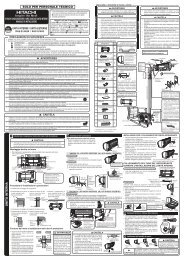
RAS-25YHA2.indd - Hitachi Air Conditioning Products
RAS-25YHA2.indd - Hitachi Air Conditioning Products
RAS-25YHA2.indd - Hitachi Air Conditioning Products

You also want an ePaper? Increase the reach of your titles
YUMPU automatically turns print PDFs into web optimized ePapers that Google loves.
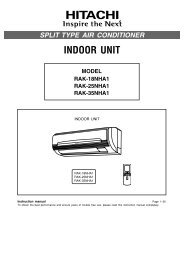
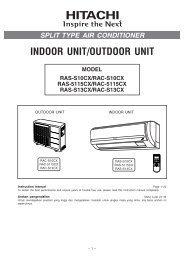
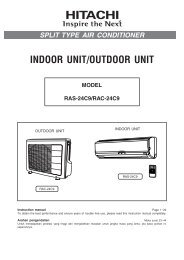
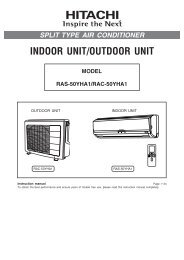
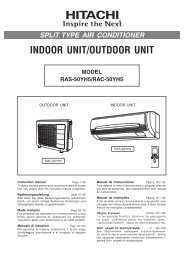
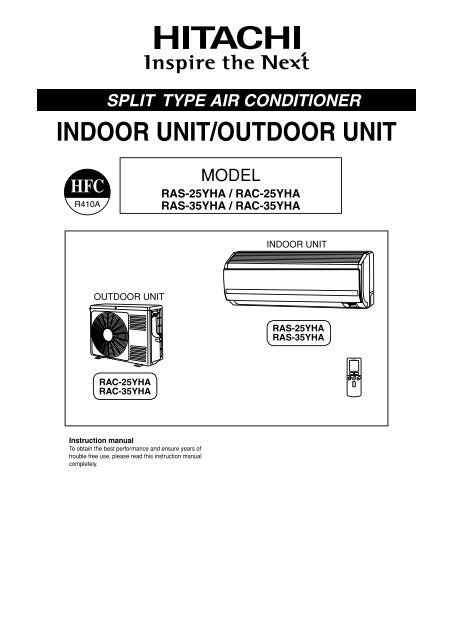
SPLIT TYPE AIR CONDITIONERINDOOR UNIT/OUTDOOR UNITMODEL<strong>RAS</strong>-25YHA / RAC-25YHA<strong>RAS</strong>-35YHA / RAC-35YHAINDOOR UNITOUTDOOR UNIT<strong>RAS</strong>-25YHA<strong>RAS</strong>-35YHARAC-25YHARAC-35YHAInstruction manualTo obtain the best performance and ensure years oftrouble free use, please read this instruction manualcompletely.
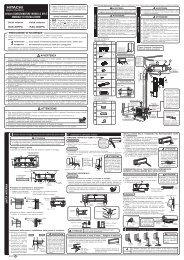
SAFETY PRECAUTION• Please read the “Safety Precaution” carefully before operating the unit to ensure correct usage of the unit.• Pay special attention to signs of “ Warning” and “ Caution”. The “Warning” section contains matters which,if not observed strictly, may cause death or serious injury. The “Caution” section contains matters which mayresult in serious consequences if not observed properly. Please observe all instructions strictly to ensuresafety.• The signs indicate the following meanings. (The following are examples of signs.)• Please keep this manual after reading.WARNINGCAUTIONThis sign in the figure indicates prohibition.PRECAUTIONS DURING INSTALLATION• Do not reconstruct the unit.Water leakage, fault, short circuit or fire may occur if you reconstruct the unit byyourself.• Please ask your sales agent or qualified technician for the installation of your unit.Water leakage, short circuit or fire may occur if you install the unit by yourself.• Please use earth line.Do not place the earth line near water or gas pipes, lightning-conductor, or theearth line of telephone. Improper installation of earth line may cause electricshock.• Be sure to use the specified piping set for R410A. Otherwise, this may result inbroken copper pipes or faults.• A circuit breaker should be installed depending on the mounting site of the unit.Without a circuit breaker, the danger of electric shock exists.• Do not install the unit near a location where there is flammable gas.The outdoor unit may catch fire if flammable gas leaks around it. Piping shall besuitable supported with a maximum spacing of 1m between the supports.• Please ensure smooth flow of water when installing the drain hose. If any failureis found in the drain path, water drops from the indoor and outdoor units, causingwet household effects.• Make sure that a single phase 230V power source is used.The use of other power sources may cause electrical components to overheatand lead to fire.PRECAUTIONS DURING SHIFTING OR MAINTENANCE• Should abnormal situation arise (like burning smell), please stop operating theunit and remove plug from the socket or turn off the circuit breaker. Contact youragent. Fault, short circuit or fire may occur if you continue to operate the unitunder abnormal situation.• Please contact your agent for maintenance.Improper self maintenance may cause electric shock and fire.Indicates the instructions that must be followed.• Please contact your agent if you need to remove and reinstall the unit.Electric shock or fire may occur if you remove and reinstall the unit yourself improperly.PROHIBITIONCONNECT EARTH LINEPROHIBITIONPROHIBITION“OFF”WARNING• Avoid an extended period of direct air flow for your health.• Do not connect the power calbe with an extension cable or do not plug too manyleads of the other electric appliance into the socket where this cable is plugged.InPROHIBITIONaddition, wire the cable with some allowances to prevent the cable from stretching.Not doing so will cause an electrical shock, heat generation or fire.• Do not bundle the power cable, pull it, put something on it, heat it, process it, orput it between things. Breakage of the power cable may result.Use PROHIBITION of a damaged cable may cause an electrical shock or a fire.PROHIBITION– 2 –PROHIBITIONPROHIBITIONPROHIBITION• Do not put objects like thin rods into the panel of blower and suction sidebecause the high-speed fan inside may cause danger.PROHIBITION
CAUTIONPRECAUTIONS DURING OPERATION• Do not use any conductor as fuse wire, this could cause fatal accident.“OFF”PROHIBITION• During thunder storm, disconnect the plug top or turn off the circuit breaker.• Spray cans and other combustibles should not be located within a meter of the airoutlets of both indoor and outdoor units.As a spray can’s internal pressure can be increased by hot air, a rupture may result.• The product shall be operated under the manufacturer specification and not forany other intended use.DON’T WETSTRICTLY OBSERVEPRECAUTIONSPROHIBITIONPROHIBITION• Do not attempt to operate the unit with wet hands, this could cause fatal accident.• When operating the unit with burning equipments, regularly ventilatethe room to avoid oxygen insufficiency.PROHIBITION• Do not direct the cool air coming out from the air-conditioner panel toface household heating apparatus as this may affect the working ofapparatus such as the electric kettle, oven etc.• Please ensure that outdoor mounting frame is always stable, firm andwithout defect. If not, the outdoor unit may collapse and cause danger.• Do not wash the unit with water or place a water container such as avase on the indoor unit.Electrical leakage could be present and cause electric shock.• Do not place plants or animals directly under the air flow as it is bad for the plants oranimals.• Do not climb on the outdoor unit or put objects on it.PROHIBITIONPROHIBITIONSPANISH ITALIANO FRANÇAIS DEUTSCH ENGLISHPROHIBITION• When operating the unit with the door and windows opened, (the room humidityis always above 80%) and with the air deflector facing down or moving automaticallyfor a long period of time, water will condense on the air deflector and dripsdown occasionally. This will wet your furniture. Therefore, do not operate undersuch condition for a long time.PROHIBITION• Indoor unit cleaning must be performed by authorized personnel only. Consult yoursales agent.Using a commercially available detergent or similar can damage the plastic partsor clog the drain pipe, causing water to drip with potential electric shock hazard.DON’T TOUCH• Do not touch the air outlet, bottom surface and aluminum fin of the outdoorunit.You may get hurt.• Do not touch the refrigerant pipe and connecting valve.Burns may result.– 3 –PROHIBITION• If the amount of heat in the room is above the cooling or heating capability of theunit (for example: more people entering the room, using heating equipments andetc.), the preset room temperature cannot be achieved.PROHIBITIONDON’T TOUCHPORTUGUÊS∂ÏÏËÓÈοРУССКИЙ
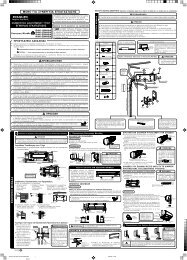
NAMES AND FUNCTIONS OF EACH PARTINDOOR UNIT<strong>Air</strong> filterTo prevent dust from coming into the indoor unit.(Refer page 16)Front panelIndoor unit indicatorsLight indicator showing the operating condition.(Refer page 5)Horizontal deflector Vertical deflector(<strong>Air</strong> Outlet)(Refer page 15)Remote controllerSend out operation signal to the indoor unit. So asto operate the whole unit.(Refer page 6)OUTDOOR UNIT<strong>Air</strong> outletWhen “heating” operation isperformed, cool air blowsand when “cooling” or“dehumidifying” operation isperformed, warm air blows.Drain hoseDrains the dehumidified water from the indoor unit to theoutdoor during “cooling” or “dehumidifying” operation.Piping and Wiring<strong>Air</strong> inlets (Rear and left sides)Drain port(Bottom)Earth terminal(Lower section of the side)About the outdoor unit:• When “Stop” is selected during operation of theindoor unit, the fan of the outdoor unit continuesturning for 10 to 60 seconds to cool the electric partsdown.• In heating operation, condensate or water due todefrosting will flow. Do not cover the drain port of theoutdoor unit because such water may freeze in thechilly area.• When the outdoor unit is hung on the ceiling, instalthe bush and drain pipe on the drain port and drainwater.MODEL NAME AND DIMENSIONSMODEL WIDTH (mm) HEIGHT (mm) DEPTH (mm)<strong>RAS</strong>-25YHA, <strong>RAS</strong>-35YHA 780 280 215RAC-25YHA, RAC-35YHA 750 548 288– 4 –
NAMES AND FUNCTIONS OF EACH PARTINDOOR UNIT INDICATORSENGLISHFILTER LAMP (Green)When the device is operated for a total of about 200hours, the FILTER lamp lights indicates that it istime to clean the filter.The lamp goes out when the“ (AUTO SWING)” button is pressed while theoperation is stopped.DEUTSCHCAUTIONOPERATION LAMP (Yellow)This lamp lights during operation.The OPERATION LAMP flashes in the following casesduring heating.(1) DURING PREHEATINGFor about 2-3 minutes after starting up.(2) DURING DEFROSTINGDefrosting will be performed about once an hour whenfrost forms on the heat exchanger of the outdoor unit,for 5-10 minutes each time.TEMPORARY SWITCHUse this switch to start and stop when the remote controller does not work.This temporary operation will be at the most recent setting made. (The unitwill immediately go into automatic operation once power is switched on.Turn off the circuit breaker or pull out the power plug if theunit is not be operated for a long period.If the power stays on and the unit is not operated, power is slightly consumed in the control circuit.The power is saved by turning off the power switch (or the circuit breaker when the power is supplied fromthe outdoor unit).Attaching the air cleansing and deodorizing filters (Accessories) to the filter frame.• Attach the air cleansing and deodorizing filters to the frameby gently compress its both sides and release after insertioninto filter frame.• The cooling capacity is slightly weakened and the cooling speedbecomes slower when the air cleansing and deodorizing filtersare used.• <strong>Air</strong> cleansing and deodorizing filters can be used for about 1 year.FrameWhen you want to renew it, please ask your sales agent.Attaching the negative ion stick to the filter frame• Put the negative ion stick to the loer hooks and install it so asto push up the upper hooks.TIMER LAMP (Orange)This lamp lights when the timer is working.– 5 –Upper hookNegativeion stickLower hookРУССКИЙ ∂ÏÏËÓÈο PORTUGUÊS SPANISH ITALIANO FRANÇAIS
NAMES AND FUNCTIONS OF EACH PARTREMOTE CONTROLLER• This controls the operation of the indoor unit. The range of control is about 7 meters. If indoor lighting is controlledelectronically, the range of control may be shorter.This unit can be fixed on a wall using the fixture provided. Before fixing it, make sure the indoor unit can be controlledfrom the remote controller.• Handle the remote controller with care. Dropping it or getting it wet may compromise its signal transmission capability.• After new batteries are inserted into the remote controller, the unit will initially require approximately 10 secondsto respond to commands and operate.AUTOHEATDEHUMIDIFYCOOLFANFAN SPEEDLOWMEDHISLEEPINGSTOP (CANCEL)START (RESERVE)START/STOPTIMETIMER SETTIMER SELECTORON TIMEROFF TIMERAUTO SWING Signal emitting window/transmission signPoint this window toward the indoor unit when controlling it.The transmission sign blinks when a signal is sent. DisplayThis indicates the room temperature selected, current time, timer status, functionand intensity of circulation selected. START/STOP buttonPress this button to start operation. Press it again to stop operation. AUTO SWING buttonControls the angle of the horizontal air deflector. FAN SPEED selectorThis determines the fan speed. Every time you press this button, the intensityof circulation will change from (AUTO) to (HI) to (MED) to (LOW).(This button allows selecting the optimal or preferred fan speed for each operationmode.) SLEEP buttonUse this button to set the sleep timer. TEMPERATURE buttonsUse these buttons to raise or lower the temperature setting. (Keep pressed,and the value will change more quickly.) TIME buttonUse this button to set and check the time and date. RESET buttonsPress this button after the batteries are replaced or when some irregularoperationis found. FUNCTION selectorUse this button to select the operating mode. Every time you press it, the modewill change from (AUTO) to (HEAT) to (DEHUMIDIFY) to (COOL)and to (FAN) cyclically. FAN SPEED selector AUTO SWING button TIMER controlUse these buttons to set the timer. OFF-TIMER button Select the turn OFF time. ON-TIMER button Select the turn ON time. RESERVE button Time setting reservation. CANCEL button Cancel time reservation.Precautions for Use• Do not put the remote controller in the following places.• In direct sunlight• In the vicinity of a heater.• Handle the remote controller carefully. Do not drop it on the floor, and protect itfrom water.• Once the outdoor unit stops, it will not restart for about 3 minutes (unless you turnthe power switch off and on or unplug the power cord and plug it in again).This is to protect the device and does not indicate a failure.• If you press the FUNCTION selector button during operation, the device maystop for about 3 minutes for protection.– 6 –
VARIOUS FUNCTIONS Auto Restart Control• If there is a power failure, operation will be automatically restarted when the power is resumed with previousoperation mode and airflow direction.(As the operation is not stopped by remote controller.)• If you intend not to continue the operation when the power is resumed, switch off the power supply.When you switch on the circuit breaker, the operation will be automatically restarted with previous operation modeand airflow direction.Note: 1. If you do not require Auto Restart Control, please consult your sales agent.2. Auto Restart Control is not available when Timer or Sleep Timer mode is set.AUTOMATIC OPERATIONThe device will automatically determine the mode of operation, HEAT or COOL depending on the initial room temperature.The selected mode of operation will change when the room temperaturevaries varies.1STARTSTOPPress the FUNCTION selector so that the display indicates the(AUTO) mode of operation.• When AUTO has been selected, the device will automaticallydeterminethe mode of operation, HEAT or COOL dependingon the currentroom temperature.• When AUTO is first selected, the device will determine thecurrentroom temperature and select the proper operationmodeaccordingly.• When the air conditioner has adjusted the room’s temperaturetothe near preset temperature, it will begin to monitoroperation. If theroom temperature subsequently changes,the air conditioner willonce again select the appropriateoperation (heating or cooling) toadjust the temperature tothe preset temperature. The monitoringoperation range is+ 3°C relative to the preset temperature.• If the mode automatically selected by the unit is notsatisfactory,manually change the mode setting (heat,dehumidify, cool or fan).Press the (START/STOP) button.Operation starts with a beep.Press the button again to stop operation. As the settings are stored in memory in the remote controller, you only haveto press the (START/STOP) button next time.You can raise or lower the temperature setting as necessary by maximumof 3°C.Press the temperature button and the temperaturesetting will change by 1°C each time.• The preset temperature and the actual room temperature may varysomewhat depending on conditions.∂ÏÏËÓÈο PORTUGUÊS SPANISH ITALIANO FRANÇAIS DEUTSCH ENGLISHPress the(FAN SPEED) button, AUTO and LOW is available.– 7 –РУССКИЙ
HEATING OPERATION• Use the device for heating when the outdoor temperature is under 21°C.When it is too warm (over 21°C), the heating function may not work in order to protect the device.• In order to keep reliability of the device, please use this device above -10°C of the outdoortemperature.12Press the FUNCTION selector so that the display indicates(HEAT).Set the desired FAN SPEED with thedisplay indicates the setting).(AUTO)(HI)(MED)(LOW)(FAN SPEED) button (the: The fan speed changes automatically accordingto the temperature of the air which blows out.: Economical as the room will become warmquickly.But you may feel a chill at the beginning.: Quiet.: More quiet.3Set the desired room temperature with the TEMPERATURE buttons(the display indicates the setting).The temperature setting and the actual room temperature may varysomewhat depending on conditions.STARTSTOPPress the (START/STOP) button. Heating operation starts witha beep. Press the button again to stop operation. As the settings are stored in memory in the remote controller, you only haveto press the (START/STOP) button next time. DefrostingDefrosting will be performed about once an hour when frost forms on the heat exchange of the outdoor unit,for 5~10 minutes each time.During defrosting operation, the operation lamp blinks in cycle of 3 seconds on and 0.5 second off.The maximum time for defrosting is 20 minutes.(If the piping length used is longer than usual, frost will likely to form.)– 8 –
ITALIANOENGLISHDEUTSCH∂ÏÏËÓÈοDEHUMIDIFYING OPERATIONUse the device for dehumidifying when the room temperature is over 16°C.When it is under 15°C, the dehumidifying function will not work.1STARTSTOPPress the FUNCTION selector so that the display indicates(DEHUMIDIFY).The FAN SPEED is set at LOW automatically.The FAN SPEED button does not work.Press the(START/STOP) button. When you want to change the operation mode, please use the FUNCTIONselector. Set the desired temperature is available. You also can use the FUNCTION selector to select this operation.FRANÇAIS Dehumidifying Function• Dehumidifying takes place with a target temperature which is slightly lower than the room temperature setting.(However, target temperature is 16°C for a temperature setting of 16°C.)If the room temperature becomes lower than the target value, operation stops. If the room temperature becomeshigher than the target value, operation restarts.• The preset room temperature may not be reached depending on the number of people present in the roomor other room conditions.SPANISHPORTUGUÊS– 9 –РУССКИЙ
COOLING OPERATIONUse the device for cooling when the outdoor temperature is 22-42°C.If humidity is very high (over 80%) indoors, some dew may form on the air outlet grille of the indoor unit.1Press the FUNCTION selector so that the display indicates(COOL).Set the desired FAN SPEED with thedisplay indicates the setting).(FAN SPEED) button (the2(AUTO)(HI)(MED)(LOW): The FAN SPEED is HI at first and varies to MEDautomatically when the preset temperature hasbeen reached.: Economical as the room will become coolquickly.: Quiet.: More quiet.3Set the desired room temperature with the TEMPERATURE buttons(the display indicates the setting).The temperature setting and the actual room temperature may varysomewhat depending on conditions.STARTSTOPPress the (START/STOP) button. Cooling operation starts with abeep. Press the button again to stop operation. The cooling functiondoes not start if the temperature setting is higher than the currentroom temperature (even though the (OPERATION) lamp lights).The cooling function will start as soon as you set the temperaturebelow the current room temperature. As the settings are stored in memory in the remote controller, you only haveto press the (START/STOP) button next time.– 10 –
ENGLISHDEUTSCH∂ÏÏËÓÈοFAN OPERATIONYou can use the device simply as an air circulator. Use this function to dry the interior of the indoor unitat the end of summer.12STARTSTOPPress the FUNCTION selector so that the display indicates(FAN).Press the(HI)(MED)(LOW)(FAN SPEED) button.: The strongest air blow.: Quiet.: More quiet.Press the (START/STOP) button. Fan operation starts with abeep.Press the button again to stop operation.FRANÇAISFAN SPEED (AUTO)… When the AUTO fan speed mode is set in the cooling/heating operation:ITALIANOFor the heating operation• The fan speed will automatically change according to the temperature ofdischarged air.• As room temperature reaches the preset temperature, a very light breezewill blow.SPANISHFor the cooling operation• Operation starts in the “HI” mode to reach the preset temperature.• As room temperature approaches the preset temperature, fan speed automaticallyswitches to “LOW”.PORTUGUÊS– 11 –РУССКИЙ
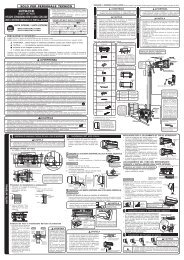
HOW TO SET THE TIMERTIME, DAY,MONTH (currenttime, day, month)Time, Day, MonthAfter you change thebatteries;1 Set the current month and daywith the TIMER control button.MDMDOFF TIMERON TIMERRESERVECANCELOFF-TimerStartStopYou can set the device to turn off atthe present time.1 Press the (OFF-TIMER) button.The (OFF) mark blinks onthe display.AMON-TimerThe device will turn on at thedesignated times.StopStart1 Press the (ON-TIMER) button.The (ON) mark blinks on thedisplay.AMON/OFF-TimerStartStop• The device will turn on (off) andoff (on) at the designated times.• The switching occurs first at thepreset time that comes earlier.• The arrow mark appearing on thedisplay indicates the sequence ofswitching operations.1 Press the (ON-OFF) button so thatthe (OFF) markblinks.PM2 Set the turn-off timewith the TIMER controlbutton.Press the (RESERVE)button.PM3 Press the (ON-TIM-ER) button so that the(OFF) mark lights and the(ON) mark blinks.PMAMHow to Cancel ReservationPoint the signal window of the remote controller toward the indoor unit, and press the (CANCEL)button.The (RESERVED) sign goes out with a beep and the (TIMER) lamp turns off on the indoorunit.NOTEYou can set only one of the OFF-timer,ON-timer and ON/OFF-timer.– 12 –
2 Set the(TIME) button.AMPM2 Set the turn-off time with theTIMER control button.PM3 Set the current time withthe TIMER control button.PMExample: The current time is 1:30p.m.4 Press the (TIME) buttonagain. The time indication startslighting instead of flashing.• The time indication will disappearautomatically in 10seconds.• To check the current timesetting, press the (TIME)button twice.The setting of the current timeis now complete.3 Point the signal window of the remote controller toward the indoor unit, andpress the (RESERVE) button.The (OFF) mark starts lighting instead of flashing and the (RESERVED)sign lights. A beep occurs and the (TIMER) lamp lights on the indoor unit.PMPMExample: The device will turn off at 11:00p.m.The setting of turn-off time is now complete.ENGLISHDEUTSCHFRANÇAIS2 Set the turn-on time with theTIMER control button.AM4 Set the turn-on time with theTIMER control button.3 Point the signal window of the remote controller toward the indoor unit, andpress the (RESERVE) button.The (ON) mark starts lighting instead of flashing and the (RESERVED)sign lights. A beep occurs and the (TIMER) lamp lights on the indoor unit.AMExample:The device will turn on at 7:00 a.m.The setting of the turn-on time is now complete.5 Point the signal window of the remote controller toward the indoor unit, andpress the (RESERVE) button.The (ON) mark starts lighting instead of flashing and the (RESERVED) signlights. A beep occurs and the (TIMER) lamp lights on the indoor unit.ITALIANOSPANISHPMAMPMAMExample:The device will turn off at 10:30p.m. and it will beturned on at 7:00 a.m.The settings of the turn-on/off time are now complete.PORTUGUÊS• The timer may be used in three ways: off-timer, on-timer and ON/OFF (OFF/ON)-timer. Set the current timeat first because it serves as a reference.• As the time settings are stored in memory in the remote controller, you only have to press thebutton is order to use the same settings next time.(RESERVE)∂ÏÏËÓÈο– 13 –РУССКИЙ
HOW TO SET THE SLEEP TIMERSet the current time at first if it is not set before (see the pages for setting the current time). Press the(SLEEP) button and the display changes as shown below.ModeSleep TimerIndication1 hour 2 hours 3 hours 7 hoursSleep timer off SLEEPSleep Timer: The device will continue working for the desired numberof hours and then turn off.Point the signal window of the remote controller toward the indoor unit,and press the SLEEP button.The timer information will be displayed on the remote controller. TheTIMER lamp lights with a beep from the indoor unit. When the sleeptimer has been set, the display indicates the turn-off time.AMExample: If you set 3 hours sleeptime at 11:38 p.m., the turn-off timeis 2:38 a.m.SleeptimerStartThe device will be turned off by the sleep timerand turned on by on-timer.1 Set the ON-timer.2 Press the (SLEEP) button and set the sleep timer.AMFor heating:AMIn this case, the device will turn off in 2hours (at 1:38 a.m.) and turn on earlysothat the preset temperature will bealmost reached at 6:00 next morning.How to Cancel ReservationPoint the signal window of the remote controller toward the indoor unit, and press the (CANCEL)button.The (RESERVED) sign goes out with a beep and the (TIMER) lamp turns off on the indoorunit.NOTEIf you set the sleep timer when the off-time or on/off-timer hasbeen set earlier, the sleep timer becomes effective insteadof the off - or on/off-timer set earlier.– 14 –
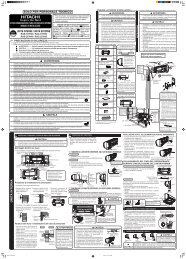
ADJUSTING THE AIR DEFLECTORS12Adjustment of the conditioned air in the upward and downwarddirections.The horizontal air deflector is automatically set to the proper angle suitablefor each operation. The deflector can be swung up and down continuouslyand also set to the desired angle using the “ (AUTO SWING)”button.• If the “ (AUTO SWING)” button is pressed once, the horizontalair deflector swings up and down. If the button is pressed again,the deflector stops in its current position. Several seconds (about 6seconds) may be required before the deflector starts to move.• Use the horizontal air deflector within the adjusting rangeshown inthe right.• When the operation is stopped, the horizontal air deflector movesand stops at the position where the air outlet closes.CAUTION• In “Cooling” operation, do not keep the horizontal air deflectorswinging for a long time. Some dew may form on the horizontal airdeflector and dew may drop.Adjustment of the conditioned air to the left and right.Hold the vertical air deflector as shown in the figure and adjust theconditioned air to the left and right.When cooling,dehumidifyingVerticalabout 15°Verticalabout 60°When heatingabout 45°ITALIANO FRANÇAIS DEUTSCH ENGLISHHOW TO EXCHANGE THE BATTERIES IN THE REMOTE CONTROLLER1Left side: Hold thethird blade from theleft endof the airdeflector to adjust thedirection. The pull forthe blade is marked.Remove the cover as shown in the figure and take outthe old batteries.Right side: Hold thethird blade from theright endof the airdeflector to adjust thedirection. The pull forthe blade is marked.about 30°SPANISHPORTUGUÊS2Install the new batteries.The direction of the batteries should match the marks inthe case.CAUTION1.Do not use new and old batteries, or different kinds of batteriestogether.2.Take out the batteries when you do not use the remote controllerfor 2 or 3 months.– 15 –Push and pull to thedirection of arrow.∂ÏÏËÓÈοРУССКИЙ
MAINTENANCECAUTIONCleaning and maintenance must be carried out only by qualified service personal. Before cleaning, stopoperation and switch off the power supply.1. AIR FILTERWhen the filter indicator lamp comes on, be sure to clean the filter. By doing so, the power rates aresaved.In case the air filter is full of dust, the air flow will decrease and the cooling capacity will bereduced. Further,noise may occur. Be sure to clean the filter following the procedure below.PROCEDURE1Open the front panel carefully and remove the filter.2Vacuum dust from the air filter using vacuum cleaner. Ifthere is too much dust, wash the filter with a detergentand rinse it thoroughly. After that, dry it in the shade.3•Set the filter with “FRONT” mark facing front, and slotthem into the original state.• After attaching the filters, push the front panel at threearrow portions as shown in figure and close it.CAUTION• Do not wash with hot water at more than 40°C. The filter may shrink.• When washing it, shake off moisture completely and dry it in the shade; do not expose it directly to the sun.The filter may shrink.• Don’t operate the unit without filter. Fault may occur if you continue.– 16 –
2. CLEANING OF FRONT PANEL• Remove the front panel and wash with clean water. Washit with a soft sponge. After using neutral detergent, washthoroughly with clean water.• When front panel is not removed, wipe it with a soft drycloth. Wipe the remote controller thoroughly with a soft drycloth.• Wipe the water thoroughly.If water remains at indicators or signal receiver of indoorunit, it causes trouble.Method of removing the front panel.Be sure to hold the front panel with both hands todetach and attach it.ENGLISHDEUTSCHFRANÇAISRemoving the Front PanelRemoving the Front Panel• When the front panel is fully opened with bothhands, push the right arm to the inside to releaseit, and while closing the front panel slightly, putit out forward.HoleShaftStep• When the front panel is fully opened with bothhands, push the right arm to the inside to releaseit, and while closing the front panel slightly, putit out forward.ITALIANOSPANISHCAUTION• Do not splash or direct water to the body of the unit when cleaning it asthis may cause short circuit.• Never use hot water (above 40°C), benzine, gasoline, acid, thinner or abrush, because they will damage the plastic surface and the coating.3. MAINTENANCE AT BEGINNING OF LONG OFF PERIODBENZINEACIDTHINNERPORTUGUÊS• Run the unit by setting the operation mode to (FAN) and thefan speed to HI for about half a day on a fine day, and dry thewhole of the unit.• Switch off the power plug or turn off the circuit breaker.<strong>Air</strong>Blow∂ÏÏËÓÈο– 17 –РУССКИЙ
INFORMATIONCAPABILITIESHeating Capability• This room air conditioner utilizes a heat pump system that absorbsexterior heat and brings it into a room to be heated. As the ambienttemperature gets lower, heating capability will also lower. In sucha situation, the inverter work to increase compressor rpm to keepthe unit’s heating capability from decreasing. If the unit’s heatingperformance is still unsatisfactory, other heating appliances shouldbe used to augment this unit’s performance.CAUTIONDo not use a stoveor any other hightemperaturedevicesin proximity to theindoor unit.PROHIBITION• The air conditioner is designed to heat an entire room so that it may take some time before you feel warm.Timer operation is recommended for effective preheating ahead of the desired time.Cooling and Dehumidifying Capabilities• If the heat present in a room exceeds the unit’s cooling capacity (for example, if there are many people in theroom or other heating appliances are used), the preset room temperature may not be reached.VARIOUS FUNCTIONS• When fan speed, room temperature are set with the remote controller before starting manual operation andthe buttons are released, the indication of settings will go off in 10 seconds and only the operation mode willbe displayed.• Pressing the button while the unit is in operation will let the protective circuit work so that the unit willnot operate for approximately 3 minutes.• During heating operation, the indoor unit’s color indicator lamp may flash with no air emitted for a while.• If you feel cold wind during warming operation with the (HI) fan speed or want to make the unit operationquieter after the room is heated, use of (AUTO) setting is recommended.• With the (LOW) setting, the unit’s cooling capability will lower slightly.• With the (LOW) setting, the unit’s heating capability will vary with the operating conditions.TIMER PROGRAMMING/SLEEP TIMER OPERATION• When the timer has been programmed, the unit will not operate even if the set time is reached unless theunit receives a signal from the remote controller. Confirm that timer programming is complete (beep) and theTIMER lamp of the indoor unit lights.• If the (SLEEP) button is pressed while the ON/OFF timer is programmed, the sleep timer takes priority.• During sleep timer operation, the fan speed sets to (LOW) regardless of the preset speed. The remotecontroller display indication will remain unchanged even with the (LOW) setting.– 18 –
REGULAR INSPECTIONPLEASE CHECK THE FOLLOWING POINTS EVERY EITHER HALF YEARLY OR YEARLY. CONTACT YOURSALES AGENT SHOULD YOU NEED ANY HELP.123CONDITIONWARNINGWARNINGAFTER SALES SERVICE AND WARRANTYIf the remote controller is nottransmitting a signal.(Remote controller display isdim or blank.)When it does not operate.WARNINGWHEN ASKING FOR SERVICE, CHECK THE FOLLOWING POINTS.Check to see if the unit’s earth line has been connectedcorrectly.If the earth line is disconnected or faulty, unit failure or electricshock hazard may result.Check to see if the mounting frame has rusted excessivelyor if the outdoor unit has tilted or become unstable.It could collapse or fall, causing injury.Check to see if the power plug is securely insertedinto the wall socket.If the power plug is not inserted into the wall socket securely,it will become hot and an electric shock or fire may occured. Ifdust or dirt is found on the power plug, clean the plug and insertit into the wall socket.CHECK THE FOLLOWING POINTS• Do the batteries need replacement?• Is the polarity of the inserted batteries correct?• Is the fuse all right?• Is the voltage extremely high or low?• Is the circuit breaker “ON”?• Is the power plug inserted?• Do you have any power cut?SPANISH ITALIANO FRANÇAIS DEUTSCH ENGLISHWhen it does not cool well.When it does not heat well.• Is the air filter blocked with dust?• Is the set temperature suitable?• Have the top and bottom air deflectors been adjusted to their correctpositions according to the operation mode selected?• Are the air inlets or air outlets of indoor and outdoor units blocked?• Is the fan speed “LOW”?PORTUGUÊS The following phenomena do not indicate unit failure.During heating, the operation indicatorblinks and air blow stopsHissing or fizzy soundsSqueaking noiseRustling noiseClicking noiseThe unit is preparing to blow warm air. Please wait.The outdoor unit is defrosting. Please wait.Refrigerant flow noise in the pipe or valve sound generated when flow rate isadjusted.Noise generated when the unit expands or contracts due to temperaturechanges.Noise generated with the indoor unit fan’s rpm changing such as operation starttimes.Noise of the motorized valve when the unit is switched on.– 19 –∂ÏÏËÓÈοРУССКИЙ
Perking noiseChanging operation noiseMist emissionSteam emitted from the outdoor unitOdorsThe outdoor unit continues to operateeven if operation is stopped.The OPERATION lamp is blinking.Does not reach the temperaturesetting.• If the unit still fails to operatenormally after performingthe above inspections, turnthe circuit breaker off andcontact your sales agent immediately.Noise of the ventilation fan sucking in air present in the drain hose and blowing outdehumidifying water that had accumulated in the condensed water collector. Fordetails, consult your sales agent.Operation noise changes due to power variations according to room temperaturechanges.Mist is generated as the air within the room is suddenly cooled by conditioned air.Water generated during defrosting operation evaporates and steam is emitted.Caused as the smells and particles of smoke, food, cosmetics, etc. present in roomair become attached the unit and blown off into the room again.Defrosting is underway (as the heating operation is stopped, the microcomputerchecks frost accumulated in the indoor unit and instructs the unit to perform automaticdefrosting if necessary).Shows preheating or defrosting operation is underway.As the protective circuit or preheat sensor operates when unit operation is stoppedduring preheating and then restarted, or when operation mode is switched fromcooling to heating, the lamp continues to blink.Actual room temperature may deviate slightly from the remote controller’stemperature setting depending on the number of people in the room, indoor oroutdoor conditions.Contact your sales agent immediately if the followingphenomena should occur:• The circuit breaker switches off or the fuse blowsfrequently.• The switch operation is not stable.• Foreign matter or water accidentally enters the unit interior.• The power cord gets excessively hot or its insulation is torn orstripped.• TIMER lamp on the indoor unit display blinks.As the nature of the failure can be identified by the blinking cycle,( check the blinking cycle before turning off the circuit breaker. )Notes• In quiet operation or stopping the running, the following phenomena mayoccasionally occur, but they are not abnormal for the operation.(1) Slight flowing noise of refrigerant in the refrigerating cycle.(2) Slight rubbing noise from the fan casing which is cooled and then graduallywarmed as operation stops.• The odor will possibly be emitted from the room air conditioner because thevarious odor, emitted by smoke, foodstuffs, cosmetics and so on, sticks to it.So please clean the air filter and the evaporator regularly to reduce the odor.• Please contact your sales agent immediately if the air conditioner still fails to operate normally after the aboveinspections. Inform your agent of the model of your unit, production number, date of installation. Pleasealso inform him regarding the fault.Please note:On switching on the equipment, particularly when the room light is dimmed, a slight brightness fluctuationmay occur. This is of no consequence.The conditions of the local Power Supply Companies are to be observed.– 20 –
MEMO
MEMO
MEMO
447 : A >