+500 Series Getting Started Manual - X-Rite
+500 Series Getting Started Manual - X-Rite
+500 Series Getting Started Manual - X-Rite
- No tags were found...

Create successful ePaper yourself
Turn your PDF publications into a flip-book with our unique Google optimized e-Paper software.
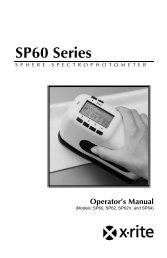
500 <strong>Series</strong>SPECTRODENSITOMETER<strong>Getting</strong> <strong>Started</strong>
500 SERIESSPECTRODENSITOMETERThe Manufacturer: X-<strong>Rite</strong>, IncorporatedDer Hersteller:4300 44th Street, S.E.El fabricante: Grand Rapids, Michigan 49512Le fabricant:Il fabbricante:Declares that:gibt bekannt:advierte que:avertit que:avverte che:Spectrodensitometer500 <strong>Series</strong>is not intended to be connected to a public telecommunications network.an ein öffentliches Telekommunikations-Netzwerk nicht angeschlossen werden soll.no debe ser conectado a redes de telecomunicaciones públicas.ne doit pas être relié à un réseau de télécommunications publique.non deve essere connettuto a reti di telecomunicazioni pubblici.1
GETTING STARTEDCE DECLARATIONManufacturer's Name:Authorized Representative:Model Name:Model No.:X-<strong>Rite</strong>, IncorporatedX-<strong>Rite</strong>, IncorporatedSiemensstraße 12b63263 Neu-Isenburg • GermanyPhone: +49 (0) 61 02-79 57-0Fax: +49 (0) 61 02 -79 57-57Spectrodensitometer500 <strong>Series</strong>Directive(s) Conformance:EMC 89/336/EEC LVD 73/23/EECWarning:This is a class A product. In a domestic environment this product may causeradio interference in which case the user may be required to take adequatemeasures.RoHS/WEEEX-<strong>Rite</strong> products meet the Restriction of Hazardous Substances (RoHS)Directive 2002/95/EC and European Union – Waste Electrical and ElectronicEquipment (WEEE) Directive 2002/96/EC. Please refer to www.xrite.com formore information on X-<strong>Rite</strong>’s compliance with the RoHS/WEEE directives.2
GETTING STARTED<strong>Getting</strong> <strong>Started</strong>This document is designed to get you familiarized with yourX-<strong>Rite</strong> 500 <strong>Series</strong> Spectrodensitometer. If you need anyfurther instructions or information, you can find a completeOperator's <strong>Manual</strong> in a Portable Document Format (PDF) fileon the CD that was shipped with your instrument.Table of ContentsWhat to do first… 5Unpack and Inspect 5Unlock the Shoe 5Charge the Battery 6Apply Power 6Instrument Description & Features 7The Main Menu 7The Keys 7Function Screens 8Using the Instrument 10Operational Steps: The Basics 10Important Measurement Techniques 11Taking a Measurement 12Calibrating the Instrument 13White Calibration 13Configuring the Instrument 14Configuration Settings 14Instrument Functions 18Selecting a Function 18Selecting a Measurement Mode 18Accessing Options 19Selecting an Illuminant (528, 530 only) 19User Dialog Error Messages 204
500 SERIESSPECTRODENSITOMETERWhat to do first…Unpack and Inspect• Remove the instrument from the shipping carton. Be sureto keep the original carton. If shipment is necessary, theinstrument should be packaged in the original carton.Contact X-<strong>Rite</strong> if you need a new shipping carton.• Inspect the instrument for any damage. If any damageoccurred during shipment, immediately contact thetransportation company. Do not proceed with installationuntil the carrier’s agent has inspected the damage.• Check your packaging contents against your packing listand original order. A detailed packaging drawing and aparts list can be found in the instrument's Operator's<strong>Manual</strong>.Unlock the ShoeThe instrument shoe must be unlocked to take measurements.(The instrument is shipped with the shoe locked.) When theinstrument is not in use, the shoe should be re-locked toprotect the instrument optics. A rotating latch on the bottom ofthe instrument locks the shoe closed.Lock PositionUnlock PositionLatchTo unlock the shoe:1. Hold the shoe against the instrument and rotate thelatch.2. Align the latch so that it fits through the cut-out in theshoe.3. Carefully release the shoe to open.5
GETTING STARTEDCharge the BatteryOnly use the AC Adapter supplied or the optional batterycharger (X-<strong>Rite</strong> P/N 500CHG). The battery pack must remainin the instrument at all times to operate.Before initial “remote” use of the instrument, charge thebattery pack for approximately three hours. However, ifimmediate use is required, the instrument can be operated“tethered” to the AC adapter during battery charging.To attach the AC adapter:1. Verify that the voltage indicated on the adaptercomplies with the AC line voltage in your area. Ifnot, contact X-<strong>Rite</strong> or an authorized representative.2. Insert the small plug from the adapter into the powerinputconnector on the instrument. (If you are usingserial cable SE108-92, you may insert the small pluginto the power connector at the end of the cable.)3. Plug the adapter into an AC wall receptacle.Apply PowerThe Battery switch—located on the bottom of theinstrument—turns the instrument off and on during batteryoperation. When the AC adapter is attached, the instrumentremains on and the battery switch has no affect.Battery Switch6
500 SERIESSPECTRODENSITOMETERInstrument Description & FeaturesThe X-<strong>Rite</strong> 500 <strong>Series</strong> Spectrodensitometer relies on anintegrated spectrophotometric engine, allowing accurate andprecise measurements. This instrument has intuitive keys anda high-contrast graphic display.Tab KeyTab KeyMain Menu KeyEscape KeyGraphic DisplayEnter KeyTarget WindowInstrument ShoePower InputI/O PortThe Main MenuWhen the instrument is first powered-up, the main (top level)screen appears. The main screen consists of two areas, MainMenu and Instrument/Option Data. The left side of the screenlists all available functions. The right side of the screen listsinstrument information when the Main Menu title ishighlighted and specific option information when a function ishighlighted.The KeysPerform menu and option navigation with the five keysarranged around the display screen. Each key has a uniquesymbol for performing a specific operation.@ Tab Down key – advances the highlighted bar (reversevideo) to the next available “tab stop.” A “tab stop”indicates an item that can be acted on further, such as ameasurement or a setting option. Tab stops generallyfollow a left-to-right or top-to-bottom sequence. When thelast tab stop is reached, the next key press returns to thefirst tab stop in that menu's list.7
GETTING STARTED$ Tab Up key – performs the same function as the TabDown key except in reverse order. Tab stops follow aright-to-left or bottom-to-top sequence.# Enter key – activates the highlighted item. If the functionis a menu, such as Options, then the Option menu itemsappear. If the item is a value, such as cal alert time, thenthe value will increment to the next choice. Whenentering an active function from the main menu, theactive function is displayed with the highlight on the firstrequired operation in the measurement list (typicallypaper or sample).! Escape key – backs-up the instrument screen one menulevel. For example, if an option or value is being modifiedat the time the key is pressed, the edits are aborted and theprevious screen or menu appears.% Main Menu key – returns the instrument screen to themain menu with Main Menu highlighted. This is a quickexit out of any function. If any option or value is beingmodified at the time the key is pressed, the edits areaborted and the previous setting reinstated.Function ScreensThe instrument function screen consists of six main areas:Active Function, Options Menu, Measurement List,Measurement Data, User Dialog, and Current Status orIllum/Obs.Active FunctionMeasurement ListUser DialogDEN— REF01> PaperSampleReferenceOptionsV 0.06C 0.06M 0.06Y 0.05< Select Mode> TOptions MenuMeasurement DataCurrent Status orIllum/Obs• Active Function – This area displays the currentmeasurement mode. Pressing the Enter key # when themode is highlighted toggles through additional modes (forexample, Density and Density –Ref#).8
500 SERIESSPECTRODENSITOMETER• Options Menu – Each active function contains anOption Menu, which has one or more changeable settings.Pressing the Enter key # when the menu is highlightedopens a list of available options (for example, Color andMode).• Measurement List – This portion of the screen displaysthe measurement items available for the active function.When the highlight is located on an item outside themeasurement list, an arrow (>) appears to the left of theactive measurement item. The corresponding data isrepresented in the measurement data portion of the screen.In the example above, the displayed data represents papervalues.• Measurement Data – This portion of the screeninstantaneously displays measurement data for the activefunction. Measurement data that is out-of-range or unableto display in the space provided appears as XXX.• User Dialog – This portion (bottom line, not includingthe status or illum/obs) indicates the current mode orcondition of the instrument. For example, this area wouldindicate that a measurement is required when a step ishighlighted in the measurement list. Any error conditionencountered during a measurement is also displayed inthis area. See User Dialog Error Messages for moreinformation about error messages.• Current Status or Illum/Obs – This portion of thescreen indicates the current status or illuminant observer.For the colorimetric functions, pressing the Enter key #toggles through the available illuminants. Instrumentstatus is changed through configuration. See Configuringthe Instrument.9
GETTING STARTEDUsing the InstrumentOperational Steps: The BasicsThere are four basic techniques used to navigate through theinstrument screens, select functions and settings, anddetermine values.Opening a Menu or FunctionOpening a menu or a function gives you access to additionalitems related to the menu or specific information for afunction. Below are examples of a typical menu and functionscreens.MenuCONFIGURATIONLanguage :EnglishActive Functions...Density Opt :TColor Option:CIECal Options :24 hrsflDEN- REF01> PaperSampleReferenceOptionsV 0.06C 0.06M 0.06Y 0.05< Select Mode> TFunctionTo open a menu or function:1. Use the Tab Up key $ or Tab Down key @ to highlightthe desired menu or function.2. Press the Enter # key.Opening an EditorOpening an editor allows you to select items and/or edit valuesfor a selection or function. Below is an example of an editor.CONFIGURATIONLanguage Language :EnglishActiveEnglishFunctions...ColorDeutschOption:CIEDensityFrançaisOpt :TCal Options :24 hrsflflEditorTo open an editor:1. Use the Tab keys $@ to highlight the desired selectionor function.2. Press the Enter # key to access the editor.10
500 SERIESSPECTRODENSITOMETERSelecting from a ListMany settings and functions allow you to select specific itemsfrom a list. Lists can be found in every type of screen: menus,editor, function screens, etc.To select an item from a list:1. Use the Tab keys $@ to highlight the desired item inthe list.2. Press the Enter key # to save your selection (andreturn to the previous screen).Editing a ValueMany settings and functions allow you to edit specific values.Values are typically edited in editor screens.To edit a value:1. Use the Tab keys $@ to highlighted the desired value.2. Press the Enter key # to access the menu.3. Use the Tab keys $@ to choose the desired digit(arrows above and below designated selection). Pressthe Enter key # to access the editor.NOTE: If the editor menu includes letters and symbols (such as thestandard name editor), you can press the Enter key # again toquickly page through groups of letters, symbols, and numbers.4. Use the Tab keys $@ to highlight the desired numberand press the Enter key # to exit the editor.5. When editing is completed, use the Tab keys $@ tohighlight Save & Exit and press Enter key #.Important Measurement TechniquesIn order for the instrument to obtain accurate and repeatablemeasurements, the bottom of the shoe must be flat with thesurface to be measured. When measuring curved items wherea flat surface is not available, a fixture should be used. Afixture allows accurate positioning of the sample tangent to themeasurement plane. If the item to be measured is smaller thanthe shoe, you may want to make a platform—at same height asthe item—for the rest of the instrument to sit on.11
GETTING STARTEDTaking a MeasurementWhen required to take a measurement, the user dialog displaysa measure prompt. Be sure to use the previously discussedproper measurement techniques.To take a measurement:1. Wait for a prompt to appear in the userdialog.2. Center the instrument target window over a sample of thepaper.3. Lower and hold the instrument down to take a reading.4. When is displayed in the user dialog,release the instrument. The measurement data appears.12
500 SERIESSPECTRODENSITOMETERCalibrating the InstrumentUnder normal circumstances, the instrument should becalibrated at least once a day. Calibrating the instrument everyday ensures the best measurement accuracy and stability.White CalibrationIMPORTANT: Every white calibration reference has a set ofreflectance values that are unique. Use the calibration reference onlyif the reflectance values match those of the instrument you arecalibrating. The calibration reference shipped with an instrument ismarked with a matching serial number. If a different calibrationreference is used, the reflectance values for that reference must beentered in the instrument. Refer to the Operator’s <strong>Manual</strong> if thevalues need to be modified.The White Calibration function is used to update the whitecalibration point in the instrument.NOTE: If an Optics Change? message appears during the whitecalibration, select No and re-measure the calibration reference. If theinstrument optics was changed, a full calibration must be performed.See the Operator's <strong>Manual</strong>.1. Make sure the calibration reference is clean beforeuse. Carefully clean the reference and white ceramicdisk with a dry, lint-free cloth. Do not use solvents orcleaners of any kind.2. Press Tab Up $ or Tab Down @ to highlightCalibration. Press Enter key # to access the whitecalibration function.3. Place the instrument onto the calibration reference. Theinstrument fits snugly with the target window openingcentered over the white ceramic disk.4. Lower the instrument to the shoe; hold steady untilthe user dialog indicates the calibration is completed.5. Store the calibration reference in a dry, dust free area,away from direct exposure to light.13
GETTING STARTEDConfiguring the InstrumentYou may set up your instrument according to your specificneeds. This is done through the Configuration menu. TheConfiguration menu has more options than what can bedisplayed in one screen. Use the Tab keys $@ to scroll throughall the options.OptionsCONFIGURATIONLanguage :EnglishActive Functions...Density Opt :TOption SettingsColor Option:CIECal Options :24 hrsflNOTE: Most configuration option settings are displayed to the rightof the option.Configuration SettingsUse the Operational Steps described in Using the Instrumentto set your configuration settings.LanguageThe Language configuration allows you to select the languageyou want to display on your instrument: English, Deutsch,Español, Français, Italiano, Português, Chinese, Japanese.Active FunctionsThe Active Functions configuration allows you to select thefunctions that are available in the main menu. An > indicatesthe function is active.NOTE: Use the Enter key # to toggle functions on and off. Then usethe Escape key ! to return to the previous menu.Density OptionsThe Density Options configuration allows you to determinethe following settings:• Status – Select the status used for density functions.Status is dependent upon the filters applied to the densitydata obtained from a measurement. Available status:Status T, Status A, Status G, Status E, Ax, Tx, Ex, StatusI, HIFI.14
500 SERIESSPECTRODENSITOMETER• Precision – Determine whether you want to use high ornormal precision when displaying density values. Twodisplay formats are available; high precision and normalprecision (the default). Normal precision simply removesone decimal place of resolution from the displayed datavalues.• Gray Set - allows you to EXPAND the region that theinstrument considers to be neutral in shade. For example:this can be especially helpful on newsprint in the printingof ‘yellow’ pages.Color Option (520, 528, 530 only)The Color Option configuration allows you to determine thefollowing settings:• Lab Method – Choose to calculate L*a*b* values usingthe CIE method or the Hunter method.• LCh Method (528, 530 only) – Choose to calculateL*C*h° values using either the L*C*h°(ab) method or theL*C*h°(uv) method.• CMC Tolerancing (528, 530 only) – Set a series ofconstants to be used in the calculation of DE CMC .• CIE94 Tolerancing (528, 530 only) – Set a series ofconstants to be used in the calculation of DE CIE94 .• Precision – Determine whether you want to use high(default) or normal precision when displaying color values.High precision simply adds another decimal place ofresolution to the displayed data values.CalibrationThe Calibration configuration allows you to determine thefollowing settings:• Full Calibration – Required only for specialcircumstances. See the Operator's <strong>Manual</strong>.• Enter Reflectances – <strong>Manual</strong>ly enter reflectance valuesfor white calibration.• Cal Alert – Enable a calibration alert and set how oftenthe instrument will alert you to perform a calibration.15
GETTING STARTED16Serial PortThe Serial Port configuration allows you to determine thefollowing settings:• Baud Rate – Choose the correct baud rate.• Hand Shake – Set the method of hand shaking betweenthe instrument and your computer. There are four handshake methods: Off, CTS, BUSY, or XON.• Auto XMT – Enabled with status returned, enabledwith no status returned, enabled with no status return orattribute designation (Spreadsheet), or disable (off)automatic transmission of measured data.• Separator – Determine the character that separates thedata components of a measurement: Space, Comma, Tab,CR (carriage return), CRLF (carriage return, line feed).• Delimiter – Determine the character that terminates thestring of measured data: Space, Comma, Tab, CR(carriage return), CRLF (carriage return, line feed).• Protocol – Select the desired protocol, RCI or ICP.• Emulation - Determines the output characteristics of theinstrument: Normal or 400 <strong>Series</strong>.Power DownThe Power Down configuration allows you to adjust theamount of time the unit remains on without any use beforeturning itself off. This configuration only affects theinstrument when the charger is not connected. This value canrange from 10 to 120 seconds.Speed ReadThe Speed Read configuration allows you to set the timeduration the reading motor remains on after a measurement.The time setting can range from 0 to 9 seconds (3 being thedefault value). This feature is useful when quick measurementof consecutive patches is desired.DisplayThe Display configuration allows you to determine thefollowing settings:• Contrast – Set the contrast of the display for optimalviewing. The setting value can vary from -9 to +9.
500 SERIESSPECTRODENSITOMETER• Orientation – Determine whether you want the displayviewable for right-handed (right) or left-handed (left) use.• Security – Enable (on) or disable (off) the entireConfiguration options menu. See steps below to accessthe Configuration menu when Security is enabled.• Unit ID – This unique number identifies the instrument.This number is only used for upgrading your instrument.This number cannot be changed.• Battery Status – Lists various voltage conditions andtemperature of the battery. This information would mainlybe used by X-<strong>Rite</strong>’s Technical Support staff for diagnosticpurposes.• Error Log – Used by X-<strong>Rite</strong>'s Technical Support toidentify where an error condition occurred in theinstrument.To gain access to the Configuration menu if Security isenabled:1. Remove the AC adapter and turn off the instrumentwith the battery switch.2. Press and hold the read switch (located in front of the optics)as you turn the instrument on with the battery switch.3. When the main menu appears, release the read switch.The Configuration item appears in the main menu.NOTE: You must set the Security to Off if you want theConfiguration item to automatically appear the next time you turnthe instrument on.BeeperThe Beeper configuration allows you to turn the instrument’sbeeper On or Off.Patch SmartsThe Patch Smarts configuration allows you to set the autorecognition of a patch to On or Off within the Dot, Trap, andPrint Contrast functions.User ConfigurationThe User Configuration allows you to quickly configure dotand density options with minimal set up time.17
GETTING STARTED18Instrument FunctionsThe 528 and 530 instruments contain both densitometric andcolorimetric functionality. Your instrument may have fewerfunctions available. Refer to the chart below for specificinstrument functions.Functions 504 508 518 520 528 530Density X X X X X XColor X X X*Match X X*Dot X X X X XTrap X X XPrint Contrast X X XHue/Grayness X X XPaper Indices X XCompare X X XEFS X X X* Includes reflectance data and reflectance graph feature. Fordetailed instructions and more information about a specificfunction, see the Operator's <strong>Manual</strong>.Selecting a FunctionAll functions are available from the Main Menu.– MAIN MENU–DensityColorMatchEFSDot^AllAbsoluteStat TTo select a function:1. Use the Tab keys $ @ to highlight the desired function.2. Press the Enter key #. This opens the function screen.Selecting a Measurement ModeMeasurement modes typically determine how the instrumentevaluates the data that it measures, for example, DENSITY andDEN-REF#.DENSITYMeasurement ModeDEN- REF01> PaperSampleReferenceOptionsV 0.06C 0.06M 0.06Y 0.05< Select Mode> T
500 SERIESSPECTRODENSITOMETERTo select a measurement mode:1. Use the Tab keys $ @ to highlight the mode.2. Press the Enter key # to alternate between theavailable modes.Accessing OptionsMany functions have one or more options that further specifyhow the instrument interprets and uses data.DEN- REF01> PaperSampleReferenceTo access an option:1. Use the Tab keys $ @ to highlight the Options item.2. Press the Enter key # to open the Options menu.3. Use the Operational Steps described in Using theInstrument to set/change any option settings.Selecting an Illuminant (528, 530 only)Color measurement data can be viewed under differentilluminant conditions. (Status must be changed through theConfiguration options. For more information, see Configuringthe Instrument or the Operator's <strong>Manual</strong>.)COLOR- REF01Sample> ReferOptionsV 0.06C 0.06M 0.06Y 0.05< Select Options> TOptionsL* 31.06a* —0.05b*—33.12< Select Illum> D50/2Color, Mode, ReferenceA, C, D50, D55, D65,D75, F2, F7, F11, F12To select an illuminant:1. Use the Tab keys $ @ to highlight the currentilluminant.2. Repeatedly press the Enter key # until the desiredilluminant is shown. The measurement dataimmediately changes to reflect the selectedilluminant.19
GETTING STARTEDUser Dialog Error MessagesErrors encountered during a measurement are displayed inthe User Dialog. All errors are accompanied by a longbeep. Any errors (except ) encounteredduring a measurement cancel that measurement; and thedata displayed is from the prior measurement.User Dialog Errors: Displays with an incomplete measurement.Instrument was released too soon. Measure did not complete successfully. Tryagain. Could be a hardware failure if itoccurs again. Displays when calibration is required. Calibration failed. Make sure the instrumentis properly positioned on the reference. Displays with an incomplete calmeasurement. Instrument was released toosoon. This warning appears when the battery fallsbelow approximately 25% of full charge.Measurements are still possible, but thebattery should be charged soon. Displays when not enough battery powerremains to take measurement. The currentmeasurement is aborted. Battery not installed, disconnected, or dead.Unit will not allow any measurements. Did not measure a true 50% dot tint in 50%Dot Cal procedure. Wrong charger connected to unit.MP FailureThis error "pops up" instead of appearing inthe User Dialog. It is generated when tryingto change the configuration, but the unitcannot make the change permanent. Tryagain.20
Corporate Headquarters - USA4300 44th Street SEGrand Rapids, Michigan 49512Phone 1 800 248 9748 or 1 616 803 2100Fax 1 800 292 4437 or 1 616 803 2705Corporate Headquarters - EuropeAlthardstrasse 708105 RegensdorfSwitzerlandPhone (+41) 44 842 24 00Fax (+41) 44 842 22 22Corporate Headquarters - AsiaRoom 808-810Kornhill Metro Tower, 1 Kornhill RoadQuarry Bay, Hong KongPhone (+852) 2 568 6283Fax (+852) 2 885 8610Please visit www.xrite.com for a local office near you.P/N 528-601 Rev. R