Procedure for Insertion of a PVC - Royal Devon & Exeter Hospital
Procedure for Insertion of a PVC - Royal Devon & Exeter Hospital
Procedure for Insertion of a PVC - Royal Devon & Exeter Hospital
- No tags were found...
You also want an ePaper? Increase the reach of your titles
YUMPU automatically turns print PDFs into web optimized ePapers that Google loves.
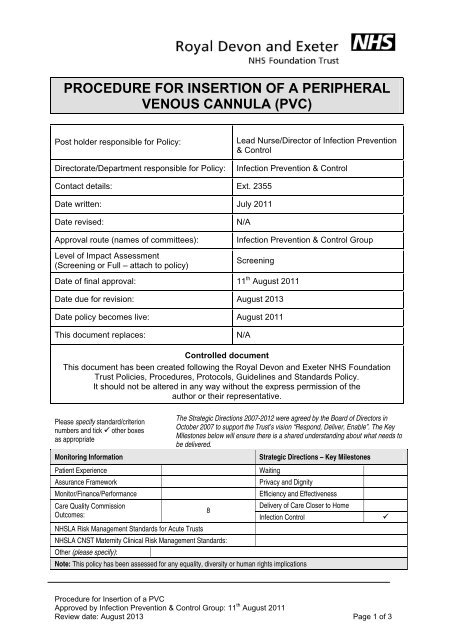
PROCEDURE FOR INSERTION OF A PERIPHERALVENOUS CANNULA (<strong>PVC</strong>)Post holder responsible <strong>for</strong> Policy:Directorate/Department responsible <strong>for</strong> Policy:Lead Nurse/Director <strong>of</strong> Infection Prevention& ControlInfection Prevention & ControlContact details: Ext. 2355Date written: July 2011Date revised:Approval route (names <strong>of</strong> committees):Level <strong>of</strong> Impact Assessment(Screening or Full – attach to policy)N/AInfection Prevention & Control GroupScreeningDate <strong>of</strong> final approval: 11 th August 2011Date due <strong>for</strong> revision: August 2013Date policy becomes live: August 2011This document replaces:N/AControlled documentThis document has been created following the <strong>Royal</strong> <strong>Devon</strong> and <strong>Exeter</strong> NHS FoundationTrust Policies, <strong>Procedure</strong>s, Protocols, Guidelines and Standards Policy.It should not be altered in any way without the express permission <strong>of</strong> theauthor or their representative.Please specify standard/criterionnumbers and tick other boxesas appropriateMonitoring In<strong>for</strong>mationThe Strategic Directions 2007-2012 were agreed by the Board <strong>of</strong> Directors inOctober 2007 to support the Trust’s vision “Respond, Deliver, Enable”. The KeyMilestones below will ensure there is a shared understanding about what needs tobe delivered.Strategic Directions – Key MilestonesPatient ExperienceWaitingAssurance FrameworkPrivacy and DignityMonitor/Finance/Per<strong>for</strong>manceEfficiency and EffectivenessCare Quality CommissionDelivery <strong>of</strong> Care Closer to Home8Outcomes:Infection ControlNHSLA Risk Management Standards <strong>for</strong> Acute TrustsNHSLA CNST Maternity Clinical Risk Management Standards:Other (please specify):Note: This policy has been assessed <strong>for</strong> any equality, diversity or human rights implications<strong>Procedure</strong> <strong>for</strong> <strong>Insertion</strong> <strong>of</strong> a <strong>PVC</strong>Approved by Infection Prevention & Control Group: 11 th August 2011Review date: August 2013 Page 1 <strong>of</strong> 3
PROCEDURE FOR INSERTION OF APERIPHERAL VENOUS CANNULA (<strong>PVC</strong>)This procedure should be read in conjunction with the Vascular Access Device policySection 6.3Equipment• Clean tray• Clean gloves• 2% chlorhexidine in alcohol wipe ( e.g. PDI wipe)• Cannula• IV cannula dressing ( e.g. IV Opsite 3000)• Extension set with needlefree connector• 0.9 % normal saline <strong>for</strong> injection• 10ml syringe and needle• Tubifast<strong>Procedure</strong>This procedure is undertaken using an aseptic non touch technique, the key partsbeing:• Clean tray• Cannula shaft and tip• Disinfected insertion site• Dressing• Tip <strong>of</strong> syringe• Hub <strong>of</strong> needle• Extension set and needle free connector.• Sharps bin1) Explain procedure to patient and obtain verbal consent2) Clean hands using alcohol gel or soap and water.3) Open the cannula and needle free connector device packaging ready <strong>for</strong> usewithout touching the key parts. Draw up saline flush using a needle and primethe needle free extension line/lines again without touching key parts.4) Position patient com<strong>for</strong>tably and select most appropriate site <strong>for</strong> insertion.5) Place the single use tourniquet.6) Disinfect insertion site using wipe, ensuring a contact time <strong>of</strong> 30-60 secondsand allow to thoroughly dry.7) Cleanse hands with hand rub gel and put on clean non-sterile gloves.8) Remove the cannula from the packaging. Ensure the stylet moves freely bybriefly withdrawing it no more than 2mm. Bend the wings through 180degrees so that they will lie flat after insertion.<strong>Procedure</strong> <strong>for</strong> <strong>Insertion</strong> <strong>of</strong> a <strong>PVC</strong>Approved by Infection Prevention & Control Group: 11 th August 2011Review date: August 2013 Page 2 <strong>of</strong> 3
9) Without retouching the planned insertion point, apply skin tension and anchorvein with one hand.10) Insert cannula a short distance into the vein at a low angle with the beveluppermost.11) The entry <strong>of</strong> the needle tip into the vein is indicated by the presence <strong>of</strong> bloodin the flashback chamber.12) Advance the cannula a few millimetres further into the vein to ensure thatcannula is positioned within the lumen <strong>of</strong> the vein.13) Avoid any contamination by holding the hub by the wing or protection cap.14) Withdraw the stylet partially (5mm) to avoid exit through the posterior veinwall. Advance the cannula <strong>of</strong>f the stylet into the vein. Release tourniquet.15) Raise the patient’s arm to avoid blood spillage, withdraw stylet and placedirectly into sharps bin. If raising the arm is not possible, press on the veinabove the cannula tip.16) Attach appropriate IV connector.17) Flush cannula with 5mls 0.9% sodium chloride to confirm patency through theneedle free connector using an aseptic non-touch technique.18) Apply cannula dressing19) Cover with tubifast.20) In the event <strong>of</strong> failing to cannulate a vein, apply sterile gauze swab andremove the cannula, applying pressure <strong>for</strong> 2 minutes. If patient coagulationscreen is prolonged or platelets are low then a longer period <strong>of</strong> pressure isrecommended.21) Subsequent attempts must be made proximal to previous attempts or cannulasites, i.e. higher up the arm.22) Dispose <strong>of</strong> equipment, remove gloves and cleanse hands.<strong>Procedure</strong> <strong>for</strong> <strong>Insertion</strong> <strong>of</strong> a <strong>PVC</strong>Approved by Infection Prevention & Control Group: 11 th August 2011Review date: August 2013 Page 3 <strong>of</strong> 3


