Grundfos Alldos DDC Smart O&M Manual - WES Dosing Products
Grundfos Alldos DDC Smart O&M Manual - WES Dosing Products
Grundfos Alldos DDC Smart O&M Manual - WES Dosing Products
- No tags were found...

Create successful ePaper yourself
Turn your PDF publications into a flip-book with our unique Google optimized e-Paper software.
English (GB)1.2 Qualification and training of personnelThe personnel responsible for the installation,operation and service must be appropriatelyqualified for these tasks. Areas of responsibility,levels of authority and the supervision of thepersonnel must be precisely defined by the operator.If necessary, the personnel must be trainedappropriately.Risks of not observing the safety instructionsNon-observance of the safety instructions may havedangerous consequences for the personnel, theenvironment and the pump and may result in the lossof any claims for damages.It may lead to the following hazards:• Personal injury from exposure to electrical,mechanical and chemical influences.• Damage to the environment and personal injuryfrom leakage of harmful substances.1.3 Safety instructions for the operator/userThe safety instructions described in theseinstructions, existing national regulations on healthprotection, environmental protection and for accidentprevention and any internal working, operating andsafety regulations of the operator must be observed.Information attached to the pump must be observed.Leakages of dangerous substances must bedisposed of in a way that is not harmful to thepersonnel or the environment.Damage caused by electrical energy must beprevented, see the regulations of the local electricitysupply company.1.5 <strong>Dosing</strong> chemicalsWarningBefore switching the supply voltageback on, the dosing lines must beconnected in such a way that anychemicals in the dosing head cannotspray out and put people at risk.The dosing medium is pressurised andcan be harmful to health and theenvironment.WarningWhen working with chemicals, theaccident prevention regulationsapplicable at the installation site shouldbe applied (e.g. wearing protectiveclothing).Observe the chemical manufacturer'ssafety data sheets and safetyinstructions when handling chemicals!WarningIf the diaphragm leaks or is broken,dosing liquid will escape from thedischarge opening on the dosing head(see fig. 3).Take suitable precautions to preventharm to health and damage to propertyfrom escaping dosing liquid!Check daily whether liquid is escapingfrom the discharge opening!Changing the diaphragm, see section7. Service.CautionBefore starting work on the pump, thepump must be in the ’Stop’ operationalstate or be disconnected from themains. The system must bepressureless!Only orginal accessories and original spare partsshould be used. Using other parts can result inexemption from liability for any resultingconsequences.1.4 Safety of the system in the event of afailure in the dosing pumpThe dosing pump was designed according to thelatest technologies and is carefully manufacturedand tested.If it fails regardless of this, the safety of the overallsystem must be ensured. Use the relevantmonitoring and control functions for this.CautionMake sure that any chemicals that arereleased from the pump or anydamaged lines do not cause damage tosystem parts and buildings.The installation of leak monitoringsolutions and drip trays isrecommended.CautionCautionCautionA deaeration hose, which is routed intoa container, e.g. a drip tray, must beconnected to the deaeration valve.The dosing medium must be in liquidaggregate state!Observe the freezing and boiling pointsof the dosing medium!The resistance of the parts that comeinto contact with the dosing medium,such as the dosing head, valve ball,gaskets and lines, depends on themedium, media temperature andoperating pressure.Ensure that parts in contact with thedosing media are resistant to thedosing medium under operatingconditions, see data booklet!Should you have any questionsregarding the material resistance andsuitability of the pump for specificdosing media, please contact <strong>Grundfos</strong>.4
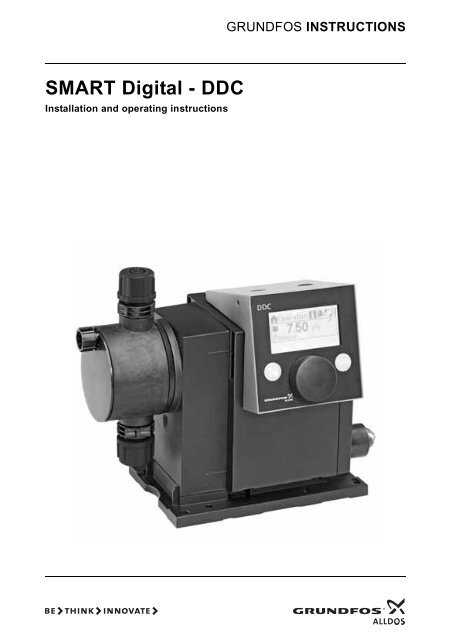
2. GeneralThe <strong>DDC</strong> dosing pump is a self-primingdiaphragm pump. It consists of a housingwith stepper motor and electronics, adosing head with diaphragm and valves and thecontrol cube.Excellent dosing features of the pump:• Optimal intake even with degassing media, asthe pump always works at full suction strokevolume.• Continuous dosing, as the medium is sucked upwith a short suction stroke, regardless of thecurrent dosing flow, and dosed with the longestpossible dosing stroke.2.1 ApplicationsThe pump is suitable for liquid, non-abrasive, nonflammableand non-combustible media strictly inaccordance with the instructions in these installationand operating instructions.Areas of application• Drinking water treatment• Waste water treatment• Swimming pool water treatment• Boiler water treatment• CIP (Clean-In-Place)• Cooling water treatment• Process water treatment• Wash plants• Chemical industry• Ultrafiltration processes and reverse osmosis• Irrigation• Paper and pulp industry• Food and beverage industries2.2 Improper operating methodsThe operational safety of the pump is onlyguaranteed if it is used in accordance with section2.1 Applications.2.3 WarrantyWarningOther applications or the operation ofpumps in ambient and operatingconditions, which are not approved, areconsidered improper and are notpermitted. <strong>Grundfos</strong> cannot be heldliable for any damage resulting fromincorrect use.WarningThe pump is NOT approved foroperation in potentially explosiveareas!WarningA sunscreen is required for outdoorinstallation!A guarantee claim in accordance with our generalterms of sale and delivery is only valid if the followingrequirements are fulfilled:• The pump is used in accordance with theinformation within this manual.• The pump is not dismantled or incorrectlyhandled.• The maintenance is carried out by authorised andqualified personnel.• Original spare parts are used for repairs duringmaintenance.English (GB)2.4 NameplateType designationVoltagePower consumption Mark of approval, CE mark, etc.Max. dosing flowFrequencyEnclosure classPl/hgphpsiModelCurrent consumptionCountry of productionMax. operating pressureTM04 1116 1110Fig. 1Nameplate5
English (GB)2.5 Type keyThe type key is used to identify the precise pump and is not used for configuration purposes.Code Example <strong>DDC</strong> 6- 10 AR- PP/ V/ C- F- 3 1 U2U2 F GPump typeMax. flow [l/h]Max. pressure [bar]AARControl variantStandardA with alarm relay and analog inputPPPVCPVSSPVC-P3<strong>Dosing</strong> head materialPolypropylenePVC (polyvinyl chloride) (only up to 10 bar)PVDF (polyvinylidene fluoride)Stainless steel DIN 1.4401PVC with Plus 3EVTCSSF3I12U2U2U7U7AAVVXXI001I002I003I004FBGIEJLXGGasket materialEPDMFKMPTFEValve ball materialCeramicStainless steel DIN 1.4401Control cube positionFront-mounted (can be changed to the right or left)Voltage1 x 100-240 V, 50/60 Hz24-48 VDC**Valve typeStandardSpring-loaded (HV version)Suction/discharge side connectionHose, 4/6 mm, 6/9 mm, 6/12 mm, 9/12 mmHose 1/8" x 1/4"; 0.17" x 1/4"; 1/4" x 3/8"; 3/8" x 1/2"Threaded Rp 1/4", female (stainless steel)Threaded 1/4" NPT, female (stainless steel)No connectionInstallation set*Hose, 4/6 mm (up to 7.5 l/h, 16 bar)Hose, 9/12 mm (up to 60 l/h, 13 bar)Hose 0.17" x 1/4" (up to 7.5 l/h, 16 bar)Hose, 3/8" x 1/2" (up to 60 l/h, 10 bar)Power plugEU (Schuko)USA, CanadaUKAustralia, New Zealand, TaiwanSwitzerlandJapanArgentinaNo plug (only 24-48 VDC)**Design<strong>Grundfos</strong> <strong>Alldos</strong>*) Including: 2 pump connections, foot valve, injection unit, 6 m PE discharge hose, 2 m PVC suction hose,2 m PVC deaeration hose (4/6 mm**) Available 20116
2.6 Device overviewControl cubeStart/stop key(Sect. 6.1)100%Graphic LC display(Sect. 6.2.2)Click wheel (Sect. 6.1)100 % key (Sect. 6.1)English (GB)Mains connectionSignal inputs, outputs(Sect. 4.3)Mounting plateTM04 1173 3510Fig. 2Front view of the pumpControl cube assemblyscrewsValve, discharge sideDeaeration valveConnection, deaerationhose<strong>Dosing</strong> headDrain opening in case ofdiaphragm breakageValve, suction sideTM04 1175 3510Fig. 3Rear view of the pump7
English (GB)3. Technical data/dimensions3.1 Technical dataDataMechanicaldataPump type6-10 9-7 15-4Turndown ratio (setting range) [1:X] 1000 1000 1000Max. dosing flowMax. dosing flow with SlowMode 50 %Max. dosing flow with SlowMode 25 %Min. dosing flow[l/h] 6.0 9.0 15.0[gph] 1.5 2.4 4.0[l/h] 3.00 4.50 7.50[gph] 0.75 1.20 2.00[l/h] 1.50 2.25 3.75[gph] 0.38 0.60 1.00[l/h] 0.0060 0.0090 0.0150[gph] 0.0015 0.0024 0.0040Max. operating pressure[bar] 10 7 4[psi] 150 100 60Max. stroke frequency 1) [Strokes/min] 140 200 180Stroke volume [ml] 0.81 0.84 1.58Accuracy of repeatability [%] ±1Max. suction lift during operation 2) [m] 6Max. suction lift when priming with wetvalves 2) [m] 2 2 3Min. pressure difference between suction anddischarge side[bar] 1Max. pressure, suction side [bar] 2Max. viscosity in SlowMode 25 % with springloadedvalves 3) [mPas] (= cP) 2500 2000 2000Max. viscosity in SlowMode 50 % with springloadedvalves 3) [mPas] (= cP) 1800 1300 1300Max. viscosity without SlowMode with springloadedvalves 3) [mPas] (= cP) 600 500 500Max. viscosity without spring-loaded valves 3) [mPas] (= cP) 50 50 300Min. diameter of hose/pipe on suction/discharge side 2) 4) [mm] 4 6 6Min. diameter of hose/pipe on suction side forhighly viscous media (HV) 4) [mm] 9Min. diameter of hose/pipe on discharge sidefor highly viscous media (HV) 4) [mm] 9Max. media temperature [°C] 45Min. media temperature [°C] -10Max. ambient temperature [°C] 45Min. ambient temperature [°C] 0Max. storage temperature [°C] 70Min. storage temperature [°C] -208
DataElectrical dataSignal inputSignal outputWeight/ sizeSoundpressure levelPump type6-10 9-7 15-4Voltage [V] 100-240 V, 50-60 HzLength of mains cable [m] 1.5Max. current consumption (100 V) [A] 8Max. current consumption (230 V) [A] 25Max. power consumption P 1 [W] 14Housing enclosure classIP 65, Nema 4XElectrical safety classIIMax. load for level input12 V, 5 mAMax. load for pulse input12 V, 5 mAMax. load for level input, external stop12 V, 5 mAMin. pulse length [ms] 5Max. pulse frequency [Hz] 100Impedance at 0/4-20 mA analog input [Ω] 15Max. resistance in level circuit [Ω] 1000Max. resistance in pulse circuit [Ω] 1000Max. ohmic load on relay output [A] 0.5Max. voltage on relay output [V] 30 VDC / 30 VACImpedance at 0/4-20 mA analog output [Ω] 500Weight (PVC, PP, PVDF) [kg] 2.4Weight (stainless steel) [kg] 3.2Diaphragm diameter [mm] 44 50Max. sound pressure level [dB(A)] 60English (GB)ApprovalsCE, CSA-US, NSF61, GHOST, C-Tick1) The maximum stroke frequency varies depending on calibration2) Data is based on measurements with water3) Maximum suction lift: 1 m, dosing flow reduced (approx. 30 %)4) Length of suction line: 1.5 m / length of discharge line: 10 m (at max. viscosity)9
3.2 DimensionsEnglish (GB)17.5110G 5/8"A1A100%CB200.81051201684 x Ø6D161 17TM04 8169 3510Fig. 4Dimensional drawingPump type A [mm] A1 [mm] B [mm] C [mm] D [mm]<strong>DDC</strong> 6-10 280 251 196 46.5 24<strong>DDC</strong> 9-7 280 251 196 46.5 24<strong>DDC</strong> 15-4 280 251 200.5 39.5 2410
4. Assembly and installation4.1 Pump assemblyThe pump is delivered with a mounting plate.The mounting plate can be mounted vertically e.g. ona wall or horizontally e.g. on a tank. It takes just afew quick steps to firmly secure the pump to themounting plate by means of a slot mechanism.The pump can easily be released from the mountingplate for maintenance.4.1.1 Requirements• The mounting surface must be stable and mustnot vibrate.• <strong>Dosing</strong> must flow upwards vertically.4.1.2 Align and install mounting plate• Vertical installation: Mounting plate slotmechanism must be above.• Horizontal installation: Mounting plate slotmechanism must be opposite the dosing head.• The mounting plate can be used as a drilltemplate, please see fig. 4 for drill holedistances.4.1.3 Engage pump in mounting plate1. Attach the pump to the mounting plate supportclamps and slide under slight pressure until itengages.Fig. 6 Engaging the pump4.1.4 Adjust control cube positionThe control cube is fitted to the front of the pump ondelivery. It can be turned by 90 ° so that the user canselect to operate the pump from the right or left side.CautionThe enclosure class (IP65/Nema 4X)and shock protection are onlyguaranteed if the control cube isinstalled correctly!TM04 1159 0110English (GB)CautionPump must be disconnected from thepower supply!Fig. 5Locate mounting plate1. Indicate drill holes.2. Drill holes.3. Secure mounting plate using four screws,diameter 5 mm, to the wall, on the bracket or thetank.TM04 1162 0110WarningMake sure that you do not damage anycables and lines during installation!1. Carefully remove both protective caps on thecontrol cube using a thin screwdriver.2. Loosen screws.3. Carefully lift off control cube only so far from thepump housing that no tensile stress is producedon the flat band cable.4. Turn control cube by 90 ° and re-attach.– Make sure the O-ring is secure.5. Tighten screws slightly and attach protectivecaps.IP65, Nema 4XTM04 1182 0110Fig. 7Adjusting control cube11
English (GB)4.2 Hydraulic connectionCautionWarningRisk of chemical burns!Wear protective clothing (gloves andgoggles) when working on the dosinghead, connections or lines!The dosing head may contain waterfrom the factory check!When dosing media which should notcome into contact with water, anothermedium must be dosed beforehand!Hose connection procedure1. Push union nut and tensioning ring across hose.2. Push cone part fully into hose, see fig. 8.3. Attach cone part with hose to correspondingpump valve.4. Tighten union nut manually.– do not use tools!5. Tighten up union nuts after 2-5 operating hours ifusing PTFE gaskets!6. Attach deaeration hose to the correspondingconnection (see fig. 3) and run into a container ora collecting tray.CautionCautionFaultless function can only beguaranteed in conjunction with linessupplied by <strong>Grundfos</strong>!The lines used must comply with thepressure limits as per section3.1 Technical data!Important information on installation• Observe suction lift and line diameter, seesection 3.1 Technical data.• Shorten hoses at right angles.• Ensure that there are no loops or kinks in thehoses.• Keep suction line as short as possible.• Route suction line up towards the suction valve.• Installing a filter in the suction line protects theentire installation against dirt and reduces therisk of leakage.HoseFig. 8NoteCautionUnion nutTensioning ringHydraulic connectionCone partPressure differential between suctionand discharge side must be at least1 bar/14.5 psi!Tighten up the dosing head screwsonce before commissioning and after2-5 operating hours at 3 Nm.Installation exampleThe pump offers various installation options. In thepicture below, the pump is installed in conjunctionwith a suction line, level switch and multifunctionvalve on a <strong>Grundfos</strong> tank.TM04 1155 0110DeaerationhoseMultifunctionvalveTankSuction linewith emptysignalTM04 1183 0110Fig. 9Installation example12
4.3 Electrical connectionWarningThe enclosure class (IP65/Nema 4X) is only guaranteed if plugs or protective caps arecorrectly installed!WarningThe pump can start automatically when the mains voltage is switched on!Do not manipulate mains plug or cable!The rated voltage of the pump, see section 2.4 Nameplate, must conform to local conditions.Signal connectionsEnglish (GB)21213 43 4431 21GND23►4123GND141232TM04 1187 3410Fig. 10Wiring diagram of the electrical connections13
English (GB)Analog, external stop and pulse inputPinsFunctionPlug type1/brown 2/white 3/blue 4/blackAnalog GND/ (-) mA (+) mA mA signalExternal stop GND X PulsePulse GND X PulseLevel signals: empty and low-level signalPinsFunctionPlug type1/brown 2/white 3/blue 4/blackLow-level signal X GND PulseEmpty signal X GND PulseRelay outputs*PinsFunctionPlug type1/brown 2/white 3/blue 4/blackRelay 1 X X PulseRelay 2 X X Pulse* applies to <strong>DDC</strong>-AR control variant14
5. Commissioning5.1 Setting the menu languageFor description of control elements, see section 6.1. Turn click wheel to highlight the cog symbol.Operation7.50 l/h<strong>Manual</strong>English (GB)2. Press the click wheel to open the ’Setup’ menu.Operation7.50 l/h<strong>Manual</strong>3. Turn the click wheel to highlight the ’Language’menu.4. Press the click wheel to open the ’Language’menu.5. Turn the click wheel to highlight the desiredlanguage.6. Press the click wheel to select the highlightedlanguage.7. Press the click wheel again to confirm the’Confirm settings’ prompt and apply the setting.LanguageOperation modeSlowModeCalibrationKey lockLanguageOperation modeSlowModeCalibrationKey lockEnglishDeutschFrancaisEspanolItalianoEnglishDeutschFrancaisEspanolItalianoSetupSetupSetupSetupSetupConfirmsettings?English ><strong>Manual</strong> >Off>OffEnglish ><strong>Manual</strong> >Off>Off❑❑❑❑❑❑❑❑TM04 1184 1110Fig. 11Set menu language15
English (GB)5.2 Deaerating the pumpWarningThe deaeration hose must beconnected correctly and inserted into asuitable tank!1. Open deaeration screw by approximately half aturn.2. Press and hold down the 100 % key (deaerationkey) until liquid flows continuously without anybubbles from the deaeration hose.3. Close deaeration screw.NotePress the 100 % key andsimultaneously turn the click wheelclockwise to increase the duration ofthe process to up to 300 seconds. Aftersetting the seconds, do not press thekey any longer.5.3 Calibrating the pumpThe pump is calibrated in the factory for media with aviscosity similar to water at maximum pumpbackpressure (see section 3.1 Technical data) .If the pump is operated with a backpressure thatdeviates or if dosing a medium whose viscositydeviates, the pump must be calibrated.Requirements• The hydraulics and electrics of the pump areconnected (see section 4. Assembly andinstallation).• The pump is integrated into the dosing processunder operating conditions.• The dosing head and suction hose are filled withdosing medium.• The pump has been deaerated.16
Calibration process - example for <strong>DDC</strong> 7.5 - 161. Fill a measuring beaker with dosing medium.Recommended filling volumes:<strong>DDC</strong>-type 6-10 9-7 15-4Medium V 1 0.3l 0.5l 1.0lV 1 = 300 mlEnglish (GB)2. Read off and note down the fill volume V 1(e.g. 300 ml).3. Place the suction hose in the measuring beaker.4. Start the calibration process in the ’Setup >Calibration’ menu.StrokesCalibration200Calibrat. volume 0.0 mlSTARTSTOP5. The pump executes 200 dosing strokes anddisplays the factory calibration value(e.g. 125 ml).StrokesCalibration200Calibrat. volume 125 ml6. Remove the suction hose from the measuringbeaker and check the remaining volume V 2(e.g. 170 ml).V 2 = 170 ml7. From V 1 and V 2 , calculate the actual dosedvolume V d = V 1 -V 2(e.g. 300 ml - 170 ml = 130 ml).V d = V 1 -V 2 = 130 ml8. Set and apply V d in the calibration menu.– The pump is calibrated.StrokesCalibration200STARTSTOPCalibrat. volume 130 mlActual dosed volume V dTM04 1154 111017
English (GB)6. Operation6.1 Control elementsThe pump control panel includes a displayand the following control elements.Fig. 12KeysOperation<strong>Manual</strong>Start/stop keyKeyStart/stopkey100 % key7.50 l/hControl panelFunction100%100 % keyGraphical LCdisplayClick wheelStarting and stopping the pump.The pump doses at maximum flowregardless of the operation mode.Click wheelThe click wheel is used to navigate through themenus, select settings and confirm them.Turning the click wheel clockwise moves the cursorclockwise in increments in the display. Moving yourfinger anti-clockwise moves the cursor anticlockwise.TM04 1188 35106.2 Display and symbols6.2.1 NavigationIn the ’Info’, ’Alarm’ and ’Setup’ main menus, theoptions and submenus are displayed in the rowsbelow. Use the ’Back’ symbol to return to the highermenu level. The scroll bar at the right edge of thedisplay indicates that there are further menu itemswhich are not shown.The active symbol (current cursor position) flashes.Press the click wheel to confirm your selection andopen the next menu level. The active main menu isdisplayed as text, the other main menus aredisplayed as symbols. The position of the cursor ishighlighted in black in the sub-menus.When you position the cursor on a value and pressthe click wheel, a value is selected. Turning the theclick wheel clockwise increases the value, turningthe click wheel anti-clockwise reduces the value.When you now press the click wheel, the cursor willbe released again.6.2.2 Operating statesThe operating state of the pump is indicated by asymbol and display colour.Display Fault Operating stateWhite -Green -YellowRedWarningAlarmStopStandbyRunningStop Standby RunningStopStandby6.2.3 Sleep mode (energy-saving mode)If in the ’Operation’ main menu the pump is notoperated for 30 seconds, the header disappears.After 2 minutes, the display switches to the’Operation’ main menu and the display brightness isreduced. This state will be cancelled when the pumpis operated or a fault occurs.18
6.2.4 Overview of display symbolsThe following display symbols may appear in the menus.Top row with main menus (Sect. 6.3)OperationInfoAlarmSetupOperationBackRun displayRunning - rotates when pump is dosingBlocked drive - flashing symbolEnglish (GB)7.48 l/h<strong>Manual</strong>7.48 l/hActivated functionsSlowMode (Sect. 6.5)Additional display (Sect. 6.7.2)Target flowOperation modeOperating state (Sect. 6.2.2) anddosing flow100%Key lock (Sect. 6.6)<strong>Manual</strong> (Sect. 6.4.1)Pulse (Sect. 6.4.2)Analog 0/4-20 mA (Sect. 6.4.3)RunningStandbyStopDeaeratingDiaphragm position 'out’ (Sect. 7.)Diaphragm position ’in’ (Sect. 7.)Input current (Analog)Total dosed volumeSignal and error displayExternal stop (Sect. 6.8.2)Empty signal (Sect. 6.8.3)Low-level signal (Sect. 6.8.3)Cable break (Sect. 6.4.3)Service (Sect. 7.)TM04 1189 3410Fig. 13Overview of display symbols19
English (GB)6.3 Main menusThe main menus are displayed as symbols at the topof the display. The currently active main menu isdisplayed as text.6.3.1 OperationStatus information such as the dosing flow,selected operation mode and operating stateis displayed in the ’Operation’ main menu.Operation0.040 ml/Pulse3.40 l/h6.3.2 InfoYou can find the date, time and informationabout the active dosing process, variouscounters, product data and the service system statusin the ’Info’ main menu. The information can beaccessed during operation.The service system can also be reset from here.InfoCountersServiceServiceKitReset service systemSoftware rev.Serial no.:Product no.:Type Key>-❑V0.20TM04 1126 1110TM04 1106 10106.3.3 AlarmYou can view errors in the ’Alarm’ main menu.Alarm1Empty2Low levelUp to 10 warnings and alarms, together with theirdate, time and cause, are listed in chronologicalorder. If the list is full, the oldest entry will beoverwritten, see Section 8. Faults.6.3.4 SetupThe ’Setup’ main menu contains menus forpump configuration. These menus aredescribed in the following sections.LanguageOperation modePulse memory *SlowModeCalibrationKey lockDisplayInputs/OutputsBasic settings12.02.201012.02.2010Delete alarmmessagesSetupDeutsch >Pulse >❑Off >>Off >>>>12:3412:34* Menu ’Pulse memory’ is only displayed inoperation mode ’Pulse’.❑Section5.16.46.4.26.55.36.66.76.86.9TM04 1109 1010TM04 8166 3510CountersThe ’Info > counters’ menu contains the followingcounters:CountersVolumeTotal dosed volume [l] or US gallonsOperating hoursAccumulated operating hours (pumpswitched on) [h]Motor runtimeAccumulated motor runtime [h]StrokesAccumulated number of dosingstrokesPower on/offAccumulated frequency of switchingmains voltage onresettableYesNoNoNoNo20
6.4 Operation modesThree different operation modes can be set in the’Setup > Operation mode’ menu.• <strong>Manual</strong>, see section 6.4.1• Pulse, see section 6.4.2• Analog 0-20 mA, see section 6.4.3Analog 4-20 mA, see section 6.4.36.4.1 <strong>Manual</strong>In this operation mode, the pump constantlydoses the dosing flow set with the click wheel.The dosing flow is set in l/h or ml/h. The pumpautomatically switches between the units.Alternatively, the display can be reset to US units(gph).Operation3.40 l/h<strong>Manual</strong>Fig. 14 <strong>Manual</strong> modeThe setting range depends on the pump type:* When the SlowMode function is active, the maximumdosing flow is reduced, see section 3.1 Technicaldata.TM04 8170 3510Setting range*Typel/hgph<strong>DDC</strong> 6-10 0.0060 - 6.0 0.0015 - 1.5<strong>DDC</strong> 9-7 0.0090 - 9.0 0.0024 - 2.4<strong>DDC</strong> 15-4 0.0150 - 15.0 0.0040 - 4.06.4.2 PulseIn this operation mode, the pump doses theset dosing volume for each incoming (potential-free)pulse, e.g. from a water meter. There is no directconnection between incoming pulses and dosingstrokes. The pump automatically calculates theoptimum stroke frequency for dosing the set volumeper pulse.The calculation is based on:• the frequency of external pulses• the set dosing volume/pulse.Operation0.040 ml/Pulse3.40 l/hFig. 15 Pulse operation modeThe dosing volume per pulse is set in ml/pulse usingthe click wheel. The setting range for the dosingvolume depends on the pump type:TypeSetting range [ml/Pulse]<strong>DDC</strong> 6-10 0.0016 - 16.2<strong>DDC</strong> 9-7 0.0017 - 16.8<strong>DDC</strong> 15-4 0.0032 - 31.6The frequency of incoming pulses is multiplied by theset dosing volume. If the pump receives more pulsesthan it can process at the maximum dosing flow, itruns at the maximum stroke frequency in continuousoperation. Excess pulses will be ignored if thememory function is not enabled.Memory functionWhen the ’Setup > Pulse memory’ function isenabled, up to 65,000 unprocessed pulses can besaved for subsequent processing.TM04 1126 1110English (GB)NoteThe contents of the memory will bedeleted when:– switching off the power supply– switching the operating mode– the pump is interrupted (e.g. alarm,external stop).21
English (GB)6.4.3 Analog 0/4-20 mAApplies to <strong>DDC</strong>-AR control variantIn this operation mode, the pump doses according tothe external analog signal. The dosing volume isproportional to the signal input value in mA.Operationmode4-20 mA0-20 mAIf the input value in operation mode 4-20 mA fallsbelow 2 mA, an alarm is displayed and the pumpstops. A cable break or signal transmitter error hasoccured. The ’Cable break’ symbol is displayed inthe ’Signal and error display’ area of the display.Q [%]1008060402000Fig. 16Input value4 - 20 mAAnalog scaling<strong>Dosing</strong> flow≤ 4.1 mA 0 %≥ 19.8 mA 100 %≤ 0.1 mA 0 %≥ 19.8 mA 100 %0 - 20 mA4 8 12 16 20[mA]TM04 1120 20106.5 SlowModeWhen the ’SlowMode’ function is enabled, thepump slows down the suction stroke. The function isenabled in the ’Setup > SlowMode’ menu and isused to prevent cavitation in the following cases:• for dosing media with a higher viscosity• for degassing dosing media• for long suction lines• for large suction lift.In the ’Setup > SlowMode’ menu, the speed of thesuction stroke can be reduced to 50 % or 25 %.CautionFig. 186.6 Key lockSlowMode menuThe key lock is set in the ’Setup > Key lock’menu by entering a four-digit code. It protects thepump by preventing changes to settings. Two levelsof key lock can be selected:LevelEnabling the 'SlowMode' functionreduces the maximum dosing flow ofthe pump to the set percentage value!SlowModeOffSlowMode [50 % max.]SlowMode [25 % max.]Description❑❑TM04 1153 1110Operation6.5 ml/h0-20 mA 17.14 mAFig. 17Analog operation modeTM04 1127 1110SettingsSettings +keysAll settings can only be changed byentering the lock code.The start/stop key and the 100 %key are not locked.The start/stop key and the 100 %key and all settings are locked.It is still possible to navigate in the ’Alarm’ and ’Info’main menu and reset alarms.Temporary deactivationIf the key lock function is activated but settings needto be modified, the keys can be unlocked temporarilyby entering the deactivation code. If the code is notentered within 10 seconds, the display automaticallyswitches to the ’Operation’ main menu. The key lockremains active.DeactivationThe key lock can be deactivated in the ’Setup > Keylock’ menu via the ’Off’ menu point. The key lock isdeactivated after the general code ’2583’ or a predefinedcustom code has been entered.22
6.7 Display SetupUse the following settings in the ’Setup > Display’menu to adjust the display properties:• Units (metric/US)• Display contrast• Additional display6.7.1 UnitsMetric units (litres/millilitres/bar) or US units (USgallons/PSI) can be selected. According to theoperation mode and menu, the following units ofmeasurement are displayed:Operation mode/functionMetric units US units<strong>Manual</strong> control ml/h or l/h gphPulse control ml/ ml/0/4-20 mAAnalogue controlml/h or l/h gphCalibration ml mlVolume counter l gal6.7.2 Additional displayAdditional display provides additional informationabout the current pump status. The value is shown inthe display with the corresponding symbol.In ’Pulse’ mode the ’Target flow’ information can bedisplayed with Q = 1.28 l/h (see fig. 19).Fig. 19Operation1.28 l/hPulse1.28 l/hAdditional displayDisplay with additional displayTM04 8167 35106.8 Inputs/outputsIn the ’Setup > Inputs/outputs’ menu, you canconfigure the two outputs ’Relay 1+2’ and the signalinputs ’External stop’, ’Empty signal’ and ’Low levelsignal’.Fig. 20 ’Setup > Inputs/outputs’ menu6.8.1 Relay outputsApplies to <strong>DDC</strong>-AR control variantThe pump can switch two external signals usinginstalled relays. The relays are switched by potentialfreepulses. The connection diagram of the relays isshown in section 4.3 Electrical connection. Bothrelays can be allocated with the following signals:Relay 1signalAlarm*Warning*StrokesignalPumpdosingRelay 2signalAlarmWarningStrokesignal*PumpdosingDescriptionTM04 1152 1110Display red, pumpstopped (e.g. emptysignal, etc.)Display yellow, pump isrunning (e.g. low-levelsignal, etc.)each full strokePump running anddosingContact typeNO* NO* Normally open contactNCRelay 1Relay 2External stopEmpty signalLow-level signalNCIn/Output>>NONONONormally closedcontactEnglish (GB)The additional display can be set as follows:* Factory settingSettingDefault displayDosed volumeDescriptionTarget flow (pulse)Input current (analog) 1)Dosed vol. since last reset(see Counters on page 20)1) only <strong>DDC</strong>-AR control variant23
English (GB)6.8.2 External stopThe pump can be stopped via an externalpulse, e.g. from a control room. When activating theexternal stop pulse, the pump switches from theoperational state ’Running’ into the operational state’Standby’. The corresponding symbol appears in theSignal/error display (see section 6.2.2 Operatingstates).CautionFrequent disengagement from themains voltage, e.g. via a relay, canresult in damage to the pumpelectronics and to the breakdown of thepump. The dosing accuracy is alsoreduced as a result of internal startprocedures.Do not control the pump via the mainsvoltage for dosing purposes!Only use the ’External stop’ function tostart and stop the pump!The contact type is factory-set to closing contact(=>NO). In the ’Setup > Inputs/outputs > Externalstop’ menu, the setting can be changed to openingcontact (=>NC).6.8.3 Empty and low-level signalsIn order to monitor the fill level in the tank, adual-level control unit can be connected to the pump.The pump responds to the signals as follows:7. ServiceIn order to ensure a long service life anddosing accuracy, wearing parts such asdiaphragms and valves must be regularly checkedfor signs of wear. Where necessary, replace wornparts with original spare parts made from suitablematerials.Should you have any questions, please contact yourservice partner.WarningIf the diaphragm leaks or is broken,dosing liquid will escape from thedischarge opening on the dosing head(see fig. 3).Take suitable precautions to preventharm to health and damage to propertycaused by escaping dosing liquid!Check daily whether liquid is escapingfrom the discharge opening!Fill level sensorLow levelEmptyPump status• Display is yellow• flashes• Pump continuesrunning• Display is red• flashes• Pump stopsBoth signal inputs are allocated to the closingcontact (=>NO) in the factory. They can bere-allocated in the ’Setup > Inputs/outputs’ menu toopening contact (=>NC).6.9 Basic settingsAll settings can be reset to the settings default upondelivery in the ’Setup > Basic settings’ menu.Selecting ’Save customer settings’ saves the currentconfiguration to the memory. This can then beactivated using ’Load customer settings’ .The memory always contains the previously savedconfiguration. Older memory data is overwritten.24
7.1 Service systemAccording to the motor runtime service requirementswill appear. Service requirements appear regardlessof the current operational state of the pump and donot affect the dosing process. If no servicerequirement has occurred, service has to beperformed at least every two years.Service requirement Motor runtime [h]*’Service soon’ 7500’Service now’ 8000* Since the last service system resetFig. 21Service soon!Please exchangediaphragm and valves!Service kit:97xxxxxx’Service soon’Service now!Please exchangediaphragm and valves!Service kit:97xxxxxxTM04 1131 1110TM04 1131 11107.2 Perform serviceOnly spare parts and accessories from <strong>Grundfos</strong>should be used for maintenance. The usage of nonoriginalspare parts and accessories renders anyliability for resulting damages null and void.Information about carrying out maintenance can befound in the service kit catalog on our homepagewww.grundfosalldos.com.CautionWarningWhen dosing dangerous media,observe the corresponding precautionsin the safety data sheets!Risk of chemical burns!Wear protective clothing (gloves andgoggles) when working on the dosinghead, connections or lines!Do not allow any chemicals to leak fromthe pump. Collect and dispose of allchemicals correctly!Before any work to the pump, the pumpmust be in the ’Stop’ operational stateor be disconnected from the mains. Thesystem must be pressureless!7.2.1 <strong>Dosing</strong> head overview1 2 3 5 7 89English (GB)Fig. 22 ’Service now’The service requirement signals when thereplacement of wearing parts is due and displays thenumber of the service kit. Press the click wheel totemporarily hide the service prompt.When the ’Service now’ message appears (displayeddaily), the pump must be serviced immediately. Tosignalise in the ’Operation’ menu, the symbolappears in the ’Signal/error display’ area of thedisplay.The number of the service kit required is alsodisplayed in the ’Info’ menu.For media which result in increased wear, the serviceinterval must be shortened.4 6 10Fig. 23 <strong>Dosing</strong> head, exploded view1 Safety diaphragm2 Flange3 O-ring4 Diaphragm5 Valve on discharge side6 Valve on suction side7 <strong>Dosing</strong> head8 Screws with discs9 Cover10 Deaeration valveTM04 1123 211025
English (GB)7.2.2 Dismantling the diaphragm and valves1. Make system pressureless.2. Empty dosing head before maintenance andflush it if necessary.3. Set pump to ’Stop’ operational state using the’Start/stop key’.4. Press the ’Start/stop’ and ’100 %’ keys at thesame time to put the diaphragm into ’out’position.– Symbol must be displayed as theoperational state (see fig. 13).5. Take suitable steps to ensure that the returningliquid is safely collected.6. Dismantle suction, pressure and deaerationhose.7. Dismantle valves on suction and discharge side(5, 6).8. Remove the cover (9).9. Loosen screws (8) on the dosing head (7) andremove with discs.10. Remove the dosing head (7).11. Unscrew diaphragm (4) counter-clockwise andremove with flange (2).7.2.3 Reassembling the diaphragm and valves1. Attach flange (2) correctly and screw on newdiaphragm (4) clockwise.– Make sure that the O-ring (3) is seatedcorrectly!2. Press the ’Start/stop’ and ’100 %’ keys at thesame time to put the diaphragm into ’in’ position.– Symbol must be displayed as theoperational state (see fig. 13).3. Attach the dosing head (7).4. Install screws with discs (8) and cross-tighten.– Torque: 3 Nm.5. Attach the cover (9).6. Install new valves (5, 6).– Do not interchange valves and pay attention todirection of arrow.7. Connect suction, pressure and deaeration hose(see section 4.2 Hydraulic connection)8. Press the "Start/Stop" key to leave the servicemode.9. Deaerate dosing pump (see section5.2 Deaerating the pump).10. Please observe the notes on commissioning insection 5. Commissioning!7.3 Resetting the service systemAfter performing the service, the service systemmust be reset using the ’Info > Reset service system’function.7.4 RepairsAfter consulting <strong>Grundfos</strong>, please send the pump,together with the safety declaration completed by aspecialist, to <strong>Grundfos</strong>. The safety declaration canbe found at the end of these instructions. It must becopied, completed and attached to the pump.CautionWarningThe pump housing must only beopened by personnel authorised by<strong>Grundfos</strong>!Repairs must only be carried out byauthorised and qualified personnel!Switch off the pump and disconnect itfrom the voltage supply before carryingout maintenance work and repairs!If the pump has been used to dose toxicliquids or liquids hazardous to health,the pump must be cleaned prior todispatch!If the above requirements are not met, <strong>Grundfos</strong> mayrefuse to accept delivery of the pump. The shippingcosts will be charged to the sender.26
8. FaultsIn the event of faults in the dosing pump,a warning or an alarm is triggered.The corresponding fault symbol flashes inthe ’Operation’ menu, see section 8.1 List of faults.The cursor jumps to the ’Alarm’ main menu symbol.Press the click wheel to open the ’Alarm’ menu and,where necessary, faults to be acknowledged will beacknowledged.A yellow display indicates a warning and the pumpcontinues running.A red display indicates an alarm and the pump isstopped.The last 10 faults are stored in the ’Alarm’ mainmenu. When a new fault occurs, the oldest fault isdeleted.The two most recent faults are shown in the display,you can scroll through all the other faults. The timeand cause of the fault are displayed.1EmptyAlarm2Low level12.02.201012.02.2010Delete alarmmessages12:3412:34The list of faults can be deleted at the end of the list.If there is a service requirement, this appears whenthe ’Alarm’ menu is opened. Press the click wheel totemporarily close the service prompt (see section7.1 Service system).❑TM04 1109 1010English (GB)8.1 List of faults8.1.1 Faults with error messageDisplay in the’Alarm’ menuPossible causePossible remedyEmpty(Alarm)Low level(Warning)Motor blocked(alarm)Cable break(Alarm)Service soon/now(Warning)• <strong>Dosing</strong> medium tank empty • Fill tank.• Check contact setting (NO/NC)• <strong>Dosing</strong> medium tank almost empty• Backpressure greater thannominal pressure• Damage to gears• Defect in analog line 4-20 mA(input current < 2 mA)• Reduce backpressure.• Arrange for repair to drive if necessary.• Check line/plug connections and replace,if necessary.• Check signal transmitter.• Time interval for service expired • Perform service (see section 7.2 Performservice).27
English (GB)8.1.2 General faultsFault Possible cause Possible remedy<strong>Dosing</strong> flow too highNo dosing flow ordosing flow too lowIrregular dosingLiquid escaping fromthe discharge openingon the flangeLiquid escapingPump not sucking inInlet pressure greater thanbackpressureIncorrect calibrationAir in dosing headFaulty diaphragmLeakage/fracture in linesValves leaking or blockedValves installed incorrectlyBlocked suction lineSuction lift too highViscosity too highPump outside the calibrationDeaeration valve openValves leaking or blockedBackpressure fluctuationsFaulty diaphragm<strong>Dosing</strong> head screws notscrewed in as far as they will goValves not screwed in as far asthey will goSuction lift too highBackpressure too highSoiled valvesInstall additional spring-loaded valve(approx. 3 bar) on the discharge side.Increase pressure differential.Calibrate the pump (see section 5.3 Calibratingthe pump).Deaerate the pump.Change the diaphragm (see section 7.2 Performservice).Check and repair lines.Check and clean valves.Check that the arrow on the valve housing ispointing in the direction of flow. Check whether allO-rings are installed correctly.Clean suction line/install filter.Reduce suction lift.Install priming aid.Enable 'Slow Mode’ (see section 6.5 SlowMode).Enable 'Slow Mode’ (see section 6.5 SlowMode).Use hose with larger diameter.Install spring-loaded valve on the discharge side.Calibrate the pump (see section 5.3 Calibratingthe pump).Close the deaeration valve.Tighten up valves, replace valves if necessary(see section 7.2 Perform service).Keep backpressure constant.Change the diaphragm (see section 7.2 Performservice).Tighten up screws (see section 4.2 Hydraulicconnection).Tighten up valves/union nuts (see section4.2 Hydraulic connection).Reduce suction lift, if necessary provide positiveinlet pressure.Open the deaeration valve.Flush system, replace valves if necessary (seesection 7.2 Perform service).9. DisposalThis product and all its associated parts mustbe disposed of in an environmentally friendlymanner. Use appropriate waste collectionservices. If there is no such facility or the facilityrefuses to accept thse materials used in the product,the product can be sent to the nearest <strong>Grundfos</strong>company or service centre.28Subject to alterations.
Appendix 1Safety declarationPlease copy, fill in and sign this sheet and attach it to the pump returned for service.AppendixProduct type (nameplate)Model number (nameplate)<strong>Dosing</strong> mediumFault descriptionPlease make a circle around the damaged parts.In the case of an electrical or functional fault, please mark the cabinet.100%TM04 8168 3510Please describe the error / cause of the error in brief.We hereby declare that the pump has been cleaned and is completely free from chemical, biological andradioactive substances._____________________________________Date and signature_____________________________________Company stamp29
<strong>Grundfos</strong> companiesArgentinaBombas GRUNDFOS de Argentina S.A.Ruta Panamericana km. 37.500 Lote 34A1619 - GarinPcia. de Buenos AiresPhone: +54-3327 414 444Telefax: +54-3327 411 111AustraliaGRUNDFOS Pumps Pty. Ltd.P.O. Box 2040Regency ParkSouth Australia 5942Phone: +61-8-8461-4611Telefax: +61-8-8340 0155AustriaGRUNDFOS Pumpen Vertrieb Ges.m.b.H.<strong>Grundfos</strong>straße 2A-5082 Grödig/SalzburgTel.: +43-6246-883-0Telefax: +43-6246-883-30BelgiumN.V. GRUNDFOS Bellux S.A.Boomsesteenweg 81-83B-2630 AartselaarTél.: +32-3-870 7300Télécopie: +32-3-870 7301BelorussiaПредставительство ГРУНДФОС в Минске220123, Минск,ул. В. Хоружей, 22, оф. 1105Тел.: +(37517) 233 97 65Факс: (37517) 233 9769E-mail: grundfos_minsk@mail.ruBosnia/HerzegovinaGRUNDFOS SarajevoTrg Heroja 16,BiH-71000 SarajevoPhone: +387 33 713 290Telefax: +387 33 659 079e-mail: grundfos@bih.net.baBrazilBOMBAS GRUNDFOS DO BRASILAv. Humberto de Alencar Castelo Branco,630CEP 09850 - 300São Bernardo do Campo - SPPhone: +55-11 4393 5533Telefax: +55-11 4343 5015Bulgaria<strong>Grundfos</strong> Bulgaria EOODSlatina DistrictIztochna Tangenta street no. 100BG - 1592 SofiaTel. +359 2 49 22 200Fax. +359 2 49 22 201email: bulgaria@grundfos.bgCanadaGRUNDFOS Canada Inc.2941 Brighton RoadOakville, OntarioL6H 6C9Phone: +1-905 829 9533Telefax: +1-905 829 9512China<strong>Grundfos</strong> <strong>Alldos</strong><strong>Dosing</strong> & DisinfectionALLDOS (Shanghai) Water Technology Co.Ltd.West Unit, 1 Floor, No. 2 Building (T 4-2)278 Jinhu Road, Jin Qiao ExportProcessing ZonePudong New AreaShanghai, 201206Phone: +86 21 5055 1012Telefax: +86 21 5032 0596E-mail: grundfosalldos-CN@grundfos.comChinaGRUNDFOS Pumps (Shanghai) Co. Ltd.22 Floor, Xin Hua Lian Building755-775 Huai Hai Rd, (M)Shanghai 200020PRCPhone: +86-512-67 61 11 80Telefax: +86-512-67 61 81 67CroatiaGRUNDFOS CROATIA d.o.o.Cebini 37, BuzinHR-10010 ZagrebPhone: +385 1 6595 400Telefax: +385 1 6595 499www.grundfos.hrCzech RepublicGRUNDFOS s.r.o.Čapkovského 21779 00 OlomoucPhone: +420-585-716 111Telefax: +420-585-716 299DenmarkGRUNDFOS DK A/SMartin Bachs Vej 3DK-8850 BjerringbroTlf.: +45-87 50 50 50Telefax: +45-87 50 51 51E-mail: info_GDK@grundfos.comwww.grundfos.com/DKEstoniaGRUNDFOS Pumps Eesti OÜPeterburi tee 92G11415 TallinnTel: + 372 606 1690Fax: + 372 606 1691FinlandOY GRUNDFOS Pumput ABMestarintie 11FIN-01730 VantaaPhone: +358-3066 5650Telefax: +358-3066 56550FrancePompes GRUNDFOS Distribution S.A.Parc d’Activités de Chesnes57, rue de MalacombeF-38290 St. Quentin Fallavier (Lyon)Tél.: +33-4 74 82 15 15Télécopie: +33-4 74 94 10 51GermanyGRUNDFOS Water Treatment GmbHReetzstraße 85D-76327 Pfinztal (Söllingen)Tel.: +49 7240 61-0Telefax: +49 7240 61-177E-mail: gwt@grundfos.comGermanyGRUNDFOS GMBHSchlüterstr. 33D-40699 ErkrathTel.: +49-(0) 211 929 69-0Telefax: +49-(0) 211 929 69-3799E-mail: infoservice@grundfos.deService in Deutschland:E-mail: kundendienst@grundfos.deGreeceGRUNDFOS Hellas A.E.B.E.20th km. Athinon-Markopoulou Av.P.O. Box 71GR-19002 PeaniaPhone: +0030-210-66 83 400Telefax: +0030-210-66 46 273Hong KongGRUNDFOS Pumps (Hong Kong) Ltd.Unit 1, Ground floorSiu Wai Industrial Centre29-33 Wing Hong Street &68 King Lam Street, Cheung Sha WanKowloonPhone: +852-27861706 / 27861741Telefax: +852-27858664HungaryGRUNDFOS Hungária Kft.Park u. 8H-2045 Törökbálint,Phone: +36-23 511 110Telefax: +36-23 511 111IndiaGRUNDFOS Pumps India Private Limited118 Old Mahabalipuram RoadThoraipakkamChennai 600 096Phone: +91-44 2496 6800IndonesiaPT GRUNDFOS PompaJl. Rawa Sumur III, Blok III / CC-1Kawasan Industri, PulogadungJakarta 13930Phone: +62-21-460 6909Telefax: +62-21-460 6910 / 460 6901IrelandGRUNDFOS (Ireland) Ltd.Unit A, Merrywell Business ParkBallymount Road LowerDublin 12Phone: +353-1-4089 800Telefax: +353-1-4089 830ItalyGRUNDFOS Pompe Italia S.r.l.Via Gran Sasso 4I-20060 Truccazzano (Milano)Tel.: +39-02-95838112Telefax: +39-02-95309290 / 95838461JapanGRUNDFOS Pumps K.K.Gotanda Metalion Bldg. 5F,5-21-15, Higashi-gotandaShiagawa-ku, Tokyo,141-0022 JapanPhone: +81 35 448 1391Telefax: +81 35 448 9619KoreaGRUNDFOS Pumps Korea Ltd.6th Floor, Aju Building 679-5Yeoksam-dong, Kangnam-ku, 135-916Seoul, KoreaPhone: +82-2-5317 600Telefax: +82-2-5633 725LatviaSIA GRUNDFOS Pumps LatviaDeglava biznesa centrsAugusta Deglava ielā 60, LV-1035, Rīga,Tālr.: + 371 714 9640, 7 149 641Fakss: + 371 914 9646LithuaniaGRUNDFOS Pumps UABSmolensko g. 6LT-03201 VilniusTel: + 370 52 395 430Fax: + 370 52 395 431MalaysiaGRUNDFOS Pumps Sdn. Bhd.7 Jalan Peguam U1/25Glenmarie Industrial Park40150 Shah AlamSelangorPhone: +60-3-5569 2922Telefax: +60-3-5569 2866
MéxicoBombas GRUNDFOS de México S.A. deC.V.Boulevard TLC No. 15Parque Industrial Stiva AeropuertoApodaca, N.L. 66600Phone: +52-81-8144 4000Telefax: +52-81-8144 4010NetherlandsGRUNDFOS NetherlandsVeluwezoom 351326 AE AlmerePostbus 220151302 CA ALMERETel.: +31-88-478 6336Telefax: +31-88-478 6332E-mail: info_gnl@grundfos.comNew ZealandGRUNDFOS Pumps NZ Ltd.17 Beatrice Tinsley CrescentNorth Harbour Industrial EstateAlbany, AucklandPhone: +64-9-415 3240Telefax: +64-9-415 3250NorwayGRUNDFOS Pumper A/SStrømsveien 344Postboks 235, LeirdalN-1011 OsloTlf.: +47-22 90 47 00Telefax: +47-22 32 21 50PolandGRUNDFOS Pompy Sp. z o.o.ul. Klonowa 23Baranowo k. PoznaniaPL-62-081 PrzeźmierowoTel: (+48-61) 650 13 00Fax: (+48-61) 650 13 50PortugalBombas GRUNDFOS Portugal, S.A.Rua Calvet de Magalhães, 241Apartado 1079P-2770-153 Paço de ArcosTel.: +351-21-440 76 00Telefax: +351-21-440 76 90RomâniaGRUNDFOS Pompe România SRLBd. Biruintei, nr 103Pantelimon county IlfovPhone: +40 21 200 4100Telefax: +40 21 200 4101E-mail: romania@grundfos.roRussiaООО ГрундфосРоссия, 109544 Москва, ул. Школьная 39Тел. (+7) 495 737 30 00, 564 88 00Факс (+7) 495 737 75 36, 564 88 11E-mail grundfos.moscow@grundfos.comSerbiaGRUNDFOS Predstavništvo BeogradDr. Milutina Ivkovića 2a/29YU-11000 BeogradPhone: +381 11 26 47 877 / 11 26 47 496Telefax: +381 11 26 48 340SingaporeGRUNDFOS (Singapore) Pte. Ltd.24 Tuas West RoadJurong TownSingapore 638381Phone: +65-6865 1222Telefax: +65-6861 8402SloveniaGRUNDFOS d.o.o.Šlandrova 8b, SI-1231 Ljubljana-ČrnučePhone: +386 1 568 0610Telefax: +386 1 568 0619E-mail: slovenia@grundfos.siSouth Africa<strong>Grundfos</strong> (PTY) Ltd.Corner Mountjoy and George Allen RoadsWilbart Ext. 2Bedfordview 2008Phone: (+27) 11 579 4800Fax: (+27) 11 455 6066E-mail: lsmart@grundfos.comSpainBombas GRUNDFOS España S.A.Camino de la Fuentecilla, s/nE-28110 Algete (Madrid)Tel.: +34-91-848 8800Telefax: +34-91-628 0465SwedenGRUNDFOS AB(Box 333) Lunnagårdsgatan 6431 24 MölndalTel.: +46(0)771-32 23 00Telefax: +46(0)31-331 94 60SwitzerlandGRUNDFOS ALLDOS International AGSchönmattstraße 4CH-4153 ReinachTel.: +41-61-717 5555Telefax: +41-61-717 5500E-mail: grundfosalldos-CH@grundfos.comSwitzerlandGRUNDFOS Pumpen AGBruggacherstrasse 10CH-8117 Fällanden/ZHTel.: +41-1-806 8111Telefax: +41-1-806 8115TaiwanGRUNDFOS Pumps (Taiwan) Ltd.7 Floor, 219 Min-Chuan RoadTaichung, Taiwan, R.O.C.Phone: +886-4-2305 0868Telefax: +886-4-2305 0878ThailandGRUNDFOS (Thailand) Ltd.92 Chaloem Phrakiat Rama 9 Road,Dokmai, Pravej, Bangkok 10250Phone: +66-2-725 8999Telefax: +66-2-725 8998TurkeyGRUNDFOS POMPA San. ve Tic. Ltd. Sti.Gebze Organize Sanayi BölgesiIhsan dede Caddesi,2. yol 200. Sokak No. 20441490 Gebze/ KocaeliPhone: +90 - 262-679 7979Telefax: +90 - 262-679 7905E-mail: satis@grundfos.comUkraineТОВ ГРУНДФОС УКРАЇНА01010 Київ, Вул. Московська 8б,Тел.:(+38 044) 390 40 50Фах.: (+38 044) 390 40 59E-mail: ukraine@grundfos.comUnited Arab EmiratesGRUNDFOS Gulf DistributionP.O. Box 16768Jebel Ali Free ZoneDubaiPhone: +971-4- 8815 166Telefax: +971-4-8815 136United KingdomGRUNDFOS Pumps Ltd.Grovebury RoadLeighton Buzzard/Beds. LU7 8TLPhone: +44-1525-850000Telefax: +44-1525-850011U.S.A.GRUNDFOS Pumps Corporation17100 West 118th TerraceOlathe, Kansas 66061Phone: +1-913-227-3400Telefax: +1-913-227-3500UsbekistanПредставительство ГРУНДФОС вТашкенте700000 Ташкент ул.Усмана Носира 1-йтупик 5Телефон: (3712) 55-68-15Факс: (3712) 53-36-35<strong>Grundfos</strong> companiesAddresses revised 03.11.2010
Being responsible is our foundationThinking ahead makes it possibleInnovation is the essence15.720369 V1.095726994 1110ECM: 1065172GBThe name <strong>Grundfos</strong>, the <strong>Grundfos</strong> logo, and the payoff Be–Think–Innovate are registrated trademarksowned by <strong>Grundfos</strong> Management A/S or <strong>Grundfos</strong> A/S, Denmark. All rights reserved worldwide.www.grundfosalldos.com