table of Contents - Salesforce.com
table of Contents - Salesforce.com
table of Contents - Salesforce.com
- No tags were found...

Create successful ePaper yourself
Turn your PDF publications into a flip-book with our unique Google optimized e-Paper software.
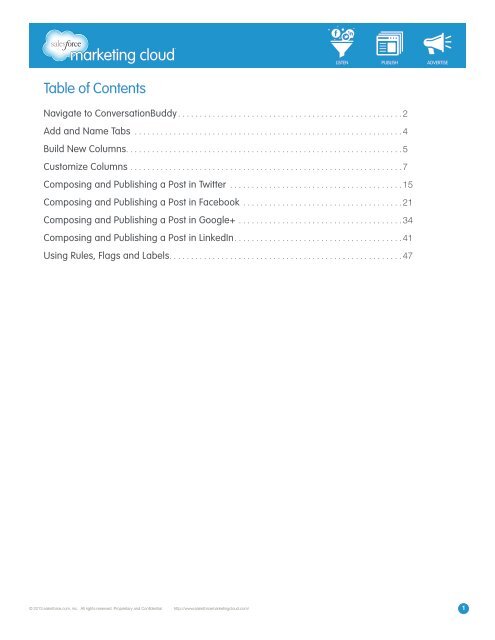
LISTEN PUBLISH ADVERTISETable <strong>of</strong> <strong>Contents</strong>Navigate to ConversationBuddy. ................................................... 2Add and Name Tabs .............................................................. 4Build New Columns. . . . . . . . . . . . . . . . . . . . . . . . . . . . . . . . . . . . . . . . . . . . . . . . . . . . . . . . . . . . . . . . 5Customize Columns. .............................................................. 7Composing and Publishing a Post in Twitter ........................................ 15Composing and Publishing a Post in Facebook ..................................... 21Composing and Publishing a Post in Google+ ...................................... 34Composing and Publishing a Post in LinkedIn. ...................................... 41Using Rules, Flags and Labels. ..................................................... 47© 2013 salesforce.<strong>com</strong>, inc. All rights reserved. Proprietary and Confidential http://www.salesforcemarketingcloud.<strong>com</strong>/ 1
LISTEN PUBLISH ADVERTISENAVIGATE TO CONVERSATIONBUDDYTMOverviewConversationBuddyTM enables you to organize, manage and create social media conversations and statuses onFacebook, Twitter, Google+ and LinkedIn. Within ConversationBuddy you can create, organize, segment, labeland flag. You can create a customized column view that enables you to view multiple social media Pr<strong>of</strong>iles at thesame time, customize column parameters to track key conversation topics and respond quickly to posts.Log In and Navigate to ConversationBuddy1. Navigate to your unique URL for Buddy Media and enter your username and password <strong>com</strong>bination.2. Click Login to continue to the Buddy Media Social Marketing Suite.Login ScreenNote - The Dashboard is the first screen you will see when you log in.3. From the top navigation click ConversationBuddy.Menu Bar© 2013 salesforce.<strong>com</strong>, inc. All rights reserved. Proprietary and Confidential http://www.salesforcemarketingcloud.<strong>com</strong>/ 2
LISTEN PUBLISH ADVERTISEColumnsThe Home view is the default landing page when you navigate to ConversationBuddy, represented by the houseicon. It consists <strong>of</strong> customizable tabs and columns.• Tabs are <strong>com</strong>prised <strong>of</strong> columns and are a way to organize your columns into categories. You can createup to 5 tabs in ConversationBuddy.• Columns display a stream <strong>of</strong> conversations related to one or more social Pr<strong>of</strong>iles within Buddy Media.You can create an unlimited number <strong>of</strong> columns in ConversationBuddy.New users start with one untitled tab and 3 columns:• Posts From Others - View all posts from your social Pr<strong>of</strong>iles made by others.• Posts From Brand - View all posts you sent to your social Pr<strong>of</strong>iles.• Flagged - View all flagged posts from your social Pr<strong>of</strong>iles.Note - When you first get started with ConversationBuddy the scope <strong>of</strong> these columns is a <strong>com</strong>bination <strong>of</strong> allPr<strong>of</strong>iles and streams to which you have access.To the right <strong>of</strong> the Home icon are: Outbox, Flagged, Tools and Analytics.ConversationBuddyHave questions? Contact us:Wwww.salesforcemarketingcloud.<strong>com</strong>Emarketingcloud@salesforce.<strong>com</strong>@marketingcloudT1-888-672-3426© 2013 salesforce.<strong>com</strong>, inc. All rights reserved. Proprietary and Confidential http://www.salesforcemarketingcloud.<strong>com</strong>/ 3
LISTEN PUBLISH ADVERTISEADD AND NAME TABSOverviewYou can add and customize tabs in ConversationBuddy to help manage and organize your social media Pr<strong>of</strong>iles.Create up to five unique tabs to effeciently monitor your social Pr<strong>of</strong>iles. Tabs are customizable and all settingsare unique to each user.Add a TabTo add a new Tab in ConversationBuddy, take the following steps:1. At the far right <strong>of</strong> the last tab click the plus icon. A new tab is added to the list. It contains threecolumns: Inbox, Sent and Flagged.Add a TabCustomize a Tab NameA new tab has the default name Untitled. To customize the name <strong>of</strong> a tab, take the following steps:1. Click on the name <strong>of</strong> a tab.2. Type a name in the field provided.Note - You can enter a maximum <strong>of</strong> ten characters in a Tab Name.3. Press Enter to save the name.Rename a Tab© 2013 salesforce.<strong>com</strong>, inc. All rights reserved. Proprietary and Confidential http://www.salesforcemarketingcloud.<strong>com</strong>/ 4
LISTEN PUBLISH ADVERTISEADD COLUMNSOverviewColumns are a stream <strong>of</strong> conversations related to the social Pr<strong>of</strong>iles that you have access to within BuddyMedia. You can create an unlimited number <strong>of</strong> columns in each tab. You can also customize column settings byname, Pr<strong>of</strong>iles, column type, media, status and/or labels.Add a ColumnTo add a new column in ConversationBuddy, take the following steps:1. Below the tabs, click the Add Column button to open the Add Column window.Add Column2. In the Add Column window, select a column type from one <strong>of</strong> the following options:• Posts From Others - View all <strong>of</strong> the posts that your fans and followers have posted to your socialPr<strong>of</strong>iles.• Posts From Brand - View all posts you acting as your brand have published out to your socialPr<strong>of</strong>iles.• Flagged - View all flagged posts from your social Pr<strong>of</strong>iles.• Custom Stream Messages - View all custom stream posts from your social Pr<strong>of</strong>iles.3. Click Add to add the column with the default settings or click Customize to update the column settingsbefore adding it to the tab.Note ‐ You can also customize the column settings after adding it to the tab.© 2013 salesforce.<strong>com</strong>, inc. All rights reserved. Proprietary and Confidential http://www.salesforcemarketingcloud.<strong>com</strong>/ 5
LISTEN PUBLISH ADVERTISEAdd Column WindowHave questions? Contact us:Wwww.salesforcemarketingcloud.<strong>com</strong>Emarketingcloud@salesforce.<strong>com</strong>@marketingcloudT1-888-672-3426© 2013 salesforce.<strong>com</strong>, inc. All rights reserved. Proprietary and Confidential http://www.salesforcemarketingcloud.<strong>com</strong>/ 6
LISTEN PUBLISH ADVERTISECUSTOMIZE COLUMNSOverviewEach column provides the option to customize the content. At the top <strong>of</strong> each column there are four buttons toupdate the column settings:• Filter by Date - Select this option to set a start date and end date from the calendar window.• Export Column - Select this option to export the content in the column as a TSV (tab separated value)or CSV (<strong>com</strong>ma separated value) file.• Edit Column - Select this option to update the column settings.• Remove Column - Select this option to delete the column from the tab.Column OptionsFilter by DateYou can filter a column by a specific date range. To filter a column by date, take the following steps:1. In the top right corner <strong>of</strong> a column, click the Filter by Date icon.2. In the calendar window, select a start date and an end date. Or, at the bottom <strong>of</strong> the calendar window,type a start date and an end date in the Range field.Date Range© 2013 salesforce.<strong>com</strong>, inc. All rights reserved. Proprietary and Confidential http://www.salesforcemarketingcloud.<strong>com</strong>/ 7
LISTEN PUBLISH ADVERTISE3. Click Apply.Note - The selected date range will display at the top <strong>of</strong> the column.Selected Date RangeExport a ColumnYou can export all <strong>of</strong> the posts in a column as either a TSV or a CSV file. To export the items in a column, takethe following steps:1. In the top right corner <strong>of</strong> a column, select the Export Column icon.2. From the drop-down menu, select CSV or TSV file type.Note - CSV (Comma Separated Values) is more <strong>com</strong>mon. TSV (Tab Separated Values) is more <strong>com</strong>plex. Itdisplays information such as the date and time the post was sent, and post type. You can link back to theoriginal post on the native social network..Export Options3. In the Export Column window, select a start date and an end date.4. Click Export.Export ButtonNote - You will receive an email with a link to the exported file.© 2013 salesforce.<strong>com</strong>, inc. All rights reserved. Proprietary and Confidential http://www.salesforcemarketingcloud.<strong>com</strong>/ 8
LISTEN PUBLISH ADVERTISEEdit a ColumnYou can edit a Column Name, Pr<strong>of</strong>iles, Column Type, and apply Additional Filters to each column. To editcolumn settings, take the following steps:1. In the top right corner <strong>of</strong> a column, click the Edit icon to open the Customize Column window.2. In the Column Name field, customize the name <strong>of</strong> the column. The name displays at the top <strong>of</strong> thecolumn.3. In the Pr<strong>of</strong>iles drop-down menu, you can view a roll-up <strong>of</strong> all Pr<strong>of</strong>iles that you have access to, or selectone or more specific Pr<strong>of</strong>iles. To update the Pr<strong>of</strong>iles in the column, select from one <strong>of</strong> the followingoptions:• All Pr<strong>of</strong>iles - Select this option to show content from all Pr<strong>of</strong>iles to which you have access.• Select Pr<strong>of</strong>iles - Select this option to specify one or more Pr<strong>of</strong>iles to which you have access.4. In the Add Pr<strong>of</strong>iles field, type the name <strong>of</strong> the Pr<strong>of</strong>iles to add to the column.Column Pr<strong>of</strong>iles5. Column type filtering opitons will vary depending on the social network selected.If you select a Facebook Pr<strong>of</strong>ile, then select one <strong>of</strong> the following options:• All - Select this option to view all posts and <strong>com</strong>ments on the selected Facebook Pr<strong>of</strong>iles.• All Sources - Select this option to view posts from others and from your brand.• From Others - Select this option to view posts to your brand from other users.• From Brand - Select this option to view posts posted by your brand.• Post - Select this option to view all posts on the selected Facebook Pr<strong>of</strong>ile.• All Sources - Select this option to view posts from others and from your brand.• From Others - Select this option to view posts to your brand from other users.• From Brand - Select this option to view posts posted by your brand.© 2013 salesforce.<strong>com</strong>, inc. All rights reserved. Proprietary and Confidential http://www.salesforcemarketingcloud.<strong>com</strong>/ 9
LISTEN PUBLISH ADVERTISE• Comment - Select this option to view all <strong>com</strong>ments on the selected Facebook Pr<strong>of</strong>ile.• All Sources - Select this option to view posts from others and from your brand.• From Others - Select this option to view posts to your brand from other users.• From Brand - Select this option to view posts posted by your brand.Facebook Column TypeIf you select a Twitter social Pr<strong>of</strong>ile, then select one <strong>of</strong> the following options:• All - Select this option to view all posts and <strong>com</strong>ments on the selected Twitter Pr<strong>of</strong>iles.• All Sources - Select this option to view posts from others and from your brand.• From Others - Select this option to view posts to your brand from other users.• From Brand - Select this option to view posts posted by your brand.• Outgoing Tweets - Original Tweets from the Pr<strong>of</strong>ile.• Outgoing Retweets - Retweets from the Pr<strong>of</strong>ile.• Mentions - @ mentions <strong>of</strong> the Pr<strong>of</strong>ile username.• Replies - replies to or from the Pr<strong>of</strong>ile.• All Sources - Select this option to view replies from others and from your brand.• From Others - Select this option to view replies to your brand from other users.• From Brand - Select this option to view replies posted by your brand.Twitter Column Type© 2013 salesforce.<strong>com</strong>, inc. All rights reserved. Proprietary and Confidential http://www.salesforcemarketingcloud.<strong>com</strong>/ 10
LISTEN PUBLISH ADVERTISEIf you select a Google+ social Pr<strong>of</strong>ile, then select one <strong>of</strong> the following options:• All - Select this option to view all posts and <strong>com</strong>ments on the selected Google+ Pr<strong>of</strong>iles.• All Sources - Select this option to view posts from others and from your brand.• From Others - Select this option to view posts to your brand from other users.• From Brand - Select this option to view posts posted by your brand.• Post - Select this option to view all posts on the selected Google+ Pr<strong>of</strong>ile.• Comment - Select this option to view all <strong>com</strong>ments on the selected Google+ Pr<strong>of</strong>ile.• All Sources - Select this option to view <strong>com</strong>ments from others and from your brand.• From Others - Select this option to view <strong>com</strong>ments to your brand from other users.• From Brand - Select this option to view <strong>com</strong>ments posted by your brand.Google+ Column Options6. In the Additional filters, segment further by Media, Status, Labels and Targeting Country/Language.Additional FiltersNote - The options displayed depend upon the Pr<strong>of</strong>ile media type selected.© 2013 salesforce.<strong>com</strong>, inc. All rights reserved. Proprietary and Confidential http://www.salesforcemarketingcloud.<strong>com</strong>/ 11
LISTEN PUBLISH ADVERTISE• In the Labels section, you can segment by specific Labels created within Buddy Media. Type the labelname in the space provided and select the label from the list.Labels• If a Facebook Pr<strong>of</strong>ile is selected, you can segment by Targeted Country/Language. This enables you t<strong>of</strong>ilter by posts that were targeted to users located in a specific country (based on their IP address) andusers with custom language settings in Facebook. You can segment by the following options:• Countries - In the Add Countries field, type the name <strong>of</strong> the country you want to filter by.• Languages - In the Add Languages field, type the language you want to filter by.Targeted Country/Language7. At the bottom <strong>of</strong> the Customize Column window, click Save to apply the selected settings.© 2013 salesforce.<strong>com</strong>, inc. All rights reserved. Proprietary and Confidential http://www.salesforcemarketingcloud.<strong>com</strong>/ 13
LISTEN PUBLISH ADVERTISERemove a ColumnTo remove a column, take the following step:1. In the top right corner <strong>of</strong> the column, click the X to close the column.Navigate to Columns that are not VisibleTo navigate to columns that are not visible:1. At the bottom <strong>of</strong> the columns in ConversationBuddy, a scroll bar populates to navigate between thecolumns that are not visible.Move ColumnsTo move columns within the current tab, or move columns to a new tab:1. Click and drag the title bar <strong>of</strong> a column and move it left or right to change its position within the tab. Or,click and drag the title bar <strong>of</strong> a column and drag it over a tab to move it to a different tab.Note - The tab furthest to the left will be the default tab displayed when you navigate to ConversationBuddy.Have questions? Contact us:Wwww.salesforcemarketingcloud.<strong>com</strong>Emarketingcloud@salesforce.<strong>com</strong>@marketingcloudT1-888-672-3426© 2013 salesforce.<strong>com</strong>, inc. All rights reserved. Proprietary and Confidential http://www.salesforcemarketingcloud.<strong>com</strong>/ 14
LISTEN PUBLISH ADVERTISECOMPOSING AND PUBLISHING A POST INTWITTEROverviewYou can <strong>com</strong>pose and publish Tweets in ConversationBuddy to distribute to your Twitter Pr<strong>of</strong>iles. You can postout to one or more Twitter accounts at one time. You can also create unique Tweets by attaching photos.Compose a TweetTo <strong>com</strong>pose a tweet in ConversationBuddy, take the following steps:1. Log in to Buddy Media. From the top navigation bar, select ConversationBuddy.2. In the top right corner, click the Compose button to open the Compose Message window.Compose3. In the Add Pr<strong>of</strong>iles or Distribution Lists field, type the name <strong>of</strong> a Pr<strong>of</strong>ile or Distribution List. Select one ormore Twitter Pr<strong>of</strong>iles and/or Distribution Lists from the drop-down menu.Add Pr<strong>of</strong>iles or Distribution ListsNote - A Twitter Distribution List enables you to send Tweets to a selected group <strong>of</strong> Twitter accounts at onetime. You can create Distribution Lists in the Tools section <strong>of</strong> ConversationBuddy. You can only apply oneDistribution List per tweet and applying it will override all previous Pr<strong>of</strong>ile selections.© 2013 salesforce.<strong>com</strong>, inc. All rights reserved. Proprietary and Confidential http://www.salesforcemarketingcloud.<strong>com</strong>/ 15
LISTEN PUBLISH ADVERTISE4. If you add a Distribution List, a warning screen will populate. Click Yes to continue.Distribution List Warning Screen5. In the Enter a Message field, enter desired text.Enter your Message• The Preview field will display what your draft post will look like prior to publishing.Preview Draft PostsNote - The Compose Message box has a character count for Twitter starting at 140 characters, and countsdown as characters are typed into the Enter a Message field.© 2013 salesforce.<strong>com</strong>, inc. All rights reserved. Proprietary and Confidential http://www.salesforcemarketingcloud.<strong>com</strong>/ 16
LISTEN PUBLISH ADVERTISEAdd AttachmentsYou can add one type <strong>of</strong> attachment to Tweets in ConversationBuddy:• Image - You can attach a photo from your <strong>com</strong>puter to Tweets <strong>com</strong>posed in ConversationBuddy.Add AttachmentAttach an Image to a Twitter PostTo attach an image to a post, take the following steps:1. Below the Enter a Message field, click the Image icon.2. Click Choose File and select an image from your <strong>com</strong>puter.Attach an ImageNote - The image will display below the Enter a Message field and it will display in the post as a shortened URL.Add a Label to a PostYou can add one or more Labels to Tweets to help sort and track posts in the columns in ConversationBuddy.To add a Label to a post, take the following steps:1. In the Compose Message window, in the Add Label field, type a Label name.Add Label2. In the drop-down menu select a pre-existing Label. Or, create a new Label by typing the full Label namein the Add Label field and click Create New to the right <strong>of</strong> the new Label name.© 2013 salesforce.<strong>com</strong>, inc. All rights reserved. Proprietary and Confidential http://www.salesforcemarketingcloud.<strong>com</strong>/ 17
LISTEN PUBLISH ADVERTISEPublishing a Twitter PostYou can choose one <strong>of</strong> three publishing options for Twitter posts:• Send Now - You can click Send Now to publish a post live on the selected Twitter Pr<strong>of</strong>iles.• Schedule - You can click Schedule to select a future date and time to publish the post on the selectedTwitter Pr<strong>of</strong>iles.• Seed - You can click Seed to suggest content to other Pr<strong>of</strong>ile owners for approval before it is publishedon the selected social media Pr<strong>of</strong>iles.Send NowTo publish a post as Send Now, take the following steps:1. In the Compose Message window, click Send Now.2. Click Publish.Note - The post will be published immediately on the selected social media Pr<strong>of</strong>iles. It will display in the Outboxcolumn <strong>of</strong> ConversationBuddy.Send NowScheduleTo Schedule a post, take the following steps:1. In the Compose Message window, click Schedule.2. In the Calendar, select a date to schedule the post.3. In the Time <strong>of</strong> Day drop-down menus, select a time <strong>of</strong> day to schedule the post.4. Click Schedule.Note - The post will display in the Outbox column <strong>of</strong> ConversationBuddy. From the Outbox you can edit the postcontent and the scheduled date and time.© 2013 salesforce.<strong>com</strong>, inc. All rights reserved. Proprietary and Confidential http://www.salesforcemarketingcloud.<strong>com</strong>/ 18
LISTEN PUBLISH ADVERTISESchedule a PostSeedClients with multiple Twitter Pr<strong>of</strong>iles enabled within ConversationBuddy can Seed or suggest Tweets out to thePr<strong>of</strong>ile owners. The Pr<strong>of</strong>ile owners can approve the suggested Tweet and publish it on their individual TwitterPr<strong>of</strong>iles. To Seed a post, take the following steps:1. In the Compose Message window, click Seed.2. Check the Lock Message Content and Targeting box. This prevents users from editing the postcontent, adding and removing Walls, countries or languages (optional).3. Check the Choose a Date box. This enables you to Set a Specific Date and time to publish the post, orto Set a Window <strong>of</strong> time to publish the post.• Click Set Specific Date to select a specific date and time to publish the post. When a Pr<strong>of</strong>ile ownerapproves the post, the post is published at the specified date and time. In the Date field, select adate to publish the post. In the Time <strong>of</strong> Day drop-down menus, select a time <strong>of</strong> day to publish thepost.Set Specific Date© 2013 salesforce.<strong>com</strong>, inc. All rights reserved. Proprietary and Confidential http://www.salesforcemarketingcloud.<strong>com</strong>/ 19
LISTEN PUBLISH ADVERTISE• Click Set Window to select a window <strong>of</strong> time to publish the post. When the Pr<strong>of</strong>ile owner approves thepost, they can select a date and time from within the parameters <strong>of</strong> the window <strong>of</strong> time to publish. In theEarliest Publish Date section, select the earliest date and time. In the Latest Publish Date section, selectthe latest date and time to publish the post.Set Window4. Click Seed.Note - The post will display in the Outbox column <strong>of</strong> ConversationBuddy. From the Outbox you can edit the postcontent and the selected date and time.Have questions? Contact us:Wwww.salesforcemarketingcloud.<strong>com</strong>Emarketingcloud@salesforce.<strong>com</strong>@marketingcloudT1-888-672-3426© 2013 salesforce.<strong>com</strong>, inc. All rights reserved. Proprietary and Confidential http://www.salesforcemarketingcloud.<strong>com</strong>/ 20
LISTEN PUBLISH ADVERTISECOMPOSING AND PUBLISHING A FACEBOOKPOSTOverviewYou can <strong>com</strong>pose a Facebook post in ConversationBuddy to distribute to your social Pr<strong>of</strong>iles. You can useConversationBuddy to post out to one or more social media Pr<strong>of</strong>iles within the same network. You cancreate unique posts by attaching links or photos. You can also upload photos to a Facebook album fromConversationBuddy.Post to FacebookTo <strong>com</strong>pose a Facebook post in ConversationBuddy, take the following steps:1. Log in to Buddy Media. From the top navigation bar, select ConversationBuddy.2. At the top right <strong>of</strong> the ConversationBuddy screen, click the Compose button to open the ComposeMessage window.Compose3. In the Add Pr<strong>of</strong>iles or Distribution Lists field, type the name <strong>of</strong> a Pr<strong>of</strong>ile or Distribution List. Select one ormore Facebook Pr<strong>of</strong>iles and/or Distribution Lists from the drop-down menu.Add Pr<strong>of</strong>iles or Distribution ListsNote - A Distribution List enables you to post to multiple Pr<strong>of</strong>iles within one social network. You can alsopost out to a list <strong>of</strong> users based on their Facebook location and/or language settings. Location is basedon a Facebook user’s IP address. Language is based on a Facebook user’s default language setting or thelanguage the user selects when they first register for Facebook. Create a Distribution List in the Tools section <strong>of</strong>ConversationBuddy.© 2013 salesforce.<strong>com</strong>, inc. All rights reserved. Proprietary and Confidential http://www.salesforcemarketingcloud.<strong>com</strong>/ 21
LISTEN PUBLISH ADVERTISE4. If you add a Distribution List, a warning screen will populate. Click Yes to continue.Distribution List Warning Screen• Below the Add Pr<strong>of</strong>iles or Distribution Lists field, click Edit to update the location, language settings orfeed targets <strong>of</strong> a Distribution List or Pr<strong>of</strong>ile.• In the Add Countries field, type the name <strong>of</strong> new countries to add to the list. Or, click the X at theright <strong>of</strong> a country to remove it from the list.• Click the Everywhere radio button to post the Facebook post to all areas within the selectedlocations.• Click the By State/Province radio button to filter the selected locations by state or province. In theAdd States field, type the name <strong>of</strong> the States or Provinces by which to filter.• Click the By City radio button to filter the selected locations by city. In the Add Cities field, type thename <strong>of</strong> the cities by which to filter.Filter by Location© 2013 salesforce.<strong>com</strong>, inc. All rights reserved. Proprietary and Confidential http://www.salesforcemarketingcloud.<strong>com</strong>/ 22
LISTEN PUBLISH ADVERTISEAdd AttachmentsThere are three types <strong>of</strong> attachments that you can add to Facebook posts in ConversationBuddy:• URL - You can attach a URL from any website (For example: Blog, Mainstream News, Twitter, YouTube,etc.) to a Facebook post. Or, you can link to one <strong>of</strong> your Facebook tabs created in Pr<strong>of</strong>ileBuddy.• Image - You can attach a photo from your <strong>com</strong>puter to posts in social media networks.• Question - You can add a Question on a Facebook Page to create an interactive poll for fans <strong>of</strong> theFacebook Page.Add AttachmentsAttach a Link to a Facebook PostTo attach a Link to a Facebook post, take the following steps:1. Below the Enter a Message field, click the Link icon. There are two types <strong>of</strong> Links you can attach to aFacebook post:• Link to a URL - Select this option to attach a URL from any website.• Link to one <strong>of</strong> your Facebook tabs - Select this option to link to one <strong>of</strong> your Facebook tabs created inPr<strong>of</strong>ileBuddy.2. If you click Link to a URL, in the Enter a URL field, insert the desired URL.3. Click OK.Note - Buddy Media will link to the URL, pulling in all aspects <strong>of</strong> the website.Link to a URL© 2013 salesforce.<strong>com</strong>, inc. All rights reserved. Proprietary and Confidential http://www.salesforcemarketingcloud.<strong>com</strong>/ 25
LISTEN PUBLISH ADVERTISETo customize the URL, take the following steps:• To customize the title, click on the title and type a new one into the field. Press Enter to save the newtitle.• To customize the URL, click on the URL and type a new URL into the field. Press Enter to save the newURL.• To customize the description, click on the description and type a new one into the field. Press Enter tosave the new description.• To customize the thumbnail, click Upload a Thumbnail. Click Choose File and select an image fromyour <strong>com</strong>puter.Update the Link4. If you click Link to one <strong>of</strong> your Facebook tabs, in the drop-down menu, select the desired Facebook tab.Note - The Facebook tabs in the drop-down menu are the tabs available for the selected Facebook Pr<strong>of</strong>ile.5. Click OK.Link to Facebook tabs© 2013 salesforce.<strong>com</strong>, inc. All rights reserved. Proprietary and Confidential http://www.salesforcemarketingcloud.<strong>com</strong>/ 26
LISTEN PUBLISH ADVERTISEAttach an Image to a Facebook PostTo attach an image to a Facebook post, take the following steps:1. Below the Enter a Message field, click the Image icon.2. Click Choose File and select an image from your <strong>com</strong>puter.Attach an ImageNote - The image will display below the Enter a Message field and it will display in the Wall Photo Album, or, ifthat does not exist, it will display in the My Photos Album on Facebook. The text in the Enter a Message field willdisplay with the image.© 2013 salesforce.<strong>com</strong>, inc. All rights reserved. Proprietary and Confidential http://www.salesforcemarketingcloud.<strong>com</strong>/ 27
LISTEN PUBLISH ADVERTISEUpload Photos to a Facebook AlbumYou can upload one or more photos to a Facebook album from ConversationBuddy. You can add photos to anexisting album or create a new album. To upload photos to a Facebook album, take the following steps:1. In the Compose Message window, below the attachment icons, click Upload Photos to a FacebookAlbum. The Enter a Message field changes to +Add Photo.2. In the Select an Album drop-down menu, select an existing album, or click +New Album to create anew album.• If you select +New Album, the Add Album window will display.• In the Album Name field, type a name for the new album (optional).• In the Album Description field, type a description for the album (optional).3. Click OK.Add Album4. Click +Add Photo and select one or multiple photos from your <strong>com</strong>puter.5. In the Add a Description field, type a description for each photo (optional).6. At the right <strong>of</strong> the Add a Description field, click the X to remove a photo (optional).7. At the bottom <strong>of</strong> the Compose Message window, click +Add Photo to add additional photos.Upload Photos to a Facebook Album© 2013 salesforce.<strong>com</strong>, inc. All rights reserved. Proprietary and Confidential http://www.salesforcemarketingcloud.<strong>com</strong>/ 28
LISTEN PUBLISH ADVERTISEAdd a Label to a PostYou can add a Label to a post to easily sort and track it in ConversationBuddy columns. To add a Label to apost, take the following steps:1. In the Compose Message window, in the Add Label field, type a Label name.Add Label2. In the drop-down menu, select a pre-existing Label. Or, create a new Label by typing the full Label namein the Add Label field and click Create New to the right <strong>of</strong> a new Label name.Publishing a Facebook PostYou can choose one <strong>of</strong> three publishing options for Facebook posts:• Send Now - You can click Send Now to publish a post live on the selected social media pr<strong>of</strong>iles.• Schedule - You can click Schedule to select a future date and time to publish the post on the selectedsocial media pr<strong>of</strong>iles.• Seed - You can click Seed to suggest content to other pr<strong>of</strong>ile owners for approval before it is published.Send NowTo publish a post as Send Now, take the following steps:1. In the Compose Message window, click Send Now.2. Click Publish.Note - The post will be published immediately on the selected social media Pr<strong>of</strong>iles. It will display in the Outboxcolumn <strong>of</strong> ConversationBuddy.Send Now© 2013 salesforce.<strong>com</strong>, inc. All rights reserved. Proprietary and Confidential http://www.salesforcemarketingcloud.<strong>com</strong>/ 29
LISTEN PUBLISH ADVERTISEScheduleTo Schedule a post, take the following steps:1. In the Compose Message window, click Schedule.2. In the Calendar, select a date to schedule the post.3. In the Time <strong>of</strong> Day drop-down menus, select a time <strong>of</strong> day to schedule the post.4. Click Schedule.Note - The post will display in the Outbox column <strong>of</strong> ConversationBuddy. From the Outbox you can edit the postcontent and the scheduled date and time.Schedule a PostSeedClients with multiple Facebook Pr<strong>of</strong>iles enabled within ConversationBuddy can Seed or suggest posts out tothe Pr<strong>of</strong>ile owners. The Pr<strong>of</strong>ile owners can approve the suggested post and publish on their individual FacebookPr<strong>of</strong>iles. To Seed a post, take the following steps:1. In the Compose Message window, click Seed.© 2013 salesforce.<strong>com</strong>, inc. All rights reserved. Proprietary and Confidential http://www.salesforcemarketingcloud.<strong>com</strong>/ 30
LISTEN PUBLISH ADVERTISE2. Check the Lock Message Content and Targeting box (optional). This prevents users from editing thepost content, adding and removing Walls, countries or languages.3. Check Choose a Date box. This enables you to Set a Specific Date and time to publish the post, or toSet a Window <strong>of</strong> time to publish the post.• Click Set Specific Date to select a specific date and time to publish the post. When a Pr<strong>of</strong>ile ownerapproves the post, it is published at the specified date and time. In the Date field, select a date topublish the post. In the Time <strong>of</strong> Day drop-down menus, select a time <strong>of</strong> day to publish the post.Set Specific Date• Click Set Window to select a window <strong>of</strong> time to publish the post. When the Pr<strong>of</strong>ile owner approves thepost, they can select a date and time from within the parameters <strong>of</strong> the window <strong>of</strong> time to publish it.In the Earliest Publish Date section, select the earliest date and time to publish the post. In the LatestPublish Date section, select the latest date and time to publish the post.Set Window4. Click Seed.Note - The post will display in the Outbox column <strong>of</strong> ConversationBuddy. From the Outbox you can edit the postcontent and the selected date and time.© 2013 salesforce.<strong>com</strong>, inc. All rights reserved. Proprietary and Confidential http://www.salesforcemarketingcloud.<strong>com</strong>/ 31
LISTEN PUBLISH ADVERTISEFacebook RepliesFacebook Replies are an effective way to respond to people without @mentioning them. When enabled you willsee threaded replies in your ConversationBuddy column enabling you to interact with your customers and fans.In ConversationBuddy replies are added displaying a special reply icon, so you can differentate replies fromother posts and <strong>com</strong>ments.Reply IconWhen you view a reply, the parent <strong>com</strong>ment and parent post will display.Parent Post and Comment© 2013 salesforce.<strong>com</strong>, inc. All rights reserved. Proprietary and Confidential http://www.salesforcemarketingcloud.<strong>com</strong>/ 32
LISTEN PUBLISH ADVERTISEReply to Comments or RepliesTo reply to a <strong>com</strong>ment or reply, <strong>com</strong>plete the following steps:1. Select the desired <strong>com</strong>ment or reply to which you wish to reply.2. Click the respond icon. A window will display that provides details on the account you are replying from,and displays any related posts or <strong>com</strong>ments.Respond IconNote - If you choose to reply on a reply, the original <strong>com</strong>ment will display as well.3. Insert the desired reply and click Publish.Have questions? Contact us:Wwww.salesforcemarketingcloud.<strong>com</strong>PublishEmarketingcloud@salesforce.<strong>com</strong>@marketingcloudT1-888-672-3426© 2013 salesforce.<strong>com</strong>, inc. All rights reserved. Proprietary and Confidential http://www.salesforcemarketingcloud.<strong>com</strong>/ 33
LISTEN PUBLISH ADVERTISECOMPOSING AND PUBLISHING A GOOGLE+POSTOverviewYou can <strong>com</strong>pose a Google+ post in ConversationBuddy to distribute to your social Pr<strong>of</strong>iles. Post out to one ormore social media Pr<strong>of</strong>iles within the same network. You can create unique posts by attaching links and photos.Post to Google+To <strong>com</strong>pose a Google+ post in ConversationBuddy, take the following steps:1. Log in to Buddy Media. From the top navigation bar, select ConversationBuddy.2. At the top right corner, click the Compose button to open the Compose Message window.Compose3. In the Add Pr<strong>of</strong>iles or Distribution Lists field, type the name <strong>of</strong> a Pr<strong>of</strong>ile or Distribution List. Select one ormore Pr<strong>of</strong>iles and/or Distribution Lists from the drop-down menu.Add Pr<strong>of</strong>iles or Distribution ListsNote - A Google+ Distribution List enables you to send posts to a selected group <strong>of</strong> Google+ accounts at onetime. You can create Distribution Lists in the Tools section <strong>of</strong> ConversationBuddy. You can only apply oneDistribution List per Google+ post and applying it will override all previous Pr<strong>of</strong>ile selections.© 2013 salesforce.<strong>com</strong>, inc. All rights reserved. Proprietary and Confidential http://www.salesforcemarketingcloud.<strong>com</strong>/ 34
LISTEN PUBLISH ADVERTISE4. If you add a Distribution List, a warning screen will populate. Click Yes to continue.Distribution List Warning Screen5. In the Enter a Message field, type a post.Enter a Message• The Preview field will display what your draft post will look like prior to publishing.Preview Draft Posts© 2013 salesforce.<strong>com</strong>, inc. All rights reserved. Proprietary and Confidential http://www.salesforcemarketingcloud.<strong>com</strong>/ 35
LISTEN PUBLISH ADVERTISEAdd AttachmentsThere are two types <strong>of</strong> attachments that you can add to a Google+ post in ConversationBuddy:• Link - You can attach a Link from any website (For example: Blog, Mainstream News, Twitter, YouTube,etc.) to a Google+ post.• Image - You can attach a photo from your <strong>com</strong>puter to posts in social media networks.Add AttachmentsAttach a Link to a Google+ PostTo Link a URL to a Google+ post, take the following steps:1. Below the Enter a Message field, click the Link icon.Note - You can not link to a Facebook Tab from a Google+ post.2. Click Link to a URL. In the Enter a URL field, type a URL.Note - Buddy Media will link to the website, pulling in all aspects <strong>of</strong> it.Link to a URL3. Click OK.© 2013 salesforce.<strong>com</strong>, inc. All rights reserved. Proprietary and Confidential http://www.salesforcemarketingcloud.<strong>com</strong>/ 36
LISTEN PUBLISH ADVERTISEAttach an Image to a Google+ PostTo attach an image to a post, take the following steps:1. Below the Enter a Message field, click the Image icon.2. Click Choose File and select an image from your <strong>com</strong>puter.Attach an ImageAdd a Label to a Google+ PostYou can add a Label to a post to easily sort and track items in the columns in ConversationBuddy. To add aLabel to a post, take the following steps:1. In the Compose Message window, in the Add Label field, type a Label name.Add Label2. In the drop-down menu, select a pre-existing Label. Or, create a new Label by typing the full Label namein the Add Label field and click Create New to the right <strong>of</strong> a new Label name.© 2013 salesforce.<strong>com</strong>, inc. All rights reserved. Proprietary and Confidential http://www.salesforcemarketingcloud.<strong>com</strong>/ 37
LISTEN PUBLISH ADVERTISEPublishing a Google+ PostYou can choose one <strong>of</strong> three publishing options for Google+ posts: Send Now, Schedule or Seed.• Send Now - You can click Send Now to publish a post live on the selected social media Pr<strong>of</strong>iles.• Schedule - You can click Schedule to select a future date and time to publish the post on the selectedsocial media Pr<strong>of</strong>iles.• Seed - You can click Seed to suggest content to other Pr<strong>of</strong>ile owners for approval before it is publishedon the selected social media Pr<strong>of</strong>iles.Send NowTo publish a post as Send Now, take the following steps:1. In the Compose Message window, click Send Now.2. Click Submit to publish the post.Note - The post will be published immediately on the selected social media Pr<strong>of</strong>iles. It will display in the Outboxcolumn <strong>of</strong> ConversationBuddy.Send Now© 2013 salesforce.<strong>com</strong>, inc. All rights reserved. Proprietary and Confidential http://www.salesforcemarketingcloud.<strong>com</strong>/ 38
LISTEN PUBLISH ADVERTISEScheduleTo Schedule a post, take the following steps:1. In the Compose Message window, click Schedule.2. In the Calendar, select a date to schedule the post.3. In the Time <strong>of</strong> Day drop-down menus, select a time <strong>of</strong> day to schedule the post.4. Click Schedule.Note - The post will display in the Outbox column <strong>of</strong> ConversationBuddy. From the Outbox you can edit the postcontent and the scheduled date and time.Schedule a PostSeedClients with multiple Google+ Pr<strong>of</strong>iles enabled within ConversationBuddy can Seed or suggest posts out to thePr<strong>of</strong>ile owners. The Pr<strong>of</strong>ile owners can approve the suggested post and set it live on their individual Google+Pr<strong>of</strong>iles. To Seed a post, take the following steps:1. In the Compose Message window, click Seed.2. Check the Lock Message Content and Targeting box. This prevents users from editing the postcontent, adding and removing Walls, countries or languages (optional).© 2013 salesforce.<strong>com</strong>, inc. All rights reserved. Proprietary and Confidential http://www.salesforcemarketingcloud.<strong>com</strong>/ 39
LISTEN PUBLISH ADVERTISE3. Check the Choose a Date box. This enables you to Set a Specific Date and time to publish the post, orto Set a Window <strong>of</strong> time to publish the post.• Click Set Specific Date to select a specific date and time to publish the post. When a Pr<strong>of</strong>ile ownerapproves the post, it is published at the specified date and time. In the Date field, select a date topublish the post. In the Time <strong>of</strong> Day drop-down menus, select a time <strong>of</strong> day to publish the post.Set Specific Date• Click Set Window to select a window <strong>of</strong> time to publish the post. When the Pr<strong>of</strong>ile owner approves thepost, they can select a date and time from within the parameters <strong>of</strong> the window <strong>of</strong> time to publish it.In the Earliest Publish Date section, select the earliest date and time to publish the post. In the LatestPublish Date section, select the latest date and time to publish the post.Set Window4. Click Seed.Note - The post will display in the Outbox column <strong>of</strong> ConversationBuddy. From the Outbox you can edit the postcontent and the selected date and time.Have questions? Contact us:Wwww.salesforcemarketingcloud.<strong>com</strong>Emarketingcloud@salesforce.<strong>com</strong>@marketingcloudT1-888-672-3426© 2013 salesforce.<strong>com</strong>, inc. All rights reserved. Proprietary and Confidential http://www.salesforcemarketingcloud.<strong>com</strong>/ 40
LISTEN PUBLISH ADVERTISECOMPOSING AND PUBLISHING A STATUSUPDATE TO LINKEDINOverviewYou can <strong>com</strong>pose and publish status updates to a LinkedIn <strong>com</strong>pany page through ConversationBuddy. Thisenables you to post out to one or more LinkedIn pages at one time. You can also add attachments to createunique status updates to publish to your LinkedIn pages.Compose a LinkedIn Status UpdateTo Compose a LinkedIn status update in ConversationBuddy, take the following steps:1. Log in to Buddy Media. From the top navigation bar, select ConversationBuddy.2. In the top right corner, click the Compose button to open the Compose Message window.Compose3. In the Add Pr<strong>of</strong>iles or Distribution Lists field, type the name <strong>of</strong> a LinkedIn page or Distribution List. Thiswill populate a list <strong>of</strong> Pr<strong>of</strong>iles and Distribution Lists to which you have access.Add Pr<strong>of</strong>iles or Distribution ListsNote - A LinkedIn Distribution List enables you to post status updates to a selected group <strong>of</strong> LinkedIn pages atone time. You can create Distribution Lists in the Tools section <strong>of</strong> ConversationBuddy. You can only apply oneDistribution List per status update and applying it will override all previous Pr<strong>of</strong>ile selections.© 2013 salesforce.<strong>com</strong>, inc. All rights reserved. Proprietary and Confidential http://www.salesforcemarketingcloud.<strong>com</strong>/ 41
LISTEN PUBLISH ADVERTISE• If you add a Distribution List, a warning screen will populate. Click Yes to continue.Distribution List Warning Screen4. In the Enter a Message field, type a post.Enter a Message• The Preview field will display what your draft post will look like prior to publishing.Preview Draft Posts© 2013 salesforce.<strong>com</strong>, inc. All rights reserved. Proprietary and Confidential http://www.salesforcemarketingcloud.<strong>com</strong>/ 42
LISTEN PUBLISH ADVERTISEAttach a Link to a LinkedIn Status UpdateThere is one attachment that you can add to LinkedIn status updates in ConversationBuddy:• Link - You can attach a Link from any website (For example: Blog, Mainstream News, Twitter, YouTube,etc.) to a LinkedIn status update.To Link a URL to a LinkedIn status update, take the following steps:1. Below the Enter a Message field, click the Link icon.Note - You can not link to a Facebook Tab from a LinkedIn status update.2. Click Link to a URL. In the Enter a URL field, insert the desired URL.Note - Buddy Media will link to the website, pulling in all aspects <strong>of</strong> the it.Link to a URL3. You can customize the title, URL, description and thumbnail <strong>of</strong> the URL before posting it on LinkedIn(optional). To customize the URL, take the following steps:• To customize the title, click on the title and type a new one into the field. Press Enter to save the newtitle.• To customize the URL, click on the URL and type a new URL into the field. Press Enter to save the newURL.• To customize the description, click on the description and type a new one into the field. Press Enter tosave the new description.© 2013 salesforce.<strong>com</strong>, inc. All rights reserved. Proprietary and Confidential http://www.salesforcemarketingcloud.<strong>com</strong>/ 43
LISTEN PUBLISH ADVERTISE• To customize the thumbnail, click Upload a Thumbnail. Click Choose File and select an image fromyour <strong>com</strong>puter.4. Click OK.Publishing a LinkedIn Status UpdateYou can choose one <strong>of</strong> three publishing options for LinkedIn status updates: Send Now, Schedule or Seed.• Send Now - You can click Send Now to publish a status update live on the selected social mediaPr<strong>of</strong>iles.• Schedule - You can click Schedule to select a future date and time to publish the status update on theselected social media Pr<strong>of</strong>iles.• Seed - You can click Seed to suggest content to other Pr<strong>of</strong>ile owners for approval before it is publishedon the selected social media Pr<strong>of</strong>iles.Send NowTo publish a post as Send Now, take the following steps:1. In the Compose Message window, click Send Now.2. Click Publish to publish the status update.Note - The status update will be published immediately on the selected social media Pr<strong>of</strong>iles. It will display in theOutbox column <strong>of</strong> ConversationBuddy.Send Now© 2013 salesforce.<strong>com</strong>, inc. All rights reserved. Proprietary and Confidential http://www.salesforcemarketingcloud.<strong>com</strong>/ 44
LISTEN PUBLISH ADVERTISEScheduleTo Schedule a post, take the following steps:1. In the Compose Message window, click Schedule.2. In the Calendar, select a date to schedule the status update.3. In the Time <strong>of</strong> Day drop-down menus, select a time <strong>of</strong> day to schedule the status update.4. Click Schedule.Note - The status update will display in the Outbox column <strong>of</strong> ConversationBuddy. From the Outbox you canedit the post content and the scheduled date and time.SeedClients with multiple LinkedIn accounts enabled within ConversationBuddy can Seed or suggest status updatesout to the account owners. The account owners can approve the suggested status update and set it live ontheir individual LinkedIn account. To Seed a post, take the following steps:1. In the Compose Message window, click Seed.2. Check the Lock Message Content and Targeting box. This prevents users from editing the postcontent, adding and removing Walls, countries or languages (optional).3. Check the Choose a Date box. This enables you to Set a Specific Date and time to publish the post, orto Set a Window <strong>of</strong> time to publish the post.• Click Set Specific Date to select a specific date and time to publish the post. When a Pr<strong>of</strong>ile ownerapproves the post, the post is published at the specified date and time. In the Date field, select adate to publish the post. In the Time <strong>of</strong> Day drop-down menus, select a time <strong>of</strong> day to publish thepost.Set Specific Date© 2013 salesforce.<strong>com</strong>, inc. All rights reserved. Proprietary and Confidential http://www.salesforcemarketingcloud.<strong>com</strong>/ 45
LISTEN PUBLISH ADVERTISE• Click Set Window to select a window <strong>of</strong> time to publish the post. When the Pr<strong>of</strong>ile owner approves thepost, they can select a date and time from within the parameters <strong>of</strong> the window <strong>of</strong> time to publish thepost. In the Earliest Publish Date section, select the earliest date and time to publish the post. In theLatest Publish Date section, select the latest date and time to publish the post.Set Window4. Click Seed.Have questions? Contact us:Wwww.salesforcemarketingcloud.<strong>com</strong>Emarketingcloud@salesforce.<strong>com</strong>@marketingcloudT1-888-672-3426© 2013 salesforce.<strong>com</strong>, inc. All rights reserved. Proprietary and Confidential http://www.salesforcemarketingcloud.<strong>com</strong>/ 46
LISTEN PUBLISH ADVERTISEUSING RULES, FLAGS, LABELS, DISTRIBUTIONLISTS AND THE OUTBOXRules OverviewA Rule automates actions on specific posts <strong>com</strong>ing into or out <strong>of</strong> your social Pr<strong>of</strong>ile(s). Rules use a list <strong>of</strong> triggerwords and/or phrases which filter through new posts. You can set up automatic notification emails when Rulesare triggered to ensure posts are segmented and addressed quickly. When you view posts in a column inConversationBuddy, the trigger words and/or phrases highlighted in red indicate conditions matching a Rule.Add a New RuleTo add a new Rule, take the following steps:1. Log in to Buddy Media. From the top navigation bar, select ConversationBuddy.2. From the ConversationBuddy navigation bar, select the Tools icon. The Rules area displays.Tools3. At the far right, click Add Rule.Add Rule4. At the top <strong>of</strong> the new Rule screen, click the title. Insert new title text. Click anywhere outside <strong>of</strong> the titleto save.Note - Clicking Save at this point will result in the error message: There was a problem with your submission.Must have one or more Pr<strong>of</strong>ile(s).Update Title <strong>of</strong> Rule© 2013 salesforce.<strong>com</strong>, inc. All rights reserved. Proprietary and Confidential http://www.salesforcemarketingcloud.<strong>com</strong>/ 47
LISTEN PUBLISH ADVERTISE5. In the Pr<strong>of</strong>iles section, click Add Pr<strong>of</strong>iles. Type the name <strong>of</strong> a Pr<strong>of</strong>ile to populate a list <strong>of</strong> availablePr<strong>of</strong>iles.6. From the list, select a Pr<strong>of</strong>ile. You can repeat step 5 to add multiple Pr<strong>of</strong>iles.Note - Pr<strong>of</strong>iles can be selected from the same or different social networks.7. Below Add Pr<strong>of</strong>iles, select the Message Source for the Rule. A Message Source defines the type <strong>of</strong> postto which the Rule will apply.• In<strong>com</strong>ing - You can select In<strong>com</strong>ing to filter posts created by users who are posting to your Pr<strong>of</strong>ile.• Outgoing - You can select Outgoing to filter posts your brand creates for the selected Pr<strong>of</strong>ile.• Both - You can select Both to filter all In<strong>com</strong>ing and Outgoing posts for the selected Pr<strong>of</strong>ile.Add Pr<strong>of</strong>iles and Message Source8. In the Conditions section, type the trigger words and/or phrases in the Add a Keyword field. The postmust contain these trigger words and/or phrases for the Rule to activate.9. After each trigger word and/or phrase, press Enter to accept the condition.Note - There is no limit to the number <strong>of</strong> conditions. However, the same word or phrase can only be enteredonce.10. To use the Wildcard Filter, add an Asterisk (*) at the end <strong>of</strong> any word and check the Use Wildcard Filterbox. When the Wildcard Filter is enabled, any extension <strong>of</strong> that word will trigger the Rule. For example,entering s* will filter any word that begins with s (shoot, snap, ship, etc.).Conditions© 2013 salesforce.<strong>com</strong>, inc. All rights reserved. Proprietary and Confidential http://www.salesforcemarketingcloud.<strong>com</strong>/ 48
LISTEN PUBLISH ADVERTISE11. In the Actions section, under Apply the following actions, select one <strong>of</strong> the three options:• None - No moderation. No action will be taken on the post.• Auto-Flag the message - Flags the post for review in Buddy Media. This will place the post in theFlagged section <strong>of</strong> ConversationBuddy.• Auto-delete messages - Immediately removes the post from your Pr<strong>of</strong>ile (only applies to Facebookand Google+ posts).Note - All posts that are deleted will still be available for review in the Home section <strong>of</strong> ConversationBuddy. Toview, Filter by Status - Removed. However, you can not undo a deleted Facebook post. Once a post is deletedfrom your Facebook Page, it can not be added back onto the Page.12. From the Optional Actions section, select one <strong>of</strong> the following two options:• Check the Apply Labels box to populate the Add Label section. Type the name <strong>of</strong> a Label in the AddLabel field. You can select a Label from the list or add a new Label by selecting the Create New optionin the drop-down.• Check the Notify Users box to populate the Notify Users section. In the Add Users field, type the name(s)<strong>of</strong> the users to notify. An email will be sent to the address associated with their Buddy Media account.You can set up email notifications even if you do not opt to Flag posts.• Select Aggregate Notifications to send email notifications twice daily that contain a report <strong>of</strong> theposts that meet the above conditions.• Select Send Immediately to send email notifications immediately that contain a report <strong>of</strong> the poststhat meet the above conditions.Actions© 2013 salesforce.<strong>com</strong>, inc. All rights reserved. Proprietary and Confidential http://www.salesforcemarketingcloud.<strong>com</strong>/ 49
LISTEN PUBLISH ADVERTISE13. Click Save to activate the Rule.Save a RuleEdit or Delete a RuleTo edit or delete a Rule, take the following steps:1. On the Tools page, at the far right <strong>of</strong> the Rule you want to edit, click the gear icon. The Ruleconfiguration screen displays.Edit a Rule2. Modify the desired options.3. At the far right <strong>of</strong> the screen, click Remove to delete a Rule.4. A warning message displays, confirming: Are you sure you want to delete? Click OK to continue.Remove a RuleExample Use Case for Rules:• Identify and respond to questions <strong>com</strong>ing to your brand, such as ‘when will your new product bereleased?’ and ‘where can I purchase this?’ by using triggers such as ‘when,’ ‘where’ and ‘how.’• Define and respond to posts noting product or service issues by using triggers such as ‘broken’ or‘problem.’• Identify <strong>com</strong>petitor mentions.• Identify and thank/reward brand advocates by using triggers such as ‘great,’ ‘love,’ ‘awesome,’ and‘fantastic.’© 2013 salesforce.<strong>com</strong>, inc. All rights reserved. Proprietary and Confidential http://www.salesforcemarketingcloud.<strong>com</strong>/ 50
LISTEN PUBLISH ADVERTISEFlags OverviewThe ConversationBuddy Flagged section displays all posts that have been Flagged and are awaiting review.Flags can be applied to a post automatically using a Rule or posts can be manually Flagged by a user. Flaggedposts display in the column with a red line on the left side <strong>of</strong> the box.Flagged PostsManually Flag a PostTo manually Flag a post, take the following steps:1. From the ConversationBuddy navigation bar, click the Home icon to navigate to the Home section <strong>of</strong>ConversationBuddy.Home2. In the top right hand corner <strong>of</strong> the desired post, select the Flag icon.Flag a Post© 2013 salesforce.<strong>com</strong>, inc. All rights reserved. Proprietary and Confidential http://www.salesforcemarketingcloud.<strong>com</strong>/ 51
LISTEN PUBLISH ADVERTISE3. In the Notes for Flagged item box, you can select from the following two options:• Notify Users - In the Notify Users field, type the name(s) <strong>of</strong> the users to notify. An email will be sent tothe email address associated with their Buddy Media account.• Add a Note - In the Add a Note field, type the desired text to send to the user.4. Click OK to add a Flag.Manage Flagged PostsTo take actions on Flagged posts, take the following steps:1. In the ConversationBuddy navigation bar, click the Flag icon to navigate to the Flagged section <strong>of</strong>ConversationBuddy.Flagged2. To filter the Clients and Pr<strong>of</strong>iles displayed, click All Pr<strong>of</strong>iles to open the Client and Pr<strong>of</strong>iles window.All Pr<strong>of</strong>iles3. In the Client and Pr<strong>of</strong>iles window, on the left side bar, select a client name. Only the Pr<strong>of</strong>iles for theselected client will display. Or, across the top <strong>of</strong> the Client and Pr<strong>of</strong>iles window, use the social networkNavigation Bar to display only Pr<strong>of</strong>iles from the selected social network.4. Select the desired Pr<strong>of</strong>iles. A blue border will display around each.Note - To select all Pr<strong>of</strong>iles, at the bottom, check Select all Pr<strong>of</strong>iles.5. Click Apply.© 2013 salesforce.<strong>com</strong>, inc. All rights reserved. Proprietary and Confidential http://www.salesforcemarketingcloud.<strong>com</strong>/ 52
LISTEN PUBLISH ADVERTISEClient and Pr<strong>of</strong>ile Selector WindowApprove Posts in the Flagged SectionTo approve one or more posts in the Flagged Section, take the following steps:1. At the far right <strong>of</strong> a post, click Approve to open the Add Note window.2. In the Add Note field, type the desired text (optional).3. Click Confirm & Approve to continue. This action removes the post from the list <strong>of</strong> Flagged posts.Add Note© 2013 salesforce.<strong>com</strong>, inc. All rights reserved. Proprietary and Confidential http://www.salesforcemarketingcloud.<strong>com</strong>/ 53
LISTEN PUBLISH ADVERTISERemove Posts in the Flagged SectionTo remove one or more posts in the Flagged Section, take the following steps:1. At the far right <strong>of</strong> a post, click Remove to open the Add Note window.2. In the Add Note field, type the desired text (optional).3. Click Confirm & Remove and the post is removed from the Flagged section, as well as the live socialnetwork in which it displays.Note - You can only remove posts from Facebook and Google+, you can not delete Tweets from other users.Remove Posts in the Flagged SectionAdd a Note to a Flagged PostTo add a note to a Flagged post, take the following steps:1. Click on a post to open the Inspector Panel.2. At the bottom <strong>of</strong> the Inspector Panel, type a note in the Enter your note here field.3. Press Enter.© 2013 salesforce.<strong>com</strong>, inc. All rights reserved. Proprietary and Confidential http://www.salesforcemarketingcloud.<strong>com</strong>/ 54
LISTEN PUBLISH ADVERTISEInspector PanelLabels OverviewA Label is an organizational tool within ConversationBuddy to track the posts you create and/or receive throughyour Pr<strong>of</strong>iles. You can apply a Label when you <strong>com</strong>pose a post, automatically apply one using a Rule, or applyone to a post within the Inspector Panel. Labels can simplify navigation because every Labeled post can besegmented out to an individual column.Apply a Label to a Post in the Inspector PanelTo apply Labels to posts in the Inspector Panel, take the following steps:1. In the ConversationBuddy navigation bar, click the Home icon to navigate to the Home section.Home2. In a column, click on a post to open the Inspector Panel.3. In the Add Label field, type a Label. You can select a pre-existing Label from the list or add a new Labelby selecting the (create new) option in the drop-down.Note - The Label icon will display under that post and the number next to the Label will adjust to reflect the newLabel.© 2013 salesforce.<strong>com</strong>, inc. All rights reserved. Proprietary and Confidential http://www.salesforcemarketingcloud.<strong>com</strong>/ 55
LISTEN PUBLISH ADVERTISELabel ManagementChange the Name <strong>of</strong> a LabelTo change the name <strong>of</strong> a Label, take the following steps:1. From the ConversationBuddy navigation bar, select the Tools icon to navigate to the Tools section. TheRules area displays.Tools2. On the left rail, click Labels.3. From the list <strong>of</strong> Labels, click the Label name.4. Type a new name into the Name field.5. Click Enter.Note - If you update a label, this does not update the previous posts.Delete a LabelTo delete a Label, take the following steps:1. At the far right <strong>of</strong> the Label, click the X to remove the Label from ConversationBuddy.Note - This will remove the Label from all posts it is associated with.© 2013 salesforce.<strong>com</strong>, inc. All rights reserved. Proprietary and Confidential http://www.salesforcemarketingcloud.<strong>com</strong>/ 56
LISTEN PUBLISH ADVERTISEExample Use Case for Labels:• Define specific types <strong>of</strong> content, such as questions or polls.• Outline specific types <strong>of</strong> promotional messages, such as ‘percentage <strong>of</strong>f’ or ‘free shipping.’• Highlight specific campaigns, such as ‘Olympics’ or ‘film festival.’• Sort by specific target audiences.Distribution Lists OverviewA Distribution List is an organizational tool within ConversationBuddy that enables you to post to multiplePr<strong>of</strong>iles within one social media network. You can create Distribution Lists for Twitter, Facebook, Google+and Linkedin accounts, however, you can only include accounts from the same social media network within aDistribution List.Create a Distribution ListTo create a Distribution List, take the following steps:1. From the ConversationBuddy navigation bar, select the Tools icon to navigate to the Tools section.Tools2. On the left side bar, select Distribution Lists.3. At the far right, click +Add List to create a new Distribution List.Add List4. At the top <strong>of</strong> the Distribution Lists screen, click the title. Type a new title. Click anywhere outside <strong>of</strong> thetitle to save.5. In the Apply to the following Pr<strong>of</strong>iles section, click Add Pr<strong>of</strong>iles. Type the name <strong>of</strong> a Pr<strong>of</strong>ile to populate alist <strong>of</strong> available Pr<strong>of</strong>iles.6. From the list, select a Pr<strong>of</strong>ile. You can repeat step 5 to add multiple Pr<strong>of</strong>iles.Note - You can only add Pr<strong>of</strong>iles from the same social media network to a Distribution List.© 2013 salesforce.<strong>com</strong>, inc. All rights reserved. Proprietary and Confidential http://www.salesforcemarketingcloud.<strong>com</strong>/ 57
LISTEN PUBLISH ADVERTISEAdd Pr<strong>of</strong>iles7. If you add Facebook Pr<strong>of</strong>iles in the Add Pr<strong>of</strong>iles field, you can geo-target Facebook users based oncountry (location) and/or Language. Geo-targeting enables you to send posts to users based on theirCountry and/or Language settings in Facebook. Location is based on a Facebook user’s IP address andlanguage is based on a Facebook user’s default language settings or the language a user selects whenthey first register for Facebook. To geo-target Facebook users, take the following steps:• In the Apply to the following Countries section, type the name <strong>of</strong> a country in the Add Countries field topopulate a drop-down menu <strong>of</strong> available countries. From the drop-down menu, select a country. Youcan repeat the above step to add multiple countries to the Distribution List.• Check the Everywhere radio button to post the Facebook post to all areas within the selectedlocations.• Check the By State/Province radio button to filter the selected locations by state and/or province. Inthe Add States field, type the name <strong>of</strong> the state and/or province by which to filter.• Check the By City radio button to filter the selected locations by city.In the Add Cities field, type thename <strong>of</strong> the city by which to filter.Add Countries• In the Languages section, type the name <strong>of</strong> a language in the Add Languages field to populate a dropdownmenu <strong>of</strong> available languages. From the drop-down menu, select a language. You can repeat theabove step to add multiple languages to the Distribution List.Add Languages8. Click Save.© 2013 salesforce.<strong>com</strong>, inc. All rights reserved. Proprietary and Confidential http://www.salesforcemarketingcloud.<strong>com</strong>/ 58
LISTEN PUBLISH ADVERTISEOutbox OverviewThe ConversationBuddy Outbox is a central location to view all outgoing posts. You can view all posts that areScheduled, Waiting for Approval, Seeded or all Sent posts. You can filter the Outbox by Client, Social Pr<strong>of</strong>ile,date and type <strong>of</strong> post.Filter Outbox Posts by Pr<strong>of</strong>ile and DateTo filter Outbox posts, take the following steps:1. From the ConversationBuddy navigation bar, click the Outbox icon to navigate to the Outbox section <strong>of</strong>ConversationBuddy.Outbox2. To filter the Clients and Pr<strong>of</strong>iles displayed, click All Pr<strong>of</strong>iles to open the Client and Pr<strong>of</strong>iles window.All Pr<strong>of</strong>iles3. In the Client and Pr<strong>of</strong>iles window, in the left side bar, select a client name. Only the Social Pr<strong>of</strong>iles for theselected client will display.4. Select the desired Pr<strong>of</strong>iles. A blue border will display around each.Note - To select all Pr<strong>of</strong>iles, at the bottom check Select all Pr<strong>of</strong>iles.5. Click Apply.© 2013 salesforce.<strong>com</strong>, inc. All rights reserved. Proprietary and Confidential http://www.salesforcemarketingcloud.<strong>com</strong>/ 59
LISTEN PUBLISH ADVERTISEClient and Pr<strong>of</strong>ile Selector Window6. You can filter the posts in the Outbox by a specific date range. In the left side bar, select a day from thecalendar to filter the Outbox by one day. Or, click Select Date Range to select a start date and an enddate to filter the Outbox by multiple days.Select a Date RangeNote - The selected date will display in blue and the Outbox posts for the selected date will display. Red dotsindicate that a post is scheduled for that date.© 2013 salesforce.<strong>com</strong>, inc. All rights reserved. Proprietary and Confidential http://www.salesforcemarketingcloud.<strong>com</strong>/ 60
LISTEN PUBLISH ADVERTISEFilter the Outbox by Type <strong>of</strong> PostThere are 4 options to filter the Outbox:• All - Displays all posts for the selected date.• Scheduled - Displays all posts that are scheduled to be sent at a later date. Edit the scheduled dateand post content from this section.• Waiting for Approval - Displays all posts created by users who only have the permission set to<strong>com</strong>pose and author posts. When users with limited permissions <strong>com</strong>pose or author a post, the post willdisplay in this section and a user with full permissions can edit, approve or remove the post.• Seeded - Displays posts that have been seeded to you or posts that you have seeded.Note - By default, posts are displayed by type All. The total number <strong>of</strong> posts for each type will display next toeach type.Filter Outbox by Post TypeRemove Posts in the OutboxTo remove one or more posts in the Outbox, take the following steps:1. At the far left <strong>of</strong> each post, check the box to select it. When one or more posts are selected a Removebutton displays at the top <strong>of</strong> the post list. Click Remove to delete posts.2. A warning screen displays. Click OK to continue.Remove Posts in the Outbox© 2013 salesforce.<strong>com</strong>, inc. All rights reserved. Proprietary and Confidential http://www.salesforcemarketingcloud.<strong>com</strong>/ 61
LISTEN PUBLISH ADVERTISEEdit Posts in the OutboxTo edit a post in the Outbox, take the following steps:1. At the far right <strong>of</strong> a post, click the Pencil icon.2. In the Compose Message window, edit the content and/or date <strong>of</strong> the post.3. Click Save.Edit PostsView Failed Posts in the OutboxFailed posts are posts that have failed to publish due to a Facebook API or authorization issue. To view all failedposts, take the following steps:1. In the top right hand corner <strong>of</strong> the Outbox, click Failed Posts.2. A list <strong>of</strong> all posts that have failed due to a Facebook API issue or authorization issue will display. In thelist <strong>of</strong> all failed posts, check the box at the far left <strong>of</strong> each post to select one or more posts.3. When posts are selected, Retry and Remove buttons display at the top <strong>of</strong> the list.• Click Retry to retry sending the post.• Click Remove to delete the post.Note - The Failed Posts icon will only display if you have posts that have failed.Have questions? Contact us:Wwww.salesforcemarketingcloud.<strong>com</strong>Emarketingcloud@salesforce.<strong>com</strong>@marketingcloudT1-888-672-3426© 2013 salesforce.<strong>com</strong>, inc. All rights reserved. Proprietary and Confidential http://www.salesforcemarketingcloud.<strong>com</strong>/ 62