EPSON TM-T88V Technical Reference Guide - Support
EPSON TM-T88V Technical Reference Guide - Support
EPSON TM-T88V Technical Reference Guide - Support
- No tags were found...
Create successful ePaper yourself
Turn your PDF publications into a flip-book with our unique Google optimized e-Paper software.
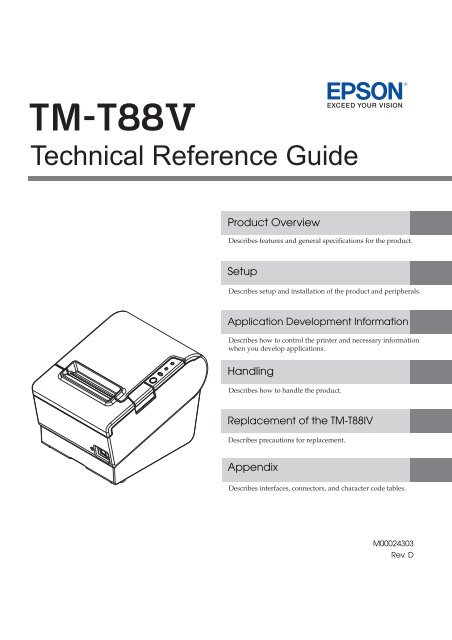
<strong>Technical</strong> <strong>Reference</strong> <strong>Guide</strong>Product OverviewDescribes features and general specifications for the product.SetupDescribes setup and installation of the product and peripherals.Application Development InformationDescribes how to control the printer and necessary informationwhen you develop applications.HandlingDescribes how to handle the product.Replacement of the <strong>TM</strong>-T88IVDescribes precautions for replacement.AppendixDescribes interfaces, connectors, and character code tables.M00024303Rev. D
Cautions• No part of this document may be reproduced, stored in a retrieval system, or transmitted in any formor by any means, electronic, mechanical, photocopying, recording, or otherwise, without the priorwritten permission of Seiko Epson Corporation.• The contents of this document are subject to change without notice. Please contact us for the latestinformation.• While every precaution has been taken in the preparation of this document, Seiko Epson Corporationassumes no responsibility for errors or omissions.• Neither is any liability assumed for damages resulting from the use of the information containedherein.• Neither Seiko Epson Corporation nor its affiliates shall be liable to the purchaser of this product or thirdparties for damages, losses, costs, or expenses incurred by the purchaser or third parties as a result of:accident, misuse, or abuse of this product or unauthorized modifications, repairs, or alterations to thisproduct, or (excluding the U.S.) failure to strictly comply with Seiko Epson Corporation’s operatingand maintenance instructions.• Seiko Epson Corporation shall not be liable against any damages or problems arising from the use ofany options or any consumable products other than those designated as Original <strong>EPSON</strong> Products or<strong>EPSON</strong> Approved Products by Seiko Epson Corporation.Trademarks<strong>EPSON</strong> and ESC/POS are registered trademarks of Seiko Epson Corporation in Japan and othercountries/regions.Microsoft and Windows are registered trademarks of Microsoft Corporation.ESC/POS ® Command System<strong>EPSON</strong> ESC/POS is a proprietary POS printer command system that includes patented or patentpendingcommands. ESC/POS is compatible with all types of <strong>EPSON</strong> POS printers and displays(excluding the <strong>TM</strong>-C100 printer).ESC/POS is designed to reduce the processing load on the host computer in POS environments. Itcomprises a set of highly functional and efficient commands and also offers the flexibility to easily makefuture upgrades.Copyright © 2010-2011 Seiko Epson Corporation. All rights reserved.2
For SafetyKey to SymbolsThe symbols in this manual are identified by their level of importance, as defined below. Readthe following carefully before handling the product.You must follow warnings carefully to avoid serious bodily injury.WARNINGCAUTIONProvides information that must be observed to prevent damage to the equipment or loss ofdata. Possibility of sustaining physical injuries. Possibility of causing physical damage. Possibility of causing information loss.Provides information that must be observed to avoid damage to your equipment or amalfunction.Provides important information and useful tips.3
WarningsWARNINGTo avoid risk of electric shock, do not set up this product or handle cables during athunderstormNever insert or disconnect the power plug with wet hands.Doing so may result in severe shock.Handle the power cable with care.Improper handling may lead to fire or electric shock. Do not modify or attempt to repair the cable. Do not place any heavy object on top of the cable. Avoid excessive bending, twisting, and pulling. Do not place the cable near heating equipment. Check that the plug is clean before plugging it in. Be sure to push the plug all the way in.Be sure to use the specified power source.Connection to an improper power source may cause fire or shock.Do not place multiple loads on the power outlet.Overloading the outlet may lead to fire.Shut down your equipment immediately if it produces smoke, a strange odor, orunusual noise.Continued use may lead to fire. Immediately unplug the equipment and contact yourdealer or a Seiko Epson service center for advice.Never attempt to repair this product yourself.Improper repair work can be dangerous.Never disassemble or modify this product.Tampering with this product may result in injury or fire.Do not allow foreign matter to fall into the equipment.Penetration by foreign objects may lead to fire.If water or other liquid spills into this equipment, do not continue to use it.Continued use may lead to fire. Unplug the power cord immediately and contact yourdealer or a Seiko Epson service center for advice.Using in the presence of silicon gas (silicon adhesive, silicon oil, silicon powder,etc.) including siloxane and of malignant gas (nitric acid, hydrosulfuric, ammonia,chlorine, etc.) may cause contact failure at contact points in a mechanical switchand a DC motor, etc., in a short time because of adhesion or oxidization of theinsulation film.If you open the DIP switch cover, be sure to close the cover and tighten the screwafter adjusting the DIP switch.Using this product with the cover open may cause fire or electric shock.4
About this ManualAim of the ManualThis manual provides developers/engineers with all the necessary information for design,development and installation of a POS system, and also design and development of a printerapplication.Manual ContentThe manual is made up of the following sections:Chapter 1Chapter 2Chapter 3Chapter 4Chapter 5AppendixProduct OverviewSetupApplication Development InformationHandlingReplacement of the <strong>TM</strong>-T88IVSpecifications of Interfaces and ConnectorsCharacter Code Tables6
Contents■ For Safety...............................................................................................................................3Key to Symbols ....................................................................................................................................... 3Warnings ................................................................................................................................................. 4Cautions.................................................................................................................................................. 5■ Restriction of Use ..................................................................................................................5■ About this Manual ................................................................................................................6Aim of the Manual................................................................................................................................. 6Manual Content .................................................................................................................................... 6■ Contents ................................................................................................................................7Product Overview ........................................................................13■ Features ...............................................................................................................................13■ Product Configurations ......................................................................................................14Interfaces.............................................................................................................................................. 14Buzzer .................................................................................................................................................... 14Colors .................................................................................................................................................... 15Accessories........................................................................................................................................... 15■ Part Names and Functions.................................................................................................16Power Switch ........................................................................................................................................ 16Power Switch Cover............................................................................................................................. 17Control Panel ....................................................................................................................................... 17Connectors........................................................................................................................................... 18Offline .................................................................................................................................................... 19■ Error Status ...........................................................................................................................20Automatically Recoverable Errors ..................................................................................................... 20Recoverable Errors............................................................................................................................... 20Unrecoverable Errors ........................................................................................................................... 21■ NV Memory (Non-Volatile Memory) ................................................................................22NV Graphics Memory.......................................................................................................................... 22User NV Memory .................................................................................................................................. 22Memory Switches (Customized Value) ............................................................................................. 23User-defined Page ............................................................................................................................... 23Maintenance Counter ........................................................................................................................ 23■ Product Specifications .......................................................................................................24Printing Specifications ......................................................................................................................... 25Character Specifications .................................................................................................................... 26Printable Area ...................................................................................................................................... 27Printing and Cutting Positions............................................................................................................. 29Paper Specifications............................................................................................................................ 30Electrical Characteristics .................................................................................................................... 31Environmental Conditions................................................................................................................... 32External Dimensions and Mass ........................................................................................................... 337
■ Option Specifications ........................................................................................................ 34Power Supply Unit (PS-180) ..................................................................................................................34Setup .............................................................................................35■ Flow of Setup....................................................................................................................... 35■ Installing the Printer............................................................................................................ 36Important Notes on Horizontal Installation ........................................................................................36Important Notes on Wall Hanging......................................................................................................36■ Changing the Paper Width................................................................................................ 37■ Setting the DIP Switches..................................................................................................... 39Setting Procedure.................................................................................................................................39For Serial Interface................................................................................................................................40For Parallel Interface ............................................................................................................................42For Built-in USB Interface ......................................................................................................................43For Ethernet/Wireless LAN/USB Interface ...........................................................................................44Selecting the Print Density (DIP Switches 2-3/2-4).............................................................................45Selecting the BUSY Status ....................................................................................................................46■ Connecting the Power Supply Unit (PS-180).................................................................... 47Connecting the Power Supply Unit ....................................................................................................47■ Setting the Memory Switches(Customized Value)48Functions ...............................................................................................................................................49■ Adjusting the Paper Roll Near-End Sensor ....................................................................... 53■ Connecting the Printer to the Host Computer................................................................. 54For Serial Interface................................................................................................................................54For Parallel Interface ............................................................................................................................56For USB Interface...................................................................................................................................57For Ethernet Interface ..........................................................................................................................60For Wireless LAN Interface ...................................................................................................................62■ Connecting the Cash Drawer ........................................................................................... 63Connecting the Drawer Kick-out Cable............................................................................................63■ Setting the Internal Buzzer (for Model with an Internal Buzzer)...................................... 65■ Connecting the Optional External Buzzer........................................................................ 66Unpacking.............................................................................................................................................66Installation Position ...............................................................................................................................67Installation Procedures.........................................................................................................................68Adjusting the Buzzer Volume ...............................................................................................................69Setting the Optional External Buzzer ..................................................................................................69■ Attaching the Connector Cover ....................................................................................... 70■ Arranging the Cables ........................................................................................................ 728
Application Development Information......................................73■ How to Control the Printer ..................................................................................................73Selecting a Driver................................................................................................................................. 73ESC/POS Commands .......................................................................................................................... 74■ Software and Manuals .......................................................................................................79Drivers.................................................................................................................................................... 79Utilities.................................................................................................................................................... 81How to Get Drivers, Manuals, and the Utility.................................................................................... 82■ Setting/Checking Modes...................................................................................................83Self-test Mode ...................................................................................................................................... 83Hexadecimal Dumping Mode ........................................................................................................... 85NV Graphics Print Mode ..................................................................................................................... 86Receipt Enhancement Information Print Mode............................................................................... 87Memory Switch Setting Mode............................................................................................................ 88Handling .......................................................................................89■ Installing and Replacing Roll Paper..................................................................................89■ Removing Jammed Paper.................................................................................................91■ Cleaning the Thermal Head ..............................................................................................93■ Preparing for Transport .......................................................................................................94Replacement of the <strong>TM</strong>-T88IV ....................................................95■ Compatibility ......................................................................................................................95Printing .................................................................................................................................................. 95Print Density .......................................................................................................................................... 95Two-Color Printing ................................................................................................................................ 95Number of Head Energizing Parts...................................................................................................... 95Printable Area (for 80 mm Width Paper)........................................................................................... 96Cutting Method ................................................................................................................................... 96Manual Paper Feed ............................................................................................................................ 96Receive Buffer ...................................................................................................................................... 96Memory Capacity............................................................................................................................... 96Electrical Characteristics .................................................................................................................... 96DIP Switches ......................................................................................................................................... 97Printer Status ......................................................................................................................................... 97Logo Registration ................................................................................................................................. 97Driver Compatibility............................................................................................................................. 97USB Low Power Consumption Mode ................................................................................................. 98Maintenance Counter ........................................................................................................................ 98Buzzer .................................................................................................................................................... 98Power Supply Box................................................................................................................................. 98Overall Dimensions .............................................................................................................................. 999
■ Additional Functions and Functional Improvements.................................................... 100Paper Width ........................................................................................................................................100Print Speed..........................................................................................................................................100Barcodes .............................................................................................................................................100Number of Characters.......................................................................................................................101Image Tone Setting ............................................................................................................................101Interface..............................................................................................................................................101USB Class..............................................................................................................................................101Customized Value ..............................................................................................................................102R/E Information Printing Mode..........................................................................................................102Low Power Load Mode......................................................................................................................103Reliability .............................................................................................................................................103Appendix....................................................................................105■ Specifications of Interfaces and Connectors................................................................ 105RS-232 Serial Interface........................................................................................................................105IEEE 1284 Parallel Interface................................................................................................................108USB (Universal Serial Bus) Interface...................................................................................................111■ Character Code Tables ................................................................................................... 112Common to All Pages........................................................................................................................112Page 0 [PC437: USA, Standard Europe]...........................................................................................113Page 1 (Katakana).............................................................................................................................114Page 2 (PC850: Multilingual) .............................................................................................................115Page 3 (PC860: Portuguese) .............................................................................................................116Page 4 (PC863: Canadian-French)..................................................................................................117Page 5 (PC865: Nordic) .....................................................................................................................118Page 11 (PC851: Greek) ....................................................................................................................119Page 12 (PC853: Turkish)....................................................................................................................120Page 13 (PC857: Turkish)....................................................................................................................121Page 14 (PC737: Greek) ....................................................................................................................122Page 15 (ISO8859-7: Greek) ..............................................................................................................123Page 16 (WPC1252) ...........................................................................................................................124Page 17 (PC866: Cyrillic #2) ..............................................................................................................125Page 18 (PC852: Latin2) ....................................................................................................................126Page 19 (PC858: Euro) .......................................................................................................................127Page 20 (KU42: Thai) ..........................................................................................................................128Page 21 (TIS11: Thai)...........................................................................................................................129Page 26 (TIS18: Thai)...........................................................................................................................130Page 30 (TCVN-3: Vientamese) ........................................................................................................131Page 31 (TCVN-3: Vientamese) ........................................................................................................132Page 32 (PC720: Arabic) ...................................................................................................................133Page 33 (WPC775: Baltic Rim) ..........................................................................................................134Page 34 (PC855: Cylillic)....................................................................................................................135Page 35 (PC861: Icelandic) ..............................................................................................................136Page 36 (PC862: Hebrew) .................................................................................................................137Page 37 (PC864: Arabic) ...................................................................................................................138Page 38 (PC869: Greek) ....................................................................................................................139Page 39 (ISO8859-2: Latin2)...............................................................................................................14010
Page 40 (ISO8859-15: Latin9)............................................................................................................ 141Page 41 (PC1098: Farci).................................................................................................................... 142Page 42 (PC1118: Lithuanian) .......................................................................................................... 143Page 43 (PC1119: Lithuanian) .......................................................................................................... 144Page 44 (PC1125: Ukranian)............................................................................................................. 145Page 45 (WPC1250: Latin 2) ............................................................................................................. 146Page 46 (WPC1251: Cyrillic) ............................................................................................................. 147Page 47 (WPC1253: Greek).............................................................................................................. 148Page 48 (WPC1254: Turkish).............................................................................................................. 149Page 49 (WPC1255: Hebrew) ........................................................................................................... 150Page 50 (WPC1256: Arabic)............................................................................................................. 151Page 51 (WPC1257: Baltic Rim)........................................................................................................ 152Page 52 (WPC1258: Vientamese).................................................................................................... 153Page 53 (KZ1048: Kazakhstan) ......................................................................................................... 154Page 255 (User-Defined Page)......................................................................................................... 155International Character Sets ............................................................................................................ 15611
Chapter 1 Product OverviewProduct OverviewThis chapter describes features and specifications of the product.FeaturesPrinting•High speed printing (300 mm/s maximum).•Shifting from 80 mm width paper printing to 58 mm width paper printing is available.•Multi-tone graphic printing.1Handling•Easy drop-in paper loadingSoftware•Command protocol is based on the ESC/POS Proprietary Command System.• OPOS ADK, OPOS ADK for .NET, JavaPOS ADK, and Windows printer drivers are available.•In addition to supporting several kinds of bar code printing, DS1 DataBar printing and twodimensionalsymbol (PDF417, QR code, MaxiCode, Composite Symbology) printing arepossible.•Various layouts are possible by using page mode.•A maintenance counter function is supported.•User-defined font function is supported.• Paper-saving function is supported.•Image tone can be changed.•The remote configuration tool allows you to check the status of and configure the printer connectedto a computer on the network.•The <strong>TM</strong>-<strong>T88V</strong> is ENERGY STAR qualified. (Some configurations may be exempted, dependingon their components.)13
Others•Various interface boards (<strong>EPSON</strong> UB series * ) can be used.•Built-in USB interface is also available for all interface models.•The <strong>TM</strong>-<strong>T88V</strong> Software & Documents Disc (drivers, utility, and manuals).* Except the following interface boards with the buzzer function UB-E02A, UB-R02A, UB-R03AProduct ConfigurationsInterfacesInterface board (UB):Serial/Parallel/USB/Ethernet/Wireless LANBuilt-in USB interface(May be covered with aplate for some models.)•Serial UB + built-in USB interface model• Parallel UB + built-in USB interface model•USB UB•Ethernet UB•Wireless LAN UBCAUTIONFor this printer, never use a LAN interface board or a wireless LAN interface boardwith a buzzer function.Otherwise, the printer or the interface board may be damaged.The name of interface boards with a buzzer function has “A” at the end.Example) UB-E**A, UB-R**A (*: alphanumeric character)Buzzer•Model with the internal buzzer function•Optional external buzzerThe optional external buzzer and the internal buzzer cannot be used together at the sametime.14
Chapter 1 Product OverviewColors•ECW(Epson Cool White)•EDG(Epson Dark Gray)AccessoriesIncluded• Roll paper (for operation check)•Power switch cover•Connector cover• Roll paper guide for 58 mm width paper*•Two strips for the roll paper guide*•Screw for the roll paper guide*•The <strong>TM</strong>-<strong>T88V</strong> Software & Documents Disc (drivers, utilities, and documentation) *• Warranty certificate*•Setup <strong>Guide</strong> or User’s manual* May not be included depending on the model.1Options•AC adapter•AC cable•Power supply box (Model: OT-BX88V)•Affixing tape for fixing the printer (Model: DF-10)• Wall hanging bracket (Model: WH-10)•Interface boards (UB series)•Optional external buzzer (Model: OT-BZ20)15
Part Names and FunctionsRoll paper coverCutter coverControl panelConnectorcoverCover open buttonPower switch coverPower switchPower SwitchTurns the printer on or off. The marks on the switch: ( : OFF/ : ON)CAUTIONBefore turning on the printer, be sure to check that the AC adapter is connected tothe power supply.Before turning the printer off, it is recommended to send a power-off command to theprinter. If you use the power-off sequence, the latest maintenance counter values aresaved. (Maintenance counter values are usually saved every two minutes.)For detailed information about ESC/POS commands, see the ESC/POS ApplicationProgramming <strong>Guide</strong>.16
Chapter 1 Product OverviewPower Switch CoverInstall the power switch cover that comes with the <strong>TM</strong>-<strong>T88V</strong> onto the printer to preventinadvertent changing of the power switch, to prevent tampering, and to improve the appearanceof the printer.To reset the printer when the power switch cover is installed, insert a long, thin object (such asthe end of a paper clip) into the hole in the power switch cover and press the power switch.WARNINGControl PanelIf an accident occurs with the power switch cover attached, unplug the power cordimmediately.Continued use of the printer may cause fire or shock.1(Power) LEDError LEDPaper LEDFeed buttonLEDsPower LED (green)•Lights when the power supply is on.•Goes out when the power supply is turned off.Error LEDLights or flashes when the printer is offline.•Lights after the power is turned on or after a reset (offline). Automatically goes out after awhile to indicate that the printer is ready.•Lights when the end of the roll paper is detected, and when printing has stopped (offline). Ifthis happens, replace the roll paper.•Flashes when an error occurs. (For details about the flash codes, see "Error Status" on page 20.)•Goes out during regular operation (online).17
Paper LED•Lights when there is no more roll paper or there is little remaining.•Off when there is a sufficient amount of roll paper remaining.•Flashes when a self-test is in progress.Feed buttonPressing this button once feeds the roll paper by one line. Holding this button down feeds theroll paper continuously.ConnectorsAll cables are connected to the connector panel on the lower rear of the printer.Serial interfaceParallel interfacePower supplyDrawer kick-out(DK)USB interface (Built-in/UB)Ethernet interfaceUSB Plus Power• Drawer kick-out connector:•Interface connector:•Power supply connector:Connects a cash drawer or the optional external buzzer.Connects the printer with the host computer interface.Connects the power supply unitThe picture above shows a serial interface model. For details on the various interfaces andhow to connect the power supply connector and cash drawer, see "Connecting the Printerto the Host Computer" on page 54 and "Connecting the Cash Drawer" on page 63.18
Chapter 1 Product OverviewOfflineThe printer automatically goes offline under the following conditions:•During power on (including resetting with the interface) until the printer is ready•During the self-test•While roll paper is fed using the Feed button.•When the cover is open.•When the printer stops printing due to a paper-end (if an empty paper supply is detected bythe roll paper end sensor or if the driver has been set to stop printing when a roll paper nearendis detected)•When an error has occurred119
Error StatusThere are three possible error types: automatically recoverable errors, recoverable errors, andunrecoverable errors.Automatically Recoverable ErrorsPrinting is no longer possible when automatically recoverable errors occur. They can berecovered easily, as described below.ErrorError descriptionError LED flash codeApprox.160 msRecovery measureRoll papercover openerrorThe roll paper coverwas opened duringprinting.Recovers automaticallywhen the roll papercover is closed.Print headtemperatureerrorA high temperatureoutside the head driveoperating range wasdetected.Recovers automaticallywhen the print headcools.Recoverable ErrorsPrinting is no longer possible when recoverable errors occur. They can be recovered easily byturning the power on again or sending an error recovery command from the driver aftereliminating the cause of the error.ErrorError descriptionError LED flash codeApprox.160 msRecovery measureAutocutter errorAutocutter does notwork correctly.Approx.2.56 sRemove the jammedpaper or foreign matterin the printer, close theroll paper cover, sendthe error recoverycommand, or turn thepower on to recover.The error recovery command is valid only if a recoverable error (excluding automaticallyrecoverable errors) occurs.20
Chapter 1 Product OverviewUnrecoverable ErrorsPrinting is no longer possible when unrecoverable errors occur. The printer must be repaired.Turn off the power immediately when unrecoverable errors occur.CAUTIONErrorMemory R/W errorHigh voltage errorLow voltage errorError descriptionAfter R/W checking, the printer does notwork correctly.The power supply voltage is extremelyhigh.The power supply voltage is extremely low.Error LED flash codeApprox.160 ms1CPU execution errorThe CPU is executing an incorrect address.Internal circuitconnection errorInternal circuits are not connectedcorrectly.Approx.2.56 s21
NV Memory (Non-Volatile Memory)The printer's NV memory stores data even after the printer power is turned off. NV memorycontains the following memory areas for the user:•NV graphics memory• User NV memory•Memory switches (customized value)•User-defined page•Maintenance counterCAUTIONNV memory can be rewritten about 100,000 times. As a guide, NV memory rewriting shouldbe 10 times or less a day when you program applications.See the ESC/POS Application Programming <strong>Guide</strong> for more details.NV Graphics MemoryGraphics, such as shop logos to be printed on receipts, can be stored. Even with a serial interfacemodel whose communication speed is low, high speed graphics printing is possible.Use the <strong>TM</strong>-<strong>T88V</strong> Utility to register graphics.You can also print and confirm the registered graphics in the NV graphics memory print mode.For detailed information about the <strong>TM</strong>-<strong>T88V</strong> Utility, see the <strong>TM</strong>-<strong>T88V</strong> Utility User’sManual.For information about how to use the NV graphics memory print mode, see "NVGraphics Print Mode" on page 86.User NV MemoryYou can store and read text data for multiple purposes, such as for storing a note includingcustomizing or maintenance information of the printer.22
Product SpecificationsPrinting methodCutting methodThermal line printingPartial cut (cutting with one point in left edge left uncut)Roll paper (single-ply) width 80 mm width paper printing: 79.5 ± 0.5 mm (3.13 ± 0.02")58 mm width paper printing: 57.5 ± 0.5 mm (2.26 ± 0.02")InterfacesSerial (RS-232), Parallel (IEEE1284), Ethernet (10/100BASE-T),USB (Full-speed), Wireless LAN (IEEE802.11b)Buffers Receive buffer 4 KB/45 bytes (selectable using DIP switch 1-2)Downloaded bufferNV graphics dataBarcode/two-dimensional symbol/composite symbol printingDKD function12 KB (both for user-defined characters and downloadedimages)256 KBUPC-A, UPC-E, JAN 8 (EAN 8), JAN 13 (EAN 13), CODE 39, ITF, CODABAR (NW-7), CODE 93, CODE 128, GS1-128,GS1 DataBar Omnidirectional, GS1 DataBar Truncated,GS1 DataBar Stacked, GS1 DataBar Stacked Omnidirectional,GS1 DataBar Limited, GS1 DataBar Expanded,GS1 DataBar Expanded Stacked, PDF417, QR CODE, MaxiCode, Composite Symbology2 drivesSupplied voltage DC 24 V ± 7%Life Mechanism 20,000,000 linesThermal headAutocutterMTBFMCBFTemperature/humidity150 million pulses150 km2,000,000 cuts (when using the specified original paper types,PD150R or PD160R)1,500,000 cuts (when using paper types other than thespecified original paper types)360,000 hours70,000,000 linesOperating: 5 to 45°C {41 to 113°F}, 10 to 90% RHStorage: -10 to 50°C {14 to 122°F}, 10 to 90% RHOverall dimensions 145 × 195 × 148 mm {5.71 × 7.68 × 5.83"} (W × D × H)Weight (mass)Approx. 1.6 kg {3.5 lb} (roll paper excluded)24
Chapter 1 Product OverviewPrintable Area80 mm paper width printingThe printable area of paper with a width of 79.5 ± 0.5 mm {3.13 ± 0.02"} is 72.2 ± 0.2 mm {2.84 ±0.008"} (512 dots), and the space on the right and left sides is approximately 3.7 mm {0.15"}.79.5 + - 0.5 mm {3.13 + - 0.02”}0.141 0.05 mm {0.0056 + - 0.002”}72.2 + - 0.2 mm {2.84 + - 0.008}1+ -All the numeric values are typical.3.7 mm {0.15} 3.7 mm {0.15}In 2-divided energizing, the print position within the printable area of the thermalelements for dots 1 to 256 and 257 to 512 is shifted approximately 0.07 mm {0.0028"} inthe paper feed direction as shown in the figure below.1256257 512About 0.07 mmIn 4-divided energizing, the print position within the printable area of the thermalelements for dots 1 to 128, 129 to 256, 257 to 384, and 385 to 512 is shiftedapproximately 0.04 mm {0.0016"} in the paper feed direction as shown in the figurebelow.1129257385512About 0.04 mm27
58 mm paper width printingThe printable area of paper with a width of 57.5 ± 0.5 mm {2.26 ± 0.02"} is 50.8 ± 0.2 mm {2.00 ±0.008"} (360 dots), and the space on the left side is approximately 3.7 mm {0.15"} and the space onthe right side is approximately 3.0 mm {0.12"}.57.5 + - 0.5 mm {2.26 + - 0.02”}0.141 0.05 mm {0.0056 + - 0.002”}+ -All the numeric values are typical.50.8 + - 0.2 mm {2.00 + - 0.008}3.7 mm {0.15} 3.0 mm {0.12}In 2-divided energizing, the print position within the printable area of the thermalelements for dots 1 to 256 and 257 to 360 is shifted approximately 0.07 mm {0.0028"} inthe paper feed direction as shown in the figure below.1256257 360About 0.07 mmIn 4-divided energizing, the print position within the printable area of the thermalelements for dots 1 to 128, 129 to 256, and 257 to 360 is shifted approximately 0.04 mm{0.0016"} in the paper feed direction as shown in the figure below.1129257360About 0.04 mm28
Chapter 1 Product OverviewPrinting and Cutting PositionsManual-cutter positionLast line ofa previous receiptApprox. 29Autocutter blade positionCenter of the print dotlinePrintable areaApprox. 151Paper feed direction[units: mm (All the numeric values are typical.)]The values above may vary slightly as a result of paper slack or variations in the paper.Take this into account when setting the cutting position of the autocutter.29
Paper SpecificationsPaper typesFormSpecified thermal paperRoll paperSize Roll paper diameter 83 mm {3.27"} maximumRoll paper spool Inside: 12 mm {0.47"}, Outside: 18 mm {0.71"}Roll width when taken upPaper widthSpecified roll paper typeSpecified original paper type80 mm width paper printing: 80 + 0.5/-1.0 mm58 mm width paper printing: 58 + 0.5/-1.0 mm80 mm width paper printing: 79.5 ± 0.5 mm58 mm width paper printing: 57.5 ± 0.5 mmNTP080-80/NTP058-80In U.S.A.: Nakagawa Mfg. (USA) Inc.In Europe: Nakagawa Mfg. (Europe) GmbHIn Southeast Asia: N.A.K. Mfg. (Malaysia) SDN BHD(Original paper: TF50KS-E Nippon Paper Industries Co., Ltd.TF50KS-E, TF60KS-E (NIPPON Paper Industries Co., Ltd.)PD150R, PD160R, PD190R (OJI Paper Mfg. Co., Ltd.)P220AGB-1 (Mitsubishi Paper Mills Limited.)P300, P310, P350 (Kanzaki Specialty Papers)AF50KS-E (Jujo Thermal Oy)F5041 (Mitsubishi HiTec Paper Flensburg GmbH)KT55F20, KT48F20 (Koehler Paper Group)Paper must not be pasted to the roll paper spool.The remaining amount of the roll paper when a roll paper near-end is detected differsdepending on the spool type.30
Chapter 1 Product OverviewElectrical CharacteristicsSupply voltage DC 24V ± 7%Current consumption(at 24V, 25°C, normalprint density)Standby Mean: Approximately 0.015AMaximum 1A for drawer kick-out driving.Operating Mean: Approximately 1.8ANote: When print ratio isapproximately 18% Continuous printing for 50lines (repeating 20H-7FH) Font A 42 columns ASCII character 5 line feeding AutocuttingABCDEBCDE42 columns678967890131
Environmental ConditionsTemperature/HumidityOperatingStorage(Factory packing)5 to 45°C {41 to 113°F}, 10 to 90% RH (See the operatingtemperature and humidity range below.)-10 to 50°C {14 to 122°F}, 10 to 90% RH (except for paper)[%RH]Relative humidity906531°C, 90%34°C, 75%Operating environmentrange34°C, 90%40°C, 65%45°C, 50%45°C, 43%105 34 40 45Ambient temperature[°C]Specified original paperother than belowSpecified original paper:P300, P310, P350Acoustic noise (operating)Approximately 55 dB (bystander position)Note:The values above are measured in the Epson evaluationcondition.Acoustic noise differs depending on the paper used, printingcontents, and the setting values, such as print speed or printdensity.32
Chapter 1 Product OverviewExternal Dimensions and Mass•Width: Approximately 145 mm {5.71"}•Depth: Approximately 195 mm {7.68"}•Height: Approximately 148 mm {5.83"}• Mass: Approximately 1.6 kg {3.53 lb} (except for roll paper)1[Units: mm]33
Option SpecificationsPower Supply Unit (PS-180)1366833[Unit: mm]ElectriccharacteristicsInput conditionsInput voltage (rating): 90 to 264VAC(100VAC -10% to 230VAC +15%)Frequency (rating): 50/60 Hz ± 3 HzInput current (rating): 1.3AOutput conditions Output voltage (rating): 24VDC ± 5%Output current (rating): 2.1ACase specificationsDimensions(W × D × H)WeightColor136 × 33 × 68 mm {5.35 × 1.30 × 2.68"}(excluding projections)Approx. 0.4 kg {14.11 oz} (excluding the AC cable)Black (matte)For Energy Star printers, always use the power supply that came with your printer.For detailed information about the PS-180, see the instruction manual for the PS-180.34
Chapter 2 SetupSetupThis chapter describes setup and installation of the product and peripherals.Flow of SetupThis chapter consists of the following sections along with the setup flow of the product andperipherals.1. Installing the Printer (page 36)2. Changing the Paper Width (page 37)3. Setting the DIP Switches (page 39)24. Connecting the Power Supply Unit (PS-180) (page 47)5. Setting the Memory Switches (Customized Value) (page 48)6. Adjusting the Paper Roll Near-End Sensor (page 53)7. Connecting the Printer to the Host Computer (page 54)8. Connecting the Cash Drawer (page 63)9. Setting the Internal Buzzer (for Model with an Internal Buzzer) (page 65)10. Connecting the Optional External Buzzer (page 66)11. Attaching the Connector Cover (page 70)12. Arranging the Cables (page 72)35
Installing the PrinterYou can install this printer horizontally. With an optional hanging bracket (WH-10), you can alsoattach the printer to a wall.Important Notes on Horizontal Installation•The printer must be installed horizontally on a flat surface (not tilted).•Do not place the printer in dusty locations.•Do not knock or strike the printer. This may cause defective print.•Do not catch cables or place foreign matter under the printer.Important Notes on Wall HangingYou need to perform the following tasks to install the printer on a wall. For more details, see theinstallation manual for the optional wall hanging bracket (WH-10).•Installing the roll-paper stoppers•Changing the location of the roll paper near-end sensor•Attaching the connector cover•Attaching the wall hanging bracket (WH-10)For the other notes, see the installation manual for the optional wall hanging bracket (WH-10).Be sure to attach the connector cover when you install the printer on a wall using thewall hanging bracket.36
Chapter 2 SetupChanging the Paper WidthThe printer is initially set to print on 80 mm width paper and you can change the printer to printon 58 mm width paper by installing the roll paper guide and changing the paper width settingwith the customized value.Follow the steps below to install the roll paper guide.Once you change the paper width from 80 mm to 58 mm, you cannot change it back to 80mm.To set the customized value, see "Setting the Memory Switches (Customized Value)" onpage 48.12Open the roll paper cover.Install the roll paper guide so that the projection on its bottom is alignedwith the hole at the right of the roll paper holder.2Hole3Tighten the enclosed screw to fix the roll paper guide.37
4Paste the enclosed 2 small strips along the roll paper guide on thebottom of the roll paper holder.Make sure the space between the top edge of the strip and the line of the groove in the rollpaper guide is 0.5 mm or less.38
Chapter 2 SetupSetting the DIP SwitchesOn this printer, you can make various settings with DIP switches.The DIP switches are already set for the current interfaces. Change the setting if necessary.Functions of the DIP switches differ depending on the interface.For models with the buzzer function, see also "Setting the Internal Buzzer (for Model withan Internal Buzzer)" on page 65.Setting ProcedureFollow the steps below to change the DIP switch settings.CAUTIONBefore you remove the DIP switch cover, turn the printer off.Otherwise, a short-circuit may cause the printer to malfunction.DIP switch settings are enabled only when the power is turned on or the printer is reset viathe interface. If the settings are changed after that, the functions will not change.212Make sure the power supply for the printer is turned off.Unscrew the screw to remove the DIP switch cover from the base of theprinter.DIP switch bank 2DIP switch bank 134Set the DIP switches, using the tip of a tool, such as a small screwdriver.Replace the DIP switch cover, and screw it in place.39
For Serial InterfaceWhen using the built-in USB interface, it is not necessary to change the DIP switch setting buttheir function changes. For the details, see "For Built-in USB Interface" on page 43.DIP Switch Bank 1SW Function ON OFFInitialsetting1-1 Data reception error Ignored Prints “?” OFF1-2 Receive buffer capacity 45 bytes 4 KB OFF1-3 Handshaking XON/XOFF DTR/DSR OFF1-4 Word length 7 bits 8 bits OFF1-5 Parity check Yes No OFF1-6 Parity selection Even Odd OFF1-7See the “ Transmission Speed (DIP Switches ONTransmission speed selections1-8 1-7/1-8)” table below.OFFFor DIP switch 1-2 (Receive buffer capacity), see also DIP switch 2-5 (Sets the releasecondition of the receive buffer BUSY state.)Transmission Speed (DIP Switches 1-7/1-8)38400Transmission speed (bps: bits per second) SW 1-7 SW 1-82400, 4800, 9600, 19200, 38400, 57600, 115200 *4800 OFF ON9600 (default) ON OFF19200 OFF OFFbps: bits per second* When DIP switches 1-7 and 1-8 are set to ON, the value (initially 38400) can be set to any of thevalues listed in the lower portion of the row using a command, memory switch setting mode, or<strong>TM</strong>-<strong>T88V</strong> Utility. (See "Setting the Memory Switches (Customized Value)" on page 48.)Depending on print conditions, such as print duty, print head temperature, and datatransmission speed, print speed is automatically adjusted, which can cause white lines dueto intermittent print (the motor sometimes stops). To avoid this, set the transmission speedhigher or keep the print speed constant by setting it lower.ONON40
Chapter 2 SetupDIP Switch Bank 2SW Function ON OFF2-1 Handshaking (BUSY condition) Receive buffer full2-22-3 2-42-5Reserved (Do not changesetting)Selects print densitySets the release condition of thereceive buffer BUSY state. (Thisfunction is effective when DIPSwitch 1-2 is set to off.)Fixed to OFF Offline Receive buffer fullSee "Selecting the Print Density (DIP Switches2-3/2-4)" on page 45.Releases the BUSYstate when theremaining capacityof the receive bufferreaches 138 bytes.Releases the BUSYstate when theremaining capacityof the receive bufferreaches 256 bytes.Initialsetting2-6Reserved (Do not changesetting)Fixed to OFFOFF2-7 I/F pin 6 reset signal Enabled Disabled OFF2-8 IF pin 25 reset signal Enabled Disabled OFFOFFOFFOFFOFF2 For DIP Switch 2-1 (BUSY condition), see also "Selecting the BUSY Status" on page 46. When you use the APD, change the setting of DIP switch 2-1 (BUSY condition) to ON. Do not change the setting of DIP switches 2-2 and 2-6. Otherwise, the printer may notoperate normally.41
For Parallel InterfaceWhen using the built-in USB interface, it is not necessary to change the DIP switch setting buttheir function changes. For the details, see "For Built-in USB Interface" on page 43.DIP Switch Bank 1SW Function ON OFFInitialsetting1-1 Auto line feed Always enabled Always disabled OFF1-2 Receive buffer capacity 45 bytes 4 KB OFF1-3Selects paper sensors to outputpaper-end signals (defaultvalue of a command)DisabledRoll paper end sensorenabled, roll papernear-end sensorenabled1-4 Error signal output Disabled Enabled OFF1-5 Undefined — OFF1-8OFFDIP Switch Bank 2SW Function ON OFF2-1 Handshaking (BUSY condition) Receive buffer full2-22-3 2-42-52-6 2-72-8Reserved (Do not changesetting)Selects print densitySets the release condition of thereceive buffer BUSY state. (Thisfunction is effective when DIPSwitch 1-2 is set to off.)Reserved (Do not changesettings)IF pin 31 reset signal (Do notchange setting)Fixed to OFF Offline Receive buffer fullSee "Selecting the Print Density (DIP Switches2-3/2-4)" on page 45.Releases the BUSYstate when theremaining capacityof the receive bufferreaches 138 bytes.Fixed to OFFFixed to ONReleases the BUSYstate when theremaining capacityof the receive bufferreaches 256 bytes.InitialsettingOFFOFFOFFOFFOFFON For DIP Switch 2-1 (BUSY condition), see also "Selecting the BUSY Status" on page 46. Do not change the setting of DIP switches 2-2, 2-6, and 2-7. Otherwise, the printer maynot operate normally.42
Chapter 2 SetupFor Built-in USB InterfaceWhen using the serial or parallel interface, it is not necessary to change the DIP switch settingbut their function changes. For the details, see "For Serial Interface" on page 40 and "For ParallelInterface" on page 42.DIP Switch Bank 1SW Function ON OFFFactorysetting1-1 Auto line feed Always enabled Always disabled OFF1-2 Receive buffer capacity 45 bytes 4 KB OFF1-3 1-6Undefined — OFF1-7 Undefined — *1-8Setting of USB power-savingfunction* Varies depending on the interfaces.Disabled Enabled OFF2DIP Switch Bank 2SW Function ON OFF2-1 Handshaking (BUSY condition) Receive buffer full2-22-3 2-42-5Reserved (Do not changesetting)Selects print densitySets the release condition of thereceive buffer BUSY state. (Thisfunction is effective when DIPSwitch 1-2 is set to off.)* Varies depending on the interfaces.Fixed to OFF Offline Receive buffer fullSee "Selecting the Print Density (DIP Switches2-3/2-4)" on page 45.Releases the BUSYstate when theremaining capacityof the receive bufferreaches 138 bytes.Releases the BUSYstate when theremaining capacityof the receive bufferreaches 256 bytes.Factorysetting2-6 Reserved (Do not changeFixed to OFFOFF2-7 settings)2-8 Reserved — * For DIP Switch 2-1 (BUSY condition), see also "Selecting the BUSY Status" on page 46. Do not change the setting of DIP switches 2-2, 2-6, and 2-7. Otherwise, the printer maynot operate normally.OFFOFFOFFOFF43
For Ethernet/Wireless LAN/USB InterfaceDIP Switch Bank 1SW Function ON OFFFactorysetting1-1 Auto line feed Always enabled Always disabled OFF1-2 Receive buffer capacity 45 bytes 4 KB OFF1-3 1-8Undefined — OFFDIP Switch Bank 2SW Function ON OFF2-1 Handshaking (BUSY condition) Receive buffer full2-22-3 2-42-52-6 2-72-8Reserved (Do not changesetting)Selects print densitySets the release condition of thereceive buffer BUSY state. (Thisfunction is effective when DIPSwitch 1-2 is set to off.)Reserved (Do not changesettings)Reserved (Do not changesetting)Fixed to OFF Offline Receive buffer fullSee "Selecting the Print Density (DIP Switches2-3/2-4)" on page 45.Releases the BUSYstate when theremaining capacityof the receive bufferreaches 138 bytes.Fixed to OFFFixed to ONReleases the BUSYstate when theremaining capacityof the receive bufferreaches 256 bytes.FactorysettingOFFOFFOFFOFFOFFON For DIP Switch 2-1 (BUSY condition), see also "Selecting the BUSY Status" on page 46. Do not change the setting of DIP switches 2-2, 2-6, and 2-7. Otherwise, the printer maynot operate normally.44
Selecting the BUSY StatusWith DIP switch 2-1, you can select conditions for invoking a BUSY state as either of thefollowing:•When the receive buffer is full•When the receive buffer is full or the printer is offlineIn either case above, the printer enters the BUSY state after power is turned on (includingresetting with the interface) and when a self-test is being run.Printer BUSY Condition and Status of DIP Switch 2-1OfflinePrinter statusDuring the period after power is turned on(including resetting with the interface) to when theprinter is ready to receive data.ONBUSYDIP SW 2-1During the self-test. BUSY BUSYWhen the cover is open. — BUSYDuring paper feed with the Feed button. — BUSYWhen the printer stops printing due to a paper-end(when printer has run out of roll paper).— BUSYWhen waiting for the paper Feed button to bepressed before macro execution.— BUSYWhen an error has occurred. — BUSYWhen the receive buffer becomes full. BUSY BUSYOFFBUSY46
Setting the Memory Switches(Customized Value)With the “memory switch (customized value),” a software switch for this printer, you can set thefunctions shown in the table below.The memory switches (customized value) are already set. Change the setting if necessary.For an outline of the functions, see the following section.Use the methods in this table to set the memory switches (customized value).Memory SwitchSetting Mode<strong>TM</strong>-<strong>T88V</strong> UtilityESC/POSCommandsPaper width ✔ ✔ ✔Print density ✔ ✔ ✔Multi-tone print density ✔ ✔ ✔Print speed ✔ ✔ ✔Font Code page International character set Font A/B replacement✔ ✔ ✔Optional Buzzer ✔ ✔ ✔USB class ✔ ✔ ✔Selection of interface mode ✔ ✔Number of head energizing parts ✔ ✔Power supply unit capacity ✔ ✔ ✔Automatic paper cut ✔ ✔ ✔Paper reduction Upper space reduction Lower space reduction Line space reduction rate Line feed reduction rate Barcode height reduction rateTransmission speedfor serial interface✔ ✔ ✔✔ ✔ ✔Printer model* 1 ✔ ✔*1: Setting printer model is also available with the <strong>TM</strong>-<strong>T88V</strong> Printer Model Setting Utility.48
Chapter 2 SetupTo directly configure the printer in the memory switch setting mode, see "Memory SwitchSetting Mode" on page 88.For detailed information about the <strong>TM</strong>-<strong>T88V</strong> Utility, see the <strong>TM</strong>-<strong>T88V</strong> Utility User’sManual.For detailed information about ESC/POS commands, see the ESC/POS ApplicationProgramming <strong>Guide</strong>.FunctionsSetting the paper width•80 mm (initial setting)•58 mmBe sure to install the roll paper guide when you select the 58 mm paper width. (See"Changing the Paper Width" on page 37.)Once you change the paper width from 80 mm to 58 mm, you cannot change it back to80 mm.2Setting the print densitySelectable from levels 1 to 13 (70% 130%)The print density can be set with DIP switches (2-3/2-4) or the customized value. (See"Selecting the Print Density (DIP Switches 2-3/2-4)" on page 45.) The initial setting of thecustomized value is “Depends on the DIP switch settings.” If the customized value ischanged, the value set with the customized value is enabled.Setting the multi-tone print densitySelectable from levels 1 to 13 (70% 130%)First change the print density, and then configure the Multi-tone print density.If you set the density too high, the contrast becomes lower. Select the density levelchecking the overall tone balance of your image.49
Setting the print speedSelectable from levels 1 to 13 (Slow Fast) (initial setting: level 13)Depending on print conditions, such as print duty, print head temperature, and datatransmission speed, print speed is automatically adjusted, which may cause white lines dueto intermittent print (the motor sometimes stops). To avoid this, keep the print speedconstant by setting it lower, or set the transmission speed higher for the serial interface.(See "Transmission Speed (DIP Switches 1-7/1-8)" on page 40.)Setting font•Code page: Selectable from 43 pages including user defined page•International character set: Selectable from 18 sets•Font A/B replacementOptional BuzzerWhen to sound the buzzer is selectable from the following occasions.•When an error occurs•When automatic paper cut activates•When specified pulse 1 (2 pin) occurs•When specified pulse 2 (5 pin) occursUSB Class•Printer Class•Vendor Class50
Chapter 2 SetupSelecting interface modeSelectable from: automatic selection, fixed to UB interface, or fixed to built-in USB. Those 3modes are described in both tables below.The <strong>TM</strong>-<strong>T88V</strong> has dual interfaces: a built-in USB interface and another interface selectedby the customer. (The selectable interface is referred to as the “UB” interface.) The tablebelow describes the modes you can set for the printer to control the dual interfaces.For models with serial/parallel UBInterface mode UB Built-in USBAutomatic selection (initial setting) Available AvailableFixed to UB Available Not availableFixed to built-in USB Not available AvailableFor models with other UBInterface mode UB Built-in USB2Automatic selection (initial setting) Available Not availableFixed to UB Available Not availableFixed to built-in USB Not available AvailableAutomatic selection:The interface of either the UB or built-in USB to which data is transmitted first is selected.Once the interface is selected, the selection is enabled until the power is turned off or theprinter is reset.Setting the number of head energizing parts•One-part energizing (initial setting)•Two-part energizing•Four-part energizingUsually, the number of head energizing parts does not need to be changed.The maximum print speed (300 mm/s) can be performed only when one-part energizingis selected.51
Setting the power supply unit capacitySelectable from levels 1 to 3 (Low High) (initial setting: level 3)Setting the automatic paper cut•Not use this function (initial setting)•Cut paper when the cover is closed•Print logo when paper is cutPrinting logo when paper is cut is not available with memory switch setting mode.Setting the paper reduction•Extra upper space reduction: enabled or disabled (initial setting)•Extra lower space reduction: enabled or disabled (initial setting)•Line space reduction rate: not reduced (initial setting), 25%, 50%, or 75%•Line feed reduction rate: not reduced (initial setting), 25%, 50%, or 75%•Barcode height reduction rate: not reduced (initial setting), 25%, 50%, or 75%Setting the transmission speed for serial interfaceWhen DIP switches 1-7 and 1-8 are set to ON, the value (initially 38400) can be set to 2400, 4800,9600, 19200, 38400, 57600, or 115200. (See "Transmission Speed (DIP Switches 1-7/1-8)" on page40.)Setting the printer modelWhen you use the <strong>TM</strong>-<strong>T88V</strong> with the APD Ver. 4.00 ~ 4.04, you need to change the printer modelname to “<strong>TM</strong>-T88IV.”52
Chapter 2 SetupAdjusting the Paper Roll Near-End SensorBelow are two situations where a roll paper NE sensor adjustment is required.•To adjust the detection position to suit the diameter of the roll paper core used.•To adjust the detection position of remaining amount of paper.Since roll paper cores vary slightly in shape, depending on paper roll design andmanufacturing tolerances, it is impossible to detect the remaining paper exactly.Use roll paper with a core inner diameter of 12 mm {0.47"} and outer diameter of 18 mm{0.71"} so that the NE sensor can detect the remaining paper as accurately as possible.Follow the steps below to adjust the roll paper near-end detector.1Open the roll paper cover, and remove the roll paper.2Loosen the adjustment screw fastening the sensor, and align the upperedge of the positioning plate with the adjustment position.Adjustment positionRemaining amount of paper(outer diameter: mm)2Upper Approx. 27 {1.06"}Lower (Initial setting) Approx. 23 {0.97"}34Tighten the adjustment screw.After adjustment, make sure that the detection lever operates smoothly.For wall-hangingDetection leverPositioningplateAdjustment screwFor horizontal installationAdjustment screwPositioningplateDetection lever53
Connecting the Printer to the Host ComputerBe sure to install the driver before connecting the printer to the host computer.The printer uses modular connectors specifically designed for the cash drawer. Do notconnect these connectors to an ordinary telephone line.For Serial InterfaceSerial interface connection diagramWhen this printer is connected to a host computer by the serial interface, two connection formsare possible:•Stand alone• Pass-through connectionStand aloneThis printer is connected to the host computer via the serial port. When a customer display(DM-D) is to be connected, connect it to the host computer via the serial port.DM-DSerial cableSerial cableModular cable<strong>TM</strong>-<strong>T88V</strong>Cash drawerPass-through connectionThis printer is connected to the host computer over the serial interface via a customer display(DM-D).DM-DModular cableSerial cableSerial cable<strong>TM</strong>-<strong>T88V</strong>Cash drawer54
Chapter 2 SetupConnecting the serial interface (RS-232) cableWARNINGBe sure to turn off the power supply for both the printer and host computer beforeconnecting the cables.12Insert the interface cable connector firmly into the interface connectoron the connector panel.When using connectors equipped with screws, tighten them to securethe connectors firmly.234When using interface cables equipped with a grounding line, attach theground line to the screw hole marked “FG” on the printer.Connect the other end of the interface cable to the host computer.55
For Parallel InterfaceParallel interface connection diagramThis printer is connected to the host computer via the parallel port. When a customer display(DM-D) is to be connected, connect it to the host computer via the serial port.DM-DSerial cableParallel cableModular cable<strong>TM</strong>-<strong>T88V</strong>Cash drawerConnecting the parallel interface cable1234Insert the interface cable connector firmly into the interface connectoron the connector panel.Press down the clips on either side of the connector to lock it in place.When using interface cables equipped with a ground line, attach theground line to the screw hole marked “FG” on the printer.Connect the other end of the interface cable to the host computer.56
Chapter 2 SetupFor USB InterfaceIf you want to communicate via the built-in USB interface when you use a model with aninterface other than the serial/parallel interface, you need to change the interface modewith the memory switch (customized value). To set the memory switch (customized value),see "Setting the Memory Switches (Customized Value)" on page 48.USB interface connection diagramWhen this printer is connected to the host computer by the USB interface, two connection formsare possible:•Stand alone•Y connection (only with the UB-U01III/U02III)Stand aloneThis printer is connected to the host computer via the USB port. When a customer display(DM-D) is to be connected, connect it to the host computer via the serial port.2DM-DSerial cableUSB cableModular cable<strong>TM</strong>-<strong>T88V</strong>Cash drawer57
Y connection (only with the UB-U01III/U02III)This printer is connected to the host computer via the USB port. When a customer display(DM-D) is to be connected, connect it to the printer via the modular cable.Make sure to pull out the power cable before connecting cables.When connecting a customer display to the printer, connect the modular jack from thecustomer display to the DM connector.Set the communication conditions of the customer display as follows: Baud rate: 19200 bps Bit length: 8-bit Parity: no parity Stop bit: 1DM-DModular cableUSB cableModular cable<strong>TM</strong>-<strong>T88V</strong>Cash drawerConnecting the built-in USB interface cable12Put the USB cable on the hook as shown in the figure, then connect itfirmly to the built-in USB interface connector.Connect the other connector of the cable to the host computer.Built-in USB interfaceconnectorUSB cableHook58
Chapter 2 SetupConnecting the USB interface cable12Attach the locking wire saddle at the location shown in the figure below.Put the USB cable through the locking wire saddle.Putting the USB cable through the locking wire saddle, as shown in the figure below,prevents the cable from coming unplugged.USB upstream connectorUB-boardLocking wire saddleUSB cable3Connect the USB cable from the host computer to the USB upstreamconnector.259
For Ethernet InterfaceConnect the printer to a network by a LAN cable via a hub.For the setting method of the IP address, see<strong>TM</strong>-<strong>T88V</strong> Software User's Manual.Ethernet interface connection diagramDM-DSerialcable10/100BASE-<strong>TM</strong>odular cable<strong>TM</strong>-<strong>T88V</strong>Cash drawer<strong>TM</strong>-<strong>T88V</strong>A customer display (DM-D series) cannot be connected to the printer when the printer isconnected to the host computer. To connect the customer display, connect the printer to thehost computer via the serial interface.60
Chapter 2 SetupConnecting the Ethernet interface cableCAUTIONWhen LAN cables are installed outdoors, make sure devices without proper surgeprotection are cushioned by being connected through devices that do have surgeprotection. Otherwise, the devices can be damaged by lightning.Never attempt to connect the customer display cable, drawer kick-out cable, orthe standard telephone line cable to the 10/100BASE-T LAN connector.Connect a 10/100BASE-T cable to the 10/100BASE-T LAN connector by pressing firmly until theconnector clicks into place.10/100BASE-T LANinterface connectorLED(Green)LED(Yellow)SwitchPress down the switch for awhile when the power is on toinitialize to the factory settings.2When using the Ethernet interface, the network configuration is required. Make the settingsusing <strong>TM</strong>-<strong>T88V</strong> Utility.61
For Wireless LAN InterfaceFor details on how to set up a wireless LAN interface, see the <strong>TM</strong>-<strong>T88V</strong> Software User's Manual.Wireless LAN interface connection diagramAccess pointModular cable<strong>TM</strong>-<strong>T88V</strong>Cash drawerWhen using the wireless LAN interface, the network configuration is required. Make thesettings using <strong>TM</strong>Net WinConfig.62
Chapter 2 SetupConnecting the Cash DrawerWhen using a cash drawer, connect the cash drawer.Use the cash drawer handled by <strong>EPSON</strong> or your dealer.If the optional external buzzer is used, you cannot use a cash drawer.Connecting the Drawer Kick-out CableWARNINGSpecifications of drawers differ depending on makers or models. When you use adrawer other than specified, make sure its specification meets the following conditions.Otherwise, devices may be damaged. The load, such as a drawer kick-out solenoid, must be connected between pins 4 and2 or pins 4 and 5 of the drawer kick-out connector. When the drawer open/close signal is used, a switch must be provided betweendrawer kick-out connector pins 3 and 6. The resistance of the load, such as a drawer kick-out solenoid, must be 24 or moreor the input current must be 1A or less. Be sure to use the 24V power output on drawer-kick out connector pin 4 for driving theequipment.Use a shield cable for the drawer connector cable.Two driver transistors cannot be energized simultaneously.Leave intervals longer than 4 times the drawer driving pulse when sending itcontinuously.Be sure to use the printer power supply (connector pin 4) for the drawer powersource.Do not insert a telephone line into the drawer kick-out connector.Doing so may damage the telephone line or printer.2Connect the connector of the drawer kick-out cable to the printer.Drawer kick-out connector63
Drawer Connection CircuitryF.G1Drawer kick-out connectorWith shielded2Drawer kick-out solenoid3Control device+24V 456Drawer open/close switchPrinter sideUser side [Drawer kick-out side]64
Chapter 2 SetupSetting the Internal Buzzer(for Model with an Internal Buzzer)When using the internal buzzer, configure the buzzer.Models with the buzzer function can beep the buzzer when the drawer is opened.The buzzer setting is performed by setting the DIP switches for the buzzer and specifyingconnector pin numbers to which a command outputs a pulse signal.DIPswitchSpecified connector pin ON OFF Initial setting1 Drawer kick out connector pin 2 Buzzer beeps.Buzzer does notbeep.ON2 Drawer kick out connector pin 5 Buzzer beeps.Buzzer does notbeep.Since the buzzer drive signal and the cash drawer drive signal are common in the printer,do not use the same connector pin numbers to output the signal for the buzzer and thecash drawer.OFF2For detailed information about ESC/POS commands, see the ESC/POS ApplicationProgramming <strong>Guide</strong>.65
Connecting the Optional External BuzzerWhen using the optional external buzzer (OT-BZ20), install the optional external buzzer.If your printer is not equipped with a buzzer, you can use the optional external buzzer (OT-BZ20) by connecting it to the drawer.The optional external buzzer and the drawer cannot be used together at the same time.If you configure the memory switch (customized value) setting to enable the optionalexternal buzzer, the drawer cannot be opened because the pulse is not sent to thedrawer kick connector pin.Make sure to use the accessory magic tape (hook and loop fastener) to attach theoptional external buzzer to the printer.Be careful not to spill water, oil, solvent, or any other liquid over the printer. Doing so mayresult in malfunction of the printer.UnpackingOpen the package and confirm that it contains all of the parts listed in the illustration. If anyparts are missing or damaged, please contact your dealer for assistance.Optional external buzzerAffixing tape(1 pair, 2 pieces)User’s Manual66
Chapter 2 SetupInstallation PositionThis product is recommended to be installed in the following positions.• When using the printer horizontally: either side• When using the printer vertically or on the wall:either side/top/bottom (only for wall-hanging installation) ** For the <strong>TM</strong>-<strong>T88V</strong>, the buzzer cannot be installed on the bottomHorizontalinstallationVertical/Wall-hanginginstallationDo not install the optional external buzzer at the roll paper exit.To prevent liquid from entering inside, it is recommended to install the optional externalbuzzer so that the volume adjustment knob is positioned sideways or downward. (Fordetails of the volume adjustment knob, see "Adjusting the Buzzer Volume" on page 69.)267
Installation Procedures123Turn off the printer.Connect and disconnect the optional external buzzer while the printer is turned off. If youconnect it while the printer is turned on, the buzzer does not function correctly.Clean and dry the printer case where the optional external buzzer willbe installed.With 2 pieces of the affixing tape combined, peel off the sticker on oneside, and paste it around the center of the attaching surface of theoptional external buzzer.Affixing tape4Connect the cable of the optional external buzzer to the drawer kickoutconnector on the printer.Be sure to connect to the drawer kick-out connector on the applicable printer.Do not connect both the optional external buzzer and the drawer by using a splitter orsimilar device.Drawer kick-outconnector68
Chapter 2 Setup5Peel off the sticker on the other side of the affixing tape, and attach andfix the optional external buzzer to the printer case.Printer case67Turn on the printer.Make settings for the optional external buzzer on the printer.To use this product, be sure to enable the optional external buzzer with the printer setting.For the details on the setting, see the <strong>Technical</strong> <strong>Reference</strong> <strong>Guide</strong> for each printer.When the optional external buzzer is enabled with the printer setting, the drawer cannotbe driven.2Adjusting the Buzzer VolumeTurn the volume adjustment knob to adjust the buzzer volume.HighVolume adjustment knobLowSetting the Optional External BuzzerWhen and how to beep can be set by the driver, <strong>TM</strong>-<strong>T88V</strong> Utility or the printer's customizedvalue. (See "Setting the Memory Switches (Customized Value)" on page 48.)69
Attaching the Connector CoverWhen using the connector cover, attach the connector cover.Follow the steps below to attach the connector cover to protect cables.12Turn over the printer.Position the two hooks on both sides of the connector cover so that theyhook the printer case.Hooks345Push the connector cover down to click onto the printer case.Pass each cable through the cable exits at the bottom of the connectorcover.Turn over the printer and make sure the cables are not pinched.70
Chapter 2 SetupThe serial, USB, or power cables can pass beneath the front of the printer so that theback of the printer looks uncluttered.To remove the connector cover, turn the printer over, and push the connector coverdown while pushing both sides of the connector cover inward to detach the hooks fromthe printer case.271
Arranging the CablesRoute the cables when using the connector cover.Pass the cables through cable exits in the connector cover. The connector cover has cable exits onthe back and both sides.You can also route the cables out the front by passing them through the notch in the printerbottom.If you want to pass the USB cable through the cable exit on the back, fit the cable under the hookon the printer to prevent the cable from coming off.HooksAfter the cable arrangement, turn over the printer, and make sure the cables are not pinched.72
Chapter 3 Application Development InformationApplication Development InformationThis chapter describes how to control the printer and gives information useful for printerapplication development.How to Control the PrinterUse a driver or ESC/POS commands to control the printer.Selecting a DriverChoose one of the drivers listed in "Drivers" on page 79, depending on the application operatingenvironment.For information about the driver operating environment, see the installation manual for eachdriver.When you newly develop an application•Use APD if you want to print True Type fonts or print many graphics.•OPOS ADK is recommended for system extensibility. An OPOS driver is provided for variousperipherals and it is a POS industry standard now. It enables POS system efficiency, reductionof development cost, and effective use of application assets.3You can use all functions, including ones not supported by OPOS ADK or APD, by usingESC/POS commands through your driver. Use the DIRECT I/O function of OPOS ADK, thecontrol A command of APD, or Status API to send ESC/POS commands from each driver.(See "ESC/POS command functions" on page 74.)73
ESC/POS CommandsESC/POS is the Epson original printer command system. With ESC/POS commands, you candirectly control all the <strong>TM</strong> printer functions, but detailed knowledge of printer specifications orcombination of commands is required, compared to using a driver.To use ESC/POS commands, you need to agree to a nondisclosure contract first and obtain the ESC/POS Application Programming <strong>Guide</strong>. Ask your dealer for details.The ESC/POS command functions are listed below. See the ESC/POS Application Programming<strong>Guide</strong> for more details.ESC/POS command functionsCommands for printingPrint and line feedPrint and feed n linesPrint data in page modePrint and return to standard mode (in page mode)Commands for line spacingSet line spacingSelect default line spacingCommands for print characterSelect character code tableSelect an international character setSet right-side character spacingSet all character fonts and stylesTurn underline mode on/offTurn emphasized mode on/offSelect character fontSelect character sizeTurn smoothing mode on/offTurn upside-down print mode on/offTurn white/black reverse print mode on/offSet character fonts and styles74
Chapter 3 Application Development InformationSelect/cancel user-defined character setDefine user-defined charactersCancel print data in page modeCommands for panel buttonsEnable/disable panel buttonsCommands for paper sensorsSelect paper sensor(s) to stop printingSelect paper sensor(s) to output paper-end signalsCommands for print positionsHorizontal tabSet horizontal tab positionsSet left marginSet print area widthSelect justificationSet absolute print positionSet relative print positionSet print area in page mode3Select print direction in page modeSet absolute vertical print position in page modeSet relative vertical print position in page modeCommands for bit imageTransmit the NV graphic memory capacityPrint the graphics data in the print bufferTransmit the remaining capacity of the NV graphics memoryTransmit the key code list for defined NV graphicsDelete the specified NV graphics dataDefine the NV graphics dataPrint the specified NV graphics dataStore the graphics data in the print bufferSelect bit-image mode75
Define downloaded bit imagePrint downloaded bit imageRegister the Windows BMP in the NV graphics memoryDefine Windows BMP NV graphicsCommands for statusEnable/disable Automatic Status Back (ASB)Transmit statusTransmit real-time statusCommands for barcodePrint barcodeSet barcode heightSet barcode widthSelect print position of HRI charactersSelect font for HRI charactersCommands for two-dimensional codesPDF417: Set the number of columns in the data regionPDF417: Set the number of rowsPDF417: Set the width of modulePDF417: Set the row heightPDF417: Set the error correction levelPDF417: Select the optionsPDF417: Store the data in the symbol storage areaPDF417: Print the symbol data in the symbol storage areaPDF417: Transmit the size information of the symbol data in the symbol storage areaQR Code: Select the modelQR Code: Set the size of moduleQR Code: Select the error correction levelQR Code: Store the data in the symbol storage areaQR Code: Print the symbol data in the symbol storage data areaQR Code: Transmit the size information of the symbol data in the symbol storage area76
Chapter 3 Application Development InformationMaxiCode: Select the modeMaxiCode: Store the data in the symbol storage areaMaxiCode: Print the symbol data in the symbol storage areaMaxiCode: Transmit the size information of the symbol data in the symbol storage areaTwo-dimensional GS1 DataBar: Set the width of moduleTwo-dimensional GS1 DataBar: Set the maximum width of GS1 DataBar Expanded StackedTwo-dimensional GS1 DataBar: Store the data in the symbol storage areaTwo-dimensional GS1 DataBar: Print the symbol data in the symbol storage areaTwo-dimensional GS1 DataBar: Transmit the size information of the symbol data in the symbolstorage areaComposite Symbology: Set the width of moduleComposite Symbology: Set the maximum width of GS1 DataBar Expanded StackedComposite Symbology: Select font for HRI charactersComposite Symbology: Store the data in the symbol storage areaComposite Symbology: Print the symbol data in the symbol storage areaComposite Symbology: Transmit the size information of the symbol data in the symbol storageareaCommands for mechanical control3Select cut mode and cut paperCommands for customizationSet the customized setting valuesTransmit the customized setting valuesSet the configuration item for the serial interfaceTransmit the configuration item for the serial interfaceDelete the specified record of NV user memoryStore the data in the specified record of NV user memoryTransmit the data in the specified record of NV user memoryTransmit capacity of the NV user memory currently being usedTransmit the remaining capacity of the NV user memoryTransmit the key code listDelete all data in the NV user memory77
Commands for sub-functionsInitialize printerTransmit printer IDSet horizontal and vertical motion unitsSelect peripheral deviceGenerate pulse to drawerGenerate pulse to drawer in real-timeExecute power-off sequenceClear buffer(s)Enable/disable real-time commandSend real-time request to printerSelect page modeSelect standard modeSet the process ID responseExecute test printSelect the print speedSelect the number of parts for the thermal head energizingInitialize maintenance counterTransmit maintenance counter78
Chapter 3 Application Development InformationSoftware and ManualsThe following software and manuals are provided for application development.DriversSoftware<strong>EPSON</strong> Advanced Printer Driver (APD):In addition to ordinary Windows driver functions, thisdriver has controls specific to POS, such as controls forpaper cut, a cash drawer, or customer display. TheStatus API (Epson original DLL) that monitors printerstatus and sends ESC/POS commands is alsoattached to this driver.OPOS ADK:This OCX driver can control POS peripherals using OLEtechnology* 1 . Because controlling POS peripheralswith original commands is not required on theapplication side, efficient system development ispossible.OPOS ADK for .NET:OPOS ADK for .NET allows you to developapplications that are compatible with Microsoft POSfor .NET.When developing applications, use a separatedevelopment environment such as Microsoft VisualStudio .NET.JavaPOS ADK (Windows):JavaPOS ADK (Linux):JavaPOS is the standard specification which definesan architecture and device interface (API) to accessvarious POS devices from a Java based system. UsingJavaPOS standard API allows control with Java-basedapplications of functions inherent to each device. Aflexible design with Java language and JavaPOSenables many different types of computer systems,such as stand alone or network configuration, to usea same application. You can use JavaPOS to buildapplications and drivers independently of platforms.This allows flexible configurations using thin clients tomeet the system requirements.Manual APD Install Manual APD <strong>TM</strong>/BA/EU Printer Manual APD Printer Specification Devmode API/PRINTERINFO Manual Status API Manual Sample Program <strong>Guide</strong> OPOS Installation Manual User’s Manual Application Development <strong>Guide</strong> UnifiedPOS Retail Peripheral Architecture* 2 Sample Program <strong>Guide</strong> OPOS ADK for .NET Installation <strong>Guide</strong> UnifiedPOS Retail Peripheral Architecture* 2 User's <strong>Reference</strong> (SetupPOS) Application Development <strong>Guide</strong>(POSPrinter <strong>TM</strong>-<strong>T88V</strong>)JavaPOS ADK Installation <strong>Guide</strong>379
Software<strong>TM</strong> Virtual Port Driver:This driver is a Serial-USB and Parallel-USB conversiondriver to make an <strong>EPSON</strong> <strong>TM</strong>/BA/EU printer and DM-Dcustomer display connected via USB accessible froma POS application through virtual COM ports and avirtual LPT port.Without making changes in the POS application thatcontrols devices connected through serial or parallelinterfaces, devices connected via USB can bedirectly controlled with ESC/POS commands.<strong>TM</strong>-<strong>T88V</strong> Mac Printer Driver:Mac printer driver allows you to control the <strong>TM</strong>-<strong>T88V</strong>using Common UNIX Printing System (CUPS) on MacOS X.This is a full raster printer driver. It is able to printimages, text, and vector graphics etc., that anapplication displays. With this driver many printercontrols are possible, such as paper cut timingcontrol, cash drawer control, printing speed control,blank line skip, and upside-down printing. It alsoprovides API and dialogues for print setting, sampleapplications, and logo setting utility.Epson <strong>TM</strong>/BA Series Thermal Printer Driver:The Epson <strong>TM</strong>/BA Series Thermal Printer Driver allowsyou to control the <strong>TM</strong>-<strong>T88V</strong> using Common UNIXPrinting System (CUPS) on GNU/Linux.This is a full raster printer driver. It is able to printimages, text, and vector graphics etc., that anapplication displays. With this driver many printercontrol are possible, such as paper cut timing control,cash drawer control, printing speed control, blankline skip, and upside-down printing.Manual<strong>TM</strong>COMUSB Serial Emulation Driver User’sManual<strong>TM</strong>-<strong>T88V</strong> Mac Printer Driver User's Manual Epson <strong>TM</strong>/BA Series Thermal Printer DriverInstallation Manual Epson <strong>TM</strong>/BA Series Thermal Printer DriverManual <strong>TM</strong>-<strong>T88V</strong> Thermal Printer Driver Manual*1: OLE technology developed by Microsoft divides software into part blocks. The OPOS driveris presupposed to be used with a development environment such as Visual Basic, unlikeordinary Windows drivers. It is not a driver to be used for printing from commercialapplications.*2: This guide describes general information on how to control printers using the OPOS ADK (inthe chapter “POS Printer” and “Appendix-A”). It does not describe Epson’s specific functions.80
Chapter 3 Application Development InformationUtilitiesSoftware<strong>TM</strong>-<strong>T88V</strong> Utility:Use for the following functions: Storing logos Font settings Communication I/F settings Printing control settings Paper reduction settings Automatic paper cut settings Operation check Setting backup/restore<strong>TM</strong>-<strong>T88V</strong> Printer Model Setting Utility:Use to change the printer model name when you usethe <strong>TM</strong>-<strong>T88V</strong> with the APD Ver. 4.00 ~ 4.04.<strong>TM</strong>Net WinConfig:Use for IP address or wireless LAN setting.EpsonNet Simple Viewer:Use to monitor the network and the printer status.<strong>TM</strong> / BA /EU Printer Remote Configuration Tool:This is a package of EpsonNet Simple Viewer and <strong>TM</strong>-<strong>T88V</strong> Utility.First install this software in the computer with theadministrator's authority, and set up the firewall. Next,install the printer driver in each client computer andset up the firewall. Then you can check the status ofand configure the printer connected to a clientcomputer on the network from the computer with theadministrator's authority.BMP File Converter:Use to convert the BMP image files used in Windowsinto a data format which can be interpreted by<strong>EPSON</strong> POS printers (<strong>TM</strong> series). Conversion to multitoneor black and white image command is possible.After execution a binary file with the command stringis created.Manual <strong>TM</strong>-<strong>T88V</strong> Software User’s Manual <strong>TM</strong>-<strong>T88V</strong> Utility User’s Manual <strong>TM</strong>-<strong>T88V</strong> Software User’s Manual <strong>TM</strong>Net WinConfig User’s <strong>Guide</strong> UB-E02 <strong>Technical</strong> <strong>Reference</strong> <strong>Guide</strong> UB-R02/R03 <strong>Technical</strong> <strong>Reference</strong> <strong>Guide</strong>EpsonNet Simple Viewer User’s Manual<strong>TM</strong> / BA /EU Printer Remote ConfigurationTool User’s ManualA package of EpsonNet Simple Viewer and<strong>TM</strong>-<strong>T88V</strong> Utility.Readme.txt File381
How to Get Drivers, Manuals, and the UtilityDrivers, manuals, and the <strong>TM</strong>-<strong>T88V</strong> Utility can be installed by the <strong>TM</strong>-<strong>T88V</strong> installer in theincluded the <strong>TM</strong>-<strong>T88V</strong> Software & Documents Disc.You can also obtain them from one of the following URLs.For customers in North America, go to the following web site:http://www.epsonexpert.com/ and follow the on-screen instructions.For customers in other countries, go to the following web site:http://www.epson-pos.com/82
Chapter 3 Application Development InformationSetting/Checking ModesBesides the ordinary print mode, the printer has the following modes to set or check settings ofthe printer.•Self-test Mode• Hexadecimal Dumping Mode•NV Graphics Print Mode•Receipt Enhancement Information Print Mode•Memory Switch Setting ModeSelf-test ModeYou can confirm the following information by running the self-test mode. You can also set theinterface mode.•Control circuit functions•Printer mechanism•Print quality•ROM version•Maintenance Information•DIP switch settings3Follow the steps below to run this mode.12Close the roll paper cover.While pressing the Feed button, turn on the printer. (Keep pressing theFeed button until the printer starts printing.)The printer starts printing current status of the printer.With the LAN interface, before printing starts, it takes 6 seconds if the IP address is fixedand 13 seconds if the IP address is obtained with the automatic setting. (It may take longerdepending on the response time from the host.)When the printer finishes printing the printer status, the following message is printed andthe Paper LED flashes. (The printer is now in the self-test wait mode.):“Select Modes by pressing Feed button.Continue SELF-TEST: Less than 1 secondMode Selection : 1 second or more”83
3Press the Feed button while the printer is in the self-test wait mode.If you select the SELF-TEST, the printer prints a rolling pattern using only the built-incharacter set.If you select the mode selection, follow the instructions printed by the printer.After printing the following message, the printer is initialized and returned to the normal mode.“*** completed***”84
Chapter 3 Application Development InformationHexadecimal Dumping ModeIn the hexadecimal dumping mode, the printer prints the data transmitted from a host computerin hexadecimal numbers and their corresponding characters.Follow the steps below to run this mode.If there is no character corresponding to print data, “.” is printed.If print data is less than one line, press the Feed button to print the line.Applications that confirm printer status may not work correctly during the hexadecimaldumping mode. The printer returns only the status for “Transmit real-time status.”123Open the roll paper cover.While pressing the Feed button, turn on the printer.Close the roll paper cover.The printer starts printing data received from then on in hexadecimal numbers and theircorresponding characters.Printing example:3Hexadecimal DumpTo terminate hexadecimal dump,press FEED button three times.1B 21 00 1B 26 02 40 40 1B 69 . ! . . & . @ @ . i1B 25 01 1B 63 34 00 1B 30 31 . % . . c 4 . . 0 141 42 43 44 45 46 47 48 49 4A A B C D E F G H I J*** completed ***Turn off the printer or press the Feed button three times to return to the normal mode.85
NV Graphics Print ModeYou can confirm the following information by running NV graphics print mode:•Capacity of the NV graphics•Used amount of the NV graphics•Unused capacity of the NV graphics•Number of NV graphics that are registered• Key code, number of dots in X direction, number of dots in Y direction, number of colors to bedefined.•NV graphics dataFor detailed information about NV graphics, see "NV Graphics Memory" on page 22.Follow the steps below to run this mode.12345Close the roll paper cover.While pressing the Feed button, turn on the printer. (Keep pressing theFeed button until the printer starts printing.)The printer starts printing current status of the printer.After the printing has been completed, press the Feed button for morethan one second.The printer starts printing instructions.After the printing has been completed, press the Feed button.Then press the Feed button for more than one second.Turn the power off and on to return to the normal mode.86
Chapter 3 Application Development InformationReceipt Enhancement Information Print ModeYou can confirm the following information by running the R/E information mode:•Automatic top logo setting•Automatic bottom logo setting•Extended settings for automatic top/bottom logoFollow the steps below to run this mode.12345Close the roll paper cover.While pressing the Feed button, turn the power on. (Keep pressing theFeed button until the printer starts printing.)The printer prints current status of the printer.After the printing has been completed, press the Feed button for morethan one second.The printer starts printing instructions.After the printing has been completed, press the Feed button twice.Then press the Feed button for more than one second.3Turn the power off and on to return to the normal mode.87
Memory Switch Setting ModeYou can configure the memory switches (customized values) of the printer.•Print density•Communication conditions using a serial interface•Auto reduction of the amount of paper to use•Autocutting of paper while the cover is closed•Paper width•Default value of character code page/international character set•Auto replacement of font•Selection of an interface•Selection of USB class•Power supply capacityFor detailed information about memory switches (customized value), see "Setting the MemorySwitches (Customized Value)" on page 48.Follow the steps below to run this mode.12345Close the roll paper cover.Turn on the printer while pressing the Feed button.The printer prints current status of the printer.After the printing has been completed, press the Feed button for morethan one second.The printer starts printing instructions.After the printing has been completed, press the Feed button threetimes.Then press the Feed button for more than one second.The printer starts printing instructions.After one setting has been completed, the printer stores the setting and then starts initializing.After that, the printer returns to the normal mode.88
Chapter 4 HandlingHandlingThis chapter describes basic handling of the printer.Installing and Replacing Roll PaperWARNINGDo not open the roll paper cover during printing.The printer may be damaged.Do not touch the manual cutter with your hands when installing or replacing theroll paper.Otherwise, you may be injured because the manual cutter blade is sharp.Use roll paper that meets the printer specification. For details about paper specification,see "Paper Specifications" on page 30.Paper must not be pasted to the roll paper spool.1Press the cover open lever to open the roll paper cover.4When the roll paper cover cannot be opened, see "Removing Jammed Paper" on page 91.2Remove the used roll paper core, if any.89
3Install the roll paper in the correct direction.4Pull out some roll paper, and close the roll paper cover.5Tear off the roll paper with the manual cutter.90
Chapter 4 HandlingRemoving Jammed PaperWhen a paper jam occurs, never pull out the paper forcibly. Open the roll paper cover andremove the jammed paper.When the roll paper cover cannot be opened, follow the steps below to remove the jammedpaper.CAUTIONDo not touch the thermal head (See"Cleaning the Thermal Head" on page 93.) becauseit can be very hot after printing.12Turn off the printer.Slide the cutter cover toward the front to open it.3Turn the knob until you see a triangle in the opening.This returns the cutter blade to the normal position. There is a label near the cutter to assistyou.491
45Close the cutter cover.Open the roll paper cover and remove the jammed paper.92
Chapter 4 HandlingCleaning the Thermal HeadEpson recommends cleaning the thermal head periodically (generally every 3 months) tomaintain receipt print quality.CAUTIONAfter printing, the thermal head can be very hot. Do not touch it and let it cool beforeyou clean it. Do not damage the thermal head by touching it with your fingers or anyhard object.Turn off the printer, open the roll paper cover, and clean the thermal elements of the thermalhead with a cotton swab moistened with an alcohol solvent (ethanol or IPA).Thermal headDepending on the roll paper used, paper dust may stick to the platen roller and roll paper endsensor. To remove the paper dust, clean the platen roller and roll paper end sensor with a cottonswab moistened with water. Turn on the printer power only after the water has completelydried.493
Preparing for TransportFollow the steps below to transport the printer.1234Turn off the printer.Remove the power supply connector.Remove the roll paper.Pack the printer upright.94
Chapter 5 Replacement of the <strong>TM</strong>-T88IVReplacement of the <strong>TM</strong>-T88IVThe <strong>TM</strong>-<strong>T88V</strong> is designed so that it can smoothly replace the <strong>TM</strong>-T88IV. This chapter describesprecautions for the replacement.CompatibilityPrintingThe printing and character specifications are the same as those of the <strong>TM</strong>-T88IV. Without specialconfigurations, the <strong>TM</strong>-<strong>T88V</strong> prints the same results as the <strong>TM</strong>-T88IV prints.Print DensityThe print density of the <strong>TM</strong>-<strong>T88V</strong> can be set with DIP switches (2-3/2-4) as can the <strong>TM</strong>-T88IV.Set the density the same as for the <strong>TM</strong>-T88IV to print in the same print density.The print density can be set also with a customized value. The initial setting of thecustomized value is “Depends on the DIP switch settings.” If the customized value ischanged, the value set with the customized value is enabled. (See "Setting the MemorySwitches (Customized Value)" on page 48.)Two-Color PrintingYou cannot use the paper for two-color printing (P320RB/P320BB) with the <strong>TM</strong>-<strong>T88V</strong>, which youcan use with the <strong>TM</strong>-T88IV.Number of Head Energizing Parts5For the <strong>TM</strong>-<strong>T88V</strong>, the initial setting of the number of head energizing parts is “One-partenergizing.” You can change the setting with the customized value (See "Setting the MemorySwitches (Customized Value)" on page 48.); however it does not usually need to be changed.Number of head energizing part<strong>TM</strong>-<strong>T88V</strong> One-part energizing Two-part energizing Four-part energizing<strong>TM</strong>-T88IV One-part energizing Two-part energizing Four-part energizing Auto energizing95
Printable Area (for 80 mm Width Paper)The printable area (left/right margins, print start position from the autocutting position, printstart position from the manual cutting position) of the <strong>TM</strong>-<strong>T88V</strong> is the same as that of the<strong>TM</strong>-T88IV.Cutting MethodThe <strong>TM</strong>-<strong>T88V</strong> uses the partial cutting method (cutting with one point in left edge left uncut) asdoes the <strong>TM</strong>-T88IV.Manual Paper FeedManual paper feed is not possible with the <strong>TM</strong>-<strong>T88V</strong> while it is possible with the <strong>TM</strong>-T88IV afterprinting pauses.Receive BufferYou can set the receive buffer of the <strong>TM</strong>-<strong>T88V</strong> to 4KB or 45 bytes with DIP switch 1-2 as with the<strong>TM</strong>-T88IV. The buffer full condition and buffer full release condition of the <strong>TM</strong>-<strong>T88V</strong> are thesame as those of the <strong>TM</strong>-T88IV.Memory CapacityThe sizes of the download buffer and NV graphics data of the <strong>TM</strong>-<strong>T88V</strong> are the same as those ofthe <strong>TM</strong>-T88IV.Electrical CharacteristicsThe operating voltage of the <strong>TM</strong>-<strong>T88V</strong> is DC24 ± 7%, the same as the <strong>TM</strong>-T88IV. The currentconsumption differs, depending on the print duty.The <strong>TM</strong>-<strong>T88V</strong> does not have a low power consumption mode, which the <strong>TM</strong>-T88IV has, soyou cannot set DIP switches 2-3 and 2-4 to on. Use the newly added low power load modeinstead.96
Chapter 5 Replacement of the <strong>TM</strong>-T88IVDIP SwitchesThe functional assignments of DIP switches are the same as those of the <strong>TM</strong>-T88IV except forDIP switches 2-3 and 2-4.Since the <strong>TM</strong>-<strong>T88V</strong> does not have a low power consumption mode, do not set DIP switches 2-3and 2-4 both to ON.Printer StatusThe <strong>TM</strong>-<strong>T88V</strong> goes to the same status under the same conditions as the <strong>TM</strong>-T88IV. You canreplace the <strong>TM</strong>-<strong>T88V</strong> with the <strong>TM</strong>-T88IV without modifying applications.Logo RegistrationThe <strong>TM</strong>-<strong>T88V</strong> can register logos in the NV memory (NVRAM) with the <strong>TM</strong>-<strong>T88V</strong> Utility, whilethe <strong>TM</strong>-T88IV can register logos with the <strong>TM</strong> Flash LOGO Setup Utility for NVRAM (<strong>TM</strong>-Flogo).Driver CompatibilityYou can operate the <strong>TM</strong>-<strong>T88V</strong> with a driver for the <strong>TM</strong>-T88IV or the <strong>TM</strong>-T88III.You cannot operate the <strong>TM</strong>-T88IV with a driver for the <strong>TM</strong>-<strong>T88V</strong>.Advanced Printer DriverWhen the <strong>TM</strong>-T88IV was controlled by APD Ver. 4.00 ~ 4.04, you need to change the <strong>TM</strong>-<strong>T88V</strong>printer model name to “<strong>TM</strong>-T88IV” using the customized value. (See "Setting the MemorySwitches (Customized Value)" on page 48.)When the <strong>TM</strong>-T88IV was controlled by an APD other than Ver. 4.00 ~ 4.04, you can replace itwith the <strong>TM</strong>-<strong>T88V</strong> without modifying the APD.5OPOS ADKIf the <strong>TM</strong>-T88IV was controlled by an OPOS ADK, you can replace it with the <strong>TM</strong>-<strong>T88V</strong> withoutmodifying the OPOS ADK.97
USB Low Power Consumption ModeWith the <strong>TM</strong>-<strong>T88V</strong>, you can enable the USB low power consumption mode with DIP Switch 1-8,just as you can with the <strong>TM</strong>-T88IV. (See "For Ethernet/Wireless LAN/USB Interface" on page44.)Maintenance CounterThe <strong>TM</strong>-<strong>T88V</strong> has a maintenance counter just as the <strong>TM</strong>-T88IV has.Buzzer<strong>TM</strong>-<strong>T88V</strong> is available with a built-in buzzer or without the buzzer. Even if you purchase the onewithout the buzzer, you can attach an optional external buzzer. You can beep the buzzer with thepulse signal using a command. (See "Setting the Internal Buzzer (for Model with an InternalBuzzer)" on page 65, "Connecting the Optional External Buzzer" on page 66.)For detailed information about ESC/POS commands, see the ESC/POS ApplicationProgramming <strong>Guide</strong>.Power Supply BoxThe optional power supply box (OT-BX88V) is available to be attached under the <strong>TM</strong>-<strong>T88V</strong> tohold the power unit, just as the OT-BX88 has been available for the <strong>TM</strong>-T88IV.98
Chapter 5 Replacement of the <strong>TM</strong>-T88IVOverall DimensionsYou can place the <strong>TM</strong>-<strong>T88V</strong> in the same location as the <strong>TM</strong>-T88IV, since its overall dimensionsand weight are about the same as or smaller than those of the <strong>TM</strong>-T88IV. With the wall hangingbracket (WH-10), you can attach the <strong>TM</strong>-<strong>T88V</strong> to a wall just as you can with the <strong>TM</strong>-T88IV.<strong>TM</strong>-<strong>T88V</strong>W:145 × D:195 × H:148 mm Approximately 1.6kg{W:5.71" × D:7.68" × H:5.83" Approximately 3.53 lb}<strong>TM</strong>-T88IVW:148 × D:145 × H:195 Approximately 1.8kg{W:5.71" × D:7.68" × H:5.83" Approximately 3.97 lb}145145141141599
Additional Functions and Functional ImprovementsPaper WidthYou can change the printer to print on 58 mm width paper by installing the roll paper guide andchanging the paper width setting with the customized value.Once you change the paper width form 80 mm to 58 mm, you cannot change it back to 80mm.Print SpeedThe <strong>TM</strong>-<strong>T88V</strong> has increased its print speed up to a maximum of 300 mm/s.<strong>TM</strong>-<strong>T88V</strong><strong>TM</strong>-T88IVMaximum print speed 300 mm/s 200 mm/sPrint speed setting(Customized value)Level 1 to 13 Level 1 to 9Note: When the printer prints text (built-in fonts) with the default print density level at 24V and25°C {77°F}.Depending on print conditions such as print duty, print head temperature, and datatransmission speed, print speed is automatically adjusted.BarcodesWith the <strong>TM</strong>-<strong>T88V</strong>, printing the following barcodes, two-dimensional symbols and compositesymbology is additionally possible.•GS1-128•GS1 DataBar Omnidirectional•GS1 DataBar Truncated•GS1 DataBar Stacked•GS1 DataBar Stacked Ominidirectional•GS1 DataBar Limited•GS1 DataBar Expanded•GS1 DataBar Expanded Stacked•MaxiCode•Composite Symbology100
Chapter 5 Replacement of the <strong>TM</strong>-T88IVNumber of CharactersFor the <strong>TM</strong>-<strong>T88V</strong>, character code tables and international characters are added.Character code tables<strong>TM</strong>-<strong>T88V</strong>128 × 43 pages(including user-defined page)<strong>TM</strong>-T88IV128 × 11 pages(including user-defined page)International characters 18 sets 14 setsImage Tone Setting<strong>TM</strong>-<strong>T88V</strong> allows you to specify tone of images (2 tones/Grayscale).InterfaceThe USB interface is added to the main unit of the <strong>TM</strong>-<strong>T88V</strong> as standard equipment.USB ClassWhen using the built-in USB interface or USB Plus Power, USB printer class can be used besidethe USB vendor-defined class. This setting can be done in customized value. (See "Setting theMemory Switches (Customized Value)" on page 48.)5101
Customized ValueFor the <strong>TM</strong>-<strong>T88V</strong>, the following customized value functions are added.•Paper width•Multi-tone print density•Initial value of the character code table•Initial value of the international character set•Optional buzzer•USB class•Interface mode•Power supply unit capacity•Automatic paper cut when the cover is closed•Automatic paper-saving (upper space reduction)•Automatic paper-saving (lower space reduction)•Automatic paper-saving (line space reduction rate)•Automatic paper-saving (line feed reduction rate)•Automatic paper-saving (barcode height reduction rate)•Font A replacement•Font B replacement•Printer modelFor the <strong>TM</strong>-<strong>T88V</strong>, the following customized value functions are deleted.•Single-color printing/two-color printing• Black-color density in two-color printingFor detailed information about the customized value, see"Setting the Memory Switches(Customized Value)" on page 48.R/E Information Printing ModeThe <strong>TM</strong>-<strong>T88V</strong> has a Receipt Enhancement (R/E) Information Printing mode that lets youconfirm the following information:•Automatic top logo setting•Automatic bottom logo setting•Extended settings for automatic top/bottom logo102
Chapter 5 Replacement of the <strong>TM</strong>-T88IVLow Power Load ModeFor the <strong>TM</strong>-<strong>T88V</strong>, there is a new low power load mode. In this mode, the power supply load islowered by automatically changing the print speed, depending on the print duty. You can set themode with the customized value. (See "Setting the Memory Switches (Customized Value)" onpage 48.)ReliabilityThe <strong>TM</strong>-<strong>T88V</strong> has improved reliability.<strong>TM</strong>-<strong>T88V</strong><strong>TM</strong>-T88IVPrinter mechanism 20 million lines 15 million linesLifePrint head 150 million pulse, 150 km 100 million pulse, 100 kmAutocutter 2 million cuts 1.5 million cutsMCBF 70 million lines 52 million lines5103
104
AppendixAppendixSpecifications of Interfaces and ConnectorsFor detailed information about LAN or wireless LAN, see one of the following: LAN: UB-E02 <strong>Technical</strong> <strong>Reference</strong> <strong>Guide</strong> Wireless LAN: UB-R02/R03 <strong>Technical</strong> <strong>Reference</strong> <strong>Guide</strong>RS-232 Serial InterfaceInterface board specifications (RS-232-compliant)ItemSpecificationsData transfer methodSynchronizationSerialAsynchronousHandshake Select one of the following with DIP switch 1-3: DTR/DSR XON/XOFFSignal level MARK -3V to -15V logic “1”/OFFSPACE+3V to +15V logic “0”/ONBit length Select one of the following with DIP switch 1-4: 7 bit 8 bitTransmission speed[bps: bits per second] Select one of the following with DIP switch 1-7/1-8:4800/9600/19200/38400 bps Select one of the following with commands:2400/4800/9600/19200/38400/57600/115200 bpsParity check Select one of the following with DIP switch 1-5: Yes NoParity selection Select one of the following with DIP switch 1-6: Even OddStop bit1 or more bitsHowever, the stop bit for data transfer from the printer is fixed to 1 bit.Connector Printer side DSUB 25-pin (female) connector105
Functions of each connector pinPin no. Signal name Signal direction Function1 FG — Frame ground2 TXD Output Transmission data3 RXD Input Reception data4 RTS Output Equivalent to DTR signal (pin 20)6 DSR Input This signal indicates whether the host computer canreceive data.SPACE indicates that the host computer can receivedata. MARK indicates that the host computercannot receive data.When DTR/DSR control is selected, the printertransmits data after confirming this signal (except iftransmitted using some ESC/POS commands).When XON/XOFF control is selected, the printer doesnot check this signal.Changing DIP switch 2-7 lets this signal be used as aprinter reset signal.When you use this signal as the printer’s reset signal,the printer is reset when the signal remains MARK fora pulse width of 1 ms or more.7 SG — Signal ground20 DTR Output 1) When DTR/DSR control is selected, this signalindicates whether the printer is BUSY. SPACE statusIndicates that the printer is ready to receive data. MARK statusIndicates that the printer is BUSY. Set BUSY conditionswith DIP switch 2-1.2) When XON/XOFF control is selected, the signalindicates that the printer is properly connected andready to receive data from the host. The signal isalways SPACE, except in the following cases: During the period from when power is turned on towhen the printer is ready to receive data. During the self-test.25 INT Input Changing DIP switch 2-8 enables this signal to beused as a reset signal for the printer. The printer isreset if the signal remains at SPACE for a pulse widthof 1 ms or more.106
AppendixXON/XOFFWhen XON/XOFF control is selected, the printer transmits the XON or XOFF signals as follows.The transmission timing of XON/XOFF differs, depending on the setting of DIP switch 2-1.SignalPrinter statusDIP switch 2-11 (ON) 0 (OFF)XON1) When the printer goes online after turning on the power (orreset using the interface)TransmitTransmit2) When the receive buffer is released from the buffer full state Transmit Transmit3) When the printer switches from offline to online — Transmit4) When the printer recovers from an error using some ESC/POScommands— TransmitXOFF 5) When the receive buffer becomes full Transmit Transmit6) When the printer switches from online to offline — TransmitCodeThe hexadecimal numbers corresponding to the XON/XOFF codes are shown below.• XON code: 11H•XOFF code: 13HCAUTIONWhen the printer goes from offline to online and the receive buffer is full, XON is nottransmitted.When the printer goes from online to offline and the receive buffer is full, XOFF is nottransmitted.When DIP switch 1-3 is off, XON is not transmitted as long as the printer is offline, evenif a receive buffer full state has been cleared.107
IEEE 1284 Parallel InterfaceModesThe IEEE 1284 parallel interface supports the following two modes.Mode Communication direction Other informationCompatibility mode Host Printer communication Centronics-compliantReverse mode Printer Host communication Assumes a data transfer from anasynchronous printerCompatibility ModeCompatibility mode allows data transmission from host to printer only: Centronics-compatible.SpecificationData transmissionSynchronizationHandshakingSignal levelsConnectorReverse communication8-bit parallelExternally supplied STROBE signalsACK and BUSY signalsTTL-compatible connectorADS-B36BLFDR176 (HONDA) or equivalent productNibble or byte modeReverse ModeThe transfer of status data from the printer to the host proceeds in the nibble or byte mode.This mode allows data transfer from an asynchronous printer under the control of the host. Datatransfers in the nibble mode are made via the existing control lines in units of four bits (a nibble).In the byte mode, data transfer proceeds by making the 8-bit data lines bidirectional. Both modesfail to proceed concurrently in the compatibility mode, thereby causing half-duplextransmission.108
AppendixInterface signalsPinSourceCompatibilityModeNibble ModeByte Mode1 Host Strobe HostClk HostClk2 Host/Ptr Data0 (LSB) Data0 (LSB) Data0 (LSB)3 Host/Ptr Data1 Data1 Data14 Host/Ptr Data2 Data2 Data25 Host/Ptr Data3 Data3 Data36 Host/Ptr Data4 Data4 Data47 Host/Ptr Data5 Data5 Data58 Host/Ptr Data6 Data6 Data69 Host/Ptr Data7 (MSB) Data7 (MSB) Data7 (MSB)10 Printer Ack PtrClk PtrClk11 Printer Busy PtrBusy/Data3,7 PtrBusy12 Printer Perror AckDataReq/Data2,6 AckDataReq13 Printer Select Xflag/Data1,5 Xflag14 Host AutoFd HostBusy k HostBusy15 NC ND ND16 GND GND GND17 FG FG FG18 Printer Logic-H Logic-H Logic-H19 GND GND GND20 GND GND GND21 GND GND GND22 GND GND GND23 GND GND GND24 GND GND GND25 GND GND GND26 GND GND GND27 GND GND GND109
PinSourceCompatibilityModeNibble ModeByte Mode28 GND GND GND29 GND GND GND30 GND GND GND31 Host Init Init Init32 Printer Fault DataAvail/Data0,4 DataAvail33 GND ND ND34 Printer DK_STATUS ND ND35 Printer +5V ND ND36 Host SelectIn 1284-Active 1284-ActiveNC: Not ConnectedND: Not DefinedCAUTIONA signal name with a rule above it indicates an “L” active signal.Bidirectional communications cannot take place, unless all signal names for both sidescorrespond to each other.Connect all signal lines using a twisted-pair cable. Connect the return side to the signalground level.Make sure the signals satisfy electrical characteristics.Set the leading edge and trailing edge times to 0.5ms or less.Do not ignore Ack or BUSY signals during a data transfer. Ignoring such signals mayresult in data corruption.Make the interface cables as short as possible.110
AppendixUSB (Universal Serial Bus) InterfaceOutline•Full-speed transmission at 12 Mbps [bps: bits per second]•Plug & Play, Hot Insertion & RemovalUSB transmission specificationsUSB functionOverall specificationsTransmission speedTransmission methodPower supply specificationsCurrent consumed by USB busAccording to USB 2.0 specificationsUSB Full-Speed (12 Mbps)USB bulk transmission methodUSB self power supply function0 mAUSB packet size (with full-speed connection)USB bulk OUT (<strong>TM</strong>)USB bulk IN (<strong>TM</strong>)64 bytes64 bytesStatus transmission from printer with USB interfaceIn order to ensure that there is no lack of status data, it is necessary to periodically retrieve statusdata at the host computer.Unlike RS 232C transmission, it cannot spontaneously interrupt data transmission to the hostcomputer.The printer has a 128-byte status data buffer. Statuses that exceed the buffer capacity arecanceled.111
Character Code TablesThe character code tables show only character configurations. They do not show theactual print pattern.“SP” in the table shows a space.Common to All PagesWhen International character set (See "International Character Sets" on page 156.) is USA:HEX 0 1 2 3 4 5 6 70 NUL DLE SP00 16 321 XON01 17202 183 XOFF03 194 EOT DC404 205 ENQ NAK05 216 ACK06 22707 238 CAN08 249 HT09 25A LF10 26BESC11 27C FF FS12 28D CR GS13 29ERS14 30F15 310 @ P48 64 80! 1 A Q33 49 65 81" 2 B R34 50 66 82# 3 C S35 51 67 83$ 4 D T36 52 68 84% 5 E U37 53 69 85& 6 F V'()∗+,-./38 54 70 867 G W39 55 71 878 H X40 56 72 889 I Y41 57 73 89: J Z42 58 74 90; K [43 59 75 91< L ¥44 60 76 92= M ]45 61 77 93> N ^46 62 78 94? O _47 63 79 95`abcdefghijklmnop96 112q97 113r98 114s99 115t100 116u101 117v102 118w103 119x104 120y105 121z106 122{107 123|108 124}109 125~110 126SP111 127112
Appendix113Page 0 [PC437: USA, Standard Europe]HEX 8 9 A B C D E F0 Ç128É144á160░176└192╨208α224≡2401 ü129æ145í161▒177┴193╤209β225±2412 é130Æ146ó162▓178┬194╥210Γ226≥2423 â131ô147ú163│179├195╙211π227≤2434 ä132ö148ñ164┤180─196╘212Σ228⌠2445 à133ò149Ñ165╡181┼197╒213σ229⌡2456 å134û150a166╢182╞198╓214μ230÷2467 ç135ù151o167╖183╟199╫215τ231≈2478 ê136ÿ152¿168╕184╚200╪216Ф232°2489 ë137Ö153┌169╣185╔201┘217Θ233•249Aè138Ü154¬170║186╩202┌218Ω234·250Bï139¢155½171╗187╦203█219δ235√251Cî140£156¼172╝188╠204▄220∞236n252Dì141¥157¡173╜189═205▌221Φ237²253EÄ142Pt158«174╛190╬206▐222ε238■254FÅ143ƒ159»175┐191╧207▀223∩239SP255
114Page 1 (Katakana)HEX 8 9 A B C D E F0 128┴144SP160176192208═2242401 129┬145161177193209╞2252412 130┤146162178194210╪2262423 131├147163179195211╡2272434 132¯1481641801962122282445 133─1491651811972132292456 134│1501661821982142302467 135│1511671831992152312478 136┌152168184200216♠2322489 137┐153169185201217♥233249A138└154170186202218♦234250B139┘155171187203219♣235251C140156172188204220●236252D141157173189205221○237253E142158174190206222238▓254F┼143159175191207223239SP255
Appendix115Page 2 (PC850: Multilingual)HEX 8 9 A B C D E F0 Ç128É144á160░176└192ð208Ó224-2401 ü129æ145í161▒177┴193Ð209β225±2412 é130Æ146ó162▓178┬194Ê210Ô226 2423 â131ô147ú163│179├195Ë211Ò227¾2434 ä132ö148ñ164┤180─196È212õ2282445 à133ò149Ñ165Á181┼197ı213Õ229§2456 å134û150a166Â182ã198Í214μ230÷2467 ç135ù151o167À183Ã199Î215þ231¸2478 ê136ÿ152¿168©184╚200Ï216Þ232°2489 ë137Ö153®169╣185╔201┘217Ú233¨249Aè138Ü154¬170║186╩202┌218Û234·250Bï139ø155½171╗187╦203█219Ù235¹251Cî140£156¼172╝188╠204▄220ý236³252Dì141Ø157¡173¢189═205¦221Ý237²253EÄ142×158«174¥190╬206Ì222¯238■254FÅ143ƒ159»175┐191¤207▀223´239SP255
116Page 3 (PC860: Portuguese)HEX 8 9 A B C D E F0 Ç128É144á160░176└192╨208α224≡2401 ü129À145í161▒177┴193╤209β225±2412 é130È146ó162▓178┬194╥210Γ226≥2423 â131ô147ú163│179├195╙211π227≤2434 ã132õ148ñ164┤180─196╘212Σ228⌠2445 à133ò149Ñ165╡181┼197╒213σ229⌡2456 Á134Ú150a166╢182╞198╓214μ230÷2467 ç135ù151o167╖183╟199╫215τ231≈2478 ê136Ì152¿168╕184╚200╪216Ф232°2489 Ê137Õ153Ò169╣185╔201┘217Θ233•249Aè138Ü154¬170║186╩202┌218Ω234·250BÍ139¢155½171╗187╦203█219δ235√251CÔ140£156¼172╝188╠204▄220∞236n252Dì141Ù157¡173╜189═205▌221Φ237²253EÃ142Pt158«174╛190╬206▐222ε238■254FÂ143Ó159»175┐191╧207▀223∩239SP255
Appendix117Page 4 (PC863: Canadian-French)HEX 8 9 A B C D E F0 Ç128É144¦160░176└192╨208α224≡2401 ü129È145´161▒177┴193╤209β225±2412 é130Ê146ó162▓178┬194╥210Γ226≥2423 â131ô147ú163│179├195╙211π227≤2434 Â132Ë148¨164┤180─196╘212Σ228⌠2445 à133Ï149¸165╡181┼197╒213σ229⌡2456 134û150³166╢182╞198╓214μ230÷2467 ç135ù151¯167╖183╟199╫215τ231≈2478 ê136¤152Î168╕184╚200╪216Ф232°2489 ë137Ô153┌169╣185╔201┘217Θ233•249Aè138Ü154¬170║186╩202┌218Ω234·250Bï139¢155½171╗187╦203█219δ235√251Cî140£156¼172╝188╠204▄220∞236n252D141Ù157¾173╜189═205▌221Φ237²253EÀ142Û158«174╛190╬206▐222ε238■254F §143ƒ159»175┐191╧207▀223∩239SP255
118Page 5 (PC865: Nordic)HEX 8 9 A B C D E F0 Ç128É144á160░176└192╨208α224≡2401 ü129æ145í161▒177┴193╤209β225±2412 é130Æ146ó162▓178┬194╥210Γ226≥2423 â131ô147ú163│179├195╙211π227≤2434 ä132ö148ñ164┤180─196╘212Σ228⌠2445 à133ò149Ñ165╡181┼197╒213σ229⌡2456 å134û150a166╢182╞198╓214μ230÷2467 ç135ù151o167╖183╟199╫215τ231≈2478 ê136ÿ152¿168╕184╚200╪216Ф232°2489 ë137Ö153┌169╣185╔201┘217Θ233•249Aè138Ü154¬170║186╩202┌218Ω234·250Bï139ø155½171╗187╦203█219δ235√251Cî140£156¼172╝188╠204▄220∞236n252Dì141Ø157¡173╜189═205▌221Φ237²253EÄ142Pt158«174╛190╬206▐222ε238■254FÅ143ƒ159¤175┐191╧207▀223∩239SP255
Appendix119Page 11 (PC851: Greek)HEX 8 9 A B C D E F0 Ç128Ί144ϊ160░176└192Τ208ζ224-2401 ü129SP145ΐ161▒177┴193Υ209η225±2412 é130Ό146ó162▓178┬194Ф210θ226υ2423 â131ô147ύ163│179├195Χ211ι227Φ2434 ä132ö148А164┤180─196Ψ212κ228χ2445 à133Ύ149Β165Κ181┼197Ω213λ229§2456 Ά134û150Γ166Λ182Π198α214μ230ψ2467 ç135ù151Δ167Μ183Р199β215ν231¸2478 ê136Ώ152Е168Ν184╚200γ216ξ232°2489 ë137Ö153Ζ169╣185╔201┘217ο233¨249Aè138Ü154Η170║186╩202┌218π234ω250Bï139ά155½171╗187╦203█219р235ϋ251Cî140£156Θ172╝188╠204▄220σ236ΰ252DΈ141έ157Ι173≡189═205δ221ς237ώ253EÄ142ή158«174Ο190╬206ε222τ238■254FΉ143ί159»175┐191Σ207▀223´239SP255
120Page 12 (PC853: Turkish)HEX 8 9 A B C D E F0 Ç128É144á160░176└192SP208Ó224-2401 ü129ċ145í161▒177┴193SP209β225SP2412 é130Ċ146ó162▓178┬194Ê210Ô226l2423 â131ô147ú163│179├195Ë211Ò227ʼn2434 ä132ö148ñ164┤180─196È212Ġ228˘2445 à133ò149Ñ165Á181┼197ı213ġ229§2456 ĉ134û150Ğ166Â182Ŝ198Í214μ230÷2467 ç135ù151ğ167À183ŝ199Î215Ħ231¸2478 ê136İ152Ĥ168Ş184╚200Ï216ħ232°2489 ë137Ö153ĥ169╣185╔201┘217Ú233¨249Aè138Ü154SP170║186╩202┌218Û234˙250Bï139ĝ155½171╗187╦203█219Ù235SP251Cî140£156Ĵ172╝188╠204▄220Ŭ236³252Dì141Ĝ157ş173Ż189═205SP221ŭ237²253EÄ142×158«174ż190╬206Ì222·238■254FĈ143ĵ159»175┐191¤207▀223´239SP255
Appendix121Page 13 (PC857: Turkish)HEX 8 9 A B C D E F0 Ç128É144á160░176└192o208Ó224-2401 ü129æ145í161▒177┴193a209β225±2412 é130Æ146ó162▓178┬194Ê210Ô226SP2423 â131ô147ú163│179├195Ë211Ò227¾2434 ä132ö148ñ164┤180─196È212õ2282445 à133ò149Ñ165Á181┼197€213Õ229§2456 å134û150Ğ166Â182ã198Í214μ230÷2467 ç135ù151ğ167À183Ã199Î215SP231¸2478 ê136İ152¿168©184╚200Ï216×232°2489 ë137Ö153®169╣185╔201┘217Ú233¨249Aè138Ü154¬170║186╩202┌218Û234·250Bï139ø155½171╗187╦203█219Ù235¹251Cî140£156¼172╝188╠204▄220ì236³252Dı141Ø157¡173¢189═205¦221ÿ237²253EÄ142Ş158«174¥190╬206Ì222¯238■254FÅ143ş159»175┐191¤207▀223´239SP255
122Page 14 (PC737: Greek)HEX 8 9 A B C D E F0 А128Р144ι160░176└192╨208ω224Ώ2401 В129Σ145κ161▒177┴193╤209ά225±2412 Г130Т146λ162▓178┬194╥210έ226≥2423 Δ131Υ147μ163│179├195╙211ή227≤2434 Е132Ф148ν164┤180─196╘212ϊ228Ï2445 Ζ133Х149ξ165╡181┼197╒213ί229Ÿ2456 Η134Ψ150ο166╢182╞198╓214ó230÷2467 Θ135Ω151π167╖183╟199╫215ύ231≈2478 Ι136α152р168╕184╚200╪216ϋ232°2489 Κ137β153σ169╣185╔201┘217ώ233•249AΛ138γ154ς170║186╩202┌218Ά234·250BΜ139δ155τ171╗187╦203█219Έ235√251CΝ140ε156υ172╝188╠204▄220Ή236n252D≡141ζ157Φ173╜189═205▌221Ί237²253EО142η158χ174╛190╬206▐222Ό238■254FП143θ159ψ175┐191╧207▀223Ύ239SP255
Appendix123Page 15 (ISO8859-7: Greek)HEX 8 9 A B C D E F0 SP128SP144SP160°176ΐ192Π208ΰ224π2401 SP129SP145‘161±177Α193Р209α225р2412 SP130SP146’162²178Β194SP210β226ς2423 SP131SP147£163³179Γ195Σ211γ227σ2434 SP132SP148€164´180Δ196Τ212δ228τ2445 SP133SP149Dp165΅181Ε197Υ213ε229υ2456 SP134SP150¦166Ά182Ζ198Ф214ζ230φ2467 SP135SP151§167•183Η199Χ215η231χ2478 SP136SP152¨168Έ184Θ200Ψ216θ232ψ2489 SP137SP153©169Ή185Ι201Ω217ι233ω249ASP138SP154˛170Ί186Κ202Ϊ218κ234ϊ250BSP139SP155«171»187Λ203Ϋ219λ235ϋ251CSP140SP156¬172Ό188Μ204ά220μ236ό252DSP141SP157-173½189Ν205έ221ν237ύ253ESP142SP158SP174Ύ190Ξ206ή222ξ238ώ254FSP143SP159—175Ώ191Ο207ί223ο239SP255
124Page 16 (WPC1252)HEX 8 9 A B C D E F0 €128SP144SP160°176À192Ð208à224ð2401 SP129‘145¡161±177Á193Ñ209á225ñ2412 ‚130’146¢162²178Â194Ò210â226ò2423 ƒ131“147£163³179Ã195Ó211ã227ó2434 „132”148¤164´180Ä196Ô212ä228ô2445 …133•149¥165μ181Å197Õ213å229õ2456 †134–150¦166182Æ198Ö214æ230ö2467 ‡135—151§167·183Ç199×215ç231÷2478 ˆ136˜152¨168¸184È200Ø216è232ø2489 ‰137153©169¹185É201Ù217é233ù249AŠ138š154a170o186Ê202Ú218ê234ú250B ‹139›155«171»187Ë203Û219ë235û251CŒ140œ156¬172¼188Ì204Ü220ì236ü252DSP141SP157 173½189Í205Ý221í237ý253EŽ142ž158®174¾190Î206Þ222î238þ254FSP143Ÿ159¯175¿191Ï207β223ï239ÿ255-
Appendix125Page 17 (PC866: Cyrillic #2)HEX 8 9 A B C D E F0 А128Р144а160░176└192╨208р224Ё2401 Б129С145б161▒177┴193╤209с225ё2412 В130Т146в162▓178┬194╥210т226Є2423 Г131У147г163│179├195╙211у227є2434 Д132Ф148д164┤180─196╘212ф228Ї2445 Е133Х149е165╡181┼197╒213х229ї2456 Ж134Ц150ж166╢182╞198╓214ц230Ў2467 З135Ч151з167╖183╟199╫215ч231ў2478 И136Ш152и168╕184╚200╪216ш232°2489 Й137Щ153й169╣185╔201┘217щ233•249AК138Ъ154к170║186╩202┌218ъ234·250BЛ139Ы155л171╗187╦203█219ы235√251CМ140Ь156м172╝188╠204▄220ь236№252DН141Э157н173╜189═205▌221э237¤253EО142Ю158о174╛190╬206▐222ю238■254FП143Я159п175┐191╧207▀223я239SP255
126Page 18 (PC852: Latin2)HEX 8 9 A B C D E F0 Ç128É144á160░176└192đ208Ó224-2401 ü129Ĺ145í161▒177┴193Ð209β225˝2412 é130ĺ146ó162▓178┬194Ď210Ô226˛2423 â131ô147ú163│179├195Ë211Ń227ˇ2434 ä132ö148Ą164┤180─196ď212ń228˘2445 ů133Ľ149ą165Á181┼197Ň213ň229§2456 ć134ľ150Ž166Â182Ă198Í214Š230÷2467 ç135Ś151ž167Ě183ă199Î215š231¸2478 ł136ś152Ę168Ş184╚200ě216Ŕ232°2489 ë137Ö153ę169╣185╔201┘217Ú233¨249AŐ138Ü154SP170║186╩202┌218ŕ234•250Bő139Ť155ź171╗187╦203█219Ű235ű251Cî140ť156Č172╝188╠204▄220ý236Ř252DŹ141Ł157ş173Ż189═205Ţ221Ý237ř253EÄ142×158«174ż190╬206Ů222ţ238■254FĆ143č159»175┐191¤207▀223´239SP255
Appendix127Page 19 (PC858: Euro)HEX 8 9 A B C D E F0 Ç128É144á160░176└192ð208Ó224-2401 ü129æ145í161▒177┴193Ð209β225±2412 é130Æ146ó162▓178┬194Ê210Ô226 2423 â131ô147ú163│179├195Ë211Ò227¾2434 ä132ö148ñ164┤180─196È212õ2282445 à133ò149Ñ165Á181┼197€213Õ229§2456 å134û150a166Â182ã198Í214μ230÷2467 ç135ù151o167À183Ã199Î215þ231¸2478 ê136ÿ152¿168©184╚200Ï216Þ232°2489 ë137Ö153®169╣185╔201┘217Ú233¨249Aè138Ü154¬170║186╩202┌218Û234·250Bï139ø155½171╗187╦203█219Ù235¹251Cî140£156¼172╝188╠204▄220ý236³252Dì141Ø157¡173¢189═205¦221Ý237²253EÄ142×158«174¥190╬206Ì222¯238■254FÅ143ƒ159»175┐191¤207▀223´239SP255
128Page 20 (KU42: Thai)HEX 8 9 A B C D E F0 ┌128๐144SP160ฒ176ย192เ208224๊ิ2401 ┐129๑145ก161ณ177ร193แ209225๋ิ2412 └130๒146ข162ด178ฤ194โ210226์ิ2423 ┘131๓147ค163ต179ล195ใ211227่ี2434 │132๔148ฆ164ถ180ว196ไ212228้ี2445 ─133๕149ง165ท181ศ197ๆ213ฺ229๊ี2456 ├134๖150จ166ธ182ษ198ฯ214ํ่230๋ี2467 ┤135๗151ฉ167น183ส199ุ215ํ้231่ึ2478 ┴136๘152ช168บ184ห200ู216ํ๊232้ึ2489 ┬137๙153ซ169ป185ฬ201ิ217ํ๋233๊ึ249A┼138ฃ154ฌ170ผ186อ202ี218ั่234๋ึ250B█139ฅ155ญ171ฝ187ฮ203ึ219ั้235่ื251C←140โ156ฎ172พ188ะ204ื220ั๊236้ื252D↑141ใ157ฏ173ฟ189ฦ205ั221ั๋237๊ื253E→142ไ158ฐ174ภ190า206ํ222ิ่238๋ื254F↓143เ159ฑ175ม191۫า207223ิ้239SP255
Appendix129Page 21 (TIS11: Thai)HEX 8 9 A B C D E F0ั่128ึ๋144เ160ฐ176ภ192ะ208เ224๐2401ั้129ื่145ก161ฑ177ม193ั209แ225๑2412ั๊130ื้146ข162ฒ178ย194า210โ226๒2423ั๋131ื๊147ฃ163ณ179ร195۫า211ใ227๓2434ิ่132ื๋148ค164ด180ฤ196ิ212ไ228๔2445ิ้133ํ่149ฅ165ต181ล197ี213ๅ229๕2456ิ๊134ํ้150ฆ166ถ182ฦ198ึ214ๆ230๖2467ิ๋135ํ๊151ง167ท183ว199ื215231๗2478ิ์136ํ๋152จ168ธ184ศ200ุ216232๘2489ี่137┌153ฉ169น185ษ201ู217233๙249Aี้138┐154ช170บ186ส202ฺ218234๚250Bี๊139└155ซ171ป187ห203─219235๛251Cี๋140┘156ฌ172ผ188ฬ204┴220236โ252Dึ่141│157ญ173ฝ189อ205┬221ํ237ใ253Eึ้142├158ฎ174พ190ฮ206┼222๎238ไ254Fึ๊143┤159ฏ175ฟ191ฯ207฿223๏239SP255
130Page 26 (TIS18: Thai)HEX 8 9 A B C D E F0 ┌128โ144SP160ฐ176ภ192ะ208เ224๐2401 ┐129ใ145ก161ฑ177ม193ั209แ225๑2412 └130ั่146ข162ฒ178ย194า210โ226๒2423 ┘131ั้147ฃ163ณ179ร195۫า211ใ227๓2434 │132ั๊148ค164ด180ฤ196ิ212ไ228๔2445 ─133ั๋149ฅ165ต181ล197ี213ๅ229๕2456 ├134ิ่150ฆ166ถ182ฦ198ึ214ๆ230๖2467 ┤135ิ้151ง167ท183ว199ื215231๗2478 ┴136ิ๊152จ168ธ184ศ200ุ216232๘2489 ┬137ิ๋153ฉ169น185ษ201ู217233๙249A┼138ิ์154ช170บ186ส202ฺ218234๛250B█139ี่155ซ171ป187ห203ึ่219235ื่251C←140ี้156ฌ172ผ188ฬ204ึ้220236ื้252D↑141ี๊157ญ173ฝ189อ205ึ๊221ํ237ื๊253E→142ี๋158ฎ174พ190ฮ206ึ๋222ไ238ื๋254F↓143เ159ฏ175ฟ191ฯ207฿223๏239SP255
Appendix131Page 30 (TCVN-3: Vientamese)HEX 8 9 A B C D E F0 SP128SP144SP160SP176SP192é208SP224SP2401 SP129SP145SP161SP177SP193ẹ209ỏ225ủ2412 SP130SP146SP162SP178SP194ề210õ226ũ2423 SP131SP147SP163SP179SP195ể211ó227ú2434 SP132SP148SP164SP180SP196ễ212ọ228ụ2445 SP133SP149SP165à181SP197ế213ồ229ừ2456 SP134SP150SP166ả182ặ198ệ214ổ230ử2467 SP135SP151SP167ã183ầ199ì215ỗ231ữ2478 SP136SP152ă168á184ẩ200ỉ216ố232ứ2489 SP137SP153â169ạ185ẫ201SP217ộ233ự249ASP138SP154ê170SP186ấ202SP218ờ234ỳ250BSP139SP155ô171ằ187ậ203SP219ở235ỷ251CSP140SP156ơ172ẳ188è204ĩ220ỡ236ỹ252DSP141SP157ư173ẵ189SP205í221ớ237ý253ESP142SP158đ174ắ190ẻ206ị222ợ238ỵ254FSP143SP159SP175SP191ẽ207ò223ù239SP255
132Page 31 (TCVN-3: Vientamese)HEX 8 9 A B C D E F0 SP128SP144SP160SP176SP192É208SP224SP2401 SP129SP145Ă161SP177SP193Ẹ209Ỏ225Ủ2412 SP130SP146Â162SP178SP194Ê ̀210Õ226Ũ2423 SP131SP147SP163SP179SP195Ể211Ó227Ú2434 SP132SP148SP164SP180SP196Ễ212Ọ228Ụ2445 SP133SP149SP165À181SP197Ế213Ô ̀229Ừ2456 SP134SP150SP166Ả182Ặ198Ệ214Ổ230Ử2467 SP135SP151Ð167Ã183Â ̀199Ì215Ỗ231Ữ2478 SP136SP152SP168Á184Ẩ200Ỉ216Ố232Ứ2489 SP137SP153SP169Ạ185Ẫ201SP217Ộ233Ự249ASP138SP154Ê170SP186Ấ202SP218Ờ234Ỳ250BSP139SP155Ô171Ằ187Ậ203SP219Ở235Ỷ251CSP140SP156Ơ172Ẳ188È204Ĩ220Ỡ236Ỹ252DSP141SP157Ư173Ẵ189SP205Í221Ớ237Ý253ESP142SP158SP174Ắ190Ẻ206Ị222Ợ238Ỵ254FSP143SP159SP175SP191Ẽ207Ò223Ù239SP255
Appendix133Page 32 (PC720: Arabic)HEX 8 9 A B C D E F0 SP128SP144ب160░176└192╨208ض224≡2401 SP129ّ145ة161▒177┴193╤209ط225ً2412 é130ْ146ت162▓178┬194╥210ظ226ٌ2423 â131ô147ث163│179├195╙211ع227ٍ2434 SP132¤148ج164┤180─196╘212غ228َ2445 à133149ح165╡181┼197╒213ف229ُ2456 SP134û150خ166╢182╞198╓214μ230ِ2467 ç135ù151د167╖183╟199╫215ق231≈2478 ê136ء152ذ168╕184╚200╪216ك232°2489 ë137آ153ر169╣185╔201┘217ل233·249Aè138أ154ز170║186╩202┌218م234·250Bï139ؤ155س171╗187╦203█219ن235√251Cî140£156ش172╝188╠204▄220ه236ⁿ252DSP141إ157ص173╜189═205▌221و237²253ESP142ئ158«174╛190╬206▐222ى238■254FSP143ا159»175┐191╧207▀223ي239SP255
134Page 33 (WPC775: Baltic Rim)HEX 8 9 A B C D E F0 Ć128É144Ā160░176└192ą208Ó224-2401 ü129æ145Ī161▒177┴193č209ß225±2412 é130Æ146ó162▓178┬194ę210Ō226“2423 ā131ō147Ż163│179├195ė211Ń227¾2434 ä132ö148ż164┤180─196į212õ2282445 ģ133Ģ149ź165Ą181┼197š213Õ229§2456 å134¢150”166Č182Ų198ų214μ230÷2467 ć135Ś151¦167Ę183Ū199ū215ń231„2478 ł136ś152©168Ė184╚200ž216Ķ232°2489 ē137Ö153®169╣185╔201┘217ķ233·249AŖ138Ü154¬170║186╩202┌218Ļ234·250Bŗ139ø155½171╗187╦203█219ļ235¹251Cī140£156¼172╝188╠204▄220ņ236³252DŹ141Ø157Ł173Į189═205▌221Ē237²253EÄ142×158«174Š190╬206▐222Ņ238■254FÅ143¤159»175┐191Ž207▀223’239SP255
Appendix135Page 34 (PC855: Cylillic)HEX 8 9 A B C D E F0 ђ128љ144а160░176└192л208Я224-2401 Ђ129Љ145А161▒177┴193Л209р225ы2412 ѓ130њ146б162▓178┬194м210Р226Ы2423 Ѓ131Њ147Б163│179├195М211с227з2434 ё132ћ148ц164┤180─196н212С228З2445 Ё133Ћ149Ц165х181┼197Н213т229ш2456 є134ќ150д166Х182к198о214Т230Ш2467 Є135Ќ151Д167и183К199О215у231э2478 ѕ136ў152е168И184╚200п216У232Э2489 Ѕ137Ў153Е169╣185╔201┘217ж233щ249Aі138џ154ф170║186╩202┌218Ж234Щ250BІ139Џ155Ф171╗187╦203█219в235ч251Cї140ю156г172╝188╠204▄220В236Ч252DЇ141Ю157Г173й189═205П221ь237§253Eј142ъ158«174Й190╬206я222Ь238■254FЈ143Ъ159»175┐191¤207▀223№239SP255
136Page 35 (PC861: Icelandic)HEX 8 9 A B C D E F0 Ç128É144á160░176└192╨208α224≡2401 ü129æ145í161▒177┴193╤209ß225±2412 é130Æ146ó162▓178┬194╥210Γ226≥2423 â131ô147ú163│179├195╙211π227≤2434 ä132ö148Á164┤180─196╘212Σ228⌠2445 à133þ149Í165╡181┼197╒213σ229⌡2456 å134û150Ó166╢182╞198╓214μ230÷2467 ç135Ý151Ú167╖183╟199╫215τ231≈2478 ê136ý152¿168╕184╚200╪216Φ232°2489 ë137Ö153⌐169╣185╔201┘217Θ233·249Aè138Ü154¬170║186╩202┌218Ω234·250BÐ139ø155½171╗187╦203█219δ235√251Cð140£156¼172╝188╠204▄220∞236ⁿ252DÞ141Ø157¡173╜189═205▌221φ237²253EÄ142Pt158«174╛190╬206▐222ε238254FÅ143ƒ159»175┐191╧207▀223∩239SP255
Appendix137Page 36 (PC862: Hebrew)HEX 8 9 A B C D E F0 א128נ144á160░176└192╨208α224≡2401 ב129ס145í161▒177┴193╤209ß225±2412 ג130ע146ó162▓178┬194╥210Γ226≥2423 ד131ף147ú163│179├195╙211π227≤2434 ה132פ148ñ164┤180─196╘212Σ228⌠2445 ו133ץ149Ñ165╡181┼197╒213σ229⌡2456 ז134צ150ª166╢182╞198╓214μ230÷2467 ח135ק151º167╖183╟199╫215τ231≈2478 ט136ר152¿168╕184╚200╪216Φ232°2489 י137ש153⌐169╣185╔201┘217Θ233·249Aך138ת154¬170║186╩202┌218Ω234·250Bכ139¢155½171╗187╦203█219δ235√251Cל140£156¼172╝188╠204▄220∞236ⁿ252Dם141¥157¡173╜189═205▌221φ237²253Eמ142Pt158«174╛190╬206▐222ε238254Fן143ƒ159»175┐191╧207▀223∩239SP255
138Page 37 (PC864: Arabic)HEX 8 9 A B C D E F0 °128β144SP160٠176¢192ذ208224?2401 ·129∞145 161١177ء193ر209ف225?2412 ·130φ146آ162٢178آ194ز210ق226ن2423 √131±147£163٣179أ195س211ك227ه2434 ▒132½148¤164٤180ؤ196ش212ل228ه2445 ─133¼149أ165٥181ع197ص213م229ى2456 │134≈150SP166٦182ئ198ض214ن230ي2467 ┼135«151€167٧183ا199ط215ه231غ2478 ┤136»152ا168٨184ب200ظ216و232ق2489 ┬137لأ153ب169٩185ة201ع217ى233لآ249A├138لأ154ت170ف186ت202غ218ي234لآ250B┴139SP155ث171؛187ث203¦219ض235ل251C┐140SP156،172س188ج204¬220ع236ك252D┌141لا157ج173ش189ح205÷221غ237ي253E└142لا158ح174ص190خ206×222غ238■254F┘143ء159خ175؟191د207ع223م239SP255
Appendix139Page 38 (PC869: Greek)HEX 8 9 A B C D E F0 SP128Ί144ϊ160░176└192Τ208ζ224 2401 SP129Ϊ145ΐ161▒177┴193Υ209η225±2412 SP130Ό146ό162▓178┬194Φ210θ226υ2423 SP131SP147ύ163│179├195Χ211ι227ϕ2434 SP132SP148Α164┤180─196Ψ212κ228χ2445 SP133Ύ149Β165Κ181┼197Ω213λ229§2456 Ά134Ϋ150Γ166Λ182Π198α214μ230ψ2467 €135©151Δ167Μ183Ρ199β215ν231΅2478 ·136Ώ152Ε168Ν184╚200γ216ξ232°2489 ¬137²153Ζ169╣185╔201┘217ο233¨249A ¦138³154Η170║186╩202┌218π234ω250B ‘139ά155½171╗187╦203█219ρ235ϋ251C ’140£156Θ172╝188╠204▄220σ236ΰ252DΈ141έ157Ι173Ξ189═205δ221ς237ώ253E―142ή158«174Ο190╬206ε222τ238■254FΉ143ί159»175┐191Σ207▀223´239SP255
140Page 39 (ISO8859-2: Latin2)HEX 8 9 A B C D E F0 ░128└144SP160°176Ŕ192Ð208ŕ224đ2401 ▒129┴145Ą161ą177Á193Ń209á225ń2412 ▓130┬146˘162˛178Â194Ň210â226ň2423 │131├147Ł163ł179Ă195Ó211ă227ó2434 ┤132─148¤164´180Ä196Ô212ä228ô2445 ┘133┼149165181Ĺ197Ő213ĺ229ő2456 ┌134▄150Ś166ś182Ć198Ö214ć230ö2467 █135▀151§167ˇ183Ç199×215ç231÷2478 ©136╚152¨168¸184Č200Ř216č232ř2489 ╣137╔153Š169š185É201Ů217é233ů249A║138╩154Ş170ş186Ę202Ú218ę234ú250B╗139╦155Ť171187Ë203Ű219ë235ű251C╝140╠156Ź172ź188Ě204Ü220ě236ü252D ¢141═157 173˝189Í205Ý221í237ý253E ¥142╬158Ž174ž190Î206Ţ222î238ţ254F┐143®159Ż175ż191Ď207ß223239˙255
Appendix141Page 40 (ISO8859-15: Latin9)HEX 8 9 A B C D E F0 SP128SP144SP160°176À192Ð208à224ð2401 SP129SP145¡161±177Á193Ñ209á225ñ2412 SP130SP146¢162²178Â194Ò210â226ò2423 SP131SP147£163³179Ã195Ó211ã227ó2434 SP132SP148€164Ž180Ä196Ô212ä228ô2445 SP133SP149¥165μ181Å197Õ213å229õ2456 SP134SP150Š166182Æ198Ö214æ230ö2467 SP135SP151§167·183Ç199×215ç231÷2478 SP136SP152š168ž184È200Ø216è232ø2489 SP137SP153©169¹185É201Ù217é233ù249ASP138SP154ª170º186Ê202Ú218ê234ú250BSP139SP155«171»187Ë203Û219ë235û251CSP140SP156¬172Œ188Ì204Ü220ì236ü252DSP141SP157 173œ189Í205Ý221í237ý253ESP142SP158®174Ÿ190Î206Þ222î238þ254FSP143SP159¯175¿191Ï207ß223ï239ÿ255
142Page 41 (PC1098: Farci)HEX 8 9 A B C D E F0 SP128ؤ144ح160░176└192ع208ک224 2401 SP129ئ145خ161▒177┴193ع209ك225ی2412 ،130ب146خ162▓178┬194ع210گ226ي2423 ؛131ب147د163│179├195غ211گ2272434 ؟132پ148ذ164┤180─196غ212ل228٠2445 ً133پ149ر165ض181┼197غ213ل229١2456 آ134ت150ز166ض182ظ198غ214م230٢2467 آ135ت151ژ167ط183ع199ف215م231٣2478136ث152س168ط184╚200ف216ن232۴2489 ا137ث153س169╣185╔201┘217ن233۵249Aا138ج154ش170║186╩202┌218و234۶250B139ج155ش171╗187╦203█219ه235٧251Cء140چ156ص172╝188╠204▄220ه236٨252Dأ141چ157ص173 189═205ق221ه237٩253Eأ142×158«174ظ190╬206ق222ۀ238■254F143ح159»175┐191SP207▀223ی239SP255
Appendix143Page 42 (PC1118: Lithuanian)HEX 8 9 A B C D E F0 Ç128É144á160░176└192ą208α224≡2401 ü129æ145í161▒177┴193č209β225±2412 é130Æ146ó162▓178┬194ę210Γ226≥2423 â131ô147ú163│179├195ė211π227≤2434 ä132ö148ñ164┤180─196į212Σ228„2445 à133ò149Ñ165Ą181┼197š213σ229“2456 å134û150a166Č182Ų198ų214μ230÷2467 ç135ù151o167Ę183Ū199ū215τ231≈2478 ê136ÿ152¿168Ė184╚200ž216Φ232°2489 ë137Ö153⌐169╣185╔201┘217Θ233·249Aè138Ü154¬170║186╩202┌218Ω234˙250Bï139¢155½171╗187╦203█219δ235√251Cî140£156¼172╝188╠204▄220∞236ⁿ252Dì141¥157¡173Į189═205▌221ϕ237²253EÄ142Pt158«174Š190╬206▐222ε238■254FÅ143ƒ159»175┐191Ž207▀223239SP255
144Page 43 (PC1119: Lithuanian)HEX 8 9 A B C D E F0 А128Р144а160░176└192ą208р224Ё2401 Б129С145б161▒177┴193č209с225ё2412 В130Т146в162▓178┬194ę210т226≥2423 Г131У147г163│179├195ė211у227≤2434 Д132Ф148д164┤180─196į212ф228„2445 Е133Х149е165Ą181┼197š213х229“2456 Ж134Ц150ж166Č182Ų198ų214ц230÷2467 З135Ч151з167Ę183Ū199ū215ч231≈2478 И136Ш152и168Ė184╚200ž216ш232°2489 Й137Щ153й169╣185╔201┘217щ233·249AК138Ъ154к170║186╩202┌218ъ234·250BЛ139Ы155л171╗187╦203█219ы235√251CM140Ь156м172╝188╠204▄220ь236ⁿ252DН141Э157н173Į189═205▌221э237²253EО142Ю158о174Š190╬206▐222ю238■254FП143Я159п175┐191Ž207▀223я239SP255
Appendix145Page 44 (PC1125: Ukranian)HEX 8 9 A B C D E F0 А128Р144а160░176└192╨208р224Ё2401 Б129С145б161▒177┴193╤209с225ё2412 В130Т146в162▓178┬194╥210т226Ґ2423 Г131У147г163│179├195╙211у227ґ2434 Д132Ф148д164┤180─196╘212ф228Є2445 Е133Х149е165╡181┼197╒213х229є2456 Ж134Ц150ж166╢182╞198╓214ц230І2467 З135Ч151з167╖183╟199╫215ч231і2478 И136Ш152и168╕184╚200╪216ш232Ї2489 Й137Щ153й169╣185╔201┘217щ233ї249AК138Ъ154к170║186╩202┌218ъ234÷250BЛ139Ы155л171╗187╦203█219ы235±251CМ140Ь156м172╝188╠204▄220ь236№252DН141Э157н173╜189═205▌221э237¤253EО142Ю158о174╛190╬206▐222ю238■254FП143Я159п175┐191╧207▀223я239SP255
146Page 45 (WPC1250: Latin 2)HEX 8 9 A B C D E F0 €128SP144SP160°176Ŕ192Đ208ŕ224đ2401 SP129‘145ˇ161±177Á193Ń209á225ń2412 ‚130’146˘162˛178Â194Ň210â226ň2423 SP131“147Ł163ł179Ă195Ó211ă227ó2434 „132”148¤164´180Ä196Ô212ä228ô2445 …133•149Ą165μ181Ĺ197Ő213ĺ229ő2456 †134–150¦166182Ć198Ö214ć230ö2467 ‡135—151§167·183Ç199×215ç231÷2478 SP136SP152¨168¸184Č200Ř216č232ř2489 ‰137153©169ą185É201Ů217é233ů249AŠ138š154Ş170ş186Ę202Ú218ę234ú250B ‹139›155«171»187Ë203Ű219ë235ű251CŚ140ś156¬172188Ě204Ü220ě236ü252DŤ141157 173˝189Í205Ý221í237ý253EŽ142ž158®174190Î206Ţ222î238ţ254FŹ143ź159Ż175ż191Ď207ß223239˙255
Appendix147Page 46 (WPC1251: Cyrillic)HEX 8 9 A B C D E F0 Ђ128ђ144SP160°176А192Р208а224р2401 Ѓ129‘145Ў161±177Б193С209б225с2412 ‚130’146ў162І178В194Т210в226т2423 ѓ131“147Ј163і179Г195У211г227у2434 „132”148¤164ґ180Д196Ф212д228ф2445 …133•149Ґ165μ181Е197Х213е229х2456 †134–150¦166182Ж198Ц214ж230ц2467 ‡135—151§167·183З199Ч215з231ч2478 €136SP152Ё168ё184И200Ш216и232ш2489 ‰137153©169№185Й201Щ217й233щ249AЉ138љ154Є170є186К202Ъ218к234ъ250B ‹139›155«171»187Л203Ы219л235ы251CЊ140њ156¬172ј188М204Ь220м236ь252DЌ141ќ157 173Ѕ189Н205Э221н237э253EЋ142ћ158®174ѕ190О206Ю222о238ю254FЏ143џ159Ї175ї191П207Я223п239я255
148Page 47 (WPC1253: Greek)HEX 8 9 A B C D E F0 €128SP144SP160°176ΐ192Π208ΰ224π2401 SP129‘145΅161±177Α193Ρ209α225ρ2412 ‚130’146Ά162²178Β194SP210β226ς2423 ƒ131“147£163³179Γ195Σ211γ227σ2434 „132”148¤164΄180Δ196Τ212δ228τ2445 …133•149¥165μ181Ε197Υ213ε229υ2456 †134–150¦166182Ζ198Φ214ζ230ϕ2467 ‡135—151§167·183Η199Χ215η231χ2478 SP136SP152¨168Έ184Θ200Ψ216θ232ψ2489 ‰137153©169Ή185Ι201Ω217ι233ω249ASP138SP154ª170Ί186Κ202Ϊ218κ234ϊ250B ‹139›155«171»187Λ203Ϋ219λ235ϋ251CSP140SP156¬172Ό188Μ204ά220μ236ό252DSP141SP157 173½189Ν205έ221ν237ύ253ESP142SP158®174Ύ190Ξ206ή222ξ238ώ254FSP143SP159―175Ώ191Ο207ί223ο239SP255
Appendix149Page 48 (WPC1254: Turkish)HEX 8 9 A B C D E F0 €128SP144SP160°176À192Ğ208à224ğ2401 SP129‘145¡161±177Á193Ñ209á225ñ2412 ‚130’146¢162²178Â194Ò210â226ò2423 ƒ131“147£163³179Ã195Ó211ã227ó2434 „132”148¤164´180Ä196Ô212ä228ô2445 …133•149¥165μ181Å197Õ213å229õ2456 †134–150¦166182Æ198Ö214æ230ö2467 ‡135—151§167·183Ç199×215ç231÷2478 ˆ136˜152¨168¸184È200Ø216è232ø2489 ‰137153©169¹185É201Ù217é233ù249AŠ138š154ª170º186Ê202Ú218ê234ú250B ‹139›155«171»187Ë203Û219ë235û251CŒ140œ156¬172¼188Ì204Ü220ì236ü252DSP141SP157 173½189Í205İ221í237ı253ESP142SP158®174¾190Î206Ş222î238ş254FSP143Ÿ159¯175¿191Ï207ß223ï239ÿ255
150Page 49 (WPC1255: Hebrew)HEX 8 9 A B C D E F0 €128SP144SP160°176ְ192׀208א224נ2401 SP129‘145¡161±177ֱ193ׁ209ב225ס2412 ‚130’146¢162²178ֲ194ׂ210ג226ע2423 ƒ131“147£163³179ֳ195׃211ד227ף2434 „132”148₪164´180ִ196װ212ה228פ2445 …133•149¥165μ181ֵ197ױ213ו229ץ2456 †134–150¦166182ֶ198ײ214ז230צ2467 ‡135—151§167·183ַ199׳215ח231ק2478 ˆ136˜152¨168¸184ָ200״216ט232ר2489 ‰137153©169¹185ֺ201SP217י233ש249ASP138SP154×170÷186SP202SP218ך234ת250B ‹139›155«171»187ֻ203SP219כ235SP251CSP140SP156¬172¼188ּ204SP220ל236SP252DSP141SP157 173½189ֽ205SP221ם237SP253ESP142SP158®174¾190־206SP222מ238SP254FSP143SP159¯175¿191ֿ207SP223ן239SP255
Appendix151Page 50 (WPC1256: Arabic)HEX 8 9 A B C D E F0 €128گ144SP160°176ہ192ذ208à224ً2401 پ129‘145،161±177ء193ر209ل225ٌ2412 ‚130’146¢162²178آ194ز210â226ٍ2423 ƒ131“147£163³179أ195س211م227َ2434 „132”148¤164´180ؤ196ش212ن228ô2445 …133•149¥165μ181إ197ص213ه229ُ2456 †134–150¦166182ئ198ض214و230ِ2467 ‡135—151§167·183ا199×215ç231÷2478 ˆ136ک152¨168¸184ب200ط216è232ّ2489 ‰137153©169¹185ة201ظ217é233ù249Aٹ138ڑ154ه170؛186ت202ع218ê234ْ250B ‹139›155«171»187ث203غ219ë235û251CŒ140œ156¬172¼188ج204220ى236ü252Dچ141SP157 173½189ح205ف221ي237SP253Eژ142SP158®174¾190خ206ق222î238SP254Fڈ143ں159¯175؟191د207ك223ï239ے255
152Page 51 (WPC1257: Baltic Rim)HEX 8 9 A B C D E F0 €128SP144SP160°176Ą192Š208ą224š2401 SP129‘145SP161±177Į193Ń209į225ń2412 ‚130’146¢162²178Ā194Ņ210ā226ņ2423 SP131“147£163³179Ć195Ó211ć227ó2434 „132”148¤164´180Ä196Ō212ä228ō2445 …133•149SP165μ181Å197Õ213å229õ2456 †134–150¦166182Ę198Ö214ę230ö2467 ‡135—151§167·183Ē199×215ē231÷2478 SP136SP152Ø168ø184Č200Ų216č232ų2489 ‰137153©169¹185É201Ł217é233ł249ASP138SP154Ŗ170ŗ186Ź202Ś218ź234ś250B ‹139›155«171»187Ė203Ū219ė235ū251CSP140SP156¬172¼188Ģ204Ü220ģ236ü252D¨141¯157 173½189Ķ205Ż221ķ237ż253Eˇ142˛158®174¾190Ī206Ž222ī238ž254F¸143SP159Æ175æ191Ļ207ß223ļ239˙255
Appendix153Page 52 (WPC1258: Vientamese)HEX 8 9 A B C D E F0 €128SP144SP160°176À192Đ208à224đ2401 SP129‘145¡161±177Á193Ñ209á225ñ2412 ‚130’146¢162²178Â194̉210â226̣2423 ƒ131“147£163³179Ă195Ó211ă227ó2434 „132”148¤164´180Ä196Ô212ä228ô2445 …133•149¥165μ181Å197Ơ213å229ơ2456 †134–150¦166182Æ198Ö214æ230ö2467 ‡135—151§167·183Ç199×215ç231÷2478 ˆ136˜152¨168¸184È200Ø216è232ø2489 ‰137153©169¹185É201Ù217é233ù249ASP138SP154ª170º186Ê202Ú218ê234ú250B ‹139›155«171»187Ë203Û219ë235û251CŒ140œ156¬172¼188̀204Ü220́236ü252DSP141SP157 173½189Í205Ư221í237ư253ESP142SP158®174¾190Î206̃222î238₫254FSP143Ÿ159¯175¿191Ï207ß223ï239ÿ255
154Page 53 (KZ1048: Kazakhstan)HEX 8 9 A B C D E F0 Ђ128ђ144SP160°176А192Р208а224р2401 Ѓ129‘145Ұ161±177Б193С209б225с2412 ‚130’146ұ162І178В194Т210в226т2423 ѓ131“147Ə163і179Г195У211г227у2434 „132”148¤164ө180Д196Ф212д228ф2445 …133•149Ө165μ181Е197Х213е229х2456 †134–150¦166182Ж198Ц214ж230ц2467 ‡135—151§167·183З199Ч215з231ч2478 €136SP152Ё168ё184И200Ш216и232ш2489 ‰137153©169№185Й201Щ217й233щ249AЉ138љ154Ғ170ғ186К202Ъ218к234ъ250B ‹139›155«171»187Л203Ы219л235ы251CЊ140њ156¬172ə188М204Ь220м236ь252DҚ141қ157-173Ң189Н205Э221н237э253EҺ142һ158®174ң190О206Ю222о238ю254FЏ143џ159Ү175ү191П207Я223п239я255
Appendix155Page 255 (User-Defined Page)HEX 8 9 A B C D E F0 SP128SP144SP160SP176SP192SP208SP224SP2401 SP129SP145SP161SP177SP193SP209SP225SP2412 SP130SP146SP162SP178SP194SP210SP226SP2423 SP131SP147SP163SP179SP195SP211SP227SP2434 SP132SP148SP164SP180SP196SP212SP228SP2445 SP133SP149SP165SP181SP197SP213SP229SP2456 SP134SP150SP166SP182SP198SP214SP230SP2467 SP135SP151SP167SP183SP199SP215SP231SP2478 SP136SP152SP168SP184SP200SP216SP232SP2489 SP137SP153SP169SP185SP201SP217SP233SP249ASP138SP154SP170SP186SP202SP218SP234SP250BSP139SP155SP171SP187SP203SP219SP235SP251CSP140SP156SP172SP188SP204SP220SP236SP252DSP141SP157SP173SP189SP205SP221SP237SP253ESP142SP158SP174SP190SP206SP222SP238SP254FSP143SP159SP175SP191SP207SP223SP239SP255
International Character SetsCountryASCII code (Hex)23 24 25 2A 40 5B 5C 5D 5E 60 7B 7C 7D 7EUSA# $ % * @ [ ¥ ] ^ ` { | } ~France# $ % * à ° ç § ^ ` é ù è ¨Germany# $ % * § Ä Ö Ü ^ ` ä ö ü βU.K.£ $ % * @ [ ¥ ] ^ ` { | } ~Denmark I # $ % * @ Æ Ø Å ^ ` æ ø å ~Sweden# ¤ % * É Ä Ö Å Ü é ä ö å üItaly# $ % * @ ° ¥ é ^ ù à ò è ìSpain IPt $ % * @ ¡ Ñ ¿ ^ ` ¨ ñ } ~Japan # $ % * @ [ ¥ ] ^ ` { | } ~Norway# ¤ % * É Æ Ø Å Ü é æ ø å üDenmark II # $ % * É Æ Ø Å Ü é æ ø å üSpain II# $ % * á ¡ Ñ ¿ é ` í ñ ó úLatin America # $ % * á ¡ Ñ ¿ é ü í ñ ó úKorea # $ % * @ [ W ] ^ ` { | } ~Slovenia/Croatia # $ % * Ž Š Đ Ć Č ž š đ ć čChina# Ұ % * @ [ ¥ ] ^ ` { | } ~Vietnum₫ $ % * @ [ ¥ ] ^ ` { | } ~Arabia# $ % * @ [ ¥ ] ^ ` { | } ~156


