
You also want an ePaper? Increase the reach of your titles
YUMPU automatically turns print PDFs into web optimized ePapers that Google loves.
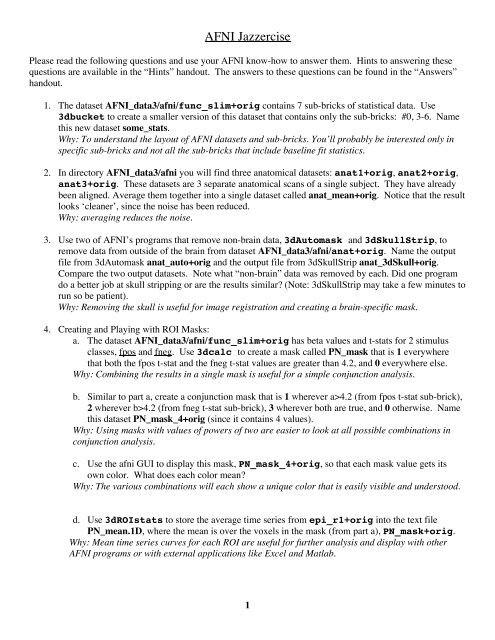
<strong>AFNI</strong> <strong>Jazzercise</strong>Please read the following questions and use your <strong>AFNI</strong> know-how to answer them. Hints to answering thesequestions are available in the “Hints” handout. The answers to these questions can be found in the “Answers”handout.1. The dataset <strong>AFNI</strong>_data3/afni/func_slim+orig contains 7 sub-bricks of statistical data. Use3dbucket to create a smaller version of this dataset that contains only the sub-bricks: #0, 3-6. Namethis new dataset some_stats.Why: To understand the layout of <strong>AFNI</strong> datasets and sub-bricks. You’ll probably be interested only inspecific sub-bricks and not all the sub-bricks that include baseline fit statistics.2. In directory <strong>AFNI</strong>_data3/afni you will find three anatomical datasets: anat1+orig, anat2+orig,anat3+orig. These datasets are 3 separate anatomical scans of a single subject. They have alreadybeen aligned. Average them together into a single dataset called anat_mean+orig. Notice that the resultlooks ‘cleaner’, since the noise has been reduced.Why: averaging reduces the noise.3. Use two of <strong>AFNI</strong>’s programs that remove non-brain data, 3dAutomask and 3dSkullStrip, toremove data from outside of the brain from dataset <strong>AFNI</strong>_data3/afni/anat+orig. Name the outputfile from 3dAutomask anat_auto+orig and the output file from 3dSkullStrip anat_3dSkull+orig.Compare the two output datasets. Note what “non-brain” data was removed by each. Did one programdo a better job at skull stripping or are the results similar? (Note: 3dSkullStrip may take a few minutes torun so be patient).Why: Removing the skull is useful for image registration and creating a brain-specific mask.4. Creating and Playing with ROI Masks:a. The dataset <strong>AFNI</strong>_data3/afni/func_slim+orig has beta values and t-stats for 2 stimulusclasses, fpos and fneg. Use 3dcalc to create a mask called PN_mask that is 1 everywherethat both the fpos t-stat and the fneg t-stat values are greater than 4.2, and 0 everywhere else.Why: Combining the results in a single mask is useful for a simple conjunction analysis.b. Similar to part a, create a conjunction mask that is 1 wherever a>4.2 (from fpos t-stat sub-brick),2 wherever b>4.2 (from fneg t-stat sub-brick), 3 wherever both are true, and 0 otherwise. Namethis dataset PN_mask_4+orig (since it contains 4 values).Why: Using masks with values of powers of two are easier to look at all possible combinations inconjunction analysis.c. Use the afni GUI to display this mask, PN_mask_4+orig, so that each mask value gets itsown color. What does each color mean?Why: The various combinations will each show a unique color that is easily visible and understood.d. Use 3dROIstats to store the average time series from epi_r1+orig into the text filePN_mean.1D, where the mean is over the voxels in the mask (from part a), PN_mask+orig.Why: Mean time series curves for each ROI are useful for further analysis and display with other<strong>AFNI</strong> programs or with external applications like Excel and Matlab.1
5. Fun with 1D files:a. Create three 1-column files with the numbers 1-10 in one column of the first file, 11-20 in thesecond file, and 21-30 in the third file. (note: you might use 2 different <strong>AFNI</strong> programs to createeach file)b. Catenate these 3 files into one 3-column file. Call this 1D file 3_cols.1D.c. Create a new file that contains columns 1, 2, 3, 3, 2,1, from part b (i.e., there will be a total of 6columns in this new 1D file). Call this new 1D file 6_cols.1D.d. Now take the 6 columns from question 7b and average them together to create a new file with asingle column. Call that new file ex_mean.1D.Why: <strong>AFNI</strong> 1D programs can help to combine and analyze data from multiple voxels or masks.6. Fun with the <strong>AFNI</strong> GUI:a. Open <strong>AFNI</strong>_data3/afni/anat+orig and in any one of the views (sagittal, axial, or coronal),change the gray-scale intensity range to be 500 minimum and 1500 maximum.b. Open <strong>AFNI</strong>_data3/afni/func_slim+orig and set the Full-F as the OLay and Threshold. Setthe Threshold to F=8.0. Show only Positive values and set the color scale to show only 8 colors.Edit the color scale so that F-values between 14 and 28 are shown in lime green.c. View the above settings you created from part b in a sagittal slice. Make a jpeg file from sagittalslice #166 and name it cool_slide.d. Switch to Talairach view and Talairach to the right fusiform gyrus.e. Change the display to show 6 sagittal slices all at once, in a 3x2 montage.f. Can you find the <strong>AFNI</strong> Mission statement hidden in the <strong>AFNI</strong> GUI?Why: The <strong>AFNI</strong> GUI has the flexibility to look at your data, and it’s fun once you learn how.7. Doing Calculations in <strong>AFNI</strong>:a. Determine what type of data (short, float, etc) makes up dataset<strong>AFNI</strong>_data3/afni/func_slim+orig.Why: It’s important to know how to find information about your dataset.b. Calculate 22.3 * 44.5 using the simple calculating program in <strong>AFNI</strong>.Why: <strong>AFNI</strong> provides calculation tools including simple ones that are useful in scripts.8. Image Filtering:a. Smooth <strong>AFNI</strong>_data3/afni/epi_r1+orig with a 8mm FWHM filter. Name the output fileex_blur8.b. Enhance <strong>AFNI</strong>_data3/afni/anat+orig by emphasizing the minimum-valued voxels across +/-3 voxels in the sagittal (x) direction. Name the output dataset ex_minx3. Note the effects oneach slice direction.2
c. Enhance dataset ex_minz3+orig from part b by removing the noise with program3danisosmooth. Name the output dataset ex_aniso. Use the -viewer option in this programto select the number of noise-removing iterations.Why: Image filtering provides some powerful ways to enhance the data. Data can be changed inradically different ways. Use this power wisely.9. Random Exercises with <strong>AFNI</strong> Datasets:a. Open dataset <strong>AFNI</strong>_data3/afni/anat+orig dataset and find the spatial storage order (i.e., xyzorientation).Re-orient it to LPI orientation and name the new output dataset exLPI.Why: Data may be required by specific programs to match other data or to match a specificorientation.b. Open dataset <strong>AFNI</strong>_data3/afni/func_slim+orig and create 2 separate datasets: one withthe 3 rd sub-brick only and one with the 4 th sub-brick only. Call the former dataset ex_fneg_coefand the latter ex_fneg_tstat.Why: Extracting specific data is useful for exporting to other software or for making the data fit inmemory more easily if it’s a large dataset.c. Combine ex_fneg_coef+orig and ex_fneg_tstat+orig from part b into a singledataset called ex_fneg, having the fneg Coef for sub-brick 0, and fneg t-stat for sub-brick 1.Why: Datasets can be manipulated to include only what you’re interested in.d. Convert dataset <strong>AFNI</strong>_data3/afni/func_slim+orig to Talairach coordinates with a 4mm 3resolution. Use dataset anat+tlrc in the same directory as the data parent to perform thetransformation on func_slim+orig. Name the output file func_slim4mm.Why: Talairach data will be 1mm 3 by default. This resolution is often not necessary because itdoesn’t reflect the resolution of the EPI data. It makes processing slower and taxes memory too.e. Locate the maximum “Full-F” stat voxel value in dataset func_slim4mm+tlrc and find thename of the Talairach atlas region that corresponds to that voxel’s position.Why: Finding maximum activation can be scripted or searched interactively. Atlas regions should beused as a guide. The <strong>AFNI</strong> GUI includes various atlases that cite the regions associated with anyspecific voxel.f. Dataset <strong>AFNI</strong>_data3/afni/anat+orig was acquired sagittally and contains 124 slices. Createa new dataset that contains only slices 40-90 of anat+orig. Provide the new dataset with theprefix name anat_40_90.Why: If memory or processing speed is a constraint, you can work with only part of the data.3