Montageanleitung (deutsch, englisch) CANview ... - IFM Electronic
Montageanleitung (deutsch, englisch) CANview ... - IFM Electronic
Montageanleitung (deutsch, englisch) CANview ... - IFM Electronic

Create successful ePaper yourself
Turn your PDF publications into a flip-book with our unique Google optimized e-Paper software.
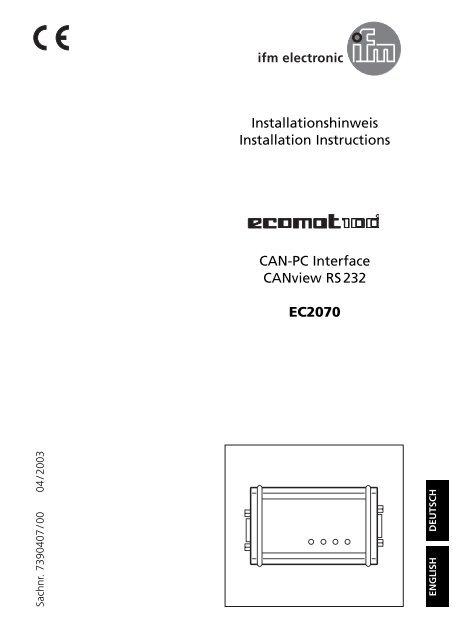
InstallationshinweisInstallation InstructionsRCAN-PC Interface<strong>CANview</strong> RS 232EC2070Sachnr. 7390407 / 00 04 / 2003ENGLISHDEUTSCH
CANVIEW RS 232Technische DatenBetriebsspannung U BBStromaufnahmeBetriebstemperaturGehäuseAbmessungen (B x H x T)Gewicht9...36 V DC(wahlweise über CAN-Bus oder externes Netzteil)ca. 70 mA (bei 24 V DC)0...70 ° CAluminium102 x 60 x 35 mm140 gDiagnose-LED CAN, ERROR, ON, RS 232Speichergröße/-typProgramm128 kByte FLASHDaten32 kByte SRAMParameter512 Byte EEPROMCAN-Schnittstelle9-poliger D-Sub-Stecker (Stift)Spezifikation 2.0 B, ISO 11898Übertragungsratemax. 1 MBit/sIdentifier11 Bit / 29 BitPufferspeicher1000 NachrichtenExtrasschaltbarer CAN-AbschlußwiderstandSerielle SchnittstelleRS 232 C, 9-poliger D-Sub-Stecker (Stift)Übertragungsratemax. 115,2 kBit/sPufferspeicher256 ZeichenHandshakesignaleCTS, RTS, DSR, DTRSoftware<strong>CANview</strong> ConfiguratorSystemanforderungenMicrosoft Windows ® 98, NT 4, 2000 oder XPProzessorab Pentium I, 200 MHzRAMab 8 MByteSchnittstelle1 freie RS 232 C-Schnittstelle (16C550 kompatibel UART)Grafik SVGA 800 x 600SonstigesLieferumfang incl. RS 232 C-Kabel (9-pol. Buchse-Buchse)359460CAN POWERRS232ONERRORCANRS 232121) Spannungsversorgung(alternativ zum CAN-Bus)2) D-Sub-Stecker, 9-polig102SEITE 4
CANVIEW RS 232AnschlussbelegungRS 232 CPin Potential 1)1 DCD2 RxD3 TxD4 DTR5 GND / RS 232 2)6 DSR7 RTS8 CTS9 n.c.POWERCAN9 + V BBPin PotentialPin Potential1 n.c.1 GND2 CAN_L13 GND 2)62 9...36 V DC2734 n.c.845 n.c.56 GND7 CAN_H8 n.c.9 211)von PC-Seite gesehen2)galvanisch getrenntWichtige Hinweise für die Verwendung von <strong>CANview</strong>• Eine Schirmung darf nur von jeweils einer Seite (RS232C-Seite oder CAN-Seite)aufgelegt werden, da sonst die galvanische Trennung aufgehoben wird!(Standardmäßig wird die Schirmung über das mitgelieferte RS232C-Kabel aufgelegt).• Die Stromversorgung erfolgt entweder über den CAN-Steckverbinder oder überden Power-Jack. Es muss sichergestellt sein, dass beide Spannungsversorgungennicht gleichzeitig erfolgen!• Die Signale CAN-Low und CAN-High am CAN-Steckverbinder müssen mit denSignalen an den CAN-Anschlußklemmen der angeschlossenen Geräte übereinstimmen.• GND des 9-poligen CAN-Steckverbinders muß mit dem GND des CAN-Bussesverbunden sein.• Für die CAN-Übertragungsrate gelten folgende Richtwerte:CAN-Übertragungsratemax.Busausdehnung1000 kBit/s . . . . . . . . . . . . 25 m800 kBit/s . . . . . . . . . . . . 50 m500 kBit/s . . . . . . . . . . . 100 m250 kBit/s . . . . . . . . . . . 250 m125 kBit/s . . . . . . . . . . . 500 m50 kBit/s . . . . . . . . . . 1000 mSEITE 5
CANVIEW RS 232<strong>CANview</strong> InbetriebnahmeDie Inbetriebnahme erfolgt durch Anschließen der RS232- und der CAN-Verbindungsowie der Stromversorgung (Hinweise auf Seite 5 beachten!).Software - <strong>CANview</strong> VCI-Treiber installieren1. Starten Sie Windows und legen Sie dieCD-ROM in das CD-Laufwerk.Alternativ zur CD-ROM kann der Treiber auchüber das Internet abgerufen werden:www.ifm-electronic.com ➔ Service ➔ Download.2. Starten Sie die Datei „setup.exe“ aus demCD-ROM-Verzeichnis „<strong>CANview</strong>“ oder ausIhrem Downloadverzeichnis und folgen Sieden Anweisungen des Setup-Programms.Nach der Installation befindet sich im Startmenüder neue Eintrag „ifm electronic Software/ VCI Configurator“.3. Öffnen Sie das Programm und wählen Sieden Button „Use ifm VCI Emulation“.Dieser Schritt ist nach der Programminstallationzwingend notwendig, um den <strong>CANview</strong>VCI-Treiber zu aktivieren.4. Überprüfen und korrigieren Sie ggf. dieSchnittstellenparameter der belegten seriellenSchnittstelle.5. Wählen Sie im Menü „VCI Device ID“ (Geräteidentifier) einen Eintrag, der mitder Angabe in Ihrer Zielsoftware (ecolog 100 plus , CANmon oder Downloader)übereinstimmt.Es ist möglich zwischen dem <strong>CANview</strong> VCI-Treiber und einem ggf. installiertenVCI-Treiber einer anderen CAN-Schnittstelle umzuschalten.Diese Funktion ermöglicht eine gleichzeitige Treiberinstallation jedoch nichtden gleichzeitigen Betrieb der CAN-Schnittstellen.SEITE 6
CANVIEW RS 232<strong>CANview</strong> betreibenAußer den genannten Einstellungen müssen in der verwendeten Zielsoftware(ecolog 100 plus , CANmon, etc.) folgende Parameter eingestellt werden:• Kommunikation über CAN• CAN-Übertragungsrate (Voreinstellung 125 kBit/s)• CAN-Interface (Geräteidentifier) in Übereinstimmung mit dem VCI-Configurator.Nach dem Starten der Kommunikation wird <strong>CANview</strong> mit den vorher festgelegtenParametern initialisiert und ist für den Datenaustausch zwischen RS232 undCAN bereit.Deinstallation der VCI-SoftwareDie Deinstallation erfolgt unter Menü „Start“ ➔ „Einstellungen“ ➔ „Systemsteuerung“➔ „Software“ ➔ „ifm VCI-Interface“.Diagnose-LEDsBei der Kommunikation über die CAN- und die RS232-Schnittstelle zeigen dieLEDs folgende Funktionen an:LED Zustand BedeutungCAN AUS Es werden keine Daten gesendetEINCAN-Kommunikation aktivblinkend ca. 20 Hz (synchron mit ERROR) Fehler CANERROR AUS Normal-Mode (keine Fehler)blinkend ca. 20 HzFehler RS232 oder CANON AUS Keine VersorgungsspannungEINNormal-ModeRS232 AUS RS232 Kommunikation inaktivEINRS232 Kommunikation aktivblinkend ca. 20 Hz (synchron mit ERROR) Fehler RS232SEITE 7
CANVIEW RS 232Safety instructionsObserve the information of this document. Non-observance of the notes,operation which is not in accordance with use as prescribed below, wronginstallation or handling can result in serious harm concerning the safety ofpersons and plant.Disconnect the devices externally before doing any work on it. If necessary,also disconnect separately supplied output load circuits.The devices may only be installed, connected and commissioned by qualifiedpersonnel.In the case of malfunctions or uncertainties please contact the manufacturer.Tampering with the device can lead to considerable risks for the safety ofpersons and plant. It is not permitted and leads to an exclusion of any liabilityand warranty claims.The software is suitable for normal use on common personal computers.According to the present state of software technology no guarantee can beassumed for the correct operation or absence of computer viruses nor forthe removal of any fault which may occur. In the case of an incorrect programifm electronic cannot be held liable for cost incurred at the customer(e.g. maintenance, repair or rectification of faults). The exclusion does notapply to damage for which liability is mandatory according to peremptorylegal provisions.ContentsFunction and features . . . . . . . . . . . . . . . . . . . . . . . . . . . . . . . . page 9Overview of data. . . . . . . . . . . . . . . . . . . . . . . . . . . . . . . . . . page 9Technical data . . . . . . . . . . . . . . . . . . . . . . . . . . . . . . . . . . . . . . page 10Wiring . . . . . . . . . . . . . . . . . . . . . . . . . . . . . . . . . . . . . . . . . . . page 11Important notes for the use of <strong>CANview</strong>. . . . . . . . . . . . . . . . . page 11Start-up of <strong>CANview</strong> . . . . . . . . . . . . . . . . . . . . . . . . . . . . . . . . page 11Install <strong>CANview</strong> VCI driver . . . . . . . . . . . . . . . . . . . . . . . . . . . page 12Operate <strong>CANview</strong> . . . . . . . . . . . . . . . . . . . . . . . . . . . . . . . . . page 13Deinstallation of the VCI software . . . . . . . . . . . . . . . . . . . . . page 13Diagnostic LEDs. . . . . . . . . . . . . . . . . . . . . . . . . . . . . . . . . . . . . page 13Notes . . . . . . . . . . . . . . . . . . . . . . . . . . . . . . . . . . . . . . . . . . . . page 14PAGE 8
CANVIEW RS 232Function and features<strong>CANview</strong> RS232 is an active CAN interface for the connection of a CAN fieldbussystem to a serial RS232 interface (e.g. PC interface).The main applications for <strong>CANview</strong> RS232 are to enable the user to do programdownloads, online diagnostics and system performance monitoring from the userPC interface via the CAN network.Overview of dataDepending on the configuration the interface can transmit and receive standardmessages (11-bit identifier) as well as extended messages (29-bit identifier). TheCAN baud rate can be freely selected according to the CiA standard.<strong>CANview</strong> can be used safely due to its large supply voltage range of 9...36 V DCand the electrically separated RS232C interface.The baud rate (up to 115.2 Kbits/s), handshake, parity, etc. can be set on theRS232 side.<strong>CANview</strong> can only be used with the following software packages:• ecolog 100 plus Version 2.1 (programming software) or higher• CoDeSys Version 2.3 (programming software) or higher• Downloader (download tool for R360 control system)• CANmon (ifm CAN monitor)• CANcom software and tools (communication software for the CAN/GSMmodem)In the event of special requirements more unit parameters can be set via a separatelyavailable configuration software (for diagnostics and test purposes or forEMV-critical applications such as modifications to the CAN transceiver waveform,e.g. vary the rising edge rate).The automatic recognition of the CAN bus baud rate is supported from the hardwareside.A CAN bus terminating resistor which can be switched on or off is integrated in<strong>CANview</strong>.The supply voltage as well as the static level of the CAN signals can be measuredusing the A/D converter of the microcontroller.ENGLISHPAGE 9
CANVIEW RS 232Technical dataOperating voltage U BBCurrent consumptionOperating temperatureHousingDimension (w x h x d)Weight9...36 V DC(optionally via CAN bus or an external power supply)approx. 70 mA (at 24 V DC)0...70 ° Caluminium102 x 60 x 35 mm140 gDiagnosis LED CAN, ERROR, ON, RS 232Memory size/typeProgram128 Kbyte FLASHData32 Kbyte SRAMParameters512 byte EEPROMCAN interface9 pole Sub-D plug (pin)Specification 2.0 B, ISO 11898Transmission ratemax. 1 Mbits/sIdentifier11 bits / 29 bitsBuffer storage1000 messagesExtrasCAN terminating resistor can be switchedSerial interfaceRS 232 C, 9-pole Sub-D plug (pin)Transmission ratemax. 115.2 kbit/sBuffer storage256 charactersHandshake signalsCTS, RTS, DSR, DTRSoftware<strong>CANview</strong> ConfiguratorSystem requirementsMicrosoft Windows ® 98, NT 4, 2000 or XPProcessorPentium I or higher, 200 MHzRAM8 Mbytes or moreInterface1 free RS 232 C interface (compatible with 16C550 UART)Graphic SVGA 800 x 600Othersupplied with RS 232 C cable (9-pole socket-socket)359460CAN POWERRS232ONERRORCANRS 232121) Power supply (alternativelyto the CAN bus)2) D-Sub plug, 9 pins102PAGE 10
CANVIEW RS 232WiringRS 232 CPin Potential 1)1 DCD2 RxD3 TxD4 DTR5 GND / RS 232 2)6 DSR7 RTS8 CTS9 n.c.POWERCAN9 + V BBPin PotentialPin Potential1 n.c.1 GND2 CAN_L13 GND 2)62 9...36 V DC2734 n.c.845 n.c.56 GND7 CAN_H8 n.c.9 211)seen from the PC2)electrically separatedImportant notes for the use of <strong>CANview</strong>• A screened cable may only be connected from one side of the <strong>CANview</strong>, eitheron the RS232C side or CAN side, otherwise the electrical separation will be deactivated!(As a standard we advise the screen is applied via the RS232C cable supplied.)• Current is supplied either via the CAN connector or via the Power-Jack. It hasto be ensured that both voltage supplies are not used at the same time!• The signals on the CAN low and CAN high CAN terminals have to match thesignals on the CAN terminals of the units connected.• GND of the 9-pole CAN connector has to be connected to GND of the CANbus.• The following guide values apply to the CAN baud rate:CANbaud ratemax.bus extension1000 Kbits/s. . . . . . . . . . . . 25 m800 Kbits/s. . . . . . . . . . . . 50 m500 Kbits/s. . . . . . . . . . . 100 m250 Kbits/s. . . . . . . . . . . 250 m125 Kbits/s. . . . . . . . . . . 500 m50 Kbits/s. . . . . . . . . . 1000 mENGLISHPAGE 11
CANVIEW RS 232Start-up of <strong>CANview</strong>Start-up is carried out by connecting the RS232 and the CAN connections as wellas the current supply (follow the notes on page 11!).Install <strong>CANview</strong> VCI driver software1. Start Windows and insert the CD-ROMinto your CD drive.As an alternative to the CD-ROM the drivercan also be downloaded from the Internet:www.ifm-electronic.com ➔ Service ➔ Download.2. Start the "setup.exe" file from the "<strong>CANview</strong>"CD-ROM directory or from your downloaddirectory and follow the instructions ofthe set-up program.After installation the new entry "ifm electronicSoftware / VCI Configurator" is in thestart menu.3. Open the program and select the "Use ifmVCI Emulation" button.This step is compulsory after the program hasbeen installed to activate the <strong>CANview</strong> VCIdriver.4. Check and if necessary correct the interfaceparameters of the serial interface used.5. Select an entry in the "VCI Device ID" (device identifier) menu which correspondsto your target software (ecolog 100plus, CANmon or Downloader).It is possible to switch between the <strong>CANview</strong> VCI driver and a possibly installedVCI driver of another CAN interface.This function enables simultaneous driver installation but not simultaneousoperation of the CAN interfaces.PAGE 12
CANVIEW RS 232Operate <strong>CANview</strong>In addition to the indicated settings the following parameters have to be set inthe used target Software (ecolog 100plus, CANmon, etc.):• communication via CAN• CAN baud rate (default setting 125Kbits/s)• CAN interface (device identifier) corresponding to the VCI Configurator.When the communication has been started <strong>CANview</strong> is initialised using the previouslydefined parameters and it is ready for the data exchange between RS232and CAN.Deinstallation of the VCI softwareThe deinstallation is made under menu "Start" ➔ "Settings" ➔ "System control"➔ "Software" ➔ "ifm VCI-Interface".Diagnostic LEDsThe LEDs indicate the following functions during communication via the CAN andRS232 interfaces:LED Status MeaningCAN OFF No data are transmittedONCAN communication activeFlashing approx. 20 HzError CAN(synchronously with ERROR)ERROR OFF Normal mode (no error)Flashing approx. 20 HzError RS232 or CANON OFF No supply voltageONNormal modeRS232 OFF RS232 communication inactiveONRS232 communication activeFlashing approx. 20 HzError RS232(synchronously with ERROR)ENGLISHPAGE 13
Technische Änderungen behalten wir uns ohne vorherige Ankündigung vor. • We reserve the right to make technical alterations without prior notice. • Nous nous réservons le droit de modifier les données techniques sans préavis.