
You also want an ePaper? Increase the reach of your titles
YUMPU automatically turns print PDFs into web optimized ePapers that Google loves.
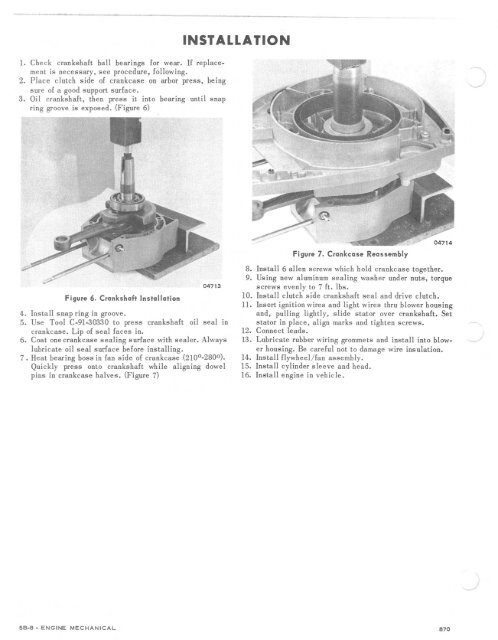
1. Check cranks haft ball bearings for wear. If replacementis necessary, see procedure, following.2. P la ce clutch s ide of crankcas e on arbor press, beingsure of a good support surface.3. Oil crankshaft , then pres s it into bearing until snapring groo ve is exposed. (F igure 6)INSTALLATIONFigure 7. Crankcase Reassem blyFigure 6. Crankshaft Installation4. Install snap ring in groove.5. Us e Tool C-91-303 30 to press crankshaft oil seal incra nkc as e . L ip of seal faces in.6. Coat one crankcase sealing surface with s ealer. Alwayslubricate oil seal surface before installing.7. Hea t bearing boss in fan side of crankcase (210 0 .280 0 ) .Quickly press onto crankshaft wh ile aligning dowelpins in crankcase halves. (Figure 7)8. Install 6 allen s cre ws which hold cra nkcas e together.9. Using new aluminum sealing washer under nuts, torquescrews evenly to 7 ft. lbs.10. Install clutch side crankshaft seal and dr ive clutch.11. Insert ignition wires and ligh t wires thru blower ho us ingand, pulling lightly, slide stator over crankshaft . Se tstator in place, align marks and ti ghten s crews.12. Connect leads.13. Lubricate rubber wiring grommets and install into blowerhousing. Be careful not to damage wire insulat ion.14. Install flywheel/fan assembly.15. Install cylinder sleeve and head.16. Install engine in vehicle .58-8 - ENGINE M ECHANICAL870