
Create successful ePaper yourself
Turn your PDF publications into a flip-book with our unique Google optimized e-Paper software.
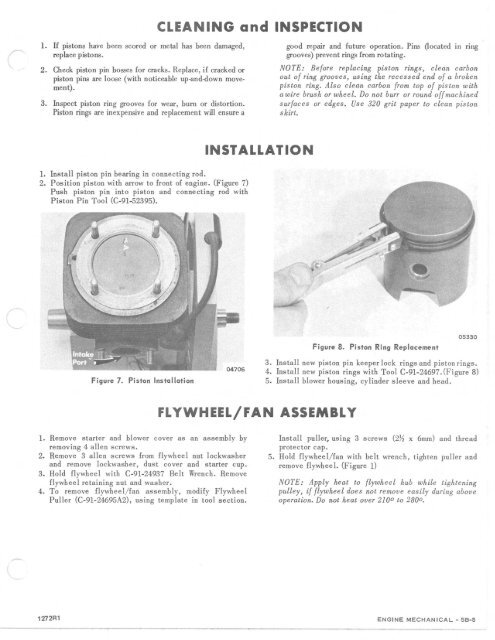
CLEANING a nd INSPECTION1. If pistons have been scored or metal has been damaged,replace pistons.2. Check piston pin bosses for cracks. Replace, if cracked orpiston pins are loose (with noticeable up-and-down movement).3. Inspect piston ring grooves for wear, bum or distortion.Piston rings are inexpensive and replacement will ensure agood repair and future operation. Pins (located In ringgrooves) prevent rings from rotating.NOTE: Before replacing piston rings, clean carbonout of ring grooves, using the recessed end of a brokenpiston ring. Also clean carbon from top of piston witha wire brush or wheel. Do not burr or round offmachinedsurfaces or edges. Use 320 grit paper to clean pistonskirt.INSTA LLATION1. Insta ll piston pin bearing in connecting rod.2. Position piston with arrow to front of engine. (Figure 7)Push piston pin into piston and connecting rod withP iston Pin Tool (C-91-52395).Figure 8.Piston Ring Replacement05330Figure 7.Piston Installation3. Install new piston pin keeper lock rings and piston rings.4. Install new piston rin gs with Tool C-91-24697. (Figure 8)5. Install blower housing, cylinder sleeve and head.FLYWHEEL/FAN ASSEM BLY1. Remove starter and blower cover as an assembly byremoving 4 allen screws.2. Remove 3 allen screws from flywheel nut lockwasherand remove lockwasher, dust cover and starter cup.3. Hold flywheel with C-91-24937 Belt Wrench. Removeflywheel retaining nut and washer.4. To remove flywheel/fan assembly, modify FlywheelPuller (C-91 -24695A2), using template in tool section.Install puller, using 3 screws (2Y:i x 6mm) and threadprotector cap.5. Hold flywheel/fan with belt wrench, tighten puller andremove flywheel. (Figure 1)NOTE: Apply heat to flywheel hub while tighteningpulley, if flywheel does not remove easily during aboveoperation. Do not heat over 210 0 to 2800.1272 R1ENGINE MECHANICAL - 58-5