Setting up a Wireless Network (Windows XP) - Wazza's Web Stuff
Setting up a Wireless Network (Windows XP) - Wazza's Web Stuff
Setting up a Wireless Network (Windows XP) - Wazza's Web Stuff
- No tags were found...

You also want an ePaper? Increase the reach of your titles
YUMPU automatically turns print PDFs into web optimized ePapers that Google loves.
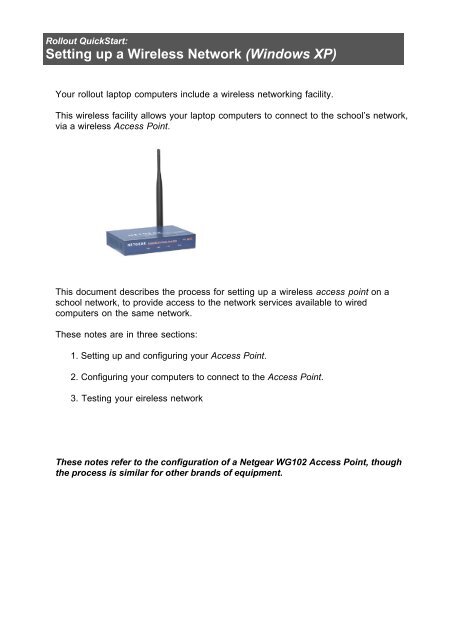
Rollout QuickStart:<strong>Setting</strong> <strong>up</strong> a <strong>Wireless</strong> <strong>Network</strong> (<strong>Windows</strong> <strong>XP</strong>)Your rollout laptop computers include a wireless networking facility.This wireless facility allows your laptop computers to connect to the school’s network,via a wireless Access Point.This document describes the process for setting <strong>up</strong> a wireless access point on aschool network, to provide access to the network services available to wiredcomputers on the same network.These notes are in three sections:1. <strong>Setting</strong> <strong>up</strong> and configuring your Access Point.2. Configuring your computers to connect to the Access Point.3. Testing your eireless networkThese notes refer to the configuration of a Netgear WG102 Access Point, thoughthe process is similar for other brands of equipment.
1. <strong>Setting</strong> Up and Configuring your Access PointMost readily available wireless access points are configured for a “generic”network, or a home network.You will need to re-configure the access point to communicate correctly with yourschool’s Local Area <strong>Network</strong> (LAN), and the DET’s Wide Area <strong>Network</strong> (WAN).Access points are configured through a web browser. You will need to temporarilyreconfigure a network computer to communicate directly with the Access Point.1.1. Disconnect a computer from the school network.1.2. Refer to the user manual that came with the Access Point to determine thedefault IP address of the Access Point.In the case of the Netgear Access Point, this address is 192.168.0.229.1.3. Use an Ethernet network cable to connect the Access Point directly to theEthernet port on the computer.1.4. Open My Computer.1.5. Click on My <strong>Network</strong> Places.1.6. Click on View <strong>Network</strong> Connections.Wazza’s QuickStart: Configuring a <strong>Wireless</strong> Access Point (Win <strong>XP</strong>) Page 2
1.7. Right-click the Local Area Connection, and choose Properties.1.8. Select the Internet Protocol (TCP/IP) and click on Properties.1.9. Your computer will be set<strong>up</strong> to Obtain an IP address using DHCP, or it willbe set to use the following IP address.IMPORTANT NOTE: Make a note of the current settings, so that you canreturn the computer to these settings once the Access Point isconfigured.1.10. Set the IP address of the computer to an IP address in the same range asthe IP address of the Access Point.In the Netgear example (where the default IP address of the Access point is192.168.0.229), use 192.168.0.210 as the IP address and 255.255.255.0 forthe subnet mask.For the purposes of setting <strong>up</strong> the Access Point there is no need to enter aDefault Gateway address.Click on OK to save the settings.Wazza’s QuickStart: Configuring a <strong>Wireless</strong> Access Point (Win <strong>XP</strong>) Page 3
1.11. Open a web browser on the computer and enter the IP address of theAccess Point. In our example this address is 192.168.0.229.1.12. You may be asked about the security certificate.Click on the Yes button.1.13. Enter the administrator username and password of the Access Point.This information is contained within the documentation that is included withthe Access Point.The Netgear username is admin, the password is password.Wazza’s QuickStart: Configuring a <strong>Wireless</strong> Access Point (Win <strong>XP</strong>) Page 4
1.14. You will see the configuration page of the Access Point.1.15. Navigate to the area of the configuration site that contains the settings forthe wireless network.Ensure that the <strong>Wireless</strong> LAN is activated, and operating in the combined802.11g/802.11b mode.Click on the Apply button.1.16. Navigate to the Security <strong>Setting</strong>s for the wireless network.The default settings are likely to be None.Wazza’s QuickStart: Configuring a <strong>Wireless</strong> Access Point (Win <strong>XP</strong>) Page 5
1.17. If your school is in an area where others may be able to connect to yourwireless network, you should enable the Access Point security settings.1.18. Click on the Edit button to edit the settings. (This process may differ on otherbrands of equipment).Provide a suitable identifying name for the network (eg - Library).Select WPA-PSK for your <strong>Network</strong> Authentication setting.1.19. If you are particularly concerned about the security of the network, disableSSID broadcasting too.This will make the network “invisible” to computers that are browsing for anetwork to which to connect.1.20. Click on the Apply button.1.21. You will be asked to reboot the Access Point.Click on the Reboot button.Wazza’s QuickStart: Configuring a <strong>Wireless</strong> Access Point (Win <strong>XP</strong>) Page 6
1.22. Reconnect to the Access Point, using your username and password, ifnecessary.1.23. Navigate to the area of the Access Point configuration site that contains thenetwork configuration information. (On the Netgear Access Point this isunder the Basic <strong>Setting</strong>s link at the left of the window).Provide a unique fixed IP address for the Access Point, that is compatiblewith your school’s network, and is within DET LAN guidelines. (Disable theDHCP client option - we want our Access Point to have the same IP addressall the time!).Include the school’s router (gateway) address, and the school’s DNS serveraddress.1.24. If necessary, enter your time-zone information, and click on the Apply button,which you may have to scroll to at the bottom of the screen.1.25. It is likely that you will now lose connection to the Access Point, because youhave change it’s IP address.1.26. Disconnect the cable joining the computer and the Access Point.Return the network settings of the computer to the original school networksettings that were entered in the network settings window before youcommenced the Access Point configuration process.This may have been a fixed IP address, or DHCP addressing.1.27. Use an Ethernet cable to connect the Access Point to the school’s network.Wazza’s QuickStart: Configuring a <strong>Wireless</strong> Access Point (Win <strong>XP</strong>) Page 7
2. Configuring computers to access the <strong>Wireless</strong> network2.1. On a computer with a wireless network card installed, check that the<strong>Wireless</strong> card is activated.This is often done using a button on the keyboard, which may emit a blueindicator light.When activated, you will be notified that the wireless network is active.2.2. Go to My Computer and click on My <strong>Network</strong> Places.2.3. Click on View <strong>Network</strong> Connections.2.4. The wireless network will have a red cross through it, indicating that it is notconnected to a wireless network.2.5. Right-click on the <strong>Wireless</strong> <strong>Network</strong> Connection icon, and choose Viewavailable wireless networks.Wazza’s QuickStart: Configuring a <strong>Wireless</strong> Access Point (Win <strong>XP</strong>) Page 8
2.6. Select the network that you have created on the Access Point.2.7. When you click on the network, you will see more information about thenetwork.2.8. Click on the Connect button, and enter the security password for yourAccess Point.2.9. After a short delay you will be advised that your are connected to the network.2.10. Your <strong>Network</strong> Connections window (My Computer > My <strong>Network</strong> Places >View <strong>Network</strong> Connections) will now show that the <strong>Wireless</strong> network isconnected.Wazza’s QuickStart: Configuring a <strong>Wireless</strong> Access Point (Win <strong>XP</strong>) Page 9
3. Testing your <strong>Wireless</strong> <strong>Network</strong>3.1. Check that your browser is configured to access your school’s network, withthe correct proxy server configured in your browser/network settings.3.2. Disconnect any wired network cables from the computer.3.3. Launch your web browser and check that you can access your school’sIntranet, and the Internet.3.4. Connect to any shared folders on your school’s server(s).3.5. Congratulations!You have now set<strong>up</strong>, and connected to, a <strong>Wireless</strong> network.Wazza’s QuickStart: Configuring a <strong>Wireless</strong> Access Point (Win <strong>XP</strong>) Page 10