science teacher's guide - DepEd Naga City
science teacher's guide - DepEd Naga City
science teacher's guide - DepEd Naga City

You also want an ePaper? Increase the reach of your titles
YUMPU automatically turns print PDFs into web optimized ePapers that Google loves.
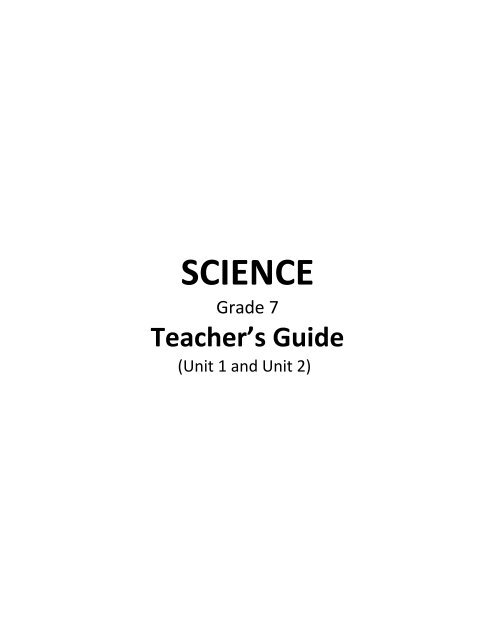
SCIENCEGrade 7Teacher’s Guide(Unit 1 and Unit 2)
For TeachersGrade 7 Science: MatterQUARTER 1DIVERSITY OF MATERIALSIN THE ENVIRONMENTDepartment of EducationUniversity of the PhilippinesNational Institute for Science and Mathematics Education Development
Copyright pageQuarter 1Teacher’s GuideGrade 7 Science: MatterDiversity of Materials in the EnvironmentMarlene B. Ferido, Jacqueline Rose M. Gutierrez, Writers.Ma. Cristina D. Padolina, Merle C. Tan, Reviewers.Rosita R. Cruz, Wilhelmina L. Dela Paz, Cecile N. Sales, Encoders.Alvin J. Encarnacion, Rizaldo Ramoncito S. Saliva, Artists.Cover Design by Alvin J. Encarnacion.May 2012
CONTENTSDiversity of Materials in the Environment: Overview . . . . . . . . . . . . . . .iModule 1. Solutions . . . . . . . . . . . . . . . . . . . . . . . . . . . . . . . . . . . . . . . 1Activity 1: What Solutions Do You Find in Your Home? . . . . . . . . . . 2Activity 2: What are the Properties of Solution? . . . . . . . . . . . . . . . . 3Activity 3: What is the Evidence that a Solution is Saturated? . . . . . 4Activity 4: Size Matters! . . . . . . . . . . . . . . . . . . . . . . . . . . . . . . . . . . . 7Activity 5: How Fast does Coffee Dissolve in Hot Water?In Cold Water?. . . . . . . . . . . . . . . . . . . . . . . . . . . . . . . . . . 9Activity 6: Which Dissolves Faster in Hot and in Cold Water:Sugar or Salt . . . . . . . . . . . . . . . . . . . . . . . . . . . . . . . . . . . 10Pre/Post Test . . . . . . . . . . . . . . . . . . . . . . . . . . . . . . . . . . . . . . . . . . . 13Module 2. Substances and Mixtures . . . . . . . . . . . . . . . . . . . . . . . . . . . 17Activity 1: Seawater! See Water and Salts! . . . . . . . . . . . . . . . . . . . . 18Activity 2: Looks may be Deceiving . . . . . . . . . . . . . . . . . . . . . . . . . 20Activity 3: My Unknown Sample: Substance or Mixture? . . . . . . . . . 25Pre/Post Test . . . . . . . . . . . . . . . . . . . . . . . . . . . . . . . . . . . . . . . . . . . 26Module 3. Elements and Compounds . . . . . . . . . . . . . . . . . . . . . . . . . . 28Activity 1: Water, “Wat-er You Made Of?. . . . . . . . . . . . . . . . . . . . . . 29Activity 2: The Periodic Table: It’s Element-ary! . . . . . . . . . . . . . . . . 34Activity 3: The “Matter” on Labels . . . . . . . . . . . . . . . . . . . . . . . . . . . 36Activity 4: The Iron-y of Food. . . . . . . . . . . . . . . . . . . . . . . . . . . . . . . 38Pre/Post Test . . . . . . . . . . . . . . . . . . . . . . . . . . . . . . . . . . . . . . . . . . . 39Module 4. Acids and Bases . . . . . . . . . . . . . . . . . . . . . . . . . . . . . . . . . . 41Activity 1: How can You Tell if the Mixture is Acidic or Basic?. . . . . . 41Activity 2: Color Range, pH Scale! . . . . . . . . . . . . . . . . . . . . . . . . . . 45Activity 3: What Happens to a Metal when Exposed toan Acidic Mixture? . . . . . . . . . . . . . . . . . . . . . . . . . . . . . . 47Pre/Post Test . . . . . . . . . . . . . . . . . . . . . . . . . . . . . . . . . . . . . . . . . . . 48Module 5. Metals and Nonmetals . . . . . . . . . . . . . . . . . . . . . . . . . . . . . . 51Activity 1: Which can Conduct Electricity, Metals or Nonmetals? . . . 52Activity 2: Acidity of the Oxides of Metals and Nonmetals . . . . . . . . 56Pre/Post Test . . . . . . . . . . . . . . . . . . . . . . . . . . . . . . . . . . . . . . . . . . . 57
DIVERSITY OF MATERIALS IN THE ENVIRONMENTOVERVIEWThis set of five modules on the Diversity of Materials in the Environmentprovides many opportunities for students to increase their understanding ofsolutions, substances and mixtures, elements and compounds, acids andbases, and metals and nonmetals, through engaging them in scientific inquiry.There is a wide range and variety of materials on Earth. These includenatural materials, those that have been made from other materials (processedor manufactured), and those which make up living things. In Grade 7, thedevelopment of ideas about materials begins with awareness of solutions,which students often encounter everyday as liquid mixtures. Furtherawareness of materials in terms of the components they are made of—substances, elements, compounds are taken up in Modules 2, 3, and 5.Students will also study the properties of a special group of compounds—acidsand bases in Module 4.These concepts will be encountered by the students in the contexts andlife situations that they are most familiar with. It is important to recognize thatthe teaching of the concepts covered in this set of modules focuses more on the„macro‟ view (the tangible and visible). Science education research recommendsthat concepts be taught, initially, at the macro level only. Explanations at the„submicroscopic‟ level (atomic or molecular level) could be shared inappropriate doses enough to be processed by the students. The use ofchemical symbols and equations are reserved for higher grade levels muchlater. The experiences gained through different activities in each module willallow students to transform the information they obtain into a form that isusable to them in their own personal and community context.The development of the modules veers away from teaching <strong>science</strong> that istextbook-centered to that which incorporates interactive and inquiry-basedlearning experiences. Inquiry is essential in learning <strong>science</strong>. When studentsare engaged in inquiry, they describe objects and phenomena, “identifyquestions that can be answered through scientific investigations; design andconduct a scientific investigation; use appropriate tools and techniques to
gather, analyze, and interpret data; develop descriptions, explanations,predictions, and models using evidence; think critically and logically to makethe relationships between evidence and explanations; recognize and analyzealternative explanations and predictions; communicate scientific proceduresand explanations; and use mathematics in all aspects of scientific inquiry” (TheNational Science Education Standards, U.S. National Research Council, 2000.p.19).Research has shown that the use of inquiry and investigative skillsdevelop with age. In this set of modules, the students will apply the inquiryskills they learned in earlier grades. They will plan and carry out simple <strong>science</strong>investigations. Each student will be able to participate first-hand in looking forevidence to answer questions they have posed at the beginning. They will haveopportunities to gather and interpret data as well as draw conclusions basedon evidence they have gathered. They will perform fair tests by identifyingvariables to be changed, measured and controlled, and do repeat trials.The teacher needs to <strong>guide</strong> and intervene throughout the process ofinvestigation to improve the students‟ understanding of the concepts involved.Gradually, the students will gain more independence in looking for evidence toanswer questions as they move from <strong>guide</strong>d inquiry to full investigations.It is hoped that through the use of inquiry, teachers will be able tofacilitate learning of <strong>science</strong> and assess each student‟s developingunderstandings and abilities. Some activities, by themselves, can be consideredas embedded assessment. There is also a pre/post test that should beadministered before and after all the activities in each module have beencompleted. The teacher needs to analyze the results of these tests. The pretestresults will indicate students‟ prior knowledge and alternative conceptions (ifany). The posttest results will show the extent of students‟ comprehension ofthe concepts and their capacity to demonstrate needed skills. The posttest canalso reveal students‟ misconceptions that need to be addressed in succeedingmodules.Grade 7 Science: MatterDiversity of Materials in the Environmentii
Teacher's GuideModule 1: SolutionsMODULE 1: SOLUTIONSOverviewIn this module on Solutions, the activities have been sequenced insuch a way that the concepts are developed gradually from the first to thelast activity. It starts with the students being acquainted with solutionsfound in their home. The second activity allows them to study the commoncharacteristics of solutions—appearance, number of phases observed, abilityto be dissolved in water, and ability to be filtered. In Activity 3, studentsbegin to distinguish a saturated from an unsaturated solution through a<strong>guide</strong>d investigation where they learn that there is a maximum amount ofsolute that can dissolve in a given amount of solvent at a certaintemperature.Key question for this moduleWhat common properties do solutions have?Are solutions always liquid?Will all solids dissolve in water?How fast do solids dissolve in water?The development of inquiry skills is also gradual. In Activity 1, thestudents will simply write observations and present their observations intable form. In the second activity, students will predict, find some patternsand draw conclusions based on the collected data in order to give thecommon characteristics of solutions. Students will have the opportunity toobserve, measure, analyze data and consequently give generalizations whenthey distinguish between a saturated and an unsaturated solution inActivity 3.Activities 4 to 6 deal with factors affecting how fast a solid solutedissolves in water. Students will perform a <strong>guide</strong>d investigation where theywill (1) formulate specific question(s) to a testable form; (2) formulate ahypothesis that identifies a cause and effect relationship between thedependent and independent variables; (3) select and justify a procedure tobe used in answering the specific question(s); (4) identify the dependent andindependent variables in the investigation; (5) carry out the procedure thatGrade 7 Science: MatterDiversity of Materials in the Environment 1
Teacher's GuideModule 1: Solutionsincludes a fair test, including controlling variables and doing repeated trialsto increase accuracy and reliability; (6) make observations that are relevantto the specific question(s); (7) make measurements using appropriatedevices; (8) record and report all observations and data; (9) interpretpatterns from the data gathered; (10) infer and explain relationships fromthe data; and (11) draw a conclusion from the results obtained, including astatement to support or reject the hypothesis.Activity1What Solutions Do You Find in Your Home?!For the TEACHER1. Assign your students to go to a store or grocery and list the productsbeing sold. Ask them to identify which among the products aresolutions.2. Let the students describe the products in terms of color andappearance, odor, feel, and taste (for food products).3. They may also search their kitchen shelves and storage areas at hometo identify the solutions they use at home. Let the students bring theproduct itself or the label of the used product.4. Bring to class other solutions which students may not recognize assolutions. Some examples are bronze medal, brass, stainless steelutensils, sterling silver jewelry, coins, and other solutions.Grade 7 Science: MatterDiversity of Materials in the Environment 2
Teacher's GuideModule 1: SolutionsActivity2What are the Properties of Solutions?Table 1. Data table for Activity 2(1)(2)(3)(4)(5)(6)Samplesolid orliquidWilldissolve inone cupwater(yes or no)AppearanceNumberof phasesCan beseparatedbyfiltration(yes orno)Solutionor not?Sugar completely uniform one NO solutionSalt completely uniform two NO solutionMongoseedsnot at all not uniform two YES not asolutionPowderedjuicecolloidcompletelyorpartiallynot uniform two NO orsomepowderleft onfilterpaper(not asolution)Cooking oil not at all not uniform Two NOnot alayerssolutionVinegar completely uniform one NO solutionNote: In column 3, students may describe the mixture in other ways suchas homogeneous or heterogeneous. They may also describe the color of themixture.Based on the results of this activity, there are common properties thatsolutions have as stated in the Student Module at the end of Activity 2.Grade 7 Science: MatterDiversity of Materials in the Environment 3
Activity3What is the Evidence that a Solution is Saturated?Teacher's GuideModule 1: SolutionsAnswers to QuestionsQ1. The solution appears uniform throughout. It is homogeneous.Q2. Five and ½ teaspoons of sugar were added when there was excessundissolved sugar observed remaining in the container.Q3. Five teaspoons of sugar is the maximum amount that can dissolvein 20 mL of water.Note:Activity 3 is done at room temperature only. The effect of temperatureon solubility is not yet discussed in Grade 7. Activities 4 to 6 will deal onlywith the factors affecting how fast a solid solute dissolves in water.While in general, solubility of solute increases as temperature isincreased, it should be noted that the relationship between temperature andsolubility is not simple. Faster dissolving does not necessarily mean moreextensive dissolving. It is important to distinguish the effect of temperatureon how fast the process of dissolving takes place from its effect on the finalamount of solute that will completely dissolve.The solubility of some solutes decreases as temperature increases.On the other hand, there are solutes that increase their solubility at highertemperatures. For some other solutes, their solubility is not affected by anincrease in temperature. Since the effect of temperature on different solutesis more accurately explained using solubility curves, Grade 7 students arenot expected to use these solubility curves, which will be taken up in Grade9. The effect of temperature on the solubility of gases in liquids will also betaken up also in Grade 9.Teacher Demonstration: Concentration of SolutionsMaterialsWHAT ARE THE PROPERTIES OF SOLUTIONS?food color (blue, yellow, or green)medicine dropperswater4 clear, transparent bottlesstirrerGrade 7 Science: MatterDiversity of Materials in the Environment 4
Teacher's GuideModule 1: SolutionsProcedure (Part 1)1. Label the clear, transparent bottles with numbers 1 to 4.2. Place one drop of food color in bottle #1.3. Add 50 mL water to the food color in bottle #1 and stir the solution.4. Place 10 drops of food color in bottle #2.5. Add 50 mL water to the food color in bottle #2 and stir the solution.6. Show the class bottles #1 and #2 and ask them to differentiate the twobottles.Procedure (Part 2)1. Place one drop of food color in bottle #3.2. Add 20 mL water in bottle #3 and stir the solution.3. Place one drop of food color in bottle #4.4. Add 100 mL water to the food color in bottle #4 and stir the solution.5. Show the class bottles #3 and #4 and ask them to differentiate the twobottles.After the demonstration, student should be aware that concentratedsolutions can be prepared either by adding more solute and keeping theamount of solvent the same or keeping the amount of solute the same andreducing the amount of solvent.Activities 4 to 6 focus on some factors affecting how fast a solidsolute dissolves in water. These activities will allow students to performsimple investigations where they have to do the following:1. formulate a specific question or problem to a testable form2. formulate a hypothesis (the statement that gives a tentative answer orsolution to the question; a possible explanation that will be proven ordisproven)3. select and justify a procedure to be used in answering the specificquestion4. identify the dependent and independent variables in the investigationThe dependent variable is the factor or condition that is measured or responding in an experiment the change or result that occurs due to the independent variable the “what will happen” in an experimentGrade 7 Science: MatterDiversity of Materials in the Environment 5
Teacher's GuideModule 1: SolutionsThe independent variable is the factor or condition that is changed in an experiment directly caused by the experimenter manipulated in the experiment the “what you do” in the experiment5. carry out the procedure that includes a fair test, which includesidentifying the control variables (factors that are kept the same) anddoing repeated trials to increase accuracy and reliability.A fair test is making sure that in an experiment, one factor orcondition (the independent variable) affects another (thedependent variable) by keeping all other conditionsconstant or the same.6. make observations that are relevant to the specific question7. make measurements using appropriate devices and units8. record and report all observations and data9. interpret patterns from the data gathered10. infer and explain relationships from the data; and11. draw a conclusion from the results obtained, including a statement tosupport or reject the hypothesis.The teacher will demonstrate the effect of stirring, as one factoraffecting how fast solids dissolve in liquids. For the other factors affectinghow fast solids dissolve in water, the class can be divided into groups of 6-8students, where different groups can address any one of the following:a) the effect of particle sizeb) the effect of temperaturec) the nature of the soluteThe discussion for Grade 7 will be limited only on the factors thataffecting how fast a solid solute dissolves in water based on the results ofthe students’ investigations in this module.Teacher Demonstration: The Effect of Stirring1. Put one (1) teaspoon of chocolate powder in each of two differenttransparent drinking cups, labeled cup A and cup B, respectively.2. Add ½ cup of water in each of the cups. Let the students observe closely.3. Stir the mixture in cup A 10 times using a stirrer or teaspoon. Do not stirthe mixture in cup B.Grade 7 Science: MatterDiversity of Materials in the Environment 6
Teacher's GuideModule 1: Solutions4. Let the students observe what happens in each cup.5. Ask the students: what differences do you observe between cup A andcup B?6. Let the students give the reason(s) for the results they observed.Emphasize that stirring the solution will let the solvent particles comein contact faster with the corners and edges of solute particles. Therefore,the solute dissolves faster. Keep in mind that stirring does not affect theamount (how much) of solute that dissolves in solution. You will recall inActivity 3 that a solute remains undissolved no matter how much you stir ifit is already a saturated solution.Activity4Size Matters!1. Let different groups of students design and conduct an investigation tofind out whether the particle size of a solid affects how fast it dissolvesin water.2. Ask students to come up with a hypothesis in a testable form.Example: The crushed salt dissolves faster than the uncrushed (saltwhich has bigger size of particles).3. Ask students to think about how they could investigate this questionusing table salt. Introduce them to the idea that crushing salt will makethe particle size smaller.WHAT ARE THEPROPERTIES OF4. Provide measuring cups and teaspoons, water, table salt (big crystals)SOLUTIONS?and crushed salt. Let them use a big cup or glass bottle to roll over tablesalt in order to crush it.5. Let the students list the materials they need. Check whether the list iscomplete. Make sure that the following materials are listed (though thegroups may ask for different amounts):2 clear plastic cups2 stirrersMeasuring cups: ½ cup, 1 cup2 tablespoons of rock saltwaterGrade 7 Science: MatterDiversity of Materials in the Environment 7
Teacher's GuideModule 1: Solutions6. Check the procedure of the students. The dependent and independentvariables should be identified. The control variable should also bespecified and considered in the procedure to be done.7. Let the students perform at least two trials (replicates), but it is muchbetter if three trials or replicates are done.Effect of Particle SizeIn the discussion, ask students if their observations from theinvestigation support this idea that smaller pieces can dissolve faster thanlarger ones. They can infer that when water and salt are mixed, the particlesare constantly moving within the container.The teacher should let the students imagine that in a solution, theparticles of the solute (table salt) and the solvent (water) are constantlymoving. Water particles collide everywhere along the surface of the particlesof table salt.When the water particles come close to the salt particles, the collisionhappens more often at the corners and edges of the solid salt. At the cornersand edges of the solid, the particles are more easily removed than thosewhich are within the solid.The container with crushed salt has much smaller particles in thesolution than the container with bigger crystals of salt. So water particlescould more easily surround the smaller particles of crushed salt than thesurface of the big salt crystal. Therefore, the crushed salt dissolves faster.Thus, the smaller particles of salt, the easier they mix with the water.These explanations refer to the surface area of the solute particles.The surface area is the area of the solute particles exposed to the solvent(water in this case). Since the crushed table salt has a bigger the surfacearea, then it dissolves faster. Therefore, crushed table salt dissolves fasterthan the bigger granules of salt.Note: The term “surface area” is not used in explaining the effect of particlesize to Grade 7 students since it may still be difficult for them tovisualize what it means. However, showing a big whole cube andanother cube of the same dimension but cut into smaller pieces ofcubes may help students visualize that the cube cut into smallerpieces has a larger surface area.Grade 7 Science: MatterDiversity of Materials in the Environment 8
Teacher's GuideModule 1: SolutionsActivity5How Fast does Coffee Dissolve in Hot Water? In ColdWater?This activity will let students conduct an investigation to see how fastcoffee dissolves in cold and in hot water.1. Ask students how they make hot coffee. Ask them if they could make“cold coffee” by adding cold water or milk to the hot coffee.2. In groups, ask them to write a hypothesis in testable form to comparehow fast coffee dissolves in cold and in hot water. An example of ahypothesis is: Coffee powder dissolves faster in hot water than in coldwater.WHAT ARE THE PROPERTIES OF SOLUTIONS?3. Give time for the students to determine which variables should becontrolled. They should come up with the following variables: amount ofwater in each cup; amount of coffee in each cup; method of stirring;time when the solid is added to water, and how long each solution isstirred. Students should know that what differs in each cup is thetemperature of the water.Note: You may either have each group conduct its own investigationaccording to the group’s plans, or have a class discussion to decide on aprocedure that everyone will use.4. Let them list the materials they need as well as the amounts needed.Their list should include the following:2 cups hot water 2 stirrers2 cups cold water Measuring cups: ½ cup, 1 cupinstant coffee powderMeasuring spoons: ½ tsp, 1 tsp2 clear plastic cups5. The following procedure is one method students can use. Differentratios of coffee and water can be used since different groups areassigned to investigate the effect of temperature.Grade 7 Science: MatterDiversity of Materials in the Environment 9
Teacher's GuideModule 1: SolutionsProcedure1. Place ½ cup of cold water in a cup.2. Place ½ cup of hot water in another cup.3. At the same time, add ½ teaspoon of coffee to each cup.4. Stir each solid for 10 seconds and observe.5. Stir for another 10 seconds and observe again.Expected results: The coffee in hot water will make the color of water darkbrown or black. The coffee powder will dissolve faster in hot water. In coldwater, there will be some coffee particles remaining that did not dissolve.With more stirring, the coffee in the cold water may also completely dissolvein the water after some time.Note: Coffee is used in this activity because making hot coffee is common tostudents and such will show how heating a liquid can affect how fast a soliddissolves.Let the students draw diagrams or illustrations showing the stages of asolid dissolving. Ask students questions like the following:• Does coffee dissolve faster in hot water?• What is the best way to make “cold coffee”?The Effect of TemperatureMost solids, like coffee powder, dissolve faster in hot water than incold water. At higher temperature, the water particles in move faster andcome in contact more frequently with the solute particles (the coffeepowder).Activity6Which Dissolves Faster in Hot and in Cold Water:Sugar or Salt?The nature of soluteQuestions to investigate: Does salt dissolve faster in hot water than incold water? Does sugar dissolve faster in hot water than in cold water?1. Ask students to investigate how temperature affects how fast sugar andsalt dissolve in water.Grade 7 Science: MatterDiversity of Materials in the Environment 10WHAT ARE THE PROPERTIES OF SOLUTIONS?
Teacher's GuideModule 1: SolutionsIn their earlier investigations, students learned that the temperature ofwater affected how fast coffee dissolves in water. Ask students how theycould test whether the temperature of water affects how fast salt dissolves inwater. Similarly, ask them how they can test whether temperature of wateraffects how fast sugar dissolves in water.2. Let the students formulate a hypothesis in testable form. For example,they can predict that both sugar and salt dissolve better in hot waterthan in cold water.3. Ask the students to identify the dependent and the independentvariables.4. Give time for the students to determine which variables should becontrolled. They should come up with the following variables: amount ofwater in each cup; amount of salt and sugar in each cup; method ofstirring; time when the solid is added to water, and how long eachsolution is stirred. Students should recognize that what differs in eachcup is the temperature of the water.You may ask students these questions to <strong>guide</strong> them in controllingvariables:• Do you need to use the same amount of sugar in each sample?• Do you need to use the same amount of water in dissolving bothsugar and salt?• Should the water be at the same or at different temperatures?5. Let them list the materials they need as well as the amounts needed.Their list should include the following:2 cups of water 4 plastic cups2 cups cold water 2 stirrers2 tablespoon sugar Measuring cups: ½ cup, 1 cup2 tablespoon salt Measuring spoons: ½ tsp, 1 tsp6. The following procedure is one method students can use. Differentamounts of salt, sugar and water can be used depending on theplanned procedure of the students.Hint: It is better to use a small volume of water, for example, 20 mL ofwater to make the time for investigation shorter.Sugar in hot and cold watera. Place 20 mL of hot water in a cup.b. Place 20 mL of cold water in another cup.c. At the same time, add 2 teaspoons of sugar to each cup.Grade 7 Science: MatterDiversity of Materials in the Environment 11
Teacher's GuideModule 1: Solutionsd. Stir the sugar in each cup for 10 seconds and observe. Whathappened to the sugar?e. Record your observations.f. Stir for another 10 seconds and observe again.g. Set aside both containers.h. After 5 minutes, observe closely the bottom of the container.Salt in cold and hot waterRepeat Steps 1 to 7 with salt.7. Discuss the results of the investigation. Ask the following questions:• Does temperature affect how fast sugar dissolves in water? Give theevidence based on your observations.• Does temperature affect how fast salt that dissolves in water? Givethe evidence based on your observations.• Which dissolves easier in hot water: sugar or salt?Expected results:For sugar: Sugar dissolves faster in hot water than in cold water. Twoteaspoons of sugar can completely dissolve at room temperature inthree minutes. But, two teaspoons of sugar can completely dissolve at75 o C in one minute and 13 seconds.For salt: There is about the same amount of salt remaining at thebottom of both the hot and cold containers. Only a little more salt candissolve in very hot water than in cold.Students can conclude that temperature affects how fast sugardissolves in water more than it affects how fast salt dissolves in water.This conclusion is based on the difference in the time needed todissolve sugar in cold and in hot water. However, there is only a slightdifference in the time needed to completely dissolve the salt in hot waterthan in cold water.8. Let students use their observations to make statements about the effectof temperature on how fast salt dissolves in water as well as how fastsugar dissolves in water.9. When all groups have completed their investigation, compare theresults.Grade 7 Science: MatterDiversity of Materials in the Environment 12
Teacher's GuideModule 1: SolutionsPre/Post Test1. Which of the following is an example of a solution? (Choose more thanone.)a. Vinegarb. Mud in waterc. Food coloring in waterd. Sugar dissolved in watere. Ice creamGive the reason why you think these are solutions.2. Which statement describes the solute?a. It is the solid formed in solution.b. It is the liquid part of the solution.c. It is the component of a solution in smaller amount.d. It is the component of a solution in bigger amount.3. Which is more concentrated, a solution containing 5 grams of salt in 10grams of water or a solution containing 18 grams of salt in 90 grams ofwater? Show your calculations.4. The label of the 200-mL rubbing alcohol that Mrs. Herrera boughtshows that it contains 40% ethyl alcohol. What is the volume of ethylalcohol does the rubbing alcohol contain? Show your calculations.5. Joel and Ben wanted to find out how much salt is needed to make asaturated solution in 100 mL of water. Use the following data to answerthe questions below the table.StepNumberAmount ofsalt addedObservations1 6 grams After stirring, salt completely dissolved.2 6 grams After stirring, salt completely dissolved.3 6 grams After stirring, salt completely dissolved.4 6 grams After stirring, salt completely dissolved.5 6 grams After stirring, salt completely dissolved.6 6 grams After stirring, salt completely dissolved.7 6 grams After stirring, some salt is seen at thebottom of the container.a. Which is the solute of the solution? Which is the solvent?b. In which step is the solution described as saturated solution?Explain your answer.c. What the concentration of the solution in step 4?Grade 7 Science: MatterDiversity of Materials in the Environment 13
Teacher's GuideModule 1: Solutions6. Give one reason why people stir coffee or juice in water after they haveadded sugar.7. Why do you think that it is easier to dissolve powdered brown sugarthan a big whole piece or chunk of brown sugar (the size of a small icecream cup) in water?For items 8-10: A group of students was asked to investigate how fast sugardissolves in cold and in hot water?8. If this is going to be a fair test, what variables should they control?a. Amount of water and sugar in each cup, method of stirring, timewhen the solid is added to water, how long each solution is stirred.b. Amount of water and sugar in each cup, method of stirring, how longeach solution is stirred.c. Amount of sugar in each cup; method of stirring, time when the solidis added to water, how long each solution is stirred.d. Amount of water in each cup, method of stirring, time when the solidis added to water; how long each solution is stirred.9. What is the dependent variable (what is being measured)?I. The temperature of water.II. The amount of sugar.III. The length of time that sugar completely dissolves in hot water.IV. The length of time that sugar completely dissolves in cold water.a. I only c. II and IIIb. II only d. III and IV10. What is the independent variable in the investigation?a. I only c. I, II and IIIb. II and III d. II, III and IVGrade 7 Science: MatterDiversity of Materials in the Environment 14
Teacher's GuideModule 1: SolutionsAnswer Key1. (a), (c), (d); Vinegar, food coloring in water, and sugar dissolved inwater are all solutions since each appears to be in one phase only(homogeneous) and transparent.2. (c). The component in smaller amount is the solute. Thecomponent present in greater amount is the solvent. The solidformed in a solution is called a precipitate.3. grams salt in 10 grams water is more concentrated.Calculations:5 grams salt/10 grams water x 100% = 50% salt18 rams salt/90 grams water x 100% = 20% salt4. % volume = volume solute/volume solution x 100%40% = volume solute/200 mL x 100 %volume solute = 40% x 200 mL= 80 mL ethyl alcohol5.a. Salt is the solute; water is the solvent.b. The solution is saturated at step 6. The solution issaturated when all (maximum amount) of the solute wasdissolved. At step 7, some salt already came out of solutionand did not dissolve anymore.c. 24 grams/100 mL6. Stirring will increase the movement or allows fasterspreading of solute particles in the solvent. This in turnhastens the contact between the surface of the solute andthe solvent particles.7. Powdered brown sugar has more corners and edges since theparticles of the powder are smaller. So there will be more particlesof brown sugar that can attach or come in contact with the water,making it dissolve faster in water.8. (a)9. (d)10. (a)Grade 7 Science: MatterDiversity of Materials in the Environment 15
Teacher's GuideModule 1: SolutionsReferencesBrady, J. E. & Senese, F. (2004). Chemistry: Matter and its changes, 4thedition. River Street Hoboken, NJ: John Wiley & Sons, Inc.Bucat, R. B. (Ed.) (1984). Elements of chemistry: Earth, air, fire & water.Volume 2. Canberra <strong>City</strong>, A.C.T., Australia.California Grade 7 Science. (2009) Cluster 2: Particle theory of matter,Grades 5 to 8: A foundation for implementation. Retrieved January 17,2012 fromhttp://www.edu.gov.mb.ca/k12/cur/<strong>science</strong>/found/5to8/7c2.pdf.Elvins, C., Jones, D., Lukins, N., Miskin, J., Ross, Bo., & Sanders, R. (1990)Chemistry one: Materials, chemistry in everyday life. Port Melbourne,Australia: Heinemann Educational Australia.Hill, J. W. & Kolb, D. K. (1998). Chemistry for changing times, 8th edition.Upper Saddle River, NJ: Prentice Hall.Kurtus, Ron (13 January 2006). Mixtures. Retrieved Jan 9, 2012 fromhttp://www.school-for-champions.com/chemistry/mixtures.htm.Philippines. Department of Education (2004). Chemistry: Science andtechnology textbook for 3rd year. (Revised ed.) Quezon <strong>City</strong>: Author.University of California at Berkeley. CEPUP Lawrence Hall of Science.(1990). Chemistry survey & solutions and pollution. Menlo Park,California: Addision-Wesley Publishing Company.Grade 7 Science: MatterDiversity of Materials in the Environment 16
MODULE 2: SUBSTANCES AND MIXTURESTeacher's GuideModule 2: Substances & MixturesIn this module, students will broaden their knowledge about thedifferent samples of matter. They will find out that mixture is just one of thetwo major classes of matter. The other of which is the substance. Based ondifferences in behavior under certain conditions, they should be able todistinguish one from the other.Key questions for this moduleHow are mixtures different from substances?How are they similar?A series of activities will gear the students in answering the questions above.With the hope that students will find connection between the topics they havelearned in the lower grade levels to the ones they are about to learn, the firstactivity will bring them to their past lesson on separating mixtures. Moreover,the products obtained from this activity will be the ones used for theproceeding activity which will focus on differentiating substances frommixtures. In this manner, the students will be more convinced that mixturesmay be composed of substances. A culminating activity will check if they havelearned the distinguishable behaviors between these classes of matter vis-àvistheir ability to design an investigation.Skills enhanced in this moduleScience Inquiry SkillsManipulative Skills• making qualitative and quantitative observations• drawing inferences from observations• organizing and tabulating data• comparing and contrasting behaviors ofsubstances and mixtures• classifying samples as mixtures and substances• plotting and interpreting line graphs• stating a generalization based on observations ordata which are consistent in a number of trialsthrough• observing proper behavior inthe laboratory to preventaccidents and errors• using the correct technique insmelling, feeling, and tastingsamples• using the correct technique inmaking temperature readings• setting up equipment forboiling and melting samples• constructing an improvisedequipmentGrade 7 Science: MatterDiversity of Materials in the Environment 17
Teacher's GuideModule 2: Substances & MixturesActivity1Seawater! See water and salt!In grade 6, students have encountered several ways in separatingmixtures. Most of them are techniques to separate heterogeneous mixturessuch as scooping, filtration, anddecantation. In this activity, they willexperience a way of separating thecomponents of a homogeneousmixture. It is important that they areaware of the kind of sample they areworking with — mixture. They mayreview some characteristics of mixturessuch as those in the table on the right.They may check the sample that theyare going to use in this activity if itdoes have the characteristics listed inthe table. The students should knowthat the seawater sample is made up ofCharacteristics of Mixtures may be solid, liquid or gas may be homogeneous orheterogeneous made up of two or morecomponents components may beseparated/recovered byphysical means such asfiltration, and distillation amount of components mayvarycomponents; however, they cannot be distinguished because the sample ishomogeneous. This activity will help them “see” the components of theirseawater sample which are salt and water. They will distill the water out fromthe mixture and may refer to this product as distilled water. The remainingsample will evaporate out the rest of the water leaving salt crystals.Important!• Emphasize the ones written in the “Take Care!” boxes.• Make sure to use glassware that were not previously used forharmful chemicals. The students will be asked to taste a portion ofthe distillate.Grade 7 Science: MatterDiversity of Materials in the Environment 18
Teacher's GuideModule 2: Substances & MixturesTeaching Tips• Alternative materials• Salt solution instead of seawater. To prepare a salt solution, addabout 3.0g table salt and 10 mL water. Mix well and filterundissolved particles.• Broken tiles or porous pot chips instead of boiling chips. The chipscan be reused two times. After the activity, collect all the chips.Wash, dry and then keep them in a covered container.• Ballpen casing and rubber hose instead of the delivery tube usedfor the distillation setup.• Aluminum foil instead of evaporating dish. The foil may beshaped like a bowl and fitted around the mouth of a beaker. SeeFigure 2 in Student Module 2.• Wire gauze without the asbestos. Simply scrape off the asbestoscenter of those old wire gauze, provided they are not yet worn out.Collect the asbestos and dispose of properly.• Distillation techniques• Do not remove the flame from the test tube while distillation is inprogress. This may cause the cold liquid to be sucked back intothe hot test tube. Remove the receiving test tube first beforeextinguishing the flame.• Do not let the solution in the sample flask dry up. Remove theflame as soon as the liquid in the sample flask is only about 1 cmhigh from the bottom.• Keep the receiver in the water bath while doing the distillation. Itis better to add ice to the water bath.• You may discuss the distillation techniques above and ask thestudents the possible reason for such techniques. Allow thestudents to think or give them prompt questions that may lead themto think of the reasons.• Let the students be the ones to assemble the distillation setup,however make sure that they have done it correctly. You mayinclude this as an assessment.Grade 7 Science: MatterDiversity of Materials in the Environment 19
Teacher's GuideModule 2: Substances & MixturesAnswers to Activity QuestionsQ1. The liquid is tasteless like ordinary drinking water. No, seawater issalty while the distillate is not.Q2. There are some small, solid crystals left.Q3. The residue tastes salty. It tastes like salt.Activity2Looks may be DeceivingIn Activity 1, students have learned that mixtures, despite thehomogeneity, are made up of components. These components were referredas substances. However, the word substance is being introduced in themodule for the first time. The students may not have any idea on what asubstance is. Hence, this activity will build in the students the concept ofsubstance from their previous knowledge on mixtures. They will find out thatthe behavior of mixtures are much different than those of substances. Beingso, substance is another class of matter.This activity is divided into two parts: part A will differentiatesubstances and mixtures through the way the temperature changes duringboiling; while in part B, these two are differentiated through how theyappear/behave while they are melting. Both parts will make use of samplesthat appear to be identical. Part A will use the distilled water obtained inActivity 1 and seawater; while Part B will use benzoic acid and a mixture ofbenzoic acid and salt. They will first differentiate the samples based onappearance. They will find it difficult to identify one from the other by simplylooking at them since they are homogeneous. As such, looks may bedeceiving. Only after the activity, they will realize a way these samples may bedifferentiated. From here, the students will give their operational definition ofsubstances.It is highly encouraged to use the distilled water obtained in Activity 1as the sample for Part A. In this manner, the students will be more convincedthat mixtures may be composed of substances. Salts that were recoveredfrom Activity 1 are still mixtures of different salts and minerals. In effect, itmay be said that mixtures may also be composed of mixtures.Grade 7 Science: MatterDiversity of Materials in the Environment 20
RemindersTeacher's GuideModule 2: Substances & Mixtures• In part A, make sure the students will boil the distilled watersample first. In this manner, the chances of contaminating thedistilled water may be lessened. Also, make sure the seawatersample has the same odor as distilled water. Allow the seawater todissipate its characteristic odor by leaving the container partlycovered overnight.• In part B, make sure the samples are placed in their assigned Xmarks of the improvised melting dish.• The expected results and generalization are as follows. Allow thestudents to come about these generalizations by themselves as youfacilitate in processing their results.• During boiling, the temperature of a substance changes at firstthen it becomes the same, while the temperature of a mixture isdifferent at different times.• During melting, a substance melts completely/smoothly withina short time; while the mixtures have portions that seem to benot melting.• Do the following after Activity 2 to emphasize that melting andboiling behavior of a substance are the same even the amountchanges.• Boil different volumes (1 mL, 3mL, 5mL) of distilled water. Askthe students to describe the boiling behavior of distilled water indifferent volumes. (The behavior is the same for the differentvolumes of distilled water, i.e., the temperature changes at firstthen it becomes the same.)• Melt different amounts (1 scoop, 2 scoops, 3 scoops, 4 scoops) ofbenzoic acid. Ask the students to describe the melting behaviorof benzoic acid in different amounts. (The behavior is the samefor the different amounts of benzoic acid, i.e., the samples meltcompletely/smoothly within a short time.)• Let them think of other properties that will not change with theamount of a substance (e.g., density).Grade 7 Science: MatterDiversity of Materials in the Environment 21
Teacher's GuideModule 2: Substances & MixturesTeaching Tips• Emphasize that the samples that will be used in Part A are theproducts from Activity 1. Part B will not be using the ones collectedfrom Activity 1. However, after the activity, students will infer themelting behavior of one of its products.• The melting dish made by other classes or batches may be used.You may skip the construction of an improvised melting dish if it isalready available.• In case some materials for Part B are not available, a video mayserve as an alternative. To get a copy of this video, please accesscurriculum.nismed.upd.edu.ph.• Allow students to tinker with the samples so they may be able togive a rich description for each of them. Hand lens, if available, maybe used.• Let the students assemble the setup for boiling. This will give anopportunity for the students to enhance their lab/manipulativeskills. This can also be included as an assessment.• Review techniques in the proper use of a laboratory thermometer.Make sure temperature is read at the eye level. There is no need toshake the thermometer to bring the reading to zero.Grade 7 Science: MatterDiversity of Materials in the Environment 22
Teacher's GuideModule 2: Substances & MixturesTeaching Tips• Check how your students construct their graphs. This part is anopportunity to reinforce what they have learned aboutinvestigations in Module 1. This can be a way to check if theyunderstand the concepts of independent and dependent variables;and if they can plot using the appropiate graph to show theirresults.• Let them identify the kind of graph (line) that best suits theirdata.• Let them identify the independent (time) and the dependent(temperature reading in o C) variables.• Let them plot the graph and see to it that it is correctly done.- The data for the x-axis must be the independent variable,while the y-axis is for the dependent variable.- The scale is appropriate. They should have regular intervalsin their x-axis. Since reading is done every 30 sec, you cansuggest that they plot every reading they have obtained.Hence, the x-axis will have 30 sec per unit.- The axes should be labelled with both quantity and units.- There is a descriptive title for their graph.• Compare the data obtained by the different groups. Discusssimilarities and differences among these data. Make ageneralization based on the data obtained. Emphasize that thisgeneralization was based on data that is consistent in a number oftrials.• After doing Part B of Activity 2, ask the students to describe howsodium chloride melts. Tell them that it is a substance. After somestudents have shared their answers, show them a video on howsodium chloride melts.Grade 7 Science: MatterDiversity of Materials in the Environment 23
Teaching TipsTeacher's GuideModule 2: Substances & Mixtures• Reiterate the point that “looks can be deceiving” and may not beenough basis to classify a sample as substance or mixture.• Allow them to revisit what they wrote in Tables 1 and 2 in the celllabelled Appearance/Odor. Do the liquid samples look the same?(Yes.) How about the solid samples? (Yes.) Based on theappearance, can you say that the samples are the same? (Yes.)• Try this one too! If it is possible to freeze the samples from Activity1, the students can compare the physical states the samples canassume. Ask them the following questions: Do they look thesame? (Yes.) Right after getting the samples from the freezer, whatwere their physical states? (Solid.)• After establishing that appearance, odor, physical state cannotdistinguish a substance from a mixture, ask them the followingquestions: When you boiled these two samples, can you say thatthey are the same? (No, they are not anymore the same.) Howabout the solid samples you used in part B? (They are also notanymore the same.) Can you say that they are the same after youhave observed how they behave while being melted? (No, they arenot anymore the same.)• How can boiling and melting determine if a sample is a substanceor a mixture? (During boiling, the temperature of a substancechanges at first then it becomes the same, while the temperatureof a mixture is different at different times. During melting, asubstance melts completely/smoothly and within a short time,while the mixtures have portions that seem to be not melting.)Answers to Activity QuestionsPart AQ1. The temperature changes at first and then it becomes the same.Q2. A substance has the same boiling temperature.Q3. The temperature is always changing.Q4. A mixture has changing boiling temperature.Part BQ1. Benzoic acid melts completely/smoothly within a short time.Q2. A substance melts completely/smoothly within a short time.Q3.Some parts of the mixture have started to melt and some parts don’tseem to melt.Q4. A mixture does not melt completely/smoothly like a substance. Thereare some portions that seem to be not melting.Grade 7 Science: MatterDiversity of Materials in the Environment 24
Teacher's GuideModule 2: Substances & MixturesActivity3My Unknown Sample: Substance or Mixture?This activity may assess two things: 1) their understanding of thedistinguishable behaviors between substances and mixtures; and 2) theirability to conduct an unstructured investigation. Each student is given oneunknown sample, either a solid or liquid. Refer to the table below for somesamples that may be used as unknowns. They will design a procedure thatwill identify their unknown sample as substance or mixture. They will decidewhich methodology is best fitted to test their sample. This procedure may becritiqued by their fellow students but you will still be the one to give the finalcheck and “go signal” to do the activity.Some unknown samples that may be used in the activityLiquidSolidSubstance distilled water benzoic acidMixturevinegarmineral waterseawaterbenzoic acid-salt*benzoic acidmonosodiumglutamate*benzoic acid-white sugar**The ratio between the two components is 1:1.Answers to Activity QuestionsQ1. Answers will depend on the student’s unknown.For solid unknown, determine its melting behavior to identify whetherit is a substance or a mixture. A substance meltscompletely/smoothly, while a mixture takes longer time to completelymelt.For liquid unknown, determine its boiling behavior to identify whetherit is a substance or a mixture. A substance has a constant boilingtemperature, while a mixture boils at a temperature range.Note that the method has to be repeated at least three times beforethe student can conclude if their unknown sample is a substance or amixture.Grade 7 Science: MatterDiversity of Materials in the Environment 25
Teacher's GuideModule 2: Substances & MixturesPre/Post Test1. You were tasked to check if the liquid sample you have is a substanceor a mixture. Which among these tests is the BEST way to do so?I. Color comparisonII. Taste comparisonIII.IV.Boiling testMelting testA. I, II, III and IVB. I, II and III onlyC. I, II and IV onlyD. I and III only2. A liquid has the following properties: one-phase, colorless, boils atvarying temperature. Which of the following BEST describes theliquid?A. SolutionB. SubstanceC. SuspensionD. Coarse mixture3. Jill has an unopened box of a 2-meter foil labeled 100% made ofaluminum. Aluminum is a substance. Jill takes just a thumb-sizepiece of the aluminum foil. Which of the following statements isTRUE about the piece of aluminum foil that Jill took compared withthe rest that was left in the box?A. Its mass and melting behavior are different.B. Its mass and melting behavior are the same.C. The mass is different but the melting behavior is the same.D. The mass is the same but the melting behavior is different.Answer Key1. D2. A3. CGrade 7 Science: MatterDiversity of Materials in the Environment 26
Teacher's GuideModule 3: Substances & MixturesReference(no author). (no date). Atoms, elements, and compounds. RetrievedJanuary 16, 2012, from http://www.kgg.org.uk/atoms.html(no author). (no date). Lesson 6: Pure substances. Retrieved January 30,2012, fromhttp://www.saskschools.ca/curr_content/<strong>science</strong>9/chemistry/lesson6.htmlAmerican Association for the Advancement of Science. (no date). AAAS<strong>science</strong> assessment. Retrieved March 30, 2012, fromhttp://assessment.aaas.org/pages/homeBurns, R.A. (1999). Fundamentals of chemistry. New Jersey: Prentice-Hall, Inc.College of Southern Idaho. (2003). Melting point tips and <strong>guide</strong>lines.Retrieved January 21, 2012, fromhttp://www.csi.edu/ip/physci/faculty/rex/MPTips.htmHill, J.W., & Kolb, D.K. (1998). Chemistry for changing times 8th edition.New Jersey: Prentice-Hall, Inc.Padolina, M.C.D., Simon-Antero, E., Alumaga, M.J.B., & Estanilla, L.C.(2004). Conceptual and functional chemistry. Quezon <strong>City</strong>: VibalPublishing House, Inc.Philippines. Ministry of Education and Culture. (1980). Chemistry in ourenvironment: High school <strong>science</strong> III (Teacher’s ed.). Quezon <strong>City</strong>:AuthorPhilippines. Department of Education. (2009). Chemistry: Science andtechnology textbook for 3rd year. (Reprint ed.). Quezon <strong>City</strong>: AuthorShugar. G., & Dean, J. (1990). The chemist’s ready reference handbook.USA: McGrawHill, Inc.Grade 7 Science: MatterDiversity of Materials in the Environment 27
Teacher's GuideModule 3: Elements & CompoundsMODULE 3: ELEMENTS AND COMPOUNDSIn this module, students will begin broadening and deepening theirknowledge about substances. They will find out that substances, likemixtures, are of various kinds. Being so, like mixtures which may beclassified in many ways such as solution, suspension, and colloid;substances may also be further classified into smaller groups, such aselements and compounds.Key questions for this moduleHow are elements different from compounds?How are they similar?A series of activities will gear the students in answering the questionsabove. With the hope that students will find connection between the topicsthey have learned in the lower grade levels to the ones they are about tolearn, the first activity will resurface some ideas from Module 2. It will beginwith compound, for the reason that it is more comparable with mixtures interms of the number of components they are made of. Moreover, theproducts obtained from this activity will serve as the examples used tointroduce the next concept, which is element. In this manner, the studentswill see better the connection between compounds and elements, that is,compounds are made up of elements. The periodic table will also beintroduced to familiarize the students with the elements and the periodictable per se. Two activities culminate this module which will let thestudents realize that these elements and compounds are found just aboutanywhere, even with the food they eat.Grade 7 Science: MatterDiversity of Materials in the Environment 28
Teacher's GuideModule 3: Elements & CompoundsActivity1Water, “Wat-er “You Made Of?In Module 2, students have learned that substances and mixturesshare some similarities such as homogeneity. All substances arehomogeneous while only some mixtures are. Also, they learned that beinghomogeneous does not automatically say that a sample is made up of onlyone component. This holds true for one group of substances — thecompounds. Compounds are homogeneous which are also made up ofcomponents. In this activity, the students will separate components ofwidely used compound — water. They will learn that water is made up of theelements hydrogen and oxygen. The properties of each of these substancesare different from one another.Components of water are separated through the passage of an electriccurrent, hence the process is termed as electrolysis. The students will usean improvised electrolysis apparatus. You will find below how to constructone from commonly available materials.Reminders• Acquaint the students with theapparatus before doing the activity.Emphasize some parts (as shown inFigure 1) because they will bementioned in the activity procedure.• Prepare ahead 5% NaOH. You mayeither use NaOH pellets or Liquid Sosa.• NaOH pellets. Place 100 mL distilledwater in a beaker. Dissolve carefully5 g of NaOH pellets (corrosive).Store NaOH solution in PET bottle.Label with its name, concentrationand date of preparation. NaOHabsorbs CO2 from air. Itsconcentration could change aftersome time.• Liquid Sosa. Mix thoroughly 1mLliquid sosa and 20mL water.samplecontainerConnect redwire to positive(+) terminal ofthe dry cell.1234567891011electrolysissyringestainlessscrewConnect blackwire to negative(-) terminal ofthe dry cell.Figure 1. An improvised electrolysisapparatus1234567891011Grade 7 Science: MatterDiversity of Materials in the Environment 29
Teacher's GuideModule 3: Elements & CompoundsTeaching Tips• Run down the procedure before doing the activity. Together,visualize what is supposed to be done. Have one complete setup thestudents can look at while emphasizing some procedures. Ask somequestions as you go through each step, for example:• Procedure 1: What are the components of a 5% sodiumhydroxide solution? (Sodium hydroxide and water.) How muchin percentage is each of these components present in the saidsolution? (95% water and 5% sodium hydroxide.) What is thecomponent that is of highest amount in the solution? (water.)• Procedure 2: What is the basic solution referred to? (5% sodiumhydroxide solution) Why is it referred as a basic solution?(Sodium hydroxide is a base.)• Procedure 4: Here is the dry cell, where will you connect the redwire? (Positive terminal.) How about the black wire? (Negativeterminal.)• Assess your students’ capability in doing the activity. If you findthat the students are not yet ready to be the ones to do this, youare free to make this as a demonstration activity instead.• Emphasize the difference in behavior of the the two products. In thepresence of a flame or spark, hydrogen gives off a “pop” sound whileoxygen induces a brighter spark. You may also try doing the samething with water. Collect some water vapor in a test tube and inserta glowing stick/flame. Nothing is supposed to happen. This will letthe students observe that these three exhibit different behaviors,hence are different substances.Answers to Activity QuestionsQ1. A “pop” sound was heard.Q2. A brighter spark was observed.Grade 7 Science: MatterDiversity of Materials in the Environment 30
Teacher's GuideModule 3: Elements & CompoundsConstruction of an Improvised Electrolysis ApparatusMaterials Needed• glue• ruler• alcohol lamp• stripping knife• dry cells (1.5V)• 2 paper clips (bulldog type)• 3 disposable syringes (10 mL)• 2 stainless steel screws #6 (2 x 12)• 2 connecting wires (red and black)• GI wire (about 6 cm, ordinary wire)• plastic bottle (1 L, 8 cm in diameter or more), preferably thick andhard• hard plastic straw or dextrose plastic tube (6 cm long)Procedure (Source: Practical Work in High School Chemistry)1. Get two disposable 10 mL syringes andremove the plungers. Attach the two syringes atthe base. Using an alcohol lamp, heat the edgeof the base to be attached. Refer to the figure onthe right.2. Insert each tip of the syringe inside aplastic straw about 6 cm long. Bend thestraw to close it and place a bulldog typepaper clip on the bend to keep it in place.Refer to the figure on the right. These willserve as the “electrolysis syringes”.Grade 7 Science: MatterDiversity of Materials in the Environment 31
Teacher's GuideModule 3: Elements & CompoundsConstruction of an Improvised Electrolysis Apparatus3. Divide the plastic bottle into three portions. Mark “cutting lines”around the bottle. Refer to the figure on the right.Distance between cutting-line marks: Bottom portion (3): about 5 cm from thebottom part of the bottle.1Middle portion (2): about 6 cmfrom the marked line of thebottom portion (3)236 cm5 cmHeat the stripping knife in an alcohol lamp. Use the hot strippingknife to cut around these line marks.4. Use the middle portion of the bottle tomake a stand for the sample container.Make two small squares measuring about 2cm x 2 cm at opposite sides of the base.These will serve as passageway for theconnecting wires.2cm x x 22cm5. Use the bottom portion of the bottle as the samplecontainer. Measure the distance betweenthe centers of the “electrolysis syringes”.Mark this length with a line on thebottom of the cup. Then using a hot GIwire (2 mm in diameter) bore a small holeat each end of the line. The stainless screwswill pass through these holes.Grade 7 Science: MatterDiversity of Materials in the Environment 32
Teacher's GuideModule 3: Elements & CompoundsConstruction of an Improvised Electrolysis Apparatus6. Insert the stainless screw through each hole byrotating it carefully until 1/4 of the nail is out atthe bottom of the bottle. Refer to the figure onthe right. To prevent leaks, apply glue aroundthe stainless screws at the bottom part of thesample container.Note: The glue should only be applied on the outsidesurface of the sample container.7. Support the sample container on the standprepared in #3. Refer to the figure on the right.8. Invert the “electrolysis syringes” over thestainless screws. Complete the setup asshown in the figure on the right. Insert the drycells between the connecting wires when youare ready to do the electrolysis.12345678910111234567891011Connect to positive(+) terminal of thedry cellConnect tonegative (-)terminal of the drycellNote: This procedure is also available inhttp://curriculum.nismed.upd.edu.ph/2012/04/how-to-make-animprovised-electrolysis-apparatus/Grade 7 Science: MatterDiversity of Materials in the Environment 33
Teacher's GuideModule 3: Elements & CompoundsActivity2The Periodic Table: It’s Element-ary!In Activity 1, they were able to generate two elements — hydrogen andoxygen. In this activity, they will find out that these two elements are just afraction of the numerous elements currently existing. Also, that these arethe substances that are homogeneous which are made up of only onecomponent. Being so, they are said to be the “simplest form of matter”.All of the elements are systematically organized in the periodic table. Itwas described to be “amazingly” done as varied information about all of theelements are laid out in a single table. Patterns and trends are evident in thearrangement. It serves as a handy reference and as such was labelled as achemist’s tool. This tool can then be a good starting material to learn aboutthe different elements. However, note that this is the first time for thestudents to formally use this tool. Being so, this activity, as it walks themthrough the periodic table, focuses only with the basic information — nameand symbol. Do not overwhelm them with the vast information the periodictable can provide. Worse, if they are required to memorize its contents.Gradually, let them realize these different information through variedactivities that require its use. In that manner, they may find the periodictable not that complicated — it’s even quite simple that it’s “element-ary”.Reminders• Periodic table is a tool in Chemistry that we can refer to every nowand then. The more we use it, the more we get to be familiar withwhat it contains. Thus, there is no need to memorize such table.• A periodic table is provided at the end page of Modules 3 and 5. Theinformation placed there is limited to the scope of the module forthis quarter. It is highly encouraged to begin with the names andsymbols of the elements as they try to know what the elements are.Group number will be introduced at the latter part of the activity.Atomic numbers, at this point, will serve as a <strong>guide</strong> on howelements are sequenced in the table; it will not be defined as thenumber of protons of an element’s atom. The latter will be discussedin grade 8 when they have already learned about the particulatenature of matter.Grade 7 Science: MatterDiversity of Materials in the Environment 34
Teacher's GuideModule 3: Elements & CompoundsTeaching Tips• Show students pictures of some elements. You may refer to some ofthe books and websites listed at the end page of this <strong>guide</strong>. They maygive other descriptions of the elements such as physical state atstandard conditions and color. If possible, use real samples .• As an assignment, a student may choose one element and find moreinformation about it. A poster or something similar may be done as ifthe student is trying to promote that element.Answers to Activity QuestionsTable 1. Name and symbol of some elements and the groupnumber it belongs to.Group NumberQ# Name Symbol(Q9)beryllium Be 21phosphorus P 15germanium Ge 14darmstatdtium Ds 10boron B 132nitrogen N 15fluorine F 17vanadium V 5lithium Li 1chlorine Cl 173 argon Ar 18calcium Ca 2manganese Mn 7iron Fe 84silver Ag 11mercury Hg 12lead Pb 14silicon Si 145 magnesium Mg 2gold Au 11aluminum Al 136copper Cu 11tin Sn 14carbon C 147 potassium K 18titanium Ti 4barium Ba 2Grade 7 Science: MatterDiversity of Materials in the Environment 35
Teacher's GuideModule 3: Elements & CompoundsActivity3The “Matter” on LabelsFood in itself is a sample of matter and thereby made up of eitherelements, compounds or mixtures. By law, these matter must be written infood labels. In this activity, the students will find these matter on foodlabels. They will focus on the elements and compounds that make up thefood they eat. They will be more aware of the existence of elements andcompounds around them. They will find out that these elements are some ofthe nutrients that a food provides. These nutrients are called minerals.They can find them listed in the Nutrition Facts. Moreover, these mineralsare not added as the elements themselves. Most of the time, compounds ofthat element are the ones added to manufacture the food. Being so, it is thecompound which is the one listed as the Ingredient.Aside from the knowledge the students may gain in this activity, it isalso hoped that the students acquire the habit of reading food labels. Thefood they eat has a major implication to their health and well-being. It isimperative then to be aware of what is taken in by the body. These are alllisted in a food label. Therefore, reading food labels “matter”.Teaching Tips• Ask the students to bring more food labels. The ones used in theactivity are hoped to be only supplemental.• As an assignment, the students can find product labels other thanfood such as medicine, household cleaning products, cosmetics andtolietries. They can identify elements and compounds listed on thoselabels.Grade 7 Science: MatterDiversity of Materials in the Environment 36
Teacher's GuideModule 3: Elements & CompoundsTeaching Tips• In the activity, the students will find out that the list of ingredientsdoes not seem to contain those nutrients in the Nutrition Facts. Theiron reported in chocolate candy is provided by the unsweetenedchocolate/cocoa listed in the ingredient. This is an opportunity toemphasize that aside from knowing the name of the compound, it isan added advantage if they are familiar with the natural mineralcontent of the food. Some of them are listed in Table 2 of Module 3. Itmay also go the other way around. An ingredient is listed but doesnot have a counterpart in the Nutrition Fact. There may be tworeasons for this. One is that the mineral is not that essential forhealth maintenance. The other is that the food product does notsignificantly provide that nutrient.Answers to Activity QuestionsNote: Answers below are based on those labels provided in the activity.However, it is highly encouraged that the students use additional labelsfor reference.Table 3. Compounds and their constituent elements written in the foodlabelsFood Product Compound Constituent ElementsCereal DrinkChocolate candySoy sauceiron pyrophosphatezinc sulfatesodium bicarbonatesodium,calcium chloridemonosodiumglutamateiron, phosphorus, oxygenzinc, sulfur, oxygenhydrogen, carbon,oxygencalcium, chlorinesodium, carbon, hydrogen,nitrogen, oxygenGrade 7 Science: MatterDiversity of Materials in the Environment 37
Teacher's GuideModule 3: Elements & CompoundsActivity4The Iron-y of FoodMost of the minerals added to the food are in the form of compounds,for it is more easily absorbed by the body if it is in such form. Being so,rarely that the element itself is added. However, there are food productswhich are fortified with element iron.Iron in the blood is the one responsible in carrying oxygen from thelungs to the rest of the body. For the body to function well, oxygen iscritically needed. Health officials had to find ways to ascertain that there isenough iron in the food. Besides, there was a time when a lot of people werestricken with anemia — sickness caused by a deficiency of iron. To addressthis, most of the food products especially milk and cereal were required tobe fortified with iron. Some food are added with compounds of iron such asferrous sulfate, ferric pyrophosphate, and ferrous fumarate. However,addition of some of these compounds affect the taste of the food. In effect,consumers may not buy or patronize the food product. Food technologistsdevised other ways to add iron to food products. One of which is tomanufacture a food grade iron. This is the elemental iron which wassubjected into a reduction process that makes it permissible to be added tofood. Being the element iron itself, properties of this substance are retainedsuch as its ability to be attracted by a magnet.In this activity, students will be able to recover the iron present in afood product. Emphasize though that the iron in the food is safe to eatcompared to the iron that makes up the concrete nail and other productsthat are not meant to be ingested. Also, the ones that will be recovered fromthe activity should not be ingested.Most of the equipment needed for this activity may be available inyour TLE laboratory. A video* is provided in case the materials for thisactivity are not easily accessible/available.*http://curriculum.nismed.upd.edu.ph/2012/04/the-iron-y-of-food/Answers to Activity QuestionsQ1. There are small, black pieces or bits that are attached to the magnet.Q2. With its attraction to the magnet, it is highly possible that the blackbits recovered from the food are pieces of iron.Grade 7 Science: MatterDiversity of Materials in the Environment 38
Teacher's GuideModule 3: Elements & CompoundsPre/Post Test1. Which of the following statements is TRUE?A. Ferrous sulfate cannot be broken down into simpler substances.B. Compounds are made up of one kind of element.C. Water is composed of more than two elements.D. Compounds are more complex than elements.2. Calcium chloride is a compound of the two elements calcium andchlorine. Which of the following statements is TRUE?A. Calcium chloride is listed in the periodic table.B. The symbol for calcium chloride includes Ca and Cl.C. Chlorine may still be broken down into a simpler form.D. Calcium and chlorine belong to the same group in the periodic table.For questions 3 to 5. Refer to the information below. You may also refer tothe periodic table. Write the symbols only.SubstanceSymbolSubstancemelts atSubstanceboils atCa 850 o C 1490 o CCu 1083 o C 2600 o CFe 1540 o C 2900 o CHe -270 o C -269 o CMg 650 o C 1110 o CNCl3 -37 o C 71 o CNO -163 o C -152 o CNa2CO3 858 o C 890 o CSiO2 1610 o C 2230 o C3. Which compound melts above 1000 o C and boils above 2000 o C?4. Which element is gaseous at room temperature?5. Which substance is liquid at 30 o C?Answer Key1. D2. B3. SiO24. He5. NCl3Grade 7 Science: MatterDiversity of Materials in the Environment 39
Teacher's GuideModule 3: Elements & CompoundsReference(no author). (no date). Melting and boiling points of compounds. RetrievedMarch 30, 2012, from http://www.gcse<strong>science</strong>.com/imeltcomplz.htm(no author). (no date). Understanding food additives. Retrieved February 6,2012, from http://www.understandingfoodadditives.org/pages/Ch2p5-3.htmBurns, R.A. (1999). Fundamentals of chemistry. New Jersey: Prentice-Hall, Inc.Hill, J.W., & Kolb, D.K. (1998). Chemistry for changing times 8th edition.New Jersey: Prentice-Hall, Inc.Nutritionist-Dietitians’ Association of the Philippines. (2006). Ironfortification of rice: The Philippine experience. Retrieved February 18,2012, from http://www.ndap.org.ph/iron-fortification-rice-philippineexperiencePadolina, M.C.D., Simon-Antero, E., Alumaga, M.J.B., & Estanilla, L.C.(2004). Conceptual and functional chemistry. Quezon <strong>City</strong>: VibalPublishing House, Inc.Philippines. National Institute for Science and Mathematics EducationDevelopment. (2001). Practical work in high school chemistry: Sourcebookfor teachers. Quezon <strong>City</strong>: AuthorPhilippines. Department of Education. (2009). Chemistry: Science andtechnology textbook for 3rd year. (Reprint ed.). Quezon <strong>City</strong>: AuthorRose, A. (2012). Iron rich foods: Foods high in iron for health. RetrievedFebruary 18, 2012, from http://www.ironrichfood.org/USA. Department of Energy. (1991). Iron compounds and magnetism.Retrieved February 20, 2012, fromhttp://www.newton.dep.anl.gov/askasci/chem03/chem03870.htmWorld Health Organization. (2004). Recommended nutrient intakes —minerals . Retrieved March 9, 2012, fromhttp://whqlibdoc.who.int/publications/2004/9241546123_annexes.pdfGrade 7 Science: MatterDiversity of Materials in the Environment 40
Teacher's GuideModule 2: Acids and BasesMODULE 4: ACIDS AND BASESIn this module, students will get acquainted with the properties of agroup of compounds—acids and bases. They will prepare plant indicators tohelp them determine the acidity or basicity of common household items.Upon completion of this module, students will be able to answer thefollowing key questions that will allow them recognize the characteristicproperties of acids and bases.Key questions for this moduleHow acidic or basic are common household materials?Does water from different sources have the same acidity?What is the effect of acid on metals?Similar to Module 1, the activities have been developed in such a waythat concepts are developed gradually from the first to the last activity. Itstarts with the students distinguishing between acidic and basic mixturesthrough the use of a plant indicator, which they will prepare. Using theplant indicator, they will determine the acidity or basicity of commonhousehold items as well as that of water from different sources. In Activity 2,students are <strong>guide</strong>d to determine the pH of the solutions in Activity 1. InActivity 3, students will investigate the effect of an acid on a metal like iron.They will find out what happens after the metal has been in contact with theacidic mixture for some time.Activity1How can You Tell if a Mixture is Acidic or Basic?This is a colorful activity that the students will enjoy. Instead of usinglitmus paper, which can only indicate if a sample is acidic or basic, the useof plant indicators has an advantage since these can specify a range of pHvalues.This activity is divided into three parts. Part A allows the students toprepare the plant indicator and use it in Part B to determine the acidity orGrade 7 Science: MatterDiversity of Materials in the Environment 41
Teacher's GuideModule 2: Acids and Basesbasicity of common household items. Similar to Part B, Part C gives thestudents the opportunity to test different water samples from varioussources for acidity or basicity.If you want the class to always have indicator paper available for use,then it is good to ask selected students to work on the following with theguidance of the teacher outside of their class time in Science.Preparing an eggplant/camote acid-base indicator paperNote: You may do this if you need to use an indicator to test samples inother <strong>science</strong> activities.1. Pour the indicator solution prepared in Part A into a shallow plastic orceramic container. (Do not use a metal container.)2. Cover the entire filter or bond paper with the indicator solution bydipping the paper into the solution.3. Air dry for about five minutes. (There is no need to air dry the papercompletely at this point.)4. Repeat procedure numbers 1 and 2 three times or until the color of thepaper becomes dark.5. Continue drying the indicator paper. When the paper is completely dry,cut the paper into small square pieces. This is your indicator paper. Keepit in a covered bottle.6. Label the bottle properly (with name of material and date of preparation).Background Information on IndicatorsThe red, purple, and blue colors of most flowers and some vegetablescontain compounds called anthocyanins. A typical anthocyanin is red inacid, purple in neutral, and blue in basic solution. The eggplant extractshows yellow in a strong base since it contains anthoxanthins (colorless inacid, yellow in base) in addition to anthocyanins. Note that anthocyaninsand anthoxanthins are usually present in many plants. The green color is amixture of blue and yellow. Colors of anthocyanins in neutral to basicGrade 7 Science: MatterDiversity of Materials in the Environment 42
Teacher's GuideModule 2: Acids and Basescondition are very unstable. The purple, blue, and green colors will fadeand eventually turn to yellow upon exposure to air.Teaching TipsPart A• Only one of the suggested plants will be prepared by all groups inthe class.• If the other plants are available, you may assign some groups to usethe other suggested plants that can be used as indicators.• Emphasize the caution written in the “Take Care!” box.Part C• Instruct the students to use a wide-mouthed plastic container,about ½ liter capacity to collect water. The container for collectingwater should be dipped or immersed about 6 inches or about 15 cmfrom the surface of the source of water.Grade 7 Science: MatterDiversity of Materials in the Environment 43
Teacher's GuideModule 2: Acids and BasesAnswers to Activity 1Table 1. Acidic or basic nature of household materialscalamansiSample Color of indicator Nature of sampletap water (water fromthe faucet)distilled watervinegarsugar in waterbaking sodabaking powdersoft drink (colorless)coconut water (frombuko)toothpasteshampoosoapstrongly acidicweakly acidicneutralstrongly acidicweakly acidic orneutral (depending onthe type of waterused)basicbasicstrongly acidicweakly acidicbasicbasicbasicRemindersIt is recommended that preparation for Activity 3 be started theday before Activity 2 is done. This will ensure that students havethree days to observe the changes in each setup of Activity 3.Refer to the Teaching Tips for Activity 3 regarding instructions onthe setups.Grade 7 Science: MatterDiversity of Materials in the Environment 44
Teacher's GuideModule 2: Acids and BasesActivity2Color Range, pH Range !This activity introduces students to another method that can be usedto distinguish acids from bases. It is through the use of the pH scale, whichextends from 0 to 14. Students simply need to use color range given foreggplant indicator in the student module.Teaching Tips• If a universal indicator paper is available, it would be good to useit also and compare the pH observed with that of the plantindicator.• The excess plant indicator can be stored in a bottle and kept in acool dark place or inside a refrigerator.• The pH indicated in the answers for Table 3 may not be exactlythe same as the pH observed using the plant indicator preparedby the students. This is acceptable as long as the nature of thesample (acidic or basic) is the same as expected. This means thata sample of calamansi may not have exactly pH 2, but it shouldstill be in the strongly acidic range.Grade 7 Science: MatterDiversity of Materials in the Environment 45
Teacher's GuideModule 2: Acids and BasesAnswers to Activity 2Table 3. pH of samples from Activity 1SamplepH based oneggplant/camote Acidic or Basicindicatorcalamansi pH 2 strongly acidictap water (water pH 5 to 6weakly acidicfrom the faucet)Distilled water around pH 7 neutralvinegar pH 2 to 3 strongly acidicsugar in water pH 6-7 weakly acidic toneutralbaking soda pH 8 to 9 basicbaking powder around pH 8 basicsoft drink (colorless) pH 2 to 3 strongly acidiccoconut water (from pH 5weakly acidicbuko)toothpaste pH 8 to 9 basicshampoo pH 8 to 9 basicsoap pH 8 to 9 basicAnswers to Part C will depend on the sources of water, so pH willdepend on the specific water sample tested by the student.Grade 7 Science: MatterDiversity of Materials in the Environment 46
Activity3Teacher's GuideModule 2: Acids and BasesWhat Happens to Metals When Exposed to an AcidicMixture?Teaching TipsThe setup for this activity has to be prepared ahead of time. You caninstruct the students to set up the iron nails.If 100-mL beakers are available in your school, beakers can be used.Follow step numbers 1 to 5 in the procedure for preparing the setup.Students should be observing and recording for 3 days.Answers to Activity QuestionsQ1. There are three different bottles for each sample of iron nail to makesure that replicate data are gathered for the setups.Q2. At the end of 3 days, the iron nail has rust all over its sides, head,and tip.Q3. When iron rusts, it produces a characteristic flaky red-brown solid,commonly called iron rust.Further Explanation on Rusting of IronRust is hydrated iron or iron (III) hydroxide, Fe(OH)3, sometimeswritten as Fe2O3∙3H2O. This layer does not securely stick to the surfaceof the iron. It flakes off, weakening the metal and leaving it exposed tofurther rusting and structural decay.Iron forms rust upon prolonged exposure to oxygen and moisturein the air and in the presence of acid. Recall that the acid used inActivity 3 is vinegar, which is about 4.5 to 5% acetic acid.Note that you do not need to let the students memorize thechemical formula of iron rust. It is sufficient for Grade 7 students toknow that rust is hydrated iron or iron hydroxide.Grade 7 Science: MatterDiversity of Materials in the Environment 47
Teacher's GuideModule 2: Acids and BasesPre/Post Test1. Arrange the following household items: toothpaste, bath soap, tap water,vinegar from the most acidic to most basic?a. tap water, milk, toothpaste, vinegarb. milk, tap water, vinegar, toothpastec. toothpaste, milk, tap water, vinegard. vinegar, tap water, milk, toothpaste2. Arrange the household items in question number (1) from the item withthe highest pH to the one with the lowest pH.3. Give a reason why farmers need to know how acidic or basic the soil isbefore they plant their crop.4. Give at least two (2) safe ways you should practice when you handle anacid, like muriatic acid.5. Why does “rust” form on some metallic materials?Grade 7 Science: MatterDiversity of Materials in the Environment 48
Teacher's GuideModule 2: Acids and BasesAnswer Key1. (D) vinegar, tap water, milk, toothpast2. toothpaste, milk, tap water, vinegar3. Any one of the answers below is considered correct.(a) Some plants grow well in acidic soil while others prefer basic soil.Farmers need to know the pH of their soil since plants will onlygrow in a specific pH range.(b) The pH also affects how much nutrients from the soil becomeavailable to plants.4. Any two of the following answers is considered correct.(a) Do not take internally (Do not taste nor drink).(b) Avoid contact with eyes, nose and mouth.(c) Use only in well ventilated areas.(d) Always keep the container tightly sealed.(e) Do not store in a warm place.(f) Keep out of reach of children.5. A metal like iron forms rust when exposed for a long time to oxygenand moisture in the air and in the presence of an acid.Grade 7 Science: MatterDiversity of Materials in the Environment 49
Teacher's GuideModule 2: Acids and BasesReferencesBrady, J.E. & Senese, F. (2004). Chemistry: Matter and its changes, 4 thedition. River Street Hoboken, NJ: John Wiley & Sons, IncBucat, R.B. (Ed.) (1984). Elements of chemistry: Earth, air, fire & water,Volume 2. Canberra <strong>City</strong>, A.C.T., Australia: Australian Academy ofScience.Bucat, R. B. (Ed.) (1983). Elements of chemistry: Earth, air, fire & water,Volume 1. Canberra <strong>City</strong>, A.C.T., Australia: Australian Academy ofScience.Burns, R. A. (1999). Fundamentals of chemistry, 3 rd edition. Upper SaddleRiver, N.J. Prentice-Hall, Inc.Elvins, C., Jones, D., Lukins, N., Miskin, J., Ross, B., & Sanders, R. (1990).Chemistry one: Materials, chemistry in everyday life. Port Melbourne,Australia: Heinemann Educational Australia.Gallagher, R. & Ingram, P. (1989). Co-ordinated <strong>science</strong>: Chemistry. Oxford,England: Oxford University Press.Heffner, K. & Dorean, E. (n.d.) Must it rust? The reaction between iron andoxygen. Retrieved Feb 16, 2012 fromhttp://www.haverford.edu/educ/knight-booklet/mustitrust.htmHeyworth, R. M. (2000). Explore your world with <strong>science</strong> discovery 1. FirstLok Yang Road, Singapore. Pearson Education South Asia Pte Ltd.Hill, J.W. & Kolb, D.K. (1998). Chemistry for changing times, 8 th edition.Upper Saddle River, NJ: Prentice Hall.Philippines. Department of Education. (2004).Chemistry: Science andtechnology textbook for 3 rd year. (Revised ed.). Quezon <strong>City</strong>: Author.Grade 7 Science: MatterDiversity of Materials in the Environment 50
Teacher's GuideModule 5: Metals and NonmetalsMODULE 5: METALS AND NONMETALSStudents are already familiar with metals. They have encountered alot of this during their early grade levels. In fact, they use metals as one ofthe segregation scheme when they were starting the habit of 5Rs — reduce,reuse, recycle, recover and repair. Appearance was their primary basis whenthey identify metals. In this module, students will broaden their knowledgeon the properties of metals. They will learn additional characteristics ofmetals. They will find out that these are also elements. Moreover, they willfind out that not all elements exhibit such properties. Most of them havehighly contrasting properties with that of metals. As such, they werereferred as nonmetals.Key questions for this moduleHow are metals different from nonmetals?How are they similar?A series of activities will gear the students in answering the questions above.With the hope that students will find connection between the topics theyhave learned in the lower grade levels to the ones they are about to learn, asimple activity on identifying the metals around them will be done. It isexpected that they will be basing it on the appearance of the material. Othersimple activities are interspersed within the student module to learn moreproperties exhibited by different metals. They will verify if such propertiesare truly exhibited by metals. For instance, they will bring close a magnet todifferent samples of metals. They will find out that not all of these propertiesare exhibited by metals. The main activity highlights the property that iscommon to all metals — electrical conductivity. It will be followed byanother activity that will likewise differentiate a metal and a nonmetal.Grade 7 Science: MatterDiversity of Materials in the Environment 51
Teacher's GuideModule 5: Metals and NonmetalsActivity1Which can Conduct Electricity, Metals orNonmetals?Prior to this activity, the students must have learned that metalsshare a number of common properties. However, not all of the metals exhibitthese properties. For instance, only some metals are magnetic. The commonones are iron, nickel and cobalt.In this activity, students will learn that there is a property that allmetals possess — electrical conductivity. This is the ability of a material toallow electricity to pass through it. They will use an improvised electricalconductivity tester to check for such property. You will find below how toconstruct one from commonly available materials.Reminder• The sound (and light) indicates thata material is electrically conductive.The stem of the tester is electricallyconductive. Please see figure on theright. Make sure that the tips of theconductivity tester are not touchingeach other especially when testingthe sample material.These are made from copper.Make sure they are nottouching each other.•Teaching Tips• Acquaint the students with the electrical conductivity tester beforestarting the activity. Allow them to try having the tips of the testertouch each other. Ask them about what they observe. This will helpemphasize the reminder stated above.may give other descriptions of the elements such as physical stateat standard conditions and color. Use real samples if possible.Grade 7 Science: MatterDiversity of Materials in the Environment 52
Teacher's GuideModule 5: Metals and NonmetalsTeaching Tips• After processing the activity, you may go back to the reminder setfor this activity. Ask the students again why they were asked not tolet the tips of the electrical conductivity tester touch each other.What could be the material of the stem of the conductivity tester?(Metal.)• The students can find other objects around them to test using theimprovised electrical conductivity tester; and identify these objects ifthese are made up of metals or nonmetals.• Students have to understand the concept of conductivity, that is, amaterial is conductive if it allows something to pass through it. Inthe case of electrical conductivity, it is electricity that is allowed topass. A material may also allow heat to pass through it. In this case,the material is said to be thermally conductive. However, theconcept of being thermal has not been formally introduced to thestudents. Being so, describe the elements that are thermallyconductive as heat conductors. The term thermal conductivity is theone used for many references, so for familiarity purposes, the termis mentioned. Moreover, when they have to find the values fromdifferent references, these are referred as thermal conductivityvalues. During the 3rd quarter (physics), the student will learn moreabout conductivity.• Show students pictures of some metals and nonmetals. You mayrefer to some of the books and websites listed at the end page of this<strong>guide</strong>. They may give other descriptions of the elements such asphysical state at standard conditions and color. If possible, use realsamples.Answers to Activity QuestionsQ1. Aluminum, copper and iron look like metals; while iodine and sulfurlook like nonmetals.Q2. Aluminum, copper and iron are electrical conductors; while iodineand sulfur are nonconductors of electricity.Grade 7 Science: MatterDiversity of Materials in the Environment 53
Teacher's GuideModule 5: Metals and NonmetalsConstruction of an Improvised Electrical Conductivity testerMaterials Neededalcohol lampstripping knifepliers (long nose)musical greeting cardinsulated copper wire, 2 pcs (2.0 mm in diameter, 24 cm long);2 pcs wood/chopstick (1 cm x 1 cm)thick iron nail, 7 cm long, 3 mm thickProcedure1. Using pliers and a stripping knife, remove about 6 cm of theinsulation of the copper wire on one end. At the other end ofthe wire, remove about 15 cm of the insulation.Fig. 12. Measure four 1.5 cm length on the 6 cm stripped portion of thecopper wire. Mark these lengths as L1, L2, L3, and L4.Fig. 23. Using a pair of pliers, completely turn L1180 o angle until its end touches the L2 sideof the wire. Turn L3 opposite to L1. Lastly,bend L4 in the opposite direction so thatfour zigzag bends are formed. See Figure 3.Do this for both wires.Fig. 3Grade 7 Science: MatterDiversity of Materials in the Environment 54
Teacher's GuideModule 5: Metals and NonmetalsConstruction of an Improvised Electrical Conductivity tester4. Open the musical greeting card andcarefully remove the integrated circuitby cutting out the paper on which theIC is attached.Fig. 45. Lift the long metal sheet of the switchpart of the IC. Fold it to expose thenegative (-) terminal of the switch.Retain the dry cell. See Figure 5.Fig. 56. Clip the metal electrodes on the IC, oneon the positive (+) terminal and theother on the negative (-) terminal.Place a block of wood or plastic or anyinsulator between the two electrodesand fix it by taping. See Figure 6.Fig. 6Grade 7 Science: MatterDiversity of Materials in the Environment 55
Teacher's GuideModule 5: Metals and NonmetalsActivity2Acidity of the Oxides of Metals and NonmetalsThis activity reinforces the idea learned from Module 3, that is,compounds may be formed when elements combine. Hence, metals andnonmetals, being elements, may form compounds. Combining with oxygen,a metal or a nonmetal may form an oxide. However, the acidity differsdepending on the nature of this oxide. This, again, is a definingcharacteristic of a metal and a nonmetal. A metal oxide is generally basic;while a nonmetal oxide is acidic.Moreover, the activity will allow the students to apply their learning inModule 4. They will test the acidity of their samples. It is very important thatthey know how to interpret the color changes of the acid/base indicator. Thelitmus paper is suggested to be used in this activity. However, you may useother acid/base indicators that are more available in your school. You mayrefer to Module 4 for some of these indicators.Answers to Activity QuestionsQ1. Magnesium is a metal.Q2. The red litmus paper changed its color to blue.Q3. The oxide of magnesium is basic.Q4. Sulfur is a nonmetal.Q5. The blue litmus paper changed its color to red.Q6. The oxide of sulfur is acidic.Grade 7 Science: MatterDiversity of Materials in the Environment 56
Teacher's GuideModule 5: Metals and NonmetalsPre/Post Test1. Which of the following elements is most likely ductile at roomtemperature?A. SulfurB. MercuryC. NitrogenD. Aluminum2. An element was subjected into flame and the acidity of the oxide formedwas tested. Solution of this oxide turned red litmus paper to blue. Whichis most likely that element?A. ChlorineB. NickelC. PhosphorusD. SiliconFor questions 3 to 5. Refer to the information below. Write the symbols only.ElementSymbolMP( o C)BP( o C)Al 660 2450 GoodBr -7 58 PoorCa 850 1490 GoodCl -101 -35 PoorCu 1083 2600 GoodHe -270 -269 PoorFe 1540 2900 GoodPb 327 1750 GoodMg 650 1110 GoodHg -39 357 GoodN -210 -196 PoorO -219 -183 PoorP 44 280 PoorK 64 760 GoodNa 98 890 GoodS 119 445 PoorZn 419 906 GoodElectricalconductivity3. Which metal is liquid at room temperature?4. Which nonmetal is liquid at room temperature?5. List the nonmetals in order of increasing boiling point.Answer Key1. D2. B3. Hg4. Br5. He, N, O, Cl,Br, P, SGrade 7 Science: MatterDiversity of Materials in the Environment 57
Teacher's GuideModule 5: Metals and NonmetalsReferenceBarbalace, K. (1995). Periodic table of elements sorted by thermalconductivity. Retrieved March 14, 2012, fromhttp://EnvironmentalChemistry.com/yogi/periodic/thermal.htmlBreck, W.G., Brown, R.J.C., & McCowan, J.D. (1988). Chemistry for<strong>science</strong> and engineering 2nd edition. Canada: McGraw-Hill RyersonLimitedBurns, R.A. (1999). Fundamentals of chemistry. New Jersey: Prentice-Hall, Inc.Fine, L.W., Beall, H., & Stuehr, J. (2000). Chemistry for scientists andengineers. USA: Harcourt, Inc.Gallagher, R., & Ingram, P. (1989) Co-ordinated <strong>science</strong>: Chemistry. NewYork: Oxford University PressHill, J.W., & Kolb, D.K. (1998). Chemistry for changing times 8th edition.New Jersey: Prentice-Hall, Inc.Padolina, M.C.D., Simon-Antero, E., Alumaga, M.J.B., & Estanilla, L.C.(2004). Conceptual and functional chemistry. Quezon <strong>City</strong>: VibalPublishing House, Inc.Philippines. Department of Education. (2009). Chemistry: Science andtechnology textbook for 3rd year. (Reprint ed.). Quezon <strong>City</strong>: AuthorPhilippines. National Institute for Science and Mathematics EducationDevelopment. (2001). Practical work in high school chemistry:Sourcebook for teachers. Quezon <strong>City</strong>: AuthorGrade 7 Science: MatterDiversity of Materials in the Environment 58
For TeachersGrade 7 ScienceQUARTER 2Living Things and TheirEnvironmentDepartment of EducationUniversity of the PhilippinesNational Institute for Science and Mathematics Education Development
Copyright pageQuarter 2Teacher’s GuideGrade 7 ScienceLiving Things and Their EnvironmentMaria Helen D.H. Catalan, Michael Anthony B. Mantala,Risa L. Reyes,Ma. Dulcelina O. Sebastian, Rodolfo S. Treyes, Writers. Merle C. Tan, Reviewer.Rosita R. Cruz, Wilhelmina L. Dela Paz, Cecile N. Sales, Encoders.Rizaldo Ramoncito S. Saliva, Artist. Cover design by Alvin J. Encarnacion.May 2012
CONTENTSLiving Things and Their Environment: OverviewModule 1. From Cell to Organism . . . . . . . . . . . . . . . . . . . . . . . . . . . . . 64Activity 1: What makes up and organism?. . . . . . . . . . . . . . . . . . . . . 67Activity 2: Levels of organization in an organism . . . . . . . . . . . . . . . 71Pre/Post Test . . . . . . . . . . . . . . . . . . . . . . . . . . . . . . . . . . . . . . . . . . . 72Module 2. Plant and Animal Cells . . . . . . . . . . . . . . . . . . . . . . . . . . . . . 75Activity 1: Comparing plant and animal cells . . . . . . . . . . . . . . . . . . 76Activity 2: Investigating plant cells . . . . . . . . . . . . . . . . . . . . . . . . . . 79Pre/Post Test . . . . . . . . . . . . . . . . . . . . . . . . . . . . . . . . . . . . . . . . . . 81How to Use the Light Microscope . . . . . . . . . . . . . . . . . . . . . . . . . . . 85Pre/Post Test . . . . . . . . . . . . . . . . . . . . . . . . . . . . . . . . . . . . . . . . . . . 89Module 3. Living Things Other Than Plants & Animals . . . . . . . . . . . . . 93Activity 1: Are these also plants? . . . . . . . . . . . . . . . . . . . . . . . . . . . 94Activity 2: What other living things are found in the school grounds? 98Pre/Post Test . . . . . . . . . . . . . . . . . . . . . . . . . . . . . . . . . . . . . . . . . . . 103Activity 3: What do these living things look like under themicroscope? . . . . . . . . . . . . . . . . . . . . . . . . . . . . . . . . . . . 104Module 4. Reproduction: The Continuity of Life . . . . . . . . . . . . . . . . . . 107Activity 1: Can you grow new plants from “eyes”? . . . . . . . . . . . . . . 107Activity 2: Can one become two? . . . . . . . . . . . . . . . . . . . .. . . . . . . . 108Activity 3: Structure of a Gumamela flower . . . . . . . . . . . . . . . . . . . . 110Pre/Post Test . . . . . . . . . . . . . . . . . . . . . . . . . . . . . . . . . . . . . . . . . . . 112Module 5. Interactions . . . . . . . . . . . . . . . . . . . . . . . . . . . . . . . . . . . . . . 114Activity 1: What does it mean to be alive?. . . . . . . . . . . . . . . . . . . . . 115Activity 2: Housemates? Ecomates! . . . . . . . . . . . . . . . . . . . . . . . . 117Activity 3: Which eats what? . . . . . . . . . . . . . . . . . . . . . . . . . . . . . . . 122Activity 4: What to do with food wastes ?. . . . . . . . . . . . . . . . . . . . . . 126Pre/Post Test . . . . . . . . . . . . . . . . . . . . . . . . . . . . . . . . . . . . . . . . . . . 129
LIVING THINGS AND THEIR ENVIRONMENTOVERVIEWScience is about asking questions and looking for answers.Each of the five modules on Living Things and Their Environment forGrade 7 starts with questions that will <strong>guide</strong> students in their journey ofconstructing the big ideas through activities that are interspersed in themodules. The students are provided with opportunities to develop the inquiryskills as well as their critical thinking, problem solving, and communicationskills.There are five modules on Life Science:Module 1:Module 2:Module 3:Module 4:Module 5:From Cell to OrganismPlant and Animals CellsLiving Things Other than Plants and AnimalsReproduction: The Continuity of LifeInteractionsThese modules deal with the levels of organization and diversity of livingcomponents of the environment both at the organism and ecosystem levels; therelationships among living things, and between living things and theirenvironment; and how living things reproduce to continue their own kind.Most of the activities may be performed as groupwork while some may beperformed individually or with a partner. It is strongly urged that studentsread the activities before performing them. It is also important that thestudents take note of the safety measures.There is also a pre/post test that should be administered before and afterall the activities in each module have been completed. The pretest results willreveal students’ prior knowledge and alternative conceptions (if any). Theposttest results will show the extent of students’ comprehension of theconcepts and their capacity to demonstrate needed skills. The posttest can alsouncover students’ misconceptions that need to be addressed in succeedingmodules.The K to 12 curriculum spirals and increases in difficulty at each gradelevel so as to provide challenges appropriate to the students’ age. The toolsand habits of inquiry that students will acquire will help them develop intoscientifically literate and productive citizens.
TEACHING GUIDEMODULE1FROM CELL TOORGANISMOverviewIn the First Quarter, the students learned that there are differentmaterials in the environment. For this quarter, they will be introduced tothe diverse kinds of living things and the processes and interactions they gothrough. This module deals with different kinds of living things and whatthey are made up of.In the lower grades, the students have learned that the human body ismade up of organ systems that work together. In turn, these organ systemsare made up of organs whose functions are related with each other. Forexample, the heart and the blood vessels are organs that facilitate thecirculation of blood and nutrients to the different parts of the body;similarly, the esophagus, stomach, and intestines work together to carry outdigestion of food. The organs are made up of even smaller structures: thetissues and cells.In this module, the students will be introduced to the concept of levelsof organization in an organism. They will learn in the activity titled, “Whatmakes up an organism?” that whatever happens to the smaller structureswill affect the bigger structures and, eventually, the whole organism. Drawout from the students the idea that these structures work together to carryout specific functions to make the organism meet its basic needs andsurvive.Towards the end of the module, the students will recognize that allorganisms are made up of cells – the basic unit of structure and function inall living things. They will discover more about cells in Module 2.Key questions for this moduleWhat are organisms? What makes them up?Grade 7 Science 64Living Things and Their Environment
MotivationBallpen disassemblyBelow are parts of 4 different kinds of ballpens. Ask the students toidentify which part belongs to which ballpen.Photo: Courtesy of Michael Anthony B. MantalaA ballpen has parts like those shown in the picture below. Ask themto identify the function of each part of the ballpen.Other PartsInk TubeCapBarrel ShellBallpointPhoto: Courtesy of Michael Anthony B. MantalaHave them take a closer look at the top picture on the next page. Askthem to identify the part of the ballpen that is missing and its function. Askthem to imagine how the ballpen will work compared to the ballpen withcomplete parts.Grade 7 Science 65Living Things and Their Environment
Photo: Courtesy of Michael Anthony B. MantalaBelow is a picture of a ballpen that was assembled with a part thatbelongs to another ballpen. Ask the students to identify the part of theballpen that was replaced and its function. Ask them to imagine how theballpen will work compared to the original ballpen.Photo: Courtesy of Michael Anthony B. MantalaIn this motivation part of the lesson, you used ballpens to representstructure and function in organisms. The ballpen is made up of differentparts that have specific functions; they work together to make the ballpenperform its function. Similarly, organisms are made up of parts that worktogether: organ systems, organs, tissues, and cells.Of course, you can use other representations. Bear in mind though,that the use of representations has its limitations. It can help, to someextent, concretize abstract concepts like structural organization inorganisms as it can also give, to some extent, misconceptions like using theballpen as a representation for concepts the apply to living things.That said, have them discover through a discussion that like theballpen that is made up of different parts that work together, organ systemsare made up of organs that also work together to carry out the organsystem‟s task. Anything that happens to the small parts will certainly affectthe bigger parts and, eventually, the organism.Grade 7 Science 66Living Things and Their Environment
Activity1What makes up an organism?In this activity, you will ask the students to read the selection andanswer the questions that follow. The activity seeks to answer the questions:„What are organisms?‟ and, „What are they made up of?‟If you have a model or a poster of a human torso, you can show it tothe class and ask the students to check the parts closely. If not, you candirect the class to check Figure 2 of Module 1.Q1. What parts of the human body do you see?They will see that the human body is made up of different parts.Q2. To which organ systems do these parts belong?To answer this question, have them recall the different organ systemsof the body that they have learned in the lower grades. Then, have them lookat Figure 3.Figure 3 shows some organ systems of the human body. Have themidentify the parts that make up each of the organ systems. Ask them todescribe how the different parts work together in an organ system. Havethem imagine what happens to the organism if any of the organ systems isinjured or diseased.Q3. Can you identify these organ systems?The organ systems shown in Figure 3 include the skeletal, muscular,circulatory, and nervous systemsQ4. How do these organ systems work together?To answer this question, they will have to identify the functions ofeach of the organ systems and describe how the function of one organsystem relates to the functions of the others. For example, the skeletalsystem, along with the muscular system, functions for movement. Thebones move according to the alternating contraction and relaxation of themuscles. These movements of the skeletal and muscular systems arecoordinated by the nervous system. All these happen because of energy thatcomes from the nutrients transported by the circulatory system to thedifferent parts of the body.Organ systems are made up of functionally related organs. Figure 4shows a model of a human heart.Q4. Refer to Figure 4. What parts of the human heart do you see?Grade 7 Science 67Living Things and Their Environment
The human heart is made up of muscles and blood vessels: the veinsand arteries. If they had advanced readings, they would probably mentionauricles, ventricles, and valves in addition to what is shown in the figure.They will have more on these and other parts of the heart in higher Biology.Q6. What do you think will happen to the heart if any of these parts wereinjured or diseased?An injury to any of the parts of the heart is an injury of the heart. Thismeans, the heart will suffer in the same way that its parts suffer.Q7. If these parts of the heart were injured or diseased, what do you thinkwill happen to the organism?As you ask this question, you can also ask them if they know ofrelatives or acquaintances who have been diagnosed with heart ailment.They would probably mention that the person is weak and experiences chestpains or difficulty in breathing. An injury to any of the parts of the heartaffects the organism – the person.Another organ – the kidney – belongs to another organ system, theexcretory system. Like the processing you did for the heart, ask the studentsto check out the picture of a model of a human kidney.Q8. Refer to Figure 5. What parts of the human kidney do you see?Like the heart, the kidneys are made up of muscles and blood vessels.Those who had advanced readings may probably mention renal cortex,medulla, and pelvis in addition to what is shown in the figure. They willhave more on these and other parts of the heart in higher Biology.Q9. What do you think will happen to the kidneys if any of these parts wereinjured or diseased?An injury to any of the parts of the kidneys is an injury of the entireorgan. This means, the kidneys will suffer in the same way that its partssuffer.Q10. If these parts of the kidneys were injured or diseased what do youthink will happen to the organism?Before you ask this question, you can ask them if they know of peoplewho have been diagnosed with kidney problems. You can also ask how thesepeople are coping with the disease. They will probably mention that thesepeople are weak and have difficulty urinating or may have poor appetite. Aninjury to any of the parts of the kidneys affects the organism – the person.Organs themselves are made up of even smaller parts: the tissues andcells. Guide the students through Figure 6 that shows a picture of a muscleGrade 7 Science 68Living Things and Their Environment
tissue. You should be able to draw the idea that these tissues play specifictasks to keep the organs, organ systems, and the whole organism healthy.Q11. What procedure can a medical doctor do to correct an injury the theseorgans?They will answer this question using what they have learned from theinterviews they made of the articles they have read.Q12. What do you think will happen to the organs if these tissues wereinjured or diseased?The organ will suffer from an injury to the tissues.Q13. If these tissues were injured or diseased, what do you think willhappen to the organ systems?The organ systems will suffer, too.Q14. If these tissues were injured or diseased, what do you think willhappen to the organism?The organism will suffer, too. For example, a cut on the tissues of theskin is felt by the whole organism. Anything that happens to the tissues willaffect the bigger structures they make up.Plants are also made up of organ systems: the root and shoot systems.The roots absorb water and nutrients; the shoot system moves them to thedifferent parts of the plant.Q15. In what ways are the functions of the organ systems of plants similarto those of animals?Like the organ systems of animals, those of plants have parts thatwork together. For example, the shoot system of plants is composed of thestem, leaves, and flowers. The stem has tissues that allow for the transportof water and nutrients from the roots to the leaves. The leaves on the otherhand serve as structures for photosynthesis through which, theymanufacture their food. The flowers are the reproductive organs of plants.Q16. In what ways are they different?Plants have only two organ systems: the root and shoot systems;whereas, animals have complex organ systems that work directly with theother organ systems. For example, plants do not have a nervous system thatcoordinates the functions of the other organ systems of animals. Plants alsodo not have circulatory and respiratory systems that move oxygen andnutrients to the different parts of the body.Grade 7 Science 69Living Things and Their Environment
Figure 8 shows a picture of a flower. Flowers are the reproductiveorgans of plants. Together with the leaves and the stems, they make up theshoot system.Q17. How are flowers similar to the reproductive organs of animals?Like the reproductive organs of animals, complete flowers have maleand female parts. These parts work together to bear seeds from which newplants germinate.Q18. How are they different?Plants can dispense with their flowers – their reproductive organs – togenerate their kind for they can also reproduce asexually. Animals thatreproduce sexually make use of only their reproductive organs to do so.Q19. How do the flowers, leaves, and stems help plants meet their basicneeds?They have learned in the lower grades that plants are able tomanufacture their food through photosynthesis. They use their leaves tocarry out this process. The stem provides support to the leaves, flowers, andfruits. They also serve as channels for the transport of water and nutrientsfrom the roots to the different parts of the plant. The flowers serve as theirreproductive organs.Q20. What do you think will happen to the plant if any of the parts thatmake up the shoot system were injured or diseased?Anything that happens to any of the parts that make up the shootsystem of pants will certainly affect the plant as well. You can ask them tocite examples to highlight this connection.The root system is another organ system of plants. In some plants, itis made up of the primary root, the secondary roots, and the root hairs.Figure 9 shows a picture of a root tip of an orchid.Q21. Aside from absorbing water and nutrients, what other functions dothe roots serve?Roots also provide anchorage to the plant.Plants have tissues, too. You can peel off the skin of onion bulbs toshow your students what tissues look like. Tissues of onion bulbs wouldlook like a transparent plastic. Roots are also made up of tissues. Figure 10shows a model of a section of a root tip.Grade 7 Science 70Living Things and Their Environment
Tissues are made up of cells – the basic units of structure andfunction in organisms. All organisms are made up of cells; they are thesmallest level of organization at which the properties of life can be carriedout.Q22. What do you think will happen to the roots if the tissues that makethem up were injured or diseased?Q23. If the roots were injured or diseased, what do you think will happen tothe plant?Serious damage to the root will kill the plant.Q24. What do you think will happen to the tissues, organs, and organsystems if these cells were injured or diseased?When cells or tissues are injured or diseased, the higher levels oforganization that they make up are affected as well.Q25. What do you think will happen to the organism?The different parts that make up an organism each perform a specificfunction. Anything that happens to the smallest of parts that make up anorganism will most likely affect the whole organism.Activity2Levels of organization in an organismFor Activity 2, Levels of organization in an organism, ask the studentsto complete the table on page 8 of Module 1 using the information theygathered from their interviews with relatives or neighbors who have diseasesaffecting certain organs or who know of people who have the disease. Theymay also use the information from the articles that they have read inActivity 1. Have the students read the procedure for completing the table.The activity will help the students synthesize what they have learnedabout what makes up an organism; it also serves as an enrichment activity.In each of the boxes that correspond to the levels of organization, have themdescribe how the disease affects the parts that make up each level. Oppositeeach level of organization, have them cut and paste pictures (they may usethe pictures that come with the articles) that show how the disease affectsthe parts that make up the different levels. Another option is to have themshow it through drawing. After completing the table, have them present theirwork to class.Grade 7 Science 71Living Things and Their Environment
In the last part of Activity 2, ask the students to reflect on thequestion, Are there levels of organization that are bigger than the organism?At the end of Module 1, the students should have learned thefollowing big ideas:o Organisms are made up of parts: organ systems, organs, tissues,and cells.o Whatever happens to any of these parts will affect the other partsand the whole organism.o We need to keep our cells and tissues healthy to make our organs,organ systems, and the whole body healthy.o To stay healthy, we need to eat nutritious foods; they include theplants in our backyard and the animals in our farm.o Like us, these plants and animals are also organisms. They havebasic needs that include proper care for them.PRE/POST TEST1. The heart pumps blood that carries oxygen and nutrients to the differentparts of the body. To which organ system does the heart belong?A. CirculatoryB. DigestiveC. ExcretoryD. Reproductive2. Cancer starts from cells that start to grow uncontrollably fast. Theydestroy tissues and organs. What does this say about the effects ofdiseased cells on the higher levels of organization in an organism?A. Cancer involves only certain kinds of cells and does not affect anyother kind of cell.B. Diseased cells affect only the next higher levels of organization thatthey make up – the tissues.C. Diseased cells damage the higher levels of organization they make up:tissues, organs, organ systems, and eventually, the whole organism.D. Diseased cells do not affect the other parts of an organism.Grade 7 Science 72Living Things and Their Environment
3. Each part of an organ system plays a specific function. Which of thefollowing structures does not match its function?A. Eyes : SightB. Kidneys : RespirationC. Heart : CirculationD. Stomach : Digestion4. Flowers are the reproductive organs of plants. How are flowers differentfrom the reproductive organs of animals?A. Flowers have male and female parts; animals have either male orfemale parts.B. Flowers need pollinators like bees to reproduce; animals do not.C. Flowers are shed from time to time; nothing is shed from animals.D. There is no difference between flowers and the reproductive organs ofanimals.5. The organ systems of plants consist of the root and shoot systems. Whyis it important for these organ systems to work together?A. To grow and surviveB. To avoid pests and other animalsC. To survive floods and strong windsD. To survive droughts and earthquakes6. Which of the following differentiates organs from tissues?A. Organs make up tissues; tissues make up organsB. Tissues make up organs; cells make up tissuesC. Organs and tissues are made up of cells.D. Organs and tissues make up an organ system.7. At which smallest level of organization in an organism can thecharacteristics of life be carried out?A. Organ system C. TissueB. Organ D. Cell8. Which is the correct sequence – from biggest to smallest – of the levels oforganization in an organism?A. Cell Organ Organ System TissueB. Organ Organ System Tissue CellC. Tissue Cell Organ Organ SystemD. Organ System Organ Tissue CellGrade 7 Science 73Living Things and Their Environment
Answer Key1. A2. CNote: When cancer cells metastasize, they spread to the cells of othertissues and organs. But even in the early stages, they start affectingnearby cells and tissues and making them cancerous.3. B4. BNote: Some animals are hermaphroditic like the earthworms. They haveboth male and female parts; hence A is not the answer. Egg andsperm cells are shed from the reproductive organs of animals fromtime to time; hence, C is not the answer. Option B shows adifference between flowers and the reproductive organs of animals;D is not the answer.5. A6. B7. D8. DReferencesBright Hub Education. (2009). Science Lesson Plan: Biological Organization.Middle School Science Lessons. Retrieved January 16 2012 fromhttp://www.brighthubeducation.com/Education. (2003). The Pyramid of Life (Levels of Biological Organization).Biology Demystified: A Self-Teaching Guide. Retrieved January 16,2012 from http://www.education.com/Scitable by Nature Education. (2008). Biological Complexity and IntegrativeLevels of Organization. Scitable Topicpage. Retrieved February 7, 2012from http://www.nature.com/scitableGrade 7 Science 74Living Things and Their Environment
TEACHING GUIDEMODULE2PLANT AND ANIMALCELLSOverviewThe module presents to the students discoveries about the cell basedon what have been observed by scientists through the microscope. Itdiscusses concepts that all organisms are made up of cells and that anorganism can be just single-celled (unicellular) or many-celled(multicellular). Through the module they will be introduced to the cell, itsparts and their functions, and similarities and differences between twokinds of cells.Key questions for this moduleAre all cells the same?If not, in what ways are they different?Activity 1 shows how plant and animal cells look like through theillustrations presented. Students will study and analyse these illustrations.Through these they will also be able to observe the differences in shapes ofthe two cells as shown by the figures presented. In the activity students willconstruct a Venn diagram to illustrate how it can be used to differentiateplant from animal cells.Activity 2 is an alternate activity that students can do IF YOURSCHOOL HAS MICROSCOPES. It will give them an opportunity to have ahands-on experience of studying plant cells using this tool. It will alsodemonstrate how a stain can help in making plant cells more visible underthe microscope. In the activity students will also draw plant cells as seenunder the light microscope.Grade 7 Science 75Living Things and Their Environment
Cell PartsStart by saying that in the earlier module, you learned that organismshave organ systems composed of organs. These organs are made up of evensmaller parts namely, tissues and the smallest of which are the cells. Makethem recall what they have learned in Module 1 by showing them themuscle tissues, plant root tissues and the cell models they saw in theprevious module. Let them identify which are the tissues or the cells. Orshow and ask them whether an onion bulb, a stem, or a leaf or a leaf midribis an organ, tissue or cell. Watch out for wrong answers like, some may stillmistake tissues for cells. Make sure that they will be able to differentiate onefrom the other at this point. Then, continue by asking them the essentialquestions.Activity1Comparing plant and animal cellsYou may wish to use enlarged illustrations of Figures 1 and 2 duringthe discussion part of the activity. Add the information that these diagramsare results of cell studies done using the more powerful electron microscope.Researchers and scientists put together all the cell parts they have seenunder this type of microscope in the diagrams presented.Give time for students to study and analyse the figures. Let themexamine first the plant cell then, the animal cell. Have them describe theplant cell and its parts by asking them how each part looks like or wherethey are located or the number of a part present in a cell. Then, let studentsanswer the questions.Q1. Compare the shape of a plant cell with that of an animal cell as shownin Figures 1 and 2. Answers may be: Plant cells are rectangular orangular or rigid in shape, while animal cells are rounded and somewhatirregular or spherical or cylindrical. Mention that there are many othershapes of animal cells according to their functions that they will studylater in the next grade levels.Q2. Which cell parts are found in both cells? The nucleus, plasmamembrane, cytoplasm, the mitochondrion, rough and smoothendoplasmic reticulum, Golgi body, vacuole/vesicle, ribosome/s andlysosome are common to both plant and animal cells.Q3. Which cell parts are present only in animal cells? The centrioles arepresent in animal cells only.Q4. Which cell parts are present only in plant cells? The cell wall andchloroplast are present in plant cells only.Grade 7 Science 76Living Things and Their Environment
After students have read what a Venn diagram is, call one or two toexplain if they have understood what it is. A correct explanation would be: AVenn Diagram shows relationships between and among sets or groups ofobjects that have something in common. It uses two circles that overlap withone another. The common things are found in the overlapping area, whilethe differences are in the non-overlapping areas. You can either havestudents make their Venn Diagram individually or by groups.The Venn diagram that students made may look like the one below:Come up with a system of correcting students’ work. An examplewould be for a completely correct output like the figure above, score it 16.For any wrongly placed part or heading subtract 1 point. Take note that cellparts present only in plant or animal cells may be written either on the leftor right side of the overlapping area.Q5. Based on your observations and study of plant and animal cells, citedifferences and similarities between them.Differences between plant and animal cells:Plant and animal cells differ in shape and in some parts. Plant cellsare rectangular or angular or rigid in shape, while animal cells arerounded and somewhat irregular.Plant cells have cell walls and chloroplasts which animal cells donot have. Animal cells have centrioles which plant cells do nothave.Similarity between plant and animal cells:Both plant and animal cells have common parts namely: thenucleus, plasma membrane, cytoplasm, the mitochondrion, roughand smooth endoplasmic reticulum, Golgi body, vacuole/vesicle,ribosomes and lysosome.Grade 7 Science 77Living Things and Their Environment
End the discussion for the activity by asking students if plant andanimal cells are the only types of cells. Watch out for students who have themisconception and might think that there are only two types of cells. Clarifythat cells can be of different kinds, plant or animal cells, bacteria, amoebacells, etc. Inform them that these will be dealt with in later topics or gradelevels.Proceed with the discussion about the nucleus, plasma membraneand cytoplasm, the basic parts of the cell. The nucleus serves as the controlcenter of the cell. The plasma membrane is also called the cell membrane. Itis semipermeable because it permits some substances but prevents othersto pass through it.Q6. What do you think will happen to the cell if the plasma membrane doesnot function properly? Without the plasma membrane, any substancecan go in and out the cell. The cell may be affected by the exit of neededsubstances or entrance of unneeded or poisonous substances that maylead to death of the cell.Point out the cell wall and the chloroplasts, the plant cell parts whichdistinguishes it from the animal cell. Mention that cell walls form the outerboundary of plant cells and are made of cellulose a tough material. Thus,cell walls serve as protective barrier. Add that fungi, algae, and bacteria alsohave cell walls.Q7. What is the purpose of the cell wall in plants? The cell wall being madeof tough or rigid material gives shape and protection to plant cells.Q8. Look at Fig. 1 again. Why are there several chloroplasts in the plantcell? The chloroplast in cells of plants is where food is made. The greaterthe number of chloroplast in them makes them efficient in making morefood for the plant.Some students may have read in other books that vacuoles/large orcentral vacuoles are only found in plant cells. Clarify that vacuoles are easilyseen in plant cells because of their size. Since water also collects in thevacuoles, it pushes out into the cell wall producing turgor pressure. Thisturgor pressure maintains crispness of fresh vegetables.In animals vacuoles are smaller and are called by some biologists asvesicles. Some books and other reading materials say that plant and animalcells contain vesicles that store and transport a variety of substances. InGrade 7, it is enough that students know that plant and animal cells haveparts that store and transport different substances, some call themvacuoles, others vesicles.Add too that lysosomes although rare are also found in plant cells. Ifanimal cells have these parts to digest or breakdown unneeded or trashGrade 7 Science 78Living Things and Their Environment
materials, then plant cells must have a part that can do this for them. Somebiologists refer to them as plant lysosomes or the small vacuoles in plantcells.Regarding Q9, if students cannot relate what they have learned aboutcontents of some plant vacuoles to the harm they cause to the animals thateat them, let them recall that part of the discussion in the student material.Q9. How would vacuoles in plants serve as defense against animals that eatthem? Vacuoles in some plants may contain poison or toxic substances.These substances can harm these animals, once eaten. So, this serve toprotect them.The centrioles which can be found in animal cells only, are locatednear the nucleus. They help organize structures during cell division.As stated in the student module, functions of the other cell parts willbe dealt with in detail in the higher grades. The following information can befor your consumption or if needed can be mentioned in class:Activity2Mitochondrion- converts energy in food to a form usable to the cell;will be taken up again in Grade 9Golgi body/apparatus – sort, modify, package and distribute cellproducts to where they are needed;Endoplasmic reticulum(ER) – carry proteins to different parts ofthe cell;Rough ER – with attached ribosomes that manufacture proteinsSmooth ER – contains no ribosomes; makes lipids(fats)Ribosomes – produced in the nucleus, occurs in large numbersand can be free floating in the cytoplasm, involved in themanufacture of protein, can be attached to the ER, thus there is arough ER; will be taken up in detail in Grade 10Nucleolus – the prominent round structure in the nucleus thatproduces ribosomes; will be dealt with in Module 4 and in Grades11 and 12Investigating plant cellsIf your school has microscopes/s let students perform Activity 2 forthem to be able to observe actual plant cells, the onion cells. It is a mustthat they do first the activities in the section on “HOW TO USE THEMICROSCOPE” for them to be able to do this activity.Grade 7 Science 79Living Things and Their Environment
In Step 2, check if students placed the piece of transparent onion skinon the slide with its non-waxy side facing up.Check students’ record of magnification of their onion cell drawings.Some may need to go back to part “D” on “The Magnifying Power of theMicroscope”.Q10. How much are these onion cells magnified?The answer may vary depending on the magnifying powers of theeyepiece and objective used.Q11. In this case, why is it not good to tilt the microscope? It is not good totilt the microscope while viewing a wet mount. It might cause water tospill and flow into its mechanical parts. This will cause its parts to rust.Q12. Describe the onion cells. The shape of onion cells are quite angular toalmost rectangular. The cytoplasm appears translucent. The nucleus iseasily seen as a dark spot, more or less rounded in shape andbrownish or dark brown in color.Q13. Did you observe any change in the image of onion cell before and afterstaining? Yes.Q14. How did the iodine solution affect the image of the onion cell? There isa change in the clarity of the image of onion cells and its parts. The cellsbecame more visible and the parts distinct. The nucleus is moreprominent or darker and brownish in color. The cell wall is clearly seen.Q15. What parts of the onion cell can you identify? Answers may vary.Usually, onion cell parts easily seen using the light microscope andiodine stain are the cell wall, cytoplasm, nucleus and sometimesplasma membrane and vacuole. Some very observant students may askabout the prominent and still darker, inner circle inside the nucleus.This is the nucleolus.Some other students may ask which are the chloroplasts or why theycannot see or identify the chloroplasts. Some might think and have thatmisconception that all plant cells contain chloroplasts. Make them recall inwhat part of the plant is food made. Lead them to the idea (by posingquestions) that chloroplasts are not found in onion cells because onionbulbs are growing under the soil. Onion bulbs are specialized leaves thatstore food, so they are not photosynthesing or better are not involved in thefood making process. They should be able to say that not all plant cells havechloroplasts. Only cells that produce food for the plant contain chloroplasts.Grade 7 Science 80Living Things and Their Environment
You can ask students what is the purpose of adding iodine solution totheir onion cell preparation. Explain that iodine solution is used to staincells. Have them recall their observation and answer to Q14 to confirm this.A drawing of four onion cells must be made. Labels should include thenucleus, cytoplasm, cell wall, and the plasma membrane and nucleolus ifobserved. Encourage them to be honest in what they have actually seen.Drawings should be realistic, that is they must only draw what was actuallyobserved.Q16. Of what importance is the contribution of the microscope in the studyof cells? The microscope makes one see objects that are not seen by justusing the eyes. It enables one to see enlarged images of specimenssuch as cells for a thorough study of their structure and thus, infer theirfunction.To summarize the lesson, ask some students what they have learnedfrom it. Check if they are able to answer the essential questions found at thebeginning of the module.PRE/POST TEST1. Which of the following parts allow different activities of the cell tohappen?A. vacuolesB. lysosomeC. cytoplasmD. vesicle2. If the chloroplasts of a plant cell are damaged, which will it be unable todo?A. protect the cellB. make food for the cellC. excrete waste materialsD. give instruction for cell to reproduceQuestions 3 and 4 refer to the figure next page. Use numbers in youranswers.Grade 7 Science 81Living Things and Their Environment
3. Which part allows or prevents substances to go into and out of this cell?4. What part of this cell store water and maintain its rigidity?The table below enumerates the parts that are present or absent intwo kinds of cells.Structure Cell A Cell Bcell wall× plasma membraneChloroplast× Vesicle ×nucleus 5. Which is a plant cell? Explain your answer.6. Which is an animal cell? Explain your answer.Grade 7 Science 82Living Things and Their Environment
Use the following options to answer the next question.I. absence of centriolesII. irregular shapeIII. presence of cell wallIV. angular and rigid shapeV. absence of chloroplast7. You are asked to identify an unknown slide. Which could help youidentify it to be an animal cell?A. I and IIIB. II and VC. I and IVD. III and IVQuestions 8 to 10 are about the figure next page. Use numbers in youranswers.8. Which part of this cell function in the excretion of waste materials?9. Which is the control center of this cell?10. It is the part of this cell which play a role during cell division.Grade 7 Science 83Living Things and Their Environment
The following questions can be given if Activity 2 was performed:I. Adding iodine solution to the onion cell preparation makes thecells______.A. big.B. small.C. less visible.D. more visible.II. Which of the following plant cell parts is not found in onion cells?A. chloroplastB. cell wallC. vacuoleD. mitochondrionKey to Self-Test1. C2. B3. 24. 115. 2 pts. – B is a plant cell because it has a cell wall and chloroplast.1 pt. – B is a plant cell but no explanation0 pt. – Wrong answer or no answer at all6. 2 pts. – A is an animal cell because it has no cell wall and nochloroplast.1 pt. – A is an animal cell but no explanation.0 pt. – Wrong answer or no answer at all7. B8. 19. 810.7Answers to Optional Questions:I. DII. AGrade 7 Science 84Living Things and Their Environment
How To Use The Light MicroscopeHumans are unable to see the cell, the tiniest part that make up allorganisms. The microscope has made possible observation of the cell, othertiny objects and organisms.This section will provide students with information about features andcapabilities of the light microscope. Activities on the parts as well as thefunction of these parts will familiarize students with this important tool inlearning <strong>science</strong>. The module will teach and help students develop the skillin manipulating it. This will aid them in doing a successful study of cellsand other investigations in later topics and grade levels. In this section,students will also calculate how much objects are magnified under themicroscope. Tips given on the proper use and care of the microscope willhelp schools maintain the equipment for efficient and longer use. Ultimately,the students will be able to recognize the role of microscopes in their studyof objects and organisms and enable them to understand life itself.If your school has microscopes you can give demonstrations or letyour students do the activities with your supervision. Start by showingstudents the light microscope. You can show the figure below to give idea tothe students the difference between the early microscopes and the currentone being used.lensmounting pinfocusing screwMicroscope constructed by Anton van Leeuwenhoek (1632-1723)(Philippines. Department of Education. (2009). Science and Technology II textbook. (Rev. ed.).Pasig <strong>City</strong>: Instructional Materials Development Corporation)Grade 7 Science 85Living Things and Their Environment
A. Introduce students to the microscope by discussing its features andcapabilities. Have students locate the different parts of the microscopeusing Figure 1 in the student material. Let them point out the parts asthey go along with the first part of the activity. Give emphasis too on thereminders or cautions regarding the use of the microscope.Q1. What are the functions of the base and the arm of the microscope? Thebase provides support to the microscope. The arm on the other handsupports the body tube and it is where the microscope is held.Q2. What have you observed about the objectives? Answers can be: they areof different lengths, they are marked with numbers followed by x, somemay say: there are three or four objectives attached to the revolvingnosepiece.Q3. What is accomplished by turning the coarse adjustment upwards?Downwards? Turning the coarse adjustment upwards and downwardsraises and lowers the body tube with the objectives respectively. It alsofocuses or brings out the object to be observed.Mention that in some new microscopes however, this movement raisesor lowers the stage.Q4. What is the other function of the revolving nosepiece? It facilitates thechanging of objectives.Q5. Which connects the eyepiece to the revolving nosepiece with theobjectives? Body tube.Students should be able to notice that the eyepiece also may have 5x,10x or 15x marks. Take note that the light microscope has two sets of lensesto magnify the object that is why it is also called a compound microscope.Lenses should only be cleaned with lens paper. A lens cleaning kit is also agood investment to maintain usefulness of the microscope. It can be boughtin photo shops.For Step 10, if the mirror was stored properly with the concave sidefacing the user the answer is No. If its position was changed, there may be acircle of light that can be seen.Q6. What are the two functions of the eyepiece? It is where you look throughin the microscope. It also magnifies the image of the object that has beenmagnified by the objective.Q7. Describe the function of the mirror. It reflects light up to the diaphragm,object to be observed and lenses.Grade 7 Science 86Living Things and Their Environment
Q8. What do you notice as you change the diaphragm openings? The size ofthe openings differ. The amount of light reflected also changes in that thebigger the opening, the greater is the amount of light reflected.Q9. What can you infer as to the function of the diaphragm? The diaphragmregulates the amount of light reflected to the object to be viewed.Q10. What parts of the microscope are being connected by the inclinationjoint? The arm and the base of the microscope.Q11. What does this movement do? It allows one to tilt the microscope soviewing is possible while seated.Emphasize to students that even if tilting of the microscope can bedone, it can cause water or liquids in wet mounts to spill and flow into themetal parts. This can cause rusting. The microscope can be tilted whenobserving dry specimens and while seated so that observing specimens willnot to be tiresome.B. Making a Wet MountA wet mount is a slide preparation in which the specimen is placed ina drop of water or liquid and held between a slide and a cover slip. Waterimproves the clarity of the image formed. Wet mounts however, cannot bestored for a long time so it is also called a temporary mount. It is importantfor students to learn the proper way of preparing wet mounts as they willuse this in doing other investigations later. Care must be taken thatbubbles will not interfere in their observation of objects or organisms.Q12. What makes letter “e” suitable for observation under the microscope?It is small and thin. Specimens must be thin and small enough to allowlight to pass through for them to be viewed under the microscope.Q13. Describe the position of the letter as seen under the microscope. Theletter is inverted.Q14. Compare the image of the letter as seen under the microscope. Theimage is larger or is enlarged as compared to the one using the eyesonly. With the microscope, the letter also appears grainy and not instraight lines.Q15. To which direction does the image move? It moves toward the oppositedirection.Have the students also move the slide forward (away from them) orbackward (toward them) and ask what they have observed. They shouldnotice that the slide also moves to the opposite direction.Grade 7 Science 87Living Things and Their Environment
Q16. Why do you have to watch from the side when changing objectives?Objectives are of different lengths. This is done to prevent accidentalcrashing of the objectives into the slide and breakage of objective lens,slide or cover slip.Q17. Why should the fine adjustment be used only with the HPO? The HPOis longer and can easily crash into the cover slip and slide.Explain that the fine adjustment other than that it is longer comparedto the scanner and LPO, moves slower or shorter in terms of distance as insteps of stairs which are closer to each other. The coarse adjustment incontrast moves fast and have greater distance as in steps of stairs which arelittle far away from each other.Q18. In which objective/s can you see the whole letter ”e”? It can be seenwhole under the scanner.Have students also describe letter “e” under the LPO and HPO. Takenote that only a part of the letter can be seen under the LPO. Under theHPO only a small portion can be seen. They may even need to move the slideto see that small portion of the letter.Q19. What are the advantages of using the HPO? the disadvantages? Theadvantages of using the HPO are: the image is greatly magnified,details of the letter or cell structure can be observed. Disadvantagesinclude: reduced field of view and the whole letter or structure cannotbe observed.Q20. In which objective is the light darker? brighter? It is darker in the HPOthan in the LPO and scanner.Ask students what they think of the field of view of the threeobjectives. They should have observed that as the magnifying power of theobjectives increase the field of view decreases.Q21. How much is the letter “e” you are now viewing under the scannermagnified? under the LPO? Under the HPO? Answer depends on whateyepiece and objective are currently used. If the eyepiece is 10x andscanner is 5x, then it is magnified 50x or 50 times. If the eyepiece is10x and the LPO used is 10x, then it is magnified 100x. If the eyepieceis 10x and the HPO is 40x, then it is magnified 400x.Q22. If a cell being observed has been magnified 200x under a 40x HPO,what is the magnifying power of the eyepiece used? The eyepiece usedis 5x.Grade 7 Science 88Living Things and Their Environment
Q23. In what ways would the microscope contribute to the study ofdifferent objects and organisms? The microscope gives an enlargedview of objects and organisms. Detailed studies of their complexstructure and consequently their functions is possible using thisequipment. It also enables one to see and observe organisms that arenot visible using the unaided eye.Silica gel is a dessicant which absorbs water or moisture. It preventsfungal growth in microscope lenses. If you are not familiar with it, ask theChemistry teachers in your school about it. Silica gel packs are found innewly bought appliances or in medicine and food bottles or containers.The steps given in preparing for storage and practices on care andmaintenance of the microscope would develop in students responsibility inthe use and giving value to this expensive yet important <strong>science</strong> tool.PRE/POST TEST1. Which two parts of the light microscope magnify the image of an object?A. eyepiece and mirrorB. eyepiece and objectivesC. objectives and mirrorD. objectives and diaphragmUse the letters in the figure next page to answer questions 2 to 4.2. It moves the body tube and objectives up and down.3. Which part makes possible the changing of the objectives?4. Which part will you adjust if the onion cell you are observing under theHPO is not clear?Grade 7 Science 89Living Things and Their Environment
5. A plant cell is viewed using a 10X eyepiece and a 43x HPO. How muchwill the cell be magnified?6. Which should be used to observe bacteria?A. 43x objective and a 10x eyepieceB. 60x objective with immersion oil and 10x eyepieceC. 60x objective and 15x eyepieceD. 97x objective with immersion oil and 5x objective7. What is the correct way of carrying a microscope?8. An animal cell being observed is seen at the topmost part of the field ofview under the LPO. If you want to center the specimen, which directionshould you move the slide?9. Which of the following can be observed using the light microscope?A. acacia barkB. five peso coinC. piece of stoneD. tip of gumamela leafRefer to the pictures below:A. B.10. Which of the two above shows letter “e” seen under the microscope?Grade 7 Science 90Living Things and Their Environment
Answer Key1. B2. B3. I4. C5. 430x or 430 times6. D7. Hold the arm by grasping it with one hand(right/left) and support thebase with the other hand(left/right)hand.8. Forward or away from me or the user9. D10. AReferencesMiller, K. R. & Levine, J. (2000). Biology (5 th Annotated teacher’s ed.). UpperSaddle River, NJ: Prentice Hall.Miller, K. R., & Levine, L. (2006). Prentice Hall biology. Upper Saddle River,NJ:Pearson.Morgan,J.G., & Carter, M. E. B. (1993). Investigating biology. (AnnotatedInstructor’s Edition. A laboratory manual for biology. Redwood <strong>City</strong>, CA:The Benjamin/CummingMy pals are here! Science 6A: Teacher’s <strong>guide</strong> (International ed.). (2010).Singapore: Marshall CavendishOram, R.F. (1994). Biology: Living systems. Teacher wraparound ed. NewYork: Glencoe.Philippines. Department of Education. (2009). Science and Technology IITextbook. (Rev. ed.). Pasig <strong>City</strong>: Instructional Materials DevelopmentCorporationReyes, V.F., & Alfonso, L. G. (1979). The microscope: Part 1. Manila: Alemar-Phoenix Publishing HouseScience and Mathematics Education Manpower Development (1998).Sourcebook on practical work for teachers: High school biology (vol. 1).Quezon <strong>City</strong>: Author.Grade 7 Science 91Living Things and Their Environment
Strauss, E., & Lisowski, M. (1998). Biology: The web of life (Teacher’s ed.).Reading, MA: Scott Foresman-Addison Wesley.University of the Philippines. Institute for Science and MathematicsEducation Development (2000). Sourcebook on practical work forteacher trainers: High school biology (vol. 2). Quezon <strong>City</strong>: Science andMathematics Education Manpower Project (SMEMDP).Winchester, A. M. (1988). Bilogy laboratory Manual (7 th ed.). Dubuque,IA:Wm.C.Brownhttp://www.biologycorner.com/worksheets/comparing_plant_animal.htmlhttp://www.cellsalive.com/cells/cell_model.htmhttp://www.eureka<strong>science</strong>.com/ICanDoThat/plant_cells_pt.htmhttp://www.teach-nology.com.worksheets/<strong>science</strong>/cell/www.microscope-microscope.org/activities/.../microscope-use.htmwww.biologycorner.com/bio1/microscope.htmlGrade 7 Science 92Living Things and Their Environment
TEACHING GUIDEMODULE3LIVING THINGS OTHERTHAN PLANTS & ANIMALSOverviewThis module contains activities that will introduce learners to livingthings other than the animals and plants they studied in Grades 3-6, or, ifthey have some knowledge about them already, bring such knowledge to theclassroom to be shared, further added to, and organized in a useful way.They will also use a magnifying lens in their study, or even a microscope, iftheir school has one. Many representatives of the groups Fungi, Algae andBacteria are quite beneficial to humans and may cause disease and harmtoo. The common members of these groups and most visible ones will bestudied first before proceeding to members that are very small in size,needing the use of a microscope to become visible to us, hence the termmicroorganisms to refer to them.Through the activities, learners will develop their inquiry skills ofobserving, communicating, inferring, comparing, classifying, and gathering,recording, and organizing data in a table.More than that, they will be getting to know their immediateenvironment more closely so that it may be protected, conserved, and madesafe and useful for their own and the community‟s benefit.Advance preparation1. Collect one kind of mushroom and lichen. You may usually find the latteron trunks of trees.2. Buy from the market ar-arusep or lato (Caulerpa) or whatever seaweed isavailable locally. If you are in a mountainous or landlocked area, youmay collect green algae or lumot from rocks, ponds, or even youraquarium in school.3. Allow molds to grow on some fruit peelings (banana) or a piece ofmoistened bread.4. Grow a bacterial colony on a slice of potato or kamote which you havedropped in boiling water for 3 minutes. Do this by getting a clean cottonbud (Q tip) wiped against your tongue or the inside of your cheek. Thenstreak it across the potato surface as a big letter Z. Keep this slice insidea clean, see-through plastic bag and seal with tape inside a dark cabinetfor 2-3 days.Grade 7 Science 93Living Things and Their Environment
DAY 1Activity1Are these also plants?1. Recall that during the elementary grades, they learned about animalsand plants---the different kinds, their characteristics and needs. Say:“Today we will examine some living things which may also be found inour environment. Ask yourself the question: „Are they also plants?‟”2. Distribute Activity 1 and tell them to answer Q1 to Q11 initially. Showthem live specimens of mushrooms and ar-arusep (Caulerpa) or otheredible algae found in the local market, if possible. In the absence ofedible seaweed, show lumot, or the green scum that forms in shallowponds or places that are always wet. Give them a few minutes to observethe specimens and write down their answers.3. When they are done, show them a specimen of a lichen (#4 in theStudent Activity). This can be collected from trunks of trees. Tell them toanswer Q12 to Q14. Following are some photos of lichens from internetsources. Tell them they can use their magnifying lenses.http://www.ppdl.purdue.edu/ppdl/weeklypics/1-12-04.html downloaded 9 March 2012Grade 7 Science 94Living Things and Their Environment
http://visual.merriam-webster.comimagesplantsgardeningplantslichenexamples-lichens.jpgYou may take photos of your own and project these. The ones shownhere may or may not be the same kinds found in your locality. Look attrunks of trees that are in shady and moist places.5. Then, show them the bacterial colony in the form of the letter Z onpotato, the fungus on rotting banana peel or the mold on old bread, andgreen algae or lumot. Tell them to answer Q15 to Q17. Ask if they knowwhat each is. Encourage them to use their magnifying lenses. They willsee something similar to the following:Q15. (a)Photo by A. Encarnacion 2012Grade 7 Science 95Living Things and Their Environment
Q16. (b) Fungus on rotting banana peelingOr, (c)Rotting banana peeling as seenthrough the naked eyeRotting banana peeling as seenthrough a magnifying lens(photos by R.L. Reyes)Old bread with mold seenthrough the naked eyeOld bread seen with a magnifying lens(photos by R.L. Reyes)and, (d)Green algae or lumot in a freshwater aquariumhttp://www.guitarfish.org/algae downloaded 12 March 2012Grade 7 Science 96Living Things and Their Environment
6. Conduct a discussion of the answers they wrote. Do not give them theanswers, though you can confirm at the end, after eliciting answers fromall, those who mentioned the correct answers.Expected answersQ1. Yes, it is a plant.Q2. Mushrooms (Correct!)Q3. Answers will vary. Example: They have “stems” and a “crown” likeminiature trees.Q4. Yes, it is a plant.Q5. Answers will vary. They may answer “seaweed” or the local name.(Correct!)Q6. Because it‟s green.Q7. One is green, the other is white, brown, or grey.Q8. Both have root-like, stem-like or fruit-like parts.Q9. Answers will vary. If they have, they may describe light brownslices of button mushrooms or pieces of black taingang daga. If it‟sseaweed, they may describe other seaweeds like guso on the coverof this module.Q10. They may have eaten dishes with mushrooms or salads withseaweeds.Q11. Answers will vary; common names are different in the differentdialects.Q12. Answers may vary; many will probably answer “plant.”Q13. Yes.Q14. Because its color is greenish; it has leaf-like parts.Q15. (a) The letter Z in a different color from the potato. It‟s white.Q16. (b) Cottony, thread-like growth (on banana peel). Some maymention amag (correct).Or, if you showed them the moldy bread,(c) There are tiny black dots and growth like cotton. (This is alsoamag.)Q17. Dark green, slimy stuff.Q18-19. Answers will vary depending on what the students already knowor have experienced. Elicit all the different answers then affirmthe correct ones. It is not expected that any student wouldguess that the Z is a bacterial colony (Q18). Students maycorrectly guess Q19 (b) or (c) as amag which both are.Grade 7 Science 97Living Things and Their Environment
Q20. (d) May be correctly identified as lumot. In English the word “moss”is used but mosses are very small plants that have thin stemsand grow on land. Lumot are actually green algae, not plants.They float in water or cling to wet rocks. They have no roots,stems or leaves.Advance preparation for Day 2Survey the school grounds beforehand so you know where to takethem to find mushrooms, puddles or rocks with algae (lumot), tree trunkswith lichens and whatever there is to find that is not recognizably ordoubtfully a plant for Activity 2.DAY 2Activity2What other living things are found in the school grounds?1. Distribute Activity 2. Tell them to wear their gloves; bring tweezers,tongs, or forceps; plastic bags or glass jars. Give them a maximum of 10minutes outside. Each student need only collect one living thing similarto the ones you showed them yesterday or which they are not sure aboutbeing a plant.In the grounds:2. Bring them to shady, moist areas with decaying plant matter. Point outcottony, powdery material on decaying logs and leaves as well as greenstuff on wet surfaces. Fruiting bodies of mushrooms are easy to spot andwould be the obvious choice of students to collect.3. Prompt them to get a sample of green algae (lumot), lichens, fuzzy orhairy patches.Back in the classroom:4. Allow them to describe the specimens they collected and to show theirdrawings (Q1) to the class. Discuss their answers to Q2, and Q3.Expected answers:Q1. Drawings will vary, depending on what they collected.Q2. Answers will depend on the exact place of collection.Q3. Answers will depend on the conditions of the place of collection, e.g.,if it was collected in a moist, shady place, the specimen must needmoisture to live. It may be inferred that it will not thrive underintense sunlight and dry conditions. They should also give air as aneed.Grade 7 Science 98Living Things and Their Environment
5. When they have heard and seen what others have collected, tell them toanswer Q4 and Q5.Q4. Answers will vary, but they are expected to collect something theyhad seen the previous day in the classroom because you pointed outthe places where they were to go and suggested what to collect. Theymay collect the same kind of living thing but of a different species orform.6. At this point (as you discuss answers to Q4), give the names of all theorganisms they observed in Activities 1 and 2: mushrooms, molds, algae,and lichens. Tell them that the Z in the potato is actually a bacterialcolony from human saliva. The lichen is a combination of fungus andalga.Allow students to group the living things they have seen so far. Askthem for their reasons for grouping together the living things. See if theysee the similarities between different kinds of mushrooms and molds andthe different kinds of algae (seaweeds) if they are by the sea, and lumot.Q5. Their answers may include the following: Mushrooms and moldsare different from plants because they are not green; they arewhite, grey, brown, black. They only have stem-like, fruit-like, andleaf-like parts just as plants do but their bodies are very muchsofter and smaller. Seaweeds may be green but they only havestem-like, fruit-like, leaf-like parts not the real parts.7. For their homework, tell them to find reference books or search theinternet for the big groups these organisms belong to based on the namesyou gave them. The names of the big groups are Fungi, Protists or justAlgae or Seaweeds, and Monerans or just Bacteria. Lichens arecombinations of a fungus and an alga. Tell them to find out thecharacteristics of these groups, their uses to humans and theenvironment, and negative effects, if any. Tell them they can give otherexamples they find out about in the course of their readings.Tell that what they did (collecting specimens in the school grounds)is already part of an investigation.8. Discuss information they gathered that may not be in agreement. Reviewtheir sources. Give them the opportunity to evaluate and judge theirsources. Explain to them that through this process, their critical thinkingskills will be honed. There should not just be one source of information.Encourage them to refer to several sources.Expected answers to questions after the activity:Q. What are the similarities among these groups? They are close to theground (small, e.g., the fungi and lumot). They need moisture to live.They grow on living things or once-living things and in fact, causedecay and decomposition, in the case of fungi.Grade 7 Science 99Living Things and Their Environment
Q. How are they different from each other? The algae are green, theymake their own food, while mushrooms are white, cream, grey andget food from decaying living things. Lichens are often found ontrunks of trees and are greyish green.Q. How are these big groups different from the plants studied in Grades3-6? These big groups are mostly smaller than plants. They have notrue leaves, true roots, true stems, true flowers.DAY 3On a table like the one below, allow the students to enter theinformation they gathered as homework the previous day.Expected information:Name ofliving thingor organismBig group/OtherExamplesMushroom Fungi /yeast, moldGreen algae,e.g.Caulerpa orar-arusep,LichenProtist(Algae)/Red algae,e.g.,Kappaphycusor EucheumaPartly fungusand partlyalgaCharacteristicsNot green;cannot make itsown foodHas green, andother colors;can make theirown food; someare one-celled,some aremulticellularAlgal part canphotosynthesize; fungal partcannotUses/BenefitsFood;decomposesliving matterFood forhumans;food for fishin pondsAlgal partprovidesfood for thefungal part;fungal partprovides ahome for thealga ; acts asindicator ofair pollution;lichens actas seed bedor spore bedHarmfulEffectsSomespecies cancausedisease, e.g.athlete‟sfoot,ringworm;some arepoisonouswhen eatenSomeconsideredpests inaquariumsandrecreationbeachesGrade 7 Science 100Living Things and Their Environment
Molds Fungi Has root-like,stem-like, fruitlikeparts; hassporesBacteriaBacteria orMoneraCan be seenonly when incolonies or bignumbersBreak downonce livingmatter intoits simplestcomponentsMakingfermentedproducts:alsodecomposesonce-livingmatterResponsiblefor spoiledfoodMay causedisease likeTB,diarrhea,pneumonia,somesexuallytransmitteddiseases,urinarytractinfection orUTI,leprosy,typhoid,rheumaticfever2. Teach them how to list down their references. Enabling them to seek andgather information on their own is a valuable skill students need to learn.They should also be engaged in evaluating credibility of various sourcesand determining acceptable information. These skills are part of criticalthinking.3. Discuss disease-carrying and beneficial members of these big groups.Settle differences by evaluating their sources.4. End the lesson by saying they have just classified certain living thingsunder three big groups apart from the groups of Animals and Plants theyhave learned about in the elementary grades. Say that other members ofthese groups, especially the microscopic and single-celledrepresentatives, will be studied in the higher grades.5. Administer the posttest.Grade 7 Science 101Living Things and Their Environment
ReferencesCalumpong, H.P. and Meñez, E.G. (1997). Field Guide to the CommonMangroves, Seagrasses and Algae of the Philippines. Makati:Bookmark Inc.Carale, L., Galvez, E. & Reyes, R. (1990). Science and Technology for a BetterLife 2. Biology Workbook. Makati: Basic Media Systems.Pundasyon sa Pagpapaunlad ng Kaalaman sa Pagtuturo ng Agham, Ink.1996. Plants of the Philippines. 2 nd Ed. Quezon <strong>City</strong>: Pundasyon saPagpapaunlad ng Kaalaman sa Pagtuturo ng Agham, Ink.Trono, G.C. Jr. (2009). Tropical Marine Macrobenthic Algae: A Lecture Series.Bicutan, Taguig, Metro Manila: Department of Science andTechnology, Philippine Council for Aquatic and Marine Research andDevelopment.University of the Philippines Institute for Science and MathematicsEducation Development (1993). Microorganisms in Biotechnology.Quezon <strong>City</strong>: UP ISMED.University of the Philippines Institute for Science and MathematicsEducation Development (1992). Fungi. Quezon <strong>City</strong>: UP ISMED.University of the Philippines Institute for Science and MathematicsEducation Development. (1989). Microbes: Friend or Foe?. Quezon<strong>City</strong>: UP ISMED.Grade 7 Science 102Living Things and Their Environment
PRE/POST TEST1. The green alga, Caulerpa, and mushrooms both have somecharacteristics similar to plants. What are these characteristics commonto both that are also found in plants?I Green color for foodmakingII Stem-like partsIII SporesIV Fruit-like partsA. I and II C. I and IIIB. II and III D. II and IV*2. Just like many living things, fungi have certain needs to survive. Whatare these needs?I FoodII Air and waterIII Sunlight and soilIV WaterA. I and II* C. I and IIIB. II and III D. II and IV3. Fungi cannot make their own food. What is the effect of their food gettingactivities?A. Decomposition of living things*B. Production of starchC. Trapping of solar energyD. Release of oxygen4. What characteristic differentiates fungi, algae and bacteria from theplants studied in Grades 3-6 aside from their small size?A. They do not have true roots, true leaves, true stems, fruits andflowers.*B. Most do not make their own food unlike plants.C. They are at the base of the food chain while animals are at the top.D. They cause diseases while plants and animals have many uses.Grade 7 Science 103Living Things and Their Environment
Teaching Guide for Activity 3 (for schools with microscopes)Activity3What do these living things look likeunder the microscope?1. Distribute Activity 3. Supervise their preparation of slides. Each groupshould have slides of each of the specimens: banana peeling mold, breadmold, lumot, bacterial colony, and lichen.2. Help them also in the manipulation of the microscope.For Q1, they may see something like this:Growth on banana peeling under LPOPhoto by R ReyesFor Q2, they may see something like this:Q3. Sample answer:Growth on banana peeling under HPOPhoto by R ReyesUnder the LPO, I see threadlike structures and two roundish,yellowish forms.Under the HPO, this yellowish, roundish form has smaller round thingsinside and a stalk or stem-like partGrade 7 Science 104Living Things and Their Environment
Q4. Show this to students and ask them to label their drawings:Fungal hyphae (plural of hypha) – fine branching, colorless threads;together they form a tangled web called a mycelium(http://www.countrysideinfo.co.uk/fungi/struct.htm downloaded 21 March 2012)The stolon is a kind of hypha connecting fruiting bodies. The stemlike part iscalled a sporangiophore. The roundish yellowish shapes are sporangia(plural for sporangium) the structures which bear the small round spores.Each spore that lands in a warm, dark, moist place “germinates” and formhyphae all over again.Source: http://www.backyardnature.net/f/bredmold.htm downloaded 21 March 2012Grade 7 Science 105Living Things and Their Environment
7. The mold on bread is similar to the mold on the old banana peeling.LPOHPOExample of Lumothttp://www.microscopyuk.org.uk/mag/indexmag.html?http://www.microscopy-uk3Grade 7 Science 106Living Things and Their Environment
TEACHING GUIDEMODULE4REPRODUCTION: THECONTINUITY OF LIFEOverviewThis module discusses the different modes of reproduction inrepresentative plants, animals, and microorganisms. Investigations in thismodule will help students understand the different ways that organismsreproduce. At the end of this module, students should be able to describeasexual and sexual reproduction and differentiate the offspring resultingfrom each mode of reproduction.Key questions for this moduleWhat are the different modes of reproduction?How can we use this knowledge to grow plants?Activity1Can you grow new plants from “eyes”?In this activity, the potato is used as an example of a plant that canreproduce asexually through vegetative reproduction. The potato tuber, aspecialized underground stem, is cut into pieces 2-3 days before planting toallow for the growth of the hard and waxy layer on the cut surface to preventrapid decomposition.If potatoes are not readily available, you may use ginger or sweetpotato for this activity.Possible answers to the developmental questions in Activity 1:Q1. The cut pieces are planted with the eye pieces pointing upward toenable the shoots to grow faster.Q2. Answers may vary.Q3. One potato “eye” will yield one new shoot.Grade 7 Science 107Living Things and Their Environment
Q4. Vegetative propagation is a faster way of propagating plants. Alarger number of offspring may also result in vegetativepropagation. In Activity 1, several new plants were grown fromone potato plant.Ask the students if they know of other plants that can be propagatedvegetatively. Students may give some of these possible answers: Someplants that can be propagated vegetatively are kamote (sweet potato),cassava, ginger, pineapple, and some ornamental plants.Activity2Can one become two?Before discussing fission, show the class how to prepare a wet mountof Protococcus. The scrapings of Protococcus must be soaked in water threedays before the cells are studied. In this way, it will be easier to separatethe cells from the other algae and debris in the scrapings. To separateProtococcus, tease the scrapings using two dissecting needles. TheProtococcus is a green alga that may form clusters or colonies.Answer to the developmental questions in Activity 2:Q5. Dividing Protococcus cells may look like these:Q6. Paramecium and amoeba are two examples of unicellularorganisms that reproduce through fission.You may show students prepared slides of Paramecium undergoingfission.Introduce budding as another type of asexual reproduction. You mayshow the class a slide of yeast cells. Have them describe what they see. Insome cases, they may see actual budding of the yeast cells. The smaller cellis called a bud which detaches itself from the mother cell and grows into amature cell. Ask the students if they know of other organisms thatreproduce by budding. Possible responses: hydra and sponges.Grade 7 Science 108Living Things and Their Environment
Prepare ahead of time a bread mold culture before the discussion onspore formation as a means of asexual reproduction. Expose a piece ofbread for a few days until you can observe mold growing on the bread.Spore formation is common among the molds. Using the bread moldculture, show the class where the spores are located.If you have a microscope, you may prepare the bread mold forexamination under the microscope. With a dissecting needle, get a fewfilaments from the culture and place them on a clean slide with a drop ofwater. Put a cover slip. Under the microscope, the bread mold looks likethis:spore casestalkMold with spore caseCall the attention of the students to the round structures at the tip ofthe stalk. These are the spore cases containing the spores. You may crushone and show the spores under the microscope to give the students an ideaof the size and number of spores. Ask students how important spores are.The acceptable response is: the spores, when carried by the wind to breador fruit, can grow into a new mold.Emphasize that proper temperature, amount of moisture, and foodsource are necessary for the spores to germinate. Ask the class if they knowof other organisms that can reproduce by spore formation. Possibleresponses: kabute (mushrooms), shelf or bracket fungi, pako (fern).Proceed to the discussion on asexual reproduction among animals.Reproduction through regeneration or replacement of missing parts is alsopossible among lower forms of animals. The bodies of sponges, hydra, andplanaria can be cut into several pieces and each part can become newindividuals. Point out the difference between regeneration and reproduction.Through regeneration lizards, crabs, and lobsters can replace missing partslike tails or legs but their tails or legs cannot regenerate the missing heads.Grade 7 Science 109Living Things and Their Environment
In general, increased specialization in animals corresponds to a decrease incapacity for regeneration.After providing students with a wide range of common examples oforganisms that reproduce asexually, ask them to describe the offspringresulting from asexual reproduction. Answer: Asexual reproduction givesrise to offspring that are identical to the parents.After the kinds of asexual reproduction have been taken up, introducethe second mode of reproduction, sexual reproduction. Emphasize thatsexual reproduction involves sex cells or gametes. The female gamete iscalled egg cell or ovum; and the male gamete is called sperm cell. A form ofsexual reproduction is called conjugation. This is exhibited by Spirogyra,Paramecium, and bread mold. If you have a prepared slide of conjugatingParamecium and Spirogyra, you may focus them under the microscope forstudents to study. Use drawings if there are no prepared slides.Sexual Reproduction in Flowering PlantsThe flower is the reproductive structure in plants. Some plants havethe male and the female reproductive structures in one flower. Others haveseparate flowers containing the male and female reproductive structures. InActivity 3, the gumamela flower will be studied.Activity3Structure of a Gumamela flowerAt the end of this activity, the students should be able to: (1)distinguish the male and the female reproductive structures; and (2)describe the function of each structure in reproduction.Ask each student to bring the following: gumamela flowers (1 fresh, 1withered, and 1 gumamela bud), scalpel or razor blade. Remind thestudents not to play with the scalpel or razor blade.To motivate the students, ask them what they think about flowers.What is the importance of flowers? Encourage discussion of responses.Then bring around the discussion to the biological importance of flowers.You may bring up the topic of pollination and the role of attractive flowers.Proceed with the activity.Grade 7 Science 110Living Things and Their Environment
Answers to the developmental questions in Activity 3:Q6. The flower is attached to the stem by a short stalk-likestructure.Q7. The sepals provide protection to the unopened flower.Q8. The stigma of the fresh flower feels sticky.Q9. The stigma is sticky so the pollen grains that fall on it can betteradhere on it.Q10. The answers may vary.Q11. Pollen grains may reach the pistil through agents of pollinationlike insects, wind, water, and humans.Use illustrations or drawings in describing the formation of a pollentube so that the students will understand the process better. Talk aboutfertilization which occurs after pollination. Fertilization is the fusion of thenuclear contents of the egg and the sperm. From this union, a zygoteresults. In plants, the zygote or embryo is within the seed.Sexual Reproduction in Humans and AnimalsSexual reproduction needs two parents, a male and a female and thisinvolves specialized cells or gametes. The more complex species havegonads for the production of the male and female gametes. Gametes differin form and structure. Use diagrams of the egg and sperm cells to facilitatethe discussion on gametes. Emphasize that gametes are microscopic cells.The method by which the sperm comes in contact with the egg cell may beexternal or internal. External fertilization usually occurs in aquaticanimals. In internal fertilization, specialized structures transport the sperminto the egg within the body of the female. Fertilization or the union of thesegametes starts the development of the new individual.Sexual reproduction gives rise to offspring that are a combination ofthe traits from its parents. Thus, the offspring differ genetically from theirparents and their siblings. These genetic differences help to ensure thesurvival of the species in changing environmental conditions.Grade 7 Science 111Living Things and Their Environment
PRE/POST TEST1. Which of the following structures are NOT involved in asexualreproduction?A. Gametes C. StemB. Tuber B. Root2. A farmer grew only one type of onion. All of the onion plants died fromthe same disease. What can be said of this onion plant population?A. Only a few plants were resistant to the disease.B. All of the onion plants were resistant to the disease.C. The onion plants were genetically identical.D. The onion plants were genetically different from each other.3. A farmer wants to propagate a good variety of a crop in a way whichmaintained all its desirable traits. Which of the following methodsshould be used?A. Self-pollinationB. Vegetative propagationC. Growing seeds produced from this varietyD. Cross-pollinating this crop with another good variety and growing theseeds resulting from the cross4. A sperm cell unites with an egg cell to form a zygote. Which process istaking place?A. Pollination C. Asexual reproductionB. Fertilization D. Vegetative propagation5. In sexual reproduction, what is the source of the genetic material in azygote?A. An egg cell only C. A pollen and a sperm cellB. A sperm cell only D. An egg cell and a sperm cell6. Which species can produce offspring that are genetically different fromtheir parents?A. A species that has few variationsB. A species that reproduces asexuallyC. A species that reproduces sexuallyD. A species that competes with a similar speciesGrade 7 Science 112Living Things and Their Environment
7. What is NOT a characteristic of sexual reproduction?A. Gametes from two parents unite to form a zygote.B. Offspring are genetically identical with the parent.C. Offspring are different from their parents and sibling.D. Genetic variability of offspring help to ensure survival in changingenvironmental conditions.1. A2. C3. B4. B5. D6. C7. BAnswer KeyReferencesHwa, K. S., Sao-Ee, G., & Luan, K. S. (2010). My pals are here! 6A <strong>science</strong>.(International Ed.). Singapore: Marshall Cavendish.Philippines. Department of Education. (2009). Science and Technology IItextbook. (Rev. ed.). Pasig <strong>City</strong>: Instructional Materials DevelopmentCorporation.Grade 7 Science 113Living Things and Their Environment
TEACHING GUIDEMODULE5INTERACTIONSOverviewIn the lower grades, learners were introduced to the living andnonliving things that make up the environment. They have also beenintroduced to the different interactions that take place among organismsand between organisms and their environment; they prey on otherorganisms for food, they have structures that help them look for food andmeet their basic needs, and they live in places where they can be safe frombigger animals.Some interactions are beneficial; others are harmful. There are alsointeractions in which populations of organisms are neither benefitted norharmed. All these interactions take place in ecosystems.All these interactions involve energy and its transformation throughtrophic levels. Producers like plants convert radiant energy into chemicalenergy through photosynthesis. This energy is transformed to other forms inthe environment as one organism feeds on another organism.In this module, the students will discover that there are levels oforganization that are beyond the level of the organism.Key questions for this moduleHow do organisms interact with each other and with theirenvironment?How is energy transferred from one organism to the other?Grade 7 Science 114Living Things and Their Environment
Activity1What does it mean to be alive?In this activity, you will ask the students to identify the components ofthe environment, compare the living and nonliving things, and describe howorganisms interact with each other and with their environment.Visit your school garden or a pond near your school. On a separatesheet of paper, ask the students to describe or draw the place.Q1. What are the things that you see in your school garden or the pond?Depending on the nature of your school garden or the pond, thestudents will probably see rocks, soil, water, insects, and plants.Q2. Which of these things are living? Which of these things are nonliving?In the sample answer to Q1, the living things include the insects andplants; the nonliving things include the rocks, soil, and water.Q3. Observe the things that you identified as living. What do they have incommon?They will probably observe that the insects move and that both theinsects and plants respond to stimuli.Q4. Observe the things that you identified as nonliving. What do they havein common?They will probably observe that, except for the water that is fluid, therocks and soil are stationary; but nonliving things do not respond to stimuliQ5. What interactions do you observe happening among the living andnonliving things?They will probably observe small plants inhabiting the rocks; or antsmaking anthills.Q6. What makes living things different from nonliving things?Accept as many answers for this question as possible. Their answersmay include properties they mentioned in answering Q3 and Q4.Grade 7 Science 115Living Things and Their Environment
Have the students observe the rocks found in the school garden or thepond. Ask them if they look like the rock shown in Figure 1 of Module 5. Ifso, have them use a magnifying lens to see the details of the small plants.Q7. What do these small plants need that is provided for by the rock?These small plants need water and nutrients. Rocks are porous andhold enough water to sustain the small plants’ growth; they also containsome nutrients and minerals that the small plants need.Q8. Where do you find these rocks that are inhabited by small plants?Most of these rocks are found in moist places.Q9. What other things in the environment are inhabited by these smallplants? Where do you find these things?Some of these small plants grow on concrete walls like those shown inFigure 2; others grow on the stem of trees.Q10. Why do you find them in these places?These places hold enough moisture and may contain some nutrientsthat support the growth of the small plants; they also get just enoughfiltered light. Direct sunlight may dry up the place and cause the smallplants to wither.Q11. Do you also see small plants growing on the fences of your school?If yes, the reason may be similar to those mentioned in the answer forQ12. What other living and nonliving things did you see in the schoolgarden or the pond? Do you see them in other parts of the school?Explain your answer.They probably will not see rocks that are inhabited by small plants inparts of the school that are dry. These small plants need enough moisture tolive and grow. Accept as many answers as possible to this question.Figure 3 shows a picture of a community of plants. Differentpopulations of organisms that interact with each other in a given placemake up a community.Q13. Do you know of a similar place near your school where you seecommunities of organisms?Grade 7 Science 116Living Things and Their Environment
The answer to this question varies depending on the other places inthe school that were visited by the students.Q14. Are the things you find in your school garden or the pond the samethings that you find in the backyard of your house? Explain youranswer.If the physical conditions of the school garden i.e., moist and withfiltered light, are the same as the physical conditions of the backyard of thehouse, then more likely, they will observe similar communities of organisms.Q15. How do living things interact with each other and with theirenvironment?Living things have basic needs to meet in order to survive. These basicneeds: water, nutrients, sunlight (for plants), and shelter, are provided tothem by their physical environment. Living things meet their basic needsthrough their interaction with their physical environment.Activity2Housemates? Ecomates!In this activity, the students will describe interdependence among thecomponents of the environment, explain how organisms interact with theirenvironment to survive, and infer what happens to organisms if theirenvironment is not able to provide them with their basic needs.Guide the students through theprocedure. They will set up 8 differentaquaria; the contents of which areprovided in the chart. Should you opt touse Bromthymol Blue as an indicator forthe presence of carbon dioxide, you mayuse the boxed procedure on the right.On a separate sheet of paper, havethe students copy Table 1. They willrecord their observations of changes, ifany, in the things that were placed ineach of the aquaria.Preparation for Bromthymol Blue (BTB)1. Add 0.1g Bromthymol Blue into16ml of 0.01N NaOH2. Mix in a small container3. Dilute to 250mL with distilledwater4. Add 5 drops in 10mL of testsample*Adapted fromhttp://www.thelabrat.comGrade 7 Science 117Living Things and Their Environment
Q16. Where did the snails and fish stay most of the time in each of thecontainers each day for three days? Explain your answer.The snails and the fish in the containers that did not have plantsstayed near the top of the water column most of the time. Snails and fishneed oxygen to live. Without plants, their only source of oxygen is the airjust above the water.Q17. What happened to the organisms in each of the containers after threedays?It’s very likely that the snails and fish in the containers that did nothave plants would have already died or are very weak.Q18. In which container/s were the organisms still alive? Which organismsare these?It’s very likely that the organisms in the containers that have plantsare still alive. These organisms are the snails, fish, and even the plants.Q19. What do you think will happen to the organisms in each of the jarswhen left closed for a longer period of time? Why do you think so?After a longer period of time, the organisms that were placed in thedark would have already died. The snails, fish, and plants that were placedtogether in the container that was placed in strong light would havesurvived.Questions 20-22 are additional questions if you used BTB.Q20. In which container/s did you observe change in color on each day forthree days?Containers B1 and B2Q21. Bromthymol blue changes color to yellow in the presence of carbondioxide. Which jar/s contained carbon dioxide?Containers B1 and B2Q22. What explains the presence of carbon dioxide in this/these container/s?These containers had snails and fish that give off carbon dioxide.Q23. How do plants and animals depend on each other?Grade 7 Science 118Living Things and Their Environment
The plants give off oxygen in the presence of light. The fishes andsnails need oxygen to survive. Plants need carbon dioxide given off by thefishes and snails to survive.What the students have observed in this activity are interactions thattake place in an aquarium. There are other kinds of interactions andinterdependence among organisms and their environment in biggerecosystems.Ecological RelationshipsObjectiveThe purpose of this section is to study the how organisms interactwith other organisms in a given environment.Teaching TipsAt a start of the lesson, explain to the students that in ourenvironment, there plants, animals, and microorganisms (bacteria, fungi).There are other microorganisms such as protozoa – they are singlecelledorganisms that have a true nucleus enclosed by a membrane. Someprotozoa have animal-like behavior such as, movement (e.g., amoeba andparamecium). Some protozoa have plant-like behavior, they are able tophotosynthesize, and these include the algae.Explain to the students that a population is a group of organisms orindividuals of the same kind (species) living in a given place and in a giventime. Have students study figure 4 and then ask:Q24. In figure 4 below, what populations of organisms can you observe?Answer:Populations of:Cotton stainer insectDragon flyFlyButterflyPraying mantisDifferent fungiDifferent plantsGrade 7 Science 119Living Things and Their Environment
FungusFungusFungusButterfly Cotton stainer Fly Dragon flyFungusPraying mantisEach picture of an organism represents of the population of that organism,e.g., cotton stainer represents the population of the cotton stainer in thegiven area. A butterfly represents the population of butterflies in the area.Explain to the students this set of populations that inhabit a certainarea form a community. Therefore, what was shown in figure 24 in thestudent text is an example of a community of different populations and inturn each population is composed of one kind of organisms. You mayintroduce other sample of a community as shown in figure below. Differentpopulations of organisms such as: Ducks, a representative of herons (whitebird), insects, tall grasses, coconut plants, and different types of fish inwater.Grade 7 Science 120Living Things and Their Environment
These populations of organisms interact among themselves. Forexample, ducks stay in water for food. They eat small animals living inwater. This is an interaction between ducks and small animals. Biologicalinteractions are the effects organisms in a community have on one another.In the environment no organism exists in absolute isolation, and thus everyorganism must interact with other organisms and the environment.In the student text, Figure 25 shows fern plants growing on a trunk ofa Narra tree. What kind of relationship do you think these two organismshave? Figure 25 shows an epiphytic fern attached itself on a trunk of aNarra tree without harming the tree. The Narra tree is a host that providesa place for the fern. When it rains, the ferns get nutrients from rottingleaves and other organic materials that collect at the root base of the fernplant. This relationship is called commensalism -- one organism benefitsfrom the host organism, while the host organism is neither positively nornegatively affected.Q25. What other examples can you give similar to this relationship?Barnacles and other seashellsPhotos: Courtesy of Rodolfo S. TreyesBarnacles on the shells of tahongBarnacles on the shells of talabaBarnacles adhering to the shell of oyster or mussels (talaba or tahong): theyare crustaceans whose adults are sedentary. The motile larvae find asuitable surface and then undergo a metamorphosis to the sedentary form.The barnacle benefits by finding a habitat where nutrients are available. Inthe case of lodging on the shell of other organisms living organism, barnaclepopulations does not hamper or enhance the survival of the animalscarrying them. However, some species of barnacles are parasitic.Grade 7 Science 121Living Things and Their Environment
Orchid plants and treesOrchid plant is an epiphytic plant species thatgrows on certain woody plants (trees). Orchiddraws its nutrients from the atmosphere, not fromthe host tree. Thus the orchid has no harmfuleffect to the woody plant.Another type of relationship is parasitism– one organism lives in or on another organism(the host) and consequently harms the hostwhile it benefits.Q26. What other example of parasitism do youknow?Activity3Hookworms consuming blood frominside an animal's intestine.Tick that feed on the blood of dogWhich Eats What?Photo: Courtesy of Rodolfo S. TreyesLet the students fill in the appropriate box to each of the organism.OrganismsQ27.Whatorganisms areinvolved?Q28.What is theeater?What is eaten?Q29.What part of thebody does theeater use to getits food?Frog and insectThe frog is theeater.An insect iseaten by thefrog.The frog stretchesits tongue tocatch an insect.Cat and mouseThe cat is theeater.The mouse iseaten.Cat uses its sharpclaws to catch themouse and bittenusing its sharpcanine teeth.Grade 7 Science 122Living Things and Their Environment
Spider andinsectThe spider is theeater.Insect is eaten.The spider usesits web to catchthe insect.MantisStudent maysearch in theinternet whatthe prayingmantis eating.(Prayingmantises eatinsects andotherinvertebratessuch as,beetles,butterflies,spiders,crickets,grasshoppers,and evenspiders.)Bird andearthwormPraying mantisSmall crawlinganimals e.g.,antsThe bird is theeater.The earthwormis eaten.By grabbing theprey with its frontclaw like legs andeating it alive.The bird uses itsbeak to get theearthworm.Students may visit a school ground or garden to make moreobservations. Facilitates the students in identifying the organisms they areobserving. They can search some information in the internet.OrganismsQ30What organismsare involved?Q31What is the eater?What is eaten?Q32How does theeater gets itsfood?Grade 7 Science 123Living Things and Their Environment
Explain to the students, what they have observed in this activity ispredation -- an interaction in which one organism captures another andfeeds on the captured organism. An animal that kills and eat other animalis called predator. An animal that is killed and eaten by its predator iscalled a prey. Prey animals are usually smaller and less powerful than thepredator that eats it.Energy Transfer in the EcosystemsPlants, animals, and microorganisms eat food to get energy thatenable them to move, grow, repair damaged body parts, and reproduce.Q33. Why plants are considered producers?Answer: Plants are capable of converting energy from the Sun intochemical energy in the form of glucose (food). The process is calledphotosynthesis, which uses water, carbon dioxide and sunlight.Q34. Are plants the only organisms in an ecosystems that can producetheir own food?Answer: There are also microorganisms that can photosynthesize;examples of which are shown in Figure 8.Grade 7 Science 124Living Things and Their Environment
Q35. How do animals and humans obtain energy to keep them alive?Answer: Humans and other animals are not capable of making theirown food. They are must eat other organisms in order to obtain theirenergy as well as nutrients.Q36. In the figure 9, what are organisms being eaten?Answer: Plants and plant parts are eaten by animals.Q37. What are the eaters?Answer: Goats, cows, caterpillar, and mouse are the eaters.Q38. What other organisms do you know in your area that eats only plants?Answer: snails, grasshoppers, horses, sheep, beetles,Q39. In figure 10, what organisms could provide energy to the snake andchicken?Answer: The snake gets its energy by eating the mouse. The Chickengets its energy by eating the caterpillar.Q40. Refer to figure 11 above. How does energy from the Sun reach the 3 rdorder consumers? Trace the flow of energy among organisms by fillingup the boxes below? The arrow ( ) pointing to the next box means―eaten by‖.Answer:Grade 7 Science 125Living Things and Their Environment
Q41. List down the organisms found in your community. Classify theorganisms according to the following categories:Organism Producer First OrderConsumerSecond OrderConsumerThird OrderConsumerAnswers to this question will depend on students’ data.Q42. Construct a food chain using the organisms listed on the table above.Answers to this question will depend on students’ data.Activity4What to do with food wastes?Before the activity review the students about the food chain. A foodchain only follows just one path as animals find food.Food ChainGrade 7 Science 126Living Things and Their Environment
Then introduce a food web — shows the many different paths plantsand animals are connected. A food web is several food chains connectedtogether.The food web below includes a third group of organisms. Besides theproducers and the consumers, the food web depicts the decomposersconsisting of bacteria and fungi. Decomposers act on dead organisms andchange these to simple nutrients which plants can use again.A Food WebAnswer Key to Qs in the activity1. Do not water the jar of food wastes without soil. Observe the foodwastes and living organisms that you find in the jar daily. Record yourobservations on a table like the one below:Day/DateObservations about food wastes and living organismsNote: Write your answers in your notebook. Add rows as needed.Answers to this question will depend on students’ observation.Grade 7 Science 127Living Things and Their Environment
Q43. What organisms did you find in the compost jar or pot from Day 1?List them down in the order of appearance. You may draw those youcannot identify. (Write your answers in your notebook.)Answer: Answers to this question will depend on students’ observation.Expect varied answers from the students. Organisms may be presentare: houseflies, molds, ants, fruit fliesQ44. Draw the microscopic organisms you observe and try to identify themwith the help of reference books.Answer: (The drawing should be similar to this photo. Student mayfocus only to the molds, they appear cottony and filamentous.)Rotting banana peel seen through a magnifying lens (photo by R.L.Reyes)Q45. Construct at least one food chain and one food web based on yourobservations.Grade 7 Science 128Living Things and Their Environment
Q46. What is the benefit of composting food wastes?Answer: Composting makes the soil fertile for the plants.Microorganisms (bacteria and fungi) break down proteins, starches, andother complex organic substances that were once part of the livingthings. During the process of decomposition, decomposers releasenutrients from the organic material back into the soil, making the soilavailable to living plants and other producers.Q47. What would you recommend to dispose of food wastes?Answer: Bury the food wastes in the soil.PRE/POST TEST1. A plant needs water, radiant energy, minerals, oxygen, and carbondioxide to live. This statement shows that an organism depends on whichof the following?A. Abiotic componentsB. Biotic componentsC. ClimateD. Minerals2. Which of the following represents an abiotic component of theenvironment?A. Sprouting mongo seedsB. Dugong nursing its youngC. Grass on mountain slopesD. Flowing lava3. Setting up an aquarium that represents a mini ecosystem has to havewhich of the following requirements?A. Fish and water onlyB. Water, sand, soil, and light onlyC. Populations of fish, snails, and plants onlyD. Communities of different species of organisms, water, sand, soil, andsunlight4. Frogs feed on insects. Which type of consumer is the frog?A. ProducerB. First order ConsumerC. Second order consumerD. Third order consumerGrade 7 Science 129Living Things and Their Environment
5. Which of the following is the correct food chain?A. Grass →grasshopper→ maya bird→hawkB. Grass →grasshopper→snake→frog→ hawkC. Grass → mouse →snake→ hawkD. Grass →mouse→ crocodile6. Which of the following describes parasitism?A. Barnacle sticking on the shell of an oysterB. Fern plant growing on a trunk of a treeC. An orchid living on a truck of a mahogany treeD. An insect larva staying on the leaves of a plant7. In a given environment, which of the following refers to a population?A. Any organisms that live together and eat in one place.B. Several numbers of organisms living in the same place.C. Different organisms live together in the same place and in the sametime.D. Group of organisms of the same kind living in the same place and atthe same time.8. Why are plants considered as producers?A. Plants produce fruits that can be eaten by animalsB. Plants produce root crops that supply carbohydrates to animals.C. Plants provide vegetable for animals and human consumption.D. Plants convert energy from the Sun into chemical energy in the formof glucose (food).Answer Key1. A2. D3. D4. C5. C6. D7. D8. DGrade 7 Science 130Living Things and Their Environment
ReferencesAbout Our Earth, Panda. (2008). Ecological Interactions. Teacher Resources,Web Fieldtrips. Retrieved February 7, 2012 fromhttp://wwf.panda.org/Global Change, University of Michigan. (2008). Ecological Communities:Networks of Interacting Species. Global Change Lectures. RetrievedJanuary 16, 2012 from http://www.globalchange.umich.edu/Nature, International Weekly Journal of Science. (2010). EcologicalInteractions. Nature Journal. Retrieved January 16, 2012 fromhttp://www.nature.com/nature/index.htmlGrade 7 Science 131Living Things and Their Environment