You also want an ePaper? Increase the reach of your titles
YUMPU automatically turns print PDFs into web optimized ePapers that Google loves.
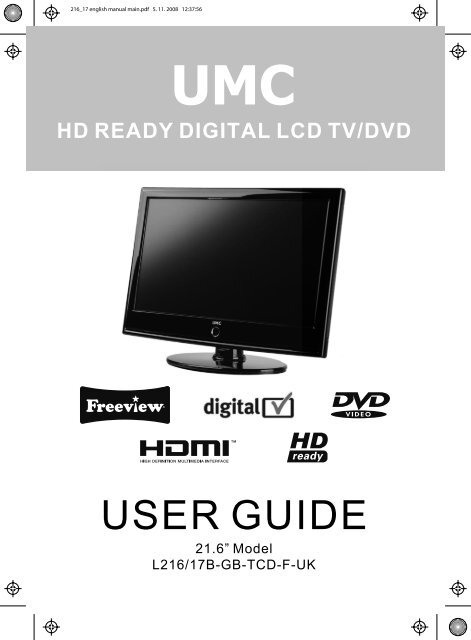
216_17 english <strong>manual</strong> main.pdf 5. 11. 2008 12:37:56HD READY DIGITAL LCD TV/DVDUSER GUIDE21.6” ModelL216/17B-GB-TCD-F-<strong>UK</strong>
lank.pdf 10. 10. 2008 13:49:40
216_17 english <strong>manual</strong> <strong>01</strong> new.pdfPage 1 3. 11. 2008 15:22:42Important Guarantee Information.Congratulations on purchasing this television. We hope you have manyyears of trouble free enjoyment from your purchase.Your product is covered under the manufacturers guarantee for 12 monthsfrom date of purchase. The guarantee is ‘return to manufacturer’ and coversthe costs of collection, parts & labour and redelivery chargesin the event of breakdown caused by mechanical or electrical failure.In the event of a fault being diagnosed, please refer to the frequentlyasked questions/troubleshooting section at the rear of this user guide.If you are still unable to remedy the fault, try resetting the TVto factory settings, (details in this user guide) or contact the helpline.In the event that a fault is diagnosed, the helpline will arrange to collectthe TV from your home or work address, return it to our service centre,repair the item and then return it to you.If we believe we cannot offer a permanent repair, we will replace the item.Sky Media <strong>UK</strong> LTD – Helpline InformationTelephone 0871 2000 463Email: service@skymediauk.co.ukInternet: www.skymediauk.co.ukThe telephone opening hours are Monday to Friday 8.30am to 6pm, Saturday 9am – 5pm.On the web site, you can register your product and guarantee, if youdo it within 7 days of purchase, you will also receive an extra FREE3 months warranty, making the warranty 15 months from date of purchase.You must retain all packaging materials as you will need these in the event ofwarranty/service support.If you need to call the helpline, you will need the following information.Model Number ________________ (Can be found on rear of TV)Serial Number ________________ (Can be found on rear of TV)Date of purchase ________________ (Can be found on sales receipt)1
2216_17 english <strong>manual</strong> 02.pdf 3. 11. 2008 13:57:03
216_17 english <strong>manual</strong> 03 new.pdfPage 1 3. 11. 2008 14:03:08Important information regarding the digital TV switchoverTelevision in the <strong>UK</strong> is going digital, bringing us all more choice and new services. Starting late2007 and ending in 2<strong>01</strong>2, television services in the <strong>UK</strong> will go completely digital, TV region by TV region.How the switchover affects your TV equipment.Your new TV has a digital tuner built in, which means it is ready to receive the Freeview signal by simplyconnecting it into your aerial socket (you can check if you can get digital TV through your aerial now orwhether you will have to wait until the switchover at www.digitaluk.co.uk)When the TV switchover happens in your area, there are at least two occasions when you will need to re-tuneyour TV in order to continue receiving your existing TV channels and also to pick up new ones. Digital <strong>UK</strong>, thebody leading the digital switchover, will advise you when you need to retune during the switchover.How to retune.Retuning your TV is a very quick and simple process. We recommend that you retuneevery few months to ensure you are receiving the very latest TV and radio channelsthat are broadcast.• In digital/freeview mode, on the remote control press ‘menu’ quickly followed by 8-8-8-8 (sopress the number 8 four times)• You will now enter the ‘First time installation’ mode. (if you do not, please refer to the sectioncalled ‘getting started’ later in this user guide)First Time InstallationCountryLanguage<strong>UK</strong>EnglishPlease ensure that the aerial is connected to the connectorlabelled ‘ RF In ’ on the rear of the TV .Ensure that OK ishighlighted in yellow and press ‘OK’ on your remote .If afterthis scan ,not all digital channels are found ,your aerial mayrequire a signal booster .alternatively ,upgrade your aerialto a high gain digital version .OKCancel• Simply press ‘OK’ or ‘Enter’ on the remote control and your TV will retune.If you do not retune your TV when advised to do so by Digital <strong>UK</strong>, you may lose some or all of your channelsuntil you do re-tune.If you are missing any channels, it may be that they are not available in your area, or that your TV aerialneeds upgrading.For help and support regarding the digital switchover, please contact Digital <strong>UK</strong>:Telephone: 08456 50 50 50 (calls charged at local call rate, approx 3p per minute daytime or 1p per minute evenings from a BT landline)Digital <strong>UK</strong> website: www.digitaluk.co.ukIf you require technical or warranty support on this television, please contact the manufacturer helpline, donot contact Digital <strong>UK</strong> unless your query is regarding the digital switchover.3
216_17 english <strong>manual</strong> 04 new.pdfPage 1 3. 11. 2008 15:26:23WARNINGSCautionThis television contains no user serviceable parts. Please refer to the manufactureror authorised repair agent in the event of malfunction. Do not remove the back coverfrom the television.WarningTo reduce the risk of fire, electric shock or damage to the television, do not exposeit to dust, rain or moisture, or place any objects filled with liquids on or near the television.Do not place the television in a confined space, ensure that nothing can obstructthe ventilation openings at the rear of the television.Do not place naked flames on or near the television.Dispose of this television and any components including batteries in an environmentallyfriendly manner. If in doubt, please contact your local authority for details of recycling.Your LCD TV should be cleaned using a dry or slightly damp cloth. You should not usean alcohol based cleanerSafetyFor your safety, this appliance is fitted with a fused moulded 3 pin mains plug. Shouldthe fuse need to be replaced, ensure that any replacement is of the same amperageand approved with the BSI mark. ( )Never try and replace the mains plug unless you have adequate qualifications and arelegally authorised to do so. In the event that a replacement Mains cable is required,contact the manufacturer for a suitable replacement.Never use the television if it is damaged in any way.Always place the television on a flat level surface avoiding anywhere which maybe subject to strong vibration. Ensure the television is not placed on top of the powercable as the weight of the television may damage the cable and cause a safety hazard.Never place mobile phones, speakers or any other device which may cause magneticor radio interference with the television. If interference is apparent, move the devicecausing the interference away from the television.PackagingPlease save the packaging for the television as you will need this in the eventof warranty/service repair or support. We are unable to carry out warranty/serviceif you are unable to package it correctly. The safest way to package your item in theevent of warranty/service repair is in its original box/packaging4
6216_17 english <strong>manual</strong> 06 new.pdfPage 1 3. 11. 2008 14:10:10
216_22 english <strong>manual</strong> content paPage 1 5. 11. 2008 12:54:21CONTENTSSETTING UP YOUR TV- What is included in the box 8- Connecting the stand 9- Tuning in TV 10- Digital Switchover Re-Tune 10- Remote control buttons and theirfunctions 11- TV buttons and their functions 12- Inputs and Connections 13- Choosing Mode/Source 13TV MENU OPERATIONPICTURE SETTINGS MENU 14 - 15- Selecting Picture Mode Preset 14- Adjusting Contrast 14- Adjusting Brightness 14- Adjusting Colour 14- Adjusting Tint 15- Adjusting Sharpness 15- Adjusting Colour Temperature 15- Dynamic Noise Reduction 15SOUND SETTINGS MENU 16- Adjusting Volume 16- Selecting Sound Mode Preset 16- Adjusting Bass 16- Adjusting Treble 16- Adjusting Balance 16TUNING SETTINGS MENU 17- Adjusting Country 17- Auto Tuning 17- Manual Tuning 17- Program Edit / Changing ChannelPosition 17- Common Inferface Slot 18TIMER SETTINGS MENU 18- Sleep Timer 18- On Screen Display Timer 18GENERAL SETTINGS MENU 19- On Screen Menu Language 19- Adjusting Picture Format 19- Blue Screen 19- Child Lock 19- First Time Installation 19- Reset Television 19CHANNEL SERVICES- Using Electronic Program Guide 20- Using Digital TV teletext 20- Using Analogue TV teletext 21PC OPERATION- Connecting to a PC 22- Auto Configuration of Screen 23- Adjusting Phase 23- Adjusting Clock 23- Adjusting Horizontal Position 23- Adjusting Vertical Position 23- Position Reset 23DVD MENU OPERATIONSYSTEM SETUP 24- Adjusting TV System 24- Adjusting Picture Format 24- Returning to Default 24CHANGING REGIONS 25AUDIO SETUP 25- Adjusting Audio Out 25- Adjusting Tone 25DIGITAL SETUP 25- Adjusting Dynamic Range 25- Adjusting the Sound 25GENERAL INFORMATION- Removing the stand 26- Wall mounting the TV 26- Using with Sky Digital 27- Frequently Asked Questions 28- Technical Specifications 29- Index 30If you experience any problems with this Television,Please contact the helpline.Customer Support/Technical HelplineSky Media <strong>UK</strong> LTDTelephone: 0871 2000 463Email: service@skymediauk.co.uk7
216_17 english <strong>manual</strong> 09.pdf 3. 11. 2008 14:17:33Attaching the standFig 1Fig 2Fig 3Push down firmlyFig 49
216_17 english <strong>manual</strong> 10 new.pdfPage 1 5. 11. 2008 13:51:33GETTING STARTED - INITIAL SET UPIMPORTANT - AFTER TUNING DO NOT PRESS ANY BUTTONS FOR 20 SECONDS SO THE CHANNELINFORMATION CAN BE STORED.TUNING INIMPORTANT — Please ensure the TV hasreached room temperature beforeconnecting the power for the first time1) Connect the mains lead to your electrical outlet2) Connect the RF Cable supplied to the'RF' on the rear of the TV and connectthe other end of the cable to your TV Aerial outletIf no channels are found the following screen will appear,please refer to additional information below.First Time InstallationUnfortunately the TV did not find any channelsPlease check your aerial connectionand refer to the user <strong>manual</strong>Do you wish to retune your TVYes Do it next time NoRE-TUNING TV / DIGITAL SWITCHOVER3) Install batteries in the remote control and pressthe [STANDBY] button to turn on the TV.DISPLAYDISPLAYThe ‘First Time Installation’ menu shouldnow appear. If it does not, please press[LCD-MENU] then 8-8-8-8 and the menu will appear.4) Press [OK] on the remote control whilst ‘OK’is highlighted on screen.In order to ensure you have the latest channels availabletuned into your TV, it is necessary to performa scan/re-tune every couple of months. You will also needto do this when your region switches over to Digital. Youwill be notified by Digital <strong>UK</strong> when your region switches.1) Press [LCD-MENU] then 8-8-8-8. The first timeinstallation menu will appear2) Press [OK] on the remote control whilst 'OK' ishighlighted on screenTuning will now take place and any new channels will beadded automatically in the correct places as broadcasted.First Time InstallationCountryLanguage<strong>UK</strong>EnglishPlease ensure that the aerial is connected to the connectorlabelled ‘ RF In ’ on the rear of the TV .Ensure that OK ishighlighted in yellow and press ‘OK’ on your remote .If afterthis scan ,not all digital channels are found ,your aerial mayrequire a signal booster .alternatively ,upgrade your aerialto a high gain digital version .OKCancelTuning will now take place.If the TV finds some, but not all, of the Digital channels, the TV isfunctioning correctly but the signal being received is not strong enough.(The signal strength needs to be above 85% - you can see the signal strengththe TV is receiving when you change channels/ programmes) you willneed to increase the signal reception in order to recieve all of the channelsavailable. The most economical way to do this is by purchasingand connecting a 'signal booster' in between the TV and the TV aerial socket.If this does not solve the problem, you will need to upgrade the TVaerial to a digital hi-gain compatible aerial10
216_17 english <strong>manual</strong> 12 new.pdfPage 1 3. 11. 2008 14:19:39TV BUTTONS & THEIR FUNCTIONSSIDE PANEL BUTTONS123456789Displays Menu/OSDProgram/Channel down and menu downProgram/Channel up and menu upVolume down and menu downVolume up and menu upSelect the input sourceDVD - PlayDVD - EjectPower On/Off1 2 3 4 5 6 7 8 9MENU CH- CH+ VOL- VOL+ SOURCE PLAY EJECT POWER12
216_17 english <strong>manual</strong> 15 new.pdfPage 1 3. 11. 2008 14:22:16TV MENU OPERATIONPICTURE SETTINGS MENUAdjusting TintLets you increase or decrease the levelof tint within the picture1) Press [LCD-MENU] to enter menu2) Press [\/] to highlight Tint3) Press [>] to increase the tintor [] to navigate through thevarious options4) Press [EXIT] to exitAdjusting SharpnessYou can change the sharpness betweenthe different preset options4) Press [EXIT] to exitDynamic Noise ReductionReduces the interference in the picture.NormalSharpSharpestSoftSoftestFor standard useFor pictures with little movementFor pictures with nearly no movementFor pictures with large amount of movementFor pictures with lots of movement1) Press [LCD-MENU] to enter menu2) Press [\/] to highlight DNR3) Press [>] to switch between OFF, LOW,MID & HIGH1) Press [LCD-MENU] to enter menu2) Press [\/] to highlight Sharpness3) Press [>] to navigate throughthe various options4) Press [EXIT] to exit4) Press [EXIT] to exit15
216_17 english <strong>manual</strong> 16 new.pdfPage 1 3. 11. 2008 14:22:39TV MENU OPERATIONSOUND SETTINGS MENUAdjusting VolumeLets you adjust the volumeof the television1) Press [LCD-MENU] to enter menu2) Press [>] to move to Sound SettingsMenu3) Press [\/] to highlight Volume4) Press [>] to increase the volumeor [] to move to Sound Settings Menu3) Press [\/] to highlight Bass4) Press [>] to increase the bass or [] to move to Sound Settings Menu3) Press [\/] to highlight Treble4) Press [>] to increase the treble or [] to move to Sound SettingsMenu3) Press [\/] to highlight Sound Mode4) Press [>] to navigate throughthe various optionsAdjusting BalanceTo switch the sound between the leftand right speakers1) Press [LCD-MENU] to enter menu2) Press [>] to move to Sound Settings Menu3) Press [\/] to highlight Balance4) Press [>] to increase the balance or [
216_17 english <strong>manual</strong> 18 new.pdfPage 1 3. 11. 2008 14:23:13TV MENU OPERATIONCommon Interface Slot(Only in Freeview Mode)Pay per view services require a “smartcard” tobe inserted into the TV. If you subscribe to apay per view service the provider will issue youwith a ‘CAM’ card “smartcard”. The CAM canthen be inserted into the COMMONINTERFACE PORT. To access the card followthe steps below.1) Press [LCD-MENU] to enter menu2) Press [>] to move to Tuning Settings Menu3) Press [\/] to highlight Common Interface4) Press [>] to enter the menuOn Screen Display TimerLets you adjust the amount of time the OnScreen Menu stays on the screen beforedisappearing.1) Press [LCD-MENU] to enter menu2) Press [>] to move to Timer Settings Menu3) Press [\/] to highlight OSD Timer4) Press [>] to increase the time and [] to move to Timer SettingsMenu3) Press [\/] to highlight Sleep Timer4) Press [>] to increase the timeto the required amount5) Press [EXIT] to exit18
216_17 english <strong>manual</strong> 19 new.pdfPage 1 3. 11. 2008 14:23:53TV MENU OPERATIONGENERAL SETTINGS MENULets you adjust the language, picture size,blue screen, add child lock, complete firsttime installation and reset the television.4) To switch on child lock or key lock press [>]On Screen Menu LanguageLets you change the on screen menu language.1) Press [LCD-MENU] to enter menu2) Press [>] to move to General SettingsMenu3) Press [\/] to highlight Language4) Press [>] to change the language5) To change Pin Code enter menu. Enter the old pincode (Default is blank), then enter the new pin codeand enter it again. Press [OK], the pin is now changedChange PIN CodeOld PIN CodeNew PIN CodeEnter PIN Code5) Press [EXIT] to exitPicture FormatLets you adjust the picture format1) Press [LCD-MENU] to enter menu2) Press [>] to move to General Settings Menu3) Press [\/] to highlight Picture Format4) Press [>] to change the pictureformat6) Press [EXIT] to exitFirst Time InstallationAllows you to reset the television for first time tuning.1) Press [LCD-MENU] to enter menu2) Press [>] to move to General Settings Menu3) Press [\/] to highlight First Time Installation4) Press [>] and First time install screen will appear5) Press [EXIT] to exitBlue ScreenChanges the background when there isno input between clear and a blue background1) Press [LCD-MENU] to enter menu2) Press [>] to move to General Settings Menu3) Press [\/] to highlight Blue Screen4) Press [>] to switch between on and off5) Press [OK] and tuning will commerce.First Time InstallationCountry<strong>UK</strong>LanguageEnglishPlease ensure that the aerial is connected to the connectorlabelled ‘ RF In ’ on the rear of the TV .Ensure that OK ishighlighted in yellow and press ‘OK’ on your remote .If afterthis scan ,not all digital channels are found ,your aerial mayrequire a signal booster .alternatively ,upgrade your aerialto a high gain digital version .OKCancelReset TelevisionYou may wish to reset the menus to factory settings e.g.if you have forgotten a changed password1) Press [LCD-MENU] to enter menu2) Press [>] to move to General Settings Menu3) Press [\/] to highlight Reset4) Press [OK] to reset the television5) Press [EXIT] to exitChild Lock/Key LockAllows you to lock certain channels andcontent so that it can not be viewed by children1) Press [LCD-MENU] to enter menu2) Press [>] to move to General Settings Menu3) Press [\/] to highlight Child Lock5) Press [EXIT] to exit19
216_17 english <strong>manual</strong> 20 new.pdfPage 1 3. 11. 2008 14:24:23ELECTRONIC PROGRAM GUIDE & DIGITAL TELETEXTElectronic Program Guide (EPG)The Electronic Program Guide (EPG) isavailable in Digital TV mode. It is a 7 dayTV guide and provides informationabout forthcoming programmes (wheresupported by the broadcasted channel).You can view the start and end time of allprograms and on all channels for the next7 days.Digital TV TeletextWith Digital TV (Freeview) there is alsodigital teletext available on somechannels. Simply follow the on screencommands. Here is an exampleof the BBC digital teletext service.1) To start digital teletext press REDbutton.It is very simple to operate.1) Press [EPG]. The following menu will appear.2) Navigate through the now and next menuusing the [>], [
216_17 english <strong>manual</strong> 21 new.pdfPage 1 3. 11. 2008 14:24:50TELETEXT OPERATION (ANALOGUE TV ONLY)Teletext is a service offered by somebroadcasters.Teletext Operation1) Press [TEXT], after a few secondsteletext page 100 should appear.Here is an example of BBC12) You can now navigate to the pageyou require in a number of ways:a) Press the page you require usingthe number buttons i.e. page 302,by pressing [3][0][2]b) Press the colour buttons, these willtake you to the page indicatedon screen for each colour3) To exit Teletext press [TEXT] twiceat any timeOther buttons[SIZE] this increases or decreases thesize of the text on screen[INDEX] some pages are more than onepage long this button displaysthe number of pages[REVEAL] if there is an answer orsomething hidden this will display it[SUBPAGE] displays the sub pageif it exists[HOLD] This stops the pages changingwhen there are multiple pages21
216_17 english <strong>manual</strong> 22 new.pdfPage 1 5. 11. 2008 12:47:31CONNECTING TO A PC - WINDOWS XPIMPORTANT— Before connecting toa PC you must ensure that the settingsof the PCs output are correct for the newLCD Monitor.4) Left click your mouse on Settings, this screen willappear. Check the screen resolution is set to whatis show in the technical specifications section. Youcan adjust the resolution by moving the slider onscreen.You need to do the following with yourold monitor connected1) Switch on your PC2) When finished booting up, right clickyour mouse anywhere on the screen,the below will appear5) Left click your mouse on Advance, this screen willappear, click on tab called ‘Monitor’3) left click your mouse on Properties,this screen will appear6) Left click on the drop down for Screen refresh rateand select 60 Hertz.7) Finally click on Apply, then click Yes and the settingswill be saved.8) Turn off your PC.9) Connect up your LCD TV to your PC and switch on.10) Switch on your PC, Windows will automaticallyInstall the LCD TV.For audio connection please refer to the Inputs andConnections page.22For Windows Vista operating system the process is very similar to the above.If you require additional support please contact the helpline.
216_17 english <strong>manual</strong> 24 new.pdfPage 1 3. 11. 2008 14:26:09DVD MENU OPERATIONSYSTEM SET UPAdjusting TV SystemLets you adjust between NTSC, PAL,AUTO (PAL is default for the <strong>UK</strong>)1) Press [DVD-SETUP] to enter menu2) Press [>] to select TV System3) Press [>] to enter menu4) Press [\/] or [/\] to highlight NTSC, PALor AUTO5) Press [OK] to confirmReturning to DefaultThis lets you switch the DVD menus show aboveback to Default settings1) Press [DVD-SETUP] to enter menu2) Press [>] to select TV System3) Press [\/] to select Default4) Press [>] to enter menu5) Press [>] to highlight Yes6) Press [OK] to confirm6) Press [DVD-SETUP] to exit7) Press [DVD-SETUP] to exitAdjusting Picture FormatThis lets you select the format of the picturethat is being shown between 16:9, 4:3LetterBox and 4:3.1) Press [DVD-SETUP] to enter menu2) Press [>] to select TV System3) Press [\/] to select TV Type4) Press [>] to enter menu5) Press [\/] or [/\] to highlight 4:3PS,4:3LB or 16:96) Press [OK] to confirm7) Press [DVD-SETUP] to exit24
216_17 english <strong>manual</strong> 25 new.pdfPage 1 3. 11. 2008 14:26:34DVD MENU OPERATIONAUDIO SET UPAdjusting Audio OutLets you adjust between SPDIF/OFF,SPDIF/RAW, SPDIF/PCMSPDIF / RAW – Select this option if you areconnecting to a Dolby Digital 5.1 surroundsounds amplifier via coax cable SPDIF / PCM– Select this option if you are connecting to aStereo Hi-fi via composite video cable1) Press [DVD-SETUP] to enter menu2) Press [\/] to select Audio Set Up3) Press [>] to select Audio Out4) Press [>] to enter menu5) Press [\/] or [/\] to highlight SPDIF/OFF,SPDIF/RAW or SPDIF/PCM6) Press [OK] to confirmDIGITAL SET UPAdjusting Dynamic RangeThis is the difference between the quietest and loudestsounds. This setting works only with DVD discsrecorded in Dolby digital.FULL: Set this to listen with the range recordedon the disc.4/8: Set this to listen with a range equivalentto a normal television.2/8: Set this to listen with a smaller differencebetween the maximum and minimum volume.1) Press [DVD-SETUP] to enter menu2) Press [\/] twice to select Digital Set Up3) Press [>] to select Dynamic Range4) Press [>] to enter menu5) Press [\/] or [/\] to increase or decreasethe Dynamic range6) Press [OK] to confirm7) Press [DVD-SETUP] to exit7) Press [DVD-SETUP] to exitAdjusting ToneLets you increase or decrease the Toneof the sound1) Press [DVD-SETUP] to enter menu2) Press [\/] to select Audio Set Up3) Press [>] to enter menu4) Press [\/] to select Tone5) Press [>] to enter menu6) Press [\/] or [/\] to increase or decreasethe tone7) Press [OK] to confirmAdjusting the SoundLets you change the sound between Stereo,Mono Left, Mono Right and Mixed Mono.1) Press [DVD-SETUP] to enter menu2) Press [\/] twice to select Digital Set Up3) Press [>] to enter menu4) Press [\/] to select Dual Mono5) Press [>] to enter menu6) Press [\/] or [/\] to switch between Stereo,Mono L, Mono R and Mix Mono7) Press [OK] to confirm8) Press [DVD-SETUP] to exit8) Press [DVD-SETUP] to exit25
216_17 english <strong>manual</strong> 26 new.pdfPage 1 5. 11. 2008 11:59:25WALL MOUNTINGIMPORTANT— BEFOREDRILLING ANY HOLES IN THEWALL ENSURE YOU ARE NOTDRILLING WHERE THERECOULD BE ANY ELECTRICWIRES, WATER OR GAS PIPESTHIS TV REQUIRES A VESA100 WALL MOUNT, OR EQUIVALENTWall Mounting the TV.1) Remove the four screws highlightedbelow.2) The wall mount can now be easily attachedto the mounting holes on the rear of the TV.These holes are indicated in the picture below100To remove the stand1) Remove the two screws highlightedbelowImportant – If wallmounting this TV,only use the screws alreadyprovided in the wallmounting holes.Using other screws which are longercould cause irrepable damage tointernal part.2) The stand will now come off26
216_17 english <strong>manual</strong> 27 new.pdfPage 1 5. 11. 2008 10:50:55USING WITH SKY DIGITALYou may wish to use your TV with SkyDigital.There are a number of connection options,the best being connecting via SCARTcable.Connecting via SCART1) Connect the SCART cable from the SkyDigital Box to SCART of the TV2) Press [SOURCE]3) Press [\/] or [/\] to select SCART4) Press [OK]The channel your Sky Digital box isdisplaying will now be shown on the TV.You may wish to share your Sky Digitalsignal around the home by using an RFconnection. If this TV is to be connectedin this way, please follow the below.Connecting via RFEnsure the Sky signal is switched on,before you start the below.1) Connect the RF cable from the RFoutput socket of the sky/cable box tothe ‘RF IN’ of the TV.2) Switch the TV to analogue TV mode3) Press [LCD-MENU] to enter menu4) Press [>] twice to select TuningSettings Menu5) Press [\/] to select Manual Tuning6) Press [>] to enter Auto tuning7) Press [OK] to start tuningOnce tuning is complete the first channelwill appear. Press [CH+] to move throughthe channel until you find the Sky channel.The channel can then be moved if youwish, please refer to the Tuning Settingmenu – Program Edit section of the <strong>manual</strong>.USING WITH SKY DIGITAL REMOTE CONTROLS(BSKYB) OR UNIVERSAL REMOTE CONTROLYou may wish to use your Sky Digital or a universalremote control to operate some of the functions of thisTV. For this you require a ‘code’ that needs to beprogrammed into your Sky Digital or universal remotecontrol.For codes for universal remote controls, please visitour website where you will find the very latestinformation and codes.For codes for Sky/Sky+Sky HD, please note that at thepoint of manufacture, BSkyB have not launched thecode required for this model of TV. They are due tolaunch a new remote control which should include thenecessary code to operate the functions of the TVduring mid-late 2009 (called revision 9). The launch datewas not known at the time of printing this <strong>manual</strong>.Please check our website for updates, alternatively,see below some alternative options of remote controlsthat are available.One for AllSky OriginalsThe One for All remote controls shown above will operateall of the functions of the Sky box in the same way theoriginal remote control will, in addition, they will alsooperate the functions of this model of TV. The One for Allversions are available to purchase from thehelpline/website. The original Sky remote controls areshown for comparison purposesIf you require any further information, you can contact us:www.skymediauk.co.ukemail - service@skymediauk.co.ukTel - 0871 2000 46327
216_17 english <strong>manual</strong> 28 new.pdfPage 1 3. 11. 2008 14:27:27FREQUENTLY ASKED QUESTIONSQuestion:I have tuned in Digital TV butI am not receiving any or all of thechannels and/or the channels I receiveare breaking upThe sound quality is high pitched?I have inserted a disc but it is not playingThe subtitles are switched onwhen I am watching a DVDI have connected the TV to my VCR viaSCART but it is not recordingSolution:1) Check you are in an area that canreceive Freeview. Visitwww.freeview.co.uk or call087<strong>01</strong> 111 270.2) Check you have a suitable aerial.Many indoor aerials will say they aredigital ready, but you will not geta good signal3) Consider purchasing a signal booster,it is much cheaper than a digital aerialand cures 70% of poor signal problems.4) Failing the above for now use theanalogue TV, until the signal becomesstronger in your area.For best performance we recommend using anoutdoor hi-gain digital aerial. If you are receivingsome digital stations first try to connect a signalbooster in between the TV and TV aerial socketGo into the sound settings menu asshown earlier in the <strong>manual</strong> and increasethe level of the bass and decreasethe treble1) Ensure you have inserted put the discin facing the correct way forward2) Ensure the disc is clean and is notscratched3) Some copied discs will not play.4) Check the DVD is a region 2 disc – to changethe region of the DVD player, refer to section‘Changing Regions’.Each time you press [Subtitles] buttonyou switch between the different languages.Off is one of the options. If you still havesubtitle on, access through the DVD discmenu and switch offIn addition to connecting via SCART, youshould connect the aerial cable from thewall socket to VCR and another aerialcable from the VCR to the TVIf you are still experiencing problems please contact the HelplineCustomer Support/Technical HelplineSky Media <strong>UK</strong> LTDTelephone: 0871 2000 463Email: service@skymediauk.co.ukVisit our web site www.skymediauk.co.uk for further Trouble shootingand frequently asked questions.28
216_17 english <strong>manual</strong> 29 new.pdfPage 1 5. 11. 2008 13:52:07TECHNICAL SPECIFICATIONL216/17Size (Inches)21.6‘’PanelResolution1920X1080Contrast Ratio 1000? 1Brightness cd/m 2 300Input SignalPC RGBRFVideoYes75 ohm Antenna / PAL-SECAM1 x SCART, 1 x S-Video, 1 x Component (YPbPr -1080i)1 x 3.5mm jack for PC, 1 x 3.5mm jack for YPbPrHDMI1 (Up to 1080p)Speaker Output Watts (RMS)2 x 3Power Voltage 110-240v 50/60Hz 4A 48W / 2W (standby)DimensionsWeightInc StandExc StandNet (Kgs)Gross (Kgs)85D x 400H x 530W200D x 355H x 530W6.1KGS8.7KGS29
216_22 english <strong>manual</strong> 30 new.pdfPage 1 5. 11. 2008 13:13:07INDEXAnalogue TV teletext 21Attaching the stand 9Audio Out 25Auto Configuration of Screen 23Auto Tuning 17Balance 16Bass 16Blue Screen 19Brightness 14Changing DVD Regions 25Child Lock 19Clock 23Colour 14Colour Temperature 15Common Inferface Slot 18Connecting to a PC 22Contrast 14Country 17Digital Switchover Re-Tune 10Digital TV teletext 20Dynamic Noise Reduction 15Dynamic Range 25Electronic Program Guide 20First Time Installation 19Frequently Asked Questions 28Horizontal Position 23Index 30Inputs and Connections 13Manual Tuning 17Mode/Source 13On Screen Display Timer 18On Screen Menu Language 19Phase 23Picture Format 19Picture Format - DVD Mode 24Picture Mode Preset 14Position Reset 23Program Edit / Changing ChannelPosition 17Remote control buttons and theirfunctions 11Removing the stand 26Reset Television 19Returning to Default 24Sharpness 15Sleep Timer 18Sound Mode Preset 16Technical Specifications 29Tint 15Tone 25Treble 16Tuning in TV 10TV buttons and their functions 12TV System 24Using with Sky Digital / Sky Digital 27Vertical Position 23Volume 16Wall mounting the TV 26What is included in the box 8OPTIONAL ACCESSORIES AND SPARE PARTSIf you wish to purchase additional accessories for example wall mounts, Sky remote controlsor replacement spare parts.Please visit our website www.skymediauk.co.uk for further details.You can find details of how to purchase either by visiting our web site or calling ourhelpline on 0871 2000 463.30
lank.pdf 10. 10. 2008 13:49:40
lank.pdf 10. 10. 2008 13:49:40
lank.pdf 10. 10. 2008 13:49:40
last.pdf 14. 10. 2008 9:19:49L21/MAN/00<strong>01</strong>


