Eternity - Manual - 32-29 DVD .indd - UMC - Slovakia
Eternity - Manual - 32-29 DVD .indd - UMC - Slovakia
Eternity - Manual - 32-29 DVD .indd - UMC - Slovakia

You also want an ePaper? Increase the reach of your titles
YUMPU automatically turns print PDFs into web optimized ePapers that Google loves.
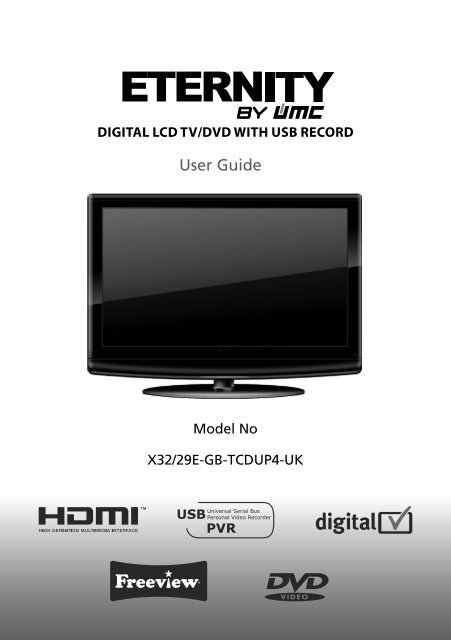
DIGITAL LCD TV/<strong>DVD</strong> WITH USB RECORDUser GuideModel NoX<strong>32</strong>/<strong>29</strong>E-GB-TCDUP4-UK<strong>Eternity</strong> - <strong>Manual</strong> - <strong>32</strong>-<strong>29</strong> <strong>DVD</strong> .<strong>indd</strong> 15/14/2010 10:26:20 AM
<strong>Eternity</strong> - <strong>Manual</strong> - <strong>32</strong>-<strong>29</strong> <strong>DVD</strong> .<strong>indd</strong> Sec1:25/14/2010 10:26:21 AM
Manufacturers GuaranteeIMPORTANT GUARANTEE INFORMATIONCongratulations on purchasing this television. We hope you have many years of trouble freeenjoyment from your purchase.Your product is covered under the manufacturers guarantee for 24 months from date ofpurchase.In the event of a fault being diagnosed, please refer to the frequently asked questions/troubleshooting section at the rear of this user guide.If you are still unable to remedy the fault, try resetting the TV to factory settings, (details in thisuser guide) or contact the helpline.In the event that a fault is diagnosed, the helpline will arrange to collect the TV from your homeor work address, return it to our service centre, repair the item and then return it to you.If we believe we cannot offer a permanent repair, we will replace the item.Sky Media UK LTD – Helpline InformationTelephone UK 0871 2000 463, ROI 01443 3940Email: service@skymediauk.co.ukWeb support: www.skymediauk.co.ukThe telephone opening hours are Monday to Friday 8.30am to 6pm, Saturday 9am – 5pm.You must retain all packaging materials, in addition to your proof of purchase/receipt, as you will needthese in the event of warranty/service support.This guarantee is in addition to and does not affect your statutory rights.If you need to call the helpline, you will need the following information.1) Model Number ______________________________________ (You can find this on the rear of the TV)2) Date of purchase ______________________________________ (You can find this on your sales receipt)3) Serial Number ______________________________________ (You can find this on the rear of the TV)EXAMPLE OF LABEL ON REAR OF TVHelpline No UK. 0871 2000 463 ROI. 01443 3940Web Support: www.skymediauk.co.uk 3<strong>Eternity</strong> - <strong>Manual</strong> - <strong>32</strong>-<strong>29</strong> <strong>DVD</strong> .<strong>indd</strong> Sec1:35/14/2010 10:26:21 AM
IMPORTANT SAFETY INSTRUCTIONSPlease read these instructions. All the safety and operating instructions should be read before theappliance is operated.Warnings• To reduce the risk of fire, electric shock or damage to the television, do not expose it todust, rain or moisture, or place any objects filled with liquids on or near the television.• Do not place the television in a confined space, ensure that nothing can obstruct theventilation openings at the rear of the television.• Do not place naked flames on or near the television.• Dispose of this television and any components including batteries in an environmentallyfriendly manner. If in doubt, please contact your local authority for details of recycling.Safety• For your safety, this appliance is fitted with a fused moulded 3 pin mains plug. Shouldthe fuse need to be replaced, ensure that any replacement is of the same amperage andapproved with the BSI mark.• Never try and replace the mains plug unless you have adequate qualifications and arelegally authorised to do so. In the event that a replacement Mains cable is required,contact the manufacturer for a suitable replacement.• Never use the television if it is damaged in any way.• Always place the television on a flat level surface avoiding anywhere which may be subjectto strong vibration.• Ensure the television is not placed on top of the power cable as the weight of thetelevision may damage the cable and cause a safety hazard.• Never place mobile phones, speakers or any other device which may cause magnetic orradio interference with the television. If interference is apparent, move the device causingthe interference away from the television.Maintenance• To clean this unit, wipe with a soft, dry cloth. If the surfaces are extremely dirty, use a soft cloth dippedin a soap and water solution or a weak detergent solution.• Use eyeglass cleaner to remove stubborn dirt from the LCD/LED Screen.• Never use alcohol, paint thinner or benzene to clean this unit.• Before using a chemically treated cloth, read the instructions thatcame with the cloth carefully.CAUTION: If water or other liquid enters the television through the display panelsurface, a malfunction may occur.Packaging• The safest way to transport your item is in the original box/packaging - please save yourpackaging for this.• You will need original box/packaging in the event of warranty/service repair or support. We are unableto carry out warranty/service if you are unable to package it correctly.4Helpline No UK. 0871 2000 463 ROI. 01443 3940Web Support: www.skymediauk.co.uk<strong>Eternity</strong> - <strong>Manual</strong> - <strong>32</strong>-<strong>29</strong> <strong>DVD</strong> .<strong>indd</strong> Sec1:45/14/2010 10:26:21 AM
IMPORTANT SAFETY INSTRUCTIONSPlease read these instructions. All the safety and operating instructions should be read before theappliance is operated.Important Information Regarding Use of Video Games, Computers,Captions or Other Fixed Image DisplaysThe extended use of fixed image program material can cause a permanent “shadow image” on the LCDpanel.This background image is viewable on normal programs in the form of a stationary fixed image. This typeof irreversible LCD/LED panel deterioration can be limited by observing the following steps:1. Reduce the brightness/contrast setting to a minimum viewing level.2. Do not display the fixed image for extended periods of time.3. Turn the power off when not in actual use.Examples of images that you need to watch out for are as follows (this is not an exhaustive list):• TV Channel Logos: e.g. Shopping channel logos and pricing displays-especially if they arebright and stationary. Moving or low-contrast graphics are less likely to cause ageing of the screen.• Time Displays• Teletext: Do not view a stationary page for long period of time• TV/<strong>DVD</strong> Menus: e.g. Listings of <strong>DVD</strong> disk content• Pause Mode: Do not leave the TV in pause mode for long periods of time, e.g. When watching <strong>DVD</strong>s orvideos.Important - Once ‘shadow image/screen burn’ occurs, it will never disappear and is not repairable underwarranty.How do I dispose of this product?UK: Waste electrical products should not be disposed of with household waste. Separatedisposal facilities exist. For your nearest facilities, please see www.recycle-more.co.uk or instore for details.ROI: Waste electrical products should not be disposed of with household waste. Separatedisposal facilities exist. Check with your Local Authority or retailer for recycling advice.Batteries• Observe the correct polarity when inserting batteries.• Do not use different types of batteries together or mix old and new batteries.• Dispose of batteries in an environmentally friendly way.• Certain regions may regulate the disposal of batteries.Please consult your local authority.CdCAUTION:CLASS 1LASER PRODUCTThis caution label is located on the rear panel of the unitTHIS UNIT IS A CLASS 1 LASER PRODUCT. HOWEVER THIS UNIT USES A VISIBLE LASER BEAM WHICH COULD CAUSEHAZARDOUS RADIATION EXPOSURE IF DIRECTED. BE SURE TO OPERATE THE PLAYER CORRECTLY AS INSTRUCTED.WHEN THIS UNIT IS PLUGGED INTO THE WALL OUTLET, DO NOT PLACE YOUR EYES CLOSE TO THE OPENINGS TO LOOKINTO THE INSIDE OF THIS UNIT.USE OF CONTROLS OR ADJUSTMENTS OR PERFORMANCE OF PROCEDURES OTHER THAN THOSE SPECIFIED HEREIN MAYRESULT IN HAZARDOUS RADIATION EXPOSURE.DO NOT OPEN COVERS AND DO NOT REPAIR YOURSELF. REFER SERVICING TO QUALIFIED PERSONNEL.IMPORTANT NOTE. Occasionally we may release new software/firmwareupgrades/enhancements for this television. Please check the ‘firmwareupgrade’ section of the website regularly.5<strong>Eternity</strong> - <strong>Manual</strong> - <strong>32</strong>-<strong>29</strong> <strong>DVD</strong> .<strong>indd</strong> Sec1:55/14/2010 10:26:22 AM
6Helpline No UK. 0871 2000 463 ROI. 01443 3940Web Support: www.skymediauk.co.uk<strong>Eternity</strong> - <strong>Manual</strong> - <strong>32</strong>-<strong>29</strong> <strong>DVD</strong> .<strong>indd</strong> Sec1:65/14/2010 10:26:22 AM
CONTENTSManufacturers Guarantee Information . . . . . . . . . . . . . . . . . . . . . . . . . . . . . . . . . . . . . . 3Important Safety Instructions . . . . . . . . . . . . . . . . . . . . . . . . . . . . . . . . . . . . . . . . . . . . . . 4-5What is included in the box . . . . . . . . . . . . . . . . . . . . . . . . . . . . . . . . . . . . . . . . . . . . . . . 8Detaching the stand and wall mounting . . . . . . . . . . . . . . . . . . . . . . . . . . . . . . . . . . . . . 9Getting Started - Initial Set Up . . . . . . . . . . . . . . . . . . . . . . . . . . . . . . . . . . . . . . . . . . . . . 11TV Buttons and Input Source Menu . . . . . . . . . . . . . . . . . . . . . . . . . . . . . . . . . . . . . . . . . 12Remote Control . . . . . . . . . . . . . . . . . . . . . . . . . . . . . . . . . . . . . . . . . . . . . . . . . . . . . . . . . 13Connections . . . . . . . . . . . . . . . . . . . . . . . . . . . . . . . . . . . . . . . . . . . . . . . . . . . . . . . . . . . . 14-15TV Menu Operation . . . . . . . . . . . . . . . . . . . . . . . . . . . . . . . . . . . . . . . . . . . . . . . . . . . . . 16-21Picture Menu . . . . . . . . . . . . . . . . . . . . . . . . . . . . . . . . . . . . . . . . . . . . . . . . . 16Sound Menu . . . . . . . . . . . . . . . . . . . . . . . . . . . . . . . . . . . . . . . . . . . . . . . . . . 17Channel Menu . . . . . . . . . . . . . . . . . . . . . . . . . . . . . . . . . . . . . . . . . . . . . . . . 18Feature Menu . . . . . . . . . . . . . . . . . . . . . . . . . . . . . . . . . . . . . . . . . . . . . . . . . 19Setup Menu . . . . . . . . . . . . . . . . . . . . . . . . . . . . . . . . . . . . . . . . . . . . . . . . . . 20<strong>DVD</strong> Menu . . . . . . . . . . . . . . . . . . . . . . . . . . . . . . . . . . . . . . . . . . . . . . . . . . . . . . . . . . . . . 21PC Operation . . . . . . . . . . . . . . . . . . . . . . . . . . . . . . . . . . . . . . . . . . . . . . . . . . . . . . . . . . . 23-24Using the television as a computer monitor . . . . . . . . . . . . . . . . . . . . . . . . 23PC Settings Menu . . . . . . . . . . . . . . . . . . . . . . . . . . . . . . . . . . . . . . . . . . . . . . 24USB Record / 7 Day TV Guide . . . . . . . . . . . . . . . . . . . . . . . . . . . . . . . . . . . . . . . . . . . . . . 25-27USB Record . . . . . . . . . . . . . . . . . . . . . . . . . . . . . . . . . . . . . . . . . . . . . . . . . . . 25USB Record / 7 Day TV Guide . . . . . . . . . . . . . . . . . . . . . . . . . . . . . . . . . . . . . 26USB Mode / Media Player . . . . . . . . . . . . . . . . . . . . . . . . . . . . . . . . . . . . . . . 27General Information . . . . . . . . . . . . . . . . . . . . . . . . . . . . . . . . . . . . . . . . . . . . . . . . . . . . . 28-<strong>32</strong>Using with Sky Digital/Virgin Media . . . . . . . . . . . . . . . . . . . . . . . . . . . . . . . 28Frequently Asked Questions . . . . . . . . . . . . . . . . . . . . . . . . . . . . . . . . . . . . . <strong>29</strong>Technical Specifications . . . . . . . . . . . . . . . . . . . . . . . . . . . . . . . . . . . . . . . . . 30Index . . . . . . . . . . . . . . . . . . . . . . . . . . . . . . . . . . . . . . . . . . . . . . . . . . . . . . . . 31Digital Switchover . . . . . . . . . . . . . . . . . . . . . . . . . . . . . . . . . . . . . . . . . . . . . 31-<strong>32</strong>Helpline No UK. 0871 2000 463 ROI. 01443 3940Web Support: www.skymediauk.co.uk 7<strong>Eternity</strong> - <strong>Manual</strong> - <strong>32</strong>-<strong>29</strong> <strong>DVD</strong> .<strong>indd</strong> Sec1:75/14/2010 10:26:22 AM
WHAT IS INCLUDED IN THE BOXAccessoriesIncluded with this TV are the following accessories:What is included in the box1 x User Guide1 x Remote ControlUser Guide2 x AAA Batteries1 x Quick Start GuideQuick StartGuide1 x Stand1 x TV1 x RF Cable1 x USB Memory StickPlease save your packaging as you will need this in the event of warranty/service repair or support. Weare unable to carry out warranty/service if you are unable to package it correctly. The safest way topackage your item in the event of warranty/service repair is in it’s original box/packaging.8Helpline No UK. 0871 2000 463 ROI. 01443 3940Web Support: www.skymediauk.co.uk<strong>Eternity</strong> - <strong>Manual</strong> - <strong>32</strong>-<strong>29</strong> <strong>DVD</strong> .<strong>indd</strong> Sec1:85/14/2010 10:26:22 AM
Attaching / detaching the stand and wall mountingDETACHING THE STANDThis television requires a VESA 400 x 200 wall mount, or equivalent.Detaching the Stand1) Remove the 4 screws highlightedIMPORTANT - Before drilling any holes in the wall ensure you are not drillingwhere there could be any electric wires, water or gas pipes.Wall mounting the TV1) Remove the four screws highlighted below.2) The wall mount can now be easily attached to the mounting holes on the rear of the TV. These holesare indicated in the picture below.For optimum viewing, if wall mounting the TV higher than eye level,the TV should be tilted downwards so that the TV’s screen is ‘face on’.See fig 1 and 2fig 1Viewing angleTVfig 2TVImportant – If wall mounting this TV, onlyuse the screws already provided in the wallmounting holes. Using other screws whichare longer could cause irreparable damage tointernal parts.Viewing angleIMPORTANT NOTE. Occasionally we may release new software/firmwareupgrades/enhancements for this television. Please check the ‘firmwareupgrade’ section of the website regularly.9<strong>Eternity</strong> - <strong>Manual</strong> - <strong>32</strong>-<strong>29</strong> <strong>DVD</strong> .<strong>indd</strong> Sec1:95/14/2010 10:26:24 AM
10Helpline No UK. 0871 2000 463 ROI. 01443 3940Web Support: www.skymediauk.co.uk<strong>Eternity</strong> - <strong>Manual</strong> - <strong>32</strong>-<strong>29</strong> <strong>DVD</strong> .<strong>indd</strong> Sec1:105/14/2010 10:26:24 AM
Getting Started - Initial Set UpGETTING STARTED - INITIAL SET UP1) Using the RF cable supplied, connect the TVto the TV Aerial wall socket (Fig A)2) Connect the power cable to the Electricaloutlet (Fig B)Fig BFig A3) Switch on the television using thepower on/off switch located on the rearof the TV.4) Insert the batteries supplied into theRemote control and press the Standbybutton to power on the TVPower on/off5) You will now be welcomed with the initialset-up screen.If it does not appear, on the remote control,please press [MENU] then 8-8-8-8 and themenu will appear.Press OK on the remote control and tuningwill start.6) After tuning the following screen willappear.If you are missing channels, the reason for this is likely to be signal strength, you shouldconsider connecting signal booster and re-tuning the TV.Tip: If the TV finds some, but not all, of the Digital channels, the TV is functioning correctly but thesignal being received is not strong enough. (The signal strength needs to be above 85% - you can see thesignal strength the TV is receiving when you change channels/ programmes) you will need to increasethe signal reception in order to receive all of the channels available. The most economical way to dothis is by purchasing and connecting a ‘signal booster’ in between the TV and the TV aerial socket. If thisdoes not solve the problem, you will need to upgrade the TV aerial to a digital hi-gain compatible aerialHelpline No UK. 0871 2000 463 ROI. 01443 3940Web Support: www.skymediauk.co.uk 11<strong>Eternity</strong> - <strong>Manual</strong> - <strong>32</strong>-<strong>29</strong> <strong>DVD</strong> .<strong>indd</strong> Sec1:115/14/2010 10:26:24 AM
TV BUTTONS & SOURCE MENUTV Buttons and Source Menu1234Volume up and menu upVolume down and menu downProgram/Channel up and menu upProgram/Channel down and menu down5 Displays Menu/OSD6 Select the input source7 Switch between standby and television on8 <strong>DVD</strong> - Eject9 <strong>DVD</strong> - Play/Pause10 <strong>DVD</strong> - Stop12345689107Choosing Mode Input/SourceTo switch between the different input/connections.A) Using the buttons on the remote control:1) Press [SOURCE/ AV] - The source menu willappear2) Press [\/] or [/\] to select the input yourequire.3) Press [OK]B) Using the buttons on the Television:1) Press [SOURCE]2) Scroll up / down using CH+/ CH- buttons tothe input/source you require3) Press Vol+ to change input/source to theone selected.12Helpline No UK. 0871 2000 463 ROI. 01443 3940Web Support: www.skymediauk.co.uk<strong>Eternity</strong> - <strong>Manual</strong> - <strong>32</strong>-<strong>29</strong> <strong>DVD</strong> .<strong>indd</strong> Sec1:125/14/2010 10:26:<strong>29</strong> AM
Remote ControlREMOTE CONTROL112STANDBY - Switch on TV when in standby or vice versaMUTE - Mute the sound or vice versaTV/RADIO - Switch to Freeview and switch between TV andradio in Freeview modeTV GUIDE - Opens the 7 Day TV Guide (Freeview mode)ATV - Switch to analogue TV sourceUSB - Switch to USB source<strong>DVD</strong> - Switch to <strong>DVD</strong> sourceEJECT - Eject disc in <strong>DVD</strong> modeREC - To record what is currently on televisionREC LIST - Opens the list of what you have previously recorded- To restart the current chapter- To advance forward to the next chapter- To stop the playback- To play in fast rewind mode- To play in fast forward mode- To play/pause23345SOURCE/AV - To display the input/source menuINFO - Press once for now/next channel informationPress twice for programme information about currentprogramme- Allows you to navigate the on-screen menusand adjust the system settings to your preferenceMENU - To display OSD menuEXIT - To exit all menusNUMBER BUTTONS - 0 – 9 to select a TV channel directly.- To return to the previous channel viewedFAV - To display favourites menuVOL - To increase / decrease the sound levelSUBTITLE - To switch the dialogue at the bottom of the screen(on/off)ASPECT - To switch the screen between the different pictureformatsAUDIO - To change the audio language (if available)SLEEP - Press repeatedly to cycle through the sleep optionsCH To increase or decrease the channel being watchedGOTO - <strong>DVD</strong> mode - To go to a specific chapterA-B - <strong>DVD</strong> Choosing mode - Press Mode once to set Input/Sourcepoint, press a second time toreturn To to point switch between the different input/ANGLE - <strong>DVD</strong> mode - Select different angle of <strong>DVD</strong> (if available)connections.REPEAT - <strong>DVD</strong> mode - To repeat playbackD.DIS - A) <strong>DVD</strong> Using mode the - To buttons display the on current the remote disc information control:ZOOM - <strong>DVD</strong> mode - To zoom inSIZE - Teletext 1) Press mode [SOURCE/ - To change AV] - the The display source size menu in Teletext willmode appearDISPLAY - To switch off the screen when listening to radio2) Press [\/] or [/\] to select the input you<strong>DVD</strong> SETUP/TEXT - <strong>DVD</strong> mode - To display the <strong>DVD</strong> setup menuTeletext require. mode - To enter TeletextD.MENU/INDEX 3) Press -[OK]<strong>DVD</strong> mode - To display the <strong>DVD</strong> disc menuTeletext mode - To display the index pageTITLE/REVEAL B) Using - <strong>DVD</strong> the mode buttons - To display on the the Television: <strong>DVD</strong> title menuTeletext mode - To reveal or hide the hidden words.HOLD - Teletext mode - Hold current page which is displayed1) Press [SOURCE]2) Scroll up / down using CH+/ CH- buttons tothe input/source you require3) Press Vol+ to change input/source to theone selected.45IMPORTANT NOTE. Occasionally we may release new software/firmwareupgrades/enhancements for this television. Please check the ‘firmwareupgrade’ section of the website regularly.13<strong>Eternity</strong> - <strong>Manual</strong> - <strong>32</strong>-<strong>29</strong> <strong>DVD</strong> .<strong>indd</strong> Sec1:135/14/2010 10:26:<strong>29</strong> AM
ConnectionsCONNECTIONSABCDEFGHIJKLMNOUSBHDMI 1HDMI 2VGA(PC)VGA(PC) Audio InS-VIDEOCOMPONENT (HD)VIDEOR/L (COMPONENT)R/L (VIDEO)SCART 1CI CARD INSCART 2RF INCOAX Audio OutUSB portHDMI inputHDMI inputVGA-PC input3.5mm PC audio inputS-Video inputComponent input (YPbPr)Video inputComponent audio inputS-Video/Video audio inputSCART inputCommon Interface Card InputSCART inputRF / TV Aerial InputDigital Coax output (all sources)A B C DEGILM N OFHJKConnecting a <strong>DVD</strong> Player/Recorder, Video Recorder orCable/Satellite BoxTVs Input/Source should be set to SCARTRF IN<strong>DVD</strong> or VCRTV AerialWall SocketSCARTOUTRFINRFOUTSCART14Helpline No UK. 0871 2000 463 ROI. 01443 3940Web Support: www.skymediauk.co.uk<strong>Eternity</strong> - <strong>Manual</strong> - <strong>32</strong>-<strong>29</strong> <strong>DVD</strong> .<strong>indd</strong> Sec1:145/14/2010 10:26:30 AM
ConnectionsCONNECTIONSConnecting a Camcorder, Camera or Games ConsoleSource should be set to VideoCamera orCamcorderYellowWhiteRedVideoAudioIn L/RConnecting a High Definition (HD) DeviceOption 1 - via HDMI to HDMI cableA HDMI cable can output both video and audio and enables you to enjoy digital-quality video and audiowith minimal loss of quality.TVs Input/Source should be set to HDMI.HDMIOUTHDMIOption 2 - via Component cableIf you are supplied with a cable from the device which has RED, GREEN, BLUE, RED & WHITE connectorsyou must connect via Component (for picture) and by phono cable (for sound).TV Source should be set to Component.RedComponent (HD)GreenBlueAudi o L/RComponentRedWhiteAudioIn L/RHelpline No UK. 0871 2000 463 ROI. 01443 3940Web Support: www.skymediauk.co.uk 15<strong>Eternity</strong> - <strong>Manual</strong> - <strong>32</strong>-<strong>29</strong> <strong>DVD</strong> .<strong>indd</strong> Sec1:155/14/2010 10:26:30 AM
TV Menu OperationPICTURE MENUAVTo access this menu, press [MENU] button on the remote control.If you wish to make changes to any of the default settings, use the scrollTo confirm any settings press [OK] button.buttons.To exit this menu at anytime, press [EXIT] button.Picture Mode - Choose from the following presetsStandardPersonalMovieSportMildGameDefault settingsLets you manually alter all the settingsRecommended settings when watching a movieRecommended settings when watching sportSet to be lighter in colour and less brightRecommended settings when playing game consolesBrightness - Increase or decrease the brightness of the pictureContrast - Switch the balance between black and whiteSharpness - Increase or decrease the sharpness of the pictureColour - Increases the colour from black and whiteColour Temperature - Choose from the following presetsStandardWarmCoolDefault settingsIncreases red within the pictureIncreases blue within the pictureNoise Reduction - Choose from the following presetsLowMinimum reduction in interferenceMiddle Medium reduction in interferenceHighMaximum reduction in interferenceOffOffTip: If you do not press any buttons for 10 seconds, the menu will automatically exit. You can change thelength of time before the menu exits automatically - see ‘OSD Timer’ section.16Helpline No UK. 0871 2000 463 ROI. 01443 3940Web Support: www.skymediauk.co.uk<strong>Eternity</strong> - <strong>Manual</strong> - <strong>32</strong>-<strong>29</strong> <strong>DVD</strong> .<strong>indd</strong> Sec1:165/14/2010 10:26:30 AM
TV Menu OperationSOUND MENUAVTo access this menu, press [MENU] button on the remote control.If you wish to make changes to any of the default settings, use the scrollany settings press [OK] button.buttons. To confirmTo exit this menu at anytime, press [EXIT] button.Sound Mode - Choose from the following presetsPersonal Selects your personal sound settingsVoiceEmphasises voice over other soundsMusicEmphasises music over voicesTheatre Provides live and full sound for moviesStandard Default settingsTip: Treble and bass levels can only be adjusted when the sound mode ‘Personal’ is selected.Bass - To adjust the amount of low frequency within the soundTreble - To adjust the amount of high frequency within the soundBalance - To switch the sound between the left and right speakersAuto Volume Level (AVL) - When ‘on’ is selected, the volume will stay at a constant level regardless of input/sourceDigital Output - This is the digital COAX Audio output. Choose from the following options:OffBitstreamPCMOffSelect this option if you are connecting to a Dolby Digital 5.1 surround sounds amplifiervia coax cable (True digital signal)Select this option if you are connecting to a Stereo Hi-fi via coax cable (Pulse-codemodulation (PCM) is a digital representation of an analogue signal)IMPORTANT NOTE. Occasionally we may release new software/firmwareupgrades/enhancements for this television. Please check the ‘firmwareupgrade’ section of the website regularly.17<strong>Eternity</strong> - <strong>Manual</strong> - <strong>32</strong>-<strong>29</strong> <strong>DVD</strong> .<strong>indd</strong> Sec1:175/14/2010 10:26:31 AM
TV Menu OperationCHANNEL MENUAVTo access this menu, press [MENU] button on the remote control.If you wish to make changes to any of the default settings, use the scrollany settings press [OK] button.buttons. To confirmTo exit this menu at anytime, press [EXIT] button.Channel Manager - Allows you to lock channels, delete channels, add/remove channel skip, move channelposition and rename channels.Favourite Manager - Add and remove favourites. Up to 4 favourite lists are availableAuto Search - You can select the country and then complete re-tune of the television<strong>Manual</strong> Search - Select the start channel (which relates to the frequency) and search manually for achannel.Note - This only searches for channels in the current source. i.e. Freeview channels on Freeview source18Helpline No UK. 0871 2000 463 ROI. 01443 3940Web Support: www.skymediauk.co.uk<strong>Eternity</strong> - <strong>Manual</strong> - <strong>32</strong>-<strong>29</strong> <strong>DVD</strong> .<strong>indd</strong> Sec1:185/14/2010 10:26:<strong>32</strong> AM
TV Menu OperationFEATURE MENUAVTo access this menu, press [MENU] button on the remote control.If you wish to make changes to any of the default settings, use the scrollany settings press [OK] button.buttons. To confirmTo exit this menu at anytime, press [EXIT] button.System Lock - This menu allows you to lock certain features of the television so that they cannot be usedor viewed. For example if you don’t want certain channels viewed by children or if the television is to beused in a hotel and you want to limit the volume.When you enter the system lock menu you will be asked for a pin code. As default it is 0000.You now have the choice to lock any of the following:System Lock - Switches all the locks on or offKey Lock - Stops the buttons on the television workingSource Lock – Press [OK] to enter then apply On to lock the source so it can’t be usedChannel Lock - Press [OK] to enter then apply locks to channels you wish to block. This will lock thechannels of the source you using, i.e. Analogue, Freeview.Default Source – You can set the default start up source, so when the television is turned on it goes to thissource, i.e. FREEVIEW, SCART, HDMI etcDefault Channel - You can set the default start up channel, so when the television is turned on it goes tothis channel.Maximum Volume – You can limit the maximum volumeChange Pin Code – Press [OK] to enter, first enter the current code, then enter your new code and confirmyour new code. Write the new code here so you don’t forget it ________________Language - Lets you adjust the different language options availableProgramme Schedule - Lets you manually set recording by date, time and number of occasions.Clock - Allows you to set the clock (as default the information is taken automatically from the digital TVsignal)Hearing Impaired - You can switch on the hearing impaired feature, this provides additional informationand subtitlesSleep Timer - Lets you set the sleep timer so the television automatically switches off after a certainamount of timeCommon Interface - Pay per view services require a “smartcard” to be inserted into the TV.If you subscribe to a pay per view service the provider will issue you with a ‘CAM’and a “smartcard”. The CAM can then be inserted into the COMMON INTERFACEPORT (CI Card In).Helpline No UK. 0871 2000 463 ROI. 01443 3940Web Support: www.skymediauk.co.uk 19<strong>Eternity</strong> - <strong>Manual</strong> - <strong>32</strong>-<strong>29</strong> <strong>DVD</strong> .<strong>indd</strong> Sec1:195/14/2010 10:26:<strong>32</strong> AM
TV Menu OperationSETUP MENUAVTo access this menu, press [MENU] button on the remote control.If you wish to make changes to any of the default settings, use the scrollTo confirm any settings press [OK] button.To exit this menu at anytime, press [EXIT] button.buttons.OSD Timer - Lets you adjust the amount of time the On Screen Menu stays on the screen before disappearingFirst Time Installation - Takes you back to the first time installation screen, so you can completely re-tuneboth Freeview and analogueAspect Ratio - Within the UK the picture format varies depending on the channel/broadcast. There are anumber of different options to best meet your needsAuto4:3Automatically displays the best picture format. So thepicture is in the correct position. May have black linesDisplays the 4:3At the top/bottom and/or sides.picture in itsoriginal size.Side bars areshown to fill the16:10 screenFull16:9Fills the screen,so no blacklinesTop andbottom barsare shown tofill the 16:10screen. 4:3pictures will bestretchedZoomThe pictureis the correctproportion butzoomed in tofill the screen14:9Displays the14:9 picturein the correctproportion. Asa result sidebars are shownon the screenBlue Screen - Changes the background when there is no input between clear and a blue background (Onlyavailable on some sources)Reset to defaultReset Menu System - This resets the menus to factory settings.Reset TV Channels - This clears all the TV channels from the television.Firmware Upgrade - From time to time we may release new firmware to improve the operation ofthe television (available to download). This menu lets you install the new software/firmware onto thetelevision. Further details of how to do this will be issued with the firmware. Contact the helpline or referto the ‘product support’ section of the website.20Helpline No UK. 0871 2000 463 ROI. 01443 3940Web Support: www.skymediauk.co.uk<strong>Eternity</strong> - <strong>Manual</strong> - <strong>32</strong>-<strong>29</strong> <strong>DVD</strong> .<strong>indd</strong> Sec1:205/14/2010 10:26:33 AM
<strong>DVD</strong> Menu<strong>DVD</strong> MENUAVTo access this menu, press [MENU] button on the remote control.If you wish to make changes to any of the default settings, use the scrollany settings press [OK] button.buttons. To confirmTo exit this menu at anytime, press [EXIT] button.TV System - Choose from the following optionsNTSCNormally used for discs from North America, Japan etcPALThe standard for discs from UK/Europe, most of Asia, Australia etcAutoFor both NTSC and PALTV Type - Choose from the following options4:3PSTraditional picture format, often used on old film4:3 LB Traditional picture which has been adapted for widescreen16:9 Widescreen picture formatDefault - This option allows you reset all <strong>DVD</strong> settings to factory settings.Tone - Choose from the following options+ Increases the treble (high frequency sound)- Increases the bass (low frequency sound)Dynamic Range - This is the difference between the quietest and loudest sounds. This setting works onlywith <strong>DVD</strong> discs recorded in Dolby digital.FullSet this to listen with the range recorded on the disc4/8 Set this to listen with a range equivalent to a normal television2/8 Set this to listen with a smaller difference between the maximum and minimum volumeDual MonoStereoMono LMono RMix MonoOutputs 2 channels of sound both left and rightOutputs left side soundOutputs right side soundOutputs a single channel of sound but mix between right and leftTip: This TV/<strong>DVD</strong> player is pre-set to play Region 2 <strong>DVD</strong>s. In the event you wish to use the TV/<strong>DVD</strong> inanother country that uses different region discs, please visit www.skymediauk.co.uk. Select ‘ProductSupport’, ‘Changing Region’.IMPORTANT NOTE. Occasionally we may release new software/firmwareupgrades/enhancements for this television. Please check the ‘firmwareupgrade’ section of the website regularly.21<strong>Eternity</strong> - <strong>Manual</strong> - <strong>32</strong>-<strong>29</strong> <strong>DVD</strong> .<strong>indd</strong> Sec1:215/14/2010 10:26:33 AM
22Helpline No UK. 0871 2000 463 ROI. 01443 3940Web Support: www.skymediauk.co.uk<strong>Eternity</strong> - <strong>Manual</strong> - <strong>32</strong>-<strong>29</strong> <strong>DVD</strong> .<strong>indd</strong> Sec1:225/14/2010 10:26:34 AM
PC OperationUSING THE TELEVISION AS A COMPUTER MONITORIMPORTANT – Before connecting the computer to the television you must ensure the computer settingsare correct for the television. You MUST do this using your old monitor.How to set up for Windows XP & Windows Vista (connecting via VGA cable to the TV)1) Switch on your computer2) When finished booting up right click your3) Left click your mouse on Properties/Personalisemouse anywhere on the screen4) Left click your mouse on Setting/Display Settings.Ensure the screen resolution is set to what is shownin the technical specifications section toward therear of this user guide. To correct the resolution tothat of the television move the slider.5) Left click your mouse on Advance/AdvanceSettings and left click on Monitor6) Left click on the drop down for Screen refresh rate and select 60 Hertz, if you experience picture noiseor ‘flickering’, select 50 hertz or 70 hertz.7) Click on Apply, then click Yes and the settings will be saved.8) Now switch off your computer and connect thetelevision (as shown)9) Switch on the TV, select the input/source toVGA/PC and re-start your PC.Connecting a LaptopIn addition to the above if you are connecting a laptop to the television you will also need to activate theVGA connection on the laptop. This can vary based on the brand of laptop you have, on many brands/models, it is as per below.1) Connect the laptop to the television2) On the Laptop push buttonsThe screen will now switch to the television.Helpline No UK. 0871 2000 463 ROI. 01443 3940Web Support: www.skymediauk.co.uk 23<strong>Eternity</strong> - <strong>Manual</strong> - <strong>32</strong>-<strong>29</strong> <strong>DVD</strong> .<strong>indd</strong> Sec1:235/14/2010 10:26:34 AM
PC OperationPC SETUP MENUAVTo access this menu, press [MENU] button on the remote control.If you wish to make changes to any of the default settings, use the scrollany settings press [OK] button.buttons. To confirmTo exit this menu at anytime, press [EXIT] button.Auto Adjust - Lets you automatically configure the television to be used as a computer monitorHorizontal Position - Changes the horizontal position of the pictureVertical Position - Changes the vertical position of the picturePhase - To adjust delay time of phase in order to reduce the noise of pictureClock - Alter this in order to reduce the noise within the pictureTip: If the computer is left in-active for a period of time, the television will switch into a ‘sleep’ state(the screen will power off to save power). To switch back on press the standby button.24Helpline No UK. 0871 2000 463 ROI. 01443 3940Web Support: www.skymediauk.co.uk<strong>Eternity</strong> - <strong>Manual</strong> - <strong>32</strong>-<strong>29</strong> <strong>DVD</strong> .<strong>indd</strong> Sec1:245/14/2010 10:26:34 AM
USB RecordUSB RECORD - DIGITAL/FREEVIEW MODEUSB RECORD – DIGITAL/FREEVIEW MODEBuilt into this television is a USB record facility. This function is available in Digital/Freeview mode whenused in conjunction with a compatible USB memory stick or USB Hard drive. The benefits of this are asfollows:• Pause live TV/Radio and then playback, fast forward and rewind (up to live TV)• One button record, if you decide you want to record the current programme• Easy programmable recording from the 7 day TV Guide• Record TV/Radio and watch/listen back on your computer/laptopDue to the nature of the product, it is necessary to use a high speed USB memory stick (as the TV readsfrom and writes to the memory stick at the same time, some memory sticks may not be suitable)You can purchase high speed memory sticks from some computer stores, alternatively, we have a selectionof tested and compatible memory sticks available to purchase directly from the helpline/web site. Theseare available in 4GB, 8GB and 16GB. (Please check the web site/helpline for latest specifications and prices)Minimum Specification - USB Memory StickRead SpeedWrite Speed20 MB/s (Mega Byte Per Second)6 MB/s (Mega Byte Per Second)If you wish to use a USB portable hard drive larger than <strong>32</strong>GB, please refer to the FAQ section at the rearof this user guide.Setting up the USB Memory Stick1) Insert the USB Memory Stick into the USB Port located on the side of the television.The TV will now test the speed of the memory2) You will then have the option to start time shiftTip: If the TV does not recognise the USB Memory Stick, please check that it is formatted to FAT<strong>32</strong>.Pause Live TV/Radio (Time Shift)Pausing Live TV/Radio is very simple.Tip: When you switch the TV to standby or change channel the Time Shift memory is wiped. To restarttime shift you must press play/pause button.One Button Record- Press the play/pause button and the television will pause and the livecontent will be recorded. To resume watching press play/pause again.- Press fast forward to go forward in a recording (i.e. to skip adverts)- Press fast rewind to go back in a recording (i.e. if you fast forwarded toofar)At any point in time you may decide to record the current channel that you are watching. To do this youneed to press the [REC] button.Tip: This television contains one TV tuner, therefore it can only record the channel you are watching orrecord one channel while the television is in standby mode.Note: USB record function is only avilable in Digital/Freeview TV/Radio mode. Due to copyright laws andillegal copying/recording it is not possible to record to/from any other input/output source.IMPORTANT NOTE. Occasionally we may release new software/firmwareupgrades/enhancements for this television. Please check the ‘firmwareupgrade’ section of the website regularly.25<strong>Eternity</strong> - <strong>Manual</strong> - <strong>32</strong>-<strong>29</strong> <strong>DVD</strong> .<strong>indd</strong> Sec1:255/14/2010 10:26:35 AM
USB RecordUSB RECORD / 7 DAY TV GUIDERecord from 7 Day TV GuideTV Guide is available in Digital TV mode. It provides information about forthcoming programmes (wheresupported by the freeview channel). You can view the start and end time of all programmes and on allchannels for the next 7 days, set reminders and plan your recording1) Press [TV GUIDE]. The following 7 Day TV Guide will appear.2) Navigate through the menu usingYou can now:Record programmes by pressing RED (Press repeatedly to record daily, weekly, monthly)Set a reminder by pressing GREENView a previous day by pressing YELLOWView the next day by pressing BLUE3) Press [EXIT] to exit the 7 day TV Guide.Playing Back Recorded ContentTo view all your recordings, press [REC LIST]You can then simply navigate usingto the content you wish to watch and press [OK]Indicates the amount of spaceavailable on the USB Memory StickNote: This TV is designed to operate with USB memory sticks up to <strong>32</strong>GB. It is possible to use either aUSB memory stick or a USB portable Hard Drive of a larger capacity, however, it must be formatted tothe FAT<strong>32</strong> file system in order to operate correctly. At the time of printing this user guide, WindowsXP/Vista computers are only capable of formatting up to <strong>32</strong>GB, therefore, you will need a softwareprogramme/utility to format larger USB drives/hard drives to FAT<strong>32</strong>. Additional help and support isavailable from the web site.26Helpline No UK. 0871 2000 463 ROI. 01443 3940Web Support: www.skymediauk.co.uk<strong>Eternity</strong> - <strong>Manual</strong> - <strong>32</strong>-<strong>29</strong> <strong>DVD</strong> .<strong>indd</strong> Sec1:265/14/2010 10:26:35 AM
USB Mode / Media PlayerUSB MODE / MEDIA PLAYERMovie Music Photo Recorded ProgrammesAVUSB mode offers playback of various different types of content that you have saved on your USB MemoryStick.On switching to USB source the above menu screen will appear. The content will be divided into Movies,Music, Photos and Recorded Programmes based on file type.You can navigate through the menus using the scrollplay/view press [OK] button.buttons. To confirm the item you wish toHelpline No UK. 0871 2000 463 ROI. 01443 3940Web Support: www.skymediauk.co.uk 27<strong>Eternity</strong> - <strong>Manual</strong> - <strong>32</strong>-<strong>29</strong> <strong>DVD</strong> .<strong>indd</strong> Sec1:275/14/2010 10:26:38 AM
General InformationUSING WITH SKY DIGITAL / VIRGIN MEDIAYou may wish to use your TV with Sky Digital, Virgin Media or another cable or Satellite box. There are anumber of connection options, the best being connecting via SCART cable.Connecting via SCART1) Connect the SCART cable from the Cable/Satellite Box to SCART of the TV2) Press [SOURCE]3) Press [\/] or [/\] to select SCART4) Press [OK]The channel your Cable/Satellite box is displaying will now be shown on the TV.Connecting via RFYou may wish to share your Sky Digital signal around the home by using an RF connection.1) Connect the RF cable from the RF output socket of the sky/cable box to the ‘RF IN’ of the TV.2) Switch the TV to analogue TV mode3) Press [MENU] to enter menu4) Press [\/] twice to select Channel Menu5) Press [>] to enter menu6) Press [\/] to select Auto Search7) Press [OK] and then select StartOnce tuning is complete the first channel will appear. Press [CH+] to move through the channel untilyou find the Sky channel. The channel can then be moved if you wish, please refer to the ChannelMenu,Channel Manager section of this user guide.USING WITH SKY DIGITAL REMOTE CONTROL (BSKYB) OR UNIVERSALREMOTE CONTROLYou may wish to use your Sky Digital or a universal remote control to operate some of the functionsof this TV. For this you require a ‘code’ that needs to be programmed into your Sky Digital or universalremote control.For codes for universal remote controls, please visit our website where you will find the very latestinformation and codes. For codes for Sky/Sky+/Sky HD, please note that at the point of manufacture,BSkyB have not launched the code required for this model of TV. They are due to launch a new remotecontrol which should include the necessary code to operate the functions of the TV during 2010 (calledrevision 9).Please check our website for updates, alternatively, see somealternative options of remote controls that are available.The One for All remote controls shown on the right willoperate all of the functions of the Sky box in the same waythe original remote control will, in addition, they will alsooperate the functions of this model of TV. The One for Allversions shown are only available to purchase from thehelpline/website. When you order, we will need to know themodel and serial number of your TV in order that we caninclude the necessary software/code for your particular TV.The original Sky remotes are shown for comparison purposesonly.28Helpline No UK. 0871 2000 463 ROI. 01443 3940Web Support: www.skymediauk.co.uk<strong>Eternity</strong> - <strong>Manual</strong> - <strong>32</strong>-<strong>29</strong> <strong>DVD</strong> .<strong>indd</strong> Sec1:285/14/2010 10:26:39 AM
General InformationFREQUENTLY ASKED QUESTIONSGeneralGeneralI would like to have loudersound by connectingadditional speakersWhy are some options inthe menu unavailable andgreyed outThere are 2 options:1) Use Digital COAX output connected to an external amplifier/surroundsound system2) Use the 3.5mm headphone output and a 3.5mm to phono cable(available separately) to connect to an amplifier/surround sound systemSome options are only available in certain sources, i.e. HDMI, PC/VGA.They are unavailable in the other sources where they have no affect.TVTV<strong>DVD</strong>VCR/<strong>DVD</strong>RecorderGame ConsolesGame ConsolesUSB ModeUSB ModeUSB Record/ TVUSB Record/ TVSystem LockI have tuned in Digital TVbut I am not receiving anyor all of the channels and/or the channels I receive arebreaking upI have re-tuned my televisionbut when I switch it off it isnot storing the channelsI have inserted a disc but it isnot playingI have connected the TV tomy VCR or <strong>DVD</strong> Recorder viaSCART but it is not recordingI have connected my PS3 tothe TV via HDMI, but I amnot receiving any pictures orsound on my TelevisionI have connected myXbox 360 to the TV viaComponent Cables (Red,Green & Blue) but I am notreceiving any soundI have inserted a USBMemory Key, but the TVdoes not recognise itUsing a USB portable harddriveI cannot change the channel,access the menu or use thered buttonWhen using the USB torecord the picture ‘breaksup’ or experience loss ofsound.I have changed the passwordon the television and nowforgotten it1) Check you are in an area that can receive Freeview. Visit www.freeview.co.uk or call 08701 111 270.2) Check you are using an aerial that is able to receive a good digitalsignal. In most cases, you will need an outdoor digital hi-gain/widebandaerial. In areas that have excellent Freeview coverage, you may be ableto use a loft type aerial but it is highly likely that you will also need toconnect a booster between the back of the TV and the TV aerial wallsocket. Unfortunately, to receive a good enough digital signal, it is notpossible to use a portable/indoor type aerial. This may change once theanalogue signal is switched off in 2012 and the Digital signal strength isincreased.Complete a first time installation, please refer to the set-up menu sectionof the manual of how to do this1) Ensure you have inserted put the disc in facing the correct way forward2) Ensure the disc is clean and is not scratched3) Some copied discs will not play.4) Check the <strong>DVD</strong> is a region 2 disc – to change the region of the <strong>DVD</strong>player, refer to section ‘Changing Regions’.In addition to connecting via SCART, you should connect the aerial cablefrom the wall socket to your VCR/<strong>DVD</strong> Recorder and another aerial cablefrom the VCR/<strong>DVD</strong> Recorder to the TV1) Ensure the TVs source is on HDMI2) Check your settings on your PS3 are as per the PS3 instruction manualComponent cables only provide HD Pictures. For the sound you will needto connect the Red & White audio cables on the Xbox to the Red & Whitephono inputs on the rear of the TV. Please refer to the ‘Connections’pages.Ensure the USB Memory Key is formatted to type FAT<strong>32</strong>.If you wish to use a portable hard drive larger than <strong>32</strong>GB, please notethat it must be formatted to the FAT<strong>32</strong> file system in order to operate onthis TV. Windows XP/Vista computers are only capable of formatting upto <strong>32</strong>GB, therefore, you will need a software programme/utility to formatlarger hard drives. Please refer to the web site for more information.During Time Shift you cannot change the channel, access the menu or usethe red buttonCheck the USB Memory Stick meet the minimum requirements of ReadSpeed - 20 MB/s (Mega Byte Per Second), Write Speed - 6 MB/s (Mega BytePer Second)There is a master password of 4711, to gain access to the TV menu andreset the normal passwordIMPORTANT NOTE. Occasionally we may release new software/firmwareupgrades/enhancements for this television. Please check the ‘firmwareupgrade’ section of the website regularly.<strong>29</strong><strong>Eternity</strong> - <strong>Manual</strong> - <strong>32</strong>-<strong>29</strong> <strong>DVD</strong> .<strong>indd</strong> Sec1:<strong>29</strong>5/14/2010 10:26:39 AM
General InformationTECHNICAL SPECIFICATIONModelX<strong>32</strong>/<strong>29</strong>E-GB-TCDUP4-UKScreen size (diagonal)<strong>32</strong>"/ 81cmResolution 1366 x 768Contrast Ratio 4000:1Brightness cd/m2 450PC RGBYesRF75 ohm Antenna / PAL-SECAMVideo Inputs 2 x SCART, 1 x Video, 1 x S-Video, 1 x Component (YPbPr - 1080i)Sound Inputs1 x 3.5mm jack for PC audio input, 1 x pair RCA Audio input shared for Video& S-Video, 1 x pair RCA Audio input for YPbPr (component)Sound Outputs1 x Coax Audio outputHDMI 2 (up to 1080i)Watts (RMS) 2 x 8Voltage110-240V 50/60Hz 160W less than 1WDimensions includingstand (mm)795W x 582H x 235DNet weight (Kgs) 14.530Helpline No UK. 0871 2000 463 ROI. 01443 3940Web Support: www.skymediauk.co.uk<strong>Eternity</strong> - <strong>Manual</strong> - <strong>32</strong>-<strong>29</strong> <strong>DVD</strong> .<strong>indd</strong> Sec1:305/14/2010 10:26:39 AM
General InformationINDEXAspect Ratio .................................................................... 20Auto Configuration of screen (PC) ................................ 24Auto Volume Level ........................................................ 17Auto Search .................................................................... 18Balance ........................................................................... 17Bass ................................................................................. 17Blue Screen .................................................................... 20Brightness ...................................................................... 16Changing <strong>DVD</strong> Regions ................................................. 21Channel Manager ........................................................... 18Clock ................................................................................ 19Clock (PC) ........................................................................ 24Colour ............................................................................ 16Colour Temperature ...................................................... 16Common Interface ........................................................ 19Connections .................................................................... 14-15Contrast .......................................................................... 16Detaching the base/stand .............................................. 9Digital Output ............................................................... 17Digital Switchover .......................................................... 31-<strong>32</strong>Dual Mono (<strong>DVD</strong>) ........................................................... 21Dynamic Range (<strong>DVD</strong>) .................................................... 21Favourites Manager ....................................................... 18Firmware Update ........................................................... 20First Time Installation .................................................... 20Frequently Asked Questions .......................................... <strong>29</strong>Getting Started ............................................................... 11Hearing Impaired ........................................................... 19Horizontal Position (PC) ................................................. 24Language ....................................................................... 19<strong>Manual</strong> Search ................................................................ 18Noise Reduction ............................................................ 16On Screen Display Timer ............................................... 20One Button Record ........................................................ 25Pause Live TV / Radio (Time Shift) ................................. 25Phase (PC) ....................................................................... 24Picture Mode ................................................................. 16Remote control .............................................................. 13Reset to default .............................................................. 20Returning to Default (<strong>DVD</strong>) .......................................... 21Sharpness ....................................................................... 16Sleep Timer .................................................................... 19Sound Mode .................................................................. 17Source Menu ................................................................... 12System Lock ................................................................... 19Technical Specifications ................................................. 30Tone (<strong>DVD</strong>) .................................................................... 21Treble ............................................................................. 17TV buttons ..................................................................... 12TV Guide ........................................................................ 26TV System (<strong>DVD</strong>) ............................................................ 21TV Type (<strong>DVD</strong>) ................................................................ 21USB Mode / Media Player .............................................. 27USB Record ..................................................................... 25Using with Sky Digital / Virgin Media .......................... 28Using the television as a computer monitor ................ 25Vertical Position (PC) .................................................. 24Wall mounting ............................................................... 9What is included in the box .......................................... 8DIGITAL SWITCHOVERTelevision in the UK is going digital, bringing us all more choice and new services. Starting late 2007 andending in 2012, television services in the UK will go completely digital, TV region by TV region.How the switchover affects your TV equipment.Your new TV has a digital tuner built in, which means it is ready to receive the Freeview signal by simplyconnecting it into your aerial socket (you can check if you can get digital TV through your aerial now orwhether you will have to wait until the switchover at www.digitaluk.co.uk)When the TV switchover happens in your area, there are at least two occasions when you will need tore-tune your TV in order to continue receiving your existing TV channels and also to pick up new ones.Digital UK, the body leading the digital switchover, will advise you when you need to retune during theswitchover.How to retune.Retuning your TV is a very quick and simple process. We recommend that you retune every few months toensure you are receiving the very latest TV and radio channels that are broadcast.1) On the remote control press [MENU] followed by 8 - 8 - 8 - 8 (so the number 8 button four times)2) The First Time Installation menu will appear. Press [OK] and tuning will take place.For help and support regarding the digital switchover, please contact Digital UK:Telephone: 08456 50 50 50 (calls charged at local call rate, approx 3p per minute daytime or 1p per minuteevenings from a BT landline)Digital UK website: www.digitaluk.co.ukHelpline No UK. 0871 2000 463 ROI. 01443 3940Web Support: www.skymediauk.co.uk 31<strong>Eternity</strong> - <strong>Manual</strong> - <strong>32</strong>-<strong>29</strong> <strong>DVD</strong> .<strong>indd</strong> Sec1:315/14/2010 10:26:39 AM
X<strong>32</strong>/MAN/0024<strong>Eternity</strong> - <strong>Manual</strong> - <strong>32</strong>-<strong>29</strong> <strong>DVD</strong> .<strong>indd</strong> Sec1:<strong>32</strong>5/14/2010 10:26:39 AM