S15-4(UK)manual 01 - UMC - Slovakia
S15-4(UK)manual 01 - UMC - Slovakia
S15-4(UK)manual 01 - UMC - Slovakia
- No tags were found...

You also want an ePaper? Increase the reach of your titles
YUMPU automatically turns print PDFs into web optimized ePapers that Google loves.
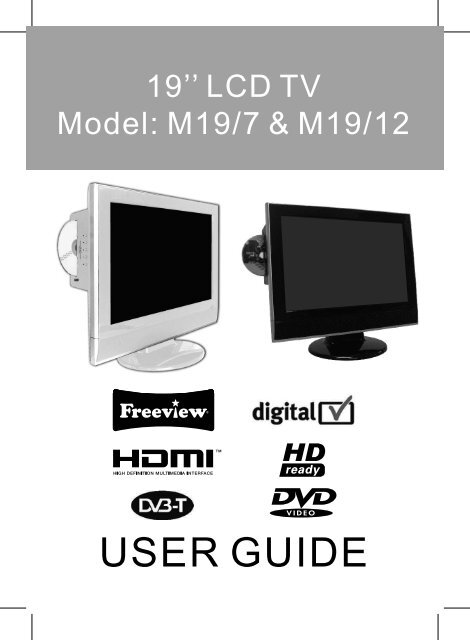
19’’ LCD TV<br />
Model: M19/7 & M19/12<br />
USER GUIDE
WARNINGS<br />
Thank you for purchasing this television. For your safety, please take time to read<br />
these instructions carefully in order to familiarise yourself with the operation<br />
of the appliance and the important safety information. We strongly recommend<br />
that this product is installed by a competent person. If in doubt, refer to the retailer<br />
or the manufacturer helpline.<br />
Caution<br />
This television contains no user serviceable parts. Please refer to the manufacturer<br />
or authorised repair agent in the event of malfunction. Do not remove the back cover<br />
from the television.<br />
Warning<br />
To reduce the risk of fire, electric shock or damage to the television, do not expose<br />
it to dust, rain or moisture, or place any objects filled with liquids on or near the television.<br />
Do not place the television in a confined space, ensure that nothing can obstruct<br />
the ventilation openings at the rear of the television.<br />
Do not place naked flames on or near the television.<br />
Dispose of this television and any components including batteries in an environmentally<br />
friendly manner. If in doubt, please contact your local authority for details of recycling.<br />
Your LCD TV should be cleaned using a dry or slightly damp cloth. You should not use<br />
an alcohol based cleaner<br />
Safety<br />
For your safety, this appliance is fitted with a fused moulded 3 pin mains plug. Should<br />
the fuse need to be replaced, ensure that any replacement is of the same amperage<br />
and approved with the BSI mark. ( )<br />
Never try and replace the mains plug unless you have adequate qualifications and are<br />
legally authorised to do so. In the event that a replacement Mains cable is required,<br />
contact the manufacturer for a suitable replacement.<br />
Never use the television if it is damaged in any way.<br />
Always place the television on a flat level surface avoiding anywhere which may<br />
be subject to strong vibration. Ensure the television is not placed on top of the power<br />
cable as the weight of the television may damage the cable and cause a safety hazard.<br />
Never place mobile phones, speakers or any other device which may cause magnetic<br />
or radio interference with the television. If interference is apparent, move the device<br />
causing the interference away from the television.<br />
Packaging<br />
Please save the packaging for the television as you will need this in the event<br />
of warranty/service repair or support. We are unable to carry out warranty/service<br />
if you are unable to package it correctly. The safest way to package your item in the<br />
event of warranty/service repair is in its original box/packaging
WARNINGS<br />
Screen Burn<br />
A characteristic of Plasma and LCD TV Panels is that displaying the same image for<br />
a long time may cause a permanent after-image to remain on the screen. This is called<br />
screen burn. Most pictures shown on your TV will be constantly moving and fill the screen.<br />
Examples of images that you need to watch out for are as follows<br />
(this is not an all-inclusive list):<br />
TV Channel Logos: e.g. Shopping channel logos and pricing displays-especially<br />
if they are bright and stationary. Moving or low-contrast graphics are less likely<br />
to cause ageing of the screen.<br />
Picture-in-Picture and Multi Picture-in-Picture: Do not view for long periods of time<br />
using the Picture-in-Picture or Multi Picture-in-Picture functions.<br />
Time Displays<br />
Teletext: Do not view a stationary page for long periods of time.<br />
TV/DVD Menus: e.g. Listings of DVD disk content.<br />
Pause Mode: Do not leave the TV in pause mode for long periods of time,<br />
e.g. When watching DVDs or videos.<br />
Note: To prevent screen burn if viewing any of the above for long periods of time,<br />
reduce contrast and brightness when viewing. Once burn-in occurs it will never<br />
disappear completely.<br />
How do I dispose of this product<br />
<strong>UK</strong>: Waste electrical products should not be disposed of with<br />
household waste. Separate disposal facilities exist. For your nearest<br />
facilities, please see www.recycle-more.co.uk or instore for details.<br />
ROI: Produced after 13th August 2005. Waste electrical products<br />
should not be disposed of with household waste. Please recycle<br />
where facilities exist. Check with your Local Authority or retailer<br />
for recycling advice.
CONTENTS<br />
Getting Started<br />
Page<br />
What is included in the box with the TV ............................................................... 4<br />
How to set up the TV for the first time<br />
Tuning into Digital / Freeview TV Stations ........................................................... 5<br />
Tuning into Analogue TV Stations (i.e 1 - 5) ........................................................ 6<br />
TV & remote control buttons<br />
Remote control buttons and their functions ......................................................... 7<br />
TV buttons and their functions ............................................................................ 8<br />
Input connections on TV<br />
Connecting power supply ................................................................................... 8<br />
Connecting via HDMI ......................................................................................... 8<br />
Connecting via VGA (For PC mode) ................................................................... 8<br />
Connecting via SCART ...................................................................................... 8<br />
Connecting via Audio ........................................................................................ 8<br />
Connecting TV In .............................................................................................. 8<br />
Connecting Coax .............................................................................................. 8<br />
Connecting YPbPr ............................................................................................ 8<br />
Changing Source .............................................................................................. 9<br />
Digital / Freeview TV operation<br />
Adjusting the picture settings ............................................................................. 10<br />
Adjusting the sound settings .............................................................................. 11<br />
Adjusting General Settings ................................................................................. 12 - 13<br />
Searching for new digital channels / services ...................................................... 13<br />
First time install / Reinstalling digital TV / radio stations ...................................... 14<br />
Using / changing system Pin code ...................................................................... 14<br />
Using Electronic Programme Guide (EPG) .......................................................... 15<br />
Analogue TV Operation<br />
Tuning Analogue TV .......................................................................................... 16<br />
Naming channels .............................................................................................. 16<br />
Editing channels / channel positions .................................................................. 17<br />
Changing country settings ................................................................................. 17<br />
Using teletext ................................................................................................... 18<br />
Using with a PC<br />
Installing to use on a Windows XP PC ................................................................ 19<br />
PC Mode Menu Operation (VGA)<br />
Adjusting Contrast ............................................................................................ 20<br />
Adjusting Brightness ......................................................................................... 20<br />
Adjusting Colour Settings .................................................................................. 20<br />
Configuration PC use ........................................................................................ 21<br />
DVD Mode Menu Operation<br />
System Settings page ........................................................................................ 22<br />
Set-up Audio .................................................................................................... 23<br />
Set-up Digital ................................................................................................... 23<br />
Wall Mounting<br />
Removing the stand .......................................................................................... 24<br />
Attaching a wall bracket .................................................................................... 24<br />
Using with Sky Digital (B Sky B)<br />
Connecting via SCART ..................................................................................... 25<br />
Connecting via RF ............................................................................................ 25<br />
Universal / Sky Remote Control<br />
Operating TV with a Universal / Sky Remote Control .......................................... 25<br />
Frequently Asked Questions .......................................................................................... 26<br />
Technical Specification .................................................................................................. 27<br />
Warranty - Helpline Information ..................................................................................... 27<br />
Index .............................................................................................................................. 28<br />
If you experience any problems with this Television,<br />
Please contact the helpline.<br />
Customer Support/Technical Helpline<br />
Sky Media <strong>UK</strong> LTD<br />
Telephone: 0870 242 6292<br />
Email: service.uk@umc-slovakia.sk
GETTING STARTED - INCLUDED ACCESSORIES<br />
Accessories<br />
Included with this TV are the following accessories:<br />
1x - User Guide Book<br />
1x - Remote control<br />
1x - RF lead<br />
2x - AAA batteries<br />
1x - AC mains lead<br />
1x - Power Adapter<br />
Please save your packaging as you will need this in the event<br />
of warranty/service repair or support. We are unable to carry out<br />
warranty/service if you are unable to package it correctly. The safest way<br />
to package your item in the event of warranty/service repair<br />
is in it’s original box/packaging.<br />
4
GETTING STARTED - INITIAL SET UP<br />
IMPORTANT - AFTER TUNING DO NOT PRESS ANY BUTTONS FOR 20 SECONDS SO THE CHANNEL<br />
INFORMATION CAN BE STORED.<br />
TUNING IN DIGITAL TV<br />
IMPORTANT — Please ensure the TV has<br />
reached room temperature before<br />
connecting the power for the first time<br />
1) Connect the mains lead to your electrical outlet<br />
and connect the power adaptor to the television.<br />
5) Ensure the Tv is in DVB mode. Press [INPUT]<br />
6) Press [V] or [\/] to highlight ‘DVB’<br />
7) Press [ENTER]<br />
2) Connect the RF Cable supplied to the<br />
'RF IN' on the rear of the TV and connect<br />
the other end of the cable to your TV Aerial<br />
outlet<br />
3) Install batteries in the remote control and press<br />
the [STANDBY] button to turn on the TV.<br />
The ‘Initial Set up-DVBT/Freeview TV’ menu<br />
should now appear. If it does not, please go<br />
to step 5.<br />
4a) Press [ENTER] on the remote control whilst<br />
‘confirm’ is highlighted on screen.<br />
8) Press [DVB-MENU]<br />
9) Press [\/] twice to select Channel Search<br />
10) Press [ENTER]<br />
11) Press [ENTER] to start search.<br />
When it has finished it will return to digital TV<br />
Tuning will now take place. When it has finished the<br />
channels will save and you will be taken to first<br />
channel found.<br />
Important - Due to signal strength variations across the <strong>UK</strong> for Digital TV, please note that not all of the<br />
channels/services may be available in your region.<br />
Over the coming months as coverage increases, more services and channels may become available.<br />
Every few months, follow point 4b to re-scan for new channels/services,<br />
In the event of poor reception it may be necessary to install a signal ‘booster’ to enhance reception.<br />
In remote regions youmay need to upgrade your aerial to a High Gain Digital Version.<br />
5
GETTING STARTED - INITIAL SET UP<br />
TUNING IN ANALOGUE TV<br />
IMPORTANT — If you dont have Digital TV<br />
(Freeview) in your area or wish to tune in via<br />
the analogue signal please follow as below.<br />
1) Switch the TV to ‘TV’ mode. Press [INPUT].<br />
4) “Yes” should be highlighted.<br />
Press [ENTER]<br />
The TV channel will now tune in. After tuning is<br />
complete some channel may not be in the correct<br />
order. The below screen will appear<br />
BBC1<br />
BBC2<br />
ITV<br />
CH4<br />
CH5<br />
I<br />
I<br />
I<br />
I<br />
I<br />
I<br />
I<br />
I<br />
I<br />
I<br />
759.25<br />
807.25<br />
733.25<br />
727.25<br />
695.25<br />
450.00<br />
450.00<br />
450.00<br />
450.00<br />
450.00<br />
OFF<br />
OFF<br />
OFF<br />
OFF<br />
OFF<br />
ON<br />
ON<br />
ON<br />
ON<br />
ON<br />
2) Press [V] or [/\] to highlight ‘TV’<br />
3) Press [ENTER]<br />
The following sholud now appear if it does not<br />
please refer to the Manual<br />
Warning - Ensure you have connected Your<br />
TV aerial to the input labelled "RF IN" on<br />
rear of TV.<br />
Do you want to run Auto search<br />
YES NO<br />
To swap a channels<br />
5) Press [RED] button to select the channel you<br />
wish to move.<br />
6) Using the [V] and [/\] buttons move to the location<br />
which you would like this channel<br />
7) Press [ENTER] to confirm location. The channel is<br />
now moved.<br />
Repeat this process until all the channels are in the<br />
order which you would like.<br />
Ensure "Yes" is highlighted and press<br />
ENTER on Remote control<br />
6
REMOTE CONTROL BUTTONS<br />
DVB mode: Exit the DVB menu.<br />
DVD mode: Stop the DVD playing.<br />
Press to slow / step the speed of DVD Playing.<br />
DVB mode: press to select NICAM.<br />
DVD mode: press to select DVD audio channels.<br />
If the channel number is larger than 9, press<br />
this button to select two digit numbers.<br />
Teletext mode: press to enter the teletext mode.<br />
DVD mode: press to play a DVD program in fast<br />
rewind mode.<br />
DVB mode: press to display FAV menu.<br />
DVD mode: press hold on or off for current page<br />
display.<br />
DVB mode: decrease fav channel.<br />
DVD mode: press to goto in DVD.<br />
DVB mode: increase fav channel.<br />
DVD mode: select different angle of DVD<br />
Teletext mode: request the index page.<br />
DVD mode: press to reply the current program from<br />
the previous chapter.<br />
TV/DVD mode: change the format of the picture.<br />
DVD mode: press to advance forward to the next<br />
chapter.<br />
Teletext mode: To reveal or hidden the hidden words.<br />
DVD mode: select the zoom of DVD playback.<br />
Teletext mode: Sub coded page access. To switch t<br />
he dialogue at the bottom of the screen<br />
DVD mode: Press to cycle through the different<br />
subtitle languages available on the DVD disc.<br />
menu.<br />
Press to cycle through the input source<br />
ie. - TV/PC/DVD/DVB-T<br />
Press repeatedly to cycle through the available<br />
video picture preset - Personal, Standart, Mild, Fresh<br />
Press to cycle through the different sound<br />
modes – Theatre, Voice, Music, Personal<br />
7
INPUTS & CONNECTIONS<br />
TV BUTTONS<br />
1<br />
2<br />
3<br />
4<br />
5<br />
6<br />
7<br />
8<br />
9<br />
INPUT<br />
MENU<br />
VOL-<br />
VOL+<br />
CH-<br />
CH+<br />
10<br />
EJECT<br />
11<br />
DVD - Play/Pause<br />
PLAY/PAUSE<br />
12<br />
13<br />
STOP<br />
BACKWARD<br />
7<br />
8 9<br />
14<br />
FORWARD<br />
REAR CONNECTIONS<br />
Component input<br />
DC In 12v HDMI In VGA In SCART VIDEO In COMPONENT PC In YPbPr In RF In Coax Out<br />
(Audio) (Audio)<br />
DC In 12v HDMI In VGA In SCART VIDEO In COMPONENT PC In YPbPr In RF In Coax Out<br />
(Audio) (Audio)<br />
Use for component<br />
connection<br />
(HD or YPbPr)<br />
DVD Digital<br />
Audio Output<br />
8<br />
Use to connect to TV<br />
Aerial to receive<br />
analogue TV or<br />
Digital/Freeview<br />
TV stations
INPUTS & CONNECTIONS<br />
Selecting Input Source<br />
To switch between the different<br />
connections is very easy.<br />
1) Press [INPUT] - The following will<br />
appear<br />
2) Press [\/] or [/\] to select the input you<br />
require.<br />
3) Press [ENTER]<br />
Connecting HD Ready Devices<br />
There are two options for High Definition (HD).<br />
1) By connecting via HDMI cable (not<br />
included) – this provides both<br />
HD picture and sound. The source should<br />
be set to HDMI<br />
2) For picture - connect via component<br />
(YPbPr) cable (not included).<br />
For sound - connect via phone (Audio L/R)<br />
to 3.5mm jack cable (not<br />
included).<br />
The source should be set to YPBPR.<br />
You will also need to connect the sound<br />
input cable to the YPbPr Audio Input.<br />
9
DVB-T MODE MENU OPERATION<br />
PICTURE SETTINGS<br />
Lets you adjust the brightness, contrast<br />
colour and sharpness to enhance<br />
the viewing experience.<br />
Adjusting Brightness<br />
Increase or decrease the brightness<br />
of the picture<br />
Adjusting Colour<br />
Increase or decrease the Red, Green & Blue which<br />
make up the picture<br />
1) Press [LCD-MENU] to enter menu<br />
2) Press [\/] 3 times to select Colour<br />
3) Then press [>] or [] or [] or [] or [
DVB-T MODE MENU OPERATION<br />
SOUND SETTINGS<br />
Lets you adjust the balance and audio<br />
presets to enhance the viewing<br />
experience.<br />
Adjusting Balance<br />
To switch the sound between the left and right<br />
speakers<br />
1) Press [LCD-MENU] to enter menu<br />
2) Press [>] to go to Sound menu<br />
3) Press [\/] twice to select Balance<br />
4) Then press [>] or [] to go to Sound menu<br />
3) Press [\/] 3 times to select Audio Preset<br />
4) Then press [>] or [
DVB-T MODE MENU OPERATION<br />
GENERAL SETTINGS<br />
Adjusting Blue Screen<br />
Changes the background when there is no<br />
input between clear and a blue<br />
background<br />
1) Press [LCD-MENU] to enter menu<br />
2) Press [>] twice to go to General menu<br />
3) Press [\/] to select Blue Screen<br />
4) Then press [>] or [] twice to go to General menu<br />
3) Press [\/] 3 times to select Input Source<br />
4) Then press [>] or [] twice to go to General menu<br />
3) Press [\/] twice to select Noise Reduce<br />
4) Then press [>] or [] twice to go to General menu<br />
3) Press [\/] 4 times to select Zoom<br />
4) Then press [>] or [] twice to go to General menu<br />
3) Press [\/] 5 times to select Reset<br />
4) Then press [>] to reset<br />
12
DVB CHANNEL SETTINGS MENU<br />
Within Digital (DVB) mode there is also<br />
a channel settings menu. This is provided so<br />
you can search for new channels, change<br />
the picture format, create favourite lists and apply<br />
a pin code to limit access.<br />
The menu is very user friendly.<br />
You can create favourite lists for up to 5 users<br />
Channel List<br />
1) Press [DVB-MENU]<br />
2) Press [ENTER]<br />
4) Press [\/] or [/\] to select the station you wish to add.<br />
It will be highlighted in light blue.<br />
5) Press [ENTER] to add<br />
Repeat this process until you have added all the<br />
channels you want<br />
You can store up to 100 stations in the favourite list<br />
6) Press [RED] to move the next Favourite list.<br />
7) Press [DVB-MENU] twice to exit<br />
To use the favourite list. Press [FAV] and select the<br />
list you require to use.<br />
Search for New Channels<br />
Every so often new channels are launched on digital.<br />
You can search for these as follows.<br />
1) Press [DVB-MENU]<br />
2) Press [\/] twice to select Channel Search<br />
3) Press [ENTER]<br />
This tells you various information about<br />
each channel<br />
To delete stations<br />
Press [\/] or [/\] to select the station<br />
Press [YELLOW] to delete the stations.<br />
To lock stations<br />
You may wish to lock channels so they<br />
can’t be viewed - i.e. Adult content.<br />
Press [\/] or [/\] to select the station<br />
Press [BLUE] to lock the selected<br />
channel<br />
Enter the pin code and then press [ENTER]<br />
See page 14 for ‘Pin Code’ function<br />
4) Press [ENTER] to start search<br />
When it has finished searching for new channels, any<br />
found will be called and the screen will return to<br />
Digital TV mode.<br />
3) Press [DVB-MENU] twice to exit<br />
Create/Edit Favourite List<br />
1) Press [DVB-MENU]<br />
2) Press [\/] to select favourite list<br />
3) Press [ENTER]<br />
13
DVB CHANNEL SETTINGS<br />
Picture Size / Format<br />
Your television has been factory set to show the<br />
correct picture format depending on the signal<br />
being received by the broadcast TV station.<br />
If you wish to change the picture format.<br />
1) Press [DVB-MENU]<br />
2) Press [\/] 5 times to select Picture Settings<br />
3) Press [ENTER] to select<br />
First Time Installation/Reinstall<br />
Press [\/] to highlight First Time<br />
Installation, Press [ENTER]. You will then<br />
be prompted on screen. Press [
ELECTRONIC PROGRAM GUIDE (EPG)<br />
Electronic Program Guide (EPG)<br />
The Electronic Program Guide is available<br />
in DVB mode. It is a 7 day TV guide and<br />
provides information about forthcoming<br />
programmes (where supported by the<br />
broadcasted channel).<br />
You can view the start and end time of all<br />
programs and on all channels for the<br />
next 7 days.<br />
It is very simple to operate.<br />
1) Press [EPG]. The following will appear<br />
3) Press [\/] or [/\] to move through<br />
the programs for the day highlighted<br />
4) Press [>] or [
TV MODE MENU OPERATION<br />
TUNING SETTINGS<br />
Tuning Program<br />
You may wish to do some additional tuning, in<br />
order to improve the picture quality, move<br />
channels around or connect via RF to<br />
a freeview box or Sky digital.<br />
1) Press [LCD-MENU] to enter menu<br />
2) Press [>] twice to go to Tuning Menu<br />
3) Press [\/] to select Tuning Program<br />
4) Press [>] to enter menu<br />
You are now in this menu. The following<br />
can now be changed:<br />
Fine Tune<br />
You may wish to improve the picture<br />
quality on certain channels.<br />
Press [\/] until Fine Tune is highlighted and<br />
Press [>] or [] or [] to change to ON<br />
Automatic Frequency Control (AFC)<br />
This lets the TV automatically fine tune to a frequency.<br />
As default it should be set to ON.<br />
Press [\/] until AFC is highlighted and<br />
Press [>] to change to ON<br />
Channel Name/Rename<br />
This is to change the name of the channel<br />
Press [\/] until Channel Name is highlighted and<br />
Press [>] to enter name.<br />
Press [\/] or [/\] to change the letters and [>] to move<br />
to next letter.<br />
Delete<br />
You may wish to delete a channel if it has<br />
not tuned in correctly or is repeated<br />
Press [\/] until Delete is highlighted and<br />
Press [>] to select. The Press [] to enter menu. Then Press [>] to scan<br />
downwards or Press [\/] to move to scan upwards<br />
and Press [>] to start.<br />
5) Press [LCD-MENU] 3 times to exit.<br />
16
TV MODE MENU OPERATION<br />
Program Edit / Changing Channel<br />
Position<br />
You can change the channel position to<br />
suit your requirements.<br />
1) Press [LCD-MENU] to enter menu<br />
2) Press [>] twice to go to Tuning menu<br />
3) Press [\/] twice to select Program Edit<br />
4) Press [>] to enter menu<br />
5) To swap a channels<br />
Press [RED]<br />
6) Move to the location where you would<br />
like to place the channel and press<br />
[ENTER].<br />
Repeat the process with all channels.<br />
Auto Search<br />
Scan for all channels based on the current<br />
settings<br />
1) Press [LCD-MENU] to enter menu<br />
2) Press [>] twice to go to Tuning menu<br />
3) Press [\/] 4 times to select Auto Search<br />
4) Then press [ENTER]<br />
5) Press [] twice to go to Tuning menu<br />
3) Press [\/] 3 times to select Country<br />
4) Then press [>] or [
TV MODE TELETEXT OPERATION<br />
Teletext is a service offered by some<br />
broadcasters.<br />
Teletext Operation<br />
1) Press [TEXT], after a few seconds<br />
teletext page 100 should appear.<br />
Here is an example of BBC1<br />
2) You can now navigate to the page<br />
you require in a number of ways:<br />
a) Press the page you require using<br />
the number buttons i.e. page 302,<br />
by pressing [3][0][2]<br />
b) Press the colour buttons, these will<br />
take you to page indicated on screen<br />
for each colour<br />
c) Press [CH+] or [CH-] these will<br />
take you to next page. i.e. if you<br />
are on page 150 and you press<br />
[CH-] the page will switch to 149<br />
3) To exit Teletext press [TEXT] twice<br />
to exit.<br />
Other buttons<br />
[SIZE] this increases or decreases the<br />
size of the text on screen<br />
[INDEX] some pages are more than one<br />
page long this button displays<br />
the number of pages<br />
[REVEAL] if there is an answer<br />
or something hidden this will display it<br />
[SUBPAGE] displays the sub page<br />
if it exists<br />
18
CONNECTING TO A PC - WINDOWS XP<br />
IMPORTANT— Before connecting to<br />
a PC you must ensure that the settings<br />
of the PCs output are correct for the new<br />
LCD Monitor.<br />
4) Left mouse click on Settings, this screen will<br />
appear. Check the Screen Resolution is set<br />
to 1024 by 768 pixels, if it is not change to this.<br />
You need to do the following with your<br />
old monitor connected<br />
1) Switch on your PC<br />
2) When finished booting up, right click<br />
your mouse anywhere on the screen,<br />
this screen will appear<br />
5) Left mouse click on Advance, this screen will appear,<br />
click on tab called ‘monitor’<br />
3) left click your mouse on Properties,<br />
this screen will appear<br />
For Visa operating system the process is<br />
very similar to the above. If you require<br />
addition support please contact the<br />
helpline.<br />
6) Left click on the drop down for Screen refresh rate<br />
and select 60 Hertz.<br />
7) Finally click Apply, then click Yes and the settings<br />
will be saved.<br />
8) Turn off your PC.<br />
9) Connect up your LCD TV to your PC and switch on.<br />
10) Switch on your PC, Windows will automatically<br />
Install the LCD TV.<br />
19
PC MODE MENU OPERATION (VGA)<br />
Within PC mode there is an additional<br />
menu. This can be operated in the<br />
following way.<br />
PC SETTINGS<br />
Adjusting Brightness<br />
Increase or decrease the brightness<br />
of the picture<br />
1) Press [LCD-MENU] to enter menu<br />
2) Press [\/] to select brightness<br />
3) Then press [>] or [] or [
PC MODE MENU OPERATION (VGA)<br />
PC SETTINGS<br />
Auto Configuration of Screen<br />
Lets you automatically configure the television<br />
to be used as a computer monitor<br />
1) Press [MENU] to enter menu<br />
2) Press [>] to select PC settings<br />
3) Press [\/] to select Auto Config<br />
Phase<br />
To adjust delay time of phase in order to reduce<br />
the noise of picture<br />
1) Press [MENU] to enter menu<br />
2) Press [>] to select PC settings<br />
3) Press [\/] 4 times to select Phase<br />
4) Then press [>] for the TV to automatically<br />
configure itself<br />
5) Press [MENU] twice to exit<br />
Horizontal Position<br />
Changes the horizontal position of the picture<br />
1) Press [MENU] to enter menu<br />
2) Press [>] to select PC settings<br />
3) Press [\/] twice to select H-Position<br />
4) Then press [>] or [] to select PC settings<br />
3) Press [\/] 5 times to select Clock<br />
4) Then press [>] or [] to select PC settings<br />
3) Press [\/] 3 times to select V-Position<br />
4) Then press [>] or [] or [
DVD MODE MENU OPERATION<br />
With DVD Mode there is an additional<br />
menu. This can be operated in the<br />
following way.<br />
SYSTEM SET UP<br />
Adjusting TV System<br />
Lets you adjust between NTSC, PAL,<br />
AUTO (PAL is default for the <strong>UK</strong>)<br />
1) Press [DVD-SETUP] to enter menu<br />
2) Press [>] to select TV System<br />
3) Press [>] to enter menu<br />
4) Press [\/] or [/\] to highlight NTSC, PAL<br />
or AUTO<br />
5) Press [ENTER] to confirm<br />
Returning Default<br />
This let you switch the DVD menus above<br />
back to Default settings<br />
1) Press [DVD-SETUP] to enter menu<br />
2) Press [>] to select TV System<br />
3) Press [\/] to select Default<br />
4) Press [>] to enter menu<br />
5) Press [>] to highlight Yes<br />
6) Press [ENTER] to confirm<br />
7) Press [DVD-SETUP] to exit<br />
6) Press [DVD-SETUP] to exit<br />
Adjust TV Type<br />
This lets you select the format of the<br />
picture that is being shown between<br />
16:9, 4:3 LetterBox and 4:3.<br />
1) Press [DVD-SETUP] to enter menu<br />
2) Press [>] to select TV System<br />
3) Press [\/] to select TV Type<br />
4) Press [>] to enter menu<br />
5) Press [\/] or [/\] to highlight 4:3PS,<br />
4:3LB or 16:9<br />
6) Press [ENTER] to confirm<br />
7) Press [DVD-SETUP] to exit<br />
22
DVD MODE MENU OPERATION<br />
AUDIO SET UP<br />
Adjusting Audio Out<br />
Lets you adjust between SPDIF/OFF,<br />
SPDIF/RAW, SPDIF/PCM<br />
This is to alter the output type. You should<br />
use SPDIF/RAW when you have an Audio<br />
receiver that can decode the signal and<br />
SPDIF/PCM if you do not have the ability<br />
to decode the signal.<br />
1) Press [DVD-SETUP] to enter menu<br />
2) Press [\/] to select Audio Set Up<br />
3) Press [>] to select Audio Out<br />
4) Press [>] to enter menu<br />
5) Press [\/] or [/\] to highlight SPDIF/OFF,<br />
SPDIF/RAW or SPDIF/PCM<br />
6) Press [ENTER] to confirm<br />
DIGITAL SET UP<br />
Adjusting Dynamic Range<br />
Lets you adjust the Dynamic range between<br />
Full, 6/8, 4/8, 2/8 and Off.<br />
1) Press [DVD-SETUP] to enter menu<br />
2) Press [\/] twice to select Digital Set Up<br />
3) Press [>] to select Dynamic Range<br />
4) Press [>] to enter menu<br />
5) Press [\/] or [/\] to increase or decrease<br />
the Dynamic range<br />
6) Press [ENTER] to confirm<br />
7) Press [DVD-SETUP] to exit<br />
7) Press [DVD-SETUP] to exit<br />
Adjusting Tone<br />
Lets you increase or decrease the Tone<br />
of the sound<br />
1) Press [DVD-SETUP] to enter menu<br />
2) Press [\/] to select Audio Set Up<br />
3) Press [>] to enter menu<br />
4) Press [\/] to select Tone<br />
5) Press [>] to enter menu<br />
6) Press [\/] or [/\] to increase or decrease<br />
the tone<br />
7) Press [ENTER] to confirm<br />
Adjusting the Dual Mono<br />
Lets you change the sound between Stereo,<br />
Mono Left, Mono Right and Mixed Mono.<br />
1) Press [DVD-SETUP] to enter menu<br />
2) Press [\/] twice to select Digital Set Up<br />
3) Press [>] to enter menu<br />
4) Press [\/] to select Dual Mono<br />
5) Press [>] to enter menu<br />
6) Press [\/] or [/\] to switch between Stereo,<br />
Mono L, Mono R and Mix Mono<br />
7) Press [ENTER] to confirm<br />
8) Press [DVD-SETUP] to exit<br />
8) Press [DVD-SETUP] to exit<br />
23
WALL MOUNTING<br />
IMPORTANT— BEFORE<br />
DRILLING ANY HOLES IN THE<br />
WALL ENSURE YOU ARE NOT<br />
DRILLING WHERE THERE<br />
COULD BE ANY ELECTRIC<br />
WIRES, WATER OR GAS PIPES<br />
THIS TV REQUIRES A VESA<br />
100 WALL MOUNT, OR EQUIVALENT<br />
Wall Mounting the TV.<br />
1) Remove the four screws highlighted<br />
below.<br />
2) The wall mount can now be easily attached<br />
to the mounting holes on the rear of the TV.<br />
These holes are indicated in the picture below<br />
100<br />
To remove the stand<br />
1) Remove the two screws highlighted<br />
below<br />
Important – Ensure the length<br />
of screws included with your<br />
wall mount that secure the<br />
Wall Mount to the TV do not exceed<br />
10 mm. Using longer screws could<br />
cause irreparable damage to the TV<br />
2) The stand will now come off<br />
24
USING WITH SKY DIGITAL<br />
You may wish to use your TV with<br />
Sky Digital.<br />
There are a number of connection options,<br />
the best being connecting via SCART<br />
cable.<br />
Connecting via SCART<br />
1) Connect the SCART cable from the Sky<br />
Digital Box to SCART of the TV<br />
2) Press [INPUT]<br />
3) Press [\/] or [/\] to select SCART<br />
4) Press [ENTER]<br />
The channel your Sky Digital box is<br />
displaying will now be shown on the TV.<br />
You may wish to share your Sky Digital<br />
signal around the home by using an RF<br />
connection. If this TV is to be connected<br />
in this way, please follow the below.<br />
Connecting via RF<br />
Ensure the Sky signal is switched on,<br />
before you start the below.<br />
1) Connect the RF cable from the RF<br />
output socket of the sky/cable box to<br />
the ‘RF IN’ of the TV.<br />
2) Press [LCD-MENU] to enter menu<br />
3) Press [>] twice to select Tuning Menu<br />
4) Press [\/] to select Tuning Program<br />
Manually tune until you locate the Sky<br />
channel. If it stops press [>]<br />
again and search will continue. (Often,<br />
the frequency required is 847.25 mhz,<br />
depending on which model of Sky Set top box)<br />
Once tuned in it will go back to TV<br />
USING WITH SKY DIGITAL REMOTE CONTROLS<br />
(BSKYB) OR UNIVERSAL REMOTE CONTROL<br />
You may wish to use your Sky Digital or universal<br />
remote control to operate the channels and sound<br />
functions of this TV. For this you require<br />
a ‘code’ that needs to be programmed into<br />
your Sky Digital or universal remote control.<br />
At the point of manufacture, BSkyB have<br />
not launched the code required for this model of TV.<br />
Sky are due to launch a new remote control which<br />
will include the necessary code to operate the basic<br />
functions of the TV during 2008 (called revision 9).<br />
The date was not released at the time of printing<br />
this <strong>manual</strong>, however it is estimated to be between<br />
July and December 2008.<br />
5) Press [ENTER] to enter menu<br />
6) Press [>] to select the channel you<br />
require your Sky on. Please select<br />
a channel not in use i.e. channel 6.<br />
7) Press [\/] 7 times to select Manual<br />
Search<br />
8) Press [>] to enter<br />
9) Press [/\] to select Up.<br />
10) Press [>] to start search.<br />
11) Once tuned in, Press [LCD-MENU]<br />
3 times to exit.<br />
25
FREQUENTLY ASKED QUESTIONS<br />
Frequently Asked Questions<br />
Question:<br />
I have tuned in Digital TV but<br />
I am not receiving any or all of the<br />
channels and/or the channels I receive<br />
are breaking up<br />
The sound quality is high pitched<br />
I have put a DVD disc into the DVD drive,<br />
but the TV is not taking it.<br />
I have inserted a disc but it is not playing<br />
The subtitles are switched on<br />
when I am watching a DVD<br />
I received my tv without a <strong>manual</strong> or<br />
I have lost my <strong>manual</strong><br />
I have connected the TV to my VCR via<br />
SCART but it is not recording<br />
Solution:<br />
1) Check you are in an area that can<br />
receive Freeview. Visit<br />
www.freeview.co.uk or call<br />
087<strong>01</strong> 111 270.<br />
2) Check you have a digital aerial.<br />
Many indoor aerials will say they are<br />
digital ready, but you will not get<br />
a good signal<br />
3) Consider purchasing a signal booster,<br />
it is much cheaper than a digital aerial<br />
and cures 70% of poor signal problems.<br />
4) Failing the above for now use the<br />
analogue TV, until the signal becomes<br />
stronger in your area.<br />
Go into the sound settings menu as<br />
shown earlier in the <strong>manual</strong> and increase<br />
the level of the bass and the decrease<br />
the treble<br />
Check the TV is set to DVD mode, as the<br />
DVD drive only works in this mode.<br />
1) Ensure you have put the disc in facing<br />
the correct way forward<br />
2) Ensure the disc is clean and is not<br />
scratched<br />
Each time you press [Subtitles] button<br />
you switch between the different languages.<br />
Off is one of the options. If you still have<br />
subtitle on, access through the DVD disc<br />
menu and switch off<br />
Manuals are available to download from our<br />
website, please visit www.skymediauk.co.uk<br />
for more information<br />
In addition to connecting via SCART, you<br />
should connect the aerial cable from the wall<br />
socket to VCR and another aerial cable from<br />
the VCR to the TV<br />
If you are still experiencing problems please contact the Helpline<br />
26
TECHNICAL SPECIFICATION<br />
1 AV/Composite RCA ,1 YPbPr/YCbCr<br />
1 SCART<br />
1 3.5mm phone jack for PC/AV audio in<br />
1 3.5mm phone jack for YPbPr/YCbCr audio in<br />
Warranty / Service support<br />
This television has a 12 month return to manufacturer warranty.<br />
Your warranty starts from Date of Purchase.<br />
In the event that your TV requires to be repaired, we may replace the item at our discretion if we believe the item is<br />
uneconomical to be repaired or if we feel a permanent repair is not possible.<br />
In the event of fault, in the first instance please refer to the frequently asked questions.<br />
If you are still unable to remedy the fault, unplug the TV from the mains power lead for 3 minutes, then reconnect.<br />
If fault is found, please make a note of the following information as you will need this when you contact the helpline.<br />
Model Number (Can be found on the rear of the TV)<br />
Serial Number (Can be found on the rear of the TV)<br />
Where purchased from (i.e retailer name)<br />
Date of purchase (Please keep a copy of your purchase reciept safe - you will need this)<br />
IMPORTANT – PLEASE SAVE ALL OF YOUR PACKAGING MATERIALS AS IN THE EVENT<br />
OF REPAIR / SERVICE, YOU WILL NEED TO PACKAGE THE ITEM ADEQUATELY IN ORDER<br />
THAT IT CAN BE COLLECTED / REPAIRED OR REPLACED AND RETURNED.<br />
Sky Media <strong>UK</strong><br />
Telephone 0870 242 6292.<br />
Email service.uk@umc-slovakia.sk<br />
You can find contact details, latest support information on any of our web sites.<br />
www.skymediauk.co.uk or www.umc-slovakia.sk<br />
27
INDEX<br />
Audio out - DVD mode 22<br />
Audio Presets 11<br />
Auto Search - TV mode 17<br />
Balance 11<br />
Block channels - DVB mode 13<br />
Blue Screen 12<br />
Brightness 10, 20<br />
Channel naming/re-name - TV mode 15<br />
Channel Order - DVB mode 13<br />
Channel Order - TV mode 17<br />
Colour 10, 20<br />
Connectivity - Rear of TV 8<br />
Contrast 10, 20<br />
Country Settings - TV mode 17<br />
Delete channels - DVB mode 14<br />
Delete channels - TV mode 14<br />
Dynamic Range - DVD mode 22<br />
Electronic Program Guide (EPG) 15<br />
FAQ 25<br />
Favourite list 13<br />
Fine Tuning - TV mode 15<br />
First Time Install - DVB mode 14<br />
HD Devices 9<br />
Horizontal Position - PC Mode 21<br />
Manual search - TV mode 15<br />
Noise Reduction 12<br />
PC Settings for using this TV 19<br />
Picture Settings - DVD mode 20<br />
Pin Code 14<br />
Remote buttons 7<br />
Reset Settings 12<br />
Reset Settings - DVD mode 20<br />
Search for new channels - DVB mode 13<br />
Sharpness 10<br />
Side TV Buttons 8<br />
Skip channel - TV mode 15<br />
Sky Digital Use 24<br />
Sound Settings - DVD mode 22<br />
Source Selection 9, 12<br />
Stand removal 23<br />
System Adjustment - TV mode 15<br />
System/Software Info 14<br />
Technical Specification 26<br />
Teletext 18<br />
Tone - DVD mode 22<br />
Tuning in Analogue TV Stations 6<br />
Tuning in Digital / Freeview TV Stations 5<br />
TV System - DVD mode 20<br />
Universal Remote controls 24<br />
Vertical Position - PC Mode 21<br />
Wall mounting 23<br />
Warranty / Service support 27<br />
What is in the box 4<br />
Zoom 12<br />
28
M19/MAN/0003