
You also want an ePaper? Increase the reach of your titles
YUMPU automatically turns print PDFs into web optimized ePapers that Google loves.
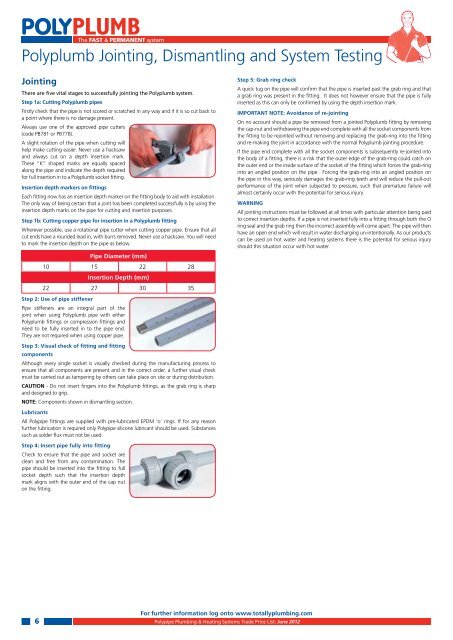
<strong>The</strong> FAST & PERMANENT systemPolyplumb Jointing, Dismantling and System TestingJointing<strong>The</strong>re are five vital stages to successfully jointing the Polyplumb system.Step 1a: Cutting Polyplumb pipesFirstly check that the pipe is not scored or scratched in any way and if it is so cut back toa point where there is no damage present.Always use one of the approved pipe cutters(code PB781 or PB778).A slight rotation of the pipe when cutting willhelp make cutting easier. Never use a hacksawand always cut on a depth insertion mark.<strong>The</strong>se “K” shaped marks are equally spacedalong the pipe and indicate the depth requiredfor full insertion in to a Polyplumb socket fitting.Insertion depth markers on fittingsEach fitting now has an insertion depth marker on the fitting body to aid with installation.insertion depth marks on the pipe for cutting and insertion purposes.Step 1b: Cutting copper pipe for insertion in a Polyplumb fittingWherever possible, use a rotational pipe cutter when cutting copper pipe. Ensure that allcut ends have a rounded lead in, with burrs removed. Never use a hacksaw. You will needto mark the insertion depth on the pipe as below.Pipe Diameter (mm)10 15 22 28Insertion Depth (mm)22 27 30 35Step 2: Use of pipe stiffenerPipe stiffeners are an integral part of the Polyplumb fittings or compression fittings andneed to be fully inserted in to the pipe end.<strong>The</strong>y are not required when using copper pipe.Step 3: Visual check of fitting and fittingcomponentsAlthough every single socket is visually checked during the manufacturing process toensure that all components are present and in the correct order, a further visual checkmust be carried out as tampering by others can take place on site or during distribution.CAUTION - Do not insert fingers into the Polyplumb fittings, as the grab ring is sharpand designed to grip.NOTE: Components shown in dismantling section.LubricantsAll <strong>Polypipe</strong> fittings are supplied with pre-lubricated EPDM ‘o’ rings. If for any reasonfurther lubrication is required only <strong>Polypipe</strong> silicone lubricant should be used. Substancessuch as solder flux must not be used.Step 4: Insert pipe fully into fittingCheck to ensure that the pipe and socket areclean and free from any contamination. <strong>The</strong>pipe should be inserted into the fitting to fullsocket depth such that the insertion depthmark aligns with the outer end of the cap nuton the fitting.Step 5: Grab ring checkA quick tug on the pipe will confirm that the pipe is inserted past the grab ring and thata grab ring was present in the fitting. It does not however ensure that the pipe is fullyinserted as this can only be confirmed by using the depth insertion mark.IMPORTANT NOTE: Avoidance of re-jointingthe cap-nut and withdrawing the pipe end complete with all the socket components fromthe body of a fitting, there is a risk that the outer edge of the grab-ring could catch onthe outer end or the inside surface of the socket of the fitting which forces the grab-ringinto an angled position on the pipe. Forcing the grab-ring into an angled position onthe pipe in this way, seriously damages the grab-ring teeth and will reduce the pull-outWARNINGto correct insertion depths. If a pipe is not inserted fully into a fitting through both the Oring seal and the grab ring then the incorrect assembly will come apart. <strong>The</strong> pipe will thenhave an open end which will result in water discharging un-intentionally. As our productsshould this situation occur with hot water.For further information log onto www.totallyplumbing.com6 <strong>Polypipe</strong> <strong>Plumbing</strong> & Heating Systems Trade Price List: June 2012