Photostory 3 – Importing and Arranging
Photostory 3 – Importing and Arranging
Photostory 3 – Importing and Arranging
Create successful ePaper yourself
Turn your PDF publications into a flip-book with our unique Google optimized e-Paper software.
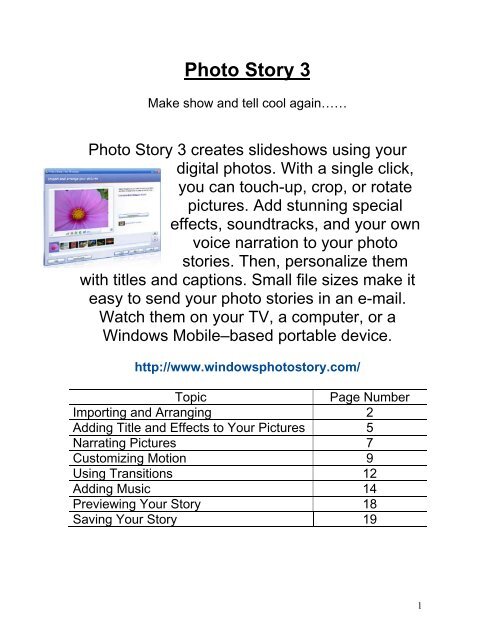
Photo Story 3Make show <strong>and</strong> tell cool again……Photo Story 3 creates slideshows using yourdigital photos. With a single click,you can touch-up, crop, or rotatepictures. Add stunning specialeffects, soundtracks, <strong>and</strong> your ownvoice narration to your photostories. Then, personalize themwith titles <strong>and</strong> captions. Small file sizes make iteasy to send your photo stories in an e-mail.Watch them on your TV, a computer, or aWindows Mobile<strong>–</strong>based portable device.http://www.windowsphotostory.com/TopicPage Number<strong>Importing</strong> <strong>and</strong> <strong>Arranging</strong> 2Adding Title <strong>and</strong> Effects to Your Pictures 5Narrating Pictures 7Customizing Motion 9Using Transitions 12Adding Music 14Previewing Your Story 18Saving Your Story 191
Photo Story 3 <strong>–</strong> <strong>Importing</strong> <strong>and</strong> <strong>Arranging</strong>When you create a new Photo Story, the first thing that you will do is importpictures. This is an easy process <strong>and</strong> allows import of most image formats,including .bmp, .dib, .eps, .gif, .jhif, .jpe, .jpeg, .jpg, .pcd, .pcx, .png, .psd, .rle,.tga, <strong>and</strong> .tif. You can import pictures from your computer, a network folder, oran MSN® Groups Web site. For each story, you can import up to 300 pictures.Simply select the Import Images button. When the dialog comes up, it is helpfulto switch to thumbnail view so that you can see the images easily that you wouldlike to add. This is useful when importing similarly-named images such as thoetaken with a digital camera.On the Import <strong>and</strong> arrange your pictures page, click Import Pictures.2
To view the pictures in the film strip, use the scroll bar located below the strip.You are now ready to arrange your pictures. To move a picture, select itsthumbnail in the timeline, <strong>and</strong> click the left or right arrow. Here, we move the 4thpicture to the 7th position.Repeat this process until you have all of the pictures in the order that you desire.Each image can be edited as well as moved. Please see Editing Your Picturesfor more information.4
Photo Story 3 <strong>–</strong> Adding Title <strong>and</strong> Effects to YourPicturesPhoto Story allows you to dress up your photos a bit by supplying Effects thatcan be applied to the images. For example, you might want to theme your storyas an Old West story. Using an effect can also make a title on a picture st<strong>and</strong>out more. This can be done to each slide individually with little effort. One the"Add a title to your pictures" dialog, select the slide that you wish to apply aneffect on, <strong>and</strong> select the effect from the dropdown.Many times, you'd like to describe the pictures in your story by overlaying wordson them. Fortunately, Photo Story makes this process fairly simple. Type thetext that you wish to appear in the caption of your picture in the box on the right.Notice the icons above. You can change the position of the text using thesebuttons. Font face <strong>and</strong> color (something that you will likely need to change tomake sure the text is easily visible) can be changed with the Font button.5
By default, when you add a title to a picture, the picture is static. No motion, orpanning <strong>and</strong> zooming effects are applied to pictures with titles. To add panning<strong>and</strong> zooming effects to pictures with titles, you must customize the motion for thepicture.To add a title to a picture• On the Add a title to your pictures page, click a picture, <strong>and</strong> then typethe title.• If you want to change the appearance or location of the title, do thefollowing:• To change the font, click the Select Font button, <strong>and</strong> then selectthe font type, style, size, effects, color, <strong>and</strong> script you want to use.• To change the horizontal alignment of the text, click the Align Leftbutton, Center Horizontally button, or Align Right button.• To move the title up or down on the page, click the Align Topbutton, Center Vertically button, or Align Bottom button. Bydefault, the title appears in the center of the picture.As you make changes, you can view them in the preview area on the leftside of the page.• Click Next.Other NotesIf you want to return to the previous page, click Back.• You can click Next without adding titles to any of your pictures.• The title can have a maximum of 1,024 characters. The text wraps in thepicture preview area.• If you want to manually control which text appears on each line, separatelines by pressing the ENTER key.• You can edit your pictures on any page in Photo Story on which the filmstrip appears by right-clicking a picture, pointing to Edit, <strong>and</strong> then clickingthe option you want.• You can save a project for your story at any time while working on thestory by clicking the Save Project button. In the Save As dialog box, typea name for the project. You must save a project for your story to be able toedit it later. Projects created by using Photo Story 3 for Windows must usea .wp3 file name extension. Otherwise, Photo Story will not be able toopen the file. By default, the project for your story is saved in your MyVideos folder.6
Photo Story 3 - Narrating PicturesTo narrate your story, decide what you want to say. If you need notes, you cantype in the note box provided. Once you're ready to begin, press the recordbutton <strong>and</strong> begin speaking.You can record up to five minutes of narration for each picture in your videostory. You can narrate the pictures in any order you want. If you do not like thenarration for a picture, you can delete the narration <strong>and</strong> record it again. Deletingthe narration does not delete any of the other enhancements made to your story,such as changing a transition.1) Hook up your Logitech Microphone via USB.2) On the record narration screen click the record button7
3) A message will pop up like the one tothe right, click NO.4) The recordingarea will nowchange to showyou are recording.To narrate the next picture in the film strip, click the Next Picture button <strong>and</strong> thenbegin speaking again. If you need to narrate a picture that is not the next picturein order in the film strip, click that picture, <strong>and</strong> then begin speaking.You can specify the number of seconds that a picture without narration willappear in the clip. Simply click that picture in the film strip, <strong>and</strong> then clickCustomize Motion. For more information about the options in the CustomizeMotion dialog box, see Customizing motion <strong>and</strong> selecting transitions.If you need to delete the narration, click that picture in the film strip, <strong>and</strong> thenclick the Delete Narration button. You can then record the narration again. Tostop narrating a picture, click the Stop Recording button. If you do not select adifferent picture, you can press the Record Narration button again to continue thenarration for that picture.8
Photo Story 3- Customizing MotionBy default, Photo Story will automatically choose the motion that your pictureswill have. However, you can easily customize this motion to focus on whateveryou would like in your image. Think about the story that you will be telling. Doyou want to reveal certain parts of the image as the story unfolds, or are yousimply providing a more interesting view of your picture?To customize motionOn the Narrate your pictures <strong>and</strong> customize motion page, click the picture forwhich you want to specify the motion, <strong>and</strong> then click Customize Motion.In the Customize Motion dialog box, select the Specify start <strong>and</strong> end position ofmotion check box.A rectangle with h<strong>and</strong>les appears on the picture in the Start position <strong>and</strong> Endposition boxes.• In the Start position box, do one or both of the following:• To resize the rectangle, point to a side or corner of the rectangle.When the cursor changes into a double-headed arrow, drag theh<strong>and</strong>le.• To move the whole rectangle, point to the center of the rectangle.When the cursor changes into a four-headed arrow, drag therectangle to the area of the picture that you want to receive focuswhen the picture first appears in your story.• In the End position box, do one or both of the following:• To resize the rectangle, point to a side or corner of the rectangle.When the cursor changes into a double-headed arrow, drag theh<strong>and</strong>le.• To move the whole rectangle, point to the center of the rectangle.When the cursor changes into a four-headed arrow, drag the9
ectangle to the area of the picture that you want to receive focus atthe end of the video for that picture.• If you want the motion for the selected picture to start where the motion forthe previous picture ended, select the Set start position to be the same asend position of the previous picture check box.Moving the rectangles clears the check box.• If this picture does not have narration <strong>and</strong> you want to specify the numberof seconds it will be displayed when your story is played, select theNumber of seconds to display the picture option, <strong>and</strong> then type or selectthe number of seconds you want the picture to display.• Click Save to save the motion <strong>and</strong> duration changes you made.• To preview the panning <strong>and</strong> zooming effects, click Preview.• When you are done customizing the panning <strong>and</strong> zooming motion for thepictures in your story, click Close.Other Notes• You should preview the panning <strong>and</strong> zooming effects for the picture toensure that you achieved the desired effects. If you do not achieve thedesired effect, you may want to try different start <strong>and</strong> end positions.• If you do not want any panning or zooming effects for a picture, select theSet end position to be the same as start position check box. Thisoption is also useful if you want the area for the start <strong>and</strong> end position tobe the same size. Select the check box <strong>and</strong> then move the rectangle inthe Start position box where you want it. When you move the rectangle inthe End position box, the check box is cleared.• If you want Photo Story to determine the number of seconds to display apicture, click the Set duration automatically check box.• Clearing the Specify start <strong>and</strong> end position of motion, Set startposition to be the same as end position of the previous picture, <strong>and</strong>Set end position to be the same as start position check boxes returnsthe start <strong>and</strong> end position for motion to the default positions.• You can also customize motion or specify the number of seconds todisplay a picture on the Narrate your pictures <strong>and</strong> customize motion<strong>and</strong> the Add background music pages by right-clicking a picture,pointing the Customize Motion, <strong>and</strong> then clicking Motion or Duration.• When you preview the panning <strong>and</strong> zooming effects, the previewresolution is 320 x 240 pixels. Your final video story may have a differentresolution depending on the activity you select on the Save your storypage.• Clicking the Reset button in the Customize Motion dialog box discards allchanges made to the selected picture on the Motion <strong>and</strong> Duration tab<strong>and</strong> on the Transition tab.10
• You can save a project for your story at any time while working on thestory by clicking the Save Project button. In the Save As dialog box, typea name for the project. You must save a project for your story to be able toedit it later. Projects created by using Photo Story 3 for Windows must usea .wp3 file name extension. Otherwise, Photo Story will not be able toopen the file. By default, the project for your story is saved in your MyVideos folder.11
Photo Story 3 - Using TransitionsPhoto Story also gives you the ability to choose what transitions you'd like tohave between slides. You will be shown the previous picture, the current picture,<strong>and</strong> a preview of what the transition will look like. By default, Photo Storyautomatically inserts a cross fade transition between slides.To turn off transitions for the between the previous <strong>and</strong> current slide, uncheck the"Start current picture using a transition" box, under the Customize Motion Dialog,Transition tab.If your transition is too fast or too slow, you can change the radio button from"Set transition duration automatically" to "Number of seconds to display thetransition." This should be set to something lower than the duration of the slide.Consider the story that you are trying to tell. Do not use the transitions distractyou from the story. Make wise choices when you select a transition so that itenhances the story. If you cannot decide, the least distracting transition is mostlikely the Cross Fade. All other transitions should be used sparingly <strong>and</strong>appropriately.Other Notes• You should preview the transition <strong>and</strong> panning <strong>and</strong> zooming effects for thepicture to ensure that you achieved the desired effects. If you do notachieve the desired effect, you may want to try a different transition ordifferent start <strong>and</strong> end positions.• If you want Photo Story to determine the number of seconds to display atransition, click the Set transition duration automatically check box.12
• You can also select a transition on the Narrate your pictures <strong>and</strong>customize motion <strong>and</strong> the Add background music pages by rightclickinga picture on the film strip, pointing to Customize Motion, <strong>and</strong> thenclicking Transition.• Clicking the Reset button in the Customize Motion dialog box discards allchanges made to the selected picture on the Motion <strong>and</strong> Duration tab<strong>and</strong> on the Transition tab.• You can save a project for your story at any time while working on thestory by clicking the Save Project button. In the Save As dialog box, typea name for the project. You must save a project for your story to be able toedit it later. Projects created by using Photo Story 3 for Windows must usea .wp3 file name extension. Otherwise, Photo Story will not be able toopen the file. By default, the project for your story is saved in your MyVideos folder.13
Photo Story 3 - Adding MusicMusic helps add emotion to your story. Like transitions, it is important that youchoose music that is appropriate to the story you want to tell. Heavy music isprobably not a good choice for a wedding story, <strong>and</strong> calm, tranquil music is likelynot a good choice for a story about the Vietnam War. You get the idea. Usemusic to your advantage. If you need something to add a consistent tie betweenyour slides, you can use a single song to do this. You are not, however, limitedto one song per story. You can add as many songs as there are slides in yourstory.To select the music for your story, select a picture. Then select a piece of musicto start playing when the picture is displayed in your story.The picture you select is the anchor image, <strong>and</strong> indicates where you want themusic to start playing. The anchor image is indicated by a musical note displayedbeneath the picture in the film strip.The music you select plays until one of the following events occurs:• The music ends.• An anchor image that specifies a new piece of music be played isencountered.• The story ends.You can replace a piece of music for an anchor image by selecting a differentpiece of music or by dragging a music file onto the anchor image in the film strip.If the anchor image is deleted from the story, the music <strong>and</strong> any othercustomizations associated with the anchor image are also deleted from the story.14
When you add background music to your story, a music strip appears above thefilm strip. The music strip displays the name of each piece of music that is addedto your video story. The music strip is color-coded for each piece of music in thestory.Photo story automatically adjusts the amount of time a piece of music will play inyour story when any of the following occurs:• A picture is added to a group of pictures.• A picture is deleted from a group of pictures.• A picture is moved to a different place in the story.• Another piece of music is added to the story.• The story ends.For example, suppose that a piece of music is long enough to play while fourpictures are displayed in your story. If you select another piece of music to playstarting at the third picture in the original group of pictures, the first piece ofmusic will automatically stop playing when the third picture is displayed in yourstory.If you select a piece of music that is shorter than the picture duration in yourstory, the music will end before the picture is completely displayed. If you wantbackground music to play for the entire picture duration, you can do one of thefollowing:• Reduce the picture duration.• Reduce the amount of narration.• Select a longer piece of music.If you select a piece of music that is shorter than the duration of a group ofpictures in your story, the music will end before the group of pictures iscompletely displayed. If you want background music to play while all the picturesin the group are displayed, you can do the following:• If you specified duration for the pictures, reduce the amount of time eachpicture in the group is displayed.• If you narrated some or all of the pictures, reduce the amount of narrationfor the group of pictures.• Loop the piece of music by adding it to the picture in the group where itended• Select a longer piece of music.15
Photo Story allows you to either add music that you have stored already on yourcomputer to the story, or you can create music using a series of options <strong>and</strong>sliders, for a nice ambient effect.Other Notes• The Add background music page also enables you to displayinformation about a selected piece of music, set the volume for a piece ofmusic, <strong>and</strong> preview your story.• When you preview your story, the preview resolution is 320 x 240 pixels.Your final story may have a different resolution, depending on the activityyou select on the Save your story page.• You can edit your pictures on any page in Photo Story on which the filmstrip appears by right-clicking a picture, pointing to Edit, <strong>and</strong> then clickingthe option you want. You can also delete, reorder, <strong>and</strong> customize motion16
• You can save a project for your story at any time while working on thestory by clicking the Save Project button. In the Save As dialog box, typea name for the project. You must save a project for your story to be able toedit it later. Projects created by using Photo Story 3 for Windows must usea .wp3 file name extension. Otherwise, Photo Story will not be able toopen the file. By default, the project for your story is saved in your MyVideos folder.17
Photo Story 3 - Previewing Your StoryA nice feature of Photo Story is that you can preview your story (at 320x240) tosee what it will look like in the final output. One thing to note about this previewis that the quality is relatively high. Depending on how you choose to save youroutput (more on this later), the quality may go down. An example of this issaving the story for the purpose of sending via email. That said, you can seehow your music, narration, transitions, <strong>and</strong> slide motion look.If changes need to be made you can use the Previous <strong>and</strong> Next buttons at thebottom of the wizard to go back <strong>and</strong> make corrections.18
Photo Story 3 - Saving Your StoryOne of the most important steps in producing your story is choosing how theworld will see it. Fortunately, Photo Story makes this a straight-forward processfor most uses. However, you need to underst<strong>and</strong> what each "Activity" reallymeans for the quality of your output. The most obvious separation that PhotoStory draws is the intended device.Save your story for playback on your computer.Every profile from every activity on your computer is available in the Settingsdialog box. If you intend to play your story on your computer, in the Settingsdialog box, select the profile that is recommended for your computer. If youselect a profile that requires a computer that is more powerful than yourcomputer, a message may be displayed indicating that Photo Story cannot createthe story. Try closing other programs <strong>and</strong> free up space on your hard disk. If theproblem persists, try selecting another profile.If you intend to save your story on your computer, <strong>and</strong> then create a Video CD(VCD) or a DVD, in the Settings dialog box, select the profile that isrecommended for your VCD or DVD player. Then import the story into anotherVCD or DVD authoring program that supports WMV files <strong>and</strong> burn the story ontoa CD or DVD.19
If you intend to save your story on your computer, <strong>and</strong> then attach it to an e-mailmessage or copy it to a portable device, we recommend that you choose anotheractivity that is optimized for these tasks in the Activities list instead.Send the story in an e-mail message.If possible, Photo Story compresses your story to be one megabyte (MB) or lessbecause some e-mail service providers do not allow users to send files that arelarger than 1 MB. However, you can select a profile that results in a story that ismore than 1 MB. After Photo Story builds your story, on the Completing PhotoStory 3 for Windows page, click Continue to e-mail your story. If your e-mailprogram is configured, Photo Story opens an e-mail message in which your storyis attached. If your e-mail program is not configured, you can save your story byclicking Save your story on the Completing Photo Story 3 for Windows page, <strong>and</strong>then send the story in an e-mail message after you configure your e-mailprogram.Save your story for playback on a Pocket PC with Windows Media Player 10Mobile.Photo Story builds your story using a profile that is appropriate for your PocketPC with Windows Media Player 10 Mobile installed. Photo Story saves the storyto the location on your computer that you specified. You must use anotherprogram to copy the story from this location to your Pocket PC.You can play the story built for this activity on a Pocket PC that has WindowsMedia Player 10 Mobile installed.If you want to play your stories on portable devices that do not have WindowsMedia Player 10 Mobile installed, you can use Microsoft Windows Movie Makerto import your story, <strong>and</strong> then save it by using the Windows Movie Maker PocketPC profile.Save your story for playback on a Smartphone with Windows Media Player10 Mobile.Photo Story builds your story using a profile that is appropriate for your device,<strong>and</strong> then saves the story to the location on your computer that you specified. Youmust use another program to copy the story to your Smartphone.Save your story for playback on a Portable Media Center.Photo Story builds your story using a profile that is appropriate for your device,<strong>and</strong> then saves the story to the location on your computer that you specified. Youmust use another program to copy the story to your Portable Media Center.20


