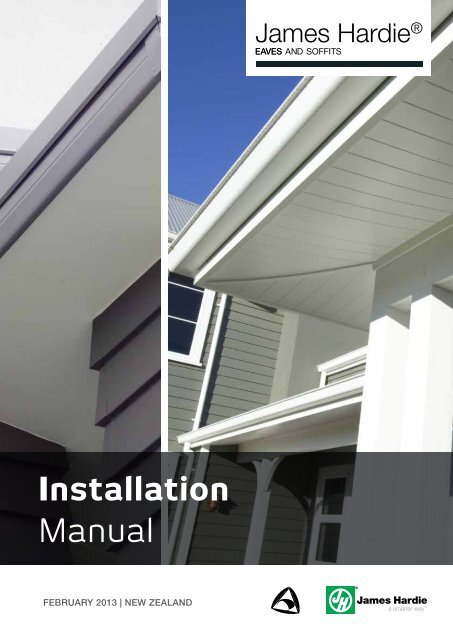
Installation Manual - James Hardie
Installation Manual - James Hardie
Installation Manual - James Hardie

You also want an ePaper? Increase the reach of your titles
YUMPU automatically turns print PDFs into web optimized ePapers that Google loves.
<strong>James</strong> <strong>Hardie</strong> ®<strong>Installation</strong><strong>Manual</strong>February 2013 | New Zealand
Content1 Introduction 3Eclipsa Eaves Lining 3Silkline ® Soffit Lining 3<strong>Hardie</strong>Groove Soffit Lining 3Villaboard ® Soffit Lining 3<strong>Hardie</strong>soffit Lining 4<strong>Hardie</strong>Flex Eaves Lining 4Product Description 5Accessories 62 Safe Working Practices 103 Framing 113.1 Timber Frame 113.2 Steel Frame 113.3 Framing Set-Out 113.4 Batten Requirements 123.5 Skillion Roof Design 124 <strong>Installation</strong> 124.1 General 134.2 Fastener Durability 134.3 <strong>Hardie</strong>soffit Lining 144.4 <strong>Hardie</strong>Flex Eaves Lining 144.5 <strong>Hardie</strong>Groove Soffit Lining Fixing Method 144.6 Eclipsa Eaves Lining and Silkline Soffit Lining 154.7 Villaboard Soffit Lining (small soffits) 154.8 Titan ® Facade Panel in a Soffit Application 184.9 Internal Swimming Pool Application 184.10 Special Details 195 Jointing Options 196 Jointing and Finishing 216.1 General 216.2 Glancing Light 216.3 Level of Finishes 216.4 Paint Finishes 226.5 Villaboard Soffit Lining Jointing and Stopping 22Mixing Instructions 226.6 Set Joints 236.7 Painting 247 Product Information 257.1 General 257.2 Durability 257.3 Finishes 258 Maintenance 25Product Warranties 27we ValueYour FeedbackTo continue with the development of our productsand systems, we value your input. Please send anysuggestions, including your name, contact details,and relevant sketches to:Ask <strong>James</strong> <strong>Hardie</strong> Fax 0800 808 988literaturefeedback@jameshardie.co.nz
<strong>Hardie</strong>soffit LINING<strong>Hardie</strong>soffit Linings are 4.5mm thick and are specificallymanufactured for the narrow soffit around the perimeter of thehouse or building. Standard widths of 450mm, 600mm and 750mmare available.• <strong>Hardie</strong>soffit Linings have an unsanded finish suitable for semiglossacrylics or lightly textured semi-gloss or high-gloss coatings.Smooth high-gloss coatings must be avoided as some surfaceundulations may be visible in critical light.• <strong>Hardie</strong>soffit Linings can be nail-fixed to timber or mechanicallyfixed to a steel frame.• <strong>Hardie</strong>soffit Linings can be uPVC jointed or the joints can be leftexpressed.<strong>Hardie</strong>Flex EAVES LINING<strong>Hardie</strong>Flex Eaves Lining are 4.5mm in thickness and are availablein wider widths for use in wider soffits, ceilings and verandahs. Theyare complementary to the <strong>Hardie</strong>soffit Lining and are fixed andjointed in a similar way.• <strong>Hardie</strong>Flex Eaves Lining has an unsanded finish suitable for semiglossacrylics or lightly textured coatings. Smooth high-glosscoatings must be avoided as some surface undulations may bevisible in critical light.• <strong>Hardie</strong>Flex Sheet 6mm, can also be used in eaves application forextra rigidity on larger spanning eaves.• When higher impact or wind resistance is required, 6mm thick<strong>Hardie</strong>Flex Sheet is used.This manual covers the use of Eclipsa Eaves Lining, Silkline Soffit Lining, Villaboard Soffit Lining, <strong>Hardie</strong>Groove Soffit Lining, <strong>Hardie</strong>soffitLining and <strong>Hardie</strong>Flex Eaves Lining in external eave and soffit applications. Further technical literature relating to these products and internallinings are available from <strong>James</strong> <strong>Hardie</strong> in the following manuals:• Villaboard Lining <strong>Installation</strong> <strong>Manual</strong>.• <strong>Hardie</strong>Groove Lining <strong>Installation</strong> <strong>Manual</strong>.• Fire and Acoustic Design <strong>Manual</strong>.The specifier or other responsible party for the project must ensure the information and details in this manual are appropriate for theintended application and specific design and detailing is undertaken for areas which fall outside the scope of this document.MAKE SURE YOUR INFORMATION IS UP TO DATEWhen specifying or installing <strong>James</strong> <strong>Hardie</strong> products, ensure you have the current manual. If you’re not sure you do, or you needmore information, visit www.jameshardie.co.nz or Ask <strong>James</strong> <strong>Hardie</strong> on 0800 808 868.4 <strong>James</strong> <strong>Hardie</strong> Eaves And Soffits <strong>Installation</strong> <strong>Manual</strong> February 2013 New Zealand
PRODUCT DESCRIPTIONTable 1Eclipsa Eaves Lining Sheet SizesPre-finished square-cut edge sheetfor use with jointersTable 2Silkline Soffit Lining Sheet SizesPre-finished square-cut edge sheetfor use with jointers.Table 3Villaboard Soffit Lining Sheet SizesSmooth recessed edgefor flush jointing.Square-cut edge alsoavailable for use withjointers.Length6mm Villaboard Lining has no chamfer on square edge sheet.9mm Villaboard Lining has small chamfer on square edge sheet.WidthTable 4<strong>Hardie</strong>Groove Soffit Lining Sheet SizesLengthMass(kg/m 2 )4.5mm thickness 5.9Square-cut edge sheet for use with jointers. Length Mass(kg/m 2 )Width (mm)600 12002400 ✔ ✔LengthMass(kg/m 2 )4.5mm thickness 5.9Width (mm)600 12002400 ✔ ✔Half groove length ways to achieve concealed joints. Length Mass(kg/m 2 )Table 5<strong>Hardie</strong>soffit Lining Sheet SizesTable 6<strong>Hardie</strong>Flex Eaves Lining Sheet SizesSquare-cut edge sheet for usewith jointers.100mmHalf groove edge2.5mmLengthWidth (mm)12007.5mm thickness 10.442400 ✔2700 ✔Width (mm)450 600 7504.5mm thickness 5.92400 ✔ ✔ ✔LengthMass(kg/m 2 )6mm thickness 8.3Mass(kg/m 2 )4rec/edgesWidth (mm)12002 rec/edges(long)Squareedges2400 ✔ ✔ ✔2700 ✔3000 ✔ ✔9mm thickness 12.42400 ✔ ✔ ✔2700 ✔3000 ✔ ✔Width (mm)1800 2400 2700 30004.5mm thickness 5.9900 ✔1200 ✔ ✔ ✔ ✔6mm thickness 7.81200 ✔ ✔ ✔<strong>James</strong> <strong>Hardie</strong> Eaves And Soffits <strong>Installation</strong> <strong>Manual</strong> February 2013 New Zealand 5
ACCESSORIESTable 7Eclipsa Eaves Lining And Silkline Soffit Lining — Accessories / Tools Supplied by <strong>James</strong> <strong>Hardie</strong>Accessories Description Product Code Accessories Description Product Code<strong>Hardie</strong>jointer 5mm2400 long750 long600 long450 longSilkline Scotia Mould(base and cap)2400 long, uPVC / White300729300921300920300919Silkline PVC2-way Jointer2400 long, uPVC / White300916 <strong>Hardie</strong>Flex CappingMould 5mm2400 long, uPVC / White30091530053838mm12mmFastfix Fasteners38 x 12mm, Nylon / White300632 Inseal 32591.5mm thick50mm wide x 50m long,Black compressible foam300767Eclipsa Eaves Lining andSilkline Soffit LiningTouch-up Paint15mlFreeAsk <strong>James</strong> <strong>Hardie</strong>on 0800 808 8686 <strong>James</strong> <strong>Hardie</strong> Eaves And Soffits <strong>Installation</strong> <strong>Manual</strong> February 2013 New Zealand
Table 8Villaboard ® Soffit Lining — Accessories / Tools Supplied by <strong>James</strong> <strong>Hardie</strong>Accessories Description Product Code Accessories Description Product CodeSilkline Scotia Mould(base and cap)2400 long, uPVC / White300916 Inseal 32591.5mm thick50mm wide x 50m long, Blackcompressible foam300767<strong>Hardie</strong>jointer 6mmuPVC / Bone colour2400 long3000 long3007303007349mm <strong>Hardie</strong>jointeruPVC / Bone colour3000mm long300736<strong>Hardie</strong>Flex Capping Mould6mm2400 long3000 longuPVC / Bone colourCorner Angle3000 longuPVC30053930054045mm10mmPlasticprotectivetapeControl Joint2700 long, uPVC / White300669 <strong>James</strong> <strong>Hardie</strong> Top CoatTopping compound for flushfinished jointing.3009783kg Pail 30449215kg Pail 304493<strong>James</strong> <strong>Hardie</strong> Base CoatBase compound for flushfinished jointing.<strong>Hardie</strong>Drive Screw s/s 31630mm x 7g 100 per jarFor fastening to timber frames.FibreZip ® ScrewsSelf drilling rib head screwBox 10004kg Pail 30449015kg Bag 304491<strong>Hardie</strong>Blade Saw Bladeø185mm poly crystallinediamond blade, for fast, cleancutting of <strong>James</strong> <strong>Hardie</strong> fibrecement.300928 Villadrive Screw 6g x 30mmFor fastening to timber frames.100/jar5kgCollated/1000303840300660300992300993300994Table 9<strong>Hardie</strong>Groove Soffit Lining — Accessories / Tools Supplied by <strong>James</strong> <strong>Hardie</strong>Accessories Description Product Code Accessories Description Product CodeSilkline Scotia Mould(base and cap)2400 long, uPVC / white300916 Inseal 32591.5mm thick50mm wide x 50m long, blackcompressible foam300767<strong>Hardie</strong>Blade Saw Bladeø185mm poly crystallinediamond blade, for fast, cleancutting of <strong>James</strong> <strong>Hardie</strong> fibrecement.<strong>Hardie</strong>Drive Screw s/s 31630mm x 7g. 100 per jarFor fastening to timber frames.300660 <strong>James</strong> <strong>Hardie</strong> Top CoatTopping compound for flushfinished jointing.300928 Villadrive Screw 6g x 30mmFor fastening to timber frames.100/jar5kgCollated/ 10003kg Pail 30449215kg Pail 304493300992300993300994<strong>James</strong> <strong>Hardie</strong> Eaves And Soffits <strong>Installation</strong> <strong>Manual</strong> February 2013 New Zealand 7
Table 10<strong>Hardie</strong>Flex Eaves Lining And <strong>Hardie</strong>soffit Lining — Accessories / Tools Supplied by <strong>James</strong> <strong>Hardie</strong>Accessories Description Product Code Accessories Description Product CodeSilkline PVC 2-way Jointer2400 long, uPVC / White6mm <strong>Hardie</strong>jointeruPVC/Bone colour2400 long3000 long300915 <strong>Hardie</strong>jointer 5mmuPVC / White2400 long750 long600 long450 long300730300734<strong>Hardie</strong>Flex 5mmCapping Mould2400 long, uPVC / White3007293009213009203009193005386mm Capping MoulduPVC/Bone colour2400 long3000 long300539300540Scotia Mould (base and cap)2400 long, uPVC / White30091638mm12mmFastfix Fasteners38 x 12mm, Nylon / White300632 Inseal 32591.5mm thick50mm wide x 50m long,Black compressible foam3007678 <strong>James</strong> <strong>Hardie</strong> Eaves And Soffits <strong>Installation</strong> <strong>Manual</strong> February 2013 New Zealand
Table 11Components Not Supplied by <strong>James</strong> <strong>Hardie</strong><strong>James</strong> <strong>Hardie</strong> recommends the following products for use in conjunction with its eaves and soffit linings. <strong>James</strong> <strong>Hardie</strong> does not supplythese products. Please contact component manufacturer for information on their warranties and further information on their products.Accessories Description Accessories Description<strong>Hardie</strong>Flex Nail40 x 2.8mm galvanised or stainless steel nails.Second coat trowel 200mmFor installing second coats on set joints on VillaboardLining.Rondo P35Control joint used in movement joints.Perforated paper tapeJoint reinforcing tape.Finishing coat trowelFor installing top coats on set joints on VillaboardLining.Corner toolFor setting of internal corners on Villaboard Lining.Level/straight edgeFor checking straightness of frame.Hand guillotineGuillotine for cutting fibre cement.HawkTo assist in the application of finishing compoundsespecially with the use of trowels.Hand sanderFor sanding set joints on Villaboard Lining.Collated screw gunNotched trowelFor applying tile adhesive to face of Villaboard Lining.Hole sawBroadknife 150mmFor setting of joints on Villaboard Lining.Electric shear/fibreshearFor cutting Villaboard Soffit Lining, <strong>Hardie</strong>GrooveSoffit Lining, <strong>Hardie</strong>soffit Lining, <strong>Hardie</strong>Flex EavesLining.Flashing tapeProprietary tape to adhere to building wrap.Tyvek, Protecto wrap or similarFlashing to Table 20 ‘E2/AS1’Flashing fabricatorFlexible joint sealantTubeSikaflex MS or similarMasking tape3M Scotch Blue painters tape 2090 or Sellotape5855 Long LifePaperback corners‘Goldline’ corner mouldsPolyurethane tapeAdhesive sealantSikaflex-11FC by SikaSeal N Flex-1 by BostikAcrylic paintDulux X10 or similar brandWaterproofing admixtureMultiplast Resin by Plaster Systems. Used in dilutedform over Villaboard Lining sheet edges to controlmoisture suction before flush stopping.<strong>James</strong> <strong>Hardie</strong> Eaves And Soffits <strong>Installation</strong> <strong>Manual</strong> February 2013 New Zealand 9
2 Safe workingpracticesWARNING - DO NOT BREATHE DUST AND CUTONLY IN WELL VENTILATED AREA<strong>James</strong> <strong>Hardie</strong> products contain respirable crystalline silica which isconsidered by some international authorities to be a cause of cancerfrom some occupational sources. Breathing excessive amountsof respirable silica dust can also cause a disabling and potentiallyfatal lung disease called silicosis, and has been linked with otherdiseases. Some studies suggest smoking may increase these risks.During installation or handling: (1) work in outdoor areas with ampleventilation; (2) minimise dust when cutting by using either ‘Scoreand Snap’ knife, fibre cement shears or, where not feasible, use a<strong>Hardie</strong>Blade Saw Blade and dust-reducing circular saw attachedto a HEPA vacuum; (3) warn others in the immediate area to avoidbreathing dust; (4) wear a properly-fitted, approved dust mask orrespirator (e.g. P1 or P2) in accordance with applicable governmentregulations and manufacturer instructions to further limit respirablesilica exposures. During clean-up, use HEPA vacuums or wetcleanup methods – never dry sweep. For further information, referto our installation instructions and Safety Data Sheets available atwww.jameshardie.co.nz.FAILURE TO ADHERE TO OUR WARNINGS, SAFETY DATASHEETS, AND INSTALLATION INSTRUCTIONS MAY LEADTO SERIOUS PERSONAL INJURY OR DEATH.<strong>James</strong> <strong>Hardie</strong> recommended safe working practicesCUTTING OUTDOORS1. Position cutting station so that wind will blow dust awayfrom user or others in working area.2. Use one of the following methods based on the requiredcutting rate:BEST• Score and snap• Hand guillotine• FibreshearBETTER• Dust reducing circular saw equipped with <strong>Hardie</strong>BladeSaw Blade and HEPA vacuum extraction.GOOD• Dust reducing circular saw equipped with <strong>Hardie</strong>BladeSaw BladeCUTTING INDOORS• Cut only using score and snap, hand guillotine orfibreshears (manual, electric or pneumatic).• Position cutting station in well-ventilated areasanding/rebating/DRILLING/OTHERMACHININGWhen sanding/rebating/drilling/machining you should alwayswear a P1 or P2 dust mask and warn others in the immediatearea.IMPORTANT NOTES:1. For maximum protection (lowest respirable dustproduction), <strong>James</strong> <strong>Hardie</strong> recommends always using“Best” — level cutting methods where feasible2. NEVER use a power saw indoors3. NEVER use a circular saw blade that does not carry the<strong>Hardie</strong>Blade logo4. NEVER dry sweep — Use wet suppression or HEPAVacuum5. NEVER use grinders6. Always follow tool manufacturer’s safety recommendationsP1 or P2 respirators can be used in conjunction with abovecutting practices to further reduce dust exposures. Additionalexposure information is available at www.jameshardie.co.nz tohelp you determine the most appropriate cutting method foryour job requirements. If concern still exists about exposurelevels or you do not comply with the above practices, youshould always consult a qualified industrial hygienist orcontact <strong>James</strong> <strong>Hardie</strong> for further information.10 <strong>James</strong> <strong>Hardie</strong> Eaves And Soffits <strong>Installation</strong> <strong>Manual</strong> February 2013 New Zealand
3 FramingWorking instructionsRefer to recommended Safe Working Practices before starting anycutting or machining of product.Score and SnapScore and Snap is a fast and efficient methodof cutting the product using special tungstentipped Score and Snap knife.Preferably score on the face side of theproduct. Score against a straight edge and repeat the action toobtain adequate depth for clean break – normally 1/3 of sheetthickness. Snap upwards to achieve break. Smooth any roughedges with a rasp.Hand GuillotineMake guillotine cut on the off-cut side of line toallow for the thickness of the blade.Fibreshear Heavy DutyAn electrically powered, fast, clean and effortlessway of cutting <strong>James</strong> <strong>Hardie</strong> building products,especially around curves such as archways.Make Fibreshear cut on the “off-cut” side of theline to allow for the thickness of the shear.<strong>Hardie</strong>Blade Saw BladeThe <strong>Hardie</strong>Blade Saw Blade used with a dustreducingand HEPA vacuum extraction allows forfast, clean cutting of <strong>James</strong> <strong>Hardie</strong> fibre cementproducts. A dust-reducing saw uses a dustdeflector or a dust collector connected to a vacuum system. Whensawing, clamp a straight-edge to the sheet as a guide and run thesaw base plate along the straight edge when making the cut.Hole-FormingFor smooth clean cut circular holes:Mark the centre of the hole on the sheet. Pre-drill a pilot hole.Using the pilot hole as a guide, cut the hole to the appropriatediameter with a hole saw fitted to a heavy duty electric drill.For irregular holes:Small rectangular or circular holes can be cut bydrilling a series of small holes around the perimeterof the hole then tapping out the waste piece from thesheet face. Tap carefully to avoid damage to sheets,ensuring that the sheet edges are properly supported.Storage and HandlingAll <strong>James</strong> <strong>Hardie</strong> building products should be stored to avoiddamage, with edges and corners of the sheets protected fromchipping. <strong>James</strong> <strong>Hardie</strong> building products must be installed in adry state and be protected from rain during transport and storage.The product must be laid flat under cover on a smooth level surfaceclear of the ground to avoid exposure to water or moisture, etc.Quality<strong>James</strong> <strong>Hardie</strong> conducts stringent quality checks to ensure thatany product manufactured falls within our quality spectrum. It isthe responsibility of the builder to ensure that the product meetsaesthetic requirements before installation. <strong>James</strong> <strong>Hardie</strong> will notbe responsible for rectifying obvious aesthetic surface variationsfollowing installation.3.1 TIMBER FRAMETimber framing must be in accordance with NZS 3604 TimberFrame Buildings.Specific design to NZS 3603 and AS/NZS 1170 can also beundertaken providing that:• the framing centres do not exceed those given in this specification• the framing member widths conform to this specification.Also refer to the Approved Document for NZBC Clause B2‘Durability’ and NZS 3602 (Timber and Wood-Based Productsfor use in Buildings) regarding timber treatment requirements andallowable moisture contents in timber for various components of thebuilding. Also refer to the framing manufacturer’s literature for furtherguidance on the use of treated timber.3.2 STEEL FRAMEThe figures in this brochure are drawn for timber framing. However,steel framing and furring channels can also be used.All metal framing centres are to be the same as specified for timberframe in this manual.Steel framing members must be fabricated from light-gauge sheetsteel 0.55mm thick minimum to 1.6mm maximum. If heaviersections are used difficulties may be experienced in fixing theself-drilling, self-tapping fasteners. Refer to specific details for theminimum flange width requirements.Sheets must not be fixed directly to drawn steel or hot-rolledsteel sections. These must first be battened out with ex 50mmthick(40mm minimum) timber battens or light-gauge metal furringchannels.Screw-fix 6mm or thicker sheets only.Screw fixings can be finished flush or sunk a maximum of 0.5mmbelow the sheet surface ready for filling.NOTE: The fasteners must not be over driven as will reduce the holding capaciity of the sheet.3.3 FRAMING SET-OUTFor the framing set-out of 450mm and 600mm-wide soffit refer toFigure 1.For the framing set-out of 750mm-wide soffits refer to Figure 2.For the framing set-out of 900mm and 1200mm-wide soffit refer toFigure 3.Pre-finished steel fascia/guttersWhen pre-finished steel fascia/gutters are used the soffit edge mustbe supported 4mm min. into fascia recess, similar to Figure 27.Ribbon board to be continuous for product fixing.NOTE: Because of the limited fascia groove available with some metal fascias a supportingribbon board will be required with fixings at 300mm centres maximum. Pre-finished soffits candistort due to surface tension when adequate edge support is not provided.<strong>James</strong> <strong>Hardie</strong> Eaves And Soffits <strong>Installation</strong> <strong>Manual</strong> February 2013 New Zealand 11
4 <strong>Installation</strong>Table 12Eaves Lining Framing CentresEaves And SoffitWidth (Mm)Wind ZoneUp to 450 L, M 1200H, VH 900451 - 600 L, M 1200H, VH 600601 - 1200 L, M, H, VH,EH*600Max. Soffit BearerCentres (Mm)This installation manual covers the use of <strong>James</strong> <strong>Hardie</strong> Eaves andSoffits for buildings within the scope of NZS 3604. For all otherbuildings specific engineering design is required.Figure 1: Eaves and soffits 450mm, 600mm wide*<strong>Hardie</strong>Flex Sheet 6mm or Villaboard Lining 6mm must be used inEH Wind Zone with soffit bearers maximum 600mm centres.3.4 Batten requirementsBattens are required when sheets are fixed over:• Gypsum board exceeding 20mm in thickness• Softboard, polystyrene or similar• Concrete, masonry block or brick.Timber battening is to be a minimum of 35mm deep x 40mm wideto achieve adequate sheet nail penetration.Figure 2: Eaves and soffits 750mm wideSteel battens must be minimum 0.55mm thick, 23mm deep andhave a bearing surface of 38mm min. Battens must be galvanised tomeet the durability requirements of the New Zealand Building Code(NZBC) and fixed to manufacturer’s specifications. All batteningcentres and sheet fixing is to be strictly in accordance with theframing and fixing required by this manual. Care must be takento ensure the battens are packed and aligned to give a true evensurface for the sheets to be fixed. Check the face of the battenswith a long straight-edge before fixing sheets.3.5 SKILLION ROOF DESIGNWhen installing soffit linings direct to skillion roof framing ensurethat sufficient ventilation has been provided within the roof space.The temperatures within these smaller roof spaces can reachextreme levels in certain conditions and this can cause cracking inflush stopped joints due to excessive movement in framing. Theframing in skillion soffits and ceiling also need engineering designconsideration. General design guide is to provide control joints at4.8m x 3.6m in either direction when fixing to this type of framing.For narrow strip soffits provide control joints at 4.8m centres.Notes1. <strong>Hardie</strong>Flex nails are the usual fixing method for <strong>Hardie</strong>soffitLining. The Fastfix method can also be used as an alternative.2. When Fastfix fastenings are used refer to Table 7 and Figure25 and 27.12 <strong>James</strong> <strong>Hardie</strong> Eaves And Soffits <strong>Installation</strong> <strong>Manual</strong> February 2013 New Zealand
Figure 3: Eaves and soffits 900mm–1200mm wideTable 13Curved Wall Minimum Bending RadiiAlong length(mm)9mm Villaboard Lining 3000 40006mm Villaboard Lining 1800 2400<strong>Hardie</strong>Flex EavesLining1800 2400<strong>Hardie</strong>soffit Lining 1800 2400Across width(mm)NOTE: The bending radii given above require no special pre-wetting of the sheet. Mechanical fixat 200mm centres maximum.To maintain the smoothness of the curve, ceiling battens are generally required at spacings asshown below.Notes1. <strong>Hardie</strong>Flex ® nails are the usual fixing method for <strong>Hardie</strong>soffit ®Lining. The Fastfix method can also be used as an alternative.2. When Fastfix fastenings are used refer to Table 7 and Figure25 and 27.4.1 GENERALRefer to Table 12 and Figure 1, 2 and 3 regarding nail fixing centres,for framing and types of fasteners.The eaves/soffits must be sealed against claddings to minimisemoisture ingress behind the claddings. The roof must have beeninstalled before installing the soffits linings. Where the soffits aresloping upwards away from the wall, a mechanical flashing mustbe provided in the soffit to wall junction. The flashing is fixed undersoffit lining and laps over the face of cladding by 35mm min. Referto Figure 18.4.1.1 Drip EdgeAll soffit linings must either be installed with a grooved fascia, referFigure 13, or with exterior cladding which forms a drip edge belowthe soffit lining by 15mm min. Soffit linings are generally fitted intothe recess formed in fascia board to form the drip edge.4.1.2 STRUCTURAL CEILING DIAPHRAGMS<strong>Hardie</strong>Flex Eaves Lining and Villaboard Soffit Lining are suitable foruse in structural ceiling diaphragms as per NZS 3604.Refer to the <strong>James</strong> <strong>Hardie</strong> Bracing Design <strong>Manual</strong>.4.1.3 CURVED APPLICATIONS<strong>Hardie</strong>Flex Eaves Lining and Villaboard Soffit Lining can be used forcurved applications.Table 14Curved Lining — Soffit Batten SpacingRange of Radii (mm) soffit batten spacing (mm)1800 200Above 1801 to 3000 300Above 3001 4004.1.4 Fastfix fastenersFastfix fasteners (38mm long) can be used as an alternative fixing forprefinished soffit and ceiling systems in conjunction with adhesives.Drill a 6mm-diameter hole through the sheet and framing to insertthe Fastfix fastener. In timber the hole must be 40mm deep.4.1.5 MAsking TAPEThe recommended masking tape for use with Silkline Soffit Liningand Eclipsa Eaves Lining is 3M Scotch Blue painters tape 2090 orSellotape 5855 longlife. This tape can only be left on the SilklineSoffit Lining or Eclipsa Eaves Lining for maximum 7 days, otherwisetape removal may cause paint loss.4.1.6 FIRE RATED SOFFITSA fire rating of 30 or 60 minutes can be achieved in a soffit whenusing 6mm or 9mm Villaboard Soffit Lining or 6mm or 7.5mm<strong>Hardie</strong>Flex Sheet when <strong>James</strong> <strong>Hardie</strong> FRR wall systems are used.For full details refer to the <strong>James</strong> <strong>Hardie</strong> Fire and Acoustic Design<strong>Manual</strong> or Ask <strong>James</strong> <strong>Hardie</strong> on 0800 808 868.4.2 Fastener DurabilityFasteners used in external applications must meet the minimumdurability requirements of the NZBC. NZS 3604 specifies therequirements for fixing’s material to be used in relation to the exposureconditions and are summarised in Table 15.The minimum bending radii are shown below.<strong>James</strong> <strong>Hardie</strong> Eaves And Soffits <strong>Installation</strong> <strong>Manual</strong> February 2013 New Zealand 13
Table 15Exposure conditions and nail selection prescribedby NZS 3604Zone / Nail MaterialFigure 4: Nail or screw and adhesive fixingZone D*Grade 316StainlessZone C outside sea sprayzone and Zone B andgeothermal hot spotsHot-dipped galvanised or316 stainlessBracing —All zonesGrade 316Stainless*(Zone C areas where local knowledge dictates that increased durability is required, appropriateselection shall be made)When using screws to fix into steel framing a minimum class-3 coatedscrew must be used.4.3 <strong>Hardie</strong>soffit LININGFor framing and fixing schedules refer to Section 3.All sheet edges are to be supported by framing or a fascia board.Fixings are to be at 200mm centres to all framing (refer Figures1 and 2).<strong>Hardie</strong>soffit Lining up to a max. width of 600mm can be jointed upto a maximum 150mm off the ceiling/soffit batten when using uPVCjointers.NOTES1. Use of 6mm thick sheets will minimise the deflection and enhancethe impact resistance.2. Sheets can be jointed as per Section 4.3. Do not screw fix 4.5mm thick sheets.4.4 <strong>Hardie</strong>Flex EAVES LININGFor framing and fixing schedules refer to Section 3.All sheet edges are to be supported by framing or a fascia board.Fixings are to be at 200mm centres to all framing (refer Figures1and 2).NOTES1. Use of 6mm thick sheets will minimise the deflection and enhancethe impact resistance.2. Sheets can be jointed as per Section 4.3. Do not screw fix 4.5mm thick sheets.4.5 <strong>Hardie</strong>Groove SOFFIT Lining FixingmethodFor framing and fixing schedules refer to Section 3.The recommended fixing methods are combined nail and adhesiveor screw and adhesive. However, screw or nail fixing only is anoption. (Refer Figure 4).To achieve a concealed joint, butt the long edges together (halfgrooved).(Refer Figure 5).NOTES1. Do not place nails or screws within 100mm of the adhesivedaubs.2. Suitable fixings are <strong>Hardie</strong>Drive stainless steel 30mm x 7gwood screws, <strong>Hardie</strong>Flex galvanised nails 40 x 2.8mm and 316stainless steel nails 40 x 2.8mm.3. Use only stainless steel fixings in sea spray zones.4. When butt jointing short ends of <strong>Hardie</strong>Groove Lining in ceiling/soffit applications, the short edges must be cut square and havechamfer formed.Nails must be finished flush with the sheet surface. Screw headscan be finished 1-2mm below the sheet surface and stopped.In steel framing the fasteners should be driven as close as possibleto the stud corners to avoid deflection of the stud flange.Figure 5: Sheet edge and groove detail4.5.1 FINISHINGOnce the sheets are in place, fill over all driven fixings with <strong>James</strong><strong>Hardie</strong> Base Coat to the required level of finish.14 <strong>James</strong> <strong>Hardie</strong> Eaves And Soffits <strong>Installation</strong> <strong>Manual</strong> February 2013 New Zealand
change lines (refer Figure 14). Framing members (to which thesheet is fixed) must not continue across this control joint. Sheetsshall be fixed across the ceiling joists or ceiling battens (referFigures 15 and 16). Figures 12 and 13 show control joints with thebattens running in the same direction as the sheet joint.Figure 13: Timber control joint detailFigure 11: Control joint layoutFix at 200mm centres with2.8mm <strong>Hardie</strong>Flex nailFigure 14: Directional changes to soffits and ceilings —control jointFigure 12: Steel ceiling batten control joint detail4.7.6 Fixing OPTION OneA smooth surface finish is obtained by minimising the visiblesheet fixings. For painted finishes the combined nail or screw andadhesive method gives this superior finish (refer Figure 19).Fix at 200mm centres down each sheet end with edge fixings ineach joist or batten. Double-fix in the centre of each joist or batten(refer Figure 19). Do not place nails or screws within 100mm ofadhesive daubs. Daubs of wallboard adhesive 25mm diameter and15mm thick must be applied to the intermediate joists or battens at250mm centres (refer Figure 19).When nogs are not installed for perimeter support, the unsupportededges between ceiling joists or battens must be supported withback blocking using a 300-400mm wide Villaboard Lining stripadhered to rear face and centred between framing.<strong>James</strong> <strong>Hardie</strong> Eaves And Soffits <strong>Installation</strong> <strong>Manual</strong> February 2013 New Zealand 17
Figure 15: Nail or screw and adhesive fixing4.7.9 Bulkhead In SoffitsThe bulkhead made in soffits is generally used to carry the servicesthrough them and they can be lined with Villaboard Soffit Lining.The box framing provided must be rigid enough to carry its weightand/or services. It must provide support to all sheet edges andjoints. The external/internal corner of a bulkhead can either bestopped using a <strong>James</strong> <strong>Hardie</strong> PVC corner mould or a ‘proprietarypaper faced rigid spine’* corner mould.*Paper faced rigid spine corner mould is generally available in the market.4.7.10 Square-edge Villaboard LININGceilings and soffitsSquare-edge Villaboard Lining is used for butt-joint; expressed-jointor uPVC-jointed ceilings.NOTES1. All surfaces to receive adhesive must be clean, free of dust, oil etc.2. Ensure daubs of adhesive never coincide with permanentfastener points, as adhesive shrinkage may cause fastener headprotrusion.4.7.7 Fixing OPTION TwoFor an alternative nail or screw-fixing method, fasteners are to bedriven along the sheet perimeter at 200mm centres and alongintermediate ceiling battens at 250mm centres (refer Figure 16).When nogs are not installed for perimeter support, the unsupportededges between ceiling joists or battens must be supported withback blocking using a 300-400mm wide Villaboard Lining stripadhered to rear face and centred between framing.Figure 16: Nail or screw4.8 Titan facade panelMay be used as soffit with expressed joint when istalled as perFigure 23 and fixings as per Villaboard Soffit Lining.4.9 internal swimming poolapplicationFor fixing Villaboard Lining and <strong>Hardie</strong>Groove Lining in internalswimming pool areas;• The sheets must be back and edge sealed before installation.• When fixing Villaboard Lining to the ceiling under a skillionroof, roof ventilation must be considered to minimise thermalmovement and sheet joint cracking.• All Villaboard Lining recessed sheet joints must be stopped.Alternatively, when using square edge Villaboard Lining, the sheetjoint must be butted over an Inseal 3259 tape with an appropriateflexible sealant in the 1mm joint.• All <strong>Hardie</strong>Groove Lining joints must have continuous bead ofsealant applied to edge of sheet before butting together.Only stainless steel fasteners must be used.• Full perimeter fixing required.• In addition, it is recommended that H3.1 treated timber ceilingbattens are used to resist decay due to higher condensationlevels present in this area.Figure 17: Sheets laid along ceiling joints (expressed orbutt joints)4.7.8 Column or wall abutmentsSoffit sheeting must be free to move independently from the buildingelement it abuts with. This is critical for flush-jointed sheeting,otherwise cracking at the joint may occur.18 <strong>James</strong> <strong>Hardie</strong> Eaves And Soffits <strong>Installation</strong> <strong>Manual</strong> February 2013 New Zealand
5 Jointing options4.10 SPECIAL DETAILSFigure 18: Sloping soffit and wall junction• All soffit lining sheet edges must be supported by framing and/ora fascia board.<strong>Hardie</strong>Flex eaves lining• Refer to Figure 22 for uPVC <strong>Hardie</strong>jointer detail• Refer to Figure 23 for express joint detail• Refer to Figure 24 for butt joint detail• Refer to Figure 26 for two-way uPVC jointer<strong>Hardie</strong>Groove soffit lining• Sheets have half groove along the long edges for butt jointing• Sheets to have chamfer formed on site along the short edgefor butt jointing<strong>Hardie</strong>soffit lining• Refer to Figure 22 for uPVC <strong>Hardie</strong>jointer detail• Refer to Figure 23 for express joint detail• Refer to Figure 26 for two-way uPVC jointerFigure 19: Gable elevationEclipsa Eaves Lining• Refer to Figure 22 for uPVC <strong>Hardie</strong>jointer detail• Refer to Figure 25 for Fastfix Fasteners fixing detail. Use a 6mmdiameter masonry drill bit to drill a hole and fix fasteners• Refer to Figure 26 for Two-way uPVC JointerSilkline soffit lining• Refer to Figure 22 for uPVC <strong>Hardie</strong>jointer detail• Refer to Figure 25 for Fastfix Fasteners fixing detail. Use a 6mmdiameter masonry drill bit to drill a hole and fix fasteners• Refer to Figure 9 for two-way uPVC jointerFigure 20: Sloping soffit to weatherboard claddingjunction (Section ‘X’)Villaboard soffit lining• Refer to Figure 21 for flush joint details. Refer to Section 5.5 forflush jointing• Refer to Figure 22 for uPVC <strong>Hardie</strong>jointer detail• Refer to Figure 23 for express joint detail• Refer to Figure 24 for butt joint detailFigure 21: Vertical flush joint setout<strong>James</strong> <strong>Hardie</strong> Eaves And Soffits <strong>Installation</strong> <strong>Manual</strong> February 2013 New Zealand 19
Figure 22: uPVC <strong>Hardie</strong>jointer detailFigure 26: Two-way uPVC jointerFigure 23: Expressed joint detailFigure 27: Cladding detail with scotia mouldFigure 24: Butt joint detailFigure 28: Brick veneer detail with scotia mouldFigure 25: Fastfix fastener fixing detailNote: Use a 6mmdiameter masonry drillbit for drilling holes insheet for fixing Fastfixfasteners.20 <strong>James</strong> <strong>Hardie</strong> Eaves And Soffits <strong>Installation</strong> <strong>Manual</strong> February 2013 New Zealand
6 JOINTING AND FINISHINGFOR VILLABOARD LINING6.1 generalVillaboard Soffit Lining is finished with paint complying with parts 7,8, 9 and 10 of AS 3730. The application and maintenance must bein accordance with the manufacturer’s specifications.note: Before flush stopping sheet edges must be sealed withMultiplast resin, water proofing admixture or other similar products.6.2 glancing lightIn some instances, due to glancing light, set joints may benoticeable in Villaboard Lining walls, especially where paint finisheshave a high gloss level. Work closely with your builder or designerto minimise this.Table 17Levels of FinishesLevel offinishArtificial lighting needs to be considered in relation to soffits.Where glancing light is an issue its effect can be lessened by:• Artificial light shading devices.• The use of light coloured, matt finish paints.6.3 LEVEL OF FINISHESDifferent levels of finishes are typically specified for differentapplications. Higher levels of finishes are used to address theglancing light issues with painted Villaboard Soffit Lining referredto above. A description of the various levels of finishes and thejointing/coating requirements can be found in Table 17.Definition* Typical jointing/setting Finish0 This level of finish may be useful in temporaryconstruction.1 For use in plenum areas above ceilings, in areas wherethe work would generally be concealed, or in buildingservice corridors and other areas not normally open topublic view.2 For use in warehouse, storage or other areas wheresurface appearance is not of primary concern.3 For use in areas which are to receive heavy or mediumtexture (spray or hand applied) finishes or where heavywall paper coverings are to be applied as the finaldecoration. This level of finish is not generally suitablewhere smooth painted surfaces or light to medium wallcoverings are specified.4 This is generally the accepted level of finish fordomestic construction. It is used where light texturesor wall coverings and smooth textured finishes andsatin/flat/low sheen paints are illuminated by noncriticallighting.5 This level of finish is for use where gloss or semi-glosspaints are specified or where critical lighting conditionsoccur on satin, flat or low sheet paints.No stopping, taping, finishing oraccessories are required. The work isconfined to gluing or screwing/nailingsheets in place.Joints and corner joints will be set with<strong>James</strong> <strong>Hardie</strong> Base Coat reinforced withperforated paper tape.Joints and corner joints will be set with<strong>James</strong> <strong>Hardie</strong> Base Coat reinforced withperforated paper tape and <strong>James</strong> <strong>Hardie</strong>Top Coat.Joints and corner joints will be set with<strong>James</strong> <strong>Hardie</strong> Base Coat reinforced withperforated paper tape and <strong>James</strong> <strong>Hardie</strong>Top Coat.Refer to flush jointing recommendationson page 22.All joints and corner joints will have tapeembedded in <strong>James</strong> <strong>Hardie</strong> Base Coatapplied over all joints, angles, fastenerheads and accessories.This application is applicable to recessededge sheets only. The use of square edgesheets will require a high build applicationand coating finish.Refer to page 23 steps 1–4 for jointing.Final <strong>James</strong> <strong>Hardie</strong> Base Coat applicationshould be feathered out to approximately200mm + each side of the joint. Then afull skim coat of <strong>James</strong> <strong>Hardie</strong> Top Coatmust be applied over entire sheet surfacein order to achieve a uniform finish.This application is applicable to recessededge sheets only.The use of square edge sheets will requirea high build application and coating finish.For use in areas where finishing and stopping isnot considered necessary.Surface free from excess jointing compound. Toolmarks and ridges are generally acceptable.Minor tool marks and ridges are generallyacceptable.This level of finish must be sufficiently smoothto accept heavy vinyl, tiles or textured coatingswithout blemishes.For use where light-texture coatings or wallpaperor other lightweight wall coverings are to beapplied. For painted finishes in non-critical lightingareas flat and low-sheen textured paints are tobe applied. Gloss and semi-gloss paints are notgenerally suitable over this level of finish as anyminor blemish will show under critical light.The weight, texture and sheen level or wallcoverings applied over this level of finish must becarefully evaluated. Joints and fasteners must beadequately concealed if the wall-covering materialis lightweight, contains limited pattern, has agloss finish, or any combination of these featuresis present. Unbacked vinyl wall coverings are notsuitable over this level of finish.This level of finish is for use where gloss, semigloss,low-sheen or non-textured paints arespecified or where critical lighting conditionsoccur.*Reference: AS/NZS 2589.1: ‘Gypsum lining in residential and light commercial construction — Application and finishing. Part 1: Gypsum plasterboard’<strong>James</strong> <strong>Hardie</strong> Eaves And Soffits <strong>Installation</strong> <strong>Manual</strong> February 2013 New Zealand 21
6.6 Set jointsStep 1 — PreparationEnsure that the recesses are clean and free of dust andcontaminants. Sheet edges must be sealed with Multiplast resin,water proofing admixture or other similar products. If workingconditions are hot and dry, dampen the area around the joint priorto working.Step 3 — Embed TapeFirmly embed the perforated paper tape centrally into the joint usinga 50mm broad knife. Ensure that there are no voids under the tapeand remove excess compounds.NOTEThe jointing method shown below provides a Level 4 finish. Formore information about this and other finishes refer to page 21.Step 2 — First CoatApply <strong>James</strong> <strong>Hardie</strong> Base Coat to fill the recess with a 150mmbroad knife.Step 4 — Thin LayerImmediately cover tape with a thin layer of <strong>James</strong> <strong>Hardie</strong> Base Coatapplied with a 150mm broadknife.NOTESteps 5, 6 and 7 are only required for paint and wall paper finish.<strong>James</strong> <strong>Hardie</strong> Eaves And Soffits <strong>Installation</strong> <strong>Manual</strong> February 2013 New Zealand 23
7 Productinformation7.1 GeneralEclipsa Eaves Lining, Silkline Soffit Lining, Villaboard Soffit Lining,<strong>Hardie</strong>Groove Soffit Lining, <strong>Hardie</strong>soffit Lining and <strong>Hardie</strong>Flex EavesLining are a cellulose fibre reinforced cement building product. Thebasic composition is Portland cement, ground sand, cellulose fibreand water.Eclipsa Eaves Lining, Silkline Soffit Lining, Villaboard Soffit Lining,<strong>Hardie</strong>Groove Soffit Lining, <strong>Hardie</strong>soffit Lining and <strong>Hardie</strong>FlexEaves Lining is manufactured to AS/NZS 2908.2 ‘Cellulose-CementProducts Part 2: Flat Sheets’ (ISO 8336 ‘Fibre Cement Flat Sheets’).<strong>James</strong> <strong>Hardie</strong> New Zealand is an ISO 9001 ‘Telarc’ certifiedmanufacturer. Eclipsa Eaves Lining, Silkline Soffit Lining, VillaboardSoffit Lining, <strong>Hardie</strong>Groove Soffit Lining, <strong>Hardie</strong>soffit Lining and<strong>Hardie</strong>Flex Eaves Lining are classified Type A, Category 3 inaccordance with AS/NZS 2908.2 ‘Cellulose-Cement Products’.For Safety Data Sheets (SDS) visit www.jameshardie.co.nzor Ask <strong>James</strong> <strong>Hardie</strong> on 0800 808 868.7.2 DurabilityResistance to moisture/rottingEclipsa Eaves Lining, Silkline Soffit Lining, Villaboard Soffit Lining,<strong>Hardie</strong>Groove Soffit Lining, <strong>Hardie</strong>soffit Lining and <strong>Hardie</strong>FlexEaves Lining has demonstrated resistance to permanent moistureinduced deterioration (rotting) and has passed the following tests inaccordance with AS/NZS 2908.2:8 MaintenanceIt is the responsibility of the specifier to determine normalmaintenance requirements for eaves and soffits to comply withNZBC Acceptable Solution B2/AS1. The extent and nature ofmaintenance will depend on the geographical location and exposureof the building. As a guide, it is recommended that basic normalmaintenance tasks shall include but not be limited to:• Washing down exterior surfaces every 6-12 months*,• Pre-painted soffits, such as Silkline Soffit Lining and EclipsaSoffit Lining, when used in harsh costal environments, the soffitmust be washed down using a hose and soft brush minimumonce every four months in addition to the other maintenancerequirements,• Re-applying exterior protective finishes**,• Maintaining the exterior envelope and connections including joints,penetrations, flashings and sealants,• Cleaning out gutters, blocked pipes and overflows as required,• Pruning back vegetation close to or touching the building.* Do not use a water blaster to wash down the soffits.**Refer to your paint manufacturer for washing down and recoatingrequirements related to paint performance.• Water permeability (Clause 8.2.2)• Warm water (Clause 8.2.4)• Heat rain (Clause 6.5)• Soak dry (Clause 8.2.5)7.3 FinishesVillaboard Soffit Lining, <strong>Hardie</strong>Groove Soffit Lining, <strong>Hardie</strong>soffit Liningand <strong>Hardie</strong>Flex Eaves Lining must be paint finished within 90 days oftheir installation. Refer to the paint manufacturer for paint suitability,mixing and application.<strong>James</strong> <strong>Hardie</strong> Eaves And Soffits <strong>Installation</strong> <strong>Manual</strong> February 2013 New Zealand 25
Notes26 <strong>James</strong> <strong>Hardie</strong> Eaves And Soffits <strong>Installation</strong> <strong>Manual</strong> February 2013 New Zealand
Product Warranties<strong>James</strong> <strong>Hardie</strong> ®February 2013All <strong>James</strong> <strong>Hardie</strong> eaves and soffit linings come with a 15 year product warranty. Pre-finished products such as Eclipsa Eaves Lining and SilklineSoffit Lining come with a 10 year coating warranty and 15 year warranty on the base sheet. All accessories supplied by <strong>James</strong> <strong>Hardie</strong> arewarranted for a period of 15 years. For full warranty details visit www.jameshardie.co.nz or Ask <strong>James</strong> <strong>Hardie</strong> on 0800 808 868.Disclaimer: The recommendations in <strong>James</strong> <strong>Hardie</strong>’s literature are based on good building practice, but are not an exhaustive statement of all relevant information andare subject to conditions (c), (d), (f) and (g) in each products warranty under “Conditions of Warranty”. <strong>James</strong> <strong>Hardie</strong> has tested the performance of the Eclipsa EavesLining, <strong>Hardie</strong>Groove Soffit Lining, Silkline ® Soffit Lining, Villaboard ® Soffit Lining, <strong>Hardie</strong>soffit Lining and <strong>Hardie</strong>Flex Eaves when installed in accordance with theEclipsa Eaves Lining, <strong>Hardie</strong>Groove Soffit Lining, Silkline ® Soffit Lining, Villaboard ® Soffit Lining, <strong>Hardie</strong>soffit Lining and <strong>Hardie</strong>Flex Eaves Lining installation manual,in accordance with the standards and verification methods required by the New Zealand Building Code (NZBC) and those test results demonstrate the product complieswith the performance criteria established by the NZBC. However, as the successful performance of the relevant system depends on numerous factors outside the control of<strong>James</strong> <strong>Hardie</strong> (e.g. quality of workmanship and design) <strong>James</strong> <strong>Hardie</strong> shall not be liable for the recommendations made in its literature and the performance of the relevantsystem, including its suitability for any purpose or ability to satisfy the relevant provisions of the NZBC, regulations and standards, as it is the responsibility of the buildingdesigner to ensure that the details and recommendations provided in the relevant <strong>James</strong> <strong>Hardie</strong> installation manual are suitable for the intended project and that specificdesign is conducted where appropriate.
Copyright February 2013. © <strong>James</strong> <strong>Hardie</strong> New Zealand. TM and ® denotes a Trademark or Registered Mark owned by <strong>James</strong> <strong>Hardie</strong> Technology Limited.