JRV212T Owners Manual - Jensen Heavy Duty
JRV212T Owners Manual - Jensen Heavy Duty
JRV212T Owners Manual - Jensen Heavy Duty
Create successful ePaper yourself
Turn your PDF publications into a flip-book with our unique Google optimized e-Paper software.
<strong>JRV212T</strong>WIRINGWHITE FEMALERCA CONNECTORRED FEMALERCA CONNECTORIR REMOTE CONTROLCONNECTORRIGHT REAR SPEAKER (+)RIGHT FRONT SPEAKER (+)LEFT FRONT SPEAKER (+)LEFT REAR SPEAKER (+)LEFT REAR SPEAKER (-)LEFT FRONT SPEAKER (-)RIGHT FRONT SPEAKER (-)RIGHT REAR SPEAKER (-)NO CONNECTIONNO CONNECTIONPOWER ANTENNA AMP+12 V ACC SWITCHEDGROUNDBACKLIGHT DIMMER+12 V BATTERYNO CONNECTIONCH3 CAMERACONNECTORCH2 CAMERACONNECTORCH1 CAMERACONNECTOR4 PIN PLUG AMPCONNECTORYELLOW VIDEO INPUTFEMALE CONNECTORFEMALE MOTOROLA TYPEANTENNA CONNECTORWHITE FEMALERCA CONNECTORRED FEMALERCA CONNECTORSIRIUS CONNECTORIPOD CONNECTOR5
<strong>JRV212T</strong>Adjusting the ClockThe current time is displayed in the top right hand corner of the LCD display. To adjust the clock:1. Press and hold the MENU button (3) to view the “System Menu.”2. Use the on-screen arrows to highlight the “Set Clock” option.3. Touch the “Set Clock” field to view the “Set Clock” screen:System MenuSet Clock:Remote SensorPoint the remote control handset (sold separately) at the remote sensor IR (11) and press thefunction keys on the handset to control the system.Day/Night BacklightPressing the button (10) allows you to quickly toggle between preset dimming levels for nightand day viewing of the display.To set the preset dimming levels:1. Press and hold the button (10) to enter the “Display Setup” menu.2. Adjust display backlight intensity using the “Dimming Day” and “Dimming Night” level settingson the Display Setup menu.02 : 35AM NEXT4. Use the on-screen arrows to adjust the hour. Continue adjusting to move between AM and PM.Touch the “NEXT” button to move to the minutes field.5. Use the on-screen arrows to adjust the hour. Touch “OK” when finished.Auxiliary InputTo access an auxiliary device:1. Connect an audio source to the AUX IN connector on the front panel (12) or to the AUX INcables on the back of the radio. Video input is accessible for the “R.AUX” mode through theVIDEO IN cable at the back of the unit.2. Touch the “F.AUX” (front AUX) or “R.AUX” (rear AUX) button to select front or rear auxiliaryinput.AM/FMWBSATUSBCDiPODF.AUXR.AUX8
<strong>JRV212T</strong>Table 4: SIRIUS Satellite RadioThe following Camera Configuration options can be adjusted:Setting Options Function Table 6: Camera ConfigurationLockedChannelsEnable SongSeekRemoveFavoritesRemove AllFavoritesListYesNoListOKCANCELWeather Alert ConfigurationView list of locked channels.Enter lock code, thentouch to lock/unlock.Select “Yes” to receive song seek alertsTouch to Enable / Disable / Delete.Select “OK” to remove all titles from your favorites list.Touch the Weather Alert Configuration option under the System Menu to adjust the followingweather alert options.Table 5: Weather Alert ConfigurationSetting Options FunctionMin Alert Levels AllNoneWarningsWatchesAuto-On Enable Yes Select “Yes” to have the radio automatically turn onNowhen a weather alert is received.Alert Volume 0/40 - 40/40 When set to “Off”, the radio will turn on at the samevolume level set when it was last turned off. Otherwise,you can choose a default turn-on level between 1 ~ 40.Clear SAME OKClear SAME Codes.CodesCANCELCancel and return to menu.SAME Code 1-7 See “SAME Decoding and Filtering” on page 13.Setting Options FunctionCamera 1 Mode Skip The output of Camera 1 image is skipped.Normal (default) The output of Camera 1 image is in normal mode.MirrorThe output of Camera 1 image is in mirror mode.Camera 2 Mode Skip The output of Camera 2 image is skipped.Normal (default) The output of Camera 2 image is in normal mode.MirrorThe output of Camera 2 image is in mirror mode.Camera 3 Mode Skip The output of Camera 3 image is skipped.Normal (default) The output of Camera 3 image is in normal mode.MirrorThe output of Camera 3 image is in mirror mode.Priority Order 1-2-3 Continue pressing to select the desired camera trigger1-3-22-1-32-3-13-1-23-2-1priority from 1 (highest) to 3 (lowest).Trigger Delay 1/6 Set delay time for displaying camera image after trigger2/63/64/65/66/6signal is removed.Auto Mic Enable Yes Select “Yes” to automatically turn on the microphone andNomute other audio when the vehicle is in reverse gear.Camera ConfigurationTouch the Camera Configuration option under the System Menu to adjust the following cameraoptions. Press and hold the CAM button (5) on the front panel to directly access the System MenuCamera Configuration options.10
<strong>JRV212T</strong>AM/FM/RBDS CONTROLS1234<strong>JRV212T</strong>891011Tuning• Touch the on-screen “TUNE+” or “TUNE-” button on the touch screen to tune up or down inone step increments.• Touch the “SEEK ” or “SEEK-” button to seek the next strong station.Preset StationsTouch the on-screen “PRESET” button to view the list of preset stations. Six numbered presetstations for the current band are listed on the touch screen and can be selected when touched. Theselected station is displayed with a highlighted frame.512ST67Enter FM/AM Mode• Press the AUDIO button (4) on the front control panel to access Audio mode (if needed).• Touch the “AM/FM” button on the touch screen to access AM/FM mode.13TUNE+TUNE-SEEK+SEEK-P1 87.5P2 90.1P3 98.1P4 106.1P5 107.9P6 87.5BAND PRESET PTY AS/PSAM/FMSATUSBF.AUXWBCDiPODR.AUXTUNE+TUNE-SEEK+STFM87.5MhzAM/FMSATUSBWBCDiPODTo store a station:1. Tune radio to desired station (large display mode is shown when tuning).2. Touch the “PRESET” button to view to the interface showing the preset list.3. Touch and hold a preset location on the screen until the station is stored and appears in thepreset list.NOTE: Only six presets are displayed at one time. Change to another band to view the presetstations stored for that band.SEEK-F.AUXR.AUXBAND PRESET PTY AS/PSInformation BarThe top portion of the touch screen is the information bar. Information such as the current band andstation, ST icon, and system clock is displayed on the information bar.Select a BandTouch the “BAND” button at the bottom of the screen to change between FM1, FM2, FM3, AM1 andAM2 bands.11
<strong>JRV212T</strong>Automatic Store / Preset Scan (AS/PS)Automatic Store1. Select a band (if needed).2. Touch and hold the “AS/PS” button for more than three seconds to automatically select 6strong stations and store them in the current band. New stations replace any stations alreadystored in that band.Preset Scan1. Select a band (if needed).2. Touch the “AS/PS” button to scan stations stored in the current band. The unit will pause for tenseconds at each preset station.3. Touch “AS/PS” again to stop scanning when the desired station is reached.RBDS OperationIn FM radio mode, touch the “PTY” button to list the following search options in pages: Any/ News /Information / Sports / Talk/Rock / Classic Rock / Adult Hits / Soft Rock / Top 40 / Country / Oldies /Soft / Nostalgia / Jazz / Classical / Rhythm and Blues / Soft R&B / Language / Religious Music /Religious Talk / Personality/ Public / College / Weather / Emergency Test / Emergency.Only six search options are displayed at one time. Touch the up/down arrows to the right of the list toaccess the next group of search options.Touch the desired program type, and then touch “SEARCH” to search for the correspondingprogram. If a corresponding program is found, the unit will play the program. If there is nocorresponding program, the unit will resume the previous program.Stereo (ST)The unit will automatically pick up an FM stereo signal, when available. When in stereo mode, the“ST” icon appears in the information bar on the screen. When no stereo signal is available, the unitwill automatically revert to mono operation, and no icon will be displayed.12
<strong>JRV212T</strong>WEATHER BAND OPERATIONWhat is the NOAA Weather Radio/Weatheradio Canada?NOAA (National Oceanic and Atmospheric Administration) is a nationwide system that broadcastslocal weather emergency information 24 hours a day via the National Weather Service (NWS)network. The U.S. network has more than 530 stations covering the 50 states as well as theadjacent costal waters, Puerto Rico, the U.S. Virgin Islands and the U.S. Pacific Territories. Eachlocal area has its own transmitting station and there are a total of seven broadcasting frequenciesused. A similar system is available in Canada under the Weatheradio Canada service administeredby Environment Canada.Weather Band Selection1. Press the AUDIO button (4) on the control panel to enter Audio mode (if needed).2. Touch the “WB” button on the touch screen to access the weather band (NOAA sevenfrequency broadcast).TUNE+TUNE-SEEK+162.475 MhzThe indication "WB" will appear on the display panel, along with the current number andchannel indication: "WB-1", “WB-2", "WB-3", "WB-4", "WB-5", "WB-6" or "WB-7".3. Touch the “TUNE+” or “TUNE-” button to tune to a weatherband station or touch the a buttonlabeled 1-7 to access one of the seven weatherband channels directly. The seven frequenciesare shown in the following table:Frequency (MHz)Preset162.400 2162.425 4162.450 5162.475 3162.500 6162.525 7162.550 1AM/FMSATUSBF.AUXWBCDiPODR.AUX1 2 3 4 5 6 7This table also shows which preset button will access the frequency. Note that one frequencycannot be accessed using a preset button. The frequency can only be reached using the tuningcontrols.NOTE: The weather band channel frequency is fixed in preset memory and cannot bechanged.NOAA Weather AlertThe Weather Alert function adds an additional level of user safety by automatically switching fromany of the available function modes to weather band for a minimum of 60 seconds if a NOAAwarning tone (1050 Hz) is received/detected. If no additional warning tone is received for 60seconds, the unit will switch back to the last known function mode.The <strong>JRV212T</strong> is equipped with a weather alert level (Min Alert Level) and weather alert power(Auto-On Enable) feature that will cause the radio to turn on automatically when a weather alert isdetected, adding an additional level of user safety. When the weather alert level is set to “All”,“Warnings” or “Watches” the weather alert function automatically switches from any of the availablefunction modes (Tuner, SIRIUS, CD, iPod, AUX) to Weather Band when the selected NOAAwarning type is received/detected.See “System Menu” on page 9 to learn how to turn the Min Alert Level and Auto-On Enable featureson.SAME Decoding and FilteringSpecific Area Message Encoding (SAME) data is also broadcast prior to alert broadcasts. SAMEdata contains information about the geographic region affected by the alert, the type of alert, and itseffective time. The geographic region included in the SAME data is called the Geographical Areacode and has the form PSSCCC where “P” represents a portion of the county, “SS” is a two-digitstate, territory, or offshore marine area identifier and “CCC” identifies the county, province, or majormetropolitan area within the state. This unit can be configured through the system setting menu withup to seven Geographical Area codes to limit the automatic tuning or power on functions describedabove.SAME data also includes the type of alert being broadcast. This unit can be configured through theSystem Setting Menu to limit the automatic tuning or power on functions based on the type of alert.SAME is activated by programming a 6 digit code - called a FIPS code - into your radio. The FIPScode or Federal Information Processing System code is a six digit code that identifies the states andcounties (or parishes) in the United States. The first digit identifies the county subdivision. The nexttwo digits identify the state or territory, and the last three identify the county. The FIPS code for yourarea can be found by calling the NWS toll free number or visiting the web site.The phone number is 1-888-NWS-SAME (1-888-697-7263) Upon calling, an automated system willprompt you to enter your state and county. When you confirm the information, the system willprovide your six digit FIPS code.The web site is: www.nws.noaa.gov/nwr/indexnw.htm. Upon selecting your state from the chart, youwill see a listing of all the counties in that state. For each county there is a listing of the SAME#(FIPS code), the location of the transmitter, the WB frequency, the call sign, the transmitter powerand miscellaneous remarks.13
<strong>JRV212T</strong>NOTE: Because broadcast areas overlap you may want to set more than one S.A.M.E.location. If you live near the border between counties, you may want to receive alerts frommore than one tower.Your radio is capable of being programmed with up to 7 different FIPS location codes. The defaultcode has been programmed at the factory - 000000 - to respond to all messages within your area.14
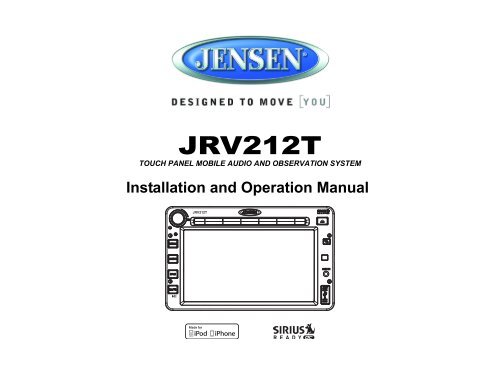
<strong>JRV212T</strong>CD/MP3/WMA OPERATION1234567<strong>JRV212T</strong>8910111213Inserting and Removing a USB DeviceInserting a USB DeviceInsert the USB device into the USB jack (13) and then press the AUDIO button (4) on the frontcontrol panel to access AV mode (if needed). The unit will automatically detect the USB device anddisplay “Loading USB” while loading.RPTSHUFINTRO2/11 00:33 10:33 PMCakeLong Time001 Long Time.mp3AM/FMSATUSBWBCDiPODDIR F.AUX R.AUXInserting and Removing a DiscInserting a DiscInsert a disc, label-side up, into the disc slot (8) with the unit turned on. The unit will automaticallydraw the disc in, enter CD mode, and play the first track on the disc.RPTSHUFINTRO2/11 00:10 12:04 AMTrack 3AM/FMElapsed playback time and track number of current track are displayed on the information bar at thetop of the screen.Ejecting a DiscPress the eject button (9) on the front panel to stop disc play and eject the disc. After the disc isejected, the unit automatically returns to AM/FM mode.SATUSBF.AUXWBCDiPODR.AUXElapsed playback time and track number of current track are displayed on the information bar at thetop of the screen.NOTE: After loading a USB device, files and folders are accessed in the order in which theywere written to the device. Therefore, the playing order may not be the same as the order inwhich they are expected to played.Removing a USB DeviceChange to another mode and then remove the USB device from the USB connector.NOTE: The USB button is operative only when a USB device is connected.MP3 Specifications• A directory that does not include an MP3 file is skipped.• Maximum number of folders: 512 (including skipped directories)• Maximum number of folder levels: 12• Maximum number of MP3 files: 999• Maximum number of characters for MP3 file name and folder name: 32• Sampling frequency: 16KHz, 22.05KHz, 24KHz, 32KHz, 44.1KHz, 48KHz.• Bit rates: maximum 384 Kbps.• Maximum number of Characters of ID3 Tag:• ID3 Tag version 1.0: 32• ID3 Tag version 2.x: 3215
<strong>JRV212T</strong>SIRIUS RADIO OPERATION123456<strong>JRV212T</strong>8910111213SIRIUS Tuning OptionsChannel TuningTouch the “TUNE+” or “TUNE-” buttons to tune up or down in one step increments.Preset Tuning• Touch the “PT+” button to view the next preset channel.• Touch the “PT-” button to view the previous preset channel.Category Tuning• Touch the “CAT” button to view the category screen.• Touch the left/right arrows at the top of the information box to change between categories.• Touch the up/down arrows to the right of the channel list to move up/down the channel list.• Touch a channel name to tune to that channel.Direct Channel Access1. Touch the “DIRECT” button to access the direct entry screen.7Switching to SIRIUS ModePress the AUDIO button (4) to access Audio mode (if needed). Touch the on-screen “SAT” button toaccess Sirius Radio.TUNE+PT+SIR1-1Rock/Pop36 Alt NationMuseSupermassive BlDIRECT INFO PRESET CAT FAV10:33 PMAM/FMSATUSBF.AUXWBCDiPODR.AUXTUNE+PT+TUNE-PT-TUNE-PT-SIR1-10 0 0 NEXTDIRECT INFO PRESET CAT FAV10:33 PMAM/FM2. Use the up/down arrows to select the first digit in the channel number and then touch the“ENTER” button to move to the second digit. Repeat for the third digit.3. Touch the “OK” button to tune to the entered channel number.NOTE: To exit the screen without making an entry, touch the “DIRECT” button.SATUSBF.AUXWBCDiPODR.AUXActivating Sirius Satellite RadioBefore you listen to Sirius Radio, you must subscribe to the service using your radio's identificationnumber. To display the Radio ID, touch the “TUNE+” or “TUNE-” button to access channel “000”.The screen displays "Radio ID" followed by a 12 figure ID number.Preset ChannelsThe preset buttons can be used to store 6 channels per band (SIR1, SIR2 and SIR3), allowingconvenient access to your favorite channels. The selected preset station is displayed in highlightedfont with a blue frame. Access SIR1, SIR2 and SIR3 bands by using the on-screen arrows to showadditional preset channels.Storing a Channel1. Tune radio to the desired channel17
<strong>JRV212T</strong>2. Touch the “PRESET” button to view the preset list.3. Touch and hold a preset location on the screen until the channel is stored and appears in thepreset list.4. Repeat steps 1-3 to program additional channels.NOTE: When listening to a preset channel, the preset number is indicated after the SIRIUSband in the top bar (i.e. SIR1-1).Recalling a Stored ChannelThe stored channels can be accessed directly by touching the corresponding preset location on thetouch screen.FavoritesThis feature lets you store and search for up to 15 Artist/Song combinations on SIRIUS SatelliteRadio.1. While the current song is playing, press the “FAV” button.2. Touch the “ARTIST” button to save the Artist or touch the “SONG” button to save the Song toyour favorites list.Next time the stored artist or song is played on SIRIUS Satellite Radio, you will be notified with analert and can then choose to tune to the channel playing the Song or Artist by touching the song orartist name in the list. The list of stored Artists/Songs can be managed through the System Menu.See “SIRIUS Satellite Radio” on page 9.Channel LockAccess Channel Lock through the System Menu under the “SIRIUS Satellite Radio” menu. See“SIRIUS Satellite Radio” on page 9.1. Select “Set Lock Code.”2. No channels can be locked with the default 0000 code. To set the lock code, you must firstenter the default code (0000):a. Use the up/down arrows to select the first digit in the channel number.b. Touch the “ENTER” button to move to the second digit.c. Repeat above steps to enter all 4 digits of the default code.d. Use the up/down arrows to select the first digit in the channel number.e. Touch the “ENTER” button to move to the second digit.f. Repeat above steps to enter all 4 digits.g. Repeat above steps to confirm the new code.3. After setting a new four digit code, you can lock channels using the “Locked Channels” optionon the System Menu.4. Upon entering the Locked Channels list, you will be prompted to enter your four digit code.a. Use the up/down arrows to select the first digit in the channel number.b. Touch the “ENTER” button to move to the second digit.c. Repeat above steps to enter all 4 digits.5. After entering the code, you can navigate the list using the up/down to highlight the channels.6. Touch the channel name to Lock (indicated by a icon) or Unlock ( ) the selected channel.18
<strong>JRV212T</strong>iPod OPERATIONThis unit is equipped with an iPod ready function that will allow you to control your iPod (ifcompatible) using the control panel control buttons. The following iPod versions are supported:• iPod Nano (1G, 2G, 3G, 4G, 5G and 6G)• iPod 5G• iPod Classic• iPhone, iPhone 3G, iPhone 3GS, 4G• iPod Touch 1G, 2G, 3G and 4G• iPod Touch 2GNOTE: iPod and iPod Cable sold separately.Accessing iPod ModeIf iPod Auto-Select is turned “On” in the system menu, youriPod will play automatically when connected to the unit.“iPod” will appear in the upper left corner of the display.If iPod Auto-Select is “Off” in the system menu, your iPodwill not play automatically when connected. In this case,touch the on-screen “iPOD” button to change to IPODmode. If you do not see the “iPOD” button, press theAUDIO button (4) to view the audio playback screen.Turning the iPod On/OffThe iPod power turns on automatically when an iPod isconnected to 30-pin iPod cable, as long as the vehicle ignition is turned on. You can turn the iPod offby disconnecting it from the cable or by turning the ignition off. When the ignition is turned off, theiPod will pause and then enter sleep mode after 2 minutes. While the iPod is connected, the powercannot be turned on or off from the iPod itself (does not apply to iPhone).NOTE: The iPod will continuously recharge when connected to the unit, as long as thevehicle ignition is turned on.Selecting a Playlist1. When an iPod is playing, touch the “DIR” button to display the playlists on the LCD.2. Use the onscreen up/down (left/right) arrows to change the playlist between Artist / Album /Genre / Song / Audiobook / Podcast.3. Press the up/down arrows to navigate the selected playlist.4. Touch to select a file to play.iPodVideoiPodphotoiPod<strong>Jensen</strong> iPod Ready CableHEAD UNITiPodminiiPodnanoOptional iPod AdaptorControlling PlaybackRPTSHUFINTRODIR3/275 2:43 10:33 PMCakeLong TimeShowroom of CompAM/FMSelecting Songs• Touch the or button to go to the next or previous file. The selected file number willappear on the information bar at the top of the screen.• Touch and hold the or button to fast forward or fast reverse.• Release to resume normal playback.Pause Playback (MUTE)• Press the MUTE button (6) to suspend playback. Playback controls are disabled when paused.• Press the MUTE button again to resume playback.Repeat Play• Touch the “RPT” button during to repeat play the current file.• Touch “RPT” again to stop repeat play.Shuffle Play• Touch the “SHUF” button on the touch screen to play all files in random, shuffled order.• Touch “SHUF” again for normal play.Intro Play• Touch the “INTRO” button to play an introduction of each file, beginning with the next file. Theunit will play the first 10 seconds of each track.• Touch “INTRO” again to stop intro play and play the current file in full.SATUSBF.AUXWBCDiPODR.AUX19
<strong>JRV212T</strong>CAMERA OPERATIONEnter Camera ModeConnect the cameras to the unit using the CAMERA 1-3 connection cables at the back of the unit.Press the CAM button (5) on the front control panel to access camera mode.2/11 00:10 12:04 AMCamera Control OptionsTouch the lower part of the screen to make the camera controls appear.• Touch the “CAM 1” button to view the Camera 1 video in full screen.• Touch the “CAM 2” button to view the Camera 2 video in full screen.• Touch the “CAM 3” button to view the Camera 3 video in full screen.• Touch the “AUDIO” button to turn the camera audio ON/OFF.• Touch the button on the screen or press button (10) on the control panel to selectBrightness, Contrast and Color settings. Use the +/- buttons to adjust each setting from 0-10.AUDIOCAM 1CAM 2 CAM 3Camera Connection and Camera TriggerThis unit can connect 3 cameras: CAM 1, CAM 2, and CAM 3. Each camera can be triggeredseparately and can be set in different trigger priority. There are 3 trigger wires at the back of the unit.If trigger signals are detected on more than one trigger wire, the channel that has the highest priorityis triggered first. Once a channel is triggered, the triggered channel video will be displayed on thefull screen. Only CAM 1 has audio input.Auto Mic EnableWhen the Auto Mic Enable feature is set to “Yes,” the current playback audio will be muted and themicrophone for camera 1 will be automatically turned on when the vehicle is placed in reverse gear.See “Camera Configuration” on page 10.Audio Output and Volume AdjustmentIn camera mode, if Camera 1 is not triggered, the front audio output will be the from the last audiosource played. Rotate the VOL control (1) to adjust the volume of the audio source.When Camera 1 is triggered and the Auto Mic Enable feature is on, the Camera 1 video appears onthe entire screen and the audio input from the camera is played. In this case, rotate the VOL control(1) to adjust the volume of the Camera 1 audio input. If the Auto Mic Enable option is off, no audio isavailable when Camera 1 is triggered.NOTE: The upper area of the screen is the current playback information bar area. Press thetop of the screen to remove the bar or make the bar reappear.20
<strong>JRV212T</strong>CARE AND MAINTENANCE• Keep the product dry. If it does get wet, wipe it dry immediately. Liquids might contain mineralsthat can corrode the electronic circuits.• Keep the product away from dust and dirt, which can cause premature wear of parts.• Handle the product gently and carefully. Dropping it can damage circuit boards and cases, andcan cause the product to work improperly.• Wipe the product with a dampened cloth occasionally to keep it looking new. Do not use harshchemicals, cleaning solvents, or strong detergents to clean the product.• Use and store the product only in normal temperature environments. High temperature canshorten the life of electronic devices, damage batteries, and distort or melt plastic parts.IgnitionThe most common source of noise in reception is the ignition system. This is often a result of theradio being placed relatively close to the ignition system (engine). This type of noise can be easilydetected because it will vary in intensity of pitch with the speed of the engine.Usually, the ignition noise can be suppressed considerably by using a radio suppression type highvoltage ignition wire and suppressor resistor in the ignition system. (Most vehicles employ this wireand resistor, but it may be necessary to check them for correct operation.) Another method ofsuppression is the use of additional noise suppressors. These can be obtained from most CB/Aradio or electronic supply shops.InterferenceRadio reception in a moving environment (automobile) is very different from reception in a stationary(home) environment. AM reception will deteriorate when passing through a tunnel or when passingunder high voltage lines. Noise can be picked up from passing automobiles. Although AM is subjectto environmental noise, it can received at great distances. This is because broadcasting signalsfollow the curvature of the earth and are reflected back by the upper atmosphere.21
<strong>JRV212T</strong>TROUBLESHOOTINGSymptom Cause SolutionNo power The vehicle’s ignition is not on If the power supply is properly connected to the vehicleaccessory terminal, switch the ignition key to “ACC”.The fuse is blownReplace the fuse.Disc cannot be loaded or Presence of CD disc inside the player Remove the disc in the player and insert the new one.ejectedInserting the disc in reverse direction Insert the compact disc with the label facing upward.Compact disc is extremely dirty or Clean the disc or try to play a new one.disc is defectiveTemperature inside the vehicle is too Wait until the ambient temperature returns to normal.highCondensationLeave the player off for an hour or so, then try again.No sound Volume is too low Adjust volume to audible level.Fader is set incorrectlyPress AUDIO button to access menu and adjust Fadersettings.Wiring is not properly connected. Check wiring connections.Mute is on or Camera Mic is active incamera modeTurn Mute Off or Turn Mic Off in camera modeThe operation keys donot workThe built-in microcomputer is notoperating properly due to noiseSound skips The installation angle is more than 30degrees.The disc is dirty or defective.Cannot tune to radiostation, auto-seek doesnot workRadio automaticallyswitches to WB (WeatherBand)Radio automatically turnson (ignition on) and tunesto WB (Weather Band)Radio mutes audio whenvehicle is in reverse gear.The antenna cable is notconnected.The signals are too weak.This is a normal function. A WeatherBand warning is being received.This is a normal function when theAlert Power feature is set to “On” inthe System Setup menu. A WeatherBand warning is being received.It is a normal function for the audio tomute when the vehicle is backing up.Press the RESET button.Adjust the installation angle to less than 30 degrees.Clean the disc and try to play again or use new disc.Insert the antenna cable firmly.Select a station manually.If you do not want this to occur, set the WB Alert settingto “Off” in the System Setup menu.If you do not want this to occur, set the Alert Powersetting to “Off” in the System Setup menu.If the camera has a microphone, the camera audio willbe played when in reverse gear.22
<strong>JRV212T</strong>SPECIFICATIONSCDSignal to Noise Ratio................................................................................................... > 60dBChannel Separation.......................................................................................More than 50 dBFrequency Response ........................................................................................40Hz - 18 kHzCD Format Compatibility .....................................................................CD-DA, CD-R, CD-RWFM RadioFrequency Range (USA)............................................................................ 87.5 to 107.9 MHzFrequency Range (Europe)........................................................................... 87.5 to 108 MHzSensitivity (S/N=30dB) ...................................................................................................... 4µVImage Rejection ........................................................................................................... >45 dBStereo Separation.......................................................................................................... >25dBAM/MWFrequency Range (USA)................................................................................. 520-1710KHzFrequency Range (Europe).............................................................................. 522-1620KHzSensitivity (S/N=20dB) ................................................................................................... 36 dBGeneralOperating Voltage..................................................................................................DC 12 VoltsGrounding System........................................................................................ Negative GroundSpeaker Impedance ..............................................................................4-8 ohms per channelTone ControlsBass (at 100 Hz)...................................................................................................... ±10 dBTreble (at 10 kHz).................................................................................................... ±10 dBPower Output ............................................................................................................. 50W x 4Current Drain...............................................................................................15 Ampere (max.)Dimensions.................................................................................... 80 (W) x 183 (D) x 100 (H)Digital Media File Format Compatibility................................................................. MP3, WMA23
<strong>JRV212T</strong>ASA Electronics Corporationwww.asaelectronics.comwww.jensenrvdirect.com© 2012 ASA Electronics Corporationv.02091224


