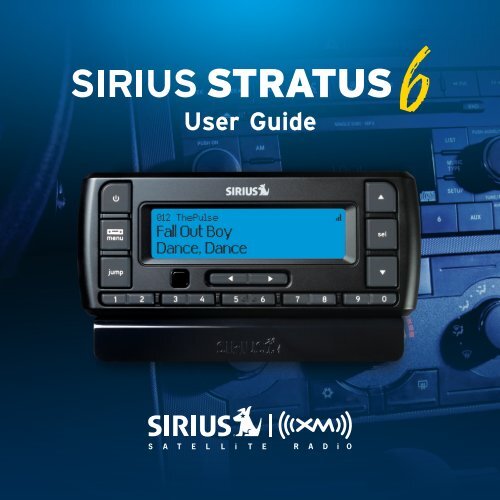
User Guide
User Guide
User Guide
You also want an ePaper? Increase the reach of your titles
YUMPU automatically turns print PDFs into web optimized ePapers that Google loves.
Introduction5
IntroductionFeaturesCongratulations, on your purchase of the Stratus 6!The Stratus 6 has these exciting features to enhance your overall experience:• Easy to read blue display: View artist name, song title, and channelinformation on an easy to read display.• A La Carte programming capability: Make individual channel selection.• Channel guide: View your individual channel lineup by category.• Improved audio connection options: Use either the included Aux In Cable,or the new PowerConnect technology to listen to the audio through yourvehicle’s stereo system.• Favorite channel presets: Save and enjoy fast access to up to 10 of yourfavorite channels.• FM preset button: Store and quickly access FM channels that give you thebest audio reception when using PowerConnect.• One-Touch Jump: Directly access traffic and weather of the 20 mostcongested cities.• Parental controls: Easily lock and unlock channels with mature content.Please read the entire <strong>User</strong> <strong>Guide</strong> before using your Stratus 6!6
Safety and Care InformationIMPORTANT! Always read and understand all the instructions to avoidinjury to yourself and/or damage to your device. SIRIUS XM Radio Inc.disclaims all responsibility for damage from data loss due to breakdown,repair, or other causes.• Do not expose to extreme temperatures (above 140ûF or below -4ûF, orabove 60ûC or below -20ûC).• Do not expose to moisture. Do not use device near or in water. Do nottouch the device with wet hands.• Do not let any foreign matter spill into device.• Do not store in dusty areas.• Do not expose to chemicals such as benzene and thinners. Do not useliquid or aerosol cleaners. Clean with a soft damp cloth only.• Do not expose to direct sunlight for a prolonged period of time, and donot expose to fire, flame, or other heat sources.• Do not try to disassemble and/or repair device yourself.• Do not drop your device or subject it to severe impact.• Do not place heavy objects on device.• Do not subject device to excessive pressure.• If the LCD screen is damaged, do not touch the liquid crystal fluid.7
IntroductionWARNING!• Opening the case may result in electric shock.• If the liquid crystal fluid comes in contact with your skin, wipe the skin areawith a cloth and then wash the skin thoroughly with soap and running water.If the liquid crystal fluid comes into contact with your eyes, flush the eyeswith clean water for at least 15 minutes and seek medical care. If the liquidcrystal fluid is ingested, flush your mouth thoroughly with water. Drink largequantities of water, and induce vomiting. Seek medical care.• Make sure that you insert the PowerConnect Power Adapter all the way intothe vehicle’s cigarette lighter or power adapter socket.• If you are using PowerConnect as your audio connection option, it isadvisable not to insert a multi-outlet adapter into the same vehiclecigarette lighter or power adapter socket to simultaneously power otherdevices. Some multi-outlet adapters can prevent the PowerConnect featurefrom working properly.• When using this product, it is always important to keep your eyes on the roadand hands on the wheel. Not doing so could result in personal injury, death, and/or damage to your device, accessories, and/or to your vehicle or other property.• Vehicle installation and radio configuration functions should not beperformed while driving. Park your vehicle in a safe location beforebeginning installation.• This product contains chemicals known to the State of California to causecancer and birth defects or other reproductive harm.Your device should be placed in your vehicle where it will not interfere with thefunction of safety features, e.g., deployment of airbags. Failure to correctly placedevice may result in injury to you or others, if the unit becomes detached duringan accident and/or obstructs the deployment of an airbag.8
What’s in the Box?menuseljumpStratus 6 RadioPowerConnect Vehicle DockAux In CableDash MountVent Mountand ExtendedVent ClampsPowerConnectPower AdapterMagnetic Mount Antennaand Rubber TailScrewsAntenna & Dash MountAlcohol Preparation Pads9
IntroductionStratus 6 FunctionsPower ButtonTurn radio on and off.FM / Menu ButtonFM: Press to access and cyclethrough FM presets.Menu: Press and hold toaccess advanced features andconfiguration options; alsowhen in configuration options,press and hold to return to maindisplay screen.Up and Down ArrowsScroll through lists andpreview channels; alsohighlight menu options.menujumpselSelect ButtonPress to confirmselection for channeland menu items; alsopress first beforeentering the channelnumber, to directlytune to a channel.Press and hold to goback to the previouschannel to which youwere listening.JumpDirectly access trafficand weather of the 20most congested cities.Left and Right ArrowsSearch for channels bycategory.Number ButtonsSelect your favoritechannels; also entera channel number.10
PowerConnect Vehicle DockColor-Coded ConnectionsThe color-coded PowerConnect Vehicle Dock makes it simple to connect. Justmatch the colors on the cable ends to the colors on the dock to see what goeswhere.Front ViewPWR FM AUDIO ANTPWR (Red)Connection forPowerConnectPower Adapter.FM (Blue)Connection foroptional FMDirect Adapter(sold separately).AUDIO (Green)Connection forAux In Cable orCassette Adapter(sold separately).ANT (Silver)Connection forthe MagneticMount Antenna.Docking RailsFits into slots onthe rear of theStratus 6 to securethe radio.11
Vehicle Installation13
jumpseljumpselVehicle InstallationStep 1: Choose a Location for Your RadioWhen installing the Stratus 6 in your vehicle, choose a location where it will notblock your vision, interfere with the controls, or obstruct any air bags. The locationshould be easily accessible and provide good visibility of the display, and shouldnot be located where it will be in direct sunlight, which will affect the visibility ofthe display screen.Several examples of the Stratus 6 mounted in a vehicle are shown: A is the ondash method using the Dash Mount, and B is the vent clip method using the VentMount.Option 1 Option 2A.A.14
jumpjumpselseljumpselOption 3A.Option 4 Option 5B.B.15
Vehicle InstallationStep 2: Install the Vent or Dash MountDepending on your situation, you can either choose to use the Dash Mount or theVent Mount.Installing the Dash Mount:CAUTION! The adhesive used on the Dash Mount may be difficult to remove. Do notinstall this mount on leather surfaces (contact your vehicle dealer if you are unsureabout your dash surface), and make sure the air temperature is atleast 60ûF (15ûC) during installation. If it’s not at least 60ûF, turn onthe heater in your vehicle to bring the temperature up to 60ûF.1 Locate a flat surface for the Dash Mount. Make surethere is ample room for the PowerConnect Vehicle Dockand Stratus 6 when installed.2 Set the orientation of the DashMount before adhering it. Loosenthe knob and adjust the adhesivefoot for the location you selectedin “Step 1: Choose a Location forYour Radio” on page 14:• Option 1 & Option 3 should be orientedas I.• Option 2 should be oriented as II.3 Attach the Dash Mount to thePowerConnect Vehicle Dock using theprovided screws.III16
4 Clean the surface with the alcohol preparation pad and let it drythoroughly.5 Peel off the adhesive liner. Position,press, and hold the Dash Mount andPowerConnect Vehicle Dock in place for30 seconds.IMPORTANT! Allow the Dash Mount adhesiveto cure (dry) for a minimum of 2-4 hours before using the mount. The bestadhesion occurs after 24 hours.6 The dock mounting plate can be tilted in different directions.Adjust as necessary for your particular vehicle. When theorientation is correct, tighten the knob.Knob Adhesive Foot Dock MountingPlateTIP! To remove, carefully lift the adhesive pad with your fingers or a spoon.Warming the pad with a hair dryer for several minutes will help soften theadhesive.17
Vehicle InstallationInstalling the Vent Mount:1 Locate a vent with horizontallouvers sturdy enough to hold yourPowerConnect Vehicle Dock and radio.Extended Vent Clamps2 If the vent louvers in your vehicle arerecessed, you may need to use thelonger vent clamps with the Vent Mount.If so, Remove the shorter vent clampsand install the longer ones into theVent Mount. Be sure to observe theorientation of the vent clamps as shown.Remove End CapShort VentClampsSlide Short Vent Clamps OutSlide Extended Vent Clamps InReplace End Cap18
3 Attach the Vent Mount to thePowerConnect Vehicle Dock usingthe provided screws.4 Push the Vent Mount onto thevehicle vent as shown (1) untilit hooks on the rear of the ventlouver (2).5 Rest the foot against thebottom of the vent (2), and adjust the tilt of the Vent Mount byrepositioning the foot to a different adjustment hole (3).1 2 3PUSHDashDashHOOKEDDashVentFOOTLouverVentTILTADJUSTMENTHOLESVentTo remove the Vent Mount, push the mount into the vent. Then lift up untildisengaged from the rear of the vent louver, and remove the Vent Mount.19
Vehicle InstallationStep 3: Mount the Magnetic Mount AntennaThe Magnetic Mount Antenna contains a strong magnet which will stick to anymetal part of your vehicle, but will not damage the vehicle.To install the Magnetic Mount Antenna:1 Choose the best location for your antenna consideringyour own personal situation. Pay particular attention toany accessories that you may have like luggage racks andhow frequently you may use them.Sedan/Coupe: We recommend mounting the antennaabove either the front windshield or the back window as shown.Magnet20
SUV: We recommend mounting the antenna at the rear of the roofas shown.Convertible: We recommend mounting the antenna at the leadingedge of the trunk as shown.Pickup Truck: We recommendmounting the antenna above the frontwindshield as shown.21
Vehicle Installation2 Attach the Rubber Tail to the antennaand press the antenna cable into theRubber Tail. The Rubber Tail will helpto position the antenna the correctdistance from the edge of the roof ortrunk lid.3 Clean the surface of the selectedmounting location using the alcoholpreparation pad and let it drythoroughly.4 Follow the Tips and Cautions shownon the next several pages, and placethe antenna in the location youProtectiveMaterialMagnetic Mount Antenna(Upside-Down)RubberAntennaTailAntenna CableStrainReliefselected. Peel the protective material from the adhesive strips andpress the Rubber Tail firmly into place on the vehicle.5 Continue to press firmly down on the Rubber Tail for another 30seconds. At room temperature (68° F), maximum adhesion usuallyoccurs within 72 hours. During this period, avoid car washes and othercontact with the antenna and the Rubber Tail.22
TIP! Mount the antenna on theroof (for most vehicles) or trunk(for convertibles) where it has aclear view of the sky in alldirections.23
TIP! Mount the antenna on the roof where ithas at least 3 inches of clear space around it.3”TIP! Use the supplied Rubber Tail to coverand protect the antenna cable.CAUTION! Don’t mount the antenna closerthan 3 inches from the edge of the roof. Usethe supplied Rubber Tail as a guide forjudging proper length and correctpositioning.24
CAUTION! Don’t mount the antenna insidethe vehicle, for example, on the dashboard.CAUTION! Don’t mount the antenna on anyof the vehicle’s front, back or side pillars.CAUTION! Don’t mount the antenna closeto a roof rack. Adjust the rack so it’s furtheraway from the antenna or move the antennacloser to the center of the roof.25
Vehicle InstallationCAUTION! Don’t mount the MagneticMount Antenna close to anotherantenna. Mount it at least 3 inches away.TIP! Always be careful to include enough slack in your cable toaccommodate open doors or trunk lids. Use things typically found aroundthe home, like electrical tape, to secure cables in areas so that hinges do notpinch the cable with the door. Hide any excess cable in the trim.26
Step 4: Route the Magnetic Mount Antenna CableBefore you begin routing the antenna cable, read these general instructionsfor how to route and hide the antenna cable. Then route your antenna cableaccording to the instructions which follow for your specific type of vehicle.Use a blunt plastic putty knife, a credit card,a plastic knife, or a similar blunt tool to lift therubber window mouldingTuck the cable under themoulding around the windowFeed cable underrubber mouldingaround window27
Vehicle InstallationRoute cable out from under rear windshieldmoulding and tuck into weatherstrippingaround trunk openingAvoid sharp bends by running cable throughweatherstripping for several inchesPull weatherstrippingfrom trunk openingTuck cable into weatherstripping.Route cable throughweatherstripping severalinches to avoid sharp bendsPull cable out of weatherstrippingand route throughtrunk to cabinRoute cable out of windowmoulding and into weatherstrippingaround trunk opening28
Bring cable out of weatherstripping and into trunkRoute cable along trunkwall and into cabin throughgap or conduit, along existingwiring harnessRoute cable along trunkwall and into cabin29
Vehicle InstallationUse a blunt plastic puttyknife or similar blunt tooltrim and tuck cableunder trim. Continuetowards front of vehicleRoute cable undertrim or upholsteryContinue routing cableunder trim or carpettowards front of vehicleRoute cable from trunkunder interior trim, intocabin and towards frontof vehicle30
Continue routing cable undercarpet or console to radio locationPull carpetor mat backCoil excesscable undercarpet or matBring cable out from trimand route under carpet todashboard or consoleBring cable outfrom trimTIP! Always be careful to include enough slack in your cable toaccommodate open doors or trunk lids. Use things typically found aroundthe home, like electrical tape, to secure cables in areas so that hinges do notpinch the cable with the door. Hide any excess cable in the trim.31
Vehicle Installation• Sedan/Coupe With Antenna Placed at the Rear of the Roof:1. Feed the antenna cable from the antenna underneath the rubbermolding around the rear window. Use a blunt plastic putty knife orsimilar blunt tool to lift the rubber molding around the rear windowand tuck the antenna cable underneath the molding. Route theantenna cable around and down the window to the lowest point. Ifyour rear window does not have rubber molding, we recommendconsulting a professional installer.2. Route the antenna cable out of the window molding and into therubber weather stripping around the trunk opening. Lift the weatherstripping from the opening and tuck the cable inside it, then replacethe weather stripping. To avoid sharp bends in the cable, run thecable inside the weather stripping for a few inches, then remove thecable from the weather stripping inside the trunk. Keep the cableaway from hinges, gears, etc., that could damage it.3. Route the cable outfrom the rubberweather stripping andalong the trunk wall.Continue routing thecable into the vehiclecabin through a conduitor along an existingwiring harness.4. Route the cablethrough the main cabin32
area under the interior trim, towards the front of the vehicle.Use a blunt plastic putty knife or similar blunt tool to lift theplastic trim just enough to tuck the cable under underneath.Avoid side airbag locations on back pillars and above the doors.Airbag locations are marked with “SRS” logos. Be careful notto crimp or cut the cable.5. Bring the cable out from the trim near the front of the cabinand route it under the carpet toward the dashboard or console.Coil any excess cable in a hidden location, such as under thecarpet, keeping it away from any vehicle pedals or controls.Secure the excess cable with wire ties (purchased separately).6. Bring the end of the cable out at the PowerConnect VehicleDock location. Leave yourself enough cable so you can easilyconnect it to the antenna connector of the dock.7. Continue with “Step 5: Connect the Magnetic Mount Antennaand PowerConnect Power Adapter” on page 39.33
Vehicle Installation34• Sedan/Coupe With Antenna Placed at the Front of the Roof:1. Feed the antenna cable from the antenna underneath the rubbermolding around the windshield. Use a blunt plastic putty knife orsimilar blunt tool to lift the rubber molding around the windshieldand tuck the antenna cable underneath the molding. Route theantenna cable around and down the windshield to the lowest point.2. At the lowest corner of the windshield, route the cable out of thewindshield molding and into the rubber weather stripping aroundthe door opening. Lift the weather stripping from the opening andtuck the cable inside it, then replace the weather stripping. Runthe cable inside of the weather stripping to the bottom of the dooropening.3. Pull the cable out of the weather stripping at the bottom of thedoor opening and route it under the carpet toward the dashboard.Coil any excess cable in a hidden location, such as under the carpet,keeping it away from any vehicle pedals or controls. Secure theexcess cable with wire ties.4. Bring the end of the cableout at the PowerConnectVehicle Dock location.Leave yourself enoughcable so you can easilyconnect it to the antennaconnector of the dock.5. Continue with “Step 5:Connect the MagneticMount Antenna and PowerConnect Power Adapter” on page 39.
• SUV:1. Feed the antenna cable underneath the rubber weatherstripping of the rear tailgate window/door and route the cablealong the rear hatch. Lift the weather stripping from theopening and tuck the cable inside it, then replace the weatherstripping. Pull the cable out from weather stripping and routeit into the cabin under the interior trim. Avoid hinges or gearsthat could crimp or cut the cable.2. Route the cable through the SUV’s main cabin area underthe interior trim, towards the front of the vehicle. Use a bluntplastic putty knife or similar blunt tool to lift the plastic trimjust enough to tuck the cable under underneath. Avoid sideairbag locations on back pillars and above the doors. Airbaglocations are marked with “SRS” logos. Be careful not to crimpor cut the cable.3. Bring the cable outfrom the trim nearthe front of the cabinand route it underthe carpet towardthe dashboard orconsole. Coil anyexcess cable in ahidden location, suchas under the carpet,keeping it away fromany vehicle pedals35
Vehicle Installationor controls. Secure the excess cable with wire ties (purchasedseparately).4. Bring the end of the cable out at the PowerConnect Vehicle Docklocation. Leave yourself enough cable so you can easily connect itto the antenna connector of the dock.5. Continue with “Step 5: Connect the Magnetic Mount Antenna andPowerConnect Power Adapter” on page 39.• Convertible:1. Bring the antenna cable from the antenna into the trunk at the frontedge of the trunk lid. Keep any bends in the cable loose. Tape or tiethe cable along the inside of the trunk lid to the trunk lid hinge strut.2. Allow enough slack in the cable so the trunk lid can easily open andclose and keep the cable away from hinges, gears, etc., that couldcrimp or cut it. Route the cable along the trunk wall and into thecabin through a conduit or along an existing wiring harness.3. Route the cable through themain cabin area under theinterior trim, towards the frontof the vehicle. Use a bluntplastic putty knife or similarblunt tool to lift the plastictrim just enough to tuck thecable under underneath. Avoidside airbag locations on backpillars and above the doors.36
Airbag locations are marked with “SRS” logos. Be careful notto crimp or cut the cable.4. Bring the cable out from the trim near the front of the cabinand route it under the carpet toward the dashboard or console.Coil any excess cable in a hidden location, such as under thecarpet, keeping it away from any vehicle pedals or controls.Secure the excess cable with wire ties (purchased separately).5. Bring the end of the cable out at the PowerConnect VehicleDock location. Leave yourself enough cable so you can easilyconnect it to the antenna connector of the dock.6. Continue with “Step 5: Connect the Magnetic Mount Antennaand PowerConnect Power Adapter” on page 39.37
Vehicle Installation• Pickup Truck:1. Use a blunt plastic putty knife or similar blunt tool to lift therubber molding around the windshield and tuck the antenna cableunderneath it.2. Continue tucking the cable underneath the windshield moldingaround the windshield to the lowest corner.3. At the lowest corner of the windshield, route the cable out of thewindshield molding and into the rubber weather stripping around thedoor opening. Lift the weather stripping from the opening and tuckthe cable inside it, then replace the weather stripping. Run the cableinside of the weather stripping to the bottom of the door opening.4. Pull the cable out of the weather stripping at the bottom of the dooropening and route it under the carpet toward the dashboard. Coil anyexcess cable in a hidden location, such as under the carpet, keepingit away from any vehicle pedals or controls. Secure the excess cablewith wire ties.5. Bring the end of the cable out atthe PowerConnect Vehicle Docklocation. Leave yourself enoughcable so you can easily connect itto the antenna connector of dock.6. Continue with “Step 5: Connectthe Magnetic Mount Antenna andPowerConnect Power Adapter” onpage 39.38
Step 5: Connect the Magnetic Mount Antenna andPowerConnect Power Adapter1 Plug the Magnetic Mount Antenna into thesilver ANT connector on the PowerConnectVehicle Dock.AUDIOANT2 Insert the PowerConnect Power Adapterinto your vehicle’s cigarette lighter orpower adapter socket.3 Plug the PowerConnect PowerAdapter into the red PWRconnector on the dock.PWRFM39
Vehicle InstallationStep 6: Connect the AudioTo play audio through your vehicle’s stereo or FM radio, decide on one of thefollowing audio connection options:• Option 1: Best: Use the included Aux In Cable if your vehicle’s stereosystem has an auxiliary input connection. Refer to your vehicle’s ownersmanual to find the location of the auxiliary input jack, or consult the vehicledealer.TIP! The auxiliary input jack may be located on the face plate of the vehicle radio,on the back of the radio, anywhere on the front dash panel, inside the glovecompartment, or inside the center console in between the front seats.• Option 2: Better: Use a Cassette Adapter if your vehicle has a builtincassette player. Cassette Adapters are sold separately and can bepurchased from an electronics retailer, or go to sirius.com/accessories.• Option 3: Good: Use the PowerConnect feature in the Stratus 6.PowerConnect plays the audio through your vehicle’s FM radio.• Option 4: Best: Use the FM Direct Adapter. If none of the previous threeaudio connection options will work in your vehicle, then you will need touse the FM Direct Adapter (FMDA) (sold separately). The FMDA needs to beinstalled by a professional installer and directly connects your radio to yourvehicle’s FM radio. To learn more, check with the retailer where you boughtyour radio, or go to sirius.com/accessories.Follow the installation instructions in the next several sections for the audioconnection option that you have selected.40
Option 1: Aux In Cable Installation Instructions1 Plug one end of the Aux In Cable into the green AUDIO connectoron the dock.AUDIOANT2 Plug the other end into the auxiliary input jack connection of yourvehicle’s stereo system.3 Insert your Stratus 6 into the dock, aligning the radio against therear of the dock so that the rails on the dock fit into the mountingslots in the back of the radio.menuseljump41
Vehicle Installation4 Power on your Stratus 6 by pressing the Powerbutton.5 Be sure the vehicle is outside and the antenna has aclear view of the sky. Verify that you are receivingthe SIRIUS signal. There should at least be one baron the upper right corner of the main display screenthat denotes antenna signal strength. You can alsopress and hold menu and then pressPress the Select button. TheSatellite and Terrestrial bars showthe strength of the signal beingreceived. If the signal reception isgood, press and hold menu to returnto the main display screen.to scroll to and highlight Signal.6 Ensure that the Stratus 6 is tuned to channel 184. Upon power up,the Stratus 6 should tune to channel 184 by default, when it’s not yetactivated. If it’s not on channel 184, refer to “Listening to SatelliteRadio” on page 62 to learn about how to tune a channel.7 Turn on your vehicle’s stereo system. Set it to play input from theauxiliary input source.8 You should hear SIRIUS channel 184 through your vehicle’s stereosystem. You are now ready to activate your Stratus 6.9 The audio level output of the Stratus 6 can be increased or decreasedas necessary to match the audio levels of other sources in your vehicle.Refer to “Audio Level” on page 84.jumpS i g n a lSAT - +TER - +42
If the signal reception is good, but there is no audio when tuned to channel184, be sure the vehicle’s stereo system is set to the correct source, i.e.,auxiliary input source (step 7). Also be sure that the audio level is sethigh enough to be heard (step 9). Refer to “Troubleshooting” on page 88 foradditional help.43
AUDIOANTVehicle InstallationOption 2: Cassette Adapter Installation Instructions1 Plug the Cassette Adapterinto the green AUDIOconnector on the dock.2 Insert the CassetteAdapter in the vehicle’scassette deck. You mayneed to turn on yourvehicle’s stereo system inorder to do so.3 Insert your Stratus 6 into the dock, aligning the radio against the rearof the dock so that the rails on the dock fit into the mounting slots inthe back of the radio.menuseljump44
4 Power on your Stratus 6 by pressing thePower button.5 Be sure the vehicle is outside and the antennahas a clear view of the sky. Verify that you arereceiving the SIRIUS signal. There should atleast be one bar on the upper right corner ofthe main display screen that denotes antennasignal strength. You can also press and hold menu and then pressto scroll to and highlight Signal. Press the Select button. TheSatellite and Terrestrial barsshow the strength of the signalbeing received. If the signalreception is good, press andhold menu to return to the maindisplay screen.6 Ensure that the Stratus 6 is tuned to channel 184. Upon powerup, the Stratus 6 should tune to channel 184 by default, when it’snot yet activated. If it’s not on channel 184, refer to “Listening toSatellite Radio” on page 62 to learn about how to tune a channel.7 If you haven’t done so, turn on your vehicle’s stereo system. Set itto play input from the cassette source.8 You should hear SIRIUS channel 184 through your vehicle’s stereosystem. You are now ready to activate your Stratus 6.9 The audio level output of the Stratus 6 can be increased ordecreased as necessary to match the audio levels of other sourcesjumpS i g n a lSAT - +TER - +45
Vehicle Installationin your vehicle. Refer to “Audio Level” on page 84.If the signal reception is good, but there is no audio when tuned to channel 184, besure the vehicle’s stereo system is set to the correct source, i.e., cassette source(step 7). Also be sure that the audio level is set high enough to be heard (step 9).Refer to “Troubleshooting” on page 88 for additional help.46
menujumpsel6 Pick the first FM channel on your list from step 4. Turn on yourvehicle’s FM radio (if you have not already done so) and tune it to thisFM channel.90.1MATCH FM CHANNELS7 Set your Stratus 6 to transmit on the same FM channel that youhave selected in step 4:i. Press and hold menu until the menu options are displayed.ii. Press to scroll to and highlight FM Settings and press theSelect button.iii. FM Channels will be highlighted. Press the Select button.iv. Press to scroll to and highlight the storage location FM2.Press the Select button.v. Tune to the FM channel you found in step 3. Press and totune in steps of .2, i.e., 99.3to 99.5. Press and to F M C h a n n e l stune in steps of 1, i.e., 99.3to 100.3. Press the Select96.3 FMbutton to select the FMchannel.49
Vehicle Installationvi. The FM channel you selectedwill be confirmed on the displayscreen. The Stratus 6 will tune tothe FM channel.F M C h a n n e l s>FM2 96.3FM3 Empty8 You should hear SIRIUS channel 184through your vehicle’s FM radio. Ifyou are satisfied with the sound quality, you’re done! You are now readyto activate your Stratus 6.9 If the selected FM channel doesn’t work well for you, work down thelist of FM channels until you find one that allows you to hear SIRIUSclearly. Each time, you will need to tune your vehicle’s FM radio to theFM channel and then set your Stratus 6 to transmit on the same FMchannel (steps 6 & 7).If the signal reception is good, but there is no SIRIUS audio when tuned to channel184, verify that both the radio and your vehicle’s FM radio are tuned to the sameFM channel (steps 6 & 7). Also ensure the chosen FM channel is a suitable one touse in your area (step 4). Verify that nothing is plugged into the AUDIO connectoron the PowerConnect Vehicle Dock. Refer to “Troubleshooting” on page 88 foradditional help.50
Option 4: FM Direct Adapter (FMDA) InstallationThe FMDA needs to be installed by a professional installer. Professionalinstallation can help improve your radio’s reception and significantly reducethe visibility of wires. To learn more, check with the retailer where you boughtyour radio, or go to sirius.com/accessories.51
Activation53
ActivationBefore you can enjoy Commercial-Free Music, plus Sports, News, Talk &Entertainment, you need to activate your Stratus 6:1 Make sure your Stratus 6 is properly installed, turned on, and receivingthe SIRIUS signal so that you can hear the audio on channel 184.2 When you first turn on the Stratus 6, after the startup sequence, theSIRIUS channel lineup may update. Wait until any channel updates havecompleted before pressing any buttons. Once the channels have beenupdated, the radio will automatically tune to channel 184.3 Make a note of the SIRIUS ID. You canfind it:• on channel 0 (zero)• on a label on the bottom of the giftbox• on the label on the back of yourStratus 6.4 Activate your service:• Online: Go to www.sirius.com andclick on “Install and Activate”OR• By phone: Call 1-888-539-SIRIUS1-888-539-7474)5 When your service is activated, yourStratus 6 will display an alertmessage. To continue, press anyChannel Updates20% Completed1 8 4 W e a t h e rTo Activate Call1-888-539-SIRIUS0 0 0 S i r i u s I DSID1234567890121 8 4 W e a t h e rSub UpdatedPress Any Key54
utton. Thereafter, if you press or , you can scroll and tuneother channels. Activation usually takes less than 5 minutes, butsometimes may take longer. We recommend that your radio remainon until activated.55
Using Your Stratus 657
Using Your Stratus 6The Main DisplayWhenever you power your Stratus 6 On, it will automatically tune to the lastchannel you were listening to before it was powered Off. The Stratus 6’s displayscreen will show the channel number, the song or show being played, and the artistname of the current channel. This screen is referred to as the main display screenin this guide.Channel Nameor Category NameChannel NumberArtist NameSong Title0 3 6 B P MBlack Eyed PeasRock That BodySignal StrengthYou can also choose to have either the channel name or category name displayedon the main display screen. To pick the mode, press and hold the menu button,press the button to highlight Display and press the Select button. Press thebutton to highlight Mode and press the Select button. Then choose the desiredoption. (Refer to “Display” on page 82.)0 7 2 R e a l J a z zLuther Hughes AnSpectacularChannel Name0 7 2 J z S t n d r dLuther Hughes AnSpectacularCategory Name58
My ChannelsChannels are organized into categories to make it easier for you to find theones that suit your taste. My Channels is a special category that displays thechannels contained in your subscription plan. You can display this and anycategory by pressing or until the category is displayed.Category NameChannel NamesM y C h a n n e l s ( 1 5 1 )>001 Hits 1002 TheBlendTotal Channels inYour SubscriptionPlan59
Using Your Stratus 6Navigation BasicsPower ButtonPressing the Power button turns the Stratus 6 On or Off.Navigation ButtonsUse the Left, Right, Up, and Down buttons to navigate through various featuresand functions of Stratus 6.• Left or Right button: Displays the channel categories such as Rock,Pop, Sports, Talk/New etc. Repeated presses cycle through the categoriesone at a time. Decreases or increases the settings of various menu optionssuch as Brightness, Audio Level, etc.• Up or Down button (press and release): Immediately tunes to thenext or previous channel in the channel lineup. Scrolls through lists andhighlights an item in the list.• Up or Down button (press and hold): Continuously scrolls throughany list. While on the main display screen, continuously scrolls through thechannel lineup and briefly displays the information of each channel. Whenthe button is released, radio tunes to the last channel it had scrolled to inthe channel lineup.Select ButtonThe Select button selects a highlighted item and confirms settings. At the mainsel60
Using Your Stratus 6Listening to Satellite RadioTune a channel:1 Press and release and to immediately tune to the next orprevious channel.2 Press and hold and to speed scroll through the channels. Releaseto tune to channel which is displayed.View a category:Channels are organized into categories to make it easier for you to find the onesthat suit your taste.1 To view a category press or .2 Scroll through the channels in thecategory using and , and find thechannel you want.3 Press the Select button to select thechannel, or press or for theprevious or next category.P o p>001 Hits 1002 TheBlendR o c k>014 ClsVinyl015 ClsRewndD a n c e / E l e c t r o n i c>035 Chill036 BPM62
Direct TuneA channel can be tuned directly by entering the channel number using thenumber buttons.1 To directly tune a channel press the Select button.0 3 5 C h i l lEnter Channel# ___2 Enter the channel number using the buttons 0-9. Wait amoment until the channel is tuned, or press the Select button toimmediately tune to the channel.63
Using Your Stratus 6JumpWhen configured properly, pressing jump will tune to the traffic and weatherchannel of a selected city, from a list of the 20 most congested cities. Thisbutton allows you to quickly tune the traffic/weather broadcast of the selectedcity, and then tune back to the original channel to which you were listening bypressing jump again.1 5 1 C H I - S t LJumping to CHIIf the traffic/weather broadcast of your selected city is not immediately available,the display will indicate that a jump is pending.Once the traffic/weather report is ready to be 0 5 3 S o u l T o w nbroadcast, the radio will automatically tune to CHI Pendingthe traffic/weather channel. Since a channelmay carry the traffic and weather reports ofmore than one city, you may have to wait a fewminutes for your desired broadcast.Pressing the jump while a jump is pending will cancel the jump. Pressing jumpafter the radio has tuned to the traffic/weather channel will return it back to thechannel you to which you had been listening immediately prior to pressing jump.TIP! To select a city for traffic/weather, refer to “Jump Settings” on page 81.64
Returning to main display screenWhen changing the radio options using the menu options, pressing andholding menu in most instances will return you to the main display screen.In some instances, you may need to follow the instructions on the displayscreen.Favorite ChannelsYou can set up to 10 of your favorite channels so you can easily access them.Each favorite channel can be assigned to a number button (0-9).To assign a favorite channel to a number button:1 Tune to the desired channel.2 Press and hold a number button(0-9) for one second, to assignthe channel as a favorite.To listen to a favorite channel:0 2 2 1 s t W a v eFavorite 1Saved1 Press the number button 0-9 that was assigned to the desiredfavorite channel.65
Using Your Stratus 6FM PresetsFM presets make it easy to quickly access stored FM channels and choose a new FMchannel from them.Use FM presets when you use PowerConnect to listen to your Stratus 6 throughyour vehicle’s FM radio.To start using a different FM preset:1 Press FM to display the current FMchannel preset.2 The currently selected FM presetis shown. To display and select thenext FM preset press FM.3 Repeatedly pressing FM will cyclethrough the FM presets. The lastdisplayed FM preset will be tuned.To return to the main displayscreen, allow the screen to time out.0 1 7 J a m _ O N97.9 FM0 1 7 J a m _ O N106.1 FMIMPORTANT! You need to ensure thatthe FM Transmitter in the Stratus 6 is turned On, and that your vehicle’s FM radiois tuned to the same FM channel.TIP! To configure the list of preset FM channels, you need to find available FMchannels in your area. Refer to”Find Available FM Channels in Your Area” on page75. Next, refer to “Set and Select an FM Channel” on page 79.66
Special Features67
Special FeaturesParental LockYour Stratus 6 has the ability to lock channels you do not want others (such aschildren) to access without your permission. Locked channels will not appear inthe channel or category list. The default lock code is 0000.Locked channels can be tuned directly using the 0-9 number buttons and enteringthe locked channel number. You will be prompted to enter your lock code. If thelock code is correctly entered, the channel will begin playing. If you tune awayfrom the locked channel to a different channel, the locked channel will again belocked.Changing the lock code:681 Press and hold menu until the menu options are displayed.2 Press to scroll to and highlight Parental Lock and press the Selectbutton.3 Press to scroll to and highlight Change My Code and press theSelect button.4 You will be prompted to enter theexisting lock code. The default lockcode is 0000. If this is the first timeyou are changing the lock code, enter0000, otherwise enter your lockcode. Use the 0–9 number buttons toenter the code and press the Selectbutton.E n t e r C o d e# ____N e w C o d e# ____
5 Enter a new 4 digit code using the 0–9 number buttons.6 Once you have entered the codeyou will then be prompted toenter the new code again toconfirm. If you entered the samelock code again, the code issaved.7 Press and hold menu to exit.To lock or unlock a channel:1 Press and hold menu until the menu options are displayed.2 Press to scroll to and highlight Parental Lock and press theSelect button.3 Lock/Unlock is highlighted.Press the Select button.4 You will be prompted to enteryour 4 digit lock code. Enter thelock code using the 0–9 numberbuttons.C o n f i r m C o d e# ____C o n f i r m C o d eCode SavedP a r e n t a l L o c k>Lock/UnlockChange My CodeE n t e r C o d e# ____5 When you have entered thecorrect code, a list of channelswill be displayed. Press and to scroll though the list andhighlight a channel you want to lock or unlock.69
6 Press the Select button to lock orunlock a channel. Note that lockedchannels will display a lock iconto the right of the channel name.L o c k / U n l o c k>104 Raw Dog105 LaughUSA7 You can continue to select channels for locking or unlocking. When youare finished, press and hold menu to exit.70
Where Else Can You Use Your Stratus 6?71
Where Else Can You Use Your Stratus 6?SIRIUS | XM offers a variety of accessories that allow you to adapt your Stratus6 Radio to your lifestyle and enhance your listening experience. With theseaccessories, you can effortlessly take your Satellite Radio listening experiencefrom your vehicle to your home or office or on the go — all with a singlesubscription.• In the Home, Office, etc. – With a Home Kit, you can play your Stratus 6over an existing home, office, or other stereo system.• In Other Vehicles – With a Vehicle Kit, you can enjoy your Stratus 6 in morethan one vehicle.• In Almost Any Location You Like – With a desktop or portable SoundSystem you have the freedom to listen to your Stratus 6 where and whenyou want, from your kitchen or den, to the office, to outside on the deck, orat a picnic.For more information on SIRIUS accessories or to purchase an accessory, pleasevisit your local retailer or www.sirius.com/accessories.72
Configuring Your Stratus 673
Configuring Your Stratus 6Sirius IDYour Stratus 6 has a numeric 12-digit ID which uniquely identifies the radio. ThisID is used during the activation process.To display the Sirius ID:1 Press and hold menu until the menu options are displayed.2 Sirius ID will be highlighted. Pressthe Select button. The Radio ID willbe displayed.3 Press and hold menu to exit.S i r i u s I D12345678901274
Find Available FM Channels in Your AreaBefore attempting any of the procedures below, you should park your vehiclein a safe location. Do not attempt to set up your FM channels or any Stratus6 function while driving.PowerConnect allows you to listen to SIRIUS audio through your vehicle’s FMradio. You will first need to find an available FM channel, which is a channelthat is not being used by an FM radio station in your area. When you tuneyour FM radio to an available channel, you should only hear static or silence– not talk or music.Once you have found an available channel, you need to tune the Stratus 6’sbuilt-in transmitter to the same channel to receive SIRIUS sound throughyour vehicle’s radio.We recommend one of the following methods to find an available FM channel:1 Use the SIRIUS | XM FM Channel FinderUse the SIRIUS | XM FM Channel Finder at www.sirius.com/fmchannel. Go to the website and enter your zip code. TheChannel Finder will suggest a list of available FM channels in yourarea. For convenience, write down or print out the list.Tune the Stratus 6 to a favorite SIRIUS channel (or to channel 184,if it’s not yet activated). Turn on your vehicle’s FM radio. Pick thefirst FM channel on your Channel Finder list and tune the FM radioto that channel. If you do not hear a local FM station broadcast,then tune the Stratus 6 to the same FM channel. (Refer to “Set75
Configuring Your Stratus 6and Select an FM Channel” on page 79.) You should hear the SIRIUSchannel through your vehicle’s radio. If you are satisfied with the soundquality, you’re done! If this FM channel doesn’t work well for you, workdown the list until you find an FM channel that allows you to hearSIRIUS clearly.OR2 Manually tune through your local FM channelsManually tune through your local FM channels on your vehicle’s FMradio. Turn on your vehicle’s FM radio. Start at 88.1 and use the ‘Manual’tune function on your vehicle’s FM radio to tune through each FMchannel one-by-one (88.1 followed by 88.3 etc.) to locate channelsthat aren’t being used by a local FM radio station. Write down each FMchannel that has only static or silence on it, until you reach 107.9. Onceyou have created your list of available FM channels, you will need to findthe one that provides the best match for Stratus 6.Tune the Stratus 6 to a favorite SIRIUS channel (or to channel 184, if it’snot yet activated). Pick the first FM channel on your list and tune the FMradio to that channel. Then tune the Stratus 6 to the same FM channel.(Refer to “Set and Select an FM Channel” on page 79.) You should hearthe SIRIUS channel through your vehicle’s radio. If you are satisfied withthe sound quality, you’re done! If this FM channel doesn’t work well foryou, work down the list until you find an FM channel that allows you tohear SIRIUS clearly.76
NOTE! You may find an FM channel with static or silence that does not workwith the Stratus 6. It is possible that some type of inaudible interference ispresent that prevents reception of the Stratus 6 broadcast. Your onlyoptions are to use another FM channel or a different audio connectionmethod.TIP! If you regularly drive from one location to another, such as your dailycommute, you may need to use different FM channels along your route forbest performance. If this is the case, we recommend saving the best FMchannels as presets on your FM radio and Stratus 6. Then you simply selectand match the best channel for the area you are in.TIP! It will be much more difficult to find available FM channels in largecities than in most suburban or rural locations. A direct audio connectionusing the Aux In Cable, Cassette Adapter, or professional installation is yourbest solution if you drive in or near large metropolitan areas.NOTE! The SIRIUS | XM FM Channel Finder relies on data from the FederalCommunications Commission. The data may not reflect the latest stations inyour area. In addition, local geography and weather conditions can impactreception, so your results may be different from the list.NOTE! The performance of FM radios are different, based on manufacturerand vehicle style. Some may not work well with the type of FM transmitterused by the Stratus 6. This is why we recommend a direct audio connectionusing the Aux In Cable or Cassette Adapter if they can be used in yourvehicle. Professional installation can also resolve almost any performanceissue.77
Configuring Your Stratus 6Turn FM Transmitter On/OffThe built-in FM Transmitter in the Stratus 6 works with the PowerConnect VehicleDock, and is used when you choose to listen to the Stratus 6 through yourvehicle’s FM radio.To turn the FM Transmitter On or Off:1 Press and hold menu until the menu options are displayed.2 Press to scroll to and highlight FM Settings and press the Selectbutton.3 Press to scroll to and highlight FM Transmitter and press the Selectbutton.4 Press either or to scroll to andhighlight either On or Off and pressthe Select button.5 Press and hold menu to exit.F M T r a n s m i t t e r>OnOffTIP! The Stratus 6 is shipped with the FM Transmitter turned On by default.TIP! The FM1 storage location is preset with FM channel 97.9.78
Set and Select an FM ChannelThe Stratus 6 allows you to easily store (i.e., preset) up to 5 different FMchannels. At any time, you can select any one of these 5 FM presets totransmit audio from the Stratus 6 to your vehicle’s FM radio. Having achoice of 5 FM presets also makes it easy to switch to the appropriate FMchannel as you travel from one area to another. Each FM preset is storedin its own storage location. You can easily add or edit the FM preset in anyone of the 5 storage locations.TIP! The FM1 storage location is preset with FM channel 97.9.To set an FM preset:1 Press and hold menu until the menu options are displayed.2 Press to scroll to and highlight FM Settings and press theSelect button.3 FM Channels will be highlighted. Press the Select button.4 Press to scroll to andhighlight the storage location(FM1 to FM5) that you want toset or select, and press theSelect button.F M C h a n n e l s>FM1 97.9FM2 Empty5 Change the FM Channel for the selected storage location by79
Configuring Your Stratus 6pressing and to tune in steps of .2, i.e., 99.3 to 99.5, and pressingand to tune in steps of 1, i.e., 99.3 to 100.3. Press the Select buttonto select the FM channel. The FM channel you selected will be confirmedon the display screen and the Stratus 6 will tune to the FM channel.6 Set your vehicle’s FM radio to same FM channel.IMPORTANT! You first need to find available FM channels in your area. Refer to”Find Available FM Channels in Your Area” on page 75.To quickly select an FM channel from the preset list:1 Press FM to display the current FM channel preset.2 The currently selected FM preset isshown. To display and select the nextFM preset press FM.3 Repeatedly pressing FM will cyclethrough the FM presets. The FMchannel displayed will be selected.To return to the main display screen,allow the screen to time out.4 Set your vehicle’s FM radio to thesame FM channel.0 1 7 J a m _ O N97.9 FM0 1 7 J a m _ O N106.1 FM80
Jump SettingsJump can be set to jump to the traffic and weather channel of one of the 20most congested cities. You’ll need to select the desired city from the list.To configure jump:1 Press and hold menu until the menu options are displayed.2 Press to scroll to and highlight Jump Settings and press theSelect button.3 A list of cities will be displayed.Press or to scroll to andhighlight your desired locationand press the Select button.4 Press and hold menu to exit.C h o o s e T r a f f i c>SFSTL81
Configuring Your Stratus 6DisplayThe Display option allows you adjust the brightness and contrast of the Stratus 6’sdisplay to improve its visibility in different lighting conditions. You also can set themode of the display screen to show channel name or category name information.To change the display’s brightness or contrast:1 Press and hold menu until the menu options are displayed.2 Press to scroll to and highlight Display and press the Select button.3 Press the Select button to chooseBrightness or press to scroll to B r i g h t n e s sand highlight Contrast and press theSelect button.4 Press or to decrease or increasethe brightness/contrast of thedisplay.5 Press the Select button to confirmthe brightness setting.6 Press and hold menu to exit.C o n t r a s t82
To change the display screen mode:1 Press and hold menu until the menu options are displayed.2 Press to scroll to and highlight Display and press the Selectbutton.3 Press to scroll to andhighlight Mode and press theSelect button.4 Press or to scroll to andhighlight Channel Name orCategory Name and press the Select button.M o d e>Channel NameCategory NameChannel Name displays the name of the channel at the top ofthe display screen, and Category Name displays the name of thecategory for the currently tuned channel.0 7 2 R e a l J a z zLuther Hughes AnSpectacularChannel Name0 7 2 J z S t n d r dLuther Hughes AnSpectacularCategory Name5 Press and hold menu to exit.83
Configuring Your Stratus 6Audio LevelThe audio level of the Stratus 6 can be adjusted when an audio connection is madebetween the dock and the vehicle’s stereo system. Audio level is used to adjust theStratus 6’s volume level to match the volume of other audio sources you may use,such as a CD player, other FM stations, or an MP3 player.Do not use the audio level as a volume control. Use the volume control on yourvehicle stereo instead.To adjust the audio level:1 Press and hold menu until the menu options are displayed.2 Press to scroll to and highlight Audio Level and press the Selectbutton.3 Press to decrease or to increase A u d i o L e v e lthe audio level.4 Press the Select button to confirmthe new audio level setting.5 Press and hold menu to exit.84
SignalFor best reception, your Magnetic Mount Antenna should have anunobstructed view of the SIRIUS satellites. In large cities, terrestrialtransmitters (ground repeaters) help increase the signal coverage.Your Stratus 6 can display the received strength of the satellite andterrestrial signals being received.To display the signal strength:Press and hold menu until the menu options are displayed.1 Press and hold menu until the menu options are displayed.2 Press to scroll to and highlight Signal and press the Selectbutton.3 The Satellite and Terrestrialbars show the strength of thesignal being received.4 Reposition the antenna if youare having trouble getting a signal. Be sure your vehicle is outsidewith an unobstructed view of the sky.5 Press and hold menu to exit.S i g n a lSAT - +TER - +85
Factory DefaultYou can clear all of your personal settings, such as favorite channels, and returnthe radio to its original out-of-the-box settings.To restore the Stratus 6 to the factory defaults:NOTE! Restoring defaults permanently removes all personal settings.1 Press and hold menu until the menu options are displayed.2 Press to scroll to and highlight Factory Default and press theSelect button.3 Press to scroll to and highlightYes and press the Select button.4 A warning screen will be displayed.If you are certain that you want toreset your Stratus 6 to the factorydefaults, press to scroll to andhighlight Yes and press the Selectbutton.5 The radio will display Restoring,and will be restored to the factorysettings.6 Press and hold menu to exit.R e s t o r e ?Yes>NoA r e Y o u S u r e ?Yes>NoRestoring86
Troubleshooting87
TroubleshootingStratus 6 has been designed and built to be trouble-free but if you experience aproblem, try this:• Check that all connections are firm and secure.• Make sure the vehicle power socket is clean and free of corrosion.• Make sure you have connected the Stratus 6 as described in this <strong>User</strong><strong>Guide</strong>. Verify that the PowerConnect Power Adapter is plugged into thevehicle’s cigarette lighter or power adapter socket, and that the LED onthe PowerConnect Power Adapter is lit (on). If not, your vehicle may needto be running to provide power to the socket.If you see this on the screen:Acquiring SignalCheck Antenna ConnectionTry this:• Make sure that the vehicle is outdoors with aclear view of the sky.• Make sure the Magnetic Mount Antenna ismounted outside of the vehicle.• Move your Magnetic Mount Antenna away fromany obstructed area. For example, if you areparked in an underground garage, you shouldreceive a signal after leaving the garage.• Make sure that the antenna cable is firmly andsecurely plugged into the PowerConnect VehicleDock. Make sure the cable is not bent or broken.• If the message persists, most likely the MagneticMount Antenna cable has been damaged. Replacethe antenna.88
If you see this on the screen:Invalid ChannelFirmware UpdatingIf this happens:You do not receive all the SIRIUSchannels to which you havesubscribedNo audio when using the Aux InCable or Cassette AdapterNo audio when usingPowerConnect or FMDAAudio sounds too softTry this:• You have attempted to tune to a channel thatyou have not subscribed to, or does not exist.Select a channel to which you have subscribed.• Your Stratus 6 is being updated over the airwith the latest software. Wait until the updateis done.Try this:• Ensure that you have followed the properactivation process. Refer to “Activation” onpage 54.• Call 1-888-539-7474 for further assistance.• Check all cables between your Stratus 6 and yourvehicle’s stereo system for a firm and secureconnection.• Ensure you have selected the proper input sourceon your vehicle’s stereo system.• Check that your Stratus 6 and your vehicle’s FMradio are tuned to the same FM channel.• Raise the volume of your stereo system orincrease the audio level of your Stratus 6 untilthe sound quality improves. Refer to “AudioLevel” on page 84.89
TroubleshootingIf this happens:Audio fades or has static whenlisteningNo song title or artist name isdisplayedTry this:• Check all cables for a firm and secureconnection.• If you are using PowerConnect to listen via yourvehicle’s FM radio, and the problem persists,it most likely is interference from anothercommercial or broadcast FM station. You willneed to find an unused or available FM channelin your area. Refer to “Find Available FMChannels in Your Area” on page 75.• If you are using PowerConnect, and you cannotsolve the audio problem, try connecting theaudio using the Aux In Cable or a CassetteAdapter. (Refer to page 41 and page 44.) If youcannot use those solutions, consider using anFM Direct Adapter. (Refer to page 51.)• The information may not be available or updatesmay be in progress.90
Product Specifications91
Product SpecificationsSystemPower Requirements:Operating Temperature:Audio Output:Stratus 6 RadioDimensions:Weight:PowerConnect Vehicle DockDimensions:Weight:FM Connector:Audio Connector:Antenna Connector:Power Connector:PowerConnect Power AdapterDimensions:Weight:Input / Output:Cable Length:Vehicle AntennaType:Connector:Cable Length:Aux In CableConnectors:Cable Length:9-16 V DC, 500 mA (max)-20°C to +60°C (-4°F to +140°F)1.0 Vrms (max)115 mm (width) x 48 mm (height) x 17 mm (depth)4.5 in (width) x 1.9 in (height) x 0.7 in (depth)66 g (2.3 oz)102 mm (width) x 52 mm (height) x 28 mm (depth)4.0 in (width) x 2.0 in (height) x 1.1 in (depth)38 g (1.3 oz)2.5 mm female3.5 mm femaleSMB male4.8 mm female94 mm (width) x 43 mm (height) x 34 mm (depth)3.7 in (width) x 1.7 in (height) x 1.3 in (depth)69 g (2.4 oz)9-16 V DC / 5 V DC, 1.5 A1.4 m (4 ft 7 in)SIRIUS Magnetic MountSMB female, right angle6.4 m (21 ft)3.5 mm stereo male to 3.5 mm stereo male1.2 m (4 ft)92
Patent and Environmental InformationPatent InformationIt is prohibited to, and you agree that you will not, copy, decompile,disassemble, reverse engineer, hack, manipulate, or otherwise access and/ormake available any technology incorporated in this product. The music, talk,news, entertainment, data, and other content on the Services are protectedby copyright and other intellectual property laws and all ownership rightsremain with the respective content and data service providers. You areprohibited from any export of the content and/or data (or derivative thereof) except in compliance with applicable export laws, rules and regulations.The user of this or any other software contained in a SIRIUS | XM radio isexplicitly prohibited from attempting to copy, decompile, reverse engineer,hack, manipulate or disassemble the object code, or in any other way convertthe object code into human-readable form.Environmental InformationFollow local guidelines for waste disposal when discarding packaging andelectronic appliances.93
FCC StatementThe user is cautioned that changes or modifications not expressly approved by SIRIUSXM Radio Inc. can void the user’s authority to operate this device.This device complies with Part 15 of the FCC Rules. Operation is subject to the followingtwo conditions:1. This device may not cause harmful interference.2. This device must accept any interference received, includinginterference that may cause undesired operation.This equipment has been tested and found to comply with the limits for a Class B digitaldevice, pursuant to Part 15 of the FCC Rules. These limits are designed to providereasonable protection against harmful interference in a residential installation.This equipment generates, uses, and can radiate radio frequency energy and, if notinstalled and used in accordance with the installation instructions, may cause harmfulinterference to radio communications. However, there is no guarantee that interferencewill not occur in a particular installation. If this equipment does cause harmfulinterference to radio or television reception, which can be determined by turning theequipment off and on, the user is encouraged to try to correct the interference by oneor more of the following measures:• Reorient or relocate the receiving antenna of the affected receiver.• Increase the separation between the SIRIUS | XM equipment and the affectedreceiver.• Connect the SIRIUS | XM equipment into an outlet on a circuit different fromthat to which the affected receiver is connected.• Consult the dealer or an experienced radio/TV technician for help.WARNING! The FCC and FAA have not certified this Satellite Radio Receiver for use inany aircraft (neither portable nor permanent installation). Therefore, SIRIUS | XM RadioInc. cannot support this type of application or installation.94
Copyrights and Trademarks©2009 SIRIUS XM Radio Inc. SIRIUS, XM and all related marks and logos aretrademarks of SIRIUS XM Radio Inc. and its subsidiaries. All other marks and logos arethe property of their respective owners. All rights reserved. Visit sirius.com/siriuslineupfor updates. All programming/channel lineup/SIRIUS service subject to change orpreemption. Hardware, subscription and activation fee required. Other fees and taxeswill apply. Month-to-month subscriptions must be activated via telephone. Hardwareand subscription sold separately. Subscription governed by SIRIUS Terms & Conditions,which can be found at sirius.com/serviceterms. Prices and programming are subjectto change. SIRIUS | XM Radio U.S. service only available in the 48 contiguous UnitedStates and the District of Columbia.95
Owners RecordOwner’s RecordThe model number is located below and the SIRIUS ID is located on the label onthe back of the Stratus 6.Record the SIRIUS ID in the space provided below. Refer to these numberswhenever you call your dealer regarding this product.Model Number: SDSV6SIRIUS ID:___________________________96
sirius.comSIRIUS XM Radio Inc.1221 Avenue of the AmericasNew York, NY 100201.888.539.7474© 2009 SIRIUS XM Radio Inc.SDSV6UG 092309a


