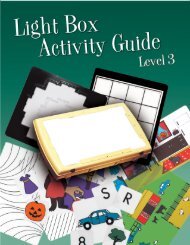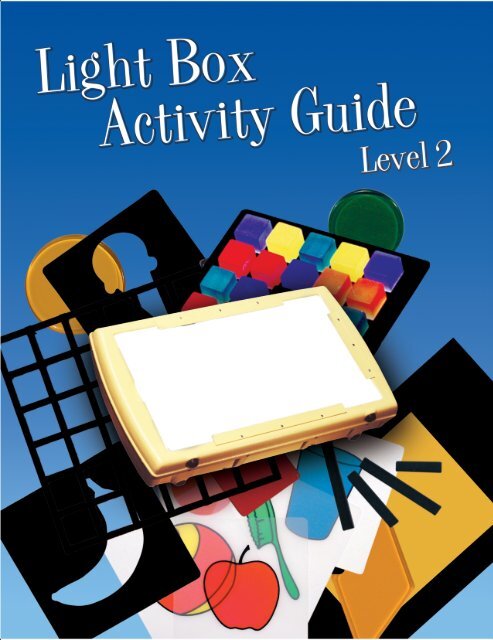
Light Box Activity Guide Level Two, Large Print (7-08680-00)
Light Box Activity Guide Level Two, Large Print (7-08680-00)
Light Box Activity Guide Level Two, Large Print (7-08680-00)

Create successful ePaper yourself
Turn your PDF publications into a flip-book with our unique Google optimized e-Paper software.
©1985, 2<strong>00</strong>4 American <strong>Print</strong>ing House for the Blind, Inc.All rights reserved.ii
ContentsPageIntroduction ................................................................ vAcknowledgments ................................................... viiiKit Items .....................................................................1Safety .........................................................................8<strong>Guide</strong>lines and Suggestions ....................................10The Child with Cortical Visual Impairment................15Maintenance.............................................................20Additional Materials ..................................................23Suggested Readings ................................................30<strong>Activity</strong> Section .........................................................35<strong>Activity</strong> Index ............................................................38Activities ...................................................................41Appendix: Vision Development Materialsfrom APH & Related Visual Tasks Chart ..................95iii
Through increased contrast, elimination of glare, andreduction of surrounding visual distractions, the <strong>Light</strong> <strong>Box</strong>appears to make a variety of visual tasks easier to perform.In addition, the brightly colored items used in the <strong>Light</strong> <strong>Box</strong>are attractive and the novelty of the materials motivatesstudents to utilize their vision.NOTE TO THE CONSUMER:The <strong>Light</strong> <strong>Box</strong> is approved.vii
AcknowledgmentsThe <strong>Light</strong> <strong>Box</strong> itself was designed by Tom Poppe, a memberof the American <strong>Print</strong>ing House -for the Blind’s Design andDevelopment staff. He also assisted in the design of the<strong>Light</strong> <strong>Box</strong> <strong>Level</strong> II materials and constructed prototypes ofthe items for formative and field evaluations.Beth Langley, Coordinator for the Diagnostic PrescriptiveProject for Profoundly Handicapped in Pinellas Park,Florida, served as a consultant for the project early in itsdevelopment. She generated numerous ideas for itemsto be included with the <strong>Level</strong> II materials.Ruth Holmes, Low Vision Educator and Coordinator of theIllinois School for the Visually Impaired, contributed herexpertise to the delineation of a sequence of skills, to beaddressed by the <strong>Level</strong> II materials.Before a final selection of materials to be evaluated wasmade, a committee reviewed the proposed skill sequenceand all materials ideas and gave its recommendations.The following participated in the meeting:Pat Carpenter, DeKalb County Schools, Scottsdale, GeorgiaNan Dempsey, New Jersey Commission for the Blind andVisually Impaired, Newark, New JerseyDr. Marvin Efron, Optometrist, West Columbia,South CarolinaKay Ferrell, American Foundation for the Blind, New York,New Yorkviii
Kit Itemspegboard – 1pegs – 64Red – 6 Round, 6 SquareBlue – 6 Round, 6 SquareYellow – 6 Round,6 SquareGreen – 6 Round,4 Square, 4 TriangularOrange – 6 Round, 4 Square, 4 TriangularTemplates – 66 x 1 Grid – 23 x 3 Grid – 25 x 5 Grid – 2cubes – 110Red – 10Blue – 10Yellow/Orange – 10Green – 20Purple – 10Orange – 25Black – 251
parquetry pieces – 1<strong>00</strong>2
Colored shape cards – 303
outline shape cards – 30<strong>Large</strong> Square – 2Medium Square – 2Small Square – 2<strong>Large</strong> Triangle – 2Medium Triangle – 2Small Triangle – 2<strong>Large</strong> Circle – 2Medium Circle – 2Small Circle – 2Half-Circle – 2Rectangle – 2Rhombus – 2Diamond – 2Trapezoid – 2Hexagon – 2raised outline shape cards – 6Medium Square – 1Medium Triangle – 1Medium Circle – 1Rectangle – 1Diamond – 1Rhombus – 14
Geometric shape stencils and Blanks – 5<strong>Large</strong> Square – 1<strong>Large</strong> Triangle – 1<strong>Large</strong> Rectangle – 1Heart – 1Hexagon – 1Familiar Object stencils and Cutouts – 15Apple – 1Banana – 1Ice Cream Cone – 1Glass – 1Knife – 1Spoon – 1Shirt – 1Sock – 1Shoe – 1Toothpaste Tube – 1Toothbrush – 1Brush – 1Crayon – 1Teddy Bear – 1Ball – 15
Familiar Object Pictures – 30Apple – 2, RedBanana – 2, YellowIce Cream Cone – 2, Yellow/BrownGlass – 2, BlueKnife – 2, YellowSpoon – 2, YellowShirt – 2, BlueSock – 2, GreenShoe – 2, RedToothpaste Tube – 2, RedToothbrush – 2, GreenBrush – 2, GreenCrayon – 2, BlueTeddy Bear – 2, BrownBall – 2, Red/YellowSticks – 482-inch – 123-inch – 124-inch – 125-inch – 126
Blackout Background – 1Acetate Sheets – 2Clear – 1Yellow – 1Vinyl Sheet – 1<strong>Activity</strong> Sheets7
Safety1. No child should use the <strong>Light</strong> <strong>Box</strong> unless he is directlysupervised by a teacher or other adult familiar with thefollowing safety instructions and <strong>Guide</strong>lines andSuggestions section of the <strong>Activity</strong> <strong>Guide</strong>.2. Check the <strong>Light</strong> <strong>Box</strong> before each use for any damage tothe unit, such as exposed electrical components, frayedcord, or any other potential hazard.3. The <strong>Light</strong> <strong>Box</strong> will not operate if it is cold (below 50ºF).Allow time for the unit to reach room temperature if it hasbeen stored several hours at 50ºF or below.4. Operate only on 120 V AC, 60 cycle electrical outlets.5. The consumer should not defeat the three-prong,grounded supply line.6. Do not operate without a tube in the sockets.7. Check to see that the plexiglass work surface is securelyin place whenever the <strong>Light</strong> <strong>Box</strong> is in use. Do not removethe work surface unless the unit is disconnected.8. Do not cover or obstruct the <strong>Light</strong> <strong>Box</strong>’s vents, or permitthe child to stick fingers or objects of any kind in them.(See diagram, page 22.)8
9. Do not allow the child to play with the electrical cord,plug, or hinged prop.10. Do not permit the child to drop, hit, stand, or sit on the<strong>Light</strong> <strong>Box</strong> or engage in any other activity which mightdamage the unit or expose electrical components.11. Keep the <strong>Light</strong> <strong>Box</strong> away from liquid or moisture. Whenusing acetate sheets for marking on, withdraw the sheetfrom the <strong>Light</strong> <strong>Box</strong> to clean. If it is necessary to clean the<strong>Light</strong> <strong>Box</strong>, disconnect it and wipe with a damp, not wet,cloth.12. Do not operate the <strong>Light</strong> <strong>Box</strong> continuously for more thaneight hours. This will prevent excessive heat buildupwithin the unit.13. The <strong>Light</strong> <strong>Box</strong> will get moderately warm during normaloperation. However, if it becomes quite hot to the touch,disconnect the unit. Before using the <strong>Light</strong> <strong>Box</strong> again,have it checked by technical personnel.NOTE TO THE CONSUMER:The <strong>Light</strong> <strong>Box</strong> is approved.9
<strong>Guide</strong>lines and SuggestionsIn November 2<strong>00</strong>2, government regulationsconcerning electronic components forced a changein the ballast/dimmer system used in theAPH <strong>Light</strong> <strong>Box</strong>.Please be advised that the new system willproduce a single flash of light when the unit isswitched on. To avoid startling the student orexposing a light-sensitive student, we suggestcovering the <strong>Light</strong> <strong>Box</strong> before switching it on or turnthe unit on before positioning the student nearby.1. When using the <strong>Light</strong> <strong>Box</strong>, place it in a darkened cornerof the room, positioned so that other children will notcome in contact with it or its electrical cord.2. Examine the <strong>Light</strong> <strong>Box</strong> for flickering to guard againstseizing in a seizure-prone child. The <strong>Light</strong> <strong>Box</strong> mayflicker on low intensities, particularly when new. Thisshoulddecrease after the first few weeks of use. If feasible,leave the <strong>Light</strong> <strong>Box</strong> on for several hours each day thefirst week you use it to help “age” the lamp/dimmersystem.3. If a child is seizure-prone, be cautious about presentingitems or displays on the <strong>Light</strong> <strong>Box</strong> which move in arhythmic, patterned manner.10
4. If a child is sensitive or averse to light, it may be helpfulto introduce the <strong>Light</strong> <strong>Box</strong> with overhead lights on. Setthe dimmer at a medium intensity, and/or decrease thesize of the illuminated area by using one of the “blackout”backgrounds. Placing one of the colored acetate sheetsor a pattern on the <strong>Light</strong> <strong>Box</strong> may also reduce theintensity of the light. Experiment to find the conditionswhich maximize the child’s visual functioning.5. For the child with sufficient vision who is reinforced bylight or the novelty of the <strong>Light</strong> <strong>Box</strong>, try working withoverhead illumination and set the <strong>Light</strong> <strong>Box</strong> at a mediumor low intensity. As the child performs an activity on the<strong>Light</strong> <strong>Box</strong>, reinforce his appropriate responses by turningup the intensity of the <strong>Light</strong> <strong>Box</strong> for a few seconds; thenreturn the intensity to a lower setting to be ready toreward the next correct response.6. Use the <strong>Light</strong> <strong>Box</strong> in a variety of positions (horizontal,vertical, angled) and place the child in a comfortableposture (sitting at a table or on the floor, lying on herside, resting over a wedge or bolster). Check with thechild’s physical therapist to find which positions are bestfor her. Note which postures enhance her visualfunctioning.7. Present the <strong>Light</strong> <strong>Box</strong> at varying distances and areas inrelation to the child’s body and watch him to see whetherhe demonstrates a preference.8. When presenting items on the <strong>Light</strong> <strong>Box</strong>, put them indifferent places on the work surface. Note whether thechild responds consistently and accurately to the items11
egardless of their location, or, instead, shows signs of afield defect. For example, if the child tilts her head to oneside, appears to be using only one eye, or reaches forobjects on one side only, there may be a field loss or thechild may have difficulty crossing the midline. This willaffect the manner in which you present activities.9. Use colored acetate sheets and objects and observewhether the child prefers one color over another.10. If the child has difficulty manipulating items on the <strong>Light</strong><strong>Box</strong> because of their tendency to slip, use the soft vinylsheet included with the kit, or use masking tape to attacha large square of clear contact paper, with its adhesiveside up, to the <strong>Light</strong> <strong>Box</strong> surface. At first, the contactpaper may be too sticky, but with a little use it will providea nonslip surface.11. Use words like “look,” “see,” and “find” when presentingitems on the <strong>Light</strong> <strong>Box</strong> work surface. Encourage the childand describe for him what he is seeing – its shape, size,position, and color.12. Show enthusiasm for each activity you perform with thechild, and use strategies that are particularly motivatingto her. Show the child a new activity, then ask her toperform it. Provide verbal and physical prompts whennecessary.13. Praise the child’s appropriate responses. It is importantto immediately reinforce correct responses with thingsthe child finds motivating—a hug, verbal praise,applause, etc.12
14. If the child engages in a disruptive behavior whileworking with the <strong>Light</strong> <strong>Box</strong>, try dimming or turning the<strong>Light</strong> <strong>Box</strong> off as a means of discouraging off-taskbehavior.15. If the child engages in self-stimulation activities whenusing the <strong>Light</strong> <strong>Box</strong>, such as light gazing or flicking, turnthe <strong>Light</strong> <strong>Box</strong> off for several seconds. When the childhas stopped self-stimulating, turn the <strong>Light</strong> <strong>Box</strong> back onand resume the activity. If he begins to self-stimulateagain, repeat the procedure. If self-stimulation continuesafter several trials, end the session; note the stimulusconditions which cause the child to self-stimulate. At thenext session, avoid these stimuli as much as possible.Try reducing the intensity of the <strong>Light</strong> <strong>Box</strong> and/or theamount of illuminated surface area. Turn on the roomlights or use colored acetate sheets as backgrounds forthe activities. Continue to turn the <strong>Light</strong> <strong>Box</strong> off when thechild self-stimulates, reintroducing it when he stops.If the child continues to self-stimulate withoutimprovement after several sessions of following thisprocedure, discontinue use of the <strong>Light</strong> <strong>Box</strong> for severaldays. When you reintroduce it, you may attempt toeliminate self-stimulation in some other way. Forexample, try rewarding the child after periods of time inwhich he does not self-stimulate, gradually increasingthe length of time you require him not to self-stimulate.Work with the child using other vision stimulation andtraining materials; it may be that the <strong>Light</strong> <strong>Box</strong> is not anappropriate tool for him at this point. Brightly colored or13
eflective objects, fluorescent materials, a penlight withcolor caps, and other items may elicit more appropriatevisual responses from some children.16. As the child develops new skills, continue to practice andbuild upon skills learned earlier.17. To transfer a skill learned on the <strong>Light</strong> <strong>Box</strong> to a normallylit environment, increase room illumination as yougradually decrease the intensity of the <strong>Light</strong> <strong>Box</strong>. As youdecrease <strong>Light</strong> <strong>Box</strong> intensity, some of the plexiglassmaterials will begin to appear dark and without color.Exchange them for other highly contrasting brightlycolored toys.18. <strong>Light</strong> <strong>Box</strong> activities should be used as a part of a totalprogram of visual development. (See SuggestedReadings.) The written activities accompanying the<strong>Light</strong> <strong>Box</strong> are not intended to provide a comprehensiveprogram of vision stimulation and training activities.14
The Child with Cortical Visual Impairment:Considerations for performing Activities with the<strong>Light</strong> <strong>Box</strong>The child diagnosed with Cortical Visual Impairment may notrespond to the activities suggested for the <strong>Light</strong> <strong>Box</strong> in thesame manner as a child whose vision loss is due to ocularabnormalities. The child whose vision loss is due to damageto the visual cortex and/or posterior visual pathways is saidto have Cortical Visual Impairment (CVI) (Groenveld, Jan &Leader, 1990). Damage may be caused by cerebral hypoxia;other causes include cytoplasmosis, toxoplasmosis,meningitis, trauma, and conditions causing cerebraldegeneration. (Merrill & Kewman, 1986).The agent causing CVI may cause additional differences inthe functioning of the child’s brain and nervous system. Ithas been observed that many children with CVI are easilyoverstimulated, a difficulty which may be associated with aninability of the nervous system to selectively attend toimportant stimuli and screen out irrelevant stimuli in theenvironment. The child is flooded with many types of stimuliwithout a sufficient means to sort out and disregard theexcess. Overstimulation, it has been theorized, may triggerthe child’s withdrawal, which serves as a protectiveresponse, shielding him from further overstimulation and theresulting stress. (Groenveld, Jan & Leader, 1990; Morse,1990). For this reason, intense visual displays, or otherintense stimuli, should be avoided, as a child with CVI mayexperience discomfort and withdraw, even if he initiallyshows signs of visual attention.15
The literature suggest the following considerations mayapply in performing activities on the <strong>Light</strong> <strong>Box</strong> with a childwho has CVI.• Intense visual displays and overstimulation of any kindshould be avoided.• Be very cautious about presenting any visual displaywith movements, shifting patterns, or flickering light.These may trigger a seizure in some children; consultthe child’s physician before introducing these(Groenveld, Jan & Leader, 1990).• The child’s cues should be carefully attended to, notingwhen he is ready for vision stimulation, and stoppingwhen he shows signs of overstimulation or tiredness(Morse, 1990).• Observation may give you some awareness of the lengthof time it takes for a particular child to process sensoryinformation; use this awareness to time yourpresentation of materials and assist the child inorganizing his responses (Morse, 1990).• Surrounding distractions should be reduced (Morse, 1990).(The <strong>Light</strong> <strong>Box</strong> itself may be of some help in this regardsince it is most often used in a darkened environment,reducing visual input from the rest of the environment.)• Positioning the child so he is comfortable and securemeans he will not need to divert energy to maintain hisposture; this may be critical to his visual performance.(Groenveld, Jan & Leader, 1990).16
• Taking care to introduce novel items gradually (Morse,1990), and ritualizing the manner in which tasks arepresented, using language to cue the child, and clearlymarking the beginning and end of tasks may lessen thechances of overstimulating him (Groenveld, Jan &Leader, 1990).• Visual displays should be simple in form and itemsshould be presented separately or with adequate spacebetween them, since children with CVI seem to havespecial difficulty discriminating between foreground andbackground information (Groenveld, Jan & Leader,1990).• Some children with CVI are sensitive to bright light;others require more light (Groenveld, Jan & Leader,1990). The <strong>Light</strong> <strong>Box</strong> should be introduced at lowillumination until you are able to determine the level thatis comfortable for the child. It may be that the <strong>Light</strong> <strong>Box</strong>is not an appropriate tool for some children.• Observe the child for field losses, which may beassociated with CVI; modify his posture and yourpresentation of visual displays and tasks to accommodatesuch losses (Groenveld, Jan & Leader, 1990).• Color may help the child with CVI perceive forms. Colorperception is usually normal in a child with CVI,however, he may respond better to bright colors than topastels, and yellows and reds may be easiest to see(Merrill & Kewman, 1986; Powell, 1996).17
• It has been suggested that more severely affectedchildren may relate better to common objects than totoys. (Groenveld, Jan & Leader, 1990). Common objects,both opaque and colored transparent ones, may be usedon the <strong>Light</strong> <strong>Box</strong> to test this preference.18
ReferencesGroenveld, M., Jan, J.E., & Leader, P. (1990). Observationsof the habilitation of children with Cortical Visual Impairment.Journal of Visual Impairment & Blindness, 84, 11-15.Merrill, M., & Kewman, D. (1986). Training of color and formidentification in cortical blindness: A case study. Archives ofPhysical Medicine and Rehabilitation, 67, 479-483.Morse, M. T. (1992). Augmenting assessment procedures forchildren with severe multiple handicaps and sensoryimpairments. Journal of Visual Impairment & Blindness,86, 73-77.Morse, M. T. (1990). Cortical visual impairment in youngchildren with multiple disabilities. Journal of VisualImpairment & Blindness, 84, 2<strong>00</strong>-203.Powell, S. A. (1996). Neural-based visual stimulation withinfants with cortical impairment. Journal of VisualImpairment & Blindness, 90, 445-446.19
MaintenanceReplacement parts for the <strong>Light</strong> <strong>Box</strong> are available at theAmerican <strong>Print</strong>ing House for the Blind, where it should bereturned if it is damaged or develops a malfunction. Repairsto the <strong>Light</strong> <strong>Box</strong> must be made in accordance with standardsset forth by Underwriters Laboratories. Technicians at theAmerican <strong>Print</strong>ing House for the Blind are trained to performsuch repairs.A worn-out bulb, however, may be replaced by the user.Replacement bulbs can be purchased from electrical supplycompanies for under $20.<strong>00</strong>. General Electric manufacturesthe 40 watt fluorescent U-bent tube used in the <strong>Light</strong> <strong>Box</strong>(mod-u-line, F40 SP30 U 6). Phillips manufactures a similarbulb. The average life of this particular fluorescent tube is12,<strong>00</strong>0 hours, however, turning the <strong>Light</strong> <strong>Box</strong> off and onreduces its life expectancy, In addition, the bulb graduallyloses full brightness over a period of time. Watch for thisgradual dimming and replace the bulb early.To replace the bulb, UNPLUG THE LIGHT BOX beforeremoving the Plexiglas work surface. Remove the Plexiglasby pushing your finger or a penknife under the Plexiglas atthe small molded depression on the left edge of the box.Slide it off the box. Four plastic ties hold the bulb in place.They can be released and should not be cut. Release eachtie by pressing down on the molded tab. Pull up on the bulb;the pins connecting the tube to the sockets should releaseeasily. Remove the old bulb and position the new bulb withthe pins over the two slots in the sockets. Press the pinsdown into the slots as the rest of the bulb is lowered in place.20
The pins will make a snapping sound as they lock in place. Itis important to secure the new bulb, reusing all four plasticties. Extra ties may also be purchased from an electricalsupply company for a few cents apiece.APH <strong>Light</strong> <strong>Box</strong>21
APH <strong>Light</strong> <strong>Box</strong>22
Additional MaterialsA number of readily available commercial items can be usedon the <strong>Light</strong> <strong>Box</strong> for activities involving shape, color, and sizediscrimination, drawing, and prewriting tasks. Cut and pasteor draw colored shapes, patterns, and pictures on a varietyof background media. Create cards or board games to teachmatching. Select and print the recommended <strong>Activity</strong> Sheetsfound on the CD-ROM in the back of this manual, or providethe child with the materials to create original artwork –drawings, or collages.Acetate Sheets (clear and transparent colored sheets ina variety of sizes; available from art and school supplystores, and Dick Blick catalog).Transparency Film (available in 8 1/2” x 11” from anyoffice supply store) may be used in some printers orcopiers in place of paper to produce transparent copiesof the <strong>Activity</strong> Sheets. (Note: Refer to the owner’smanual for your printer or copier to purchase film that issafe to use in your specific equipment).Art Film (brightly colored transparent film has anadhesive backing, sold in sheets and as rolls of tapeof various widths; may be cut to any shape; availablefrom art supply stores, Dick Blick catalog).“MonoKote” (brightly colored transparent film adheres toany surface when heated with iron; sold in rolls, may becut to any shape; available from hobby stores which sellmodel-building materials).23
Onionskin or Tracing PaperColored CellophaneColored Tissue PaperColored and Patterned Wrapping PaperColored and Patterned FabricColored Projection Markers (water soluble or permanentink markers; adheres to acetate; available from schoolsupply stores and Dick Blick catalog).Colored Grease Pencils“Cel Vinyl” (acrylic paint; highly opaque black paintadheres to acetate; apply with a brush; availablefrom art supply stores and Dick Blick catalog).Fingerpaints (use in clear or translucent white plastictray or plastic container).Crayons (use with onionskin or tracing paper)Black Electrical TapeColored RibbonColored YarnRickrackDoilies24
Colored Plastic ButtonsPlexiglas ® Sample Squares (available from companiesthat retail Plexiglas)For drawing the child’s attention to shape and for tracingaround and copying shapes, these items may be incorporatedinto activities with the <strong>Light</strong> <strong>Box</strong>:CoastersCookie CuttersGelatin MoldsstencilsWooden Blocksparquetry piecesPuzzle piecesA-Z and 1-10 Panels (available from ExceptionalTeaching Aids catalog)shape puzzles of soft rubber made by Lauri Toys(available in toy stores)Clay or Playdough ®Posterboard ShapesFamiliar objects with simple contours (a cookie, ball,bar of soap, shoe, or spoon)25
Ink and Acetate (draw your own solid or outline shapeson acetate)Other materials which may be used with the <strong>Light</strong> <strong>Box</strong> todevelop a number of skills are:Wikki Stix (colored wax wicking to be bent and pressedinto a variety of shapes or construction; available fromExceptional Teaching Aids catalog)Colored transparent plastic eating utensils, glasses, andplatesColored plastic “stained glass” ornaments made fromsimple kit; available from hobby shops)Brightly colored translucent or transparent plastic toys(Easter eggs, pop-beads, other inexpensive toys)BalloonsColored PinwheelsSmall Toy CarsHalloween MasksPlastic Halloween PumpkinsColored Plastic Clothespins26
Costume Jewelry Beads (available from hobby shops)Mosaic Tiles (bag of 150 1/2-inch transparent plasticsquares in 16 colors; available from Dick Blick catalog)MarblesColored Bath Oil BeadsColored transparent “gummy” candiesColored, transparent hard candies and suckersConfetti made of colored acetate closed in a clearplastic bottleThe following items from the American <strong>Print</strong>ing House for theBlind catalog may be used on the <strong>Light</strong> <strong>Box</strong> fordiscriminating and matching shapes, tracing, and introducingpart-whole relationships:Puzzle Form Board Kit (contains three each of circles,squares, triangles, rectangles, and diamonds; some ofthe shapes are divided into two and three pieces, whichmust be assembled correctly to form the shape; catalogNo. 1-0372-<strong>00</strong>)shape Board (board itself is not suited for use on <strong>Light</strong><strong>Box</strong>, but shapes are useful; contains five shapes,including one large, one small and three medium-sizedpieces; Catalog No. 1-0371-<strong>00</strong>)27
Additional MaterialsCRAYON28
AddressesAmerican <strong>Print</strong>ing House for the BlindP.O. <strong>Box</strong> 6085Louisville, KY 40206-<strong>00</strong>85Phone: 8<strong>00</strong>-223-1839Fax: 502-899-2274Website: www.aph.orgDick BlickP.O. <strong>Box</strong> 1267Galesburg, IL 61401Phone: 8<strong>00</strong>-447-8192Fax: 8<strong>00</strong>-621-8293Website: www.dickblick.comExceptional Teaching Aids, Inc.20102 Woodbine AvenueCastro Valley, CA 94546Phone: 8<strong>00</strong>-549-6999Fax: 582-5911Website: www.exceptionalteaching.com29
Suggested ReadingAlexander, P.K. (1990). The effects of brain damage onvisual functioning in children, Journal of VisualImpairment & Blindness, 84, 372-376.Atkinson, J., & Braddick, O. (1979). New techniques forassessing vision in infants and young children.Childcare, Health and Development, 5, 389-398.Atkinson, J., & VanHof-Duin, J. (1993). Visual assessmentduring the first years of life. In A. R. Fielder, A. B. Best &M. C. 0. Bax (Eds.), The management of visualimpairment in childhood: Clinics in developmentalmedicine (pp. 9-29). London: MacKieth Press.Blanksby, D.C. (1992). Visual therapy: Theoretically basedintervention for visually unresponsive or inattentiveinfants. Journal of Visual Impairment & Blindness, 86,291-294.Blanksby, D.C., & Langford, P.E. (1993). VAP-CAP: Aprocedure to assess the visual functioning of youngvisually impaired children. Journal of Visual Impairment& Blindness, 87, 46-49.Corn, A.L. (1986). Low vision and visual efficiency. In G.T.Scholl (Ed.), Foundations of education for blind andvisually handicapped children and youth: Theory andpractice (pp. 99-117), New York: American Foundationfor the Blind.30
Barraga, N.C. (1964). Teaching children with low vision. NewOutlook for the Blind, 58, 313-326.Barraga N.C. (Ed.). (1970). Teacher’s guide for developmentof visual learning abilities and utilization of low vision.Louisville, KY: American <strong>Print</strong>ing House for the Blind.Barraga, N.C., & Morris, J.E. (1980). Program to developefficiency in visual functioning: Sourcebook on lowvision. Louisville, KY: American <strong>Print</strong>ing House for theBlindErhardt, R.P. (1988). A developmental visual assessment forchildren with multiple handicaps. Topics in EarlyChildhood Special Education, 7, 84-101.Faye, E.E. (Ed.) (1984). Clinical low vision (2nd ed.). Boston:Little, Brown, and Company.Fellows, R.R., Leguire, L.E., Rogers, D.L., & Bremer, D.L.(1986). A theoretical approach to vision stimulation.Journal of Visual Impairment & Blindness, 80, 908-909.Fielder, A.R. & Van Hof-Van Duin, J. (1993). Visualassessment during the first years of life. In A.R. Fielder,A.B. Best & M.C.O. Bax (Eds.), The management ofvisual impairment in childhood: Clinics in developmentalmedicine (pp. 9-29). London: MacKieth Press.Gibson, E.J. (1969). Principles of perceptual learning anddevelopment. New York: Meredith Corporation.31
Goetz, L., & Gee, K. (1987). Teaching visual attention infunctional contexts: Acquisition and generalization ofcomplex motor skills. Journal of Visual Impairment &Blindness, 81, 1215-117.Groenendaal, F., & Van Hoff-Van Duin, J. (1992). Visualdeficits and improvements in children after perinatalhypoxia. Journal of Visual Impairment & Blindness, 86,215-218.Groenveld, M., Jan, J.E., & Leader, P. (1990). Observationsof the habilitation of children with cortical visualimpairment. Journal of Visual Impairment & Blindness,84, 11-15.Hall, A , Orel-Bixler, D., & Hagerstrom-Portnoy, G. (1991).Special visual assessment techniques for multiplyhandicapped persons. Journal of Visual Impairment &Blindness, 85, 23-29.Hall, A., & Bailey, I.L. (1989). A model for training visionfunctioning. Journal of Visual impairment & Blindness,83, 390-396.Harrell, L., & Akeson, N. (1986). Preschool visionstimulation: It’s more than a flashlight. New York:AmericanFoundation for the Blind.Hyvarinen, L. & Lindstedt, E. (1981). Assessment of vision inchildren. Stockholm: SRF Tal Punkt.32
Jan, J.E., & Groenveld, M. (1992). Visual behaviors andadaptations associated with cortical and ocularimpairments in children. Journal of Visual Impairment& Blindness, 87, 101-105.Jose, R.T. (Ed.). (1983). Understanding low vision. NewYork: American Foundation for the Blind.Langley, M.B. (1999). ISAVE: Individualized, SystematicAssessment of Visual Efficiency. Louisville, KY: American<strong>Print</strong>ing House for the Blind.Langley, M.B. (1980). The teachable moment and thehandicapped infant. Reston, VA: ERIC Clearing houseon Handicapped and Gifted Children.Langley, M.B., & DuBose, R. (1976). Functional visionscreening for severely handicapped children. NewOutlook for the Blind, 70, 346-350.Leguire, L.E., Fellows, R.R., Rogers, G.L., Bremer, D. L., &Fillman, R.D. (1992). The CCH vision stimulationprogram for infants with low vision: Preliminary results.Journal of Visual Impairment & Blindness, 86, 33-37.Merrill, M., & Kewman, D. (1986). Training of color and formidentification in cortical blindness: A case study. Archivesof Physical Medicine and Rehabilitation, 67, 479-483.Morse, M. (1991). Visual gaze behaviors: Considerations inworking with visually impaired multiply handicappedchildren. RE:view, 23, 5-15.33
Morse, M.T. (1992). Augmenting assessment proceduresfor children with severe multiple handicaps and sensoryimpairments. Journal of Visual Impairment & Blindness,86, 73-77.Morse, M.T. (1990). Cortical visual impairment in youngchildren with multiple disabilities. Journal of VisualImpairment & Blindness, 84, 2<strong>00</strong>-203.Powell, S.A. (1996). Neural-based visual stimulation withinfants with cortical impairment. Journal of VisualImpairment & Blindness, 90, 445-446.Rogow, S.M., & Rathwell, D. (1989). Seeing and knowing:An investigation of visual perception among children withsevere visual impairments. Journal of VisionRehabilitation, 3, 55-66.Smith, A.J., & Cote, K.S. (1982). Look at me. Philadelphia:College of Optometry Press.Steendam, M. (1989). Cortical visual impairment in children:A handbook for parents and professionals. (Availablefrom The Royal Blind Society of N. S.W., P.O. <strong>Box</strong> 176,Burwood, N.S.W. 2134, Australia).Tavernier, G.G. F. (1993). The improvement of vision byvision stimulation and training: A review of the literature.Journal of Visual impairment & Blindness, 87, 143-148.Trief, E., & Morse, A.R. (1987). An overview of preschoolvision screening. Journal of Blindness & VisualImpairment, 81, 197-2<strong>00</strong>.34
<strong>Activity</strong> SectionNotes to the teacherThe following activities have been grouped under the broad“skill areas” listed in the <strong>Activity</strong> Index on page 38. Theactivities are not developmentally sequenced; it is unlikely astudent will master each skill area before moving to the next.Over the course of vision training, many skills are developedconcurrently and learners will progress differently basedupon their particular visual handicap, past experience, age,and motivation. In general, the activities presented in laterskill areas are more difficult than activities presented in theearlier skill areas. Within each skill area, an attempt hasbeen made to order activities from least to most difficult.Even so, some students may have difficulty with one or moreapparently simple activities, yet be able to perform lateractivities in the same section with ease. The only rule canbe: be flexible in the order in which you present activities andintroduce new skill areas.To obtain a rough profile of a student’s functioning, select anactivity from the beginning, middle, and end of each skillarea, making note of the child’s performance and theconcepts and visual tasks which pose the greatest problems.Take into account the nature of the student’s handicap. Forexample, a student with a limited field yet fairly good acuitymay find smaller objects and pictures easier to recognizethan larger ones whose edges extend beyond his visualfield. Damage to the macular region may make recognition35
of small objects and pictures impossible unless they areviewed using peripheral vision; inner detail of pictures will belost. The student with poor acuity may only perform visuallywhen objects and pictures are large and boldly outlined; onthe other hand, he may want to view materials close to hiseyes, and excessively large materials could be difficult to“take in” at very close range. These are only a few examplesof the many ways in which the nature of the visual handicapwill determine the ease or difficulty of a particular activity.As you present activities, consider also the student’s ageand level of motivation. Ninety-two percent of the studentswith whom the <strong>Light</strong> <strong>Box</strong> and <strong>Level</strong> II materials wereevaluated attended longer to tasks performed on the <strong>Light</strong><strong>Box</strong> than to similar tasks performed without it. As stated inthe <strong>Guide</strong>lines and Suggestions section, show enthusiasmfor the activities, praise the child, and reinforce his effortswith something motivating. Making an activity moregame-like will encourage some students to work to theirfullest potential.A final important observation, the activities provided do notcomprise a complete program of vision stimulation andtraining exercises. They may be considered as a basis forplanning a larger program which relies upon the teacher’screativity and utilizes other materials– such as Let’s SeeSensory Kit, Let’s See Perceptual Kit (all available from theAmerican <strong>Print</strong>ing House for the Blind), and a variety ofcommercial materials appropriate for young visuallyimpaired children.36
Listed across the top of the charts at the back of this manualare products designed for vision training and manufacturedby the American <strong>Print</strong>ing House for the Blind. Major visualtasks are featured along the side. Individual items orinstructional sections intended to develop a particular visualskill are listed under the product to which they belong.37
<strong>Activity</strong> Index<strong>Level</strong> 2PageEye-Hand Coordination and Prewriting .............................. 41– child will demonstrate an ability to use his visionin the performance of fine motor tasks usingconcrete materials– child will use his vision to perform prewritingtasks, such as tracing and copying lines andsimple figuresMatching and Sorting ......................................................... 49– child will demonstrate an ability to use his visionto sort and match concrete materials– child will use his vision to match and sortpictures, shapes and objectsSpatial Relationships.......................................................... 65– child will use his vision to imitate and identify thepositions of objects relative to one another38
Identification ....................................................................... 71– child will use his vision to identify concretematerials– child will use his vision to identify picturedshapes and objectsVisual Memory.................................................................... 75– child will use his vision to recall concretematerials he has just seen– child will use his vision to recall pictured shapesand objects he has just seenSequencing and Patternmaking ......................................... 77– child will use his vision to duplicate sequencesusing concrete and pictured materials andduplicate more complex patterns using concretematerialsPart/Whole Relationships ................................................... 81– child will use his vision to relate parts ofconcrete objects and patterns to form a wholeand to separate a whole into its basic parts39
Goal: Eye-hand coordination and prewriting<strong>Activity</strong> 1: Pegs/cubesHave the child collect the pegs or cubes and drop them intoand remove them from a bag or container. Make the activityinto a game, perhaps by suggesting she “hide” all the pegsor cubes in the bag or try to fill up a plastic container beforeyou count to ten.<strong>Activity</strong> 2: Pegs/cubesLet the child manipulate the pegs or cubes, stacking themand rolling them on the <strong>Light</strong> <strong>Box</strong> surface.<strong>Activity</strong> 3: Pegs/cubesGive the child enough pegs and/or cubes and suggestbuilding a tower with them. He may only be able to stacktwo or three at first. Reward the child’s efforts.<strong>Activity</strong> 4: Pegs/cubesHave the child place some of the pegs or a tower of cubeson the <strong>Light</strong> <strong>Box</strong> surface. She may enjoy knocking them overwith a small toy car. Gradually increase the distance shemust move the car to hit the pegs.41
Goal: Eye-hand coordination and prewriting ( continued)<strong>Activity</strong> 5: Pegboard and pegs, templateand cubesHave the child place and remove pegs from the pegboard orcubes from a template. Devise a game to make the activitymore interesting. Suggest, for example, that he put his pegsin the pegboard using up all of his pegs before you use upyours, or have him remove all the cubes from a templatebefore you finish counting to ten.<strong>Activity</strong> 6: Parquetry pieces/pegs/cubesLet the child build simple structures using the pegs, cubesand parquetry pieces.<strong>Activity</strong> 7: Parquetry pieces and raised outlineshape cardsGive the child the medium circle raised outline card and amedium circle parquetry piece. Have her place the circleinside the raised line on the card. Perform the same taskwith the other raised outline shape cards and variousflat outline shape cards.<strong>Activity</strong> 8: Pegs/cubesMake circles or dots of various sizes in black ink on a sheetof acetate or tracing paper. Have the child put a cube or pegon each dot.42
Goal: Eye-hand coordination and prewriting ( continued)<strong>Activity</strong> 9: Sticks/pegs/cubesUsing a black marker or color grease pencil on acetate ortracing paper, draw a straight line across the <strong>Light</strong> <strong>Box</strong>. Havethe child place the sticks, cubes, or pegs on top of the lineyou have drawn until he reaches the end of the line. Drawvertical, diagonal, and curved lines for the child to useas well.<strong>Activity</strong> 10: Sticks and outline shape cardsUsing the sticks and the large square outline card, give thechild four, four-inch sticks and have her place the sticks onthe outline. Call her attention to the four sides and corners ofthe square. Perform the activity with other simple shapes.<strong>Activity</strong> 11: <strong>Activity</strong> Sheets #1-3<strong>Print</strong> or copy <strong>Activity</strong> Sheets #1-3 onto transparency film orpaper. (<strong>Activity</strong> Sheets are located on the enclosed CD inPDF format.) Have the child trace between two heavyhorizontal lines with his finger, then with a marker or colorgrease pencil. Have him perform the same activity with thelines oriented vertically and diagonally. (Some children mayhave difficulty understanding that they are to trace betweenthe lines rather than on the line. You may shade the areabetween the lines with a yellow marker and have them trace“the yellow path,” or simply move on to later <strong>Activity</strong> Sheetswhich require the child to trace over a single line.) Have thechild trace from left to right and top to bottom. To make theactivity more interesting, use ideas like the following:43
Goal: Eye-hand coordination and prewriting ( continued)Place a small token or treat (Teddy Bear, candy, pokerchip) at the end of the path the child must trace. If hesuccessfully traces to the end of the path, let him keep thetoken or eat the treat.Have him pretend the lines are a path or roadway. Let himuse a small toy car or small plastic animal to trace thepath, suggesting he “drive the car to the ice cream shop”or “help the horse finish the race.”Trace some of the pictures shown on <strong>Activity</strong> Sheets #3-7onto the worksheets. Show the child the pictures andidentify them with him. (He probably will be unable toidentify them himself but the idea may be motivating forhim.) Have him trace between the lines on the worksheetsuggesting, for example, that he “help the dog” (picturedon the left, at the start of the line) “find her bone” (picturedat the end of the line).<strong>Activity</strong> 12: <strong>Activity</strong> Sheets #4-6When the child can mark between two straight lines, curveyour lines slightly. Have her follow the resulting “path” with amarker. Use <strong>Activity</strong> Sheets #4, 5, and 6 or create your ownlines for the child to follow. Use some of the ideas suggestedunder <strong>Activity</strong> #11 to help motivate her.44
Goal: Eye-hand coordination and prewriting ( continued)<strong>Activity</strong> 13: <strong>Activity</strong> Sheets #7Have the child mark between the angled lines shown on<strong>Activity</strong> Sheet #7. Encourage him to follow the path to thecorner, turn the corner, and continue down. It may benecessary for him to lift the marker to see if he has reachedthe corner. If he is unsure of the location of the corner, atfirst, place your finger there. Have him draw across to yourfinger, then down.<strong>Activity</strong> 14: <strong>Activity</strong> Sheets #8-10Have the child trace the closed figures shown on <strong>Activity</strong>Sheets #8-10 and name the shapes with her.<strong>Activity</strong> 15: <strong>Activity</strong> Sheets #11-15<strong>Activity</strong> Sheets #11-15 require the child to trace straight,curved, long and short lines. Again use a variety ofmotivating games to make the exercises more interesting.Always have the child trace from left to right and top tobottom. When he has traced over a line, have him copythe line freehand below the original.<strong>Activity</strong> 16: <strong>Activity</strong> Sheets #16-22Use <strong>Activity</strong> Sheets #16-22 and have the child practicetracing multiple curves and angled lines. Orient the figures indifferent ways and call attention to their features. “This one45
Goal: Eye-hand coordination and prewriting ( continued)points down.” “This line curves up, then down.” When she hastraced the original line, encourage her to copy it freehand.<strong>Activity</strong> 17: Geometric shape stencils/familiar object stencilsGive the child a black or brightly colored felt-tip marker orcolor grease pencil. Tape a piece of acetate on the <strong>Light</strong> <strong>Box</strong>or use the large acetate sheets provided with the <strong>Level</strong> 2 kit.Have the child trace around the stencils. Name the shapesand objects he is tracing and point out their distinctivefeatures. Let him color in the outline he has traced andcompare it to the corresponding parquetry piece or picture.<strong>Activity</strong> 18: Outline shape cards/<strong>Activity</strong> SheetsHave the child color in the outline shapes with a washablemarker or color grease pencil. <strong>Activity</strong> Sheets showinggeometric shapes may also be used for this purpose, orhave the child trace around a shape Stencil and color in theresulting shape.<strong>Activity</strong> 19: <strong>Activity</strong> Sheets #23-28Have the child use <strong>Activity</strong> Sheets #23-28 tracing around thesolid line geometric shapes which are shown. Talk about thefeatures of each shape as the child traces pointing out corners,curves, long and short sides. Orient the shapes in differentways for the child to trace. Have her begin tracing in the left orupper corner of each shape. Have her color in the shape.46
Goal: Eye-hand coordination and prewriting ( continued)<strong>Activity</strong> 20: <strong>Activity</strong> Sheets #29-46Have the child complete the <strong>Activity</strong> Sheets which requirehim to trace over straight and curved dotted lines andshapes #29-46.<strong>Activity</strong> 21: <strong>Activity</strong> Sheets #29-46Create your own dot-to-dot activities involving simple dottedlines, curves, and shapes or adapt activities in coloringbooks and children’s activity books found in the supermarketand discount stores. Use some of the motivating strategiessuggested under <strong>Activity</strong> #8 to vary the exercises.<strong>Activity</strong> 22: <strong>Activity</strong> Sheets #29-46Continue to provide the child with practice in copying linesand simple shapes you draw. Draw a straight horizontal lineon a piece of blank acetate and have the child copy your linein the space below it. Show her that you would like the twolines to look alike–to be the same length and orientation.Have the child copy long, short, vertical, and diagonal lines.Also practice copying curved lines of different types andorientations. At first, have her copy single lines. Thenintroduce figures consisting of two or more straight orcurved lines, like those shown on <strong>Activity</strong> Sheets #16-28,or simple shapes.47
<strong>Activity</strong> 23: <strong>Activity</strong> Sheets #29-46Give the child a variety of opportunities to trace, copy, draw,and color. Look for childrens’ coloring books with simplepictures and exercises. The Dubnoff School Program 1,Frostig Developmental Program in Visual Perception,Fairbanks Robinson Perceptual Motor materials, and itemsproduced by DLM (Developmental Learning Materials) canbe valuable resources. Transferring these materials toacetate or tracing paper for use on the <strong>Light</strong> <strong>Box</strong> will providea number of useful worksheets. Simple pictures frommagazines and other sources may be traced onto acetateas well.48
Goal: Matching and Sorting<strong>Activity</strong> 1: Geometric shape stencils/raised outlineshape cards/parquetry piecesHave the child perform form board activities on the <strong>Light</strong> <strong>Box</strong>using the raised outline shape cards or shape stencils andcorresponding parquetry raised outline pieces, the backlessrubber form boards made by Ideal and Lauri (see AdditionalMaterials List), or the <strong>Light</strong> <strong>Box</strong> Materials: <strong>Level</strong> 1 TemplateBackgrounds and Plexiglas Blocks.<strong>Activity</strong> 2: Pegs/cubesHave the child sort the cubes into piles according to theircolor. (Clear or translucent white plastic containers will makegood containers for sorting tasks.)<strong>Activity</strong> 3: Parquetry piecesHave the child sort the pegs or parquetry pieces according tocolor without reference to their shape.<strong>Activity</strong> 4: Pegboard and pegs/template and cubesHave the child put all pegs or cubes of a particular color inthe pegboard or a template, grouping pegs by color until shehas filled it. Suggest she work in left to right order in rows, orbegin filling in at the corners to give herself enough room foreach color.49
Goal: Matching and Sorting ( continued)<strong>Activity</strong> 5: Parquetry piecesHave the child sort parquetry pieces by shape. Encouragehim to perform the task visually. Begin with shapes whosedifferences are clearly distinctive—circles, squares, andtriangles. At first, use shapes which are all of the same color,later you may mix colors when the child understands theconcept of sorting by shape. The diamond and rhombus aremost difficult to differentiate from one another and should beused after the child has had experience sorting a varietyof shapes.<strong>Activity</strong> 6: Pegboard and pegsPerform <strong>Activity</strong> #4, asking the child to group the pegs byshape rather than color.<strong>Activity</strong> 7: Pegboard and pegs/templateand cubesWhen the child is familiar with the colored cubes and theshapes and colors of the pegs, play a game with her. Scatterpegs in the pegboard or cubes in a template. Have herlocate and remove from the pegboard or template all thepegs or cubes of a certain type—all the square pegs, all theround pegs, all the red cubes, and so on. When she has hadpractice in performing this activity, have a race with her.Have her remove all the green pegs; you remove all the redpegs. See who finishes first or who has the most. You could50
also play this game using a timer. At first, allow her ampletime to locate and remove all of her pegs. As she becomesmore capable, reduce the amount of time she has to completeher search until she performs the task accurately and rapidly.<strong>Activity</strong> 8: SticksHave the child sort the Sticks according to their variouslengths. Encourage him to perform the task visually.<strong>Activity</strong> 9: Parquetry piecesGoal: Matching and Sorting ( continued)Have the child sort the parquetry pieces by size beginningwith large and small pieces and later including medium-sizedpieces as well.<strong>Activity</strong> 10: Parquetry pieces/template and cubesUse the parquetry pieces to play a form of Bingo. Draw alarge 3” x 3” or 4” x 4” grid on acetate with a heavy blackmarker. Place a parquetry Piece inside each square of thegrid. Point to a particular row. Show the child a parquetrypiece which matches the shape of the one you want her toremove. When the child locates and removes the properpiece, give her a marker (black cardboard chips do nicely) toplace in the empty square. When she has filled an entire row(horizontal, vertical, or diagonal) with markers, she candeclare, “Bingo.” Play the same game using cubes in atemplate. Show the child or tell her the color of the cubeyou wish her to find.51
Goal: Matching and Sorting ( continued)<strong>Activity</strong> 11: Parquetry pieces, raised outline shapecards and colored shape cardsIntroduce the raised outline shape cards. Select a few cardswhich are pieces, easily differentiated from one another. Slipa corresponding colored shape outline shape card behindeach and place them and their matching parquetry pieces oncards and the <strong>Light</strong> <strong>Box</strong>. Allow the child to explore themtactually and visually, discussing colored shape how theshapes on the cards are the same as the parquetry piecesyou have placed on the <strong>Light</strong> <strong>Box</strong>. Increase the number andvariety of shape cards and pieces the child must match untilhe can successfully match parquetry pieces to all of theraised outline cards.<strong>Activity</strong> 12: Parquetry pieces and coloredshape cardsHave the child close her eyes and give her a parquetry pieceto examine tactually. Take the shape away and show her twocolored shape cards, one representing the parquetry Pieceshe felt. Have her select the card which shows the shapeshe felt. Begin with obvious shapes — a circle and square.Gradually increase the complexity of the shapes you giveher. Introduce the task as a guessing game.52
Goal: Matching and Sorting ( continued)<strong>Activity</strong> 13: Parquetry pieces and coloredshape cardsIntroduce matching using only the flat colored shapecards and parquetry pieces. Select shape cards which aredistinctly different for the child’s first matching tasks. Allowhim to slide the parquetry pieces over the shape cards, atfirst, to check whether their shapes are the same. As hegrows more capable, increase the number and type ofshapes he must match. Work with him, gradually increasingthe difficulty of each exercise until he can match parquetrypieces to all of the colored shape cards.<strong>Activity</strong> 14: Parquetry pieces and coloredshape cardsPlay Lotto, forming a Lotto “card” with several of the coloredshape cards. Have the child take parquetry pieces from abag. If the shape drawn matches one of the colored shapecards the child places the parquetry piece over the card.Play together. The winner is the first to complete theirLotto card.53
Goal: Matching and Sorting ( continued)<strong>Activity</strong> 15: Colored shape cardsBegin working with the child on picture-to-picture matching –matching the various colored shape cards to one another.You may want to make up cards of your own using acetateand felt tip markers. This way, you can have many moreduplicates of a particular shape than are provided. Onceagain, select distinctly different shapes for the first exercise,and gradually increase the difficulty of the exercises until thechild is able to match all the various pictured shapes. (Sheshould, by now, be able to match by shape and ignore colordifferences.)<strong>Activity</strong> 16: Colored shape cardsPlay Lotto using the colored shape cards. Spread severalshape cards on the <strong>Light</strong> <strong>Box</strong> for the child and several foryourself. Place the shape cards which match the ones youhave selected in a pile. Take turns with the child drawingfrom the pile. If you or he draws a card for which you havethe match, place it over the matching card. If you do nothave a match, return the card to the bottom of the pile.Whoever is first to find matches for all his cards is the winnerof this game.54
<strong>Activity</strong> 17: <strong>Activity</strong> Sheets #47-50Goal: Matching and Sorting ( continued)Trace several pairs of shapes shown on <strong>Activity</strong> Sheets#47-50 on a piece of acetate. Have the child draw a linefrom the shapes in the left column to their match in theright column.You may also draw your own shapes for the child to match inthis way. As she becomes more adept at matching shapes,use more complex figures and include figures which aresimilar to one another.<strong>Activity</strong> 18: <strong>Activity</strong> Sheets #47-50Draw shapes, two or more of them alike, on a piece ofacetate. Use the shapes shown on <strong>Activity</strong> Sheets #47-50 ordraw your own shapes. Name and/or indicate to the child aparticular shape (e.g., circle) and have him color in all theother circles shown on the worksheet. Gradually increasethe number and similarity of shapes on each worksheet.55
Goal: Matching and Sorting ( continued)<strong>Activity</strong> 19: Colored shape cardsForm a board game using the shape cards or create oneusing a large sheet of acetate and colored markers orshapes cut from colored art film (See Other SuggestedMaterials). Position or draw shapes in a rectangular patharound the edge of the <strong>Light</strong> <strong>Box</strong>.Place a set of acetate cards of matching shapes in thecenter of the <strong>Light</strong> <strong>Box</strong>. Have the child place her token in theupper left-hand corner to begin the game. Have her draw acard and move the token to the nearest matching shapemoving in clockwise fashion around the board. The first childto move her token all the way around the board is the winner,or you may play for chips or Monopoly money which the childcollects each time she passes “home” or some otherdesignated spot on the board. You may develop simple orcomplex rules for the game, such as creating a square which,if landed on, forces the player to return to the “home” position.56
<strong>Activity</strong> 20: Raised outline shape cards andparquetry piecesPlace several raised outline shape cards and theirmatching parquetry pieces on the <strong>Light</strong> <strong>Box</strong>. Have the childcorrectly place each parquetry Piece within the raisedoutline. As she grows more capable, select shapes pieceswhich are closer to one another in size and configuration.Have her match more and more pieces at one time until shecan correctly match parquetry pieces to all of the raisedoutline cards.<strong>Activity</strong> 21: Outline shape cards andcolored shape cardsSelect several outline shape cards which are distinctlydifferent and locate their matches among the colored shapecards. Have the child match the outline Shapes to thecolored shapes. Allow him to check his matches by slidingthe colored shape card over the outline shape card. Thecolored shape should fill in the outline but not go over it.<strong>Activity</strong> 22: Outline shape cards andcolored shape cardsGoal: Matching and Sorting ( continued)Play Lotto using the outline shape cards and colored shapecards. (See <strong>Activity</strong> #14.)57
Goal: Matching and Sorting ( continued)<strong>Activity</strong> 23: Colored shape cardsHave the child match outline shape cards to other outlineshape cards. At first, she may check her matches by slidingthe cards over each other to see that they are identical.<strong>Activity</strong> 24: Outline shape cardsPlay Lotto using only the outline shape cards.(See <strong>Activity</strong> #14.)<strong>Activity</strong> 25: Outline shape cardsCreate a boardgame similar to the game described in<strong>Activity</strong> #18. Use only outline shape cards instead of coloredshape cards.<strong>Activity</strong> 26: Outline shape cardsPlay a Bingo game using the outline shape cards.(See <strong>Activity</strong> #10.)<strong>Activity</strong> 27: Familiar object pictures/stencils/cutoutsGather some of the actual items depicted in the familiarobject pictures–a toothbrush, brush, spoon, knife, glass,sock, apple, and banana. Let the child examine each item58
Goal: Matching and Sorting ( continued)off and on the <strong>Light</strong> <strong>Box</strong>. Identify each and point out itsdistinctive appearance – round or oblong shape, curved orstraight sides, wide and narrow places, distinguishingbumps. Place one of the objects and its correspondingfamiliar object cutouts on the <strong>Light</strong> <strong>Box</strong>. Again, point outdistinguishing visual features of both—indicating that oneis a picture of the other. Do the same with the correspondingpicture and stencil.<strong>Activity</strong> 28: Familiar object pictures/stencils/cutoutsChoose several familiar object pictures, stencils, orcutouts, depending upon which the child is able to identifymost readily. Gather the actual items which correspond tothe pictures, stencils, or cutouts and have the child matcheach object to its representation. At first select items whichhave distinctly different shapes (e.g., the apple, spoon, andsock). Later choose similarly shaped items, such as thetoothbrush, knife and spoon.<strong>Activity</strong> 29: Familiar Object stencils and cutoutsWhen the child capably matches the actual item to itsrepresentation, begin a series of matching tasks. Forexample, give the child a stencil and the cutout. Choose asimple stencil at first, such as the ball. Have him fit thecutout inside the stencil. Have him perform the task usingthe other stencils.59
Goal: Matching and Sorting ( continued)<strong>Activity</strong> 30: Familiar object picturesHave the child match pictures to pictures. Begin withpictures which are distinctly different. The child may slide thepictures over one another. Additional pictures of commonobjects may be obtained from magazines and other sources.Trace these on acetate, then color with markers or applytransparent, adhesive art film. (See Additional Materialsfor sources.)<strong>Activity</strong> 31: Familiar object stencils and picturesHave the child match stencils to pictures.<strong>Activity</strong> 32: Familiar object cutouts and picturesGive the child several distinctly different cutouts and matchingpictures. Have her match the cutouts to their pictures.<strong>Activity</strong> 33: Familiar object stencils and picturesUse the stencils to make outline pictures. Have the childmatch the familiar object pictures to their outlines, or matchoutline Pictures to one another. You may create some whichinclude inner detail showing, for example, the teddy bear’sfeatures.60
<strong>Activity</strong> 34: Familiar object stencils and picturesCreate your own object pictures for the child to match. Traceover drawings in children’s coloring books, story books, or inmagazines. Tracing paper colored with felt tip pens showsup well on the <strong>Light</strong> <strong>Box</strong>; laminate it for extra durability, ortrace onto clear acetate or Mylar ® .<strong>Activity</strong> 35: PegsHave the child sort the pegs using shape and color ascriteria. For example, blue square pegs should be groupedseparately from green square pegs; blue round pegs shouldbe grouped separately from blue square pegs, and so on.The child may group pegs using the pegboard, placing eachdifferent type of peg in its own row, or he may prefer to sortpegs into piles or containers on the <strong>Light</strong> <strong>Box</strong> surface.<strong>Activity</strong> 36: Parquetry piecesGoal: Matching and Sorting ( continued)Have the child sort parquetry pieces according to shape andcolor, as described in activity #1. The parquetry pieces mayalso be sorted by shape and size, grouping separately large,medium, and small triangles and large, medium, and smallsquares. The child may also sort the parquetry pieces bycolor and size.61
<strong>Activity</strong> 37: Colored shape cardsHave the child sort the Colored shape cards by shape andcolor, shape and size, and color and size. (Make a fewadditional cards to provide a wider variety of colors and sizesfor sorting.)<strong>Activity</strong> 38: Colored shape cardsPlay a card game using acetate cards you have made whichdisplay shapes colored with a marker or cut from adhesiveart film (See Other Suggested Materials). Make 7 to 13different shapes in four colors.62
Play Rummy, matching cards of the same shape or color toform groups of three or four. Crazy 8’s may be played bydealing six to eight cards to each player, depending on thesize of your deck. In Crazy 8’s a card is turned over from thetop of the deck. The first player attempts to match the coloror shape of this card witj a card from her hand. For example,if a red square is turned over, the first player may put on thestack any card showing a red shape, or a square. If shedoes not have a match in her hand, she must draw from thedeck until she obtains a match. The second player plays hercard based on the card put down by the first player. Thewinner is the first person to play all of her cards. (In atraditional game of Crazy 8’s the “8” card is treated as itsowner specifies [e.g., the owner can dsignate the card asclubs]. For more fun, incorporate this feature into your game,creating a special wild card which the child must recognize.)<strong>Activity</strong> 39: Familiar object picturesHave the child match pictures according to their functiongrouping toys, clothing, food, and utensils separately.Demonstrate the activity first by grouping several pictures.“These things are alike. Can you tell me how?” Have thechild complete the sorting.63
Goal: Spatial Relationships<strong>Activity</strong> 1: CubesPlace two cubes side by side on the <strong>Light</strong> <strong>Box</strong>. Give the childtwo cubes and ask him to place his cubes just like yours.Perform the same task, having him imitate thepositions of several cubes, pegs, or other objects placedin a row, in a stack, under a cup, and in various otherarrangements. See if he can perform the task without verbalcues. After he has arranged his cubes, have him describetheir positions.<strong>Activity</strong> 2: Pegs/cubesHave the child make a line of pegs or cubes across the <strong>Light</strong><strong>Box</strong>, spacing them as evenly as she can. If she performs thiseasily, suggest she make a line from the top edge of the<strong>Light</strong> <strong>Box</strong> to the edge closest to her. She may also follow theedges of the <strong>Light</strong> <strong>Box</strong> surface, making a large rectangle ofpegs or cubes.<strong>Activity</strong> 3: Pegboard and pegs/template and cubesFill the 6 x 1 template with cubes. Give the child a templateand cubes. Have him orient the template like yours and fillit with cubes. Perform the same task with the 3 x 3 template.Encourage the child to work in a left to right, top tobottom order.65
Goal: Spatial Relationships ( continued)<strong>Activity</strong> 4: Template and cubesBlock out all but three squares of the 6 x 1 template. Givethe child the other, matching, 6 x 1 template showing onlythree squares.(Have him orient the cubes like yours.) Fillyour template telling the child you are making a row. Work inleft to right (or top to bottom) order. Have the child fill hertemplate in the same manner.Demonstrate and give names for the following placementsand have the child imitate:<strong>Activity</strong> 5: Pegboard and pegs/template and cubesCompletely fill the pegboard or a template with pegs orcubes. Remove several pegs or cubes in a horizontal row.(Have the child remove the rest of the pegs or cubes in thathorizontal row.) Have him remove a vertical row, determiningwhich pegs or cubes should be removed in a left to right, topto bottom order.66
Goal: Spatial Relationships ( continued)<strong>Activity</strong> 6: Pegboard and pegs/template and cubesUse the cubes or pegs to demonstrate the meanings of otherpositional words: above, below, beside, center, andcorner. Use the pegs or cubes in or out of the pegboard or atemplate. Identify their positions relative to one another, the<strong>Light</strong> <strong>Box</strong> surface, pegboard or template (e.g., red pegbelow the green peg or blue peg in the corner of thepegboard). When she is familiar with these words place apeg or cube on the <strong>Light</strong> <strong>Box</strong> and ask the child to putanother peg or cube below it. Explore all of the positionalwords with her in this way. Have her further demonstrate herunderstanding by putting out pegs or cubes according toyour specifications:“Put out two cubes, one below the other.”“Put a peg in each of the corners of the pegboard.”In addition, have her identify the position of pegs or cubeswhich you arrange.<strong>Activity</strong> 7: Pegboard and pegs/template and cubesPlace some pegs in the pegboard or cubes in a template anddirect the child to locate and pick up a particular peg.“Pick up the peg closest to you.”“Pick up the peg in the middle.”“Pick up the peg in the corner.”67
Goal: Spatial Relationships ( continued)This can be made into a game for one or more children.A child may “keep” all correctly identified pegs.<strong>Activity</strong> 8: Parquetry pieces/sticksLet the child experiment with the Sticks and parquetrypieces, playing with them as she chooses. Verbalize whatshe is doing and point out spatial relationships and theorientation of the pieces:“You put the circle on top of the Stick.”“The Stick is pointing up and down.”‘You put the red one beside the blue one.”<strong>Activity</strong> 9: Parquetry pieces/sticksPlace three sticks on the <strong>Light</strong> <strong>Box</strong>. Orient two alike,one different. Have the child point to the one which isoriented differently. Perform the same activity using theparquetry pieces.<strong>Activity</strong> 10: Parquetry pieces/sticksPlace a triangle on the <strong>Light</strong> <strong>Box</strong>. Give the child an identicaltriangle and have him position it like yours. Perform theactivity using other shapes and other kit items—pegs, sticks.68
<strong>Activity</strong> 11: Familiar object cutoutsGoal: Spatial Relationships ( continued)Make duplicates of the Familiar Object Cutouts. Performactivities #11 and #12 using the Cutouts.<strong>Activity</strong> 12: Familiar object cutoutsExplore the meanings of positional words with the child byhaving her draw or mark on blank acetate, as you describewhat she is doing.“Your line is going up!”“You made an X below the line.”“Your line curves around and around.”Also have her draw as you give directions.“Make a dot in the middle of the sheet.”“Now, make a line over the dot.”“Make a row of dots across the sheet.”<strong>Activity</strong> 13: Template and cubes/pegboard and pegsPlay a modified checkers game with the cubes or pegs. Iftwo adjacent cubes or pegs have an empty space to oneside or the other, the child may jump the first cube over theother and claim and keep the jumped cube, You and thechild may continue the game until all possible jumps havebeen made. Help him count to see who has the most cubes.69
Goal: Spatial Relationships ( continued)<strong>Activity</strong> 14: Cubes/parquetry piecesOn acetate, draw a tic-tac-toe grid. Use cubes of two colorsto play tic-tac-toe with the child, or use parquetry pieces ofdifferent shapes and/or colors.70
Goal: Identification<strong>Activity</strong> 1: Parquetry pieces/pegs/cubesPlace pegs, cubes and/or parquetry pieces in a bag. Havethe child remove an item and name its color as she places iton the <strong>Light</strong> <strong>Box</strong>.<strong>Activity</strong> 2: Parquetry pieces/cubesScatter parquetry pieces or cubes on the <strong>Light</strong> <strong>Box</strong>. Name aparticular color and have the child find and pick up one ofthat color.<strong>Activity</strong> 3: Parquetry piecesPerform <strong>Activity</strong> #1 using the parquetry pieces. Help thechild identify the shapes he selects. (It is difficult toremember the names of geometric shapes; use thisexercise as a way of practicing naming them. It may beeasier for him to name the familiar object pictures.)<strong>Activity</strong> 4: Pegboard and pegsPlace pegs in the pegboard and direct the child to locate andpick up a particular peg(s):the yellow pegsthe red, square pegall the triangular pegsthe round peg71
Goal: Identification (continued)<strong>Activity</strong> 5: Pegs/cubesHave the child build a tower or other arrangement accordingto your specifications. Let her find and place each piece.(“Put a yellow square peg on top of the blue cube.”)<strong>Activity</strong> 6: Template and cubes/pegboard and pegsPlay a modified Bingo game. Randomly fill a template orpegboard. Indicate a particular row and name a particulartype of peg (“orange and round”) or colored cube (“green”).If there is a peg or cube matching that description in the rowyou have indicated, the child locates it and removes it.“Bingo” is declared when an entire row (vertical, horizontal,or diagonal) has been removed.<strong>Activity</strong> 7: Parquetry piecesPerform <strong>Activity</strong> #6 using parquetry pieces.<strong>Activity</strong> 8: Colored shape cards/outline shape cardsPerform <strong>Activity</strong> #6 using the colored shape cards oroutline shape cards.<strong>Activity</strong> 9: Colored shape cards/outline shape cardsCreate your own deck of acetate shape cards with a coloredmarker or by cutting out shapes from art film (See OtherSuggested Materials). Play simple card games which involvenaming the color and/or shape he has drawn. For example,72
73Goal: Identification (continued)as each new card is turned over, have the child name thecard. If he can, he may keep the card; if not, you or the nextchild has a chance to name and keep the card. The winner isthe child with the most cards.A simplified version of “Go Fish” would also be an interestinggame for several children to play. As each turn comesaround, the child asks the player to his left for the particularcard he needs to complete a set of four cards. If the playeron his left has the card (e.g., a “red triangle”), he mustsurrender it. If he does not, the child who asked must drawfrom the pile. The child who is first to group all of his cardsinto sets of four is the winner.(You may want to devise screens for card games in whichseveral players take part. A screen can be cut from a shoebox. Provide room for the child to place his cards on the<strong>Light</strong> <strong>Box</strong> yet still have the deck easily visible.)<strong>Activity</strong> 10: Familiar object picturesTell a story using the familiar object pictures. “There oncewas a boy who was very, very hungry. He couldn’t wait toeat! When he got home after school, this is what he saw.”(Point to the familiar object pictures; use several at first, laterexpand and include more pictures.) “Help the boy findsomething good to eat. Show me what you would give himto eat.” The child should point to an edible object and nameit, if possible. Make up other stories to motivate the child todiscriminate and identify the object pictures and thefunctions of each.
Goal: Identification (continued)<strong>Activity</strong> 11: Familiar object picturesSpread several pictures on the <strong>Light</strong> <strong>Box</strong> and create a storyaround the objects they display. As you tell the story, havethe child point to the appropriate picture. If the story follows aparticular sequence, have the child arrange the Pictures inleft to right sequence.74
Goal: Visual Memory<strong>Activity</strong> 1:Place a familiar object on the <strong>Light</strong> <strong>Box</strong>. Let the child view itfor a few moments, then remove the item. Replace it and addseveral other items on the <strong>Light</strong> <strong>Box</strong>. Have the child name orpoint to the object he was first shown. Initially, select additionalitems which are very different from the first object Later,choose items similar to it, requiring the child to improve hisability to remember the object’s visual appearance.<strong>Activity</strong> 2: Parquetry pieces/cubesSpread several pegs, cubes, or parquetry pieces in a row onthe <strong>Light</strong> <strong>Box</strong>. Let the child view them for a short time, thenhave her turn away, and remove one of the items. Let her viewthe new array and show her several pieces—one of which isthe missing piece. Have her name or point to the piece youremoved. Let her replace it in the array to see if it “looks right.”At first select pieces for this task which are very different fromone another. For example, show the child the following:75
Goal: Visual Memory (continued)If you remove the yellow peg, mix it with items which arewidely varied such as an orange cube, blue parquetry piece,and one of the sticks. As the child becomes more capable,group the missing piece with pieces which are similar to itand present arrays using only parquetry pieces, cubes, orpegs. Experiment with reducing the amount of time you allowthe child to view the array and the amount of time you giveher to select the missing piece.<strong>Activity</strong> 3: Colored shape cards/outline shape cards/familiar object stencils/cutouts/picturesPerform Activities # 1 and #2 using the colored shape cards,outline shape cards, familiar object stencils,cutouts, or pictures.76
Goal: Sequencing and Patternmaking<strong>Activity</strong> 1: Template and cubesReview Activities #3 and #4 given under spatial relationships,emphasizing to the child that he should arrange his cubes tolook just like yours.<strong>Activity</strong> 2: Pegs/cubesUsing the pegs in or out of the pegboard, or the cubes withor without a template, make several pairs of pegs or cubes.For example:Ask the child to find the pair which matches the blue/orangepair. (Point to the upper left-hand pair.) Or, as a somewhat moredifficult task, ask him to find the two pairs which are alike.<strong>Activity</strong> 3: Parquetry pieces/pegs/cubesPlace two or three parquetry pieces, pegs, and/or cubes in arow horizontal or vertical. Underneath this first row, make asecond row containing indentical items but in a differentorder. Have the child examine both rows, showing her thateach row contains the same items but in a different order.77
Goal: Sequencing and Patternmaking (continued)Ask her to arrange the second row so that it is the same asthe first one. If she has difficulty, it may be helpful for her totalk aloud as she goes through the sequence: “First the blueone, then the red one, then blue again.” As she becomesable to perform this task, increase the number of pieces ineach row and/or make them more similiar to one another.(Try using all pegs, all tiles, or all parquetry pieces.)<strong>Activity</strong> 4: Pegboard and pegs/template and cubesPlace a row like the following in the pegboard or template:Yellow Blue Yellow Blue YellowWith the child, name the color of the pegs or cubes, and askhim what color peg or cube should come next to continue thepattern. Have him continue the pattern until he runs out ofappropriate pegs or cubes. Set up other simple sequencesfor him to imitate. Vary shape, or shape and color. Increasethe number of pegs or cubes in the pattern from two to three.78
Goal: Sequencing and Patternmaking (continued)<strong>Activity</strong> 5: Pegboard and pegs/template and cubesPlace several pegs in the top row of the pegboard or cubes inthe top row of a template. Give the child a limited number ofpegs or cubes like the ones used in the sample row. Forexample, if your row contains a round red, round blue, andround yellow peg, give the child several each of these pegs,excluding, for the time being, other colors and shapes. Haveher duplicate your row in the row below it, then duplicate thatrow in the next row down, and so on until she runs out of pegsor cubes. Perform the activity using more and more pegs orcubes. Gradually increase the variety of pegs or cubes youuse, requiring the child to attend to shape as well as color.<strong>Activity</strong> 6: Parquetry pieces and colored shape cardsArrange several of the colored shape cards in a sequence;have the child imitate your sequence using the parquetrypieces.<strong>Activity</strong> 7: SticksArrange the Sticks in a simple sequence and have the childimitate it. Experiment with orienting the Sticks differently tocreate different sequences for him to copy.79
Goal: Sequencing and Patternmaking (continued)<strong>Activity</strong> 8: Familiar object stencils/picturesUse the stencils to make two sets of cutouts from blackposterboard. Arrange several cutouts in a sequence. Havethe child arrange his cutouts or the familiar object pictures ina matching sequence. You can arrange the cutouts so theytell a story in left to right order.<strong>Activity</strong> 9: TemplateSelect cubes of the same color and place them in the 3 x 3template. Give the child the correct number of cubes, all ofthe same color, and have her duplicate your pattern on hertemplate. Provide prompts when necessary, such as pointingto the first cube. Verbal prompts may also help the child:“Which one comes first?”“You put the first one in; where does the next one go?”“That space is empty.”Always work in left to right and/or top to bottom order.<strong>Activity</strong> 10: Template and cubesHave the child duplicate the patterns shown on pages 87-93using the 5 x 5 template. Use cubes of the same color andprovide prompts only when necessary.80
Goal: Part/Whole Relationships<strong>Activity</strong> 1: Parquetry pieces and pegsBuild a simple structure using pegs and parquetry pieces.Use only a few pieces. Have the child imitate your structure.<strong>Activity</strong> 2: Pegboard and pegsShow the child that two triangular pegs create one square pegwhen both are positioned in the same hole. Give him theremaining triangular pegs. Have him put two together to makea row of square pegs like the one you have shown him.<strong>Activity</strong> 3: Parquetry Pieces and raised outlineshape cards/Geometric shape stencilsShow the child that two Right Isosceles triangles make asquare when positioned correctly. Use the raised outlineshape card of the medium square and two mediumTriangles or use the square shape Stencil and two largeTriangles. Help the child discover the following relationshipsusing the shape stencils, raised outline shape cards, andparquetry pieces (see next page):81
Goal: Part/Whole Relationships (continued)Shape StencilsSquare – 2 large triangles2 rectangles4 small squares4 medium triangles(See <strong>Activity</strong> Sheet #51b for additional configurations)Triangle – 2 medium triangles4 small triangles(See <strong>Activity</strong> Sheet #54b for additional configurations)Rectangle – 2 medium squares4 medium triangles(See <strong>Activity</strong> Sheet #53b for additional configurations)Heart –Hexagon –2 half-circles1 medium square2 trapezoidsRaised Outline Shape CardsSquare – 2 medium triangles4 small trianglesCircle –Triangle –2 half-circles2 small trianglesRectangle – 2 small squares4 small trianglesRhombus – 2 small triangles82
<strong>Activity</strong> 4: Sticks and parquetry piecesPlace a large square and four Sticks on the <strong>Light</strong> <strong>Box</strong>. Showthe child how to put a Stick along each side of the square,outlining the square. Have the child do this on his own. Youmay need to help him get started by putting the first Stick ortwo in place yourself. Talk about the four sides of the square.<strong>Activity</strong> 5: Sticks and outline shape cardsPlace the outline shape card showing the large square onthe <strong>Light</strong> <strong>Box</strong> or draw a large square on acetate. Give thechild four Sticks and have her place them over the lines ofthe square. Perform the activity with other outline shapecards or simple figures drawn on acetate.<strong>Activity</strong> 6: SticksGoal: Part/Whole Relationships (continued)Using only two sticks, make a configuration on the <strong>Light</strong> <strong>Box</strong>,such as one of the following:Give the child two sticks and have him imitate the figure youhave just made.83
Goal: Part/Whole Relationships (continued)<strong>Activity</strong> 7: SticksIf the child capably performs other Part/Whole activities withthe Sticks, have her build a Stick square, triangle, or otherfigure using yours as a model.<strong>Activity</strong> 8: Parquetry pieces/SticksIf the child seems capable, draw some very simple designson acetate with a marker or cut stencils from Posterboard.Have the child fill in the appropriate parquetry pieces and/orSticks. If your patterns are representative of something – atfirst, represent familiar objects in his near environment – anice cream cone or cup – rather than an airplane or house.Limit the number of pieces in each pattern.84
<strong>Activity</strong> 9: <strong>Activity</strong> Sheets #51a-72bGoal: Part/Whole Relationships (continued)Assemble one of the geometric shapes or designs shown on<strong>Activity</strong> Sheets #51a-72b. Use parquetry pieces of differentcolors. Have the child identify the whole shape, if it has aname, and describe its features. Have her look within theshape and identify the smaller shapes which comprise it.<strong>Activity</strong> 10: <strong>Activity</strong> Sheets #51a-72bTrace one of the shapes shown on <strong>Activity</strong> Sheets #51a-72bwith a heavy black marker. Give the child the black outlineand appropriate parquetry pieces and have him form thewhole shape. At first, trace lines inside the shape showingplacement of the individual pieces. Work through the <strong>Activity</strong>Sheet designs and others of your own creation, beginningwith simple 2- and 3-piece designs and leading to morecomplex configurations.85
Goal: Part/Whole Relationships (continued)Some suggested patterns for the 3 x 3 template87
Goal: Part/Whole Relationships (continued)88
Goal: Part/Whole Relationships (continued)Some suggested patterns for the 5 x 5 template89
Goal: Part/Whole Relationships (continued)90
Goal: Part/Whole Relationships (continued)91
Goal: Part/Whole Relationships (continued)92
Goal: Part/Whole Relationships (continued)93
Appendix:Vision Development Materials from APH& Related Visual Tasks Chart95
1<strong>00</strong>
101
102
103
104
105
106