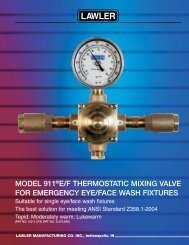
Series 911 E/F Emergency Eye Wash Valve
911E F Ins Sheet.indd - Lawler Thermostatic Mixing Valves
911E F Ins Sheet.indd - Lawler Thermostatic Mixing Valves
- No tags were found...

You also want an ePaper? Increase the reach of your titles
YUMPU automatically turns print PDFs into web optimized ePapers that Google loves.
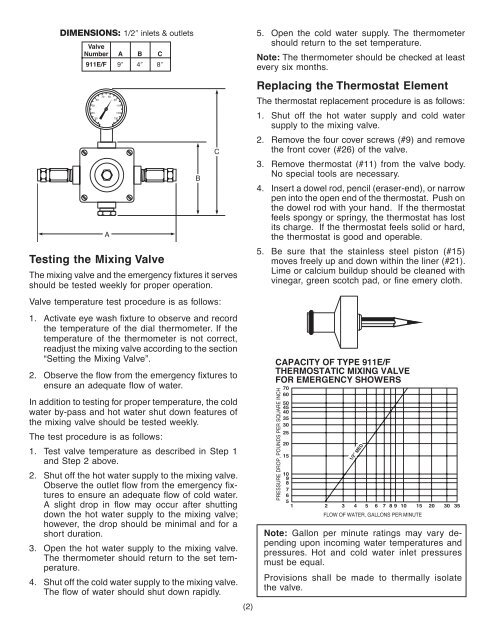
DIMENSIONS: 1/2″ inlets & outlets<strong>Valve</strong>Number A B C<strong>911</strong>E/F 9″ 4″ 8″5040603070 80Testing the Mixing <strong>Valve</strong>A90110120130The mixing valve and the emergency fixtures it servesshould be test ed week ly for prop er op er a tion.<strong>Valve</strong> temperature test procedure is as follows:1. Activate eye wash fi xture to observe and recordthe tem per a ture of the dial thermometer. If thetem per a ture of the thermometer is not cor rect,readjust the mixing valve according to the sec tion“Set ting the Mixing <strong>Valve</strong>”.2. Observe the fl ow from the emergency fi xtures toensure an adequate fl ow of water.In addition to testing for proper temperature, the coldwater by-pass and hot water shut down fea tures ofthe mixing valve should be tested week ly.The test procedure is as follows:1. Test valve temperature as described in Step 1and Step 2 above.2. Shut off the hot water supply to the mixing valve.Observe the outlet fl ow from the emergency fi x-tures to ensure an ad e quate fl ow of cold wa ter.A slight drop in fl ow may occur after shuttingdown the hot water supply to the mixing valve;how ev er, the drop should be minimal and for ashort duration.3. Open the hot water supply to the mixing valve.The thermometer should return to the set tempera ture.4. Shut off the cold water supply to the mixing valve.The fl ow of water should shut down rapidly.BC(2)5. Open the cold water supply. The thermometershould return to the set tem per a ture.Note: The thermometer should be checked at leastevery six months.Replacing the Thermostat ElementThe thermostat re place ment procedure is as fol lows:1. Shut off the hot water supply and cold watersupply to the mix ing valve.2. Remove the four cover screws (#9) and removethe front cover (#26) of the valve.3. Remove thermostat (#11) from the valve body.No special tools are necessary.4. Insert a dowel rod, pencil (eraser-end), or narrowpen into the open end of the thermostat. Push onthe dowel rod with your hand. If the thermostatfeels spongy or springy, the thermostat has lostits charge. If the thermostat feels solid or hard,the thermostat is good and operable.5. Be sure that the stainless steel piston (#15)moves freely up and down within the liner (#21).Lime or calcium buildup should be cleaned withvin e gar, green scotch pad, or fi ne emery cloth.CAPACITY OF TYPE <strong>911</strong>E/FTHERMOSTATIC MIXING VALVEFOR EMERGENCY SHOWERSPRESSURE DROP, POUNDS PER SQUARE INCH706050454035302520151/2″ MED10987651 2 3 4 5 6 7 8 9 10 15 20 30 35FLOW OF WATER, GALLONS PER MINUTENote: Gallon per minute ratings may vary dependingupon incoming water temperatures andpressures. Hot and cold water inlet pressuresmust be equal.Provisions shall be made to thermally isolatethe valve.