appliance maintained
Stone River WMH LSU(18,24,30)SF - White Mountain Hearth
Stone River WMH LSU(18,24,30)SF - White Mountain Hearth

You also want an ePaper? Increase the reach of your titles
YUMPU automatically turns print PDFs into web optimized ePapers that Google loves.
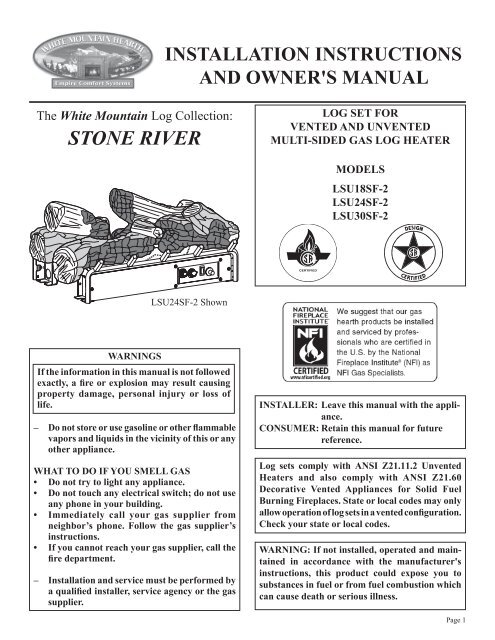
INSTALLATION Instructions<br />
AND Owner's Manual<br />
The White Mountain Log Collection:<br />
STONE RIVER<br />
Log Set for<br />
vented and UNVENTED<br />
MULTI-SIDED GAS LOG HEATER<br />
MODELS<br />
LSU18SF-2<br />
LSU24SF-2<br />
LSU30SF-2<br />
LSU24SF-2 Shown<br />
WARNINGS<br />
If the information in this manual is not followed<br />
exactly, a fire or explosion may result causing<br />
property damage, personal injury or loss of<br />
life.<br />
– Do not store or use gasoline or other flammable<br />
vapors and liquids in the vicinity of this or any<br />
other <strong>appliance</strong>.<br />
WHAT TO DO IF YOU SMELL GAS<br />
• Do not try to light any <strong>appliance</strong>.<br />
• Do not touch any electrical switch; do not use<br />
any phone in your building.<br />
• Immediately call your gas supplier from<br />
neighbor’s phone. Follow the gas supplier’s<br />
instructions.<br />
• If you cannot reach your gas supplier, call the<br />
fire department.<br />
– Installation and service must be performed by<br />
a qualified installer, service agency or the gas<br />
supplier.<br />
INSTALLER: Leave this manual with the <strong>appliance</strong>.<br />
CONSUMER: Retain this manual for future<br />
reference.<br />
Log sets comply with ANSI Z21.11.2 Unvented<br />
Heaters and also comply with ANSI Z21.60<br />
Decorative Vented Appliances for Solid Fuel<br />
Burning Fireplaces. State or local codes may only<br />
allow operation of log sets in a vented configuration.<br />
Check your state or local codes.<br />
WARNING: If not installed, operated and <strong>maintained</strong><br />
in accordance with the manufacturer's<br />
instructions, this product could expose you to<br />
substances in fuel or from fuel combustion which<br />
can cause death or serious illness.<br />
Page 1
Section<br />
TABLE OF CONTENTS<br />
Important Installation Guidelines..................................................................................3<br />
General Information.......................................................................................................3<br />
Requirements for Canada..............................................................................................4<br />
Log Placement...............................................................................................................5<br />
Ember Placement LSU18SF-2 Photos...........................................................................6<br />
Ember Placement LSU24SF-2 Photos...........................................................................7<br />
Ember Placement LSU30SF-2 Photos...........................................................................8<br />
Parts List and Parts View...............................................................................................9<br />
Master Parts Distributor List.......................................................................................10<br />
How to Order Repair Parts..........................................................................................10<br />
Service Notes...............................................................................................................11<br />
Page<br />
Page 2<br />
25743-0-0309
IMPORTANT INSTALLATION GUIDELINES<br />
Proper Log Placement<br />
Log placement is critical to proper burner performance. Logs must<br />
be correctly positioned onto the burner. The photos in this manual<br />
show the proper pinned position for logs on this set. Owners need<br />
to be shown proper log placement and instructed not to move the<br />
logs.<br />
Logs must fit firmly onto the burner when positioned as shown in<br />
the photos. Malformed logs or logs with sloppy pin holes must be<br />
replaced.<br />
Proper Placement of Rock Wool and Decorative Lava Rock<br />
Rock wool can be added to burners for a glowing ember effect.<br />
It must be positioned only on the front portion of the burner. The<br />
photos in this manual show the proper placement of rock wool.<br />
Decorative lava rock or small wood pieces should never be placed<br />
on the burner. These items are only for placement on the floor of<br />
the fireplace or firebox.<br />
Proper Primary Airflow into Burner<br />
For proper burner operation and flame appearance, the flow of<br />
primary air into the venturi tube, located on the rear of the burner,<br />
must not be reduced. This flow of air is reduced if dirt, lint or other<br />
obstructions build-up around or inside the venturi. Any obstruction<br />
in the venturi tube area must be removed. The flow of air into the<br />
venturi is also reduced if the gas orifice isn’t centered in the venturi<br />
inlet and/or is not aligned with the venturi. Any misalignment of the<br />
burner orifice may be corrected by bending the shutter cap holding<br />
the orifice to the inlet of the venturi tube.<br />
Ceiling Fans, Portable Fans or Logs Installed Near Cold Air<br />
Returns<br />
Ceiling fans or oscillating floor type fans need to be monitored<br />
during the operation of vent-free logs. If the air blows directly<br />
into the flame causing it to impinge on the log set, or firebox, it<br />
should be turned off or redirected. Ceiling fans could be reversed<br />
to possibly eliminate flame impingement, and the floor fan could<br />
be redirected. Upon installation, be aware of any cold air returns<br />
or vents in the proximity of the log set. Any draft created around<br />
a vent-free log set can cause the flame to impinge on the log and<br />
create a sooting situation.<br />
WARNING: Do not allow fans to blow directly into the fireplace.<br />
Avoid any drafts that alter burner flame patterns.<br />
WARNING: Do not use a blower insert, heat exchanger insert or<br />
other accessory not approved for use with this heater.<br />
Candles<br />
Avoid the use of scented or decorative candles while the log set is in<br />
operation. Candles produce a residue in the air that creates a soot like<br />
substance. Burning candles while the log set is operating magnifies<br />
the problem. It should be noted that candles, in general, produce<br />
soot. The amount of time burned and the quantity of candles burned<br />
will determine the amount of soot produced and deposited.<br />
Make Owners Aware of Proper Log Set Operation<br />
Properly installed and properly <strong>maintained</strong> log sets do not deposit<br />
soot on the logs. If users see soot appear on a log, call for service.<br />
Do not continue to operate the log set.<br />
Sunken Fireplace<br />
If installing this unit into a sunken fireplace, you must raise the<br />
floor to insure adequate airflow and guard against sooting. Raise<br />
fireplace floor using a non-combustible material, which is secure.<br />
Glass Doors<br />
Make sure that glass doors are open during all operations of the log<br />
set. The opening of the glass door frame should be the dimension<br />
used for the minimum front opening of the firebox.<br />
Woodburning Fireplaces<br />
The interior of the firebox and the chimney should be cleaned and<br />
free of all creosote before installing a gas burning log set. Creosote<br />
will soften when heated and can drop on the log set causing odors<br />
and possibly sooting.<br />
WARNING: Before installing in a solid-fuel burning fireplace, the<br />
chimney flue and firebox must be cleaned of soot, creosote, ashes<br />
and loose paint by a qualified chimney cleaner.<br />
GENERAL INFORMATION<br />
Qualified Installing Agency<br />
Installation and replacement of gas piping, gas utilization equipment<br />
or accessories and repair and servicing of equipment shall be<br />
performed only by a qualified agency. The term "qualified agency"<br />
means any individual, firm, corporation, or company that either in<br />
person or through a representative is engaged in and is responsible<br />
for (a) the installation, testing, or replacement of gas piping or (b) the<br />
connection, installation, testing, repair, or servicing of equipment;<br />
that is experienced in such work; that is familiar with all precautions<br />
required, and that has complied with all the requirements of<br />
the authority having jurisdiction.<br />
The installation must conform with local codes or, in the absence<br />
of local codes, with the National Fuel Gas Code, ANSI Z223.1/<br />
NFPA54* or International Fuel Gas Code.<br />
*Available from the American National Standards Institute, Inc. 11 West 42nd St.,<br />
New York, N.Y. 10018.<br />
State of Massachusetts: The installation must be made by<br />
a licensed plumber or gas fitter in the Commonwealth of<br />
Massachusetts.<br />
Sellers of unvented propane or natural gas-fired supplemental<br />
room heaters shall provide to each purchaser a copy of<br />
527 CMR 30 upon sale of the unit.<br />
In the State of Massachusetts, unvented propane and natural<br />
gas-fired space heaters shall be prohibited in bedrooms and<br />
bathrooms.<br />
25743-0-0309 Page 3
REQUIREMENTS FOR CANADA<br />
This unit cannot be installed in a UNVENTED application, this<br />
unit can only be installed as a VENTED application with these<br />
requirements.<br />
IMPORTANT SAFETY INFORMATION<br />
This unit complies with ANSI Z21.60and CGA 2.26 Decorative<br />
Gas Appliances For Installation In Solid Fuel Burning Fireplaces.<br />
Do not burn wood or solid fuels in a fireplace where a decorative<br />
gas log set is installed. This <strong>appliance</strong> is for installation only in<br />
a solid fuel burning fireplace, masonry fireplace or manufactured<br />
fireplace.<br />
Warning: Any modification to this gas log set or to controls can<br />
be dangerous. Improper installation or use of the gas log set can<br />
cause serious injury or death from fire, burns, explosion or carbon<br />
monoxide poisoning.<br />
1. Please follow all local codes regarding installation, combustion<br />
and ventilation air or in the absence of local codes follow<br />
the National Fuel Gas Code ANSI Z223.1(U.S. installation),<br />
or CAN/CGA-B149, Installation Code (Canada installation).<br />
2. Proper installation, burner pan location and log placement is<br />
important to achieve optimum look and performance of your<br />
gas log set. The logs have been designed for easy location<br />
and placement on the grate and must be followed for proper<br />
operation.<br />
3. Do not operate this log set with glass doors in the closed position.<br />
A fireplace screen must be in place when the log set<br />
is burning. Adequate combustion air must be provided for<br />
proper venting. All flames should go up and out the top of the<br />
firebox into the flue vent. If any flames float or curl forward<br />
into the room do not operate <strong>appliance</strong>. Check for an open<br />
flue and adequate combustion air into the room. A damper<br />
clamp must be installed on the firebox damper to maintain an<br />
open flue vent condition. Refer to fireplace owners manual<br />
INSTALLING DAMPER CLAMP section.<br />
4. Young children must be carefully supervised when they are<br />
in the same room as the gas log while in operation. Do not<br />
place stockings, clothing or any flammable material above or<br />
near the fireplace.<br />
5. Do not substitute or use materials other than those supplied<br />
for use with the log set.<br />
6. Also refer to IMPORTANT SAFETY INFORMATION in the<br />
fireplace Owner's Manual.<br />
WARNING; DO NOT OPERATE THIS GAS LOG SET<br />
WITH GLASS DOORS CLOSED<br />
• Clothing or other flammable material should not be placed on<br />
or near the <strong>appliance</strong>.<br />
• Do not place trash or other articles on the log set during operation.<br />
• During manufacturing, fabricating and shipping, various<br />
components of this <strong>appliance</strong> are treated with certain oils,<br />
films or bonding agents. These bonding agents are not harmful<br />
but may produce annoying smoke and smells as they are<br />
burned off during initial operation of the <strong>appliance</strong>. This is a<br />
normal temporary occurrence. A window should be opened<br />
during the initial bake out period.<br />
• Keep burner and control compartment clean.<br />
• WARNING: Before installing in a solid fuel burning fireplace,<br />
the chimney flue and firebox must be cleaned of soot,<br />
creosote, ashes and loose paint by a qualified chimney cleaner.<br />
• Installation and repair should be done by a qualified service<br />
person. The <strong>appliance</strong> should be inspected before use and at<br />
least annually by a qualified service person. More frequent<br />
cleaning may be required due to excessive lint from carpeting,<br />
bedding materials, etc. It is imperative that control compartments,<br />
burners and circulating air passageways of the <strong>appliance</strong><br />
be kept clean.<br />
• Do not put anything around the fireplace that will obstruct<br />
the flow of ventilation air.<br />
• Do keep the <strong>appliance</strong> area clear and free from combustible<br />
material, gasoline and other flammable vapors and liquids.<br />
• A yearly examination and cleaning of the venting system of<br />
the solid-fuel burning fireplace must be performed by a qualified<br />
agency.<br />
• Do make a periodic visual check of pilot and burners. Clean<br />
and replace damaged parts.<br />
• Do not use this <strong>appliance</strong> if any part has been under water.<br />
Immediately call a qualified service technician to inspect the<br />
<strong>appliance</strong> and to replace any part of the control system and<br />
any gas control which has been under water.<br />
• Never burn solid fuels in fireplace where a gas log set is installed.<br />
• This unit complies with ANSI Z21.60 Decorative Vented<br />
Appliances for Solid Fuel Burning Fireplaces. State or local<br />
codes may only allow operation of this <strong>appliance</strong> in a vented<br />
configuration. Check your state or local codes.<br />
Page 4<br />
25743-0-0309
LOG PLACEMENT<br />
Before you begin: Do not, handle these logs with your bare hands!<br />
Always wear gloves to prevent skin irritation. After handling logs,<br />
wash your hands gently with soap and water.<br />
All Logs<br />
The positioning of the logs is critical to the safe and clean operation<br />
of this heater. Sooting and other problems may result if the logs are<br />
not properly and firmly positioned in the <strong>appliance</strong>.<br />
Refer to Figures 1 and 2 for the following warning.<br />
Warning: Failure to position the parts in accordance with<br />
this diagram or failure to use only parts specifically approved<br />
with this <strong>appliance</strong> may result in property damage or personal<br />
injury.<br />
Proper Installation Sequence:<br />
ATTENTION: For the instructions below, "Front" indicates the<br />
side of the burner with the valve.<br />
LSU18SF-2<br />
(Figure 1)<br />
1. Place Left Front Log (1) on two left front row pins and two<br />
left middle row pins of burner.<br />
2. Place Right Front Log (2) on two right front row pins of<br />
burner.<br />
3. Place Center Log (3) on two right middle row pins of<br />
burner.<br />
4. Place Left Rear Log (4) on two left back row pins of burner.<br />
5. Place Right Rear Log (5) on two right back row pins of<br />
burner.<br />
LSU(24,30)SF-2<br />
(Figure 2)<br />
1. Place Left Front Log (1) on two left front row pins of<br />
burner.<br />
2. Place Left Center Log (6) on two left middle row pins of<br />
burner.<br />
3. Place Right Front Log (2) on two right front row pins of<br />
burner.<br />
4. Place Right Center Log (3) on two right middle row pins of<br />
burner.<br />
5. Place Left Rear Log (4) on two left back row pins of burner.<br />
6. Place Right Rear Log (5) on two right back row pins of<br />
burner.<br />
NOTE: When placed correctly, the logs will not cover any ports.<br />
See Figures 1 and 2 and Ember Placement Photos, pages 6 through<br />
8.<br />
Replacement Loose Material (glowing embers) Part Number<br />
Note: A single layer of embers is to be used when applying Platinum<br />
Bright Embers (alone or in combination with production embers)<br />
to the burner.<br />
Platinum Bright Embers<br />
PE-20-1<br />
Rock Wool 15999<br />
1<br />
6<br />
4<br />
1<br />
4<br />
5<br />
Log Placement LSU18SF-2<br />
Figure 1<br />
5<br />
Log Placement LSU(24,30)SF-2<br />
Figure 2<br />
The following WARNING applies when log set is installed onto<br />
an unvented gas burner assembly.<br />
WARNING: This <strong>appliance</strong> is equipped for natural or<br />
propane gas. Field conversion is not permitted.<br />
3<br />
2<br />
3<br />
2<br />
25743-0-0309 Page 5
EMBER PLACEMENT LSU18SF-2 PHOTOS<br />
FRONT (VALVE SIDE)<br />
REAR<br />
Do not cover any large ports with<br />
loose material (glowing embers)<br />
REAR<br />
FRONT (VALVE SIDE)<br />
Page 6<br />
25743-0-0309
EMBER PLACEMENT LSU24SF-2 PHOTOS<br />
FRONT (VALVE SIDE)<br />
REAR<br />
Do not cover any large ports with<br />
loose material (glowing embers)<br />
REAR<br />
FRONT (VALVE SIDE)<br />
25743-0-0309 Page 7
EMBER PLACEMENT LSU30SF-2 PHOTOS<br />
FRONT (VALVE SIDE)<br />
REAR<br />
Do not cover any large ports with<br />
loose material (glowing embers)<br />
REAR<br />
FRONT (VALVE SIDE)<br />
Page 8<br />
25743-0-0309
LOGS PARTS LIST & PARTS VIEW<br />
Attention: When ordering parts, it is very important that part number and description of part coincide.<br />
Index<br />
No.<br />
Part<br />
Number<br />
Description<br />
LSU18SF-2<br />
1 R9297 Left Front Log<br />
2 R9298 Right Front Log<br />
3 R9299 Center Log<br />
4 R9300 Left Rear Log<br />
5 R9301 Right Rear Log<br />
4<br />
1<br />
3<br />
2<br />
5<br />
Index<br />
No.<br />
Part<br />
Number<br />
Description<br />
LSU24SF-2<br />
1 R9909 Left Front Log<br />
2 R9910 Right Front Log<br />
3 R9912 Right Center Log<br />
4 R9913 Left Rear Log<br />
5 R9914 Right Rear Log<br />
6 R9911 Left Center Log<br />
LSU30SF-2<br />
1 R9915 Left Front Log<br />
2 R9916 Right Front Log<br />
3 R9918 Right Center Log<br />
4 R9919 Left Rear Log<br />
5 R9920 Right Rear Log<br />
6 R9917 Left Center Log<br />
Use Only Manufacturer's Replacement Parts. Use of Any Other Parts Could Cause Injury Or<br />
Death.<br />
4<br />
6<br />
1<br />
5<br />
3<br />
2<br />
25743-0-0309 Page 9
MASTER PARTS DISTRIBUTOR LIST<br />
To Order Parts Under Warranty, please contact your local Empire dealer. See the dealer locator at www.empirecomfort.com. To provide<br />
warranty service, your dealer will need your name and address, purchase date and serial number, and the nature of the problem with the<br />
unit.<br />
To Order Parts After the Warranty Period, please contact your dealer or one of the Master Parts Distributors listed below. This list grows<br />
from time to time. For the current list, please click on the Master Parts button at www.empirecomfort.com.<br />
Please note: Master Parts Distributors are independent businesses that stock the most commonly ordered Original Equipment repair parts<br />
for Heaters, Grills, and Fireplaces manufactured by Empire Comfort Systems Inc.<br />
Star-Fire Distributors<br />
1355 Evans Avenue<br />
Akron, OH 44305<br />
Phone: 330-630-2794<br />
Toll Free: 800-875-6220<br />
Fax: 330-633-8701<br />
Parts: Heater & Hearth and Grills<br />
East Coast Energy Products<br />
10 East Route 36<br />
West Long Branch, NJ 07764<br />
Phone: 732-870-8809<br />
Toll Free: 800-755-8809<br />
Fax: 732-870-8811<br />
Website: www.eastcoastenergy.com<br />
Parts: Heater & Hearth and Grills<br />
Dey Distributing<br />
1401 Willow Lake Boulevard<br />
Vadnais Heights, MN 55101<br />
Phone: 651-490-9191<br />
Toll Free: 800-397-1339<br />
Website: www.deydistributing.com<br />
Parts: Heater & Hearth<br />
Victor Division of F. W. Webb Company<br />
200 Locust Street<br />
Hartford, CT 06114<br />
Phone: 860-722-2433<br />
Toll Free: 800-243-9360<br />
Fax: 860-293-0479<br />
Toll Free Fax: 800-274-2004<br />
Websites: www.fwwebb.com & www.victormfg.com<br />
Parts: Heater & Hearth and Grills<br />
Parts Not Under Warranty<br />
Parts can be ordered through your Service Person, Dealer, or a Master Parts Distributor. See this page for the Master Parts Distributors<br />
list. For best results, the service person or dealer should order parts through the distributor. Parts can be shipped directly to the<br />
service person/dealer.<br />
Warranty Parts<br />
HOW TO ORDER REPAIR PARTS<br />
Warranty parts will need a proof of purchase and can be ordered by your Service Person or Dealer. Proof of purchase is required for<br />
warranty parts.<br />
All parts listed in the Parts List have a Part Number. When ordering parts, first obtain the Model Number from the name plate on your<br />
equipment. Then determine the Part Number (not the Index Number) and the Description of each part from the following appropriate<br />
illustration and list. Be sure to give all this information . . .<br />
Appliance Number<br />
Appliance Serial Number<br />
Part Description<br />
Part Number<br />
Type of Gas (Propane or Natural)<br />
Do not order bolts, screws, washers or nuts. They are standard hardware items and can be purchased at any local hardware store.<br />
Shipments contingent upon strikes, fires and all causes beyond our control.<br />
Page 10<br />
25743-0-0309
SERVICE NOTES<br />
25743-0-0309 Page 11
EMPIRE<br />
Comfort Systems<br />
Empire Comfort Systems Inc.<br />
918 Freeburg Ave. Belleville, IL 62220<br />
If you have a general question about our products, please e-mail us at<br />
info@empirecomfort.com.<br />
If you have a service or repair question, please contact your dealer.<br />
www.empirecomfort.com<br />
Page 12<br />
25743-0-0309