Create successful ePaper yourself
Turn your PDF publications into a flip-book with our unique Google optimized e-Paper software.
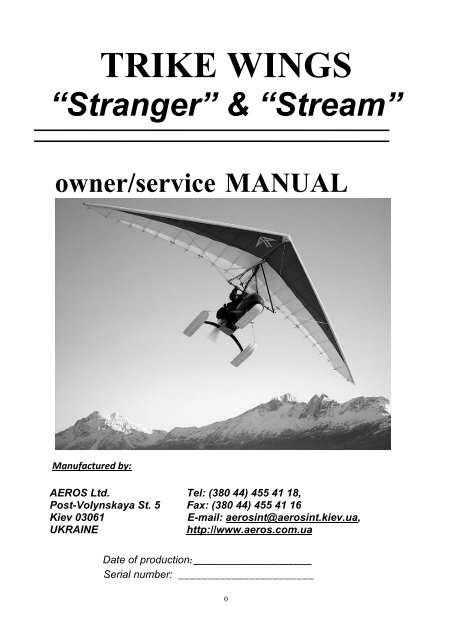
<strong>TRIKE</strong> <strong>WINGS</strong><br />
“Stranger” & “Stream”<br />
owner/service MANUAL<br />
Manufactured by:<br />
AEROS Ltd. Tel: (380 44) 455 41 18,<br />
Post-Volynskaya St. 5 Fax: (380 44) 455 41 16<br />
Kiev 03061<br />
E-mail: aerosint@aerosint.kiev.ua,<br />
UKRAINE<br />
http://www.aeros.com.ua<br />
Date of production: __________________________<br />
Serial number: _______________________<br />
0
T A B L E<br />
O F C O N T E N T S<br />
Section 1. General information......................................................................................... 3<br />
1.1. Introduction...................................................................................................... 3<br />
1.2. Main data........................................................................................................ 3<br />
Section 2. Set up procedure............................................................................................... 4<br />
2.1. Set up procedure from the package 4 meters long........................................... 4<br />
2.2. Set up procedure from the package 6 meters long........................................... 7<br />
Section 3. Preflight inspection of the glider....................................................................... 17<br />
Section 4. Inspection of the wing....................................................................................... 25<br />
Section 5. Maintenance..................................................................................................... 27<br />
Section 6. Turning............................................................................................................. 28<br />
In closing-a few final words on your safety……………………………………... 29<br />
Section 7. Log Book.......................................................................................................... 30<br />
Section 9. Schemes............................................................................................................. 31<br />
1
2
Section 1. GENERAL INFORMATION<br />
1. 1. I N T R O D U C T I O N<br />
Stranger & Stream - wings for two-seater trikes - are a product of Aeros Ltd. They are the<br />
result of an extensive design and development program aimed at optimizing your level of safety<br />
and satisfaction as a pilot, through their high performance and strength of construction.<br />
Stranger 2 is a new modification of a Stranger wing. Characteristic of this wing is different color<br />
scheme and aerofoil uprights. Stranger 2 can be used with Standard and Standard-2 hang<br />
point units only.<br />
These wings are safely controlable and stable at a wide range of operating speeds. The<br />
strength of the wings is sufficient for different conditions of flight with defined load.<br />
Please read and be sure you thoroughly understand this manual before flying your Stranger or<br />
Stream. Be sure you are thoroughly familiar with set up, break down, preflight and maintenance<br />
procedures as described in this manual.<br />
1. 2. M A I N D A T A<br />
Stranger & Stream are high performance flexible wings for a double seater trike.<br />
Wing type Stranger 15 Stream 16<br />
Sail area, sqm 14.8 16.2<br />
Wing span, m 10.2 10.2<br />
Aspect ratio 7 6.4<br />
Nose angle, deg 126 126<br />
Max airspeed, kmph 110+ 110+<br />
Stall speed, kmph (with max load) 52 50<br />
Speed of max glide angle, kmph (with max load) 70 70<br />
Range of operating overloads +4-2 +4-2<br />
Total load max, kg 450 450<br />
Weight without bag, kg 48 51<br />
After structural, aerodynamic and flight tests, the Stranger has been shown to comply with<br />
DULV requirements.<br />
Stranger & Stream were not designed to fly at bank angle over 60 degrees or pitch angle<br />
exceeding 30 degrees. Operation in any of these modes may severely compromise your safety.<br />
Flying any trike in turbulence or gusty wind can result in flight inversion, structural failure of the<br />
wing and possible fatal injuries.<br />
Performance of the wings with trilam leading edge can worsen in wet (rain, thick fog,<br />
dew, etc.) and ice-covering conditions, therefore we do not recommend to use wings in<br />
such conditions, as this can compromise your safety.<br />
3
Section 2. SET UP PROCEDURE<br />
2.1. SET UP PROCEDURE FROM THE PACKAGE 4 METRES LONG<br />
Having used the specific techniques described in this manual you will perform the set up and<br />
break down procedures without any difficulties.<br />
However, the following procedural descriptions are not intended to be a substitute for the<br />
familiarization procedure of your dealer at the time the wing is delivered.<br />
The set up procedure should be carried out on a clean, not abrasive surface. Before performing<br />
the set up procedure you must place the glider nose to the wind. During this procedure you<br />
must make a preflight inspection of the wing.<br />
2.1.1. With the glider in the bag (4 metres long) lay the glider on the ground.<br />
2.1.2. Undo the zipper. Untie the velcro straps. Remove the battens in the bags, the framebar,<br />
the leading edge tubes N3 and the nose cone from the bag. (Fig.1)<br />
Fig.1<br />
2.1.3. Turn the glider so that the downtubes packed into the safety bags are on the bottom and<br />
kingpost is on the top.<br />
2.1.4. Unfold the sail along the leading edge. Attach the leading edge tubes N3 to the leading<br />
edge tubes N2 according to the marking (L-left, R-right, marks must be on the top).<br />
Fig.2<br />
NOTE: While installing the leading edge tubes into the sail place the washout struts facing<br />
forward toward the nose of the wing and along the leading edge tubes (Fig.2)<br />
2.1.5. Rotate the bolt which is on the axle of the leading edge tube until the bolts d=6mm are<br />
positioned in the slot, closest to the nose of the wing. (Fig.3).<br />
4
Fig.3<br />
Remove the 6-mm bolts from the leading edge tube and put them through the grommets on the<br />
sail. Put these bolts through the holes in the channel inside the leading edge tube. Replace the<br />
plastic sadles and metal washers on the bolts from the other side of the tube. Manually secure<br />
bolts d=6 mm with selflocking nuts (Fig.4, 5).<br />
Fig.4<br />
Fig.5<br />
2.1.6. Rotate the bolt which is on the axle of the leading edge tube until the plastic sadles align<br />
according to the markings on the tube. (Fig.6).<br />
5
Fig.6<br />
If the marking is erased place the bolts according to Fig.7.<br />
Fig.7<br />
Tighten selflocking nuts which secure the bolts d=6 mm.<br />
2.1.7. Further set up procedure is similar tthe one from a 6-meter long bag (Section 2.2, except<br />
points 2.2.1-2.2.4).<br />
6
2.2. SET UP PROCEDURE FROM THE PACKAGE 6 METRES LONG<br />
2.2.1. With the glider in the bag (6 meters long) lay the glider on the ground (Fig.8).<br />
Fig.8<br />
2.2.2. Undo the zipper. Remove the battens in the bags, the framebar and the nose cone from<br />
the bag.<br />
2.2.3. Remove the bag and the velcro straps.<br />
2.2.4. Turn the glider so that the downtubes packed into the safety bags are on the bottom and<br />
kingpost is on the top (Fig.9).<br />
Fig.9<br />
2.2.5. Grasp the string loop at the front of the nose batten and pull the forked batten-end up<br />
over until it sits on the top of the keel tube (Fig.10).<br />
7
2.2.5A. For Stream and Stranger 2: Grasp the string loop at the front of the nose battens and<br />
put in the corresponding hole pin of the nose battens.<br />
Fig.10<br />
Fig.10A<br />
2.2.6. Spread the wings so, that the sail is a little loose and the glider is resting flat on the<br />
ground.<br />
NOTE: Take care that the reflex wires and the top wires are not wrapped around the keel and<br />
are free from the keel hardware.<br />
8
Fig.11<br />
2.2.7. Attach the hook of the top rear wire and the washout wires to the thimble of the top front<br />
wire (Fig.11). Make sure that the hook is not inverted and the reflex wires or top wires are not<br />
twisted.<br />
2.2.8. Remove the battens from the bag and lay them on the ground for each wing separately in<br />
decreasing order of length. Check them for symmetry. Correct any that are asymmetric using<br />
the template (Fig.12). Insert top surface battens from longer to shorter except two longest<br />
battens.<br />
Aeros convention is that red marked battens go in the left wing and green marked battens in<br />
the right. But you can feel free to install them the other way around, i.e. red marked battens go<br />
to the right and green marked battens go to the left. This is because Aeros do not tune glider’s<br />
turn by changing battens camber, so originally your glider comes with left and right<br />
corresponding battens symmetrical between each others. Battens are numbered from the<br />
center outwards, and the longest batten in a Stranger or Stream is designated as the "# 1"<br />
batten.<br />
9<br />
Fig.12
NOTE: Two longest battens are not removed from the battens pockets during the break down<br />
procedure.<br />
2.2.9. Secure the rear end of each top surface batten by first looping the bottom loop of leech<br />
line around the notched batten end, and then attaching the top loop using the extra loop as a<br />
handle (Fig.13). When attaching the leech line loops to the battens to which the reflex wires<br />
come, be sure the leech line loops are not caught underneath or wrapped around the reflex<br />
wires.<br />
Fig.13<br />
2.2.10. Spread the wings all the way and check all wires for twisted thimbles or tangs (Fig.14).<br />
10<br />
Fig.14
2.2.11. Remove the safety bags from the downtubes. Spread the downtubes. Install the<br />
framebar according to the marking. Fix the framebar using nuts and safety rings (Fig.14, 15).<br />
Fig.15<br />
Fig.16<br />
2.2.12. Pull the rope which is sticking out from the keel pocket until you will see the crossbar<br />
sweep wires. Remove the nut and the safety ring from the bolt which is secured to the crossbar<br />
sweep wires (these wires are attached to the crossbar center). Insert the bolt which is attached<br />
to the crossbar wire through the hole in the keel tube nearest to the nose of the wing. Fit the<br />
thimble of the other wire over the bolt and secure the assembly with nut and safety ring (Fig.17,<br />
18).<br />
11
Fig.17<br />
Fig.18<br />
Remove the rope from the crossbar sweep wires !<br />
2.2.13. Insert the tip battens until they are stopped on the stop details of the leading edge tubes<br />
and fix them using the leech lines (Fig.19).<br />
12
Fig.19<br />
Install the shortest of the bottom surface battens into the battens pockets. Fix the tip battens<br />
and the shortest of the top curve battens by rubber ropes from undersurface side - only for<br />
Stranger (Fig.20, 21).<br />
For Stranger<br />
Fig.20<br />
13
For Stranger<br />
Fig.21<br />
2.2.14. Put the glider on the A-frame. Secure the lock of the bottom wires on the nose junction<br />
channel using the clevis pin and the safety ring (Fig.22 or 22A).<br />
For Stranger<br />
14<br />
Fig.22
For Stream & Stranger 2<br />
Fig.22A<br />
2.2.15. Check the nuts which secure the down tubes to the channel and the nut which secures<br />
the channel of uprights to the keel. Check also the nut which secures the kingpost channel to<br />
the keel. Check the nuts and safety rings which secure the hang detail.<br />
Aeros Standard hang units<br />
Fig.23<br />
15
Antares hang units<br />
Fig.24<br />
2.2.16. Install the bottom surface battens. The longest bottom surface batten is inboard batten.<br />
Push the battens all way into the pocket until the rear end is secure in the batten pocket. The<br />
strings on the rear ends of the bottom surface battens are to facilitate removal of the battens<br />
from the sail during breakdown (Fig.25).<br />
Fig.25<br />
2.2.17. Install the washout tips, pushing them into the sleeves in the leading edges.<br />
2.2.18. Remove the protective bag from hang detail.<br />
2.2.19. Do a complete preflight inspection of the glider, Section 3.<br />
16
Section 3. PREFLIGHT INSPECTION OF THE GLIDER<br />
3.1. Do a complete preflight inspection of the glider. It is your responsibility during this<br />
"preflight" to check every part, component and assembly on the glider. Beginning at the nose,<br />
check all selflocking nuts, the clevis pin and the safety ring which secure the lock of the bottom<br />
front wires (Fig.26/27).<br />
Fig.26<br />
17<br />
Fig.27
3.2. Look through the nose hole and inspect each leading edge. Check that all bottom surface<br />
battens are under the leading edge tube. (Fig.28).<br />
Fig.28<br />
Make sure that the spring buttons from the inserted leading edge tubes N3 are sticking out fo<br />
the tube surface.<br />
Check for any evidence of dents, deep scratches, cracks or bends in the leading edge tubes<br />
(look for signs of crystallization of the material: a brighter, fuzzy spot on the aluminium).<br />
3.3. Check that the mylar has no bends.<br />
3.4. Look through the open bottom surface pockets near the crossbar/leading edge junction<br />
and check that this junction is safely secured with the castle nut and the safety ring. Check that<br />
top and bottom side wires are attached to the crossbar/leading edge junction properly. Check<br />
that wires are not twisted and are not caught up. (Fig.29/29A).<br />
18
Stranger<br />
Fig.29<br />
Stream and Stranger 2<br />
Fig.29A<br />
Zip the zipper near the crossbar/leading edge junction closed.<br />
3.5. Look into the sail at each wing tip, and check that the tip battens are properly seated and<br />
fixed with the leech lines and rubber ropes - for Stranger (Fig.30) and for Stream (Fig.30A).<br />
19
Fig.30<br />
Fig. 30A<br />
Check that the washout tips are installed properly into the holes in the leading edge tubes.<br />
Be sure that the batten tension leech lines are equally tensioned.<br />
To provide flight without spontaneous turn the bolts of the sail tension on the console ends<br />
must be positioned according to marking.<br />
3.6. Check the trailing edge for any cuts, tears or broken stitching.<br />
3.7. Check that the top surface battens are fixed with the batten tension leech lines.<br />
3.8. Check that each of the reflex wires are free from the batten tension leech lines and the<br />
reflex safety ring is flush with the bottom of the sail - for Stranger (Fig.31).<br />
Check fixing of quick links of reflex wires - for Stream (Fig.31A).<br />
20
Fig.31<br />
Fig.31A<br />
Check that no reflex wire is looped underneath a more inboard batten (Fig.32).<br />
21<br />
Fig.32
3.9. Check that the top rear wire, the keel mount webbing, and bottom rear wires are safely<br />
secured to the keel tube using the nut and the safety ring (Fig.33).<br />
Fig.33<br />
3.10. Check all bolts, nuts and the safety rings which secure the downtubes to the channel.<br />
Make sure that the channel to the keel and hang detail are secured (Fig.34, 35).<br />
22
Fig.34<br />
Fig.35<br />
3.11. Check that the bolt of the crossbar tension wires is secured by the nut and safety ring<br />
(see Fig.33).<br />
3.12. Check the thimble fittings at the control bar corners for any cocked or twisted thimbles<br />
and lugs. If you find any, straighten them out (if necessary, detention the crossbar and bottom<br />
wires). If you find a kink in the cable, you must replace it, or their is a danger it will fail after<br />
repeated loading and unloading.<br />
Check the nuts and safety rings at the lower control bar corners (Fig.36).<br />
23
Fig.36<br />
3.13. Fit the nose cone over the front of the keel and attach the velcro at the top rear of the<br />
nose cone. Rest the glider back on it's tail and pull the bottom corners of the nose cone back<br />
until the nose cone is tight around the nose and secure the velcro on the bottom of the nose<br />
cone (Fig.37, 38).<br />
Fig.37<br />
24
*<br />
Fig.38<br />
Now your glider is ready for mounting on the trike.<br />
Don’t fly without the nosecone!<br />
Section 4. INSPECTION OF THE WING<br />
The sail should be inspected once every three months or after each 50 flying hours. The<br />
frame should be inspected once a year, after every 100 flying hours, and after every hard<br />
landing.<br />
4.I. SAIL CHECK-UP<br />
4.1.1. Sail seam and cloth strength are assessed by testing the strength of the control clouts<br />
on the top surface (TS) of the wing. The control clouts are incorporated in the cloth piece<br />
(designated by letters UV) that is sewed onto the trailing edge close to the keel tube. For sail<br />
assessment cut control clout in the drawing and forward it to your Aeros dealer or directly to<br />
Aeros.<br />
The first sample is to be cut out after 300 flying hours and thereafter a sample must be<br />
submitted after every 150 flying hours.<br />
25
4.1.2. Checking the sail surface and seams.<br />
There should be no cuts, ruptures, threadbare holes and torn seams on the sail. Any torn<br />
seams should be re-stitched. Cuts and ruptures on the fairing and bottom surface (BS) of the<br />
sail that are not longer than 30 mm can be patched up with self-adhesive Dacron. The Dacron<br />
must be of a weight of not less than 100 g/m. Larger cuts and ruptures are to be repaired by<br />
stitching on a reinforcing piece of the same fabric (stitched along the edges). Any rupture<br />
shorter than 50 mm can be repaired in this manner, but more complicated repairs should be<br />
carried out in the workshop of producing company. If any of the batten tightening cords are torn<br />
or heavily worn they must be replaced.<br />
4.1.3. Keep an eye on the sail grommets/eyelets and all areas of the sail that are subject to<br />
extra stress, especially the keel section, the nose section of leading edge and the outer tip<br />
section of leading edge.<br />
4.2. CABLE SYSTEM<br />
The cables must be checked for broken wires. If any defect on a wire is observed, no matter<br />
how small, the cable in question MUST BE REPLACED. It is recommended that the entire<br />
cable system be replaced once every two years irrespective of service conditions.<br />
A NOTE ABOUT CABLES AND CABLE MAINTENANCE<br />
The cables which support the wing’s airframe are critical components of the wing’s structure,<br />
and must be maintained in an air worthy condition. It is a general practice in the design of<br />
aircraft structures to design to an ultimate strength of 1.5 times the highest expected load in<br />
normal service.<br />
Stranger or Stream cables, like other structural components on the wing, are typically designed<br />
with a structural safety factor of only about 50% above the expected maximum load. No<br />
significant loss in cable strength can be tolerated.<br />
A cable with even a single broken strand must be replaced before the wing is flown again. A<br />
cable which has been bent sharply enough to have taken a permanent set must also be<br />
replaced immediately.<br />
26
Some degree of fatigue due to repeated bending of cables is almost unavoidable in an aircraft<br />
that is assembled and disassembled with every flight. Bottom side wires are subject to the<br />
highest loads in flight, and are therefore the most critical.<br />
4.3. CHECKING THE TUBINGS<br />
To check the condition of the wing tubes the sail should be removed from the wing frame and<br />
the tubes should be detached at the joints. The tubes are to be inspected visually. When there<br />
is suspicion of damage, the points in question should be inspected using a magnifying glass of<br />
(5-10)X magnification. There should be no trace of corrosion, cracks, bends or dents.<br />
4.4. CHECKING THE BATTENS<br />
The batten profiles should be checked against the template and the bends should be adjusted if<br />
necessary. Check all the plastic batten heads and tails and replace if necessary.<br />
4.5. FASTENERS<br />
Check all fasteners (bolts, screws, rollers, nuts, splint pins etc.) for corrosion. Any corroded<br />
fasteners should be replaced. Bolts should not be worn and/or bent. Key bolts should be<br />
checked most thoroughly for cracks between the head and the bolt body. These are the bolts at<br />
the control bar side and bottom joints, the central spreader bar tensioning cable attach point<br />
and the rear cable attachment point on the keel tube. If any cracks are observed - REPLACE<br />
IMMEDIATELY!<br />
Section 5. MAINTENANCE<br />
5.1. MAINTENANCE<br />
• With correct maintenance your wing will retain its good condition for many years.<br />
• We recommend that do you not expose your wing to any more direct sunlight than necessary.<br />
Do not leave it standing in the sun for long periods of time when you are not flying it.<br />
• Do not leave your wing on the trike for a long period of time when the wind is strong. It will<br />
decrease the life of the sail, hang junction and frame of your wing.<br />
• Your wing should be dried thoroughly after being exposed to rain or any other source of<br />
moisture.<br />
• Your sail should never be washed with anything other then fresh water, as any soap or<br />
detergent will most likely degrade the cloth and may adversely affect the flight characteristics of<br />
your wing.<br />
• When you set up or break down your wing, take care not to allow sand, soil and dirt to enter<br />
the sail, batten pockets or tubes. Keep the leading edge tube telescopic connectors thoroughly<br />
clean as set up or break down will become difficult or impossible if they are dirty. Swab the<br />
tubes with a rag.<br />
• Keep all the wing’s foam padding that was originally supplied and use in the same places<br />
when re-packing the wing.<br />
5.2. STORAGE<br />
• You must store the wing in its bag in a dry place on soft bedding. Before storage you must<br />
ensure that the sail is dry.<br />
• The frame of the wing must not be subjected to load during storage and the tubes must not be<br />
bent under their own weight.<br />
• The wing can be storage in temperatures ranging from -10°C to +25°C.<br />
5.3. TRANSPORTATION<br />
• The wing may be transported in its bag in any vehicle that offers protection from mechanical<br />
damage, soiling and long exposure to rain. It is not recommended that the wing be carried or<br />
transported without its bag.<br />
27
Section 6. TURNING<br />
6.1. FINE TUNING THE WING<br />
Your wing has, on each side, a tensioner bolt that can be turned to 'wind up' (tighten) the sail<br />
on either side. This bolt can be found on the very tips of your wing's leading edge tubes and<br />
requires the use of a 17 spanner. If your wing has, for example, a right turning tendency this<br />
means that more angle of attack is required on the right side to bring this wing up to level flight.<br />
To do this, simply screw the right side tensioner bolt clockwise by 2 to 3 turns. This tightens the<br />
sail on that side of the wing, effectively increasing the angle of attack.<br />
NB: As this point you may need to slightly loosen the two 6-mm bolts that secure the sail<br />
to the leading edge. This is in order to ensure smooth movement of the sail during the<br />
adjustment.<br />
Test fly. If there is still a right turn, you may screw 'out' the other side (left side). Simply turn the<br />
left side tensioner bolt anti-clockwise 2 to 3 turns. Test fly and repeat the process if necessary.<br />
You may “wind” or “unwind” the sail on each side to a maximum of 12mm distance from its<br />
original position - this can be measured by looking at the position of the two 6-mm sail securing<br />
bolts on each side. If you reach this maximum and the wing still has a right turn, reset your wing<br />
to its original settings and proceed with coarse wing adjustment.<br />
6.2. COARSE WING ADJUSTMENT<br />
(Note: Ensure that your wing adjusters are restored to their original settings before<br />
attempting coarse adjustment.) You will notice if you look inside the sail at the wing<br />
tips, that the end piece of the leading edge tube is adjustable about its longitudinal axis.<br />
The tip leading edge tube section fits into the main leading edge tube and is secured in<br />
place with a small screw. This tip piece can be rotated through three positions (three<br />
securing holes available on the main leading edge piece). The wing is delivered<br />
standard with both wing tips set in their maximum angle of attack position. To correct a<br />
right turning tendency, the left side needs a decrease in angle of attack - this will<br />
decrease the lift on the left side and bring this wing down resulting in level flight. Do this<br />
by adjusting the left tip leading edge piece 'up' one position (less angle of attack). This<br />
may require some de-tensioning of the tip adjusters to give the necessary slack<br />
required to rotate the tip piece. Test fly and repeat if necessary. If you adjust until you<br />
are in the third adjustment position on the left side and the wing still has a right turn you<br />
may go through the steps of fine tuning your wing (you may fine tune your wing at any<br />
coarse adjustment setting). If the turning problem still persists, please contact Aeros<br />
LTD or your dealer for advice.<br />
28
IN CLOSING - A FEW FINAL WORDS ON YOUR SAFETY<br />
UL flying is an active air sport with associated risks. Your safety can be greatly enhanced by<br />
following a few simple rules:<br />
Your wing is delivered to you ready to fly. Do not make any adjustments, which are not<br />
described in this manual.<br />
If you are in doubt about any aspect of your wing you should consult your dealer or Aeros for<br />
advice.<br />
Only fly after having attended a good school.<br />
Fly a wing suited to your level of ability. A new risk may arise when you first fly a new type of<br />
the wing.<br />
The reactions of your new wing may well differ from those of the wing you where used to. In<br />
order to keep this risk low, we recommend that you gradually become familiar with your new<br />
wing.<br />
Before every take-off always do both an assembly check and a pre-flight check.<br />
Do not take off if the sail is wet, especially the leading edge, as the stall speed will increase<br />
significantly.<br />
Always fly with a dry sail!<br />
Take special care to avoid ice covering the glider, particularly the leading edge in wintertime.<br />
A wet wing must be dried before storing. Do not leave your glider wet for more than one day,<br />
because corrosion may result.<br />
Never fly alone.<br />
Don’t push your luck. It is your responsibility to know the limits of your wing and the limits of<br />
your own experience. Remember, that ultimately your safety is your responsibility.<br />
Fly only in places, which are suitable for flying.<br />
With proper care and maintenance, your wing will retain a high level of airworthiness for many<br />
years.<br />
Have fun. Fly safely.<br />
Aeros Team<br />
29
Section 7. LOG BOOK<br />
TABLE OF FLIGHT HOURS<br />
DATE NUMBER OF FLIGHT TOTAL HOURS BY WHOM<br />
30
34
13<br />
6,5<br />
0 0<br />
STG.B.134.000<br />
WASHOUT STICK CAP<br />
STG.B.133.000.AD<br />
WASHOUT STICK<br />
BLIND<br />
RIVET 34400 4X6<br />
STG.B.132.000<br />
WASHAUT MOUNTING BUSH<br />
25<br />
25<br />
BLIND RIVET 34400 4X6<br />
SS2515<br />
HOOK<br />
STL116000AD<br />
BUTTON SPRING<br />
STG.B.130.003.WD<br />
SHOCK CORD<br />
BLIND RIVET 34400<br />
4X6<br />
BLIND RIVET 34400 4X6<br />
STG.B.131.001<br />
TUBE N3 RIGHT<br />
AEROS<br />
by:<br />
Date:<br />
Zakidyshev 09.10.03<br />
STG.B.130.001.AD<br />
ASSEMBLED LE TUBE N3 RIGHT<br />
Scale:
LINDEMANN<br />
4<br />
1<br />
1<br />
2<br />
5<br />
3<br />
Parts List<br />
Item Qty Name Material Vendor Note<br />
1 1 STG.B.310.003.WD D16T ∅14x1 L=1565 TUBE<br />
2 1 STG.B.310.005.WD ∅2.5 7x7 WR77023<br />
L=273<br />
LINDEMANN<br />
CABLE<br />
3 1 STG.B.311.000 PLASTIC BATTEN TIP<br />
FORK<br />
4 1 PRF15.346.000 PLASTIC BATTEN TIP<br />
5 1 NT282G .<br />
PRESS SLEEVE<br />
AEROS<br />
by:<br />
Date:<br />
Zakidyshev 03.12.03<br />
STG.B.310.000.AD<br />
KEEL BATTEN<br />
Scale:
2<br />
1<br />
3<br />
Parts List<br />
Item Qty Name Material Vendor Note<br />
1 1 STG.B.312.003.WD D16T ∅12x1 L=2410 TUBE<br />
2 1 STG.B.311.000 PLASTIC BATTEN TIP<br />
FORK<br />
AEROS<br />
by:<br />
Date:<br />
Zakidyshev 03.12.03<br />
3 1 PRF15.346.000 PLASTIC BATTEN TIP<br />
STG.B.312.000.AD<br />
ASSEMBLED TOP SURFASCE BATTEN N1<br />
Scale:
2<br />
4<br />
3<br />
1<br />
5<br />
Parts List<br />
Item Qty Name Material Vendor Note<br />
1 1 STG.B.314.003.WD D16T ∅12x1 L=1435 TUBE<br />
2 1 STG.B.311.000 PLASTIC BATTEN TIP<br />
FORK<br />
3 1 STG.B.315.000 PLASTICK<br />
4 1 STG.B.316.000 B95T ∅12x1 TUBE<br />
5 1 PRF15.346.000 PLASTIC BATTEN TIP<br />
AEROS<br />
by:<br />
Date:<br />
Zakidyshev 03.12.03<br />
STG.B.314.000.AD<br />
ASSEMBLED TOP SURFASCE BATTEN<br />
N3<br />
Scale:
2<br />
2<br />
1<br />
Parts List<br />
Item Qty Name Material Vendor Note<br />
1 1 STG.B.325.003.WD B95T ∅10x0.75<br />
L=1670<br />
TUBE<br />
AEROS<br />
by:<br />
Date:<br />
Zakidyshev 13.06.02<br />
2 2 STL362000 PLASTIC BATTEN TIP<br />
STG.470.000.AD<br />
ASSEMBLED BOTTOM SURFACE BATTEN N1<br />
Scale:
2<br />
1<br />
Parts<br />
List<br />
Item Qty Name Material Vendor Note<br />
1 1 STG.B.332.003.WD D16T ∅12x1 L=540 TUBE<br />
2 1 STG.B.311.000 PLASTIC BATTEN TIP<br />
FORK<br />
AEROS<br />
by:<br />
Date:<br />
Zakidyshev 05.12.03<br />
STG.B.332.000.AD<br />
PLUG-ON BATTEN<br />
Scale:


