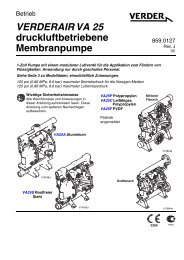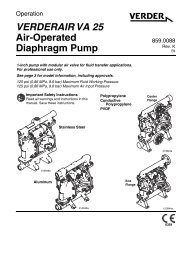
Air-Operated Diaphragm Pump
Repair or Replace Air Valve - Double Diaphragm Pump
Repair or Replace Air Valve - Double Diaphragm Pump
- No tags were found...

You also want an ePaper? Increase the reach of your titles
YUMPU automatically turns print PDFs into web optimized ePapers that Google loves.
Reassembly<br />
Follow all notes in FIG. 7. These notes contain<br />
important information.<br />
NOTE: Apply lithium-based grease whenever instructed<br />
to grease.<br />
1. Clean all parts and inspect for wear or damage.<br />
Replace parts as needed.<br />
2. If removed, grease and install the new pilot valve<br />
cartridges (102) and o-rings (103). Screw in until<br />
seated.<br />
NOTE: Cartridges (102) must be installed before pilot<br />
valves (101).<br />
3. Grease and install the pilot valves (101). Torque to<br />
20-25 in.-lb (2.3-2.8 N•m). Do not over-torque.<br />
4. Grease and install the diaphragm shaft u-cup packings<br />
(106) so the lips face out of the housing.<br />
5. If removed, insert the new bearings (105) into the<br />
center housing. Use a press or a block and rubber<br />
mallet to press-fit the bearing so it is flush with the<br />
surface of the center housing.<br />
6. Overmolded <strong>Diaphragm</strong>s:<br />
a. Clamp the shaft flats in a vise.<br />
b. If diaphragm setscrew comes loose or is<br />
replaced, apply permanent (red) Loctite ® or<br />
equivalent to diaphragm side threads. Screw<br />
into diaphragm until tight.<br />
c. Assemble the air side plate (14) onto the diaphragm.<br />
The rounded side of the plate must<br />
face the diaphragm.<br />
d. Apply medium-strength (blue) Loctite or equivalent<br />
to the threads of the diaphragm assembly.<br />
Screw the assembly into the shaft as tight as<br />
possible by hand.<br />
e. Grease the shaft u-cups (106) and the length<br />
and ends of the diaphragm shaft (104). Slide the<br />
shaft into the housing.<br />
f. Reattach the first fluid cover (3). See Torque<br />
Instructions, page 15.<br />
All Other <strong>Diaphragm</strong>s - Metal <strong>Pump</strong>s:<br />
a. Install the o-ring (301) on the shaft bolt (304).<br />
b. Assemble the fluid side plate (13), the diaphragm<br />
(15), the backup diaphragm (305, if<br />
present), and the air side diaphragm plate (14)<br />
on the bolt exactly as shown in FIG. 7.<br />
c. Apply medium-strength (blue) Loctite or equivalent<br />
to the bolt (304) threads. Screw the bolt into<br />
the shaft hand tight.<br />
d. Grease the shaft u-cups (106) and the length<br />
and ends of the diaphragm shaft (104). Slide the<br />
shaft into the housing.<br />
e. Repeat Steps a-c for the other diaphragm<br />
assembly.<br />
f. Hold one shaft bolt with a wrench and torque<br />
the other bolt to 20-25 ft-lb (27-34 N•m) at 100<br />
rpm maximum. Do not over-torque.<br />
g. Reattach the first fluid cover (3). See Torque<br />
Instructions, page 15. Go to Step 7.<br />
All Other <strong>Diaphragm</strong>s - Plastic <strong>Pump</strong>s:<br />
a. Assemble the diaphragm (15), the backup diaphragm<br />
(305, if present), and the air side diaphragm<br />
plate (14) on the fluid side plate (13)<br />
exactly as shown in FIG. 7.<br />
b. Apply medium-strength (blue) Loctite or equivalent<br />
to the threads of the screw on the fluid side<br />
plate. Screw the assembly into the shaft<br />
hand-tight.<br />
c. Grease the shaft u-cups (106) and the length<br />
and ends of the diaphragm shaft (104). Slide the<br />
shaft into the housing.<br />
d. Repeat for the other diaphragm assembly<br />
e. Hold one of the plates with a wrench, and<br />
torque the other plate to 20-25 ft-lb (27-34 N•m)<br />
at 100 rpm maximum. Do not over-torque.<br />
f. Reattach the first fluid cover (3). See Torque<br />
Instructions, page 15.<br />
g. Repeat Steps b and c for the other diaphragm<br />
assembly. Go to Step 7.<br />
14 859.0089