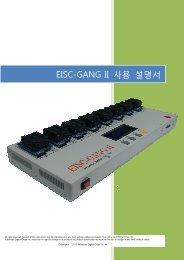
EISC USB JTAG User Guide
EISC USB JTAG User Guide - ìì´ë칩ì¤
EISC USB JTAG User Guide - ìì´ë칩ì¤
- No tags were found...
Create successful ePaper yourself
Turn your PDF publications into a flip-book with our unique Google optimized e-Paper software.
Preliminary<br />
<strong>EISC</strong> <strong>USB</strong> <strong>JTAG</strong> <strong>User</strong> <strong>Guide</strong><br />
Ver 0.92<br />
October 19, 2009<br />
Advanced Digital chips Inc.<br />
(www.adc.co.kr)
<strong>EISC</strong> <strong>USB</strong> <strong>JTAG</strong> <strong>User</strong> <strong>Guide</strong> 2
차 례<br />
1. <strong>USB</strong> 드라이버 설치 방법 .......................................................................................................... 5<br />
2. <strong>EISC</strong> <strong>USB</strong> <strong>JTAG</strong> 프로그램 설명 ............................................................................................... 8<br />
3. Programming NAND Flash ....................................................................................................... 9<br />
4. Programming NOR Flash ........................................................................................................ 11<br />
5. Pin Toggle .............................................................................................................................. 13<br />
<strong>EISC</strong> <strong>USB</strong> <strong>JTAG</strong> <strong>User</strong> <strong>Guide</strong> 3
사용 시 주의 사항 ><br />
타겟보드에 <strong>EISC</strong> <strong>USB</strong> <strong>JTAG</strong>을 연결하기 전에 타겟보드의 전원을 항상 꺼<br />
있는 상태에서 연결해야 합니다. 또한 <strong>EISC</strong> <strong>USB</strong> <strong>JTAG</strong>과 타겟보드간의 연<br />
결을 해제할 시에도 타겟보드의 전원을 끈 상태에서 연결을 해제해야 합니<br />
다.<br />
만약, 이를 지키지 않고 사용하여 발생하는 문제, 또는 사용자 부주의로 발<br />
생하는 문제는 (주)에이디칩스에서 보상하지 아니합니다.<br />
자세한 사용방법은 9, 11 페이지를 참고하여 주시기 바랍니다.<br />
<strong>EISC</strong> <strong>USB</strong> <strong>JTAG</strong> <strong>User</strong> <strong>Guide</strong> 4
1. <strong>USB</strong> 드라이버 설치 방법<br />
<strong>USB</strong> Driver는 Window XP 또는 Window 2000에 설치할 수 있다. 각각의 드라이버는 아래의<br />
폴더 목록에 들어 있다.<br />
> ls <strong>USB</strong>_driver<br />
win2000<br />
winxp<br />
- <strong>EISC</strong> <strong>USB</strong> <strong>JTAG</strong>를 PC에 연결하면 ‘새 하드웨어 검색 마법사’가 실행된다.<br />
- ‘목록 또는 특정 위치에서 설치’를 선택하고 다음을 클릭한다.<br />
- ‘<strong>EISC</strong>_<strong>USB</strong>_ISP&<strong>JTAG</strong>’ 폴더의 ‘XP_VISTA/x86’ 폴더를 선택한다. 1<br />
1 64bit 머신인 경우 ‘x64’ 폴더를 선택한다.<br />
<strong>EISC</strong> <strong>USB</strong> <strong>JTAG</strong> <strong>User</strong> <strong>Guide</strong> 5
- 아래와 같이 경고 메시지가 뜨면 ‘계속’를 선택한다.<br />
- 설치 진행 창이 나타난다.<br />
<strong>EISC</strong> <strong>USB</strong> <strong>JTAG</strong> <strong>User</strong> <strong>Guide</strong> 6
- 설치 완료 화면이 나오고 설치가 끝나게 된다.<br />
- 드라이버 설치확인은 아래와 같이 ‘장치 관리자’에서 ‘<strong>EISC</strong> <strong>USB</strong> ISP&<strong>JTAG</strong>’이 등록되어<br />
있는 것으로 알 수 있다.<br />
<strong>EISC</strong> <strong>USB</strong> <strong>JTAG</strong> <strong>User</strong> <strong>Guide</strong> 7
2. <strong>EISC</strong> <strong>USB</strong> <strong>JTAG</strong> 프로그램 설명<br />
<strong>USB</strong>를 사용하여 <strong>JTAG</strong> flash 다운로드를 하기 위해서는 아래와 같은 화면의 ‘<strong>EISC</strong> <strong>USB</strong><br />
<strong>JTAG</strong>’ 프로그램을 사용한다.<br />
EAGLE, GMX1000, EOS, CANTUS 등의 Chip을 선택하는 버튼과 NAND와 NOR를 선택하는<br />
버튼이 있다. 그리고, 다운로드 파일 선택, NOR Flash Option 설정, Pin Toggle 설정, Multi<br />
<strong>USB</strong> <strong>JTAG</strong> 디바이스 설정 등으로 구분된 TAB 선택 기능이 있다.<br />
Flash Type 선택(NAND or NOR)<br />
Chip 종류 선택<br />
Program 또는 Pin toggle<br />
시작 / 정지<br />
파일 OPEN<br />
Flash 주소 결정<br />
(Blk No: Flash의 Block 번호)<br />
파일 선택 Enable Check<br />
진행 상황 출력 창<br />
Flash 프로그램<br />
진행 시간<br />
Verify 활성화<br />
(NAND에만 적용됨)<br />
Flash 프로그램 상태 바<br />
<strong>EISC</strong> <strong>USB</strong> <strong>JTAG</strong> <strong>User</strong> <strong>Guide</strong> 8
각 기능에 대한 자세한 설명은 아래 표를 참조하여라.<br />
<strong>EISC</strong> <strong>USB</strong> <strong>JTAG</strong> 기능<br />
Products<br />
Flash Type<br />
Function<br />
Flash 저장 주소 결정<br />
RUN 버튼<br />
텍스트 창<br />
Verify 체크<br />
Chip 종류를 선택한다.<br />
설 명<br />
Ver 2.0x 버전에서는 CANTUS, EAGLE, GMX1000, EOS,<br />
PHAROS를 지원한다.<br />
NAND 또는 NOR를 선택한다.<br />
NOR 타입인 경우 Nor Options 탭에서 아래 항목을 선택해야 한<br />
다.<br />
- Download Offset Address<br />
- NOR Flash model Name<br />
- Flash의 데이터 폭 (시스템 데이터 버스 폭이 아님)<br />
- Flash의 인터페이스 개수<br />
Program 과 ‘Pin Toggle’ 기능이 있다.<br />
Program은 Flash에 데이터를 저장하는 기능이고 ‘Pin Toggle’은<br />
CPU의 모든 디지털 핀으로 구형파를 출력시킨다. 이 기능은 PCB<br />
점검에 사용될 수 있다.<br />
‘Blk No’ 에 Flash(Nand or Nor)의 Block 번호를 입력한다.<br />
Flash Programming을 시작 또는 정지시킨다.<br />
Pin Toggle 기능에서는 시작만 시킬 수 있다.<br />
Flash programming 진행 상태를 볼 수 있다.<br />
<strong>JTAG</strong> ID 값, Flash ID 값 등이 출력 된다.<br />
NAND Flash에 programming 하는 경우 쓴 값을 다시 읽어 데이<br />
터가 정확히 쓰여졌는지 확인한다.<br />
NOR Flash에는 적용되지 않는다.<br />
표 1 <strong>EISC</strong> <strong>USB</strong> <strong>JTAG</strong> 프로그램 각 기능별 설명<br />
3. Programming NAND Flash<br />
1 <strong>EISC</strong> <strong>USB</strong> <strong>JTAG</strong> 보드를 TARGET 보드의 <strong>JTAG</strong> 포트에 연결한다.<br />
2 TARGET 보드의 전원을 인가한다.<br />
3 <strong>EISC</strong> <strong>USB</strong> <strong>JTAG</strong> 보드를 PC의 <strong>USB</strong> 포트에 연결한다.<br />
4 <strong>EISC</strong> <strong>USB</strong> <strong>JTAG</strong> 보드에 LED가 ON 되는지 확인한다. (<strong>USB</strong> 장치 인식 확인)<br />
5 <strong>EISC</strong> <strong>USB</strong> <strong>JTAG</strong> PC 프로그램을 실행한다.<br />
6 Chip(Products) 종류를 선택한다.<br />
7 NAND 버튼을 선택한다.<br />
<strong>EISC</strong> <strong>USB</strong> <strong>JTAG</strong> <strong>User</strong> <strong>Guide</strong> 9
8 ‘OPEN’ 버튼을 클릭하여 파일을 선택한다.<br />
9 ‘RUN’ 버튼을 누르면 다운로드가 시작된다.<br />
10 다운로드가 완료되면 확인창이 표시된다.<br />
11 <strong>EISC</strong> <strong>USB</strong> <strong>JTAG</strong> 보드와 TARGET 보드의 연결을 해제하고자 하면, TARGET 보드의<br />
전원을 OFF한 이후에 <strong>JTAG</strong> 포트의 연결을 해제한다.<br />
다음 그림은 EAGLE 개발보드에 NAND Boot 코드를 저장하는 화면이다. ‘Downloading Done.’<br />
메시지가 출력되면 정상적으로 데이터가 저장된 것이다.<br />
<strong>EISC</strong> <strong>USB</strong> <strong>JTAG</strong> <strong>User</strong> <strong>Guide</strong> 10
4. Programming NOR Flash<br />
1 <strong>EISC</strong> <strong>USB</strong> <strong>JTAG</strong> 보드를 TARGET 보드의 <strong>JTAG</strong> 포트에 연결한다.<br />
2 TARGET 보드의 전원을 인가한다.<br />
3 <strong>EISC</strong> <strong>USB</strong> <strong>JTAG</strong> 보드를 PC의 <strong>USB</strong> 포트에 연결한다.<br />
4 <strong>EISC</strong> <strong>USB</strong> <strong>JTAG</strong> 보드에 LED가 ON 되는지 확인한다. (<strong>USB</strong> 장치 인식 확인)<br />
5 <strong>EISC</strong> <strong>USB</strong> <strong>JTAG</strong> PC 프로그램을 실행한다.<br />
6 Chip(Products) 종류를 선택한다.<br />
7 NOR 버튼을 선택한다.<br />
8 NOR Flash Model명을 선택한다. Ver 2.00에서 지원되는 Flash type은 아래와 같다.<br />
(CANTUS 칩인 경우 내부 Flash Memory를 가지므로 AutoDetect로 자동 선택되고<br />
사용자가 직접 선택할 수는 없다.)<br />
9 NOR Flash의 데이터 폭을 선택한다.(CANTUS 칩은 자동 선택)<br />
10 NOR Flash의 개수를 선택한다.(CANTUS 칩은 자동 선택)<br />
11 ‘RUN’ 버튼을 누르면 다운로드가 시작된다.<br />
12 다운로드가 완료되면 확인창이 표시된다.<br />
13 <strong>EISC</strong> <strong>USB</strong> <strong>JTAG</strong> 보드와 TARGET 보드의 연결을 해제하고자 하면, TARGET 보드의<br />
전원을 OFF한 이후에 <strong>JTAG</strong> 포트의 연결을 해제한다.<br />
<strong>EISC</strong> <strong>USB</strong> <strong>JTAG</strong> <strong>User</strong> <strong>Guide</strong> 11
다음 그림은 CANTUS 개발보드에서 ‘AutoDetect’ – Internal Flash에 프로그램 Bin 파일을 저<br />
장하는 화면이다. CANTUS는 내부 NOR Flash 메모리를 가지므로 NOR Flash Options 탭에서<br />
필요한 값들이 자동 선택된다.<br />
<strong>EISC</strong> <strong>USB</strong> <strong>JTAG</strong> <strong>User</strong> <strong>Guide</strong> 12
5. Pin Toggle<br />
‘Pin Toggle’ 기능은 Chip의 모든 디지털 핀에 구형파를 출력시켜 PCB 점검등에 사용된다.<br />
아래 그림은 EAGLE 개발보드의 모든 핀을 Toggle시키도록 하는 프로그램의 실행화면과 PIO<br />
핀에 출력되는 구형파를 캡쳐한 것이다.<br />
<strong>EISC</strong> <strong>USB</strong> <strong>JTAG</strong> <strong>User</strong> <strong>Guide</strong> 13
Revision History of Document<br />
Revision No.<br />
Ver 0.1 Initial release 08/12/2008<br />
Ver 0.92 <strong>EISC</strong> <strong>USB</strong> <strong>JTAG</strong> Programmer(Ver 2.0.00)로 변경/수정 10/19/2009<br />
<strong>EISC</strong> <strong>USB</strong> <strong>JTAG</strong> <strong>User</strong> <strong>Guide</strong> 14


