

Articulate_5_Highly_Effective_Strategies_for_Creating_Engaging_E-Learning_v7

You also want an ePaper? Increase the reach of your titles
YUMPU automatically turns print PDFs into web optimized ePapers that Google loves.
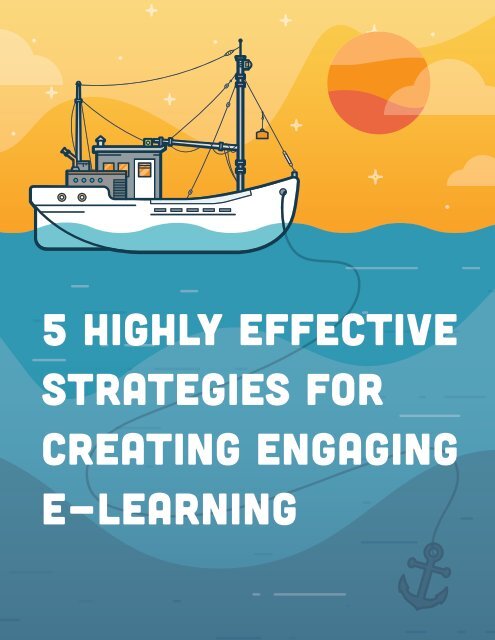
5 <strong>Highly</strong> <strong>Effective</strong><br />
<strong>Strategies</strong> <strong>for</strong><br />
<strong>Creating</strong> <strong>Engaging</strong><br />
E-<strong>Learning</strong>
Table of<br />
Contents<br />
Introduction 4<br />
How to Build a Compelling<br />
Visual Experience 6<br />
Color<br />
Contrast<br />
Repetition<br />
Alignment<br />
Balance<br />
Style<br />
How to Add Meaningful<br />
Interactions 23<br />
Discovery<br />
Questions<br />
Problem-Solving<br />
Contextual Relevance<br />
Decision Points<br />
Consequences<br />
Overcoming Objections<br />
How to Let Learners Pull<br />
Content 39<br />
The Pull Structure<br />
Meeting <strong>Learning</strong> Objectives<br />
Locking Navigation
Table of<br />
Contents<br />
How to Engage More Senses<br />
with Video 49<br />
Equipment<br />
Environment<br />
Preparation<br />
Special Tips <strong>for</strong> Screencasts<br />
Interactive Video<br />
How to Add Fun Gaming<br />
Elements 59<br />
The Secret Formula<br />
Where You Go from Here 66
Introduction<br />
Introduction 4<br />
Your supervisor drops two hundred pages of workplace safety rules and<br />
regulations on your desk. On top, you find a cheerful note that reads,<br />
“Please turn this into online training <strong>for</strong> our accident investigators,<br />
pronto. And try to make it interesting!”<br />
If you want to run <strong>for</strong> the hills, you’re not alone.<br />
We asked 3,100 e-learning developers about the biggest challenges they<br />
face in their jobs. More than half said it’s hard <strong>for</strong> them to make dry<br />
in<strong>for</strong>mation engaging to their learners. And learners have noticed. We<br />
surveyed 530 learners on their e-learning experiences, and nearly 40%<br />
said, “I get bored.”<br />
When you consider how important engagement is to the learning<br />
process, that’s a pretty big problem. After all, we learn and remember<br />
what attracts our interest and attention. 1<br />
Plus, who wants to create tedious courses? No one!<br />
For years, only people with programming skills had a prayer of<br />
overcoming this challenge. That’s no longer the case. With recent<br />
advances in technology, every e-learning developer can create courses<br />
that engage learners. That’s worth repeating: Every e-learning developer<br />
can create courses that engage learners. And you don’t need a huge<br />
budget to do it.<br />
1<br />
U.S. Department of Education: <strong>Learning</strong>: Engage and Empower.
Introduction 5<br />
You can create e-learning experiences that engage learners by following<br />
these five highly effective strategies:<br />
• Build a compelling visual experience.<br />
• Add meaningful interactions.<br />
• Let learners “pull” content.<br />
• Engage more senses with video.<br />
• Add fun gaming elements.<br />
Ready to learn how to do it all? Let’s go.
How to Build a<br />
Compelling Visual<br />
Experience
Title How to Build a Compelling Visual Experience 7<br />
You’ve heard the old adage, “Don’t judge a book by its cover.” It’s true<br />
that the most tattered, sorry-looking book can hold delightful, exciting<br />
stories inside. But it takes a big act of faith to crack that worn book open.<br />
Given a choice, most of us would grab a gorgeously designed hardcover<br />
instead. We can’t help but infer that the quality of the design reflects<br />
the quality of the content. As much as we’d all like to think that we don’t<br />
judge on looks, we do. And we do it in an instant.<br />
That’s not to say that we can’t or shouldn’t strive to overcome our<br />
prejudices. Of course we should. Can’t you just hear your mother<br />
reminding you that the oddball in your class could be the coolest person<br />
you’ll ever meet?<br />
But you don’t want to make your learners cross their fingers in hopes<br />
that your content will be good—despite its awkward appearance. In fact,<br />
you want to do the opposite: use appealing visual design to entice your<br />
learners. You want them to think, “Wow, this course looks really cool.”<br />
The truth is that even if your content is Pulitzer-worthy, your learners<br />
will find it difficult to be engaged if your course doesn’t appeal to<br />
their visual senses. You wouldn’t believe how many learners tell us<br />
that a majority of their organization’s courses look unappealing and<br />
uninviting. They also admit that when courses look bad, they seem like a<br />
waste of time. In short, they judge the content by the design.
Title How to Build a Compelling Visual Experience 8<br />
Now the good news: you don’t have to be a visual designer to build<br />
beautiful courses. Let’s look at the key ingredients to good visual<br />
design—color, contrast, repetition, alignment, and balance—and how<br />
you can apply them to your course.<br />
Color<br />
Colors can evoke feelings, sometimes quite powerfully. As the famous<br />
artist Paul Klee noted, “Color is the place where our brain and the<br />
universe meet.” It’s one of the first things we notice when we encounter<br />
something new, even if only subconsciously. A cerulean sea can slow<br />
your heartbeat. A red light can speed it up, yelling at our brains: “Pay<br />
attention to me!”<br />
We also associate different things with different colors, and this can<br />
change by cultural context or personal experience. While you don’t need<br />
to be a color scientist or psychologist to wield color effectively, you’ll<br />
want to consider the importance of color in your course design, asking<br />
yourself what emotions or images your color choices may conjure <strong>for</strong><br />
your learners.<br />
To choose your course color scheme, consult a color wheel or tool<br />
like Kuler. These make it really easy to select a palette that works well<br />
together. For example, you can create a sense of balance and harmony by<br />
choosing analagous colors, which are colors that sit next to each other
Title How to Build a Compelling Visual Experience 9<br />
on a color wheel. Or, you can use colors opposite one another on the<br />
wheel <strong>for</strong> a contrasting (yet still complementary) color scheme.<br />
Complementary colors<br />
On opposite sides<br />
of the color wheel<br />
Analogous colors<br />
Next to each other<br />
on the color wheel<br />
If you like the minimalist look, try building a monochromatic<br />
color scheme, which is composed of one base color and its shades.<br />
Monochromatic schemes are easy on the eyes, simple to create, and will<br />
never clash.<br />
While a color wheel or a tool like Kuler is really all you need to build a<br />
coordinated color scheme, if you’d like to learn more about color theory,<br />
check out worqx.com or read Understanding Color: An Introduction<br />
<strong>for</strong> Designers.
Title How to Build a Compelling Visual Experience 10<br />
Contrast<br />
One of the hallmarks of good design is well-executed contrast. Using<br />
contrast can help you separate disparate parts, aid navigation, and direct<br />
a viewer’s eye to what’s most important. Without contrast, it’s hard<br />
to know where to look, and that’s both disorienting and unpleasant<br />
to viewers.<br />
The most important rule to follow when using contrasting elements is to<br />
make them really different. The contrast should be immediately obvious.<br />
If elements are almost the same, but not exactly the same, it’ll look like<br />
a mistake.<br />
There are some really fun ways you can use contrast. Some are obvious,<br />
such as small shapes versus large shapes. But you can also contrast other<br />
elements of your design.<br />
For example, try contrasting fonts. Perhaps use a sans-serif font <strong>for</strong> the<br />
text on navigation, and a serif font <strong>for</strong> text on your slide. The characters<br />
in serif fonts have small lines called serifs at their ends. Times Roman<br />
and Courier are well-known serif fonts. Sans-serif fonts don’t have<br />
serifs, and include popular fonts like Arial and Helvetica.<br />
You can also contrast patterns and colors. Try adding a pattern to some<br />
elements, while leaving other elements “smooth.” To contrast color, you<br />
can use complementary colors, or contrast things such as dark, middle,
Title How to Build a Compelling Visual Experience 11<br />
Using different font styles together creates contrast.<br />
and light color values. You can even contrast intensity by choosing<br />
some pure colors and other muted colors. And, some colors are warm<br />
and some are cool. Play around with having one of each in your course<br />
color palette.
Title How to Build a Compelling Visual Experience 12<br />
Repetition<br />
We’ve all seen courses that look like they were assembled from spare<br />
parts of 10 different PowerPoint presentations. Our e-learning guru,<br />
Tom Kuhlmann, calls them “Frankencourses.” Each slide uses different<br />
fonts. Colors and images vary widely. Backgrounds are all over the map.<br />
You get the idea. It makes <strong>for</strong> a pretty chaotic learning experience. In<br />
fact, it can be so distracting that learners have a hard time engaging<br />
with the material. Not to mention that it breaks a fundamental design<br />
principle: repetition.<br />
It’s important to repeat design elements throughout your course.<br />
Repetition creates a sense of order and unity. A course with repeated<br />
elements will look and feel cohesive, while one with new elements on<br />
each slide will look and feel disorganized and chaotic.<br />
Imagine a slide that has six different fonts, some similar, some widely<br />
different. Yikes! Now pare that back to two contrasting fonts. Perhaps<br />
one serif and one sans-serif. Much better.<br />
So, be<strong>for</strong>e you start building out your course, define your key design<br />
elements—then make sure you consistently apply them. Choose your<br />
fonts, sticking to just two or three max. Use them in the same way<br />
throughout your course. So, <strong>for</strong> example, make all headlines the same<br />
font of the same size and weight. Then make sure every single headline<br />
in your course follows this style.
Title How to Build a Compelling Visual Experience 13<br />
A Chaotic Design<br />
The elements on this slide use lots of different shapes, fonts, colors,<br />
and sizes, and are not aligned to each other. The design shares<br />
nothing in common with previous slides in the same course.<br />
Do the same thing <strong>for</strong> color choices. Once you’ve picked a harmonized<br />
color scheme <strong>for</strong> your course, carry it through your course consistently.<br />
And don’t use another color unless you’ve done so from the beginning.<br />
You’ll also want to decide on a style <strong>for</strong> graphics, images, icons, and<br />
other design elements. So things such as boxes, buttons, and arrows<br />
should share a style. Images and backgrounds should have the same feel.
Title How to Build a Compelling Visual Experience 14<br />
If you’re using clip art, make sure you use the same style to maintain<br />
consistency. It’ll make your content look like it all belongs together.<br />
Consistent Style<br />
All elements share colors, fonts, and a clean,<br />
flat design with subtly rounded corners.<br />
Inconsistent Style<br />
Although some of these elements might look good in isolation,<br />
the different styles do not work well when used together.<br />
Another way you can give learners a sense of order is to repeat patterns<br />
<strong>for</strong> organizing or presenting in<strong>for</strong>mation. It gives learners visual cues
Title How to Build a Compelling Visual Experience 15<br />
that help them understand how the course content fits together. So,<br />
<strong>for</strong> example, if you always use bold headlines to indicate a section<br />
and underlined text to represent lessons within that section, learners<br />
will begin to build a mental map of how the course is organized and<br />
what topics will be covered. And that gives them context <strong>for</strong> what<br />
they’re learning.<br />
Alignment<br />
If you’re someone who can’t walk by a crooked picture without<br />
straightening it, you’re a step ahead when it comes to alignment, a<br />
critical design principle.<br />
To create alignment, you not only want elements on your slide to line<br />
up, they should also be equidistant. That’s not to say that every shape<br />
or thing on your slide should be placed in one line, but you do want to<br />
line elements up with something. They shouldn’t be randomly spaced on<br />
your slide.<br />
For example, say you place five tabs along the bottom of your slide to<br />
act as navigable menu items. You’ll want to align your tabs horizontally<br />
and vertically on the bottom of the slide, with the same amount of space<br />
between each. If they’re off by even a little bit, your navigation will look<br />
all wrong.
Title How to Build a Compelling Visual Experience 16<br />
Proper Alignment<br />
The tabbed navigation looks right because everything is<br />
consistently aligned and spaced.<br />
Misalignment<br />
Even though the second tab is just a little taller, lower, and further<br />
to the right than it should be, it instantly looks wrong.<br />
And don’t trust your eyes to line things up. Use drawing guides or a grid<br />
to check the alignment and spacing of all of the elements on your slide.
Title How to Build a Compelling Visual Experience 17<br />
Balance<br />
The layout is based on a 12-column 960px grid.<br />
Note how the items also have consistent vertical alignment and spacing.<br />
Another critical principle you’ll want to consider when building a slide<br />
layout is balance, which is the equal distribution of visual weight.<br />
A lot of things can determine an object’s visual weight. Some are<br />
obvious, such as size. A large object feels heavier than a smaller object.<br />
It can get tricky, though. A small object can actually balance out a larger<br />
object, depending on their relative positions. You can balance a large<br />
object near the center of your slide with a smaller object placed near the<br />
edge of it.
Title How to Build a Compelling Visual Experience 18<br />
Color, value, and texture also play a role in visual weight. Brighter, more<br />
intense colors feel heavier, as do elements with complex texture. Dark<br />
objects are heavier than light objects, and a bunch of small objects can<br />
balance out one larger object.<br />
You can balance elements on your slide in a couple of different ways.<br />
Balance items symmetrically by dividing your slide in half and then<br />
repeating the same exact compositional elements on each side, like a<br />
mirror image. Or, you can achieve radial symmetry by placing elements<br />
equally around a central axis (clocks and sunbursts are radially<br />
balanced). While easy to build out, symmetrically balanced designs<br />
can feel a bit boring. If every slide in your course were symmetrically<br />
balanced, you’d start to lose your learners’ attention a few slides in.<br />
You’ll build a much more visually engaging course if you include plenty<br />
of asymmetrically balanced slides, too. Asymmetrical balance is much<br />
more interesting and gives you lots of creative freedom.<br />
Instead of doing carbon copies of each element (like you do with<br />
symmetrical balance), you achieve asymmetrical balance by balancing<br />
different elements that have the same visual weight. So, <strong>for</strong> example,<br />
if you have one large shape on one side of your slide, you might<br />
place several smaller shapes on the other.<br />
Play around with how differently sized, shaped, colored, textured, or<br />
spaced objects impact visual weight. You’ll want to build layouts that not
Title How to Build a Compelling Visual Experience 19<br />
Assymmetrical Balance<br />
The large chart on the left is balanced by the smaller pie charts to the right.<br />
only are balanced, but that direct a learner’s attention to what’s most<br />
important.<br />
Style<br />
We’ve covered the basic principles of good design, but how do you build<br />
an engaging design that fits your course’s topic or industry? Chances are,<br />
you probably already have an idea of what it should look like.<br />
Imagine that you’re hired to develop a western movie poster. By the time<br />
you finish reading this sentence, you’ll probably have a picture in your<br />
mind of what that poster should look like. And everyone who reads this
Title How to Build a Compelling Visual Experience 20<br />
e-book probably conjures a pretty similar mental picture. Western font.<br />
Lots of brown. Cowboys and horses. Cactus and tumbleweeds. Not far<br />
off, right?<br />
Now what if you saw a poster <strong>for</strong> a western movie that completely defied<br />
this mental picture? Say it used a modern-looking font, made ample use<br />
of pinks and yellows, and featured children wearing leotards. Your mind<br />
would rebel: “That’s not a western movie!”<br />
The trick is finding a look <strong>for</strong> your course that fits your learners’<br />
expectations. You want to set the stage appropriately <strong>for</strong> what they’re<br />
about to learn.<br />
Your course will look like something. It’s your job to figure out what<br />
that something is. Tap into your own ideas of what a particular topic or<br />
industry “looks like.” Ask yourself, What colors do I associate with this<br />
topic? What types of fonts come to mind? What do the characters look<br />
like and what are they wearing? What kind of environment makes sense?<br />
Are there certain props, scenes, or images that are common to this topic<br />
or industry?<br />
You can test yourself by pretending that you’re building a workplace<br />
safety course. What design elements do you think of as being<br />
safety‐related? Now imagine that you’re building a course on IT security.<br />
How would those design elements differ?
Title How to Build a Compelling Visual Experience 21<br />
If you’re still not quite sure what look you want, look <strong>for</strong> inspiration.<br />
The web puts amazing design right at your fingertips. Visit ad agency<br />
and graphic design sites, and peruse the portfolios of leading designers<br />
on Dribbble. Check out e-learning courses developed by firms known<br />
<strong>for</strong> their design excellence, or look at templates designed <strong>for</strong> specific<br />
industries or topics. You also might want to visit E-<strong>Learning</strong> Heroes<br />
regularly, as e-learning pros in every industry regularly post inspirational<br />
examples there.<br />
In your quest to build beautiful courses that delight your learners,<br />
beware the temptation to throw in images just because they look pretty.<br />
Everything on your slide should support course objectives. Decorative<br />
graphics that don’t rein<strong>for</strong>ce the concepts you want to convey can<br />
actually impede the learning process—and potentially confuse learners.
Title How to Build a Compelling Visual Experience 22
How to Add<br />
Meaningful<br />
Interactions
Title How to Add Meaningful Interactions 24<br />
You’ve hooked your learners with compelling visual design. Now how do<br />
you keep them? You give them opportunities to actively interact with the<br />
screen throughout the course. They’ll have a hard time staying passive<br />
when they’re physically interacting with the content.<br />
Discovery<br />
Entice your learners to take action by inviting them to explore. Not many<br />
of us can resist the urge to poke around a new environment; humans are<br />
naturally inquisitive. What do we do when we walk into someone’s house<br />
<strong>for</strong> the first time? We take a look around to get a feel <strong>for</strong> what the person<br />
likes, how the person lives, and what we might have in common with<br />
them. Most of us wouldn’t feel com<strong>for</strong>table peeking inside a friend’s<br />
cabinets without good reason. But we might be tempted to look because<br />
we might find something interesting or unexpected.<br />
Build interactions that your learners want to explore, that entice<br />
them to discover content out of curiosity. For example, instead of<br />
presenting multiple slides full of bullets, create a single tab interaction<br />
that lets learners dig into content in any order they want. Not only do<br />
tab interactions invite exploration, they’re great <strong>for</strong> consolidating a<br />
lot of in<strong>for</strong>mation on a single slide. Would you rather click around on<br />
this screen mimicking an iPad application’s interface or slog your way<br />
through a bunch of slides?
Title How to Add Meaningful Interactions 25<br />
Encourage Exploration<br />
Learners click on the app-like tabs in this interaction to reveal content.<br />
With the right e-learning authoring software, you can turn any image<br />
into an experience of discovery. For example, you could have items<br />
pinned to a bulletin board or sticky notes on a desk that reveal additional<br />
in<strong>for</strong>mation when learners hover over or click on them. Or, if you need<br />
to train your sales team on a new product, you could add clickable icons<br />
to a product image like the one on the next page.<br />
There will be times when you want to pair in<strong>for</strong>mation with media to<br />
provide visual context. Or sometimes a video or photograph isn’t the<br />
context, it’s the main point. But perhaps you need to augment it with<br />
text. Media interactions make it easy to convey your message while<br />
keeping learners active, engaged, and inquisitive. You can build a media
Title How to Add Meaningful Interactions 26<br />
Clickable icons make it easy <strong>for</strong> learners to get<br />
more in<strong>for</strong>mation about elements on an image.<br />
panel or media tour that learners click through in a guided way. Or, try<br />
creating a media gallery in a lightbox they can view without interrupting<br />
the flow of the course.<br />
If you need to walk learners through a process, workflow, or procedure,<br />
process interactions are a great alternative to bullets or paragraphs<br />
of text. With a process diagram, you reveal steps one at a time, letting<br />
learners consume the in<strong>for</strong>mation in a sequential way. They control<br />
when they’re ready to move from one step to the next.
Title How to Add Meaningful Interactions 27<br />
A Sample Process Interaction<br />
In<strong>for</strong>mation is broken down into a sequence showing one step at a time.<br />
And to convey relationships between concepts, try an interactive<br />
diagram. For example, you might use a segmented pyramid that lets<br />
learners explore hierarchical relationships or a circle diagram that lets<br />
them investigate interrelated ideas.
Title How to Add Meaningful Interactions 28<br />
Questions<br />
Ask any expert conversationalist and they’ll tell you that the secret to<br />
engaging people is asking them questions. (Don’t you wish you knew<br />
that trick when you were 14?!)<br />
By asking learners questions, you connect them to the content. What do<br />
you think, learner? What do you want to do? How would you solve this?<br />
Now they’re personally involved.<br />
You can use questions in any number of ways to lure learners. You can<br />
ask questions that impact what content the learner sees next. Add a<br />
knowledge check that rein<strong>for</strong>ces key concepts. Or ask them to do an<br />
activity that lets them practice new skills.<br />
Depending on your authoring tool, you’ll have a range of assessment<br />
types to choose from. We love free<strong>for</strong>m interactions—such as drag-anddrops—because<br />
they let you turn pretty much any objects you want into<br />
a question.<br />
For example, it’s easy to use a drag-and-drop interaction as a navigation/<br />
branching tool. Ask a question like, “Which department should Sally<br />
visit to learn more about our company’s new data security policies? Drag<br />
Sally over a door to choose where she should go next.”
Title How to Add Meaningful Interactions 29<br />
Or you could use a drag-and-drop to ask learners how they’d solve a<br />
real‐world problem—or do an activity required in their jobs.<br />
For example, a course <strong>for</strong> hospitality professionals could include a<br />
table‐setting exercise where learners place utensils and other items<br />
where they belong on a table. Watch this short video tutorial to learn<br />
how to create an interaction like this with <strong>Articulate</strong> Storyline.<br />
With the right course authoring tool, you can add interactivity to any<br />
objects, media, or characters you want to create any type of interaction<br />
you can imagine. But resist the urge to add interactivity <strong>for</strong> novelty’s<br />
sake. While gratuitous interactivity might engage them the first time<br />
they see it, if your course is filled with unnecessary clicks, drags, and<br />
mouseovers, learners will start getting frustrated.
Title How to Add Meaningful Interactions 30<br />
Problem-Solving<br />
One of the ways you make interactions feel meaningful—and not just<br />
gratuitous—is to make them relevant to the learner’s job or experience.<br />
Remember, many of your learners don’t choose to take your course. It’s<br />
more likely that they’re required by law, corporate policy, or an academic<br />
program to complete the e-learning module (with flying colors, of<br />
course). And, let’s face it, you might be asked to create a course on<br />
material that’s not inherently exciting. And no interaction on its own can<br />
make up <strong>for</strong> that.<br />
So, how do you draw in reluctant learners, especially when the content<br />
isn’t naturally stimulating? Ask your learners to solve problems that they<br />
might actually face. They’ll need to think about the in<strong>for</strong>mation they’ve<br />
learned, and make decisions based on their new understanding. And if<br />
you introduce new facts throughout the scenario, they’re more likely to<br />
retain them because the in<strong>for</strong>mation is immediately meaningful. Pepper<br />
your scenario with interactivity that’s natural to the situation, and<br />
presto! You have a winning combination.<br />
Contextual Relevance<br />
Create a problem that’s contextually relevant to your learners, so that<br />
they’ll feel like they have a stake and will be motivated to solve it. And, if<br />
you can, add an emotional component. The key is to tap into the reason
Title How to Add Meaningful Interactions 31<br />
the course content is important to the learner. What’s in it <strong>for</strong> them?<br />
Why do they need the in<strong>for</strong>mation? What do they have to gain? Or,<br />
what’s at stake if they don’t learn it? In short, what’s the personal impact<br />
of this kind of decision?<br />
For example, say you’re developing anti-discrimination training<br />
<strong>for</strong> managers at a bank. Instead of a bunch of bulleted slides, what<br />
if you presented a scenario where an employee reports a troubling<br />
interaction with a colleague in another department? Perhaps the bank<br />
just settled a discrimination suit <strong>for</strong> hundreds of thousands of dollars,<br />
so management’s feeling particularly sensitive about missteps. With<br />
this type of realistic (and high stakes) situation, you can help learners<br />
internalize why the training matters.<br />
Keep in mind that any scenarios you use should tie directly to your<br />
learning objectives. What do you expect learners to know—or be able to<br />
do—by the end of the course? How will you know if they’ve met those<br />
expectations? If you’re not clear on the per<strong>for</strong>mance requirements, you<br />
can’t create scenarios that help learners meet them.<br />
Decision Points<br />
Once you’ve defined the circumstances of your scenario, you’ll need to<br />
create interactive activities and decision points where learners can apply<br />
what they’ve learned—or learn what they need to know to solve the<br />
problem. Each decision should <strong>for</strong>ce understanding, or the need to gain it.
Title How to Add Meaningful Interactions 32<br />
This is where subject matter experts can help. Ask them to share<br />
different experiences and possible outcomes. The more nuanced and<br />
loaded the situation, the more your learners will need to think through<br />
how to apply in<strong>for</strong>mation. In the real world, decisions are rarely<br />
clear‐cut and correct choices aren’t always obvious. Sometimes there<br />
isn’t a correct choice at all, just different consequences. So when you’re<br />
building a decision point, offer realistic, nuanced choices that actually<br />
<strong>for</strong>ce the learner to think.<br />
While you don’t want to try to trick learners, you can throw in some<br />
choices that are somewhat right and somewhat wrong, and ask the<br />
learner to pick the best one. You can then address nuances in the<br />
feedback. And when you don’t have a clear-cut right decision, you can<br />
create other situations that highlight what’s wrong with each choice.<br />
For example, <strong>for</strong> that anti-discrimination training, you could ask<br />
managers to decide what action to take immediately after learning of the<br />
incident:<br />
• Notify the human resources (HR) and legal departments of the<br />
potential problem.<br />
• Research the incident further and discuss a course of action with the<br />
accused’s supervisor.<br />
• Try to facilitate a resolution between the two employees.
Title How to Add Meaningful Interactions 33<br />
None of these is wrong. But none is totally right, either. So learners<br />
must think through the potential outcomes of each, which keeps them<br />
completely engaged.<br />
Consequences<br />
If you’ve ever read a Choose Your Own Adventure book, you already know<br />
how compelling it is to play the hero. Because you make the decisions<br />
that determine the outcome, you’re invested in learning what happens<br />
next. You’re drawn into the story.<br />
The same is true <strong>for</strong> decision-making scenarios. They let learners<br />
explore the consequences of their actions and wonder, “What happens<br />
if I choose this?” The point isn’t <strong>for</strong> learners to get it right the first time.<br />
It’s to let them explore consequence, to “play” with what might happen<br />
if they get it wrong.<br />
With each choice they make, you can provide feedback that deepens<br />
their understanding of the material or rein<strong>for</strong>ces key concepts.<br />
Or, instead of providing feedback and stopping there, you can let<br />
each decision drive a new twist in the scenario. Let’s look at the antidiscrimination<br />
training again.<br />
If learners choose to immediately notify the HR and legal departments<br />
of the potential problem (and thereby delay addressing the issue),
Title How to Add Meaningful Interactions 34<br />
you could present a second scenario in which the harassed employee<br />
becomes frustrated at the inaction and threatens suit. Learners then<br />
must navigate another set of challenges.<br />
The experience adapts to the learner’s choices.<br />
If they choose to research the incident, you could escalate the situation.<br />
Perhaps the incident starts infecting office culture as both parties start<br />
soliciting support from other colleagues. Suddenly, there are multiple<br />
people taking sides, each sidetracked from their core jobs. What should<br />
learners do next?
Title How to Add Meaningful Interactions 35<br />
Also, if learners try to facilitate a resolution between the two employees,<br />
they could find themselves in hot water with both HR and legal.<br />
Now what?<br />
Just be careful not to make the scenarios so difficult that they give up.<br />
It’s no fun to feel like no matter what you do, you’ll never get it right. And<br />
remember to build realistic scenarios and consequences so that learners<br />
can see how they connect to their own jobs.<br />
In this well-done decision-making scenario by Elearner Engaged, Sam is<br />
on the verge of quitting his job because his co-worker Emma won’t stop<br />
acting inappropriately with him. As the learner, you have to decide how<br />
Sam should respond to Emma with each new overture. What could be<br />
wrong with opening a jar of pickles <strong>for</strong> her? As Sam discovers, one thing<br />
can lead to another, and be<strong>for</strong>e he knows it, Emma’s cornered him into<br />
an after-work drink. Unable to deal with her, Sam decides to quit a job<br />
he otherwise loves. Make different choices <strong>for</strong> Sam, and he’ll set clear<br />
boundaries with Emma that let him find peace in the office—and keep<br />
his job.<br />
The scenario expertly presents nuanced choices, then shows the<br />
consequences of each decision Sam makes. Because the scenario is so<br />
emotionally fraught and you’re put into the driver’s seat, it’s impossible<br />
not to be fully engaged. And if you get the sad result that Sam quits, the<br />
course invites you to try again, letting you explore how different choices<br />
impact the outcome.
Title How to Add Meaningful Interactions 36<br />
Overcoming Objections<br />
If your subject matter experts or clients question whether scenariobased<br />
learning is an effective way to convey voluminous content, you can<br />
assure them that there are many ways to share key material in a scenariobased<br />
course. You can:<br />
• Create in<strong>for</strong>mation-rich, decision-making points. For the antidiscrimination<br />
training, you could provide details on a relevant antidiscrimination<br />
law when you set the stage <strong>for</strong> the scenario. “In 1991,<br />
the U.S. government passed a civil rights law that states…”<br />
• Add resources or help links that learners can access if they need<br />
more context or in<strong>for</strong>mation to make decision. For example, you<br />
could provide links to a FAQ on your course player that detail key<br />
portions of anti-discrimination laws.<br />
• Use characters to provide helpful in<strong>for</strong>mation. So you could let<br />
learners click on an HR manager to hear audio or watch video of a real<br />
person explaining what behavior is considered discriminatory.<br />
• Create a virtual guide. This could be a character or simply an<br />
interactive element you make available throughout the scenario.<br />
Learners could click on it to get tips and clues any time they need help.
Title How to Add Meaningful Interactions 37<br />
• Respond to decisions with content. When learners make a choice, it’s<br />
an opportunity <strong>for</strong> in<strong>for</strong>mation-sharing. When you provide feedback<br />
on their decisions, you can add content that underlines why each<br />
choice is a good one—or why it falls short. “That’s not a good choice<br />
because the current law requires…”<br />
Whenever you build scenario-based learning, remember to “keep it<br />
real.” The most engaging scenarios are those learners can relate to in a<br />
personal way. If you’re not sure whether the situation you envision is<br />
realistic, poll learners and subject matter experts about how and when<br />
they’d use the course content.
Title How to Add Meaningful Interactions 38
How to Let Learners<br />
Pull Content
Title How to Let Learners Pull Content 40<br />
Many e-learning courses follow the same structure. They start with an<br />
introduction that explains the course objectives. Then they’ll have a<br />
few sections of content, sometimes with a knowledge check at the end<br />
of each section. And at the end of the course, there’s a final assessment.<br />
It’s a very linear, perfectly logical structure. It’s all about pushing<br />
in<strong>for</strong>mation to the learner, then testing to make sure they got it.<br />
A typical course structure.<br />
It’s a serviceable approach, especially if you’re not tying any real<br />
per<strong>for</strong>mance requirements to the course. That is, you need learners to<br />
know something, but you don’t expect them to apply it in any particular
Title How to Let Learners Pull Content 41<br />
way. For example, let’s say your company is rolling out a new sales<br />
compensation structure and you’re building a course that details the<br />
specifics <strong>for</strong> the sales team. You don’t need them to do much more than<br />
just “get” the in<strong>for</strong>mation. You might include a quiz at the end only to<br />
make sure sales folks actually complete the course. It doesn’t really<br />
matter whether they truly understand the material. They won’t need to<br />
use what they’ve learned in their jobs, so that’s okay.<br />
This kind of course is all about pushing out in<strong>for</strong>mation. The focus is<br />
on the in<strong>for</strong>mation itself. The best courses of this type have compelling<br />
visual design, good content, and smart interactivity that keeps learners<br />
engaged. But un<strong>for</strong>tunately <strong>for</strong> learners, they’re often tedious.<br />
The Pull Structure<br />
Luckily, there’s a more engaging alternative. Don’t give learners any<br />
upfront in<strong>for</strong>mation. Yep, that’s right. Just throw them into a decision,<br />
and let them explore to find what they need. In many cases, this<br />
approach will challenge learner assumptions and misunderstandings,<br />
which is always a good way to make them think and keep them engaged.<br />
Instead of <strong>for</strong>ce-feeding or pushing all the in<strong>for</strong>mation every possible<br />
learner could ever need, build interactions that give learners control<br />
over what they see. If they don’t need the content, they won’t pull it.<br />
How much better <strong>for</strong> them! They’re not <strong>for</strong>ced to sit through something<br />
they already know. You’re letting them explore in a natural, inquisitive
Title How to Let Learners Pull Content 42<br />
way to find what they haven’t yet learned. And you’re giving each learner<br />
a unique learning experience; one that they shape based on what they<br />
know, and what they don’t.<br />
With this approach, your course structure might look more like this:<br />
In some cases, the learner might not choose to pull all of the content.<br />
Let’s say you’re training a team on using the latest version of PowerPoint<br />
to speed their production times, and you have three videos that walk<br />
through a few key time-saving tips. In the “push” model, you’d make<br />
learners watch each one (and in a specific order), whether they need<br />
them or not.
Title How to Let Learners Pull Content 43<br />
But if you take the “pull” approach, you don’t <strong>for</strong>ce learners through<br />
a defined path. They determine the value of the in<strong>for</strong>mation and<br />
control its flow. And it doesn’t matter if they don’t always pull the right<br />
in<strong>for</strong>mation, or the in<strong>for</strong>mation that would help them most, because you<br />
can give them the right in<strong>for</strong>mation through feedback.<br />
Meeting <strong>Learning</strong> Objectives<br />
To build a course where learners pull in<strong>for</strong>mation, you need to first<br />
understand how they’d use the in<strong>for</strong>mation. And how do you figure<br />
that out?<br />
It’s actually pretty simple. Look to your learning objectives, which are<br />
simply the knowledge and skills you want learners to gain as a result of<br />
taking your course. If you don’t have any yet, create them be<strong>for</strong>e you<br />
do anything else. Not only are they helpful <strong>for</strong> building a pull structure,<br />
they’re essential to creating a course that delivers the results your<br />
client wants.<br />
You can define learning objectives in three easy steps. First, think about<br />
(or ask your client) what learners need to be able to do with what they<br />
learn. Avoid vague words like “know” or “understand” and instead<br />
describe the tasks or actions you want them to per<strong>for</strong>m after completing<br />
your course.
Title How to Let Learners Pull Content 44<br />
Next, identify your learners. Are they managers? New employees? People<br />
in a specific department or role? Target your audience as narrowly<br />
as possible.<br />
Finally, define the knowledge or experience learners need to take your<br />
course. This is the instructional starting point. Knowing this helps you<br />
avoid missed assumptions about what learners already know or need<br />
to know.<br />
So if you’re creating a course <strong>for</strong> mortgage company employees on how<br />
to properly process FHA loans, your main objective might be: Teach loan<br />
officers (your learners) how to process FHA documentation to acquire<br />
proper loan qualification (the specific task they must be able to per<strong>for</strong>m<br />
post-training). You might note that you expect loan officers to have<br />
experience processing other types of loans.<br />
From here, you might have sub-objectives such as:<br />
• Train loan officers to identify correct documents required <strong>for</strong><br />
FHA loans.<br />
• Train loan officers to identify credit requirements <strong>for</strong> FHA loans.<br />
• Train loan officers to identify employment requirements <strong>for</strong><br />
FHA loans.<br />
Once you have really specific, per<strong>for</strong>mance-oriented course objectives,<br />
it’s easier to design a pull course structure. Your primary job is to design
Title How to Let Learners Pull Content 45<br />
reasons <strong>for</strong> learners to pull the content they need to meet the learning<br />
objectives. And in your learning objectives, you’ve already defined what<br />
specific tasks learners need to be able to per<strong>for</strong>m.<br />
So why not build a case study or realistic scenario based on this task? If<br />
your learner doesn’t know how to do a step in the tasks, they’ll pull the<br />
content they need to complete it.<br />
Let’s go back to our FHA training example. Remember, the learning<br />
objective is to teach loan officers to process FHA documentation to<br />
acquire proper loan qualification. Our sub-objectives are to train them<br />
to identify correct documents, credit requirements, and employment<br />
requirements.<br />
To create a pull course structure around these learning objectives,<br />
simply build a scenario that mimics what loan officers would do in<br />
their real jobs to process an FHA loan application. You could build<br />
interactions <strong>for</strong> critical steps in the loan application process, where<br />
learners would need to do things such as:<br />
• Identify questions to ask the loan applicant<br />
• Label required elements on a document<br />
• Run a credit check and decide whether the score meets requirements<br />
• Fill out an employment verification checklist
Title How to Let Learners Pull Content 46<br />
For each interaction, you’d include opportunities <strong>for</strong> learners to pull<br />
in<strong>for</strong>mation they need to complete the task. For example, you might<br />
include a link to a lightboxed FHA employment requirements FAQ on<br />
the employment verification checklist interaction.
Title How to Let Learners Pull Content 47<br />
Locking Navigation<br />
You might be thinking, “Wait a minute! If I let learners pull whatever<br />
content they want instead of locking the navigation in a linear path, how<br />
will I know they’ve met the course objectives? How will I know they’ve<br />
seen all of the content?”<br />
You’ll undoubtedly hear this objection if you go down the “pull” path.<br />
And there’s a great answer to it.<br />
The ultimate goal isn’t <strong>for</strong>cing learners to look at slides. It’s making sure<br />
they can do something or understand something. So you don’t lock the<br />
navigation. You lock decision points where learners demonstrate their<br />
understanding. Thus, they’re free to move around the content however<br />
they want, but they can’t get past that decision point until they prove<br />
they have a firm grasp of the material.
Title How to Let Learners Pull Content 48
How to Engage More<br />
Senses with Video
Title How to Engage More Senses with Video 50<br />
If you have kids between the ages of 6 and 12, you know all about the<br />
Rainbow Loom. It’s a kit consisting of a plastic pegged board, a hook,<br />
and hundreds of teensy rubber bands that little fingers trans<strong>for</strong>m into<br />
colorful bracelets—and then slip onto every available wrist they can<br />
find. When your kids master bracelets, they move to peace signs, flowers,<br />
spiders, beetles, panda bears, turtles, coke bottles…. you get the idea.<br />
And what do they do when they want to learn how to create something<br />
new? They watch a YouTube video.<br />
There’s no doubt that it’s much easier to learn how to weave a caterpillar<br />
on the Rainbow Loom by watching a video than it would be to read an<br />
instruction manual, even one with pictures. In fact, it’s probably the<br />
prevalence of such videos that’s helped stoke the Rainbow Loom craze.<br />
Videos make it simple and fun to learn new things.<br />
Once upon a time, creating a video <strong>for</strong> an e-learning course would have<br />
been cost-prohibitive and time-consuming. But that’s no longer the<br />
case. If you have a fairly new smartphone, chances are you can shoot<br />
HD video. You can record screencasts <strong>for</strong> free on sites like Screenr. And<br />
you can download free, simple-to-use video editing software. You no<br />
longer need a gaggle of experts and months of production time to create<br />
engaging videos and screencasts.<br />
How-tos aren’t the only lessons better given by video. If you need to<br />
teach a soft skill—such as collaborating with people who have different<br />
points of view—words on a slide simply don’t suffice. They can’t convey
Title How to Engage More Senses with Video 51<br />
the subtleties of body language and facial expressions that play such an<br />
important role in human interactions.<br />
Video is also a great way to hook your learners emotionally. Humans are<br />
social creatures, so we’re more invested when we learn from another<br />
person. Personalize your content with a real person, and you’ll have<br />
an easier time keeping learners engaged. This can even work <strong>for</strong> things<br />
like software training. Imagine recording webcam video along with a<br />
screencast using a tool like <strong>Articulate</strong> Replay. You could then personally<br />
guide learners through the software.<br />
Equipment<br />
Now let’s talk about how to produce a good video. The first thing you’ll<br />
want to do be<strong>for</strong>e you start recording a single frame is invest in an<br />
external microphone, because bad audio will ruin the best video ever<br />
produced. That doesn’t mean it needs to be expensive. You might even<br />
already have one: your smartphone.<br />
You can also use your iPhone or other smartphone with an HD camera<br />
as a camera. Just be sure to clip it steady so you don’t record shaky video.<br />
If you’re recording webcam video, then invest in an external HD‐quality<br />
webcam. You can easily buy one <strong>for</strong> under $100.
Title How to Engage More Senses with Video 52<br />
We use gray background paper <strong>for</strong> many of our videos. It instantly<br />
gives your videos a pro feel. You can buy a roll of seamless solid color<br />
background paper <strong>for</strong> under $50.<br />
Last, but not least, you’ll want to invest in some lighting. You’d be<br />
amazed at what a difference it makes. Don’t worry, you don’t need to<br />
start calling video supply stores. You can find everything you need at<br />
Home Depot <strong>for</strong> under $100. If nothing else, turn off any overhead lights<br />
and use three other well-placed light sources instead.<br />
If you want more tips on producing great video, watch these short,<br />
entertaining, and super helpful videos from Wistia.
Title How to Engage More Senses with Video 53<br />
Environment<br />
In an ideal world, you’d record in a studio or other controlled<br />
environment. But, in reality, most of us don’t have access to a<br />
dedicated recording space. So here are some tips <strong>for</strong> creating your own<br />
recording space.<br />
• Turn off A/C and fans, office machines, and notifications on your<br />
computer if you’re recording on a webcam.<br />
• Film in a conference room or an office with a closed door.<br />
• Avoid empty rooms, though, as sound can bounce around and create<br />
un<strong>for</strong>tunate echoes.<br />
• Don’t sit in a squeaky chair.<br />
• Turn off anything that rings or flashes lights. Better yet, remove them<br />
from your environment altogether.<br />
If you’re doing a screencast, you’ll want to do a dry run to make sure that<br />
all of your screens are set up. If you need to jump from one application<br />
to another, you’ll want to have them all open and sized to the recording<br />
window. And if you plan to add assets or files during your screencast,<br />
make sure they’re in a single folder that you can access with a few clicks.
Title How to Engage More Senses with Video 54<br />
Preparation<br />
You’ve set up the right equipment, your environment is ready. You’re<br />
ready to roll, right? Not quite. Do you know what your message is? Do<br />
you know how you’ll tell the story? While you don’t need to memorize a<br />
script word-<strong>for</strong>-word, you should have an outline of the main points you<br />
want to cover. If you’re filming someone else, you can prompt them with<br />
questions to cover the right points. If you’re recording webcam video, try<br />
taping a bulleted outline to the side of your monitor so that you can see it<br />
while you’re recording.<br />
Finally, loosen up. The best videos look and feel natural, as if the camera<br />
isn’t there at all, and we’re just having a conversation. Some people have<br />
no trouble acting natural in front of a camera, but most of us turn into<br />
mannequins as soon as we know the camera’s rolling. If you’re going to<br />
be the one on camera, banish the editor in your head and try to just have<br />
fun with it. Be yourself. People like authenticity. And if you let yourself<br />
just be you, it’ll come through. If you’re filming someone else, do what<br />
you can to make him/her laugh and take the whole thing less seriously.<br />
Special Tips <strong>for</strong> Screencasts<br />
Not all videos involve people. In fact, in e-learning, you often just need<br />
to record onscreen actions, like you see in software training. These are<br />
called screencasts. Whether you’re using Screenr, <strong>Articulate</strong> Replay, or
Title How to Engage More Senses with Video 55<br />
some other screencasting tool, here are a few tricks you can use to record<br />
better screencasts.<br />
• Tell your learners where they should be looking. Don’t just assume<br />
they’ll follow your mouse. Explain each action as you take it. For<br />
example, “Now I’ll insert a new slide by going to the menu and clicking<br />
‘Insert’ and then ‘New File.’”<br />
• Restrict the visual field. Frame your recording window so that<br />
you’re only showing what you need to show. Everything else is just a<br />
distraction.<br />
• Hide personal and proprietary in<strong>for</strong>mation. The easiest way to do<br />
this is to create another user account on your computer that you use<br />
only <strong>for</strong> screencasts. That way, you don’t need to worry about hiding<br />
personal in<strong>for</strong>mation such as folders or toolbars in your browser.<br />
Choose a solid background color <strong>for</strong> your desktop. Photographs and<br />
other images will just distract the learner.<br />
• Keep your mouse “quiet.” You don’t want to inadvertently move<br />
your cursor all over the screen while you’re talking. It’s distracting<br />
and annoying to the learners. When you’re not deliberately showing<br />
something, your mouse should be still. The best way to keep your<br />
mouse quiet is to remove your hand from it when you don’t need it.<br />
• Select the right aspect ratio. Screen recorders such as <strong>Articulate</strong><br />
Replay and Screenr will let you choose the aspect ratio <strong>for</strong> your video.<br />
You should match the aspect ratio of your course slides.
Title How to Engage More Senses with Video 56<br />
• Use the pause feature to create a better flowing video. If your<br />
screencasting tool allows it, pause your recording if you have to<br />
click on buttons and open other screens during your demos. It’ll let<br />
you set up your screens without distracting learners and will look<br />
more polished.<br />
Interactive Video<br />
Videos are great by themselves. But what if you could add explorable<br />
content to your videos? Even better! By adding interactivity, you<br />
turn a passive activity into an active one. You deepen your learners’<br />
engagement—and create opportunities to go deeper into the content.<br />
For example, say you’ve developed a video that demonstrates cooking<br />
techniques. You could add icons to the video at various points, letting
Title How to Engage More Senses with Video 57<br />
the learner click to pause the video and read additional in<strong>for</strong>mation on<br />
the topic.<br />
Or, if you’ve developed a video that shows a problematic interaction<br />
between co-workers, you could use interactive buttons to point out key<br />
points. “By citing Mae’s age when criticizing her per<strong>for</strong>mance, Debbie<br />
not only puts Mae on the defensive, she breaks the law.”<br />
The video lets learners see what’s happening, and the interactive<br />
elements let them drill into the topic if they need or want to. And if<br />
they don’t need additional in<strong>for</strong>mation, they can ignore the buttons<br />
or icons and just watch the video. This is a great way to provide two<br />
different experiences <strong>for</strong> learners with different levels of understanding.<br />
Experienced people can watch the video, while those with less<br />
experience can click on the interactive buttons to learn more.<br />
So the next time you need to show learners how to do something, try<br />
creating a video with interactive icons instead of showing a slide of bullet<br />
points. Watch this short video to learn how to add interactive elements<br />
to videos using <strong>Articulate</strong> Storyline.
Title How to Engage More Senses with Video 58
How to Add Fun<br />
Gaming Elements
Title How to Add Fun Gaming Elements 60<br />
It’s no small wonder that the gaming market is nearing the $100 billion<br />
mark. People like games. They’re fun!<br />
But what about adding game-like elements to e-learning? Can they<br />
really keep learners engaged with the material, or do they distract focus<br />
from what really matters? Do they actually help people learn, or are they<br />
simply fun, throw-away activities? Is e-learning gamification a fad, or is it<br />
here to stay?<br />
Depending on who you ask and what you mean by “game,” you’ll likely<br />
hear a range of answers. But no matter where you fall in the gamification<br />
debate, there’s no doubt that games can help keep learners engaged.
Title How to Add Fun Gaming Elements 61<br />
Karl Kapp, author of The Gamification of <strong>Learning</strong> and Instruction,<br />
explains that gamification involves crafting an experience where a player<br />
engages in a challenge and uses interactivity and dynamic feedback to<br />
make decisions and work toward a specific outcome. Sounds a lot like<br />
what we’ve been talking about throughout this e-book!<br />
You don’t need to build the next Minecraft to get your game on, which<br />
is a good thing since most e-learning developers don’t have an army<br />
of artists, animators, and programmers at their disposal. E-learning<br />
authoring tools like <strong>Articulate</strong> Storyline make it easy <strong>for</strong> even neophyte<br />
e-learning developers to build everything from simple word games to<br />
gamified scenarios.<br />
The Secret Formula<br />
To gamify your course—or some element of it—you need to first develop<br />
a challenge. Most video games require players to solve a large problem<br />
by completing smaller challenges. Games, like life, are a series of puzzles<br />
and decisions. Break up your e-learning curriculum into small segments<br />
and gamify those segments with various decision-making activities.<br />
The best challenges tie back to your learning objectives. For example, in<br />
this gamified course on safety management systems (SMS), learners can<br />
only defeat the dragon by demonstrating knowledge of SMS.<br />
Then, you need to give learners feedback. When players do something<br />
(anything, really) in a video game, their actions immediately result
Title How to Add Fun Gaming Elements 62<br />
in some type of consequence. Incorporate this idea into your online<br />
courses by letting learners know whether they’re on the right track<br />
whenever they make a decision or complete an activity. If you’re<br />
building a gameshow-like course, a simple score is enough. You can add<br />
motivation by requiring them to “win” be<strong>for</strong>e they progress to the next<br />
level. Just like in video games, learners should take a hit when they get<br />
something wrong. People will play the game over and over to top their<br />
own scores—and they’ll talk about what scores they got with co-workers<br />
in the hallways. Yes, they really will.<br />
If you’re presenting a scenario-based challenge, you can provide a much<br />
richer learning experience by explaining the consequences of a decision<br />
or branching learners to new challenges caused by their decisions. It’s<br />
better to <strong>for</strong>go scoring if you want to encourage learners to explore<br />
and take more risks. They’re more likely to try things just to see what
Title How to Add Fun Gaming Elements 63<br />
happens—and that can let them uncover pockets of knowledge they<br />
wouldn’t otherwise discover.<br />
Finally, games reward players when they do well. In this simple<br />
math game, they’re rewarded by the monkey reaching the bananas. For<br />
a gamified scenario, they might be rewarded by reaching a particular<br />
outcome, such as saving their company from a massive fine.<br />
Adding a game-like feel to the learning experience can be as simple as<br />
switching up the setting. Turn scenarios into quests, challenges into<br />
missions. Unleash your inner storyteller, and create some high drama.<br />
Throw learners into a crisis where the stakes are high, then let them<br />
discover a path to resolve it.<br />
In multi-player games like World of Warcraft, players are encouraged<br />
to engage with others to complete quests and challenges. This makes<br />
the players feel like they’re interacting with others and participating<br />
in something. Try creating a cast of characters that your learners can<br />
interact with throughout your course. Keep it interesting with a wide<br />
variety of characters, outfits, and poses.<br />
You could even follow the video game practice of hiding secret codes<br />
and other “Easter eggs,” and send your learners on an Easter egg hunt.<br />
For example, when you first introduce your learners to the course, let<br />
them know there are 12 Easter eggs buried in your course and there will<br />
be a reward <strong>for</strong> the first learner who finds them all. Your Easter eggs can
Title How to Add Fun Gaming Elements 64<br />
be earned <strong>for</strong> something as simple as getting all the answers right on a<br />
quiz. And your reward can be anything from a free lunch at the corporate<br />
cafeteria to a free copy of an e-book.<br />
And don’t be afraid to have fun. Which will your learners prefer: a<br />
click‐the-next-slide course peppered with bullet points or an interactive<br />
mission to save the world?
Title How to Add Fun Gaming Elements 65
Where You Go<br />
from Here
Title Where You Go from Here 67<br />
We’ve covered a lot of material on how you can create more engaging<br />
learning experiences. We hope it’s given you a good foundational<br />
understanding of where to start.<br />
But we know that once you get into projects, new questions and<br />
challenges rear their pesky heads.<br />
That’s why we created E-<strong>Learning</strong> Heroes, our community site of more<br />
than 100,000 e-learning developers. Visit often to find great articles,<br />
discussions, downloads, and other resources on everything e-learning.
If you enjoyed this guide, please feel free to link to it from<br />
your own site or share this link on social networks.<br />
Copyright © 2014 <strong>Articulate</strong> Global, Inc.<br />
All rights reserved.<br />
www.articulate.com