Table of Contents
ATI QC-110 Base Tool Changer Modular Manual
ATI QC-110 Base Tool Changer Modular Manual

You also want an ePaper? Increase the reach of your titles
YUMPU automatically turns print PDFs into web optimized ePapers that Google loves.
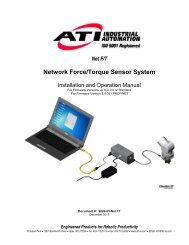
Quick Change Installation and Operation Manual<br />
Document #9620-20-B-110 Series Base Tool Changer-25<br />
2.1 Master Interface<br />
The Master plate is attached to the robot arm. The Master plate is designed with mounting features such<br />
as a boss and/or bolt and dowel holes. These features are used to accurately position and secure the Master<br />
plate to the robot arm or it may be necessary for a robot interface plate (RIP) to be utilized to adapt the<br />
Master plate to a specific robot arm. Custom RIPs are available from ATI upon request. (Refer to Section 8—<br />
Drawings <strong>of</strong> this manual for technical information on mounting features.)<br />
If the customer chooses to design and build a robot interface plate, the following should be considered:<br />
• The interface plate should be designed to include bolt holes for mounting, dowel pins, and a boss for<br />
accurate positioning on the robot and Master plate. (Refer to robot manual.) (The dowel and boss<br />
features are important to prevent rotation.)<br />
• The thickness <strong>of</strong> the interface plate must be great enough to provide the necessary thread engagement<br />
for the mounting bolts.<br />
• Mounting bolts should not be too long, such that a gap is formed at the interface.<br />
• The interface plate must be properly designed to provide rigid mounting to the Master plate.<br />
• The interface plate design should take into account clearances required for Tool Changer module<br />
attachments and accessories.<br />
2.2 Master Plate Installation<br />
1. Make sure the mounting surface <strong>of</strong> the Master plate and robot arm or RIP are clean and free <strong>of</strong> debris.<br />
2. If required, install the RIP to the robot arm, align using the boss or dowel pins and secure with customer<br />
supplied fasteners.<br />
3. Align the dowel pins to the corresponding holes in the Master plate and secure the Master plate to the<br />
robot arm or RIP with customer supplied (10) M10-1.5 socket head cap screws. Apply Loctite 242 to<br />
threads (see <strong>Table</strong> 2.1 for proper fasteners and torque).<br />
NOTICE: If an ATI RIP is used, fasteners to mount the Master plate to the RIP is supplied with<br />
the RIP. The fasteners to mount the RIP or the Master plate directly to the robot is customer<br />
supplied.<br />
4. Connect utilities to the appropriate modules and Master plate connections.<br />
Pinnacle Park • 1031 Goodworth Drive • Apex, NC 27539 • Tel: 919.772.0115 • Fax: 919.772.8259 • www.ati-ia.com • Email: info@ati-ia.com<br />
B-7