
Create successful ePaper yourself
Turn your PDF publications into a flip-book with our unique Google optimized e-Paper software.
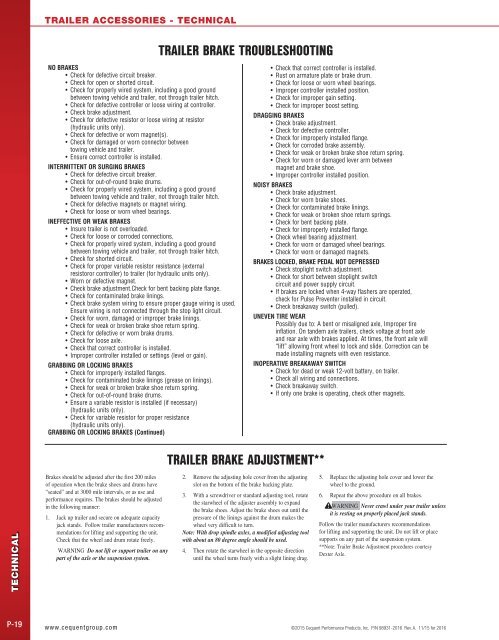
TRAILER ACCESSORIES - TECHNICAL<br />
TRAILER BRAKE TROUBLESHOOTING<br />
NO BRAKES<br />
• Check for defective circuit breaker.<br />
• Check for open or shorted circuit.<br />
• Check for properly wired system, including a good ground<br />
between towing vehicle and trailer, not through trailer hitch.<br />
• Check for defective controller or loose wiring at controller.<br />
• Check brake adjustment.<br />
• Check for defective resistor or loose wiring at resistor<br />
(hydraulic units only).<br />
• Check for defective or worn magnet(s).<br />
• Check for damaged or worn connector between<br />
towing vehicle and trailer.<br />
• Ensure correct controller is installed.<br />
INTERMITTENT OR SURGING BRAKES<br />
• Check for defective circuit breaker.<br />
• Check for out-of-round brake drums.<br />
• Check for properly wired system, including a good ground<br />
between towing vehicle and trailer, not through trailer hitch.<br />
• Check for defective magnets or magnet wiring.<br />
• Check for loose or worn wheel bearings.<br />
INEFFECTIVE OR WEAK BRAKES<br />
• Insure trailer is not overloaded.<br />
• Check for loose or corroded connections.<br />
• Check for properly wired system, including a good ground<br />
between towing vehicle and trailer, not through trailer hitch.<br />
• Check for shorted circuit.<br />
• Check for proper variable resistor resistance (external<br />
resistoror controller) to trailer (for hydraulic units only).<br />
• Worn or defective magnet.<br />
• Check brake adjustment.Check for bent backing plate flange.<br />
• Check for contaminated brake linings.<br />
• Check brake system wiring to ensure proper gauge wiring is used.<br />
Ensure wiring is not connected through the stop light circuit.<br />
• Check for worn, damaged or improper brake linings.<br />
• Check for weak or broken brake shoe return spring.<br />
• Check for defective or worn brake drums.<br />
• Check for loose axle.<br />
• Check that correct controller is installed.<br />
• Improper controller installed or settings (level or gain).<br />
GRABBING OR LOCKING BRAKES<br />
• Check for improperly installed flanges.<br />
• Check for contaminated brake linings (grease on linings).<br />
• Check for weak or broken brake shoe return spring.<br />
• Check for out-of-round brake drums.<br />
• Ensure a variable resistor is installed (if necessary)<br />
(hydraulic units only).<br />
• Check for variable resistor for proper resistance<br />
(hydraulic units only).<br />
GRABBING OR LOCKING BRAKES (Continued)<br />
• Check that correct controller is installed.<br />
• Rust on armature plate or brake drum.<br />
• Check for loose or worn wheel bearings.<br />
• Improper controller installed position.<br />
• Check for improper gain setting.<br />
• Check for improper boost setting.<br />
DRAGGING BRAKES<br />
• Check brake adjustment.<br />
• Check for defective controller.<br />
• Check for improperly installed flange.<br />
• Check for corroded brake assembly.<br />
• Check for weak or broken brake shoe return spring.<br />
• Check for worn or damaged lever arm between<br />
magnet and brake shoe.<br />
• Improper controller installed position.<br />
NOISY BRAKES<br />
• Check brake adjustment.<br />
• Check for worn brake shoes.<br />
• Check for contaminated brake linings.<br />
• Check for weak or broken shoe return springs.<br />
• Check for bent backing plate.<br />
• Check for improperly installed flange.<br />
• Check wheel bearing adjustment.<br />
• Check for worn or damaged wheel bearings.<br />
• Check for worn or damaged magnets.<br />
BRAKES LOCKED, BRAKE PEDAL NOT DEPRESSED<br />
• Check stoplight switch adjustment.<br />
• Check for short between stoplight switch<br />
circuit and power supply circuit.<br />
• If brakes are locked when 4-way flashers are operated,<br />
check for Pulse Preventer installed in circuit.<br />
• Check breakaway switch (pulled).<br />
UNEVEN TIRE WEAR<br />
Possibly due to: A bent or misaligned axle, Improper tire<br />
inflation. On tandem axle trailers, check voltage at front axle<br />
and rear axle with brakes applied. At times, the front axle will<br />
“lift” allowing front wheel to lock and slide. Correction can be<br />
made installing magnets with even resistance.<br />
INOPERATIVE BREAKAWAY SWITCH<br />
• Check for dead or weak 12-volt battery, on trailer.<br />
• Check all wiring and connections.<br />
• Check breakaway switch.<br />
• If only one brake is operating, check other magnets.<br />
TRAILER BRAKE ADJUSTMENT**<br />
TECHNICAL<br />
Brakes should be adjusted after the first 200 miles<br />
of operation when the brake shoes and drums have<br />
“seated” and at 3000 mile intervals, or as use and<br />
performance requires. The brakes should be adjusted<br />
in the following manner:<br />
1. Jack up trailer and secure on adequate capacity<br />
jack stands. Follow trailer manufacturers recommendations<br />
for lifting and supporting the unit.<br />
Check that the wheel and drum rotate freely.<br />
WARNING Do not lift or support trailer on any<br />
part of the axle or the suspension system.<br />
2. Remove the adjusting hole cover from the adjusting<br />
slot on the bottom of the brake backing plate.<br />
3. With a screwdriver or standard adjusting tool, rotate<br />
the starwheel of the adjuster assembly to expand<br />
the brake shoes. Adjust the brake shoes out until the<br />
pressure of the linings against the drum makes the<br />
wheel very difficult to turn.<br />
Note: With drop spindle axles, a modified adjusting tool<br />
with about an 80 degree angle should be used.<br />
4. Then rotate the starwheel in the opposite direction<br />
until the wheel turns freely with a slight lining drag.<br />
5. Replace the adjusting hole cover and lower the<br />
wheel to the ground.<br />
6. Repeat the above procedure on all brakes.<br />
WARNING Never crawl under your trailer unless<br />
it is resting on properly placed jack stands.<br />
Follow the trailer manufacturers recommendations<br />
for lifting and supporting the unit. Do not lift or place<br />
supports on any part of the suspension system.<br />
**Note: Trailer Brake Adjustment procedures courtesy<br />
Dexter Axle.<br />
P-19<br />
www.cequentgroup.com ©2015 <strong>Cequent</strong> Performance Products, Inc. P/N 98931-<strong>2016</strong> Rev. A. 11/15 for <strong>2016</strong>