You also want an ePaper? Increase the reach of your titles
YUMPU automatically turns print PDFs into web optimized ePapers that Google loves.
TOOLS / TESTERS - TECHNICAL<br />
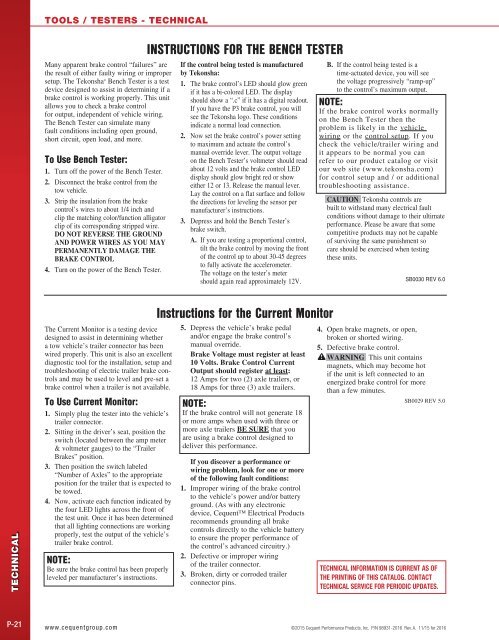
Many apparent brake control “failures” are<br />
the result of either faulty wiring or improper<br />
setup. The Tekonsha ® Bench Tester is a test<br />
device designed to assist in determining if a<br />
brake control is working properly. This unit<br />
allows you to check a brake control<br />
for output, independent of vehicle wiring.<br />
The Bench Tester can simulate many<br />
fault conditions including open ground,<br />
short circuit, open load, and more.<br />
To Use Bench Tester:<br />
1. Turn off the power of the Bench Tester.<br />
2. Disconnect the brake control from the<br />
tow vehicle.<br />
3. Strip the insulation from the brake<br />
control’s wires to about 1/4 inch and<br />
clip the matching color/function alligator<br />
clip of its corresponding stripped wire.<br />
DO NOT REVERSE THE GROUND<br />
AND POWER WIRES AS YOU MAY<br />
PERMANENTLY DAMAGE THE<br />
BRAKE CONTROL<br />
4. Turn on the power of the Bench Tester.<br />
INSTRUCTIONS FOR THE BENCH TESTER<br />
If the control being tested is manufactured<br />
by Tekonsha:<br />
1. The brake control’s LED should glow green<br />
if it has a bi-colored LED. The display<br />
should show a “.c” if it has a digital readout.<br />
If you have the P3 brake control, you will<br />
see the Tekonsha logo. These conditions<br />
indicate a normal load connection.<br />
2. Now set the brake control’s power setting<br />
to maximum and actuate the control’s<br />
manual override lever. The output voltage<br />
on the Bench Tester’s voltmeter should read<br />
about 12 volts and the brake control LED<br />
display should glow bright red or show<br />
either 12 or 13. Release the manual lever.<br />
Lay the control on a flat surface and follow<br />
the directions for leveling the sensor per<br />
manufacturer’s instructions.<br />
3. Depress and hold the Bench Tester’s<br />
brake switch.<br />
A. If you are testing a proportional control,<br />
tilt the brake control by moving the front<br />
of the control up to about 30-45 degrees<br />
to fully activate the accelerometer.<br />
The voltage on the tester’s meter<br />
should again read approximately 12V.<br />
B. If the control being tested is a<br />
time-actuated device, you will see<br />
the voltage progressively “ramp-up”<br />
to the control’s maximum output.<br />
NOTE:<br />
If the brake control works normally<br />
on the Bench Tester then the<br />
problem is likely in the vehicle<br />
wiring or the control setup. If you<br />
check the vehicle/trailer wiring and<br />
it appears to be normal you can<br />
refer to our product catalog or visit<br />
our web site (www.tekonsha.com)<br />
for control setup and / or additional<br />
troubleshooting assistance.<br />
CAUTION Tekonsha controls are<br />
built to withstand many electrical fault<br />
conditions without damage to their ultimate<br />
performance. Please be aware that some<br />
competitive products may not be capable<br />
of surviving the same punishment so<br />
care should be exercised when testing<br />
these units.<br />
SB0030 REV 6.0<br />
TECHNICAL<br />
The Current Monitor is a testing device<br />
designed to assist in determining whether<br />
a tow vehicle’s trailer connector has been<br />
wired properly. This unit is also an excellent<br />
diagnostic tool for the installation, setup and<br />
troubleshooting of electric trailer brake controls<br />
and may be used to level and pre-set a<br />
brake control when a trailer is not available.<br />
To Use Current Monitor:<br />
1. Simply plug the tester into the vehicle’s<br />
trailer connector.<br />
2. Sitting in the driver’s seat, position the<br />
switch (located between the amp meter<br />
& voltmeter gauges) to the “Trailer<br />
Brakes” position.<br />
3. Then position the switch labeled<br />
“Number of Axles” to the appropriate<br />
position for the trailer that is expected to<br />
be towed.<br />
4. Now, activate each function indicated by<br />
the four LED lights across the front of<br />
the test unit. Once it has been determined<br />
that all lighting connections are working<br />
properly, test the output of the vehicle’s<br />
trailer brake control.<br />
NOTE:<br />
Be sure the brake control has been properly<br />
leveled per manufacturer’s instructions.<br />
Instructions for the Current Monitor<br />
5. Depress the vehicle’s brake pedal<br />
and/or engage the brake control’s<br />
manual override.<br />
Brake Voltage must register at least<br />
10 Volts. Brake Control Current<br />
Output should register at least:<br />
12 Amps for two (2) axle trailers, or<br />
18 Amps for three (3) axle trailers.<br />
NOTE:<br />
If the brake control will not generate 18<br />
or more amps when used with three or<br />
more axle trailers BE SURE that you<br />
are using a brake control designed to<br />
deliver this performance.<br />
If you discover a performance or<br />
wiring problem, look for one or more<br />
of the following fault conditions:<br />
1. Improper wiring of the brake control<br />
to the vehicle’s power and/or battery<br />
ground. (As with any electronic<br />
device, <strong>Cequent</strong> Electrical Products<br />
recommends grounding all brake<br />
controls directly to the vehicle battery<br />
to ensure the proper performance of<br />
the control’s advanced circuitry.)<br />
2. Defective or improper wiring<br />
of the trailer connector.<br />
3. Broken, dirty or corroded trailer<br />
connector pins.<br />
4. Open brake magnets, or open,<br />
broken or shorted wiring.<br />
5. Defective brake control.<br />
WARNING This unit contains<br />
magnets, which may become hot<br />
if the unit is left connected to an<br />
energized brake control for more<br />
than a few minutes.<br />
SB0029 REV 5.0<br />
TECHNICAL INFORMATION IS CURRENT AS OF<br />
THE PRINTING OF THIS CATALOG. CONTACT<br />
TECHNICAL SERVICE FOR PERIODIC UPDATES.<br />
P-21<br />
www.cequentgroup.com ©2015 <strong>Cequent</strong> Performance Products, Inc. P/N 98931-<strong>2016</strong> Rev. A. 11/15 for <strong>2016</strong>


