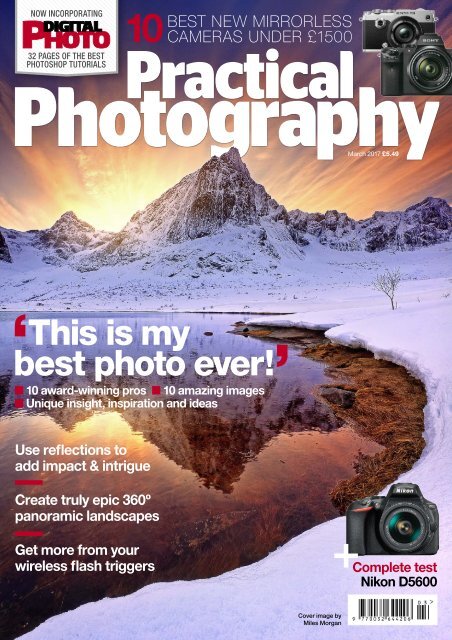
Practical Photography

You also want an ePaper? Increase the reach of your titles
YUMPU automatically turns print PDFs into web optimized ePapers that Google loves.
NOW INCORPORATING<br />
32 PAGES OF THE BEST<br />
PHOTOSHOP TUTORIALS<br />
10<br />
BEST NEW MIRRORLESS<br />
CAMERAS UNDER £1500<br />
March 2017 £5.49<br />
This is my<br />
best photo ever!<br />
n 10 award-winning pros n 10 amazing images<br />
n Unique insight, inspiration and ideas<br />
Use reflections to<br />
add impact & intrigue<br />
Create truly epic 360º<br />
panoramic landscapes<br />
Get more from your<br />
wireless flash triggers<br />
Complete test<br />
Nikon D5600<br />
Cover image by<br />
Miles Morgan
March<br />
136<br />
On the cover<br />
136 10 best mirrorless cameras<br />
034 ‘This is my best photo ever!’<br />
058 Use reflections to add impact<br />
082 Create epic 360º panoramics<br />
109 Get more from flash triggers<br />
130 Complete test – Nikon D5600<br />
Skills&ideas<br />
08<br />
Info&insight<br />
106<br />
Beyond the lens<br />
Jaw-dropping images from<br />
the cutting edge of photography.<br />
20<br />
10 clicks<br />
Whatever you’re into, we’ve<br />
got the perfect creative project.<br />
34<br />
‘My best photo ever!’<br />
10 top pros reveal the secrets<br />
behind their own favourite pictures.<br />
52<br />
A feast for the eyes<br />
Carl Warner invites us into<br />
his magical world of foodscapes.<br />
58<br />
Use reflections<br />
Discover three artistic ways<br />
to take your landscapes further.<br />
100<br />
Unintended perfection<br />
Morgan Phillips shares one of<br />
his epic environmental portraits.<br />
120<br />
Digital fairytales<br />
Linda Blacker turns YouTube<br />
celebrities into fairytale stars.<br />
162<br />
Student showcase<br />
Dovydas Arlauskas changes<br />
the way we perceive colour.<br />
Know your stuff<br />
Long exposures, wireless<br />
triggers and studio flash on a budget.<br />
112 Feedback<br />
Pro Dan Mold critiques your<br />
portraits, landscapes and wildlife images.<br />
38<br />
58<br />
Regulars<br />
06<br />
On the CD<br />
Camera & editing videos,<br />
creative borders and much more.<br />
30<br />
Ross Hoddinott<br />
Our intrepid columnist<br />
recalls the adventure of a lifetime.<br />
32<br />
Lisa-Marie McGinn<br />
Find out why bathtubs and<br />
glitter make a great fashion combo.<br />
127<br />
Next month<br />
British wildlife & weddings<br />
take centre stage in the April issue.<br />
4 PRACTICAL PHOTOGRAPHY
148<br />
Photoshop<br />
Genius<br />
68<br />
Add creative borders<br />
Use your free templates to give<br />
your images the perfect finishing touch.<br />
72<br />
Create colour effects<br />
From retro to high-contrast, discover<br />
three ways to make new styles in Elements.<br />
76<br />
Sharpen your images<br />
Apply the right amount of sharpening<br />
to the right areas in Elements.<br />
80<br />
Get creative with cropping<br />
The Crop Tool is simple to use and<br />
has the power to reframe your work.<br />
82<br />
Shoot 360º panoramics<br />
Capture and create the widest view<br />
possible for truly immersive images.<br />
88<br />
Make a multiple exposure<br />
Blend a portrait and landscape<br />
to create a dreamy composite.<br />
92<br />
Create fun shapes<br />
Use Photoshop’s Custom Shapes<br />
Tool to create composites in minutes.<br />
96<br />
Add meaning with text<br />
Use Layers and Masks to give<br />
your portraits a more meaningful spin.<br />
NEW!<br />
32-PAGE<br />
EDITING<br />
GUIDE<br />
Subscribe<br />
Save money<br />
with the latest<br />
reader offers<br />
See p50<br />
92 Use Photoshop’s Custom Shapes<br />
Tool to create composites in minutes<br />
111 Create a powerful home studio<br />
on a modest budget of just £250<br />
25<br />
GetIntoGear<br />
18<br />
The knowledge<br />
The five photo products and events<br />
you need to know about this month.<br />
130<br />
Nikon D5600<br />
The latest DX-format entry-level DSLR<br />
on the block gets a thorough road test.<br />
134<br />
Panasonic GH5<br />
Boasting 6K video and a new 20.3MP<br />
sensor, this is a seriously evolved CSC.<br />
136<br />
Best mirrorless cameras<br />
Discover the ten best pro compact<br />
system cameras under £1500.<br />
146<br />
Stylish camera bags<br />
Accessorise with five messengerstyle<br />
bags that don’t scream ‘photographer!’<br />
148<br />
Mini tests<br />
Nikon’s 360º action cam, HDR<br />
software and a lightweight tripod.<br />
52 Tuck into artist Carl Warner’s<br />
incredible foodscapes<br />
130 Full review<br />
of Nikon’s D5600
8 PRACTICAL PHOTOGRAPHY<br />
The stories behind the world’s greatest shots
Tree of life<br />
by Ahmed Altoqi<br />
l I took this shot in Al Jabal Al Akhbar in<br />
Oman. This tree, the Juniperus excelsa,<br />
is a dominant species in the Oman<br />
highlands and it can live for up to 750<br />
years. In order to create this shot I had<br />
to take two images, as the tree was right<br />
next to some road lights, which affected<br />
the lighting and meant that I wasn’t able<br />
to photograph the sky at that location. I<br />
took the panoramic photos of the Milky<br />
Way at a different location and then<br />
combined them later in Photoshop.<br />
Canon 1D X | 20mm | 30sec | f/6.3 | ISO 3600<br />
Ahmed Altoqi is a<br />
professional commercial,<br />
landscape and portrait<br />
photographer who has been<br />
working in the industry for<br />
over seven years.<br />
ahmedaltoqi.com<br />
PRACTICALPHOTOGRAPHY.COM 9
10Clicks<br />
MONO<br />
#2 Make a moody fine art portrait<br />
l A British winter is typically<br />
composed of cloudy days<br />
and a generous amount<br />
of drizzle. This can put a<br />
dampener on your creativity,<br />
but why not turn it to your<br />
advantage like Maren Klemp<br />
(500px.com/maren_elize)?<br />
“I have a strict rule when<br />
it comes to my photography,<br />
and that’s to never pick up my<br />
camera unless I have a clear<br />
idea of how I want the image<br />
to look. When I’m planning a<br />
picture I always draw sketches<br />
and make notes regarding<br />
the location, wardrobe and<br />
camera settings. This process<br />
can take weeks, but I find it<br />
much easier to achieve a good<br />
result by working this way.<br />
“I knew that I wanted this<br />
self-portrait to have a dreamy<br />
and ethereal look. The subject<br />
in the image is running alone<br />
through a dark and isolated<br />
landscape, while the umbrella<br />
symbolises protection. In<br />
order to make the image<br />
more dramatic, I created a<br />
lot of movement with my hair,<br />
which was actually the most<br />
challenging part of the shoot.<br />
“The day I shot this photo<br />
the weather was absolutely<br />
terrible. It was raining and<br />
there was a thick layer of fog<br />
shrouding the surrounding<br />
hills. While it might not<br />
have been particularly nice<br />
weather, it made the perfect<br />
backdrop for the image.”<br />
To convert a colour shot<br />
into black & white, all you<br />
need to do is put it into<br />
Photoshop and open up<br />
the Layers panel. Click on<br />
Create new fill or adjustment<br />
layer and then select Black<br />
& White... Then simply use<br />
the sliders to create the<br />
perfect amount of contrast.<br />
22 PRACTICAL PHOTOGRAPHY
TIP<br />
USE AN<br />
INTERVAL TIMER<br />
The nature of self-portraiture<br />
is that no one is behind the<br />
camera. Use an interval<br />
timer or remote shutter<br />
release to take your<br />
photo.<br />
Above A high amount of contrast will<br />
give your shot a moody feeling.<br />
SEASCAPE<br />
#3 Freeze unique waves<br />
l Is there anything so mysterious<br />
and enigmatic as the sea? Even<br />
at its calmest, it’s clear that the<br />
ocean is not something to be<br />
underestimated. This makes it a great<br />
photographic subject, as William<br />
Patino (williampatino.com) found out.<br />
“This image was captured off-shore<br />
at dawn on a morning that was<br />
unfortunately quite calm with minimal<br />
swell. Occasionally a set would roll<br />
through, providing fleeting moments<br />
in time to capture the numerous<br />
forms of the morphing waves. This<br />
break is very close to shore, which<br />
made it dangerous to shoot.<br />
“I used a telephoto lens to capture<br />
the finer details and compress the scene.<br />
I love the fact that no two waves are<br />
the same, and that every day presents<br />
new and unforeseen opportunities.<br />
You can’t really plan an exact shot like<br />
this, only track and monitor the swell<br />
and anticipate the brief moments that<br />
arise. I remember seeing the light rays<br />
on the horizon and specifically set my<br />
composition up with those in mind.<br />
“With waves it’s all about capturing<br />
a unique form, so when this one arched<br />
over I knew it was going to be a keeper.<br />
You’re really at the mercy of the elements<br />
in these moments, which is partly what<br />
makes it so enjoyable. I’ve lived on the<br />
coast my whole life, but it wasn’t until<br />
I picked up a camera that I began to<br />
truly appreciate the ocean’s beauty.”<br />
PRACTICALPHOTOGRAPHY.COM 23
It’s My Best Photo Ever!<br />
38 PRACTICAL PHOTOGRAPHY
PHILIP LEE HARVEY<br />
TRAVEL A young monk boy in traditional dress, Ladakh, India<br />
What’s the story behind this image?<br />
I took it back in 1998 in the Indian<br />
Himalayas. It was a self-funded trip to<br />
shoot the Festival of the Sun in a town<br />
called Ladakh. There’s a monastery<br />
there called Lamayury, and I found this<br />
young monk, who was in traditional<br />
dress. I grabbed my camera and managed<br />
to get three frames of him, and then<br />
he left, and I didn’t see him after that.<br />
I’ve no idea what his name was or how<br />
old he was, and he’s probably never<br />
seen this shot, which is a shame. This<br />
was one of those fortunate moments<br />
where I happened to be in the right<br />
place at the right time. Two minutes<br />
later, and I would have missed it. Back<br />
then, most photographers would have<br />
used a Polaroid first and taken meter<br />
readings. I didn’t do either, so I had to<br />
guess at the exposure. I was always<br />
pretty good at getting it to within a stop.<br />
Was there a language barrier?<br />
We didn’t say a word to each other.<br />
I assume he didn’t know any English and<br />
I certainly don’t speak Ladakhi (similar<br />
to Tibetan), so I had to rely on visual<br />
communication. He knew I was taking<br />
an image of him, and didn’t seem to<br />
mind, but it was such a fleeting moment<br />
“THIS IMAGE<br />
HELPED ME<br />
REALISE WHAT I<br />
COULD ACHIEVE”<br />
there was no time to interact. I didn’t<br />
even pose him – he just happened to be<br />
standing in the perfect position under<br />
a veranda outside a temple, which gave<br />
me that lovely sidelighting on the face.<br />
The fact that I didn’t set the shot up is<br />
what makes the expression so natural.<br />
What do you think makes this<br />
image so visually appealing?<br />
This shot works on so many levels. It’s<br />
perhaps most striking because of the<br />
minimalism of its colour – this is a classic<br />
less-is-more image where the frame<br />
isn’t overcomplicated. I’ve always been<br />
big on colour theory, and I’ve always<br />
tried to give my shots a painterly look.<br />
It probably comes from my Dad, who<br />
was an artist. As well as the colour, it’s<br />
really important that the viewer has<br />
direct eye contact with the subject,<br />
which almost always makes for a really<br />
striking portrait. Compositionally, I<br />
love the way the lines on the hat and<br />
in the fabric help to draw the viewer<br />
towards the face, and the rule-of-thirds<br />
is at work there too which gives the shot<br />
balance. This image is timeless, and it<br />
really makes you ask questions about<br />
the subject. Who is this person? Where’s<br />
he from? What’s his story? Travel<br />
photography can work out like that<br />
sometimes, and that’s the reason I love it.<br />
How was this shot edited?<br />
I took this image on a medium-format<br />
film camera, so of course it wasn’t<br />
digitally edited. Even though I could<br />
now take it into Photoshop and tweak it,<br />
I love it exactly as it is. Sometimes, it’s<br />
the imperfections that can give a shot its<br />
character. To be honest, I don’t do much<br />
editing even these days. This image is<br />
actually cross-processed. For the film<br />
geeks out there, I used Fuji 64T tungsten<br />
transparency film, then processed it as<br />
C41 to produce a negative. I then printed<br />
it onto a flat transparency film that wasn’t<br />
even designed for photography. I shoot<br />
everything digitally now, but I’m so glad<br />
I learned the ropes on film cameras –<br />
it gave me an amazing understanding<br />
of how images work that you don’t<br />
always get when shooting digital.<br />
On a personal level, why is<br />
it so special to you?<br />
Not only was this the best shot I took on<br />
my trip, but it was a turning point in my<br />
career. It was the first image I took that<br />
helped me realise what I could achieve.<br />
It actually changed the way I approached<br />
travel photography in general – I stopped<br />
relying on going to dramatic places to<br />
get dramatic shots, and realised I could<br />
get them anywhere. It was great for my<br />
career too, as it won lots of awards.<br />
THE GEAR<br />
I USED...<br />
HASSELBLAD<br />
503CW<br />
35mm film wasn’t<br />
good enough and<br />
if you’re investing<br />
that kind of<br />
money in a trip,<br />
you want the best<br />
results possible. I<br />
wanted to bring a<br />
higher production<br />
value to travel<br />
photography.<br />
At the time the<br />
Hasselblad was<br />
the best quality<br />
‘portable’ camera<br />
on the market.<br />
120MM F/4 LENS<br />
On mediumformat,<br />
a 120mm<br />
focal length is<br />
the 35mm film<br />
equivalent of<br />
an 80mm focal<br />
length, making<br />
it ideal for<br />
portraits. It<br />
also allows<br />
a shallower<br />
effective<br />
depth-of-field<br />
than an f/4 lens<br />
used on a<br />
standard 35mm<br />
camera, so<br />
photographers<br />
can achieve<br />
a blurry<br />
background.<br />
Philip Lee Harvey is a multi-award winning travel<br />
photographer. His journey has taken him to 120<br />
countries, including some of the world’s most<br />
inhospitable locations. Prints of his images are<br />
available on his website. philipleeharvey.com<br />
PRACTICALPHOTOGRAPHY.COM 39
PROJECT 2<br />
Mirror dramatic scenes<br />
to capture attention<br />
STILL BODIES OF WATER ARE<br />
nature’s mirror, able to reflect incredible<br />
sights and create mesmerising<br />
kaleidoscopic scenes that will enthral<br />
your viewer. Lakes, ponds and<br />
rivers often play the starring role in landscape<br />
photography, but there’s a difference between<br />
capturing the dynamic beauty of water and shooting<br />
a perfect reflection. To get the latter technique<br />
just right, you’ll need a fortuitous combination<br />
of certain conditions all at the same time.<br />
Shoot at dawn or dusk<br />
The rising and setting of the sun tends to produce<br />
the stillest waters of the day. This is because waves<br />
are caused by wind blowing over the water. During<br />
the daytime the sunlight warms up the land at<br />
an inconsistent rate to the lake. This difference<br />
in temperature causes wind. When the land and<br />
water are away from the sun they become the same<br />
temperature and the wind dies down. Shooting<br />
during the stillest parts of the day will not only<br />
give you a beautiful reflection, it also means that<br />
you’ll get to shoot an amazing sunrise or sunset.<br />
Use an app like PhotoPills to predict the<br />
movements of the sun and aim to get to your location<br />
half an hour before the sun moves above or below<br />
the horizon, as this will give you plenty of time to<br />
get set up. Ensure that you’re also checking the<br />
weather forecast. The maximum wind speed you can<br />
get away with will really only be a couple of miles<br />
an hour. If you can feel anything more than a light<br />
breeze in the air, then it’s not going to be your day!<br />
Break the rule-of-thirds<br />
Reflections work best when you lean into their<br />
symmetrical nature. The standard rule-of-thirds is<br />
typically a great device for landscape photography,<br />
but why not try a horizon that sits across the<br />
middle of the photo for even better reflections.<br />
Above While this<br />
shot uses a<br />
symmetrical<br />
middle horizon,<br />
it also employs<br />
the rule-of-thirds<br />
by placing the<br />
mountain on the<br />
left of the image.<br />
STILL BODIES OF WATER ARE<br />
ABLE TO CREATE MESMERISING<br />
KALEIDOSCOPIC SCENES...<br />
62 PRACTICAL PHOTOGRAPHY
Creative Reflections<br />
NO FILTER<br />
WITH ND FILTER<br />
LOUISE CAREY<br />
Pro advice Improve your<br />
reflections with an ND filter<br />
TIP<br />
STAND IN<br />
THE WATER<br />
To get rid of any foreground,<br />
simply step into the water and<br />
wait a few minutes for the<br />
ripples to disappear<br />
before taking your<br />
shot.<br />
ACHIM THOMAE<br />
No matter how ardently<br />
the weather report<br />
promises something, we<br />
all know how contrary<br />
natural forces can be.<br />
It can be incredibly<br />
frustrating to arrive at an<br />
amazing location that’s<br />
soaking up the last<br />
embers of sunset, but<br />
rather than the still glass<br />
you were expecting<br />
you’re greeted with<br />
choppy waters. While<br />
an ND filter isn’t strong<br />
enough to protect against<br />
gale-force winds, it can<br />
smooth out those finer<br />
details and provide a<br />
milky surface for some<br />
brilliantly colourful<br />
reflections. Use a 10-stop<br />
ND filter, also called a<br />
Big Stopper, and mount<br />
it in onto your lens. The<br />
dark glass will cut out<br />
the amount of light<br />
hitting your sensor,<br />
which will mean that<br />
you can increase your<br />
shutter speed and<br />
smooth the water. If you<br />
want to intensify your<br />
reflection even more,<br />
ensure that you keep<br />
your tripod low to the<br />
ground. The lower the<br />
angle that your camera<br />
‘sees’ the surface of the<br />
water, the higher the<br />
percentage of reflected<br />
light. In other words, at a<br />
low angle, your chances<br />
of seeing the bottom of<br />
the lake<br />
are much<br />
slimmer than<br />
if you view it<br />
directly from above.<br />
Don’t forget that it’s<br />
absolutely essential that<br />
the scene above the<br />
water is visually dynamic<br />
for an interesting<br />
reflection to be possible.<br />
If the best your<br />
landscape has is some<br />
sparse shrubbery and an<br />
unattractive tree that’s<br />
seen better days, a<br />
reflection isn’t going to<br />
improve your shot.<br />
Bigger is truly better with<br />
this technique, so search<br />
for quirky structures or<br />
imposing mountains.<br />
Choose the correct settings for perfect reflections<br />
1<br />
Perfect your horizon<br />
Place your camera on a tripod.<br />
Some cameras have an electronic<br />
horizon option, which will tell you when<br />
you’ve got the landscape straight. If you<br />
don’t have this, use a hotshoe spirit level.<br />
2<br />
Set your focal length<br />
The majority of landscape<br />
photography requires a wide focal<br />
length like 20mm. Shoot in aperturepriority,<br />
then set your ISO to 100 and<br />
your aperture to f/16 for the best results.<br />
3<br />
Trigger your camera<br />
Even when your camera is on a<br />
tripod, you can still cause unwanted<br />
blur by manually pressing the shutter.<br />
Instead, use a remote trigger or shutter<br />
release cable to take your shot.<br />
PRACTICALPHOTOGRAPHY.COM 63
PHOTOSHOPGENIUS...<br />
M<br />
OST DIGITAL IMAGES BENEFIT<br />
from sharpening, even those shot on<br />
the latest, high-resolution DSLRs. But<br />
while sharpening adds definition, it can’t return<br />
badly focused images to full clarity – sharpening<br />
adjustments are more about adding local contrast<br />
to firm up the details.<br />
Different amounts of sharpening are<br />
required for different images, and for different<br />
areas in the same image, so always sharpen<br />
on a Layer that’s a copy of the original. That<br />
way you can delete the effect where you don’t<br />
want it using the Eraser Tool (E) or a Layer<br />
Mask. Levels of sharpening also vary for<br />
prints and screen viewing – an image that<br />
looks over-sharp on screen may be fine or even<br />
not sharp enough, depending on the paper<br />
you’re using, so experimentation is key.<br />
When you’re starting out with Photoshop<br />
Elements you might use the most simple and<br />
automatic tools like the Enhance>Auto Sharpen<br />
option, or the Sharpen Tool (R), which works<br />
like a brush, sharpening whatever it touches. But<br />
both lack control, so here are three better ways...<br />
Sharpen with Unsharp Mask<br />
Go to Layer>Duplicate<br />
Layer... call it ‘Sharpen’ and<br />
hit OK. In the Layers palette<br />
you’ll now have a Layer<br />
ready to work on, so go to<br />
Enhance>Unsharp Mask. In<br />
the palette are three sliders,<br />
plus a preview window. Click<br />
in the window and you can<br />
toggle a before and after view.<br />
Start with Threshold,<br />
which governs the pixels to<br />
be sharpened. Low settings<br />
sharpen more pixels, so can<br />
make pics look noisy (2 to<br />
25 is better). Radius sets<br />
the width of the sharpening<br />
effect in pixels, so again is<br />
better at low settings like 2 or<br />
4. Amount sets the strength<br />
of the effect with 50-150%<br />
a good setting for most.<br />
If you see strong fringes<br />
around the details in the<br />
image you’ve gone too far.<br />
Above The settings in the<br />
Unsharp Mask panel can be<br />
tweaked to suit an image.<br />
Right Apply sharpening<br />
effects to a new Layer for<br />
a fully adjustable finish.<br />
TOO HIGH TOO LOW JUST RIGHT<br />
Above Set the strength of the<br />
sharpening, size of the affected<br />
edges and brightness changes.<br />
Above Different images require different amounts of sharpening, sympathetic to the details in the image.<br />
78 PRACTICAL PHOTOGRAPHY
ELEMENTS STEP-BY-STEP<br />
Sharpen using Adjust Sharpness<br />
Enhance>Adjust Sharpness<br />
works like an advanced<br />
Unsharp Mask. The sliders<br />
give more control, with<br />
Amount and Radius working<br />
the same as the former option.<br />
The Remove option lets you<br />
sharpen in different styles.<br />
Gaussian Blur is the same<br />
as used in Unsharp Mask,<br />
but Lens Blur offers a finer<br />
effect allowing greater<br />
detail and less fringing.<br />
Motion Blur is for images<br />
that have been marred by<br />
camera movement, and won’t<br />
do much to regular shots.<br />
With this option you also set<br />
the angle to a similar direction<br />
as the blur. At the top of the<br />
palette you can save settings<br />
you like, so if you have one<br />
recipe for print and another<br />
for screen, record them there.<br />
GAUSSIAN BLUR MOTION BLUR LENS BLUR<br />
Above Use the sliders to set<br />
the amount of sharpening,<br />
and define the number of<br />
pixels it affects.<br />
Left The subject of an image<br />
will dictate which type of blur<br />
to use to get the best results,<br />
depending on the way the<br />
original image was shot.<br />
Targeting sharpness<br />
Different parts of a photo<br />
often need varying amounts<br />
of sharpening, but thanks to<br />
adding the effect with Layers<br />
(as above), you can put it right<br />
where it’s required. Here,<br />
I used the Enhance>Adjust<br />
Sharpness option to add two<br />
different strengths of<br />
sharpening (using Remove:<br />
Lens Blur) – one for the<br />
Foreground (300%) and one<br />
for the Background (500%).<br />
You can see how the two have<br />
been labelled in the palette,<br />
so it’s clear which is which.<br />
Next, I clicked on the<br />
Background Layer, then went<br />
to Layer>Layer Mask>Hide<br />
All. With a Hide All (black)<br />
mask added, the Background<br />
Layer’s sharpening is hidden,<br />
but you can bring it back just<br />
where it’s needed, by<br />
painting White into the Mask<br />
using the Brush Tool (B). I did<br />
the same for the Foreground<br />
Layer, painting white over the<br />
closest ships to add the<br />
sharpening there, but not to<br />
the sky in either case. Finally,<br />
if your sharpening is causing<br />
coloured fringes, click<br />
Normal in the palette and<br />
change its Blending Mode<br />
to Luminosity.<br />
PRACTICALPHOTOGRAPHY.COM 79
Know Your Stuff<br />
IMAGE BROKER<br />
I’ve recently bought<br />
a 70-300mm lens to<br />
shoot wildlife, but<br />
why are some of my pics<br />
more blurry than those taken<br />
with my kit lens?<br />
Graham Bell, Canterbury<br />
Dan says: Telephoto lenses<br />
have the ability to magnify<br />
a scene and make faraway<br />
subjects, such as birds, appear<br />
much larger. Any lens with<br />
a focal length above 50mm<br />
on a full-frame camera is<br />
classed as telephoto, as<br />
these have a narrower, more<br />
‘zoomed-in’ angle-of-view<br />
than the human eye.<br />
The longer your focal<br />
length, the easier it is for<br />
camera shake to appear, as<br />
any tiny vibrations from<br />
handholding your camera<br />
become more apparent. But<br />
there’s an easy rule you can<br />
follow to stop this distracting<br />
blur from appearing.<br />
Left Take control of your<br />
shutter speed to stop camera<br />
shake when using a lens with<br />
a large focal length.<br />
Why are my telephoto pics blurry?<br />
The trick is to make<br />
sure your shutter speed is<br />
equal to, or higher than the<br />
‘reciprocal’ of your focal<br />
length. This means with a<br />
200mm lens you’ll need to<br />
shoot at 1/200sec or faster to<br />
get a sharp shot. Remember<br />
that on APS-C bodies, such<br />
as Nikon’s D3400, there’s a<br />
crop factor to think about, so<br />
be sure to use the reciprocal<br />
of the full-frame equivalent<br />
shutter speed by multiplying<br />
Above A slow shutter speed will<br />
record small vibrations from<br />
handholding, resulting in blurry<br />
camera shake.<br />
the lens’ focal length by<br />
1.5x first. For example, a<br />
200mm lens on a D3400<br />
effectively becomes 300mm,<br />
so you’ll need a shutter<br />
speed of at least 1/300sec.<br />
The rule gives the minimum<br />
shutter speed for a sharp<br />
shot, but shoot faster if you<br />
can. The technique only stops<br />
camera shake and not subject<br />
blur – for this your minimum<br />
shutter speed depends on the<br />
speed your subject is moving.<br />
Three ways to eliminate camera shake<br />
Watch your shutter speed<br />
To make sure your shutter speed is<br />
equal to, or greater than, the reciprocal<br />
of your focal length, use aperturepriority<br />
mode. Open up the aperture to<br />
let more light in. This may be f/4-5.6 on<br />
a 70-300mm, or f/2.8-4 on a 70-200mm.<br />
If the speed is still too slow, up the ISO.<br />
Frame up on a tripod<br />
Attaching your camera to the top-plate<br />
of a tripod is the best way to ensure a<br />
sharp shot. It eliminates camera shake,<br />
caused by your hands moving when<br />
shooting handheld. Be sure to engage<br />
the 2sec self-timer so you don’t jog the<br />
camera as you press the shutter button.<br />
Use image stabilisation<br />
If your camera has IS it’s worth switching<br />
it on when shooting handheld. It may be<br />
built into your camera body or lens, which<br />
can help get sharp shots when shooting<br />
at slower shutter speeds. But disable this<br />
feature when shooting on a locked-off<br />
tripod as, here, it can introduce blur.<br />
108 PRACTICAL PHOTOGRAPHY
What do the buttons on<br />
my triggers do?<br />
I’m really getting into off-camera flash<br />
and have purchased a set of radio<br />
triggers. But I don’t know what all of<br />
the buttons do. Can you help?<br />
Jeremy Hill, London<br />
Tim says: Wireless flash triggers are an<br />
essential tool for all budding strobists. They<br />
allow you to fire a flashgun wirelessly away<br />
from the camera body so that the light<br />
isn’t striking the subject directly from the<br />
front. This allows for more creative and<br />
flattering light. Using larger trigger sets,<br />
you also can fire several flashguns at once<br />
from one transmitter, allowing for more<br />
advanced lighting patterns. Although<br />
some triggers are very basic, most offer a<br />
range of different functions. We explain<br />
the most commonly found features here,<br />
so you can unlock their full potential...<br />
Flash sync port<br />
Studio heads don’t have a<br />
hotshoe, but connect to the<br />
trigger via the Strobe Sync<br />
port. Most have a cable to do<br />
this, though, if not, you may<br />
need a 6.3mm jack adapter.<br />
Signal range<br />
Some cheaper triggers use<br />
an infrared signal, so only<br />
have a range of a few metres.<br />
Radio triggers are better as<br />
they work at 100m+, and<br />
don’t require line of sight.<br />
Indicator light<br />
R&T modes<br />
Triggers are Transmitters<br />
(T), which sit on the camera<br />
hotshoe, or Receivers (R),<br />
which connect to the<br />
flashgun. Transceivers<br />
both transmit and receive.<br />
A green light shows when your triggers<br />
are working and a red light tells you the<br />
trigger can’t connect to a flash to fire it.<br />
This will help you work out if there’s a<br />
fault, or a loose connection between<br />
trigger and flash.<br />
Test button<br />
Hit this button to check if<br />
all of your flashes are<br />
firing as you would expect<br />
them to. This is built into<br />
all good transmitters/<br />
transceivers, so you can<br />
check this from your<br />
camera rather than going<br />
over to each flash to<br />
check they’re operating.<br />
Should I use my<br />
LCD at night?<br />
I love shooting night sky<br />
images, but every time I<br />
compose with the bright<br />
screen it’s hard to see in the dark<br />
again afterwards. Is there a way<br />
around this?<br />
Terry Hughes, Fakenham<br />
Louise says: The rear display has<br />
to be one of the most useful<br />
features on your camera – you can<br />
use it to compose shots, check<br />
settings and instantly play back<br />
your images. But a bright screen is<br />
a problem for astro-photographers<br />
because it affects night vision. In<br />
fact, once the human eye is<br />
adjusted to bright light conditions,<br />
it can take up to 30 minutes for<br />
optimal night vision to return.<br />
Your best bet is to go into the<br />
menu and adjust your LCD’s<br />
brightness down to its minimum<br />
setting. To do this on a Nikon<br />
DSLR, press Menu, go to the<br />
Setup tab, find Monitor brightness<br />
and set it to -5. On a Canon, go to<br />
the Settings Menu, choose LCD<br />
brightness, then turn it down to<br />
the lowest setting.<br />
You can also help to preserve<br />
night vision by using a torch with<br />
red light instead of white. In fact,<br />
one of the features of Nikon’s astro-<br />
DSLR, the D810a, is that it displays<br />
some LCD information in red. You<br />
can buy an astro torch online for a<br />
few pounds, or some headtorches<br />
have a red light option built in.<br />
NORTHERN NIGHTS PHOTOGRAPHY<br />
Shutter/PC insert port<br />
This port is where you would tether a flash<br />
and trigger to your camera via a cable for<br />
local flash triggering. This is handy for<br />
holding your flashgun next to the camera<br />
with one hand, for a slightly off-camera<br />
angle, but is limited by the PC cable length.<br />
Channels & Groups<br />
Channels stop you firing the flashes of<br />
nearby photographers using identical<br />
triggers. If this happens, you simply select a<br />
different channel. Some models allow you to<br />
group your flashguns together so you can<br />
adjust settings for several at once.<br />
Above The brightness of most<br />
camera screens can be adjusted.<br />
PRACTICALPHOTOGRAPHY.COM 109
Feedback<br />
Shooting at<br />
eye-level has<br />
made the pic<br />
intimate and<br />
engaging<br />
Portrait of a leopard<br />
by Athula Dissanayake<br />
During an early morning<br />
game drive in the Yala<br />
National Park, Sri Lanka,<br />
I spotted this big male<br />
leopard by the road. I<br />
anticipated some action,<br />
so I set up my Canon 70D and 500mm<br />
lens, and then waited. It eventually got<br />
up to stalk a buffalo calf, providing a<br />
frame-filling shot with an intense<br />
stare. I steadied the lens on a beanbag<br />
to reduce camera shake. In Photoshop<br />
I boosted the brightness, contrast and<br />
sharpening.<br />
500px.com/athuladis<br />
Dan says: It’s not every day that readers<br />
send in a picture of a leopard. Athula’s<br />
big cat has a piercing gaze, which is<br />
sure to turn heads. He focused on the<br />
eyes to make sure these were the focal<br />
point and they’re incredibly sharp.<br />
This is partly thanks to Athula’s first-rate<br />
camera gear, but also because he used<br />
a fast shutter speed and a beanbag to<br />
reduce camera shake. Getting down low<br />
to the leopard’s eye-level adds intimacy.<br />
Shooting from ground-level is the easiest<br />
way to make your wildlife pictures more<br />
engaging. It may mean getting muddy<br />
clothes, but it doesn’t cost a penny.<br />
There’s some fantastic bokeh<br />
(background blur) in this image,<br />
which is full of autumnal shades of<br />
Turn down the noise<br />
Canon 70D | 500mm | f/4.5 | 1/640sec | ISO 800<br />
brown and yellow. This complements<br />
the leopard’s coat to a tee.<br />
Although this picture is amazingly<br />
sharp, there’s a fair bit of digital noise.<br />
This may be because sharpening has been<br />
applied across the whole image, so the<br />
background noise has been sharpened<br />
too. In RAW editing software you can add<br />
a Sharpening Mask and Noise Reduction<br />
to make this less apparent (see panel).<br />
The leopard’s nearest eye falls in<br />
the middle of the shot, where the more<br />
reliable central active AF point was<br />
positioned. This has ensured the eye is<br />
in focus, though some additional ‘active’<br />
space in front of the leopard would make<br />
for a stronger composition, giving the<br />
impression it has room to move in to.<br />
Digital noise is more obvious in pictures taken<br />
with a high ISO value. Reduce this in Lightroom<br />
by going to the Develop module and finding the<br />
Detail tab. Under Noise Reduction set the<br />
Luminance slider to 30 to remove noise across<br />
the whole pic. Set the Sharpening Amount to 50<br />
to bring back detail. Hold the Alt key down and<br />
adjust the Masking Slider. Tweak the slider until<br />
areas to sharpen are shown in white – this stops<br />
you from sharpening the background noise.<br />
114 PRACTICAL PHOTOGRAPHY
This image<br />
has all of the<br />
elements<br />
needed to<br />
create a great<br />
landscape<br />
Deepdale<br />
by Steve Whitaker<br />
When I walked down this<br />
valley from St Sunday<br />
Crag in the Lake District<br />
a couple of years ago, I<br />
knew it had photographic<br />
potential. For this return<br />
visit, I arrived at sunrise to capture the<br />
moving water. To do this I set my<br />
camera up on a tripod and used a long<br />
shutter speed. The sun bathed the<br />
north-facing crags and some of these<br />
golden tones were reflected in the river.<br />
stevewhitakerphotography.co.uk<br />
Dan says: What a remarkable slice of<br />
countryside! The fluffy clouds, lush<br />
green valley, snow-capped mountains<br />
and rushing stream give this photo all<br />
of the elements required for a great<br />
landscape. The temptation would be to<br />
turn this landscape to mono, but I’m glad<br />
Steve kept the warm and gentle tones<br />
intact as they work fantastically well.<br />
While the light from the sunrise has<br />
hit the peak in the distance, the valley<br />
floor is still in shade, so the bottom half<br />
of the pic is much darker. This could<br />
have been remedied by using graduated<br />
ND filters at the time, but is also a<br />
simple fix in Photoshop (see panel).<br />
A shutter speed of 0.6sec was used<br />
to capture a rush of movement in the<br />
water. The cascading water on the rocks<br />
mid-stream looks like mini waterfalls.<br />
Having these larger in the frame could<br />
make the foreground interest stronger.<br />
You could physically get closer with a good<br />
set of wellies and a sturdy tripod (only<br />
traverse shallow areas of the stream),<br />
but if you don’t want to risk your camera<br />
gear getting wet, use a longer lens such as<br />
a 35mm to zoom in, which would make<br />
the rocks appear larger in the frame.<br />
This is a beautiful corner of the country<br />
and Steve’s commitment to get up early<br />
and shoot the sunrise has paid off.<br />
Nikon D800 | 20mm | f/11 | 0.6sec | ISO 100<br />
Selectively brighten with Levels<br />
It’s not uncommon for areas<br />
of a photograph to look too<br />
dark or bright, but it’s easy to<br />
fix in Photoshop. Click on the<br />
Create new fill or adjustment<br />
layer icon and choose Levels<br />
from the list that appears.<br />
There are three sliders under<br />
the Levels histogram. Drag<br />
the middle Midtones and<br />
right Highlights sliders<br />
towards the left a little to<br />
brighten the whole picture.<br />
When you’re done, hit Ctrl+I<br />
to turn the Layer Mask totally<br />
black, then use a soft white<br />
Brush Tool to paint over your<br />
foreground to lighten it.<br />
PRACTICALPHOTOGRAPHY.COM 115
GetIntoGear<br />
#10<br />
#9<br />
LEICA<br />
Leica has a reputation for topquality<br />
cameras and top prices too.<br />
The TL costs a cool £1450, but this<br />
is affordable for a Leica camera –<br />
the M costs £5000 and the SL, £5870.<br />
The TL is identical in size to the T,<br />
which it replaces, though its edges<br />
are now slightly chamfered (sloping).<br />
Its internal memory has been doubled<br />
to 32GB and it has the same 16MP<br />
APS-C sensor as the T. It’s not the<br />
highest resolution, but this could mean<br />
cleaner pictures at high ISOs. There<br />
are six TL (APS-C) optics available and<br />
seven SL (full-frame) lenses for the<br />
T mount. But with lens prices starting<br />
at £1280, you’ll need deep pockets.<br />
A large 3.7in touchscreen sits on<br />
the back, though it’s surrounded<br />
by a large border, so doesn’t make<br />
the most of this space. Adjusting<br />
settings relies predominantly on finger<br />
gestures and tapping to navigate the<br />
user-friendly touch menu system.<br />
Dials and buttons are sparse,<br />
but this lo-fi approach gives it a<br />
very modern feel. Leica is keen<br />
to stress a better performance<br />
in the continuous AF mode.<br />
There’s no built-in electronic<br />
viewfinder, but an optional Visoflex<br />
hotshoe EVF is available for £360.<br />
The TL looks sublime, but its<br />
5fps burst rate and lack of 4K<br />
video hinder its value for money.<br />
uk.leica-camera.com<br />
Above The TL is<br />
machined from a<br />
single block of<br />
aluminium for a<br />
simple, clean look.<br />
PROS<br />
Solid build<br />
Large<br />
touchscreen<br />
Looks great<br />
CONS<br />
Screen can’t be<br />
flipped or tilted<br />
EVF costs extra<br />
5fps max burst<br />
No 4K video<br />
SPEC<br />
Sensor size:<br />
APS-C<br />
Pixels: 16MP<br />
OLYMPUS<br />
TL £1450 PEN-F £999<br />
The Pen-F takes full advantage of its<br />
mirrorless design by being one of the<br />
lightest and most portable cameras<br />
on test. Its Micro Four Thirds sensor<br />
is smaller than an APS-C chip, but<br />
its maximum resolution of 20.3MP<br />
is very respectable. Adding to this,<br />
the whole sensor is stabilised on<br />
5 axis, so camera shake can be<br />
reduced with any lens you attach.<br />
Inside, you’ll find a TruePic VII<br />
processor, which will fire off RAWs<br />
at 10fps – twice as fast as Leica’s<br />
TL. The autofocus is limited to just<br />
contrast detect, but the 3in LCD has<br />
touch functionality, so you can tap it<br />
to quickly place the active point. You<br />
can also bunch AF points into a group<br />
of nine, which is great for tracking<br />
fast-moving subjects. The resolution<br />
of the screen is fairly low at 1037k-dot,<br />
but it can be flipped out and tilted to<br />
help you frame up. The EVF is detailed<br />
and offers an alternative to the LCD.<br />
The Pen-F is speedy, shooting as<br />
quick as 1/8000sec, though it’s not<br />
the fastest on test. There’s no pop-up<br />
flash, but an external FL-LM3 hotshoe<br />
flashgun is included. Built-in Wi-Fi<br />
allows shooting through a smartphone<br />
and movies can be recorded in<br />
Full HD. Sadly, there’s no 4K.<br />
The Pen-F is a great budget option<br />
packed with features and retro charm.<br />
olympus.co.uk<br />
Above Styled<br />
around the 1963<br />
film Pen-F SLR,<br />
this camera has<br />
loads of character.<br />
PROS<br />
Stabilised<br />
sensor<br />
Flip-out screen<br />
Clear EVF<br />
Retro charm<br />
CONS<br />
No 4K video<br />
No NFC<br />
Small MFT<br />
sensor<br />
SPEC<br />
Sensor size:<br />
Micro Four Thirds<br />
Pixels: 20.3MP<br />
RATING<br />
RATING<br />
138 PRACTICAL PHOTOGRAPHY
MIRRORLESS CAMERAS UNDER £1500<br />
#8 #7<br />
PA NASONIC<br />
A large build and chunky handgrip<br />
give the GH4R excellent handling.<br />
It can shoot at a respectable 12fps<br />
– a feat unmatched even by top<br />
APS-C DSLRs. One downside is<br />
its 16.05MP resolution, which falls<br />
behind many of its rivals. That said,<br />
the GH4R can impressively record<br />
4K footage internally, which is<br />
a huge must for videographers.<br />
Its 3in screen is a joy to use and<br />
the touch interface is very intuitive.<br />
It’s a little low in resolution at<br />
1036k-dot, but can be flipped out<br />
and rotated. Tapping to set the active<br />
AF point is quick and you can resize<br />
the point by pinching the screen too.<br />
The Electronic Viewfinder (EVF) is<br />
really clear and responsive, and makes<br />
the GH4R feel more like a DSLR.<br />
It also has a sensor that engages<br />
it when brought up to eyelevel.<br />
The autofocus system is contrast<br />
detect, though this is very speedy<br />
at acquiring a subject, thanks to<br />
its Depth from Defocus (DFD)<br />
technology. We noted a small amount<br />
of hunting when searching for focus<br />
on a subject with low contrast.<br />
The GH4R is not the most<br />
portable camera here, but it has<br />
some brilliant features and similar<br />
handling to a DSLR. It’s a solid<br />
choice for videographers.<br />
panasonic.com/uk<br />
Above Chunky<br />
buttons and dials<br />
are found all over<br />
the GH4R, making<br />
it easy to set up.<br />
PROS<br />
Tilt touch LCD<br />
4K video<br />
12fps RAW<br />
shooting<br />
Wi-Fi & NFC<br />
CONS<br />
Quite large for a<br />
mirrorless camera<br />
Resolution is<br />
fairly low at 16MP<br />
SPEC<br />
Sensor size:<br />
Micro Four Thirds<br />
Pixels: 16.05MP<br />
FUJIFILM<br />
GH4R £999 X-PRO2 £1349<br />
Fujifilm’s flagship CSC, the X-Pro2,<br />
comes packed with features. The<br />
2nd generation model comes with an<br />
APS-C sensor and sees a resolution<br />
increase of 51%, taking it to 24.3MP.<br />
The 3in 1620k-dot LCD has an<br />
incredible level of detail. But it’s<br />
fixed in place, so cannot be tilted<br />
or rotated. It also omits touch<br />
functionality. The Advanced Hybrid<br />
Viewfinder performs well and is<br />
also highly detailed at 2360k-dot.<br />
The autofocus is now an Intelligent<br />
Hybrid AF system with phase and<br />
contrast detect for faster subject<br />
acquisition. It has more AF points,<br />
a total of 77, but this is fairly scant<br />
compared to the likes of the α6500,<br />
which has 425 phase detect points.<br />
The X-Processor Pro engine<br />
grants a top burst speed of 8fps.<br />
This would be considered quick in<br />
the DSLR realm, but there are faster<br />
CSCs on test, such as Fujifilm’s 14fps<br />
X-T2 and Sony’s 11fps α6500.<br />
Wi-Fi is included and a secondary<br />
SD slot is a good addition, though<br />
a tiltable touchscreen or 4K video<br />
would be more useful for most<br />
scenarios, so Fujifilm’s X-T2 may be<br />
the better choice. Admittedly, the<br />
X-T2 doesn’t have the rangefinderstyle<br />
retro charm, so you’ll have to<br />
weigh up substance against style.<br />
fujifilm.eu/uk<br />
Above The top is<br />
reminiscent of old<br />
film cameras with<br />
chunky knobs,<br />
buttons and dials.<br />
PROS<br />
APS-C sensor<br />
High resolution<br />
Dual SD slots<br />
Viewfinder<br />
CONS<br />
No 4K video<br />
LCD has no<br />
touch functionality<br />
LCD cannot be<br />
tilted or rotated<br />
SPEC<br />
Sensor size:<br />
APS-C<br />
Pixels: 24.3MP<br />
RATING<br />
RATING<br />
PRACTICALPHOTOGRAPHY.COM 139