
You also want an ePaper? Increase the reach of your titles
YUMPU automatically turns print PDFs into web optimized ePapers that Google loves.
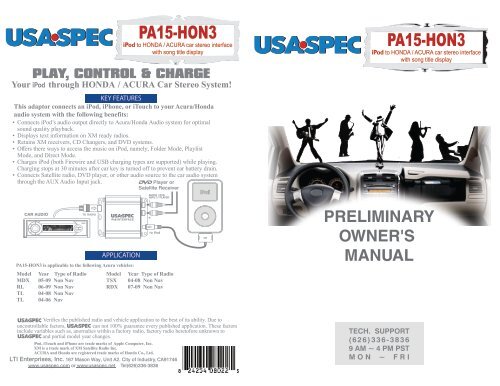
<strong>PA15</strong>-<strong>HON3</strong><br />
iPod to HONDA / ACURA car stereo interface<br />
with song title display<br />
KEY FEATURES<br />
This adaptor connects an iPod, iPhone, or iTouch to your Acura/Honda<br />
audio system with the following benefits:<br />
• Connects iPod s audio output directly to Acura/Honda Audio system for optimal<br />
sound quality playback.<br />
• Displays text information on XM ready radios.<br />
• Retains XM receivers, CD Changers, and DVD systems.<br />
• Offers there ways to access the music on iPod, namely, Folder Mode, Playlist<br />
Mode, and Direct Mode.<br />
• Charges iPod (both Firewire and USB charging types are supported) while playing.<br />
Charging stops at 30 minutes after car key is turned off to prevent car battery drain.<br />
• Connects Satellite radio, DVD player, or other audio source to the car audio system<br />
through the AUX Audio Input jack.<br />
APPLICATION<br />
<strong>PA15</strong>-<strong>HON3</strong> is applicable to the following Acura vehicles:<br />
Model Year Type of Radio<br />
MDX 05-09 Non Nav<br />
RL 06-09 Non Nav<br />
TL 04-08 Non Nav<br />
TL 04-06 Nav<br />
Model Year Type of Radio<br />
TSX 04-08 Non Nav<br />
RDX 07-09 Non Nav<br />
Verifies the published radio and vehicle application to the best of its ability. Due to<br />
<strong>PA15</strong>-<strong>HON3</strong><br />
iPod to HONDA / ACURA car stereo interface<br />
with song title display<br />
PRELIMINARY<br />
OWNER'S<br />
MANUAL
QUICK CHECK<br />
If your car is one of the following Acura model year then use the<br />
<strong>PA15</strong> -HON2 model:<br />
TSX 04-09 with Navigation<br />
MDX 05-06 with Navigation<br />
If your TL, MDX, or RDX navigation does include the XM Live<br />
Traffic option, then the <strong>PA15</strong>-ACUxl model should be used<br />
regardless of whether the Live Traffic subscription is activated or<br />
not.<br />
Please note:<br />
For technical or warranty services, please email to usa_spec@msn.com<br />
or support@usaspec.net or call 6263363836 (Pacific time 9am to 5pm).<br />
Please note that info@usaspec.com is for sales related inquiries only. It will<br />
not respond to technical support and warranty service requests.<br />
Design of this product is subject to change without notice.<br />
XM is a registered trade mark of XM Satellite Radio Inc.<br />
ACURA and Honda are registered trade marks of Honda Co., Ltd.<br />
iPod, iPhone, and iTouch are registered trade marks of Apple Computer, Inc.
Thank you for purchasing product. This manual describes the function and<br />
operation of <strong>PA15</strong>-<strong>HON3</strong> iPod interface for Acura/Honda car radios. Please read this<br />
manual before installing the interface adaptor in your vehicle.<br />
!!IMPORTANT!!<br />
It is strongly recommended that the unit is installed in an accessible location, so that<br />
it can later be easily reset or upgraded.<br />
Eject ALL CDs from the built-in CD player or CD changer before installation.<br />
products are distributed through authorized dealers so we can insure that<br />
customers receive proper services from the dealers. reserves the right to<br />
offer technical support or warranty only on products purchased through authorized<br />
dealers.<br />
SAFETY NOTE: You should always give full attention to driving. Do not operate this<br />
product in such a way that might distract you while you are driving.<br />
Section 1. ABOUT INTERFACE <strong>PA15</strong>-<strong>HON3</strong><br />
1-1 Introduction<br />
a) This interface connnects an iPod (includes iPhone and iTouch) directly to<br />
to your ACURA/HONDA audio system for optimal playback sound quality.<br />
b) This interface enables iPod to coexist with ACURA/HONDA navigation system, CD<br />
changer, XM radio receiver and DVD system, and controls iPod via both car radio and<br />
steering wheel controls.<br />
c) <strong>PA15</strong>-<strong>HON3</strong>’s on board software translates commands from radio’s CD changer control<br />
or XM control into commands that the iPod understands.<br />
i You can use either the XM control or the CD changer control of the radio to operate<br />
the iPod. Use XM control on XM ready radio if text display is desired.<br />
ii When using XM control, iPod will play at XM1 while XM channels will be<br />
retained at XM2. But, if the AUX input is disabled (DIP switch #1 set to OFF)<br />
then when iPod is disconnected from the interface, XM1 will resume to XM<br />
channels.<br />
d) This interface charges the iPod while it is playing. Charging stops automatically half an<br />
hour after car key is turned off or iPod is paused.<br />
1-2 Text Display of Song Information<br />
a) Artist name and song title can be displayed on radio by configuring <strong>PA15</strong>-<strong>HON3</strong> to<br />
work with XM buttons on the radio.<br />
b) Only DISC number and track number are displayed on radio (Disc number = Playlist<br />
number) when using the <strong>PA15</strong>-<strong>HON3</strong> with radio’s CD or AUX button.
• Examples of iPod Artist Text on Radio LCD Display:<br />
• Examples of iPod Text on Navigation Screen:<br />
FM1 FM2 AM XM1 XM2 DISC TAPE AUX<br />
CHANNEL<br />
CATEGORY<br />
NAME<br />
TITLE<br />
1-3 Package Content<br />
This package contains one each of the following: <strong>PA15</strong>-<strong>HON3</strong> interface adaptor,<br />
CAS-H3y, and CB-PA105 cables.<br />
1-4 Compatibility<br />
Future iPod and iTune software updates may affect the features and functions<br />
described in this owner’s manual and website.<br />
1-5 Application<br />
001 -We All Fall Down<br />
AR-Bekka Bramlet<br />
Bekka Bramlett<br />
America’s Sweethea<br />
1 2 3<br />
4 5 6<br />
1 2 3<br />
4 5 6<br />
MODE SCAN<br />
SOUND<br />
VOL 6
Make Model Year Type of Radio Control<br />
iPod with...<br />
ACURA<br />
MDX<br />
RL<br />
TL<br />
TSX<br />
RDX 07 - 09<br />
Note:1) To use XM control, radio needs to be XM ready.<br />
* Verifies the published radio and vehicle application to the best of its ability.<br />
Due to uncontrollable factors, can not 100% guarantee every published<br />
applications. These factors include such variables as, anomalies within a factory radio,<br />
factory radio heretofore unknown to , and partial model year changes.<br />
Section 2. Playlist Mode, Direct Mode,<br />
Folder Mode, and AUX Option.<br />
<strong>PA15</strong>-<strong>HON3</strong> Provides two ways to control your iPod, namely ( Playlist Mode +<br />
Direct Mode) or (Folder Mode + Direct Mode).<br />
2-1 Direct Mode<br />
Search and select music on iPod just as you would in portable use. Also use the track<br />
up/down, fast forward, fast reverse on radio and steering wheel to control.<br />
Note<br />
05 - 09 Non-Nav CDC or XM (1)<br />
05 - 06 Nav XM Use <strong>PA15</strong>-HON2<br />
07 - 09 Nav XM Use <strong>PA15</strong>-ACUxl<br />
06 - 09 Non-Nav CDC or XM<br />
05 - 09 Nav XM Use <strong>PA15</strong>-ACUxl<br />
04 - 08 Non-Nav CDC or XM (1)<br />
04 - 06 Nav XM<br />
07 - 09 Nav XM Use <strong>PA15</strong>-ACUxl<br />
06 - 09 Non-Nav CDC or XM<br />
06 - 09 Nav XM Use <strong>PA15</strong>-HON2<br />
Non-Nav CDC or XM (1)<br />
Nav XM Use <strong>PA15</strong>-ACUxl<br />
Direct Mode is supported in both XM control and CD changer control configuration.<br />
When <strong>PA15</strong>-<strong>HON3</strong> is configured to XM control, XM 1-5 or XM 1-8 (depending on<br />
the DIP setting) is dedicated to Direct Mode.<br />
When <strong>PA15</strong>-<strong>HON3</strong> is configured to CD changer control, DISC #8 is dedicated to<br />
Direct Mode.<br />
In Direct Mode, screen and click wheel keypad on iPod are unlocked and fully<br />
functional. When in Direct Mode, text display is not available.<br />
Application Tip<br />
When in Direct Mode, an iPhone is cable of streaming music through Pandora or<br />
Sirius/XM Online.
2-2 Folder Mode<br />
Access 3 Folders, namely, Playlist, Artist, and Album on iPod from the radio and allows<br />
text based song search by the title of Artist, Album, and Playlist. See section 3-1 for<br />
more information.<br />
Folder Mode is applicable only when <strong>PA15</strong>-<strong>HON3</strong> is configured to use XM control<br />
and the radio must have a XM button.<br />
XM 1-1 accesses Playlist Folder. Display on radio is PL-name of Playlist<br />
XM 1-2 accesses Artist Folder. Display on radio is : AR-name of artist<br />
XM 1-3 accesses Album Folder. Display on radio is AL-album name<br />
CAUTION: DO NOT operate the text based song search feature if it will distract<br />
and prevent you from giving your full attention to driving. Safe<br />
driving is your responsibility.<br />
2-3 Playlist Mode<br />
Operate and control the iPod like you would a CD changer. This mode allows you to<br />
access five Playlists on iPod from the radio. iPod screen will always display “OK to<br />
dissconnect” or “Attached to accessory” and iPod’s keypad is locked and not functional.<br />
See section 3-2 and 3-3 of this manual for more information.<br />
Playlist Mode is supported in both XM control configuration and CD changer<br />
control configuration.<br />
Radio displays artist name and song title only when adaptor is configured to<br />
control iPod with the XM buttons on the radio.<br />
When <strong>PA15</strong>-<strong>HON3</strong> is configured to use XM control, CH01 to CH06 are Playlists<br />
and CH07 is All Songs on iPod.<br />
When <strong>PA15</strong>-<strong>HON3</strong> is configured to use CD changer control, DISC #1 to DISC #6<br />
are Playlists and DISC #7 is All Songs on iPod.<br />
If your iPod has more than 6 Playlists, then please refer to Section 5: Playlist Naming.<br />
CAUTION: DO NOT operate the text based song search feature if it will distract<br />
and prevent you from giving your full attention to driving. Safe<br />
driving is your responsibility.<br />
2-3 AUX Input Option<br />
In addition to iPod, <strong>PA15</strong>-<strong>HON3</strong> can connect a second audio source to car radio.<br />
Connect the second audio source to the RCA jack labeled AUX INPUT. AUX input is<br />
enabled by setting the DIP switch #1 on the side of the interface adaptor to ON position.<br />
Section 3. Mode Setting and Function Control<br />
Please carefully read the three different configuration of <strong>PA15</strong>-<strong>HON3</strong> and decide which<br />
one to use and set the DIP switches accordingly before starting the installation.<br />
Note: Radios that do not have a XM button can only be CD changer control configuration.<br />
See Section 3-4.
3-1 Folder Mode + Direct Mode Configuration<br />
(Note: this configuration supports text display but is only applicable to radios that have<br />
XM buttons.)<br />
3-1-1 Set DIP switches as follow:<br />
Note: DIP switch #1 is only related to RCA AUX option setting and it is independent<br />
from these DIP switches’ setting.<br />
3-1-2 Functions and Radio Buttons:<br />
Press XM button on radio to access iPod at XM1.<br />
Press XM button on radio to access XM stations at XM2.<br />
Use radio Preset buttons to access iPod Folders, Direct Mode, and RCA AUX<br />
as follow:<br />
Press the DISP button on radio to view music’s text information.. Text display<br />
on radio is as follow.
Turn the TUNING knob to change tracks. Note (a): Due to radio’s maximum limit<br />
of 255 XM channels, the far left hand digit of track number display is therefore<br />
reset to 0 (zero) at every integer multiple of 256.<br />
For example, 256th track on iPod is displayed as 056 and 456th track on<br />
iPod is also displayed as 056.<br />
Press SEEK ( - / + ) or SKIP ( , ) button to select sub-folder (example:<br />
change to next or previous Playlist while in the Playlist folder; change to next<br />
or previous Artist while in the Artist folder). When in Songs Folder, press SEEK<br />
to change track by alphabetical order (this feature applies to iTouch and iPhone<br />
only. For iPods, the SEEK button will change the track up or down only).<br />
Press-and-hold (until a beep is heard) preset button #2 to begin RANDOM track<br />
play and press-and-hold the preset #2 button (until a beep is heard) to terminate<br />
RANDOM play.<br />
Press and hold (about 4 seconds) the preset #3 or the preset #4 to fast rewind<br />
or fast forward a track for approximately 40 seconds.<br />
Press SCAN button to advance 10 tracks when random is OFF.<br />
Steering wheel control:<br />
Several different steering wheel XM control designs are available from Honda<br />
and Acura. Some of the designs allow the <strong>PA15</strong>-<strong>HON3</strong> to do track up/track down<br />
while others only allow Playlist or Folder change from the steering wheel controls.<br />
In general, it is able to do track up/down if the CH+ / CH- keys on the steering<br />
wheel are the double-function type. Double-function means that the CH+/CH- button<br />
can perform two different tasks depending on the length of time it is being pressed.<br />
3-1-3 Connecting and Playing iPod<br />
When iPod is connected to interface adaptor and XM1 on radio is pressed, iPod<br />
will begin to play at XM1-4 (preset #4).<br />
XM1-4 (preset #4) will continue to play the track in the Folder which was played<br />
prior iPod is connected to the <strong>PA15</strong>-<strong>HON3</strong>. As soon as the last track of the playing<br />
Folder is completed, iPod will go to the first track of Songs folder.<br />
When returning to Songs Folder (preset #4) from Direct Mode (preset #5), Preset #4<br />
will continue the same iPod folder being played at Direct Mode. When the last<br />
track of this folder is played, iPod will then go to the first track of Songs folder.<br />
ACURA/HONDA XM radio has two modes: CHANNEL MODE and CATEGORY<br />
MODE. Press the MODE button or press-n-hold the DISP button and the radio will<br />
switch from one mode to the other. The functions being described above are applicable<br />
when XM radio is set to CHANNEL MODE.<br />
3-2 Playlist Mode (with Text display ) + Direct Mode<br />
Configuration<br />
(Note: this configuration supports text display but is applicable only to radios that have<br />
XM buttons.)
3-2-1 Set DIP switchs as follow:<br />
Note: DIP switch #1 is only related to RCA AUX option setting and it is<br />
independent from these DIP switches’ setting.<br />
3-2-2 Functions and Radio Buttons:<br />
Press XM button on radio to access iPod at XM1<br />
Press XM button on radio to access XM stations at XM2<br />
Use DISC+ or DISC- buttons on radio to access Playlists, Direct Mode, and RCA<br />
AUX as follow: (note: DISC- is Preset button #5 and DISC+ is Preset button #6<br />
Press DISP button on radio to view music’s text information. Text display on<br />
radio is as follow:
Turn the TUNING knob to change tracks. Note (a): Due to radio’s maximum limit<br />
of 255 XM channels, the far left hand digit of track number display is therefore<br />
reset to 0 (zero) at every integer multiple of 256.<br />
For example, 256th track on iPod is displayed as 056 and 456th track on<br />
iPod is also displayed as 056.<br />
Press preset button #2 to begin the RANDOM track play and press the preset<br />
#2 button 2 time to terminate the RANDOM play.<br />
Press the preset #3 or the preset #4 will retreat or advance 10 tracks respectively.<br />
Press and hold (about 4 seconds) the preset #3 or the preset #4 to fast rewind<br />
or fast forward a track for approximately 40 seconds.<br />
Press SCAN button to advance 10 tracks when random is OFF.<br />
Steering wheel control:<br />
Several different steering wheel XM control designs are available from Honda<br />
and Acura. Some of the designs allow <strong>PA15</strong>-<strong>HON3</strong> to do track up and track down<br />
while others only allow Playlist or Folder change from the steering wheel control.<br />
In general, it is able to do track up/down if the CH+ /CH- keys on the steering<br />
wheels are the double-function type. Double-function means that the CH+/CH- buttons<br />
can perform two different tasks depending on the length of time of it is being pressed.<br />
3-2-3 Connecting and Playing iPod<br />
When iPod is connected to interface adaptor and XM on radio is pressed, iPod will<br />
begin to play at XM1-7 (All Songs on iPod).<br />
XM1-7 will continue to play the track in the Folder which was played prior to iPod<br />
is connected to <strong>PA15</strong>-<strong>HON3</strong>. When the last track of the Folder is played,<br />
iPod will go to the first track of All Songs folder.<br />
When returning to XM1-7 from Direct Mode (XM1-8), XM 1-7 will continue<br />
the track and the folder that was being played at XM1-8 ( Direct Mode ). When the last<br />
track of the folder is played, iPod will then go to the first song in the All Songs folder.<br />
If iPod has more than 6 Playlists, then please refer to Section 5: Playlist Naming.<br />
3-3 Playlist Mode (without Text Display) + Direct Mode<br />
Configuration<br />
Note: Radio without a XM or SAT button must use this configuration<br />
of <strong>PA15</strong>-<strong>HON3</strong>.<br />
3-2-1 Set DIP switches as follow:<br />
Note: DIP switch #1 is only related to RCA AUX option setting and it is independent<br />
from these DIP switches’ setting.
3-3-2 Functions and Radio Buttons<br />
Press CD or AUX button on radio to access iPod.<br />
Use DISC+ or DISC- button on radio to access Playlist, Direct Mode and<br />
RCA AUX as follow.<br />
Track UP/DOWN from steering wheel remote control is supported.<br />
3-3-3 Connecting and Playing iPod<br />
When iPod is connected to interface adaptor and CD button is pressed, iPod<br />
will play at DISC #7.<br />
DISC #7 will continue to play the track in the Folder which was played prior iPod<br />
is connected to <strong>PA15</strong>-<strong>HON3</strong>. As soon as the last track of the Folder is played, iPod<br />
will go to the first track of All Songs folder.<br />
When returning to DISC #7 from Direct Mode, DISC #7 will continue the track and<br />
the folder being played at DISC #8 (Direct Mode ). When the last track of the<br />
folder is played, iPod will go to All Songs folder.<br />
If iPod has more than 6 Playlists, then please refer to Section 5: Playlist Naming.<br />
Section 4. CABLE CONNECTION<br />
Step 1-Decide which MODE to use and set DIP switches according to information in section 3.<br />
Step 2-Must remove or eject all CDs from radio.<br />
Step 3-Remove radio from the dash.<br />
Step 4-Plug the 14-pin male connector on C CAS-H3y cable to radio. If a factory<br />
cable has the same identical 14-pin male connector already connected to radio, then<br />
unplug the factory cable from radio first. If a factory 14-pin cable does not exist, then<br />
skip to Step 6 directly.
Step 5-Plug the factory 14-pin male connector to 14-pin female connector on<br />
CAS-H3y cable. Refer to Fig. (1).<br />
Step 6-Plug the 18-pin DIN connector on CAS-H3y cable to the adaptor<br />
where is labeled RADIO.<br />
Step 7-If the vehicle has Rear-Seat-Entertainment system, wire ACCessory power with a<br />
relay. refer to Fig. (2)<br />
Step 8-Connect your audio source to the RCA jacks on adaptor if AUX option is selected by<br />
DIP switch #1 = ON.<br />
Step 9-Plug CB-PA105 cable to the adaptor where it is labeled iPod.<br />
Step 10-Install radio back to the dash only after a successful test run is done.<br />
Note: On some of HONDA radio, the 14-pin connector is located at bottom<br />
side of radio chassis.<br />
WARNING!!<br />
Use only the iPod connection cable which comes with <strong>PA15</strong>-<strong>HON3</strong> interface adaptor.<br />
iPod connection cable from other sources may look similar, but they may damage your iPod.<br />
CAS-H3Y
SHOWN ON THE DIAGRAM.<br />
Fig ( 3 )<br />
NOTE: THE OTHER WIRES ON CAS-H3y CABLE ARE NOT<br />
Section 5. Playlist Naming<br />
CAS-H3y CABLE<br />
5-1 When iPod is connected to your radio via <strong>PA15</strong>-<strong>HON3</strong>, the adaptor scans all available<br />
Playlists and Folders on iPod and looks for designated HONDA Playlists which are<br />
created with iTune for direct access from HONDA / ACURA radio. The designated<br />
HONDA Playlists should be named as follow if your iPod has more than 6 Playlists.
Playlist #1: HONDA1...<br />
Playlist #2: HONDA2...<br />
Playlist #3: HONDA3...<br />
Playlist #4: HONDA4...<br />
Playlist #5: HONDA5...<br />
Playlist #6: HONDA6...<br />
The word HONDA must be in capital letters and there can be no spaces between the<br />
word HONDA and numbers.<br />
You may append text to the designated HONDA Playlist names. Example:<br />
HONDA1-jazz, HONDA3_Favorite3, HONDA5podcast, etc.<br />
5-2 If no designated HONDA Playlists are created with iTune, <strong>PA15</strong>-<strong>HON3</strong> adaptor will<br />
automatically relate the first 6 available Playlists on iPod to Playlist #1 to #6<br />
regardless how the playlists are named.<br />
5-3 If less than 6 designated HONDA Playlist are created, <strong>PA15</strong>-<strong>HON3</strong> will automatically<br />
fill up the rest of Playlist numbers beginning with the first available Playlist on iPod<br />
Example: if only 3 designated HONDA1, HONDA3 and HONDA5 Playlists are<br />
created, then the Playlist number on radio will be:<br />
Playlist # 1: HONDA1...<br />
Playlist # 2: ( the 1 available Playlist on iPod)<br />
Playlist # 3: HONDA3...<br />
Playlist # 4: ( the 2 available Playlist on iPod)<br />
Playlist # 5: HONDA5...<br />
Playlist # 6: ( the 3 available Playlist on iPod)<br />
XM is a registered trade of XM Satellite Radio Inc.<br />
iPod, iTouch and iPhone are the registered trade name of Apple Computer Inc.<br />
ACURA and HONDA are the registered trade name of Honda Motor Corporation.<br />
Design is subject to change without notice.<br />
!!CAUTION!!<br />
In general, iPods have not been designed to withstand temperature extremes in<br />
automobiles. Please consult your iPod Owner’s Manual regarding acceptable operation<br />
and storage temperatures.<br />
Do not disassemble or alter the cable and interface box.<br />
Make the connections correctly.<br />
Do not cut away the wire sheath or use the power for other equipment.<br />
Do not install in locations which might hinder vehicle operation or create hazard for<br />
vehicle occupants.<br />
Have the wiring and installation done by professionals.<br />
Arrange wiring so it is not crimped or pinched.<br />
Do not use this product for purposes other than stated for the vehicle.