

QUILTsocial | Issue 08
Here it is, the new issue of QUILTsocial Magazine! We're extremely excited to release this FREE issue featuring a full 88 pages packed with free tutorials, patterns, and product reviews. This is a very exciting issue! (I know, I say that about all of them...) But I'm very excited that we're taking a close look at 3 different sewing machine brands, highlighting their special features and exploring them with cool projects. This issue also has the very fun and diverse quilting projects you've come to expect from QUILTsocial. You don't want to miss our many tutorials, like reducing bulk in your seams, threads that enhance Sashiko work, and bringing together stenciling fabric and machine embroidery to create a one of kind quilt block, to name a few. Enjoy the issue, and happy quilting!
Here it is, the new issue of QUILTsocial Magazine! We're extremely excited to release this FREE issue featuring a full 88 pages packed with free tutorials, patterns, and product reviews.
This is a very exciting issue! (I know, I say that about all of them...) But I'm very excited that we're taking a close look at 3 different sewing machine brands, highlighting their special features and exploring them with cool projects.
This issue also has the very fun and diverse quilting projects you've come to expect from QUILTsocial. You don't want to miss our many tutorials, like reducing bulk in your seams, threads that enhance Sashiko work, and bringing together stenciling fabric and machine embroidery to create a one of kind quilt block, to name a few. Enjoy the issue, and happy quilting!

Create successful ePaper yourself
Turn your PDF publications into a flip-book with our unique Google optimized e-Paper software.
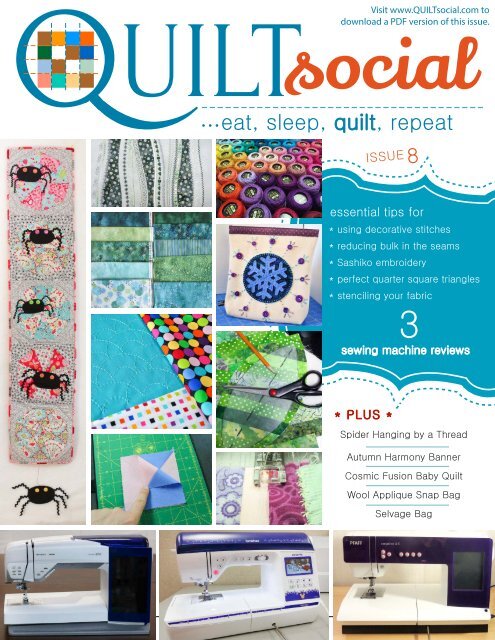
Q .c<br />
UILTsocial<br />
…eat, sleep, quilt, repeat<br />
ISSUE 8<br />
Diagram 2<br />
Visit www.<strong>QUILTsocial</strong>.com to<br />
download a PDF version of this issue.<br />
essential tips for<br />
* using decorative stitches<br />
* reducing bulk in the seams<br />
* Sashiko embroidery<br />
* perfect quarter square triangles<br />
* stenciling your fabric<br />
3<br />
sewing machine reviews<br />
* PLUS *<br />
Spider Hanging by a Thread<br />
Autumn Harmony Banner<br />
Cosmic Fusion Baby Quilt<br />
Wool Applique Snap Bag<br />
Selvage Bag<br />
Q<br />
.com<br />
UILTsocial<br />
| issue 8 1
A princess for<br />
the Queen. Give<br />
her more than just<br />
another gift this<br />
Mother’s Day.<br />
The HUSQVARNA VIKING ®<br />
DESIGNER RUBY Royale <br />
sewing and embroidery<br />
machine is our heir to the<br />
throne, a true princess for the<br />
queen. It makes it easy and<br />
rewarding to create anything<br />
your heart desires!<br />
ExclusivE fEaturEs:<br />
• Experience more beautiful embroidery<br />
than ever, even with challenging<br />
metallic threads thanks to the innovative<br />
deLuxe Stitch System.<br />
• Use the first in the industry<br />
Dimensional Stitches to add appliqué<br />
fabric.<br />
• The largest embroidery area in its<br />
class*, allowing you to stitch spectacular<br />
designs with just one hooping.<br />
Find your nearest retailer at www.husqvarnaviking.com<br />
VIKING® and DESIGNER RUBY ROYALE are trademarks of Singer Sourcing Limited LLC. HUSQVARNA and the<br />
“H” Crown Device are trademarks of Husqvarna AB. ©2017 Singer Sourcing Limited LLC. All rights reserved.<br />
UILTsocial .com<br />
Q<br />
2 | issue 8<br />
*Non-turnable; as compared to leading brands in similar price range.
editor's letter<br />
Good quilting is in the details, and there's no greater<br />
feeling of accomplishment when points match or seams<br />
lay flat when making a quilt! There's an extra bounce in my<br />
step when this happens! Accuracy takes a little practice,<br />
and the application of every nugget of information<br />
discovered through tutorials, lessons, and friendships<br />
make a world of difference. What an extraordinary age to<br />
be living in, with an incredible amount of information at our<br />
fingertips and delivered in less than a second!<br />
Last fall, I was struggling with my quarter square triangles<br />
on a baby quilt I was making with mom, which led to my<br />
request to quilter Elaine Theriault to share with <strong>QUILTsocial</strong><br />
the way to perfect quarter square triangles every time.<br />
Every tip, tutorial and project we learn from enhances<br />
our knowledge of quilting, giving us more freedom (and<br />
should I say power?) to make well-made quilts.<br />
I hope every issue of <strong>QUILTsocial</strong> quenches your thirst<br />
for knowlege about techniques, sewing tools and sewing<br />
machines. To be armed with these is to be able to do<br />
some serious good quilting.<br />
Cheerfully,<br />
follow me on<br />
Q<br />
.com<br />
UILTsocial<br />
| issue 8 3
Q<br />
Diagram 2<br />
UILTsocial<br />
…eat, sleep, quilt, repeat<br />
.com<br />
PUBLISHER, EDITOR-IN-CHIEF, ART DIRECTOR<br />
Carla A. Canonico<br />
carla@<strong>QUILTsocial</strong>.com<br />
PUBLISHER, ADVERTISING SALES<br />
John De Fusco<br />
john@<strong>QUILTsocial</strong>.com<br />
PHOTOGRAPHERS<br />
John De Fusco, Carla A. Canonico, Alessia De Fusco<br />
BLOGGERS/CONTRIBUTORS<br />
Christine Baker<br />
FairfieldRoadDesigns.com<br />
Nancy Devine<br />
nancywhiskeynancyo.blogspot.com<br />
Jackie White<br />
jabotquilt.blogspot.ca<br />
Jean Boyd<br />
patternsbyjeanboyd.com<br />
Liana Kirkey<br />
liana@thatsewingplace.ca<br />
Sarah Vanderburgh<br />
sewjoycreations.com<br />
GRAPHIC & WEB DESIGN<br />
Carla A. Canonico<br />
carla@<strong>QUILTsocial</strong>.com<br />
Sandra Armas<br />
WEB and IT Support<br />
Alejandro Araujo<br />
WEBSITE / BLOG : http://<strong>QUILTsocial</strong>.com<br />
Like us on Facebook : <strong>QUILTsocial</strong><br />
Follow us on Twitter : @<strong>QUILTsocial</strong><br />
WHERE TO GET YOUR COPY<br />
<strong>QUILTsocial</strong> is a quarterly eMagazine published by A Needle<br />
Pulling Thread. It is available free for personal use online at<br />
http://<strong>QUILTsocial</strong>.com.<br />
A limited number of printed copies of <strong>QUILTsocial</strong> are available<br />
for purchase at select quilt shops and specialty stores. Ask for it<br />
at your local shop. <strong>QUILTsocial</strong> is not available by subscription.<br />
QUILT SHOPS<br />
If you are interested in carrying <strong>QUILTsocial</strong> in your store, please<br />
email john@<strong>QUILTsocial</strong>.com.<br />
EDITORIAL<br />
Designers and other contributors who would like to be<br />
considered for future issues please email carla@<strong>QUILTsocial</strong>.com<br />
with a brief description of your work and your proposed project<br />
for the magazine.<br />
◦{<br />
daily blog<br />
◦{<br />
weekly giveaways<br />
◦{<br />
monthly newsletter<br />
◦{<br />
quarterly magazine<br />
◦{<br />
Facebook page<br />
◦{<br />
Pinterest page<br />
◦{<br />
ALL of the above!<br />
<br />
ALL<br />
FREE!<br />
SIGN UP today at<br />
www.<strong>QUILTsocial</strong>.com<br />
and receive a free ebook<br />
Elaine’s Quilting Tech Tips!<br />
©2017 <strong>QUILTsocial</strong>. All rights reserved. <strong>Issue</strong> #8. ISSN 2368-5913.<br />
No part of this publication may be reproduced without written<br />
permission from the publisher.<br />
All designs, patterns, and information in this magazine are for<br />
private, non-commercial use only, and are copyrighted material<br />
owned by their respective creators or owners.<br />
Advertiser Index<br />
65 A Needle Pulling Thread Magazine<br />
15 Brother<br />
86 Business Directory<br />
57 Coats<br />
25 Gütermann Creativ<br />
02 Husqvarna Viking<br />
35 Northcott<br />
04 <strong>QUILTsocial</strong><br />
88 UNIQUE Sewing and Quilting<br />
Q<br />
4 .com | issue 8<br />
UILTsocial
Q<br />
Diagram 2<br />
UILTsocial<br />
…eat, sleep, quilt, repeat<br />
.com<br />
issue 8<br />
c o n t e n t s<br />
06<br />
12<br />
21<br />
22<br />
26<br />
38<br />
50<br />
66<br />
70<br />
78<br />
84<br />
Making a Cosmic Fusion Baby Quilt<br />
Playing with the Brother NQ3500D's Built-in<br />
Decorative Stitches<br />
Hooked on Books<br />
Spiders Hanging by a Thread Banner<br />
A Quilter's Review of the PFAFF creative 4.5<br />
3 Creative Uses for WonderFil's Eleganza Thread<br />
Reduce Bulk in the Seams of your Quilt Block<br />
The Epic Features of the HV Designer Epic<br />
Autumn Harmony a Log Cabin Quilted Sampler<br />
A Calm Winter, a body pillow wrap<br />
Quilted Hand Muff<br />
Q<br />
.com<br />
UILTsocial<br />
| issue 8 5
Making a Cosmic Fusion baby quilt!<br />
Jean Boyd<br />
Fabrics from the Cosmic Fusion collection by Northcott<br />
The strips are cut on the lengthwise grain of the fabric.<br />
The first strip set is sewn together.<br />
I received this wonderful Cosmic Fusion<br />
fabric by Northcott! I have fabric from the<br />
green colorway, but there are also orange<br />
and purple colorways in this collection.<br />
You can have a look at all the fabric on the<br />
Northcott website.<br />
Watch for Cosmic Fusion! You can find<br />
out which quilt shops and online retailers<br />
carry Cosmic Fusion by using the Product<br />
Finder link at the top of the page on the<br />
Northcott website.<br />
I decided to make a modern-style baby<br />
quilt using 9 – 20” pieces from the<br />
collection. The quilt will be 38” x 48” when<br />
finished.<br />
If you would like to make this project<br />
with me, here’s how to get started. From<br />
each 20” pieces, cut 3 or 4 strips in varying<br />
widths from 2½” to 4” wide. Make sure you<br />
cut the strips so the longest side is on the<br />
lengthwise grain of the fabric (parallel to<br />
the selvedge edge). This will help prevent<br />
the strips from stretching as you sew them<br />
together.<br />
Sew 9 different fabric strips of varying<br />
widths together to make a strip set. Don’t<br />
worry if the top and bottom edges are<br />
uneven – they will be trimmed later. Press<br />
seams to one side. The strip set will be<br />
about 20” – 24” wide.<br />
Sew 9 more strips of varying widths<br />
together to make another strip set. Make<br />
sure to sew the fabrics together in a<br />
different order than in the first set. Sew the<br />
2 strips sets together, end to end, to make 1<br />
long strip set.<br />
Make 3 more long strip sets like this.<br />
Follow along, I’ll show you how to put<br />
these strip sets together to make the quilt<br />
top. You’ll have your modern baby quilt<br />
made in no time. I’m sure you’ll agree that<br />
this Northcott Cosmic Fusion fabric is fun<br />
to work with.<br />
Q<br />
6 .com | issue 8<br />
UILTsocial<br />
The seams are pressed to one side.<br />
Photos by Jean Boyd
Lining up strips of fabric easily<br />
for a modern baby quilt<br />
Use the lines on your ruler to help you straighten<br />
the edge of the strip set.<br />
Cutting diagram for the strip sets<br />
A sneak peek at the Modern baby quilt made with Northcott’s Cosmic Fusion fabrics<br />
Straighten one edge of the strip set. I like to use one or more of the lines<br />
on my ruler as additional guides to make sure the edge is really straight.<br />
Just align the line on your ruler with one of the seams before cutting.<br />
Use the diagram as a cutting guide to cut your strip sets into units. Pay<br />
careful attention to the orientation of the strips in each strip set. You may<br />
have to add 1 or 2 more strips if your strip sets aren’t long enough.<br />
Once the units are all cut out, it’s a good idea to put them on a design wall<br />
or on the floor, so you can check the overall design. Try to avoid having 2<br />
identical fabrics next to each other. Sometimes you can just turn a strip,<br />
end for end, to avoid having this happen.<br />
Here are my units on the design wall, all ready to sew.<br />
I love working with this Cosmic Fusion fabric! Northcott fabric is always<br />
excellent quality and the width is usually a full 44”.<br />
Here are my units on the design wall, all ready to sew.<br />
Q<br />
.com<br />
UILTsocial<br />
| issue 8 7
How to sew rickrack to<br />
your quilt like an expert<br />
Stitch close to each edge of the rickrack.<br />
This gives you a good idea about how your<br />
modern baby quilt will look.<br />
Stitch down the rickrack over the part of the seam<br />
that is sewn. Leave the rest of it hanging loose or<br />
pin to the strip set.<br />
Before I sewed the units together, I pinned some<br />
rickrack trim over the seams on the design wall to<br />
see how it would look.<br />
Q<br />
8 .com | issue 8<br />
UILTsocial<br />
Here are my units on the design wall, all<br />
ready to sew. The colors in this Northcott<br />
Cosmic Fusion collection blend together<br />
so well and the strip design looks very<br />
modern. You can go ahead and sew<br />
the units together just like this, or you<br />
might like to try my variation below<br />
using rickrack trim. The sewing method<br />
for joining the units will be the same<br />
whether you add the rickrack trim or not.<br />
As I was looking at the quilt pieces on<br />
the design wall, I wondered how it<br />
would look if I had some kind of accent<br />
or trim on the main seam lines. I had<br />
some 5⁄8” rickrack in my cupboard (it had<br />
been there for a very long time!) and I<br />
thought maybe I had finally found a use<br />
for it. Before I started sewing the units<br />
together, I pinned some rickrack on my<br />
quilt and decided I really liked it. It would<br />
go on top of the finished seams, but it<br />
would take some planning to figure out<br />
when to add the rickrack. You’ll need<br />
about 6½” yards of rickrack trim if you’d<br />
like to try this version.<br />
This is the partial seam<br />
Stitch down the rickrack over the part of the seam<br />
that is sewn. Leave the rest of it hanging loose or<br />
pin to the strip set.
Cutting diagram for the strip sets<br />
Sew units 8 and 9 together and then sew rickrack<br />
over the seam.<br />
Sew units 1⁄2 to the top of the quilt.<br />
So here’s how to sew it together!<br />
Note: If you’re using rickrack trim, press<br />
the joining seams open. If you’re not<br />
using the rickrack trim, press seams to<br />
one side.<br />
Using the diagram on the left as a<br />
guide, sew Unit 1 to Unit 2.<br />
Cut an 8” piece of rickrack and pin it<br />
on top of the seam. With thread that<br />
matches the rickrack, stitch close to<br />
each edge, using a slightly longer<br />
stitch than normal. I felt it would be<br />
better to have this double line of<br />
stitching so the rickrack trim would<br />
stay flat. Trim excess rickrack.<br />
Sew Unit 5 to Unit 6. Sew a 31” piece<br />
of rickrack over the seam, using a<br />
double stitching line.<br />
Sew Unit 4 to Units 5⁄6 using a partial<br />
seam. Start sewing at the top and<br />
sew about half-way down the strip<br />
sets. Press the sewn part of the seam<br />
open.<br />
Cut a 40” piece of rickrack and sew<br />
over the completed part of the seam,<br />
leaving the excess rickrack hanging<br />
loose.<br />
Sew Unit 3 to the top of Units 4/5/6.<br />
Sew a piece of rickrack over this seam.<br />
Sew Unit 7 to the right hand side.<br />
Sew rickrack over the seam.<br />
Sew Units 8 and 9 together. Sew<br />
rickrack over the seam.<br />
Sew Units 8/9 to Units 5/6/7. Sew<br />
rickrack over the seam.<br />
Finish sewing the partial seam. Finish<br />
sewing the rickrack over the partial<br />
seam. Sew Units 1⁄2 to the top of the<br />
quilt. Sew rickrack over the seam.<br />
Your modern baby quilt is ready to be quilted!<br />
Q<br />
.com<br />
UILTsocial<br />
| issue 8 9
Change up the way<br />
you make your quilt binding<br />
Here's an interesting way to make<br />
the binding.<br />
The finished size of the quilt is 38” x<br />
48”. It’s sized so that you just need<br />
one width of fabric 54” long [1.4m].<br />
You could also use the leftover<br />
Cosmic Fusion fabric to make a<br />
pieced backing.<br />
Layer backing fabric, batting and<br />
quilt top, making sure to center<br />
the quilt top on the backing.<br />
Baste the layers together. Quilt as<br />
desired.<br />
Trim excess backing and batting to<br />
square-up the quilt top.<br />
For the binding I decided to use<br />
the leftover dark blue and green<br />
fabrics. I like to use a ½” finishedsize<br />
binding, so I cut strips 3” wide<br />
x WOF (width of fabric). I cut<br />
enough strips so they would go<br />
all around the quilt with about 8”<br />
extra.<br />
Here’s how you can make this<br />
binding too.<br />
Cut the ends of all binding strips<br />
on a 45° or 60° angle.<br />
Sew the 3” binding strips together,<br />
end to end, to make one strip long<br />
enough to go all around the quilt.<br />
Press seams open.<br />
Fold the strip in half lengthwise<br />
with wrong sides together. Press.<br />
Cut all binding strips like this, using a 45 or 60<br />
degree angle.<br />
Start sewing on the binding using a scant ½”<br />
seam allowance.<br />
Sewing binding on the first corner<br />
Finishing the binding<br />
Press under ¼” on one angled end<br />
of the binding.<br />
Lay the binding on top of the<br />
quilt so the folded cut edge is<br />
approximately at the center of<br />
one side. Align the cut edge of the<br />
binding with the edge of the quilt.<br />
Starting about 10” from the<br />
corner and using a scant ½” seam<br />
allowance, start sewing the<br />
binding. Stop sewing ½” from the<br />
edge of the quilt and backstitch<br />
to secure. TIP Use a walking foot or<br />
even-feed foot.<br />
Fold binding up and then back<br />
down on itself to create a mitered<br />
corner. Sew from the edge of the<br />
quilt toward the next corner. Stop<br />
sewing ½” from the corner and back<br />
stitch to secure. Continue sewing<br />
the binding on the remaining sides<br />
in the same way.<br />
When you come to the last side,<br />
sew for a few inches and then stop.<br />
Tuck the unfolded end of the<br />
binding inside the folded end.<br />
Adjust the binding so it fits along<br />
the edge of the quilt. Trim off excess<br />
binding. Finish sewing binding.<br />
Fold the binding over to the back<br />
and hand-stitch in place. At each<br />
corner, fold the binding to create<br />
a 45° mitered corner. This can be<br />
stitched down or not, as desired.<br />
Q<br />
10 .com | issue 8<br />
UILTsocial
Colorway variations of the<br />
Modern Baby Quilt<br />
I have shown you how to make a modernstyle<br />
baby quilt using the green colorway of<br />
Northcott’s Cosmic Fusion fabric.<br />
This collection also comes in purple and orange<br />
colorways. Here’s how the quilt would look if you<br />
used the purple colorway and orange colorway.<br />
Just by using different colors, you get a completely<br />
different look. I hope you enjoy using this great<br />
Cosmic Fusion fabric collection by Northcott!<br />
Jean Boyd<br />
www.patternsbyjeanboyd.com<br />
Modern baby quilt using the purple Cosmic Fusion fabric from Northcott<br />
Modern baby quilt using the orange Cosmic Fusion fabric from Northcott<br />
Q<br />
.com<br />
UILTsocial<br />
| issue 8 11
Playing with the Brother NQ3500D<br />
built-in decorative stitches<br />
Liana Kirkey<br />
Brother NQ3500D’s<br />
I’m having a blast playing with the<br />
Brother NQ3500D – it’s not often I get<br />
to just sit and play on the machines.<br />
I’m discovering, though, that<br />
reviewing a machine is comprised<br />
of equal parts poking buttons, trial<br />
and error, and (gasp!) reading the<br />
machine’s instruction book. While<br />
developing these articles I found<br />
most of the tools and buttons very<br />
intuitive. However, some tools were<br />
new to me and I had to look them up<br />
in the book. Brother actually produces<br />
really good user manuals, so that part<br />
isn’t a hardship…<br />
Machines these days boast so many<br />
built-in stitches, yet I so often hear, “I<br />
never use them.” Sewing and not using<br />
your decorative stitches is like cooking<br />
and never using any seasoning!<br />
Embellishing is my second-favorite<br />
sewing pursuit and I feel that small-scale<br />
samplers are a wonderful way to stashbust<br />
and experiment with all kinds of<br />
stitches, techniques, and threads without<br />
being overwhelming. And with samplers,<br />
less is not more – the more filled with<br />
stitching it is, the more beautiful the<br />
result. The book Stupendous Stitching<br />
by Carol Ann Waugh is a wonderful<br />
inspiration for this, and you’ll definitely<br />
see her influence in the final results of<br />
the sampler shown here. I’m going to<br />
turn my creation into a slim case for my<br />
reading glasses…<br />
Bust a small bit of your stash<br />
Here’s a quick list of materials if you’d like<br />
to follow along and create with me:<br />
• cotton fabric backed with HeatnBond<br />
(Non-Woven Craft Weight Fusible<br />
Interfacing) to use as a base (I used a<br />
6” x 7” square of a very subtle print to<br />
show off the stitching, but suit your<br />
style – everything from solids to wild<br />
prints can work beautifully!)<br />
Q<br />
12 .com | issue 8<br />
UILTsocial<br />
• applique scraps to coordinate,<br />
backed with HeatnBond (I like their<br />
Light Weight)<br />
• an assortment of decorative threads<br />
and couching yarns<br />
• a bobbin filled with your regular<br />
sewing thread<br />
• flannel or soft cloth for lining (an<br />
eyeglass-cleaning microfiber would<br />
be even better), backed with<br />
HeatnBond<br />
NQ3500D exploration time<br />
I showed you the stitch panel under the<br />
machine’s top cover, here’s the home<br />
sewing screen where we can access all<br />
of those built-in stitches.<br />
On the NQ3500D’s sewing home screen, the blue<br />
stitch area hosts utility stitches, and the orange<br />
area is populated with decorative options.<br />
I decided to start with applique. This way<br />
I can use some coordinating scraps of<br />
fabric to set the tone and colorway of my<br />
panel. I sliced a piece of my fusible webbacked<br />
applique fabric into a few random<br />
curves and fused them into place.<br />
First up is to applique an edge down<br />
with a satin stitch. I chose and tested<br />
a zigzag from the first menu (1-10). I<br />
had to reduce my stitch length down<br />
to 0.1mm to get the coverage I wanted,<br />
and I’m not shy to tell you that I held my<br />
breath during the whole row thinking<br />
that it would jam with such a tight stitch.<br />
Nope – it fed beautifully and gave me<br />
perfect results! I then tried a randomwidth<br />
satin stitch (7-16) on another edge<br />
and discovered that the length and<br />
width settings were fixed – I couldn’t<br />
change them, but I really liked it as it was.<br />
The third stitch I tried was a feather stitch<br />
(6-4) straddling the edge.<br />
Three different applique finishes: satin stitch,<br />
random satin, and feather stitch.<br />
Now here’s where it gets really cool –<br />
and I get to show you that L/R Shift<br />
feature I rave about.<br />
Photos by Liana Kirkey
Because stitch patterns execute in the<br />
center of a presser foot, aligning the<br />
applique edge to the obvious center<br />
guide isn’t practical – here you can see<br />
how the right stitch of the pattern is<br />
too far away from the edge instead of<br />
hugging it as it should (I used the opentoe<br />
embroidery foot to give you a clear<br />
view of the needle position).<br />
Touching the edit/stitch switching key<br />
from here gives you this screen:<br />
By default, stitches locate in the center of the<br />
presser foot, not always the optimal location for<br />
easy guiding.<br />
Offsetting it would really make life easier<br />
– and that’s what the L/R Shift feature<br />
does: it lets you move a whole pattern<br />
left or right by 0.25mm increments!<br />
This is the manual adjustment screen on the<br />
NQ3500D – among other adjustments, here’s<br />
where you can shift your stitch left or right.<br />
I chose three stitches: a blanket stitch<br />
(10-20), one of the hemstitches (3-05),<br />
and a blind applique (1-34). I played with<br />
stitch length, width and that awesome<br />
L/R Shift to achieve just the look I wanted<br />
– and that blind stitch is barely visible – so<br />
perfect! The precision that feature offers<br />
me for edge work is fantastic!<br />
For the next little while I’m just going to<br />
play with stitches and try out the tools in<br />
the stitch screen and the editing screen.<br />
These screens offer some neat options;<br />
so let me give you a quick primer on<br />
what they contain, starting with the<br />
stitch screen:<br />
Traditional and contemporary quilter’s applique<br />
stitches: the nearly invisible blind applique, blanket<br />
stitch applique, and the angled blanket stitch<br />
The stitch screen makes the most basic but useful<br />
stitch tools conveniently available.<br />
Most of the icons on this screen are<br />
self-explanatory; along the bottom row,<br />
however, we have from left to right:<br />
• auto-pivot: I love this one! It’s an<br />
automated substitute for the knee<br />
lifter. With it highlighted, whenever<br />
you stop sewing, the needle sinks,<br />
the foot rises, and you can adjust your<br />
fabric direction. It’s so helpful when<br />
navigating curves and corners! I’m<br />
keeping it turned on for this project!<br />
• auto-reinforcement: I use this a lot,<br />
more on this later.<br />
• auto-thread cutter: another favorite of<br />
mine that we’ll employ in the next article.<br />
• save to memory: developed the<br />
perfect stitch settings or stitch<br />
combination? Save it to memory to<br />
use again and again…<br />
• image: this key shows you an<br />
enlarged image of your selected<br />
pattern<br />
• edit/stitch switching key (this one gets<br />
you in and out of the editing screen).<br />
Keeping your most-needed tools at the ready, the<br />
NQ3500D’s stitch screen is clear and intuitively<br />
set up.<br />
Now this screen holds the stitch toys,<br />
which are well-detailed in the manual:<br />
• free motion mode: this sets the<br />
presser foot height for free motion<br />
work (must lower feed dogs to use<br />
this correctly)<br />
• mirror image: horizontally mirror<br />
image most stitches<br />
• back to beginning: partway through<br />
a pattern and want to start over?<br />
Press this button!<br />
• single/repeat mode: sew<br />
continuously or just a single pattern<br />
using this<br />
• size selection: choose between<br />
preset L/S pattern sizes where<br />
available<br />
• variable key: this one changes<br />
depending on the selected stitch; it<br />
can offer pattern elongation, density,<br />
or character spacing control<br />
• step stitch keys: this key uses the<br />
sideways feed to shift patterns left<br />
or right<br />
So now, after a couple of hours of<br />
playing with all of these goodies, I now<br />
have a nearly-complete sampler (I’ve left<br />
some room for next foray).<br />
Q<br />
.com<br />
UILTsocial<br />
| issue 8 13
Nearly done – with just enough space to add in some truly original stitch options.<br />
Whenever I tested a stitch setting I liked,<br />
I added it to my panel, aligning the edge<br />
of the presser foot up to a previous row<br />
of stitching to keep my spacing even.<br />
I’ve discovered how much I like the<br />
open-toe embroidery foot for this – I can<br />
really see where I’m going!<br />
The scissors tool is also a real winner in<br />
my book. Trimming is neat and tidy, and<br />
it really keeps the thread tails under<br />
control. My sewing area isn’t nearly the<br />
mess of threads it usually is!<br />
Some observations made while playing<br />
• some menus seem to repeat patterns<br />
found in other menus<br />
• some stitches don’t let you adjust<br />
the stitch length or width, and others<br />
have preset large and small options.<br />
• the maximum speed seems to vary<br />
with the stitch pattern – some seem<br />
distinctly slower. The stitch quality<br />
is impeccable, so perhaps that’s<br />
Brother’s way of optimizing “quality<br />
control”?<br />
• I fared better when using the<br />
foot control on some stitches –<br />
my steering was certainly more<br />
consistent when I could control the<br />
start, stop and speed with my foot<br />
and keep my hands on my fabric.<br />
• a light touch on the fabric was all<br />
that was needed to steer around the<br />
curves. The feed dogs and presser<br />
feet are elongated on the NQ series<br />
for better control, and that’s definitely<br />
evident in how responsive it is.<br />
• the extra-large, sideways motion<br />
stitches are really cool, but trickier to<br />
steer. I did use one of them, but most<br />
were too large for this little sampler.<br />
• combining stitches from the<br />
decorative stitch menus is so very<br />
easy just select one stitch, then<br />
another. Can you find the combined<br />
patterns in the above picture?<br />
• metallic thread posed no problem,<br />
even at full speed, though I did have<br />
to lower the upper thread tension<br />
significantly. Of course, I was using<br />
the supplementary spool guide as<br />
recommended.<br />
So… if you’ve been playing along with<br />
me, you’ll now have an embellished<br />
panel, too – I hope you’ve left some<br />
room for a few more stitches, because<br />
I’m going to show you how to create<br />
your own stitches in My Custom<br />
Stitch. I might even have to add some<br />
couching, because I just love the look<br />
and texture of it.<br />
I have had so much fun exploring these<br />
tools, and really enjoyed sharing them<br />
with you. If you have indeed been<br />
playing along with me, I’m sure everyone<br />
would love to see your creations. Keep<br />
reading, I look forward to touring<br />
another exciting facet of the Brother<br />
NQ3500D with you all!<br />
Q<br />
14 .com | issue 8<br />
UILTsocial
Get your game on!<br />
Bring your quilting and crafting to a whole new level.<br />
Create your own unique quilts, wall hangings, games, placemats and so much more with Brother’s<br />
Q-Series sewing and quilting machines, and ScanNCut home and hobby cutting machine.<br />
Brother’s ScanNCut comes fully loaded with an exciting collection of quilt block patterns so<br />
you can design your own one-of-a-kind creations with the push of a button! Now, cut your<br />
favourite material into any shape — no matter how intricate — without ever touching bulky<br />
design cartridges or even a pair of scissors.<br />
Brother’s ScanNCut and Q-Series sewing and quilting machines —<br />
the only thing limiting your creativity is your imagination.<br />
CM650W<br />
ScanNCut2 - cut incredible appliqué,<br />
fabric pieces and quilt blocks with ease<br />
Create your own magnetic, quilted tic-tac-toe<br />
board like the one featured here.<br />
See how at brother.ca/tic-tac-toe<br />
Visit brother.ca/findadealer to find your closet<br />
authorized Brother dealer.<br />
NQ900<br />
Stylist - Q-Series sewing & quilting<br />
machine. Fall in love with the large<br />
workspace and wide table<br />
INSPIRING CREATIVITY FOR GENERATIONS<br />
Brother and its logo are trademarks of Brother Industries Ltd., Japan. All specifications are subject to change without notice. © 2016 Brother International Corporation (Canada) Ltd. 11/2016 83516<br />
15
Brother NQ3500D<br />
Design<br />
your own<br />
decorative stitches<br />
with<br />
My Custom Stitch<br />
We’ll explore something new. Well, kinda<br />
new: Brother machines have sported<br />
the My Custom Stitch feature for<br />
many, many years now, yet it’s such an<br />
underused tool (or should I say, ‘toy’?).<br />
I like to consider My Custom Stitch an<br />
advanced Etch-A-Sketch, and I have a<br />
sneaking suspicion that I’m dating myself<br />
by saying that!. With My Custom Stitch,<br />
you can create your own stitch patterns<br />
by plotting points on a grid. The section<br />
devoted to it in the manual is quite small,<br />
but it really doesn’t need to be larger – it<br />
contains all the detail you need to begin<br />
designing your own stitch patterns.<br />
And among the accessories included<br />
with the NQ3500D is a set of paper grid<br />
sheets so you can sketch out your ideas<br />
with pencil and paper before teaching<br />
them to the machine.<br />
I was looking for a specific stitch, and I<br />
couldn’t find it among the built-ins. One<br />
was close, but not exactly what I wanted,<br />
so I hand-drew my idea on one of the<br />
grids to remind myself of the first one I<br />
wanted to create. And because I’m funny<br />
that way, I even dotted the points that I<br />
want to set…<br />
My first sketch of a simple design, ready to<br />
transfer to My Custom Stitch<br />
Q<br />
16 .com | issue 8<br />
UILTsocial<br />
It’s playtime<br />
So, let’s check out this cool feature! If<br />
you have a Brother sewing machine,<br />
there’s a good chance that you have<br />
this hidden gem. Why not polish your<br />
stitch designing skills by following<br />
along with me?<br />
From the now-familiar sewing home<br />
screen, touch the pencil button along<br />
the bottom row to open up My Custom<br />
Stitch. You’ll see this screen, or possibly a<br />
variation of it if you have a different model:<br />
This is what the My Custom Stitch screen looks<br />
like… but don’t let it intimidate you!<br />
This screen looks more complex than<br />
it is – but most of it is taken up with<br />
arrows! So rather than diving into a<br />
sea of technical explanations, let’s just<br />
enter the first point. Referencing the<br />
drawing on paper, I think I want to work<br />
horizontally rather than vertically – the<br />
button in the top left takes care of that.<br />
Next, I’ll use the arrows surrounding the<br />
set button to move the pencil on the<br />
grid up 7 points to match my drawing.<br />
When it’s in the right place, touching<br />
set places the stitch.<br />
Still using the arrows, I’ll just keep<br />
moving the pencil and setting the<br />
stitches where I want them, continuing<br />
until I made one full repeat of my<br />
pattern. The top of the screen keeps<br />
track of how many stitches I set as well<br />
as the pencil’s current stitch point and its<br />
grid coordinate.<br />
A simple stitch pattern already completed on My<br />
Custom Stitch<br />
I only needed to enter six stitch points<br />
for this pattern (some are top of each<br />
other, in the middle of the ‘y’) before it<br />
repeats itself. The Test button displays a<br />
preview of my creation.<br />
A preview of the My Custom Stitch stitch<br />
pattern shown as if continuously stitched.<br />
My own creations from My Custom Stitch<br />
And here they’re tested out for real.<br />
Viewing from top to bottom, the first<br />
row is as I designed it, and the others<br />
are the result of making simple width<br />
and length adjustments. You can see<br />
that I’m really having fun with My<br />
Custom Stitch!<br />
The first of many My Custom Stitch creations<br />
to come!
I wanted to see what my first creation<br />
would look like with a heavier stitch, so<br />
I input the same stitch points again. This<br />
time, though, I used the triple stitch<br />
setting on all advancing stitches. You<br />
can’t see a difference on the editing<br />
screen except for the stitch count, but in<br />
my actual sew-out below, you can clearly<br />
see the weightier stitch version (5th row);<br />
it really shows off my pretty threads!<br />
And then I got carried away (who, me?)<br />
and created a few more. I tried a few of<br />
my own design, one from the machine<br />
manual, and a couple from the book<br />
My Custom Stitch by Barbara Skimin,<br />
published in 2002. That could be a toughie<br />
to find, but it’s still a great reference.<br />
There’s no need to worry about messing<br />
up the originals; your edited versions are<br />
saved as copies. You can save up to 15<br />
custom stitch patterns to the machine’s<br />
internal memory, or as many as you<br />
like on a USB stick. And for the tecchies<br />
who just need to know: stitch patterns<br />
save as numbered .pmv files, which you<br />
may rename at your computer. Your<br />
computer won’t be able to open these<br />
files, but if you set up a folder for them,<br />
it’s a great place to store a growing<br />
collection. Just pop ’em on a USB stick<br />
when you want to play with them on<br />
your machine.<br />
While we’re on the topic of saving<br />
stitches, of course I saved all my<br />
creations (okay, the ones I liked) so I<br />
could use them to finish off the sampler.<br />
They don’t look like much on screen, but<br />
they sure stitched out pretty!<br />
Can you spot ‘my’ stitches in the final<br />
piece? Some of them are kinda tricky;<br />
I think I was over-exuberant and didn’t<br />
leave myself as much room as I thought!<br />
Stitch panel, topped up with some My Custom<br />
Stitch creations<br />
I really had fun playing with My Custom<br />
Stitch, and I know I’ll be looking at<br />
anything patterned with new eyes. I<br />
might even take a second look at some<br />
of the hand embroidery stitches I’ve<br />
dismissed in the past because I don’t<br />
have the patience to hand sew.<br />
I hope that if you have a Brother<br />
machine, or plan on getting one, you’ve<br />
been inspired to check out My Custom<br />
Stitch and maybe design some stitch<br />
patterns of your own. It’s amazingly easy,<br />
and even a tiny bit addictive!<br />
Getting carried away is easy with My Custom<br />
Stitch. How many can you create?<br />
Now, while My Custom Stitch isn’t new,<br />
though, I think you’ll agree that it’s pretty<br />
cool – Brother has added something<br />
new starting with the Q-Series: you can<br />
now edit existing built-in stitches as well<br />
as previous creations. So, of course I had<br />
to try it out. It’s very similar to creating<br />
your own stitch, without having to start<br />
from scratch. Again, I was impressed at<br />
how easy it really was to do.<br />
Saved patterns don’t look very exciting – a good<br />
reason to make a stitched “bible” of all your<br />
stitches. They look so different on fabric!<br />
Retrieving My Custom Stitch patterns<br />
from either your machine or the USB<br />
stick is as easy as selecting other stitches<br />
on the NQ3500D: from the sewing home<br />
screen, touch the drawing icon next to<br />
the pencil, choose the source (machine<br />
or USB stick) and folder (bPocket is the<br />
default but I renamed mine just to see if<br />
the machine would read it – it did), and<br />
choose your stitch. Touch ‘Set’ and you’re<br />
ready to sew, with all of the regular stitch<br />
editing options of the built-in decorative<br />
stitches. So now it’s time to fill in the<br />
last few blank spots on the sampler we<br />
began before.<br />
Q<br />
.com<br />
UILTsocial<br />
| issue 8 17
practical sewing features of the<br />
Top 10 Brother NQ3500D<br />
One of these things is not like the other… can you<br />
tell the differences between the straight stitches?<br />
Having explored a range of the fun<br />
features of the NQ3500D it’s a good time<br />
to knuckle down and investigate the<br />
core sewing basics.<br />
Incredibly easy threading<br />
I’m still marvelling at that now. I’ve<br />
never experienced anything easier to<br />
thread than this! Especially the needle –<br />
you’ve just got to watch the video. Here<br />
it is, we’ve SLOWED it down for you.<br />
Watch as real magic happens:<br />
https://youtu.be/Vrl3MiGrf0E<br />
Pre-set straight stitches for all<br />
sewing genres<br />
A straight-stitch is probably the<br />
single most important stitch on a<br />
sewing machine, and it should come<br />
as no surprise that the NQ3500D<br />
offers plenty of options. No matter<br />
your sewing pursuit, you’re sure to<br />
find a pre-set straight stitch that will<br />
become your “go-to”.<br />
You may remember Brother’s NQ3500D<br />
main sewing screen which included<br />
several straight stitches. Some may find<br />
that confusing, but it’s actually pretty<br />
cool. Take a closer look and see if you<br />
can spot the differences:<br />
Stitches 1 to 4 are each thoughtfully<br />
pre-set with a different combination<br />
of needle positions (left or center) and<br />
reinforcing style (traditional backstitch<br />
or in-place lockstitch). First, note the<br />
placement of each stitch in its display<br />
box on screen: a stitch shown on the<br />
left stitches on the left; stitches pictured<br />
in the middle stitch in the center. Handy,<br />
but it gets even better: simply by<br />
changing the stitch width setting, one<br />
can access all 15 straight stitch needle<br />
positions. That’s 7 places on either side<br />
of center! If that isn’t enough – you can<br />
adjust them further with the L/R Shift.<br />
Stitch 5 is a triple straight stitch, perfect<br />
for seams needing extra-strong<br />
stitching.<br />
But wait for it… there’s even more! Take<br />
a look at stitches 29, 30, and 31 from<br />
the stitch card, below. See the little “P”<br />
footnote? These are set up specifically<br />
for piecing (quilters, this means you!).<br />
They are shorter stitches, and are<br />
positioned respectively ¼” from the<br />
right edge of the standard sewing foot,<br />
in the center, and ¼” from the left edge<br />
of the standard sewing foot. Someone<br />
was really thinking!<br />
NQ3500D stitch panel<br />
Convenient automatic seam reinforcing<br />
and thread trimming<br />
Now, above, I also mentioned<br />
reinforcing styles; these correspond to<br />
the securing buttons near the needle.<br />
But again, someone really had their<br />
thinking cap on: use these stitches (or<br />
any others) with the tools along the<br />
screen’s bottom row and you have<br />
some really time-saving conveniences.<br />
Envision this in your mind as I do this:<br />
select stitch 101 and activate the Auto<br />
Reinforcement (the U-turn) and Auto<br />
Thread Cutter (the scissors) tools on<br />
screen. Begin stitching. The machine<br />
takes 3 stitches, backs up 3 stitches,<br />
then proceeds until you press the<br />
U-turn button near the needle. Then<br />
it immediately backs up 3 stitches,<br />
forwards 3, and trims the thread. I told<br />
you – it’s “automagic”! These functions<br />
work on all stitches, and each stitch<br />
secures itself appropriately to the<br />
stitch type. Here’s a few to show you<br />
– beautiful stitch quality, and clean,<br />
precise reinforcements. Don’t you just<br />
love it?<br />
Q<br />
18 .com | issue 8<br />
UILTsocial
The NQ23500D does a lovely job of finishing.<br />
Shown here: auto-securing and auto-trim results<br />
Knee Lifter<br />
I’m a huge fan of the knee lifter. This<br />
handy tool is inserted into its port on<br />
the front of the machine, and offers<br />
hands-free control of the presser foot<br />
lifter. A nudge of the knee can raise or<br />
lower the presser foot, allowing you to<br />
keep your hands on your work for better<br />
control. It’s often found on industrial<br />
machines because when properly used,<br />
it’s a huge production-booster. A little<br />
bit of practice and its usage becomes<br />
second nature.<br />
Pivot function<br />
The Pivot Function can do much<br />
the same thing as a knee lifter, only<br />
automatically. With it activated, every<br />
time you stop sewing, the needle sinks<br />
into the fabric and the presser foot rises,<br />
allowing you to rotate your fabric. So<br />
handy, especially if you can’t get the<br />
hang of the knee lifter! And, of course,<br />
there’s more (there’s always more!)… It<br />
does something else that I really like:<br />
when you have the auto secure and the<br />
auto trim turned on with it, it raises the<br />
presser foot for you after securing and<br />
trimming. How cool is that?<br />
A whopping 13 presser feet included<br />
All of the basic necessities are included<br />
with the NQ3500D to get you sewing<br />
in style. Many of these feet are ‘quickswitch’;<br />
they snap on and drop off with<br />
the touch of a lever. Several of them,<br />
meant for techniques requiring a more<br />
stable hold, screw securely on to the<br />
presser foot bar.<br />
A great collection of presser feet to grow into!<br />
From top to bottom, left to right:<br />
zigzag foot (with levelling button),<br />
monogramming foot, blind hem foot,<br />
overcasting foot, zipper foot, open toe<br />
embroidery foot, stitch guide foot, opentoe<br />
quilting foot, non-stick foot, button<br />
sew-on foot, embroidery foot, adjustable<br />
zipper foot, and the buttonhole foot.<br />
These all store in the slide-on accessory<br />
tray surrounding the freearm, ready to<br />
be attached in a flash.<br />
Hassle-free fabric feeding with the<br />
AHA® Feature<br />
No more struggling with varying fabric<br />
thicknesses… when the Automatic<br />
Fabric Sensor System is turned on,<br />
the NQ3500D automatically and<br />
continuously senses the fabric thickness<br />
and adjusts the presser foot pressure for<br />
you. Of course, you can override it, but<br />
why would you when it works so well?<br />
Automatic buttonholes<br />
Slip your button into the back bracket<br />
of the buttonhole foot and snug the<br />
holder in place – that’s all it takes to<br />
measure your button perfectly! Then<br />
choose your buttonhole and lower the<br />
sensor lever. Push the start/stop button<br />
and the machine does the rest. It really<br />
couldn’t be easier! There are buttonholes<br />
for all weights of fabric, even a stretch<br />
buttonhole, and a tracer for bound<br />
buttonholes.<br />
Contents of the buttonhole menu<br />
The button sew-on foot, just finished sewing on<br />
a button.<br />
Hidden gems on the buttonhole<br />
menu<br />
Also on the buttonhole menu are a<br />
few related stitches that just beg to be<br />
mentioned, since I included them in the<br />
above stitch out: 2 mending stitches,<br />
a bar tack (I made two of those in<br />
different sizes), an eyelet, and a buttonsew-on<br />
program. They’ve really thought<br />
of everything!<br />
Built In sewing fonts<br />
The NQ3500D has 5 sewing fonts built in:<br />
block, script, double block, Cyrillic, and a<br />
Japanese font.<br />
I took a few minutes to play with the<br />
block font; it was easy to enter and<br />
quick to stitch, and I’m quite pleased<br />
with its clarity. I like this, and can see<br />
its usefulness for smaller labels and the<br />
like, but I’m glad that this machine also<br />
embroiders – I’m definitely partial to<br />
richly embroidered lettering. Still…<br />
Slip the button in the bracket on the foot, snug it<br />
in and you’re ready to sew.<br />
Getting carried away is easy with My Custom<br />
Stitch. How many can you create?<br />
Q<br />
.com<br />
UILTsocial<br />
| issue 8 19
My bonus “faves”<br />
As I was stitching out the samples for<br />
the pictures above, of course I was<br />
using the very tools I was speaking of.<br />
But… there were other features I relied<br />
upon that really deserve their own<br />
special mention again.<br />
I wanted to use the NQ3500D at home<br />
while standing at a high counter. So I<br />
didn’t bother using the foot control this<br />
time – I exclusively used the start/stop<br />
button and the speed control slider.<br />
While I like the foot control for larger<br />
projects, the freedom of not needing it<br />
was great!<br />
Project time<br />
I’m going to turn the small panel I<br />
embellished over the last couple of<br />
articles into a fancy little case for my<br />
eyeglasses. If you missed the supply list,<br />
please go back to the article, Playing<br />
with the Brother NQ3500D’s built in<br />
decorative stitches.<br />
My glasses are only a slim pair of<br />
magnifiers, so I don’t need a large case.<br />
Follow along with these steps, using your<br />
own glasses to measure:<br />
1. To make my pattern, I wrapped a<br />
piece of paper around my glasses to<br />
determine how wide I needed to cut<br />
my panel, factoring in about a ¼” seam<br />
allowance. I added some curve to the<br />
bottom and top for interest, like this:<br />
2. I layered my stitched panel and<br />
fusible-backed flannel right sides<br />
together and cut them out according<br />
to my pattern, leaving the bottom<br />
curves uncut for now.<br />
3. Matching the top curves, I stitched<br />
(using stitch 1-29 – the right-hand<br />
piecing stitch) around the top curve<br />
only. Since I sewed fusible side up, I<br />
used the non-stick foot. And I was so<br />
intent on sewing slowly and carefully<br />
around those tight curves, I forgot<br />
to change thread colors! At least this<br />
seam will be on the inside – unseen<br />
after this. And you won’t tell, will you?<br />
4. I clipped the curves closely…<br />
Stitch along the top edge and clip the<br />
curves closely.<br />
5. Then I turned it right-side out,<br />
smoothing the curves with my fingers<br />
and pressed it, fusing the flannel lining<br />
to the wrong side of the panel.<br />
7. I cheated and used the overcasting<br />
(G) foot with left straight stitch 1-01<br />
and stitched along the edge as shown,<br />
using the guide on the foot to stay<br />
an even distance from the edge. Of<br />
course, I turned the auto secure and<br />
auto trim on!<br />
TIP Using the overcasting foot (G) and the<br />
left-most straight stitch will give you a lovely<br />
¼” seam allowance.<br />
8. Last chance to trim away any pokey<br />
threads, and then overcast the edges<br />
with 1-16 – I like this overcast – it’s<br />
quite pretty.<br />
So here’s the final little project (I hope<br />
the picture’s in focus, I took it with my<br />
glasses off!)<br />
It’s now turned, and fused with right sides facing out.<br />
6. Next step was to fold it in half<br />
lengthwise and now cut the<br />
bottom curves.<br />
Stitched and stuffed (with glasses), this<br />
case is complete!<br />
It has certainly been a wonderful<br />
experience getting to play so intensely<br />
with the Brother NQ3500D; it’s certainly<br />
a machine with many fantastic, covetworthy<br />
features. It’s advanced enough to<br />
satisfy experienced sewists, yet intuitive<br />
and easy enough to learn and grow into.<br />
Definitely a winner! Cheers, and until<br />
next time: happy sewing!<br />
Liana Kirkey<br />
liana@thatsewingplace.ca<br />
My pattern piece on top of my fabric; the ruler is<br />
for a size reference.<br />
Q<br />
20 .com | issue 8<br />
UILTsocial<br />
Match the edges carefully, and then cut the<br />
bottom curves.
hooked on books<br />
Celebrate Canada<br />
Nellie Holmes and Christine Baker<br />
The newest book from Nellie and Christine features<br />
two quilts and smaller projects such as an apron,<br />
wall hanging and tote bag made using Northcott’s<br />
Oh Canada line of fabric. Full colour, easy to<br />
understand instructions!<br />
24 Pages, ISBN 978-0-9735183-3-7<br />
Upper Canada Quilt Works Publishing<br />
available at quilt shops or online at<br />
www.uppercanadaquiltworks.com<br />
or as a ebook on Craftsy<br />
Make Precut Quilts<br />
10 Dazzling Projects to Sew<br />
Favorite Designers<br />
Precut projects from favorite designs<br />
Quilting with precuts is easy, fast, and fun! Feature<br />
your favorite fabric collection in these 10 precutfriendly<br />
designs using charm packs, layers cakes,<br />
and jelly roll strips. The versatile patterns from top<br />
designers work with a variety of prints and solids,<br />
and beginner and intermediate quilters will love<br />
the bright and friendly designs. This value-packed<br />
booklet features 5 layer-cake patterns and 5 for<br />
charm squares and precut strips–perfect for anyone<br />
who wants to jump straight into sewing!<br />
42 pages, ISBN 978-1-61745-488-2<br />
Stashbooks<br />
ctpub.com<br />
Make Table Runners<br />
10 Delicious Quilts to Sew<br />
Favorite Designers<br />
A runner for every table<br />
Dress up your table with 10 colorful table runners<br />
from top designers! Whether you prefer appliqué<br />
or patchwork, traditional or modern, fancy floral or<br />
geometric designs, you’re sure to find something<br />
you’ll love. And with table toppers quick enough to<br />
make in a weekend, you can switch up your decor<br />
any time you feel like it. This value-packed booklet<br />
is sure to become your new go-to for gifts, seasonal<br />
decoration, and quick, fun projects to use up your<br />
stash!<br />
34 pages, ISBN 978-1-61745-486-8<br />
Stashbooks<br />
ctpub.com<br />
Make Baby Quilts<br />
10 Adorable Projects to Sew<br />
Favorite Designers<br />
The cutest baby quilts you'll ever see<br />
Jump right in and get sewing! With this valuepacked<br />
booklet of 10 baby quilt patterns from<br />
top designers, you’ll find a perfect style for every<br />
baby. Cute and fun appliqué patterns are mixed in<br />
with bright and cheerful patchwork, with designs<br />
ranging from traditional to modern. And with clear<br />
instructions, illustrations, and how-to photos, even<br />
beginner quilters will be whipping out these quilts<br />
in no time at all. Never wonder what to make for<br />
that new baby again!<br />
42 pages, ISBN 978-1-61745-490-5<br />
Stashbooks<br />
ctpub.com<br />
Intentional Piecing<br />
Amy Friend<br />
Let's get fussy about fabric! Fabric choice can make<br />
or break a quilt design, and quilters are always<br />
looking for ways to spotlight their favorites. Fabric<br />
has an uncanny ability to transform a project,<br />
evoke a mood and deliver a whole, new level of<br />
satisfaction to today's quilter. Learn to focus on<br />
precise, mindful work and have fun with fussy<br />
cutting with Intentional Piecing: From Fussy Cutting<br />
to Foundation Piecing, by award-winning quilter Amy<br />
Friend. Amy establishes how to make the fabric the<br />
start of every quilt in spirited, modern projects you'll<br />
use every day.<br />
160 Pages, ISBN 978-1-940655-1-85<br />
Lucky Spool<br />
www.thomasallen.ca<br />
A New Spin on Drunkard's Path<br />
12 Innovative Projects • Deceptively Simple<br />
Techniques<br />
John Kubiniec<br />
Think you’ve seen all you can make with the<br />
Drunkard’s Path block? Think again! Open your<br />
eyes to a new take on curved piecing with quilting<br />
teacher John Kubiniec. Go beyond the basics with<br />
12 innovative projects based on a classic pattern.<br />
Discover how using pre-pieced units like rail fences,<br />
half-square triangles, and sixteen-patches can<br />
completely change up the Drunkard’s Path look.<br />
Take it a step further with creative sashings and<br />
add-ons to alter the finished layout. The end result<br />
looks complex but is actually easy to sew!<br />
82 pages, ISBN 978-1-61745-301-4<br />
Stashbooks<br />
ctpub.com<br />
Q<br />
.com<br />
UILTsocial<br />
| issue 8 21
Spiders Hanging<br />
by a Thread<br />
It really doesn’t get<br />
much better than<br />
this when it comes to<br />
taking a quilted wall<br />
hanging right outside<br />
the box, or in this<br />
case off the web! This<br />
sweet spider quilt will<br />
mesmerize anyone<br />
when you see that last<br />
spider hanging on by<br />
a thread!<br />
Jackie White<br />
Q<br />
22 .com | issue 8<br />
UILTsocial<br />
Photos by Jackie White
Gather all your tools<br />
and supplies you'll<br />
need for the quilted<br />
wall hanging.<br />
finished measurements 11" x 54"<br />
materials<br />
• 5 fat quarters<br />
• ½ yd black rick rack medium and small<br />
size<br />
• HeatnBond Feather Lite Iron-On<br />
Adhesive<br />
• Two ½ yard different pieces white/<br />
black print fabric for background fabric<br />
• 1 fat quarter for binding<br />
• 1 yd batting<br />
• 1 yd backing<br />
• 10 fun buttons<br />
• 12 - 15” embroidery thread to match<br />
spider webs<br />
Template used to create spider web<br />
Instructions<br />
Making the cobweb<br />
The first thing we need to do is make<br />
our cobweb template. You do this by<br />
measuring 4½" across and a center point<br />
5" down, which is 2¼” in the middle. Cut<br />
out of cardboard ¼” up from the bottom<br />
point, cut off the little point.<br />
Using your nice template, cut 4 patterns<br />
out from two different pieces of fabric<br />
each so you have a total of 8 fabric<br />
template pieces.<br />
Alternating the fabric, sew four wedges<br />
together. Press. Laying each ½” circle on<br />
the cutting board, trim off any points<br />
on the flat edge so you get a nice clean<br />
straight line.<br />
Sew the 2 halves together matching the<br />
center point and press.<br />
Trim all the little end points. One cobweb<br />
done! Make 4 more cobwebs using your<br />
different pieces of fabric.<br />
Cut five 11½” squares from the<br />
background fabric.<br />
Cut ½” strips of HeatnBond Feather<br />
Lite Iron-On Adhesive and then subcut<br />
into 3½” strips and apply to the outer<br />
edge of each of the cobwebs following<br />
manufacturer’s instructions.<br />
Center the cobweb on each background<br />
square and press.<br />
Sew using black thread and create fun<br />
cobweb patterns in each of the cobweb<br />
blocks. You can do different quilting<br />
patterns or the same one for each<br />
cobweb. I chose the same linear pattern as<br />
my fabric is quite colorful and busy, so wanted<br />
something simple to offset the cobwebs.<br />
Sew the two halves of the cobweb together.<br />
Apply strips of HeatnBond Iron-On Adhesive to<br />
border of cobweb.<br />
Press the fused cobweb to the center of the<br />
background block.<br />
Using your fancy template, cut out 4 cobweb<br />
shapes from 2 different fabric pieces for a total of 8<br />
cobweb pieces.<br />
Cut along the edge of cobweb to ensure you have<br />
a nice clean line.<br />
Sew a fun pattern to attach the cobweb to your block.<br />
Q<br />
.com<br />
UILTsocial<br />
| issue 8 23
Making spiders for your quilt<br />
Q<br />
Sew the spiders onto the<br />
blocks and sew the blocks<br />
together. Leave the last block<br />
with no spider on it.<br />
Stitch around body of spider<br />
and stitch bend in spider legs<br />
to hold shape.<br />
24 .com | issue 8<br />
UILTsocial<br />
Let's finish things up by creating our<br />
black spiders!<br />
Cut five 4½” squares of black fabric. Iron<br />
on the HeatnBond Feather Lite Iron-On<br />
Adhesive.<br />
Set one aside. Free hand draw an oval<br />
four different sizes. You can do it on<br />
paper first then cut out and trace onto<br />
the paper side of the adhesive, or draw<br />
directly onto that.<br />
These are going to be your spiders. Cut<br />
twenty four 3½” pieces of rick rack. These<br />
are going to be your spider legs.<br />
Taking one black spider, 6 pieces of rick<br />
rack and one cobweb block. Lay spider<br />
out on block and tuck 3 ends of rick rack<br />
under one side of spider and 3 on the<br />
other side. Press.<br />
Repeat for 3 more spiders. Stitch around<br />
the body of the spider securing the rick<br />
rack legs in place and attaching them to<br />
the block. Bend the rick rack as you stitch<br />
down each leg, creating bent spider legs.<br />
One block won’t have a spider. Sew the<br />
blocks together in a vertical row with the<br />
last or bottom block not having a spider<br />
on it.<br />
For the fifth black fabric square, cut out<br />
the spider shape from that fused piece<br />
and cut the same shape out of another<br />
piece of black fabric not fused. Remove<br />
paper, sandwich together right sides out<br />
but do not press. Tuck legs into spider<br />
sandwich and then press creating a<br />
spider on its own.<br />
Stitch around outside of spider to secure<br />
legs. Kink the spider legs to cause a bend<br />
and stitch the fold in the rick rack to hold<br />
in place for each leg. Set this spider aside.<br />
Pin backing and batting to top and get<br />
ready to quilt. Using black thread, quilt fun<br />
patterns in each of the spiders. Quilt in<br />
the background as well.<br />
I quilted by echoing the shapes of the<br />
cobweb. Put on the binding as well.<br />
On each spider add cute button eyes. I<br />
simply had to add polka dot buttons.<br />
On the last block stitch down a 10 - 12”<br />
piece of embroidery thread starting<br />
somewhere on the last cobweb and<br />
hanging down off the quilt, then attach<br />
to the back of the final spider. If you find<br />
it's too flimsy, take a piece of cardboard<br />
slightly smaller than your spider and glue<br />
to the back of the spider then tape the<br />
piece of embroidery floss to it.<br />
Sew a sleeve to the back. Hang your<br />
spider quilted wall hanging and get ready<br />
for the compliments to roll in!<br />
Add some fun buttons for eyes on your cute spiders!<br />
Attach embroidery thread to the cobweb and then<br />
to the spider so he's hanging off the quilt.<br />
Jackie White<br />
jacwhite@amtelecom.net<br />
jabotquilt.blogspot.ca/<br />
twitter.com/jackiewhite121
cr eativ<br />
100% cotton thread<br />
A fine, strong, high quality sewing thread<br />
for hand or machine sewing, no matter<br />
the stitch type or fabric.<br />
Gütermann 50 wt. Cotton Quilting thread<br />
is made of long staple 100% Egyptian<br />
mercerized cotton; it’s versatile and gives<br />
seams a natural character.<br />
• Suitable for hand or machine sewing; the<br />
perfect thread for your quilting projects<br />
• Larger cone sizes are excellent for long arm<br />
quilting machines<br />
• Available in 100m, 250m, 400m, 800m, 3000m<br />
and 5000m spool lengths<br />
• 186 stunning solid and variegated shades<br />
• Ideal for ornamental stitches, decorative<br />
seams and embroidery<br />
• Soft and supple with tear and abrasion<br />
resistance<br />
• Colorfast: fade resistant to UV rays and<br />
multiple washings<br />
Look for Gütermann threads at your favourite<br />
fabric, sewing and quilting store!<br />
25
A Quilter’s Review of the<br />
PFAFF creative 4.5 Sarah Vanderburgh<br />
PFAFF creative 4.5 sewing machine<br />
This machine is a dream come true for<br />
machine embroiderers. No question it<br />
has a lot of features to let your creativity<br />
run wild. But what about for the<br />
intermediate quilter? How could I benefit<br />
from the PFAFF creative 4.5? Let's shine<br />
the light on some of the features that<br />
make quilting on this machine a joy.<br />
Set up and Sew<br />
This machine doesn’t just stitch for you, it<br />
does all the little things to make quilting<br />
easier too. Threading the machine is<br />
easy and threading the needle is even<br />
easier as the built in needle threader<br />
actually works well. I haven’t manually<br />
thread my needle yet which is really<br />
saying something. When I got my first<br />
machine many years ago I went to the<br />
department store for a get to know your<br />
machine class. I was shown how to use<br />
the automatic needle threader and did<br />
it approximately three times at home<br />
before I forgot how and gave up.<br />
This time I taught myself with the<br />
excellent PFAFF creative 4.5 manual!<br />
The manual is truly your best friend as<br />
you start to explore this machine. The<br />
labelled diagrams and explanations<br />
make it easy to figure out how to do<br />
things on the machine you expect to<br />
do – and things you may never have<br />
thought of! The manual is also available<br />
in the machine – touch “i” in the bottom<br />
task bar on the Color Touch Screen and it<br />
brings up an information menu.<br />
Bobbin Winding is a Breeze<br />
There’s a bobbin winder built in to the<br />
top of the machine – you use it with the<br />
top thread you have on the vertical spool<br />
holder just like normal, but you can also<br />
wind a bobbin with a second spool on<br />
a horizontal pin and keep your machine<br />
threaded. This is especially handy when<br />
you’re using two different color threads.<br />
Built-in Needle Threader in position Needle threaded by built-in needle threader Winding bobbin with second spool of thread<br />
Q<br />
26 .com | issue 8<br />
UILTsocial<br />
Photos by Sarah Vanderburgh
Of course I had to take a photo when<br />
I got the official sound and digital<br />
warning that my bobbin was running<br />
low. And it wasn’t so low that I had<br />
to panic! This was one of the features I<br />
have heard quilters praise in quilt shops<br />
and guild meetings. Again PFAFF has<br />
come to the rescue of bobbin angst :)<br />
I have been very impressed with my own<br />
experiences using it.<br />
IDT System<br />
Bobbin winding pop up<br />
Maybe it’s just me but prepping bobbins<br />
feels like a chore – something you wish<br />
would just be done for you so you<br />
wouldn’t have to think about it. Well<br />
this machine comes close! The machine<br />
actually winds the bobbin for you – this<br />
graphic comes up on the large display<br />
screen once you lock the bobbin in<br />
place in the winder. You can adjust how<br />
fast the machine winds the thread –<br />
then just press the go button! It stops<br />
when the bobbin’s full or you can stop it<br />
by touching the stop button.<br />
IDT System waiting to be engaged<br />
Another feature I’ve heard about that<br />
sets PFAFF machines apart is the<br />
Integrated Dual Feed System – the IDT<br />
for short. The manual describes how the<br />
system works: “As on industrial machines,<br />
the IDT System feeds the fabric from the top<br />
and bottom at the same time. The material is<br />
fed precisely, eliminating puckering on seams.<br />
. . the system prevents layers from shifting<br />
while sewing, keeping quilt layers aligned.”<br />
IDT system engaged for stitching in the ditch<br />
I really noticed the benefits of the<br />
IDT system when I was quilting in the<br />
ditch. I could feel that the machine<br />
had a stronger grip on my quilt than<br />
my regular machine and the results are<br />
visible too.<br />
Stitches on back of mini quilt<br />
The stitching on the back of my quilt are<br />
just as even as on the front.<br />
The pop-up warning to remedy bobbin angst<br />
Q<br />
.com<br />
UILTsocial<br />
| issue 8 27
When I used the IDT System to quilt on<br />
a larger quilt I noticed that the *bump*<br />
that tends to show up as you near the<br />
end of a row of quilting – didn’t! What<br />
did show would be hard to find and<br />
was probably a result of me not pinning<br />
close enough.<br />
Button Love<br />
The buttons located front and center<br />
The more I use this machine the harder<br />
I fall for the ease these buttons add to<br />
my quilting.<br />
The needle down button makes quilting<br />
so easy. It’s located the farthest to the<br />
right. Again, it lets me focus on the<br />
quilting and not operating the machine.<br />
When it’s engaged (it lights up!) the<br />
needle goes down and the presser foot<br />
lifts just a little off of the quilt so I can<br />
maneuver the quilt.<br />
The scissors is the thread snips button.<br />
When touched it cuts both the top and<br />
bottom threads and brings them to<br />
the bottom of the quilt. This one has<br />
changed how I machine blanket stitch as<br />
I don’t have to think about saving thread<br />
by moving from one section to another<br />
before I cut the thread. This feature has<br />
made my quilting more efficient.<br />
The presser foot has two buttons<br />
located in the same convenient place.<br />
The up one raises the foot the regular<br />
distance and touched one more time<br />
it lifts even more to put a quilt through<br />
the space without worrying about<br />
getting pins caught on it. The down<br />
one I engage while quilting because it<br />
automatically lifts just a little bit – with<br />
the needle down button engaged too<br />
– letting me keep both hands on the<br />
quilt to turn it to change directions. The<br />
manual calls this a pivot toggle.<br />
The button beside the presser foot<br />
buttons is to start/stop embroidery.<br />
Two buttons I haven’t used yet are the<br />
immediate tie-off – to the left of the<br />
snips – and the stitch restart – to the left<br />
of the needle down.<br />
Lots of Room for Quilting<br />
The PFAFF creative 4.5 dwarfs my regular machine.<br />
That hard case is protecting a jewel of a machine!<br />
I guess this could have been # 1! There’s<br />
double the throat space compared to<br />
my usual machine – notice the machine<br />
itself is almost twice the size!<br />
Quilting is more enjoyable without the<br />
anxiety producing rolling and pushing of<br />
the quilt through a smaller space. I also<br />
don’t have sections of stitches that are<br />
too tight because I was shoving the quilt<br />
through a small space.<br />
The creative 4.5 lets you focus on<br />
progress and not process which also<br />
makes for a happier time quilting.<br />
LED lights improve quilting process<br />
The bright LED lights combine with the<br />
larger space to make it so easy to see<br />
and quilt!<br />
It might seem like I’m focusing on a lot<br />
of little details, but the result of all the<br />
little things is that I’m quilting more and<br />
tending to the machine less. Plus the<br />
machine does these things really well<br />
– which results in quilts that are crafted<br />
beautifully.<br />
As an intermediate quilter, I’m embracing<br />
the opportunities the PFAFF creative 4.5<br />
is giving me to create accurately pieced<br />
quilts with my personal creative touches.<br />
Twin size quilt in the larger throat space<br />
Q<br />
28 .com | issue 8<br />
UILTsocial
Using decorative stitches to make a selvage project<br />
There are so many stitches to explore<br />
on the PFAFF creative 4.5 that it’s hard<br />
to know where to start! My default<br />
*playground* is creating with selvages and<br />
then it’s pretty much follow my fancy. This<br />
article goes through my play process with<br />
the stitches and my selvages.<br />
I used a fat quarter from my stash with<br />
the wrong side up as my foundation/<br />
stabilizer. I chose selvages that are from<br />
fat quarters or longer yardage. I have my<br />
selvages sorted in a couple of different<br />
ways and chose to use the ones with no<br />
white strip, dots, or words for this project.<br />
I wanted to try creating my own selvage<br />
designs with the stitches!<br />
Next I picked a stitch - stitch 4.3.19 to be<br />
exact! You’ll notice that the screen has a<br />
green *plus sign* that shows where the<br />
needle will start in the stitch. I also made<br />
sure I had the correct presser foot ready<br />
on the machine, in this case foot 2A.<br />
Stitches created with PFAFF creative 4.5. With so<br />
many stitches to choose from you may want to<br />
create selvage fabric with them all day!<br />
Stitch requires stabilizer.<br />
Selecting Stitches<br />
I turned on the machine and opened the<br />
stitches file. I started selecting different<br />
ones to see what I liked. The manual also<br />
has all of them listed out with photos<br />
and the stitch numbers.<br />
The Color Touch Screen on the PFAFF<br />
creative 4.5 gives icon details for every<br />
stitch selected – from what presser foot<br />
to use, if you need stabilizer and where<br />
the needle will start in the stitch.<br />
The screen showed me that most<br />
of them require using a stabilizer<br />
underneath – it’s the white rectangle<br />
icon above the stitch. I figured that the<br />
layer of cotton I use as a backing for the<br />
selvages could count as a stabilizer.<br />
Next raw selvage edge tucked under preceding<br />
one’s finished edge<br />
Stitching Selvages Together<br />
I started with a selvage with the raw<br />
edge at the right edge of the stabilizer<br />
and tucked the raw edge of the next<br />
selvage underneath the other edge. As<br />
you can see in the photo, I played with<br />
quite a few stitches before a plan started<br />
to formulate on how I could use this<br />
piece of stitched fabric!<br />
These selvages are close to the end of my<br />
piece. After the pink I added one more<br />
wide selvage to get to my desired length.<br />
The green plus sign indicates needle start position.<br />
Stitch start position lined up under needle<br />
Line up the bound edge of the selvage<br />
with the middle of the stitch to be sure<br />
that the stitching will actually go across<br />
both selvages.<br />
The machine will guide the stitch – you<br />
should guide the fabric with your hands<br />
but the machine may move the fabric<br />
back and forth to complete the stitch.<br />
Pink selvage seam stitched<br />
The PFAFF creative 4.5 makes it easy to<br />
play and create with stitches. With so<br />
many to choose from, it’s easy to add a<br />
personal touch to any project.<br />
Q<br />
.com<br />
UILTsocial<br />
| issue 8<br />
29
Perfect presser feet to make<br />
a zippered case<br />
It’s easier to keep your creativity flowing with all of<br />
the possibilities provided by the variety of presser feet<br />
included with the PFAFF creative 4.5. I’m going to turn<br />
my stitched selvage piece of fabric into a finished<br />
project using several of the feet.<br />
Assemble Project Pieces<br />
I kept adding selvages to my made fabric until it<br />
measured least 8” long. Then I cut two pieces 8” long<br />
x 7” wide. I have a piece of stitched selvage fabric left<br />
over for another project too.<br />
Then I found a zipper in my stash that coordinates<br />
with my selvages and cut it to the same width.<br />
Now it’s time to click the zipper foot onto the<br />
creative 4.5.<br />
Zipper Foot<br />
The PFAFF zipper foot can be attached to the left or<br />
the right of the needle to help you sew zippers on<br />
a variety of projects. Here I have it attached to the<br />
left. The photo shows my project pivoted out from<br />
under the needle so I could close the zipper pull<br />
before continuing down the seam. The extra pivot lift<br />
provided by the presser foot button came in handy<br />
here too!<br />
Presser feet included with PFAFF creative 4.5.<br />
There’s one for almost every purpose!<br />
Fabrics and zipper ready for assembly<br />
Zipper foot attached to the left of the needle<br />
Stitched case with zipper<br />
Q<br />
30 .com | issue 8<br />
UILTsocial
Fancy Stitch Foot<br />
The IDT System engages with many of<br />
the presser feet provided with the PFAFF<br />
creative 4.5 to ensure even feeding<br />
of fabrics and smooth stitching. After<br />
unzipping the zipper about half way I<br />
used presser foot 1A to sew the side<br />
seams, then the bottom one closed.<br />
Blindhem Foot<br />
Next I switched to the blindhem foot with<br />
IDT System and used it to overlock the<br />
seams so they wouldn’t unravel with use.<br />
It’s the first time I’ve used this foot and<br />
found it interesting – usually I just keep<br />
going with a regular foot because it’s<br />
easier than switching. With the PFAFF<br />
creative 4.5 it’s easy to change feet –<br />
you simply push down on the foot to<br />
release it and push it up to attach it to<br />
the machine.<br />
No unwinding a screw and making<br />
sure it doesn’t roll away!<br />
I used stitch 1.2.7 Closed Overlock and<br />
the blindhem foot to overlock the side<br />
and bottom seams. You could also do<br />
the same to the two zipper seams, but I<br />
didn’t.<br />
Quick to Make Zippered Case<br />
All that’s left to do is turn the case right<br />
side out, close the zipper and it’s ready!<br />
The case is perfect for packing my cutting<br />
tools safely to take to a quilting workshop<br />
or retreat. The selection of presser feet<br />
with the PFAFF creative 4.5 helped me<br />
create this quick project in no time.<br />
Presser Foot 1A – Fancy Stitch Foot with IDT System<br />
Stitch 1.2.7 the Closed Overlock Stitch<br />
The blindhem foot<br />
Quick zippered case project<br />
Q<br />
.com<br />
UILTsocial<br />
| issue 8 31
Embroidering a quilt label with<br />
the PFAFF creative 4.5<br />
The PFAFF creative 4.5 is ultimately an<br />
embroidery machine. While it does all<br />
of the little things this quilter wants it<br />
to do amazingly well, it also led me to<br />
experiment with embroidery for the<br />
first time!<br />
Quick. As a quilter what’s the first<br />
thing you think of to make with an<br />
embroidery machine?!<br />
A *quilt label* of course!<br />
“Tapering increases or decreases the width<br />
of the stitch during sewing to create<br />
symmetrical or asymmetrical tapers.” (from<br />
the awesome included manual.)<br />
Embroidery Unit on PFAFF creative 4.5<br />
Creating stitches with Sewing Programs<br />
Taper angle choices popup<br />
You could spend a lot of time exploring<br />
the options in this machine!<br />
Stitch conversion popup<br />
When you select one of your designed<br />
stitches in embroidery mode it gets<br />
converted to a single embroidery stitch.<br />
Now you can move it around the screen<br />
and duplicate it too.<br />
A tapered, repeated stitch<br />
There are several sewing programs in<br />
the PFAFF creative 4.5 to help you create<br />
unique stitches. You use these programs<br />
in the sewing mode. I used the tapering<br />
program and the single stitch program<br />
to create the design for the border of my<br />
quilt label.<br />
Personal Stitches File<br />
Once you’ve created stitches you<br />
like, you can save them into personal<br />
files to use again. You can add any<br />
stitch to these files which makes it<br />
conveniently quick to continue work on<br />
a project without spending a lot of time<br />
recreating stitches.<br />
PFAFF stylus<br />
I found using the included stylus made<br />
moving the design around on the Color<br />
Touch Screen easier than trying to use<br />
my finger. The stylus came in handy<br />
when selecting letters too.<br />
Q<br />
32 .com | issue 8<br />
UILTsocial
Adding Words<br />
Embroidery fonts<br />
In the embroidery mode you can see<br />
all of the fonts available on the creative<br />
4.5. The first three in the left column and<br />
the first two in the right are available as<br />
stitches in the sewing mode too.<br />
You can design a variety of quilt labels<br />
with all of these different fonts!<br />
This photo shows the progress of the<br />
machine on the embroidery. I’m a little<br />
ahead of myself here but I wanted<br />
to show you the detailed screen<br />
information. The large cross shows<br />
where the needle is in the design. The<br />
numbers in the highlighted green box<br />
let you know the position and color of<br />
thread being used. Yes, you can program<br />
the thread colors for each section – each<br />
letter even! The little green half circle<br />
is the speed control for the embroidery.<br />
Let’s just say that full speed intimidated<br />
this quilter! I had to slow down the<br />
machine a bit so I could watch it in<br />
action :)<br />
Okay. So that’s making the design. A<br />
few more photos to show getting the<br />
machine and fabric ready!<br />
Embroidery Unit<br />
The embroidery unit came in its own box<br />
which included this travel bag. I store the<br />
unit in it when not in use – you can see<br />
how big it is!<br />
Hoops stored in bottom of bag<br />
Some of the packing material from the<br />
box gets transferred into the bag to store<br />
the hoops as well. This unit comes with<br />
three sizes of embroidery hoops.<br />
The embroidery unit bag<br />
Dynamic Spring Foot<br />
Design to Stitch Out<br />
Q<br />
.com<br />
UILTsocial<br />
| issue 8 33
Dynamic Spring Foot<br />
Select the embroidery stitch out option<br />
in the task bar menu and the machine<br />
will tell you to attach the embroidery<br />
unit. It will also tell you to put on the<br />
Dynamic Spring Foot. Again, the trusty<br />
manual is your best friend here!<br />
Hooping the Fabric<br />
It’s easy to click open the hoop and put<br />
in the fabric with stabilizer underneath.<br />
One more click to clip in the top part of<br />
the hoop. The Color Touch Screen shows<br />
to use the 120 x 120 hoop for my design.<br />
Of course I couldn’t use ordinary white<br />
fabric to play – I chose pink instead!<br />
Now it’s time to use the Start Stitch<br />
button – the one beside the presser feet<br />
buttons on the front panel. I will divulge<br />
that it took me longer than necessary to<br />
figure this out – what a newbie! Remember,<br />
manual = bff!<br />
The machine creates the design in<br />
the order it was created. Threads are<br />
automatically snipped on the long stitches.<br />
The design is finished! You can see that<br />
the threads weren’t snipped between<br />
the letters so I’ll carefully cut them with<br />
some small scissors. Then I’ll cut the label<br />
to my desired size.<br />
My first embroidered quilt label is a<br />
success! Not too bad for my first time<br />
using the PFAFF creative 4.5 embroidery<br />
machine. I already started planning to<br />
use different designs to make labels that<br />
coordinate with my quilts – Halloween,<br />
Christmas, hearts, tulips! The options are<br />
limitless, too bad my quilting time isn’t!<br />
Fabric and stabilizer in hoop<br />
Design being stitched out<br />
Hoop attached to embroidery unit<br />
Design finished<br />
Q<br />
34 .com | issue 8<br />
UILTsocial
Q<br />
.com<br />
UILTsocial<br />
| issue 8 35<br />
35
Add charm to fabric with<br />
the Basic Shape Creator<br />
I’m going to share one more of the<br />
embroidery features in the PFAFF creative<br />
4.5. The quilter in me thoroughly enjoyed<br />
playing with the Basic Shape Creator to<br />
design my own charm square.<br />
If you’ve been reading along then you’ve<br />
heard me refer to the manual more<br />
than once! This machine comes with<br />
two – one is the owner’s manual and<br />
the second features beautiful photos of<br />
the available embroidery stitches with<br />
stitch numbers and color thread details.<br />
Using the Basic Shape Creator is<br />
explained with step by step instructions<br />
in the owner’s manual. I followed the<br />
directions once, then changed out the<br />
stitch and shape to create my own.<br />
Next select the shape you want to create<br />
with your stitch. The arrow on the image<br />
shows which direction the needle will go<br />
around the shape as it embroiders.<br />
Select a shape<br />
See the calculator icon?<br />
Designed 5” charm square<br />
Select a stitch<br />
In embroidery mode, select a stitch to<br />
design the shape with Basic Shape Creator<br />
– the button to touch to get into the Shape<br />
Creator is the one with butterflies in a<br />
curve in the right side menu.<br />
calculator popup<br />
The machine and embroidery stitches manuals<br />
Q<br />
36 .com | issue 8<br />
UILTsocial
The calculator popup lets you touch the<br />
number of times you want the stitch<br />
repeated in the shape. Don’t worry if<br />
you get it wrong the first time – there’s<br />
a plus and minus sign for you to change<br />
the number and see the results to make<br />
sure you like it before you stitch it out.<br />
Basic shape created<br />
This is how the shape that I created<br />
looked on the Color Touch Screen.<br />
The design needed to be in the space<br />
between the black square guides. The<br />
machine will let you know if your design<br />
won’t fit.<br />
Now it’s time to stitch it out!<br />
When the design was finished I cut the<br />
joining threads between the stitches and<br />
trimmed the fabric to a 5” charm.<br />
Then I decided to use the charm and<br />
make a placemat!<br />
I used my free Charmed placemat<br />
pattern and cut stash pieces to the sizes<br />
I need. Notice I used up the rest of the<br />
selvage fabric I created earlier this week?<br />
I love projects that let me try out new<br />
techniques and use up my stash!<br />
Designing my own charms with the<br />
embroidery stitches available with the<br />
PFAFF creative 4.5 has opened my mind<br />
to the creative possibilities of combining<br />
quilting and embroidery.<br />
I hope you have been inspired to create<br />
new things!<br />
Stitching out the design<br />
Embroidered charm in placemat<br />
Sarah Vanderburgh<br />
sewjoycreations.com<br />
Q<br />
.com<br />
UILTsocial<br />
| issue 8 37
3 great uses for<br />
TM<br />
Eleganza thread Christine Baker<br />
A couple weeks ago WonderFil sent me<br />
a selection of their Eleganza thread and<br />
I can’t wait to try it out. According to the<br />
WonderFil website Eleganza is a 2-ply<br />
100% long staple Egyptian cotton thread,<br />
double-gassed and mercerized.<br />
WonderFil’s website says that the<br />
process of double gassing involves<br />
burning off the lint from the thread two<br />
times, resulting in a much softer and<br />
cleaner finish.The result is a wonderfully<br />
smooth and lustrous surface that<br />
allows the thread to glide beautifully<br />
through all types of fabrics and<br />
fibers. The thread’s tight twist creates<br />
beautifully firm stitches while its surface<br />
sheen produces a luxurious finish to<br />
embellishment stitchery.<br />
The thread is offered in 100 different<br />
colors ranging from saturated solids<br />
to subtle tone-on-tone and random<br />
dyed contrasting variegates. According<br />
to the website, it’s perfect for hand<br />
work or embellishment projects, it’s<br />
especially good for wool applique, hand<br />
embroidery and sashiko. My interest has<br />
been piqued!!<br />
WonderFil Threads –<br />
Eleganza<br />
Available in 100 colors<br />
in the WonderFil color<br />
line and 90 colors in<br />
the Sue Spargo color line, Eleganza is a<br />
perfect match for your next hand work or<br />
embellishment project.<br />
The Sue Spargo collection<br />
When I was at Quilt Market in Houston<br />
in October I met Sue Spargo in her<br />
booth. I’ve always loved her heavily<br />
embroidered wool applique projects and<br />
patterns and we bought a couple copies<br />
of her book to bring home with us.<br />
CREATIVE<br />
STITCHING BOOK<br />
by Sue Spargo<br />
Sue’s book Creative<br />
Stitching includes<br />
step by step concise<br />
written instructions,<br />
along with clear<br />
illustrations, for 50 of Sue’s favorite<br />
stitches. Included are close up, color,<br />
photographic examples of each of the<br />
stitches used. The beginning of Creative<br />
Stitching gives you a detailed look into<br />
the needles and threads Sue uses, and<br />
throughout the book are never before<br />
seen color photographs of Sue’s work.<br />
‘Creative Stitching’ is spiral bound'.<br />
I’ve been reading through the book and<br />
trying out some of her stitches, so I was<br />
especially excited to see that WonderFil<br />
has a whole line of Eleganza threads that<br />
Sue has designed.<br />
WonderFil Sue<br />
Spargo Collection<br />
WonderFil has<br />
teamed up with<br />
Sue Spargo, author,<br />
teacher, embroidery expert and artist,<br />
to bring you a new line of colors in our<br />
Eleganza, Razzle, and Dazzle thread<br />
lines! These colors have been selected by<br />
Sue Spargo to offer an array of beautiful<br />
and inspirational choices, including<br />
variegated colors that are only available<br />
in her line.<br />
Wool applique<br />
I LOVE wool applique and had lots of<br />
fun a couple years ago using WonderFil’s<br />
Razzle and Dazzle threads to make<br />
projects such as this little table runner<br />
that I made for Valentine’s this year as<br />
well as the table runner that I made for<br />
my first blogging week on <strong>QUILTsocial</strong><br />
back in June 2014. The Razzle and Dazzle<br />
threads looked AMAZING on the wools<br />
but I did have some trouble with the<br />
threads fraying as I kept stitching with<br />
them. A little thread conditioner worked<br />
wonders to fix that problem, but I have a<br />
feeling that I’m not going to have issues<br />
like that with the Eleganza threads.<br />
Q<br />
38 .com | issue 8<br />
UILTsocial<br />
Photos by Christine Baker
Ladybug Parade wool applique banner<br />
Hand Embroidery<br />
I did a lot of hand embroidery back<br />
when I was a kid, but never really got<br />
back to it until recently. The WonderFil<br />
threads enticed me to try my hand at<br />
some basic embroidery stitches, mostly<br />
on my wool applique pieces. A few years<br />
ago my husband and I took the train to<br />
Halifax and since I was going to have<br />
lots of relaxation time I decided to take<br />
along some wool and to try my hand at<br />
learning some new embroidery stitches.<br />
I pinned a bunch of references on<br />
Pinterest and brought along some<br />
pieces of wool and my Razzle and Dazzle<br />
threads and ended up with quite a few<br />
different embroidery samples. One of<br />
the several samples that I liked the most<br />
was this little piece that I ended up<br />
making into a little zippered bag.<br />
Now that I have my new Sue Spargo<br />
embroidery stitches book I’m going to<br />
experiment a bit more using my new<br />
yummy Eleganza threads.<br />
Sashiko<br />
Although I’ve often admired Sashiko<br />
embroideries I’ve never actually tried<br />
it myself. Sashiko is a form of Japanese<br />
embroidery which is usually worked on<br />
indigo fabric with white thread. It can<br />
range anywhere from a simple gridwork<br />
to ornate designs depicting scenes<br />
from nature. Just Google “Sashiko<br />
images” and you’ll be amazed at the<br />
different designs that are available. I’m<br />
going to do a bit more research and<br />
later this week I’m going to try my hand<br />
at this lovely technique.<br />
The Slow Stitching Movement<br />
Usually for a week of blogging on<br />
<strong>QUILTsocial</strong>, I design and complete a<br />
fairly large project and break it down<br />
into manageable steps that we can<br />
complete each day for the week. It’s<br />
usually a pretty fast paced project,<br />
but it’s always fun to see the entire<br />
project through to its completion.<br />
For the purpose of this article we’re<br />
going to take it a bit slower! In starting<br />
a new year, I, for one, am looking for<br />
some quiet, reflective time. The Slow<br />
Stitching Movement was launched by<br />
international quilting personality Mark<br />
Lipinski to help creative people like us<br />
to slow down, enjoy the process, and<br />
create fiber art that we’re really proud<br />
of. Because Eleganza thread is so suited<br />
to handwork I feel inspired to take it a<br />
bit slower and to make a few smaller<br />
projects that showcase the 3 great uses<br />
for WonderFil’s Eleganza thread.<br />
Different examples of Sashiko patterns<br />
Embroidery stitches made with WonderFil’s<br />
Razzle and Dazzle threads<br />
Q<br />
.com<br />
UILTsocial<br />
| issue 8 39
4 ways<br />
to transfer embroidery designs to fabric<br />
Christine Baker<br />
Transferring designs to fabric<br />
I talked about 3 great uses for<br />
WonderFil’s Eleganza thread – Sashiko,<br />
hand embroidery and wool applique.<br />
All of these techniques lend themselves<br />
to quiet hand stitching time which is<br />
especially nice in a busy lifestyle. But in<br />
order to do some of these techniques<br />
you have to be able to follow a pattern<br />
that is marked on fabric. For quilting,<br />
stitching and embroidery there are<br />
MANY, MANY different ways to mark your<br />
fabric. Here are about 4 ways to transfer<br />
embroidery designs to fabric.<br />
Marking quilt tops for machine or<br />
hand quilting<br />
When I’m machine quilting I almost<br />
NEVER mark the quilt top. There are a<br />
couple of reasons for this: 1. I’m always in<br />
a hurry and don’t want to take the time<br />
to do it and 2. Sometimes it’s really hard<br />
to follow that marked line LOL. But, I do<br />
know that lots of people like to mark<br />
their tops before they quilt them so<br />
when I’m teaching my machine quilting<br />
class at our local quilt shop I do take a<br />
bit of time to go over the different types<br />
of fabric marking products and their<br />
benefits and drawbacks. Here’s the list of<br />
products I handout to my class:<br />
Pounce: This is chalk in a bag. Pounce<br />
or pat the bag on a stencil, leaving a<br />
chalk design on the fabric. The chalk<br />
disappears easily, so mark as you go with<br />
a pounce.<br />
Mechanical pencil: Use hard lead<br />
(0.5mm) and mark lightly so that<br />
stitching or quilting will cover it. They<br />
mark very lightly, don’t have to be<br />
sharpened all the time and they don’t<br />
smudge. Only mark them as dark as<br />
you need to see the mark when you’re<br />
quilting, as darker lines may never<br />
entirely disappear after washing. These<br />
are good only on light fabrics.<br />
A hand embroidered quilt label by Carla Canonico from her <strong>QUILTsocial</strong> blog<br />
post on June 26, 2016<br />
A free hand embroidery pattern from www.french-knots.com<br />
Colored pencils: There are many quilters’<br />
pencils on the market usually in white,<br />
silver, and yellow, the choice depending<br />
on the color of the fabric being marked.<br />
These work just fine with two significant<br />
drawbacks. They have to be sharpened<br />
constantly and they break inside when<br />
tapped or dropped making it impossible<br />
to keep them sharpened. Clover makes<br />
a mechanical pencil with yellow or silver<br />
lead that works like the mechanical<br />
pencils mentioned above.<br />
Soapstone marker: If kept sharp, these<br />
markers will show up on light and dark<br />
fabrics. These make a nice line and come<br />
out easily. They’re available in quilt shops<br />
and need to be sharpened in a hand<br />
cranked pencil sharpener. They leave a<br />
pale gray line.<br />
Soap sliver: Sharpen the edges of<br />
leftover soap for a marker that washes<br />
out easily.<br />
Q<br />
40 .com | issue 8<br />
UILTsocial
Chalk pencil: The chalk tends to brush<br />
away, so it’s best to mark as you go with<br />
these pencils.<br />
Wash-out pen, pencil or graphite<br />
marker: These markers maintain a<br />
point and are easy to see. Refer to the<br />
manufacturer’s instructions to remove<br />
the markings and test them first on the<br />
fabric scraps to make sure the marks will<br />
wash out. Note: Humidity may make the<br />
marks disappear, and applying heat to<br />
them may make them permanent.<br />
Chalk roller and chalk wheel: Powdered<br />
chalk in this wheel makes a simple, fine<br />
line. These work fine if you’re going to<br />
quilt the object right away. The chalk is<br />
easy to see, comes in different colors,<br />
and brushes right off.<br />
Hera markers: Use a Hera marker on<br />
black quilts that have simple quilting<br />
patterns. You don’t have to wash the<br />
quilt when finished. They work very well<br />
if you’re going to quilt immediately.<br />
Frixion pens: come in a variety of colors<br />
and leave a nice sharp line. The lines are<br />
removed by applying friction or heat BUT<br />
the lines may reappear in extreme cold.<br />
Marking embroidery lines on fabric<br />
Oftentimes the best technique to<br />
transfer a design onto fabric depends on<br />
the color and thickness or weight of the<br />
fabric. Many of the marking tools that I<br />
mentioned above can be used with the<br />
following techniques.<br />
Tracing<br />
To transfer a design on paper to a light<br />
weight, and light-colored fabric you can<br />
place the design under the fabric and<br />
using your preferred marking tool copy<br />
the design by tracing it directly onto the<br />
fabric. If you have problems seeing the<br />
design through the fabric you can use<br />
a light box or tape the paper and fabric<br />
onto a sunny window. Here’s a little video<br />
that I found on YouTube that explains<br />
how to do this. If I decide to use a white<br />
fabric to do some sashiko embroidery<br />
with my Eleganza threads, I’ll probably<br />
use this method to trace my design.<br />
Watch this video to learn how to use a<br />
light box or window to transfer a design<br />
to cloth.<br />
Tracing Paper<br />
To use tracing paper or<br />
transfer paper, you place a<br />
piece of the paper, colorside<br />
down on your fabric<br />
and place the pattern on<br />
top of the paper. Transfer<br />
the design to the fabric<br />
by tracing the pattern<br />
using a stylus or empty<br />
ball-point pen. Many<br />
times the papers come<br />
in yellow to use with dark<br />
fabrics and blue to use on light-colored<br />
fabrics. This technique can be used<br />
for any fabrics that are too thick to see<br />
through such as wool or denim. Tracing<br />
Paper “Chacopy” – 5 Sheets For use with<br />
tracer pen (#7843500) to copy work onto<br />
craft & sewing projects. Includes 5 pages<br />
in blue, green, red, white and yellow.<br />
Reindeer Games –<br />
Hot Iron transfers<br />
Iron-on Designs<br />
Paperbacked iron-on<br />
transfer designs are<br />
available in a variety<br />
of colors and styles.<br />
Be sure to follow<br />
the manufacturers<br />
directions before<br />
using. Keep in mind<br />
that heat transfer<br />
methods usually<br />
create a permanent image that must be<br />
completely covered by stitching to be<br />
invisible. This type of product has been<br />
available for YEARS!! I’m pretty sure that<br />
the embroidered pillowcases that my<br />
grandmother made were done using this<br />
type of transfer product. If I can find some<br />
at my local craft store it would be fun to<br />
do a couple using my Eleganza threads.<br />
Blue Birds 4” – The<br />
Stencil Company<br />
Can be used for<br />
embroidery or quilting.<br />
Q<br />
.com<br />
Stencils<br />
Stencils are great<br />
for repeat patterns<br />
and for mixing and<br />
matching for a<br />
unique style. You can<br />
also use just parts<br />
of a stencil to create<br />
a unique design.<br />
Tracing stencils<br />
works best on<br />
medium-weight fabrics such as cotton,<br />
lightweight denim, silk, linen, rayon and<br />
various synthetic blends. To use a stencil,<br />
position it on the right side of fabric<br />
and secure in place using tape. Use<br />
your preferred marking tool to trace the<br />
design following the cut-out areas of the<br />
stencil. If the fabric has any stretch to it,<br />
you may find it easier to make small dots<br />
with the along the cutout lines, rather<br />
than drawing a solid line.<br />
There are also many other techniques that<br />
have been developed using computer<br />
printers, special papers and other<br />
interesting tools. There’s always something<br />
new being developed so the next time<br />
you’re in your local quilt or craft shop ask<br />
them what’s new! Many times when I’m<br />
doing hand embroidery I just make the<br />
pattern up as I go, but for my Sashiko<br />
project in a couple days I’m definitely<br />
going to be using one of these 4 ways to<br />
transfer embroidery designs to fabric.<br />
UILTsocial<br />
| issue 8 41
Using Eleganza thread for Sashiko embroidery<br />
Christine Baker<br />
We talked about 4 ways to transfer<br />
embroidery designs to fabric. When I’m<br />
doing punchneedle embroidery I often<br />
just place my design under the fabric<br />
and trace it using a fine marker since the<br />
weaver’s cloth that I use is fairly easy to<br />
see through. I’m going to use Eleganza<br />
thread for Sashiko embroidery on a<br />
darker fabric, so I’ll have to use one a<br />
different technique such as one of the<br />
four that we discussed before.<br />
What is Sashiko?<br />
Sashiko is a traditional form of<br />
embroidery from Japan. Most of the<br />
samples in existence today are from<br />
the late 19th century but some records<br />
show that similar techniques were used<br />
for garments in the 17th century.<br />
This form of embroidery, which is also<br />
popular in quilting, uses straight or<br />
curved geometric designs stitched<br />
in a repeating pattern. The Japanese<br />
word sashiko means little stabs and<br />
refers to the small stitches used in this<br />
form of needlework.<br />
Originally Sashiko provided the practical<br />
purpose of strengthening and giving<br />
warmth to homespun fabrics in clothes<br />
worn by the lower social class citizens<br />
of Japan. The simple running stitch was<br />
used to conserve and repair garments<br />
at a time when cloth was not widely<br />
available to farmers and fishermen. The<br />
skill was passed down from generation<br />
to generation and was learned at a<br />
young age. Later on, the skill would<br />
also be used to judge a young woman’s<br />
suitability for marriage.<br />
Nowadays Sashiko is used to embellish<br />
garments and quilts and the designs can<br />
range anywhere from simple grids, to<br />
ornate nature scenes.<br />
Getting Started Stitching Sashiko –<br />
YouTube<br />
Here are various ways to start stitching<br />
using the Sashiko style. Options are<br />
discussed as well as the tools required.<br />
Sashiko: Traditional Japanese Sashiko Design<br />
& Instruction<br />
Practising my Sashiko<br />
I decided to practise my Sashiko first<br />
using a fairly simple grid design. Instead<br />
of tracing this design from paper, I just<br />
used my rotary cutting ruler and my<br />
Frixion pen to draw diagonal lines across<br />
my fabric.<br />
I had some of the Northcott ColorWorks<br />
leftover fabrics, so I picked one of the<br />
turquoise fabrics and cut a rectangle<br />
approximately 8” x 10”. I drew one line on<br />
an angle across the fabric and then used<br />
my ruler to draw parallel lines 1½” apart. I<br />
then drew one line at a right angle to these<br />
and other lines parallel to it 1½” apart.<br />
Picking the Eleganza thread<br />
One of the WonderFil Eleganza threads<br />
was a pale gray, so I picked it and<br />
threaded my needle with a section<br />
about 20” long. I didn’t have an actual<br />
Sashiko needle, so I selected one that<br />
was fairly long with a large eye so that I<br />
could easily thread it. After tying a knot<br />
in the one end I brought my needle up<br />
from the back of the fabric and started<br />
to stack some stitches on the needle.<br />
Stacking the stitches on the needle<br />
As mentioned in the video above,<br />
the Sashiko stitches are supposed to<br />
be consistent in size and the space<br />
between the stitches is supposed to be<br />
slightly smaller than the stitch itself. No<br />
two stitches are to cross or meet. When<br />
I pulled my thread through, my stitches<br />
looked okay, but I can tell that I need a<br />
bit more practice!<br />
A Frixion pen works well for marking the stitching lines<br />
Closeup of the Sashiko stitches<br />
Q<br />
42 .com | issue 8<br />
UILTsocial
Sashiko is meant to be stitched in<br />
continuous lines acoss the fabric so you<br />
don’t have to knot off at the back of the<br />
fabric very often. When I got to the end<br />
of my first line, I turned and continued<br />
stitching on one of the lines that met it at<br />
the end. I’ll continue stitching in this manner<br />
until all of the lines have been done.<br />
The Sashiko stitches are worked in continuous lines<br />
The Eleganza thread is lovely to stitch<br />
with! It pulls through the fabric nicely,<br />
doesn’t fray or get into knots. Once I got<br />
the hang of the Sashiko stitching I found<br />
it to be nice and relaxing and could see<br />
how this type of embroidery would be<br />
great for a novice stitcher. It works up<br />
quite quickly and is easy to do. It also has<br />
a modern look to it. I think a quilt made<br />
with Sashiko panels would be lovely!!<br />
Making a more complex Sashiko design<br />
After a bit of practice, I wanted to try my<br />
hand at a design that was a bit more<br />
complex. As I said before, if you google<br />
“Sashiko” designs or patterns you’ll see<br />
hundreds of pattern ideas that you can<br />
download or buy. You can print them<br />
on your printer and then use one of the<br />
methods I talked about in the previous<br />
article to mark them onto your fabric. I<br />
have a bunch of quilting templates that I<br />
use for machine quilting on my Gammill,<br />
so I picked one of them and used it<br />
to trace stitching lines onto a second<br />
rectangle of the solid fabric.<br />
I used the same color of Eleganza thread<br />
to stitch the lines on this sample. Once<br />
all of my stitching was finished, I just<br />
used my iron to apply heat to the fabric<br />
and the marking lines disappeared.<br />
A machine quilting arc template was used to<br />
draw the stitching lines on the fabric<br />
Making a snap bag using Sashiko<br />
I’m going to use the Eleganza threads to do some wool<br />
applique and embroidery and then we’re going to use<br />
both of these samples to make really cute little snap<br />
bags. I’ve really enjoyed using WonderFil’s Eleganza<br />
thread for Sashiko embroidery and I plan on doing more<br />
Sashiko in the future – I hope you enjoyed it too!<br />
Closeup of the Sashiko panel<br />
Q<br />
.com<br />
UILTsocial<br />
| issue 8 43
Using<br />
TM<br />
Eleganza thread<br />
to enhance wool applique Christine Baker<br />
Felted wool<br />
embroidered circle<br />
ornaments by<br />
fairfieldroaddesigns<br />
Wool applique<br />
I absolutely LOVE doing wool applique.<br />
I’ve designed and made many, many<br />
projects with wool many of which I have<br />
published as patterns or have been<br />
featured in magazines. I dyed my own<br />
wool and I made wool kits and items to<br />
sell in my Etsy shop. The only problem<br />
with wool is that it can be expensive<br />
to buy, so one of my favorite things<br />
to do is to applique wool onto cotton<br />
backgrounds as this makes the wool<br />
project a bit more economical.<br />
Usually I do my wool applique with hand<br />
dyed embroidery floss, but I have used<br />
WonderFil threads before and found<br />
them to be just lovely for wool applique<br />
and embroidery. Check out these wool<br />
applique ornaments that I made using<br />
Razzle and Dazzle threads from WonderFil.<br />
Picking a wool applique motif<br />
Some of the Eleganza threads that<br />
WonderFil sent me were in cool colors<br />
that reminded me of winter. The teals,<br />
purple, blue and gray made me think of<br />
snowflakes, so I dug through my wools<br />
and found some pieces that I thought<br />
would work well with the threads. I<br />
used my Accuquilt Studio cutter to cut a<br />
snowflake shape out of teal and a large<br />
circle out of a blue/purple plaid.<br />
I cut a rectangle of cream colored wool<br />
that was 10” x 20” and then folded it in<br />
half to make a 10” square. I used 505<br />
Spray to stick my shapes to this wool<br />
square. I use this spray all the time when<br />
I’m doing wool applique as it holds the<br />
shapes in place very well and doesn’t<br />
gum up your needle as you sew. For<br />
more information about using 505 Spray<br />
check out my blog post where I make<br />
felted wool table runners.<br />
I have a large button collection, so I<br />
found 12 purple buttons ranging in size<br />
from ½” to 1” and arranged them in a<br />
circle around the applique shapes.<br />
I then used my marker to mark an “x”<br />
where each of the buttons was placed<br />
so that I could remember where to sew<br />
them when all of my stitching was done.<br />
Using an erasable marker, mark an x for each<br />
button placement.<br />
I picked two of the Sue Spargo Eleganza<br />
threads to use for my project. The colors<br />
in these threads are just beautiful!!<br />
Eleganza Hints & Tips<br />
WonderFil’s website has so much great<br />
information! For all of their threads there<br />
are Hints & Tips charts available such as<br />
this one for their Eleganza thread:<br />
This photo shows how the wool applique shapes<br />
and buttons are arranged on the wool background<br />
The Sue Spargo Eleganza thread looks like it will<br />
be beautiful with the buttons and wool<br />
Q<br />
44 .com | issue 8<br />
UILTsocial
Embroidery stitches<br />
I got to stitching by first securing my<br />
snowflake with a running stitch down<br />
the middle of all of the parts. Next I used<br />
a blanket stitch to secure the circle to<br />
the wool background.<br />
I sewed all of the buttons to the<br />
background using the marks that I had<br />
made as a placement guide.<br />
Next came my embellishments using<br />
french knots in between each button and<br />
the circle and some lazy daisy stitches on<br />
the opposite side of each button.<br />
Now that the wool applique and<br />
embroidery is finished, this piece and<br />
the Sashiko sample are ready to sew into<br />
snap bags.<br />
Keep reading as I show a fun technique<br />
involving lengths of metal tape measure<br />
to make a bag that snaps closed. For<br />
now though, I’ve really enjoyed using<br />
WonderFil’s Eleganza thread for wool<br />
applique and I can’t wait to stitch up a<br />
couple of the Sue Spargo patterns that<br />
I purchased at quilt market – the other<br />
Eleganza threads look like they’ll be<br />
perfect for them!<br />
Sue Spargo patterns to use with the rest of the Eleganza Thread<br />
Stitching diagrams<br />
Closeup of the embroidery stitches<br />
Q<br />
.com<br />
UILTsocial<br />
| issue 8 45
2 easy ways<br />
to make an embroidered snap bag<br />
The finished shashiko snap bag<br />
We talked about using WonderFil’s Eleganza thread<br />
for wool applique. I found the Eleganza threads to be<br />
lovely to work with and the colors of the Sue Spargo<br />
threads were amazing!! We used the Eleganza thread<br />
for Sashiko embroidery. So now that we have these two<br />
embroidery samples finished, now I’m going to show<br />
you 2 easy ways to make an embroidered snap bag.<br />
What is a snap bag you ask?<br />
I first saw the snap bag technique at one of our guild<br />
meetings where a fellow guild member was showing<br />
how to use an old metal tape measure to make a<br />
bag with a rigid opening that would “snap” back into<br />
position when closed. These bags are great for gifts,<br />
craft shows and for storing anything from rotary<br />
cutters to make-up!<br />
Adding the borders<br />
The first step for the Sashiko bag is to sew borders<br />
onto the Sashiko panel. I trimmed the panel to 8” x 10”.<br />
Next I picked the fabrics that I wanted to use for the<br />
borders, back and lining of the bag. Since the panel<br />
was made with one of Northcott’s ColorWorks solids, I<br />
auditioned a few of the ColorWorks Concepts fabrics<br />
to use for the borders.<br />
I cut two side borders that were each 2” x 8” and<br />
sewed them to the two sides of the panel. Next I cut<br />
two borders that were 3” x 13” and sewed them to the<br />
top and bottom of the panel. I cut one piece on fabric<br />
for the back of the bag that measured 11” x 13” and<br />
sewed it to the bottom border.<br />
Auditioning border fabrics<br />
The borders and back of the bag are sewn onto the sashiko panel<br />
Q<br />
46 .com | issue 8<br />
UILTsocial
Making a snap bag<br />
I made the following video to show the<br />
basic steps of making a snap bag. Please<br />
watch the video before you follow along<br />
with the rest of the steps.<br />
I cut a piece of batting 13” x 21½” and<br />
layered it with the outside of the bag.<br />
As I mentioned in the video if you are<br />
making small bags you don’t need to<br />
do any quilting to secure the layers, but<br />
since the bags we are making are going<br />
to be quite a bit bigger, I used one of my<br />
WonderFil Konfetti threads to do a bit<br />
of topstitching around the Sashiko panel<br />
and across the back of the bag.<br />
Quilting through the outside of the bag and<br />
the batting<br />
Then I cut the lining of the bag from the<br />
white ColorWorks fabric 13” x 25” and<br />
centered the outside of the bag on the<br />
lining with wrong sides together. As<br />
shown in the video, I folded and pressed<br />
the excess fabric from the ends of the<br />
lining over the ends of the bag front.<br />
The edge of the lining fabric is double folded over<br />
the edge of the outside fabric<br />
As I showed in the video the two edges<br />
of the folded lining is top-stitched to<br />
make the channel for the tape measure<br />
to slide into. I bought a dollar store metal<br />
tape measure and cut two lengths that<br />
were each 12¼” long and rounded the<br />
edges as shown in the video. Always use<br />
OLD SCISSORS to cut the tape measure<br />
– NOT your good quilting scissors! If you<br />
are concerned with the sharpness of the<br />
ends of the tape measure, wrap each<br />
end with some duct tape to protect your<br />
fabric. When you cut your tape measure,<br />
make sure that you reattach the metal<br />
end using some scotch tape to make<br />
sure that the rest of your tape measure<br />
doesn’t retract back into the case – never<br />
to be seen again!!<br />
Make sure to tape the end of the tape measure<br />
back on to prevent the tape from going all the<br />
way into the case<br />
Following the directions in the video,<br />
the bag is folded in half with right sides<br />
together and stitched about ¼” from<br />
the edge. I trimmed the edge and then<br />
zigzagged the raw edge to make the<br />
seam neat. The next step was to insert<br />
the tape measure lengths into the<br />
two channels with the unmarked side<br />
towards the outside of the bag.<br />
The tape measure section is inserted into the<br />
channel with the unmarked side towards the<br />
outside of the bag<br />
Q<br />
.com<br />
UILTsocial<br />
| issue 8 47
A seam is sewn across the point of the bag bottom<br />
The point is trimmed off and then the raw edge is<br />
zig-zagged<br />
Cut the lining fabric 3½” longer than the outside<br />
of the bag<br />
Q<br />
48 .com | issue 8<br />
UILTsocial<br />
The finished wool applique snap bag<br />
Christine Baker<br />
FairfieldRoadDesigns.com<br />
The second side of the bag is stitched<br />
closed, trimmed and zigzagged like the<br />
first side.<br />
If you want your bag to have a squared<br />
bottom, you line up the centre line of<br />
the bottom with one of the sides of<br />
the bag and then sew a line across that<br />
point. You then sew a second line across<br />
the other bottom corner.<br />
If the bag is tiny, you can just leave the<br />
excess triangle of fabric on the inside<br />
of the bag. Since my bag is fairly big, I<br />
decided to trim the excess fabric and<br />
zigzag the raw edge like I did for the<br />
sides of the bag.<br />
The bag is turned right side out and<br />
voila!! The cutest Sashiko bag ever!! You<br />
can see that I sewed a fabric label into<br />
the side of my bag when I sewed the side<br />
seam. I ordered these great labels from a<br />
website called It’s Mine Labels for Life.<br />
They have a bunch of different sizes and<br />
designs and you just enter all of your<br />
info online, proof the finished image and<br />
then order them. Before you know it your<br />
labels arrive and you can start sewing<br />
them into your handmade creations!<br />
No batting needed<br />
For the wool applique bag I decided that<br />
I really didn’t need to add any batting<br />
as the wool background gave the bag<br />
body enough substance. Since my wool<br />
background was 10” x 20” I cut my lining<br />
10” x 23½”. My tape measure was about<br />
¾” wide so if you have a wider tape<br />
measure, you may need to add more<br />
than 3½” to the length of your lining.<br />
From there I followed the exact same<br />
steps as with the Sashiko bag. And here’s<br />
the finished wool applique snap bag<br />
– I just LOVE it!!
Stitcher,<br />
Quilter,<br />
Embroiderer,<br />
or Crafter.<br />
Because we’ve<br />
got you covered.<br />
We offer 25 different<br />
novelty thread lines<br />
ranging from 100wt<br />
to 3wt in cotton, rayon,<br />
polyester, and metallic.<br />
50 wt<br />
40 wt<br />
12 wt<br />
8 wt<br />
80 wt<br />
Find a store near you<br />
TM<br />
www.wonderfil.ca/locations<br />
49
Reduce bulk in the seams of your quilt blocks<br />
Elaine Theriault<br />
No bounce!<br />
I had forgotten to mention this. Let’s<br />
face it, the Designer EPIC is a large<br />
sewing machine and it’s heavy. It<br />
weighs 35 lbs. While I do have a very<br />
solid sewing table, I don’t have an insert<br />
for the Designer EPIC so I had to place<br />
it on my folding banquet tables and I<br />
was afraid that the bouncing would be<br />
a challenge for sewing.<br />
Husqvarna Viking<br />
Designer EPIC<br />
sewing machine<br />
As we explore more exciting features of<br />
the Husqvarna Viking Designer EPIC, I'll be<br />
happy to share some useful sewing tips<br />
like how to reduce bulk in the seams of<br />
your quilt blocks.<br />
I’m going to spend some time on a<br />
couple of cool features that I discovered<br />
by spending some serious time with the<br />
Designer EPIC.<br />
I have to mentioned how wide the bed<br />
of this sewing machine is! It’s a full 121⁄4”<br />
from the needle to the end of the work<br />
space. The reason for this large size is<br />
to accommodate a larger hoop when<br />
you’re doing machine embroidery. Since<br />
this is also a sewing machine, this extra<br />
space will be extremely beneficial when<br />
machine quilting as there’s a lot of room<br />
to handle a larger project.<br />
But where I found that extra space<br />
extremely useful was in ordinary sewing.<br />
I usually sew with an ender and leader<br />
project (small bits that get sewn in<br />
between my main project so I can chain<br />
piece without breaking the thread).<br />
There was loads of room on the bed of<br />
the Designer EPIC to place my bits so<br />
they didn’t fall on the floor or I had to<br />
keep them in front of the machine on<br />
the table. I LOVE this as it made it very<br />
handy to have those pieces handy.<br />
Notice how much extra space I still had.<br />
Keeping those bits in no way cut down<br />
on my sewing space.<br />
Q<br />
50 .com | issue 8<br />
UILTsocial<br />
A very large throat space allowed me to keep<br />
small project bits handy.<br />
Even when I placed larger blocks<br />
(waiting to be sewn) on the bed of the<br />
Designer EPIC, I still had a lot of space<br />
and still not hindering my sewing area.<br />
Room for larger blocks on the work space<br />
At some point, over the last couple of<br />
weeks, I was sewing on my own sewing<br />
machine and immediately noticed how<br />
cramped the sewing area was on my<br />
machine. There was definitely no room<br />
to keep those bits handy!<br />
I noticed right from the beginning that<br />
there wasn’t the amount of vibrations<br />
that I would have anticipated. Now if I<br />
were sewing at a very high rate, then<br />
I would get more bouncing, but who<br />
sews flat out anyway? You’re just asking<br />
for inaccuracies when you do that.<br />
Then as I was browsing through some<br />
literature on the Designer EPIC, I came<br />
across an explanation. The sewing<br />
machine was designed to lessen the<br />
vibrations! How cool is that!<br />
Very little bouncing, even on a folding table<br />
There are times when I think the<br />
engineers for the Designer EPIC were<br />
reading my mind about what I like<br />
and dislike about a sewing machine.<br />
What little details like this show me is<br />
that someone with a very thorough<br />
knowledge of sewing has had input to<br />
how the Designer EPIC was put together.<br />
That’s very important to me as a quilter!<br />
Photos by Elaine Theriault
Brilliantly designed screwdriver<br />
The best screwdriver – EVER!<br />
Speaking of thoughtful designs, this next<br />
tool is fabulous and again, extremely<br />
well thought out. We’ve all been in<br />
this position – you need to change<br />
the needle or you need to remove the<br />
presser foot ankle and those little screws<br />
are so small and so far under the head<br />
of the sewing machine that you just<br />
can’t get a good grasp on them. Right?<br />
Easy to get to the screw to change the needle<br />
Easy to get to the screw to remove the presser<br />
foot ankle<br />
Well problem solved. Have a look at this<br />
screwdriver – it’s just the best and I need<br />
about three of them!<br />
What happens with a normal screwdriver<br />
is that it’s hard to keep the tip in the<br />
slot of the screw and it slides all over<br />
the place. Not so with this brilliantly<br />
designed screwdriver. There’s a opening<br />
that fits over the head of the screw so<br />
that it won’t slip. And it’s stubby so you<br />
can get a good grasp on it. It doesn’t get<br />
any better than this.<br />
Perfecting those scant ¼” seams<br />
Let’s face it – it would be nice to sit<br />
down at the sewing machine and get<br />
that perfect SCANT ¼” seam allowance<br />
every time. It just doesn’t happen, no<br />
matter how good you are! But I’ve got<br />
some tips on how you can improve<br />
your chances of getting that perfect<br />
scant ¼” seam allowance.<br />
I’ve said this many times before, and I’ll<br />
say it again, the Quilter’s 1⁄4” Piecing Foot<br />
P is just fabulous. I use it all the time, on<br />
all my sewing machines and I get the<br />
same seam allowance no matter what<br />
I’m sewing or which machine I’m sewing<br />
on. It’s a fabulous time saver, takes the<br />
thought process out of getting started<br />
and well worth buying one for each of<br />
my sewing machines.<br />
Let’s get started with some advice. Below<br />
it looks like I’m just going to be seaming<br />
two regular pieces of fabric together.<br />
When I flip over the two pieces, you can<br />
see there’s a half square triangle on the<br />
reverse side of that seam and that extra<br />
thickness at the beginning of the seam<br />
can cause some issues.<br />
A half square triangle on the reverse side of that<br />
seam and that extra thickness at the beginning<br />
of the seam can cause some issues<br />
The Designer EPIC does have several<br />
options including the Needle Up/<br />
Down feature which helps to solve<br />
the problems when you’re sewing<br />
something like this. Two things can<br />
happen – if you don’t have the Needle<br />
Up/Down feature, then you’ll have to lift<br />
the presser foot up manually to allow<br />
space for that extra thickness to fit under<br />
the presser foot. If you don’t, the pieces<br />
are going to be pushed and shoved<br />
and you won’t have a nice match at the<br />
beginning of the seam. Other times,<br />
there’s a lot of bunching at the top and<br />
the piece won’t press flat.<br />
The Needle Up/Down feature raises the<br />
presser foot ever so slightly when I stop. I<br />
can then put this thicker seam (or any seam)<br />
right up to the needle. The presser foot<br />
doesn’t have a chance to push the fabric.<br />
Getting ready to sew what looks like a straight<br />
forward seam<br />
Q<br />
.com<br />
UILTsocial<br />
| issue 8 51
Now even with this feature, I still have<br />
to be careful. I start the seam SLOWLY<br />
to ensure the sewing machine starts<br />
to stitch properly and I sometimes will<br />
assist it with my quilter’s awl or stiletto<br />
by giving it a bit of a push.<br />
Starting the bulky seam with the assistance of a<br />
quilter’s awl<br />
Once I get over that bulky seam and<br />
have stitched about one inch, then I<br />
match up my next intersection. There’s<br />
plenty of room in front of the needle on<br />
the Designer EPIC to line up that seam<br />
intersection. I use my finger to feel that<br />
the seams are nested together and once<br />
they’re aligned to my satisfaction, I use my<br />
quilter’s awl to keep them from shifting.<br />
Lining up the next intersection and holding it in<br />
place with the quilter’s awl<br />
I know that many people feel the need<br />
to pin these intersections, however if<br />
you’re using ONE pin at each intersection,<br />
those pins will shift and cause the seams<br />
to not match. If you think about it, we’ve<br />
been taught to not stitch over pins<br />
which is a good thing. So the moment<br />
you take that pin out (close to the needle,<br />
but not under it), guess what happens?<br />
Yep – your fabric shifts and all that care of<br />
pinning was for nothing!<br />
When I use the quilter’s awl, I keep control<br />
of the intersection right up to the needle<br />
(I’ve only broken one needle in 20 years<br />
of sewing with the quilter’s awl) and I get<br />
pretty good matches on my intersections.<br />
Keeping that intersection “pinned” until it’s stitched<br />
Not only is it a good practice to pin<br />
those intersections with the quilter’s<br />
awl, but look what can happen with<br />
the seam allowances. See how the<br />
seam allowance of the diagonal seam is<br />
caught on the edge of the presser foot<br />
in the picture below? If we allow that to<br />
happen, you won’t be able to get a nice<br />
pressed end of that seam. That in turn<br />
can cause issues with matching of the<br />
seams on the next intersection.<br />
Seam allowance is caught on the presser foot and<br />
will turn over unless tamed with the quilter’s awl.<br />
Once I get near the end of the seam, I<br />
match the end as well and keep it in<br />
check using the quilter’s awl. I like the<br />
amount of room in front of the needle<br />
on the Designer EPIC. There’s plenty of<br />
room to match up seams. If my seam<br />
happened to be longer than the space<br />
in front of the needle, I would match the<br />
seam up (more or less) and hold it with<br />
my hand until the intersection comes in<br />
contact with the sewing machine. Then<br />
I would “pin” it with the quilter’s awl and<br />
finish the seam as shown below.<br />
Matching and “pinning” the end of the seam<br />
Here’s another important aspect of that<br />
seam. You want a consistent scant ¼” seam<br />
allowance for the entire length of the seam,<br />
including the start and the finish.<br />
Q<br />
52 .com | issue 8<br />
UILTsocial
The width of the seam allowance at the end of<br />
the seam is consistent with the width of the seam<br />
allowance in the middle<br />
Check out the sample below. See what<br />
happened at the end? It’s not a scant<br />
¼” seam allowance and this can cause<br />
some major inaccuracy issues, especially<br />
if it happens a lot.<br />
Yes – there’s a lot of stopping and<br />
starting when you’re piecing. I’d rather<br />
be stopping and starting to position<br />
fabric and line up seams, than sew like<br />
crazy and then have to rip out.<br />
None of the seams in the pictures<br />
below were pinned or measured in<br />
anyway and you can see how beautiful<br />
the intersections are. I know where my<br />
scant ¼” seam allowance is by using my<br />
Quilter’s ¼” Piecing Foot P, I pin on the fly,<br />
using the quilter’s awl and I take control<br />
of my seams and match things up as I go.<br />
This process saves a lot of time and yet I<br />
get pretty accurate results.<br />
Twirled seams that are pressed flat<br />
The width at the end of the seam allowance is<br />
NOT consistent with the width in the middle<br />
Why does this happen? Most times, it<br />
occurs because we take our hands off<br />
of our pieces as the seam nears the end.<br />
We’re in that much of a hurry to grab the<br />
next pieces and the sewing machine takes<br />
control and let’s the pieces do whatever.<br />
This frequently occurs if there’s a<br />
diagonal seam on the reverse side<br />
(which there is). The bulk of that seam,<br />
will push the fabric to the left or right<br />
and you end up with this inaccuracy.<br />
It’s very important that you stay in<br />
control of those pieces and “man handle”<br />
them with your quilter’s awl until the<br />
absolute end of your seam. Stop sewing<br />
and then pick up your next piece.<br />
Perfect intersection<br />
I do twirl my seams on the reverse side<br />
(it’s an old habit that I can’t shake, but I<br />
like the way it looks on the front) and<br />
reduces bulk in the seam allowances<br />
particularly with diagonal seams. In a<br />
post on <strong>QUILTsocial</strong>, I touch on how to<br />
reduce bulk in the seam allowances.<br />
Intersection is absolutely flat with the twirled seam<br />
I love surprises and each time I<br />
discovered something on the Designer<br />
EPIC, well it was exciting. There are some<br />
absolutely amazing design features on<br />
the Husqvarna Viking Designer EPIC. I<br />
hope you enjoyed reading about those<br />
features and the little tips on achieving<br />
those scant ¼” seams.<br />
I’ve got a tutorial on making the perfect<br />
Quarter Square Triangle. Read on.<br />
Q<br />
.com<br />
UILTsocial<br />
| issue 8 53
2 critical tips to perfect Quarter Square Triangles<br />
I remember my first project with half<br />
square triangles. I sewed the squares<br />
together on the diagonal, cut them in<br />
half, pressed and then trimmed. What<br />
did I know about trimming and using<br />
the diagonal line as a reference? Nope<br />
– I just laid the ruler on my half square<br />
triangle and cut out the size I needed!<br />
There wasn’t a SINGLE point on that quilt.<br />
I’ve since learned how to trim half square<br />
triangles and it’s now one of my favorite units.<br />
The quarter square triangle used to<br />
give me grief until recently. Yes, I’m still<br />
learning; the day I stop – I’ll be dead!<br />
And yes – I still get frustrated and I<br />
still make mistakes, but I’m enjoying<br />
the learning process. If everything I<br />
sewed was perfect, that means I’m not<br />
challenging myself.<br />
So – I would make quarter square<br />
triangles and they would be wonky.<br />
Why? I spent some time one afternoon<br />
evaluating the problem and I found the<br />
solution which I’ll share with you.<br />
I’ll be using the Husqvarna Viking<br />
Designer EPIC to show you how to make<br />
perfect quarter square triangles.<br />
The first thing is to cut squares. Just how<br />
big should those squares be? Start by<br />
determining the FINISHED size of the<br />
units you need. Let’s say you need 3½”<br />
finished quarter square triangles, then<br />
add 1¼” to the FINISHED size. That means<br />
you will cut squares that measure 4¾”.<br />
When you sew the quarter square<br />
triangles with this method, you’ll get two<br />
identical quarter square triangles.<br />
Start by cutting two identical sized<br />
squares. They should have contrast to<br />
each other either in value or color. I<br />
happened to have some 5” squares<br />
handy so I used those.<br />
Draw a diagonal line and stitch a scant ¼” on<br />
either side.<br />
Cut on the diagonal drawn line.<br />
Technically it doesn’t matter which way<br />
you press the seams, but be consistent.<br />
If you press one seam to the dark, then<br />
press both to the dark. If you press one<br />
seam to the light, then press both to<br />
the light. You should now have two half<br />
square triangles. DO NOT TRIM.<br />
Husqvarna Viking Designer EPIC<br />
Tutorial for Quarter Square Triangles<br />
There are different methods for making<br />
quarter square triangles. This tutorial<br />
uses half square triangles. As I work<br />
through the process, I’ll identify the<br />
pitfalls so you too can have perfect<br />
quarter square triangles.<br />
Two squares will yield two quarter square triangles.<br />
Draw a diagonal line on the wrong side<br />
of one of the squares. Place the two<br />
squares right sides together and stitch<br />
a scant ¼” on both sides of the diagonal<br />
line. Try to keep those stitching lines as<br />
straight as possible.<br />
Two half square triangles<br />
A potential pitfall is that the seams<br />
of the half square triangles are not<br />
pressed well. My seams are nice and<br />
flat. Always press these units from the<br />
RIGHT side. Never the wrong side. Why?<br />
You want to ensure that there are no<br />
tucks or folds in those seam lines, in<br />
particular at the corners. You can control<br />
that from the front, but you can’t see<br />
those potential tucks if you press from<br />
the back.<br />
Q<br />
54 .com | issue 8<br />
UILTsocial
Another pitfall – be careful that you<br />
don’t stretch the seams.<br />
In the photo below, the arrows are<br />
pointing to the corners – this area is<br />
usually not pressed well and can cause<br />
issue with your points in the final units.<br />
Again, straight seams will give you a<br />
nicer finished unit.<br />
WAIT – don’t just lay the ruler on and<br />
draw a line and don’t line the ruler up<br />
with the corners of that block. NO – you<br />
want to place the ruler so it’s more or<br />
less lined up with the corners, but more<br />
importantly, the line you are about to<br />
draw should be 90 degrees to the first<br />
seam line. This is critical to the success of<br />
your quarter square triangles.<br />
Place the two half square triangles right sides together<br />
Carefully stitch a scant ¼” on both sides<br />
of that new diagonal line. Notice that I<br />
haven’t used pins. Again, the straighter<br />
these lines of stitching are, the better<br />
results you’ll have with your quarter<br />
square triangles.<br />
Press well right to the end of the seam.<br />
Now we’re going to draw another<br />
diagonal line on the reverse of ONE of<br />
the units.<br />
Draw another diagonal line.<br />
Second line MUST be 90 degrees to the first seam.<br />
Place the two half square triangle units<br />
right sides together alternating the<br />
colors. So the pink is on the blue and<br />
the blue is on the pink as shown below.<br />
Nest those two center seams up to each<br />
other. If you recall, I would not consider<br />
pinning these units. They’re small<br />
enough that they won’t distort or shift.<br />
But very important that those two seams<br />
be nested to each other. That’s why it’s<br />
important that the seams be pressed to<br />
the same fabric. In this case, the seams<br />
were pressed to the blue fabric and this<br />
allows the seams allowances to nest<br />
against each other. This in turn helps to<br />
get a perfect intersection in the middle<br />
of the unit.<br />
Stitch a scant ¼” on both sides of the diagonal line.<br />
A scant ¼” stitched on both sides of the diagonal line.<br />
Q<br />
.com<br />
UILTsocial<br />
| issue 8 55
If you want to check how accurate your<br />
centers are before you cut the units<br />
apart, pull back one of the loose corners.<br />
A perfect match – no pins!<br />
Pull back the corner to check the intersection<br />
Cut the units apart on the diagonal line.<br />
Two untrimmed quarter square triangles<br />
The last step is to trim the units. It’s a<br />
whole lot easier, if you use a SQUARE ruler<br />
to do your squaring up. I’m right handed,<br />
so I position the ruler with the 1” and 1”<br />
markings in the top right hand corner. If I<br />
were left handed, those markings would<br />
be in the top left hand corner.<br />
I now need to know the UNFINISHED<br />
size of my quarter square units. I want<br />
units that are 3½” FINISHED so to get the<br />
unfinished size, I now add ½” for the seam<br />
allowances. That means, I’m going to trim<br />
these units down to 4” UNFINISHED.<br />
Now it may be not be exactly perfect, so<br />
you may have to jiggle the ruler around<br />
or you may have to jiggle your block<br />
underneath the ruler. Once it’s lined up<br />
to the best of your ability – then trim<br />
along the right hand side and the top<br />
side of the ruler.<br />
Rotate the block 180 degrees. Line up<br />
the clean cut edges with the 4” (in this<br />
instance) lines on the ruler and again, trim<br />
along the right and top edges of the ruler.<br />
Five reference points for trimming the quarter<br />
square triangles<br />
And there’s the perfect quarter square<br />
triangle!<br />
Units are cut apart on the diagonal line<br />
Press the seams. Confession time again<br />
– I did twirl those seams on the back. As<br />
I mentioned, old habits die hard. Plus<br />
I really like the look of the seam being<br />
distributed in all four directions, rather<br />
than have that final seam across the<br />
center of the block.<br />
Twirled seams on the back<br />
Preparing to square up the quarter square<br />
triangle unit<br />
Like the half square triangle, there’s a<br />
better way to trim these units, which in<br />
itself becomes a critical step in making<br />
the perfect quarter square triangles.<br />
In the photo below, you can see that<br />
I have 5 reference points. Since I’m<br />
trimming my blocks to 4”, I can use the<br />
intersection of the 2” lines on the ruler to<br />
find the center of the block. Then I can<br />
place the intersection of the 4” on the<br />
bottom left of the block. You can see the<br />
other three reference points below.<br />
Trimmed quarter square triangle<br />
Hopefully this tutorial takes the mystery<br />
out of making perfect quarter square<br />
triangles. With the help of the Husqvarna<br />
Viking Designer EPIC to get those nice<br />
straight seams and that scant ¼” seam<br />
allowance, making these units was a<br />
breeze. Don’t forget to lower that stitch<br />
length to 2 as you’ll be slicing through<br />
some seams.<br />
Let's continue this review of the Designer<br />
EPIC with some of its embroidery<br />
features.<br />
Q<br />
56 .com | issue 8<br />
UILTsocial
Designed<br />
for the details.<br />
Featuring Dual Duty Plus ®<br />
Hand Quilting Thread.<br />
For more information visit:<br />
makeitcoats.com<br />
Pattern “Modern Traditional” courtesy of Cheryl A. Adam<br />
15-023 © 2015 Coats. Coats is a registered trademark. All rights reserved.<br />
57
Easy to embroider on the<br />
Husqvarna Viking Designer EPIC<br />
While the Designer EPIC is a fabulous<br />
sewing machine, it’s embroidery<br />
capabilities are spectacular. I remember<br />
my first embroidery sewing machine.<br />
The design work was done on a<br />
computer and then transferred to the<br />
sewing machine via a 3½” floppy disk.<br />
Does everyone even remember floppy<br />
disks? Probably not and you don’t want<br />
to go there.<br />
Let’s get started and see what the<br />
Designer EPIC has to offer.<br />
Husqvarna Viking Designer EPIC<br />
The first thing you have to do is to<br />
remove the accessory tray. That’s easy, it<br />
just slides off leaving the machine in the<br />
free arm position.<br />
Designer EPIC with the embroidery unit attached<br />
Wow – that looks exciting. That’s a LOT of<br />
space to play with. Wait until you see the<br />
size of the hoops.<br />
You’re probably thinking that machine<br />
embroidery is going to be complicated,<br />
however, it’s much easier than you think.<br />
Don’t forget that the Designer EPIC has<br />
the JoyOS advisor and the User’s Guide<br />
built in. There’s a lot of information right<br />
at your finger tips and I’m going to show<br />
you just how easy it is to learn.<br />
Should I want to do a sewing technique<br />
that I’m not sure of, I can choose from<br />
one of the options shown above. If I<br />
want to learn about an embroidery<br />
technique, then I select Embroidery and<br />
if I want to learn some other things<br />
(which I’ll show you next), I’d choose the<br />
Knowledge Center.<br />
And the entire User’s Guide is right there<br />
as well if I need to find out something<br />
specific. No searching for misplaced<br />
papers or manuals. I love this feature!<br />
I started off by choosing the Embroidery<br />
section of the JoyOS advisor so I can<br />
learn a different embroidery technique.<br />
I can change the background color in<br />
the hoop area that will appear on the<br />
screen. While this doesn’t seem like a big<br />
deal, it’s a big deal. Depending on the<br />
color of the stitches on the screen, you<br />
may need to change the background<br />
color so you can see the stitches<br />
properly. A very useful feature indeed!<br />
Then you have various embroidery<br />
techniques that you can do. There’s<br />
a selection menu and within each<br />
menu, there are sub categories – each<br />
explaining an embroidery technique.<br />
Accessory tray is removed to allow free arm sewing<br />
Now slide the embroidery unit onto the<br />
Designer EPIC. The unit is very long so<br />
you want to make sure that you have<br />
plenty of space around the machine. The<br />
hoop will need space to move as well<br />
behind the sewing machine.<br />
Q<br />
58 .com | issue 8<br />
UILTsocial<br />
The JoyOS advisor is the start-up screen when you<br />
turn on the Designer EPIC<br />
This screen may look intimidating when<br />
you first turn on the Designer EPIC, but<br />
in fact, it’s very easy considering all the<br />
available options. If I’m going to sew, I hit<br />
“Start New” to take me to the sewing mode.<br />
If the embroidery unit is attached, when<br />
I hit “Start New”, I’ll be taken to the screen<br />
where I edit my embroidery design.<br />
First page of the embroidery tab in the JoyOS advisor
In the photo below, I’ve chosen Specialty<br />
Hoop techniques (these are nonstandard<br />
hoops that are necessary to<br />
perform various techniques). Within<br />
this category, you can see there are four<br />
separate topics that I can select.<br />
In the burgundy area below the designs,<br />
are the other design menus. Within each<br />
menu there are numerous designs.<br />
You can also see that my hoop area is<br />
blue which is the default.<br />
Available topics in the Specialty Hoop technique section<br />
Here’s another category called Surfaced<br />
Embroidery. Don’t know what this<br />
means? There’s an explanation right<br />
below the grey boxes. Surfaced<br />
Embroidery is all about dimensional<br />
effects. Again, there’s information on the<br />
three techniques.<br />
Step by Step Instructions for Basic Embroidery<br />
If you turn the Designer EPIC on and the<br />
embroidery unit is attached, this is the<br />
pop-up message you’re going to get.<br />
It’s a reminder to move everything out<br />
of the way of the arm so it doesn’t get<br />
damaged when it starts up.<br />
I love these reminders. We think we<br />
know how to operate the machine,<br />
but then we forget about the simple<br />
things, like moving stuff out of the<br />
way, which can cause a lot of damage.<br />
And there’s no time to have a machine<br />
in the repair shop!<br />
One of the embroidery design menus<br />
Remember that this screen is similar to a<br />
tablet. I can swipe up and down to scroll<br />
through the designs in one menu. Very<br />
useful and so easy to use.<br />
Surfaced Embroidery categories<br />
The next picture of the STEP BY STEP and<br />
very detailed instructions on how to<br />
do basic embroidery. You get the list of<br />
materials/equipment required and how<br />
to set up the Designer EPIC. This is the<br />
first page of the instructions. You have<br />
to scroll down to get the rest. It really<br />
doesn’t get any easier than this. The<br />
hardest thing now is to choose a design!<br />
Note these detailed instructions are<br />
included for any of the embroidery<br />
techniques that you choose!<br />
Pop up message to clear the area around the<br />
embroidery unit<br />
There are many built-in embroidery<br />
designs that come with the Designer<br />
EPIC. In addition you can incorporate<br />
the fonts and the decorative stitches.<br />
The possibilities without ever buying<br />
any other designs is mind-boggling.<br />
Scrolling up and down through one menu of<br />
embroidery designs<br />
Q<br />
.com<br />
UILTsocial<br />
| issue 8 59
In this photo, I’m scrolling side to side.<br />
Scrolling side to side will allow me<br />
to scroll through the various menus.<br />
An easy way to find the category of<br />
embroidery designs you’re looking for.<br />
Something else that’s very important<br />
is selecting the correct hoop size. The<br />
Designer EPIC will NOT start a stitchout<br />
if an appropriate hoop size is not<br />
selected. This is a safety feature and<br />
a very important one. No danger of<br />
starting a design and realizing the hoop<br />
isn’t big enough. You can see that there<br />
are lots of options for hoops. I like to<br />
select the smallest hoop possible for the<br />
design that I’m working on.<br />
My biggest issue with hoops? The sizes<br />
are metric. There are many things that I<br />
can deal with in metric, the temperature<br />
outside, driving a car, but for some reason,<br />
inches and centimeters just don’t translate<br />
for me. I must make this a “must learn” item<br />
for this year. It would save me a lot of time,<br />
not just for hoops, but in general.<br />
Scrolling side to side through the various<br />
embroidery design menus<br />
In the next photo, you can see that<br />
the pink tab opens up the embroidery<br />
design menus. I can also load a stitch<br />
(blue tab), load a font (green tab)<br />
or bring a saved file in from the file<br />
manager (red tab). The brown tab is the<br />
JoyOS advisor project tab. YES – there<br />
are designs available depending on the<br />
specialty embroidery technique you’ve<br />
chosen in the JoyOS advisor. This is so<br />
awesome! The bottom tab is the thread<br />
color edit tab.<br />
Remember that the Designer EPIC has<br />
internet capabilities. That means files can<br />
be downloaded directly to the Designer<br />
EPIC. I can upload saved files to the<br />
mySewNet cloud.<br />
These capabilities are totally amazing.<br />
Remember I said that on my old<br />
embroidery machine that all of the<br />
design work was done on the computer<br />
and then loaded via a floppy disk?<br />
There’s just no comparison between the<br />
two machines. What was once a very<br />
laborious and technical task, is so easy<br />
that anyone can do machine embroidery.<br />
Using MANY different techniques.<br />
Q<br />
60 .com | issue 8<br />
UILTsocial<br />
Lots of options to bring files/designs into the<br />
Designer EPIC<br />
Once I choose a design (in this case,<br />
Number 1 from the L Heart and Butterfly<br />
Designs menu), then information about<br />
that design appears at the bottom of<br />
the screen. I get the file name, the size,<br />
the number of stitches and how many<br />
thread colors there are in the design. All<br />
of this is very useful information when<br />
you want to stitch something out.<br />
Information about the selected design<br />
Wide variety of hoop sizes and types available
Three hoops come standard with the<br />
Designer EPIC. I’m going to talk a bit<br />
more about the hoops and how to hoop<br />
your fabric later this week.<br />
The three sizes are:<br />
360 x 260<br />
260 x 200<br />
120 x 120<br />
In case you’re like me and those<br />
numbers mean nothing to you, the<br />
equivalents are:<br />
14” x 10”<br />
10” x 7½”<br />
4½” x 4½”<br />
There’s a very large hoop that you can<br />
purchase separately. It’s called the<br />
Majestic Hoop and measures 360 x 350<br />
or for the metric challenged among us –<br />
that’s 14” x 13¾”. Now that’s huge!<br />
Here’s a design that I selected to stitch<br />
out. Yes, there are loads of buttons and<br />
options on the screen. The good news<br />
is you don’t have to touch any of them<br />
in order to stitch out a design. Simply<br />
go through the menus, select a design,<br />
thread the embrodiery machine, hoop<br />
your fabric and select GO. But once you<br />
get the hang of those basics, they will go<br />
along much quicker and you’re going to<br />
want to do a whole lot more!<br />
And if you forget a step, you can simply<br />
follow along on the handy built-in<br />
instructions on the tablet like screen!<br />
Three hoops<br />
come standard<br />
One of the many built-in embroidery designs<br />
Oh – the possibilities are endless. I’ll be<br />
doing some embroidery later this week<br />
but I wanted to give you a peek under<br />
the hood just in case you thought it was<br />
complicated. There are loads of options<br />
and once you get comfortable, then you<br />
can start to use those options. There’s<br />
plenty of stuff to keep you busy while<br />
you learn.<br />
Keep reading as we delve a bit more into<br />
the mystery of machine embroidery with<br />
the Husqvarna Viking Designer EPIC.<br />
Q<br />
.com<br />
UILTsocial<br />
| issue 8 61
Inspira stabilizers<br />
save your machine embroidery work<br />
Stabilizers are critical to the success of<br />
your machine embroidery. Without a<br />
stabilizer, your work will pull, warp and<br />
pucker, making a very unattractive and<br />
hard to work with design.<br />
There are many stabilizers on the market.<br />
Not only different brands, but many<br />
different types and while you might be<br />
able to substitute one type for another<br />
in a pinch, it’s very important to use the<br />
correct stabilizer for the job at hand.<br />
Otherwise, you’re asking for trouble.<br />
The Inspira brand of stabilizers is<br />
excellent and comes with a wide variety<br />
of types.<br />
Wait! Before you say that this is going to<br />
get complicated – it’s not! Remember, I<br />
mentioned the Knowledge Center on<br />
the JoyOS advisor – that’s the first screen<br />
you see when you turn on the Designer<br />
EPIC? Instead of hitting Start New, or<br />
the User’s Guide, or the Embroidery<br />
Techniques, I’m going to the Knowledge<br />
Center. Guess what’s in there?<br />
Yep – all kinds of information about<br />
stabilizers. I told you this entire process<br />
is so easy. No hunting on the internet,<br />
no trying to find a lost manual – it’s all<br />
built into the Designer EPIC.<br />
Small selection of Inspira stabilizers<br />
Stabilizer guide selected in the Knowledge Center<br />
Husqvarna Viking Designer EPIC with embroidery unit attached<br />
There are different categories of<br />
stabilizers. The one selected above is the<br />
specialty category.<br />
The one below is the Tear A Way<br />
products. Don’t know what a tearaway<br />
stabilizer is? The description is shown<br />
below the row of gray boxes.<br />
Q<br />
62 .com | issue 8<br />
UILTsocial
List of water soluble stabilizers<br />
OK – it’s time to get to work. I want to get<br />
out of the Knowledge Center and into<br />
the work area. I simply hit the START NEW<br />
button on the bottom right of the screen.<br />
Tear A Way stabilizer menu<br />
Did you notice that the labels on the<br />
screen are the same as the actual<br />
product? That makes it super easy to<br />
know you have the correct stabilizer. And<br />
if you need more detailed information<br />
about the stabilizer, just click on the icon<br />
for that particular one and you get all<br />
the information you could possibly want.<br />
You get an in-depth description of the<br />
stabilizer, when to use iit, and detailed<br />
instructions on how to use it.<br />
I told you – it doesn’t get any easier!<br />
Press Start New to get to work<br />
But wait! I need to sew something<br />
before I start my embroidery project. No<br />
worries. I can sew WITH the embroidery<br />
unit attached. I simply toggle from<br />
embroidery to sewing mode in the top<br />
right hand corner.<br />
Choose the stitch and the appropriate settings<br />
I would be careful of the size of project<br />
that I work on. While I could work on<br />
something fairly large, I wouldn’t want my<br />
project catching on the embroidery arm.<br />
Information on Tear-A-Way Stabilizers<br />
Toggle switch between embroidery and sewing mode<br />
Now that the sewing mode screen<br />
is up, I can choose the stitch and the<br />
appropriate settings that I want.<br />
And yes – I can SEW with the embroidery<br />
unit attached. This is fabulous. It saves<br />
having to remove the embroidery unit,<br />
find a safe place to store it and then put<br />
it back on when done stitching.<br />
Sewing with the embroidery unit attached<br />
I’m not going to have a chance to hoop<br />
anything, but wanted to show you that on<br />
all the hoops, there are four notches that<br />
assist you in lining up your design on your<br />
fabric. It takes a bit of practice to get that<br />
right. While I’m doing an okay job with<br />
hooping, I do try to hoop a big piece of<br />
fabric and then cut my image after. That’s<br />
the cheating way to do it, but it works!! I’ll<br />
have more on hooping.<br />
Q<br />
.com<br />
UILTsocial<br />
| issue 8 63
Four guides to help position your item when hooping<br />
The hoop has a spring lock on it and<br />
a screw to help keep that fabric and<br />
stabilizer tight in the hoop. The last thing<br />
you want is to have ripples or movement<br />
during the machine embroidery process.<br />
In addition, there are clips that help<br />
stabilize the larger hoops.<br />
While it sounds like there are a lot of<br />
steps to do machine embroidery, don’t<br />
forget that they’re all documented in the<br />
JoyOS advisor. Step by step!<br />
Let’s not forget that if you don’t want<br />
to sit at the sewing machine to browse<br />
the User’s Guide, you can download<br />
it to your tablet and read it at your<br />
leisure. I wasn’t a fan of e-books until<br />
recently. Now I think they’re great. Very<br />
handy, very useful and easy to use. That’s<br />
important to me, especially since I can be<br />
very technically challenged sometimes!<br />
Clips are used to help stabilize the larger hoops<br />
Spring and a screw to tighten the embroidery hoop<br />
Q<br />
64 .com | issue 8<br />
UILTsocial<br />
User’s Guide on a tablet
Get more quilting fun in<br />
A NEEDLE PULLING THREAD<br />
QUILT SEW KNIT CROCHET CROSS STITCH EMBROIDER HOOK RUGS<br />
A NEEDLE PULLING THREAD<br />
QUILT SEW KNIT CROCHET CROSS STITCH EMBROIDER HOOK RUGS<br />
4<br />
SMASHING<br />
CUSHION<br />
COVERS<br />
for WINTER DECORATING<br />
1 SWEET<br />
CROCHET<br />
CARDI<br />
QUILTING A<br />
ZENTANGLE<br />
SELF PORTRAIT<br />
MAKING<br />
A QUILLOW<br />
KNITTING<br />
2 FAIR ISLE<br />
SWEATERS<br />
1 CABLE<br />
PULLOVER<br />
Visit www.ANPTmag.com to order!<br />
L goes<br />
better<br />
with<br />
ife<br />
needlework!<br />
Q<br />
.com<br />
UILTsocial<br />
| issue 8 65
The EPIC embroidery features<br />
of the HV Designer EPIC<br />
I'm going to explore stitch-outs on the<br />
Husqvarna Viking Designer EPIC. And I’ll<br />
only be scratching the surface of what<br />
amazing embroidery techniques are<br />
available.<br />
How to hoop your fabric<br />
You want to start by cutting a piece of<br />
stabilizer that is slightly larger than your<br />
hoop. Layer your fabric (right side up)<br />
on top of the stabilizer. I don’t bother to<br />
cut my fabric down to smaller sizes, but<br />
you don’t want the piece to be too big<br />
either as it’ll be moving around as the<br />
hoop moves.<br />
Designer EPIC with embroidery unit attached<br />
Here’s a quick tip about those stabilizers.<br />
Once you remove the plastic, that label<br />
is going to get misplaced and you want<br />
to keep it with the stabilizer. Simply tuck<br />
the label inside the center of the tube<br />
and you’ll always know what kind of<br />
stabilizers you have.<br />
Built in step by step instructions for machine<br />
embroidery<br />
Here’s the design I chose. I’m doing a<br />
very simple embroidery, but there are a<br />
lot of color changes.<br />
Layer the fabric over the stabilizer<br />
Next up, you’re going to open the quick<br />
release (the spring) on the outer part of<br />
the hoop and place it underneath the<br />
fabric/stabilizer combination.<br />
Place the outer hoop underneath the fabric/stabilizer<br />
combination<br />
Insert the stabilizer label inside the roll of stabilizer<br />
Remember, if you’ve never done<br />
machine embroidery before, all the steps<br />
are built into the Embroidery Section of<br />
the JoyOS advisor. Just follow the step by<br />
step instructions. Simple!<br />
Place the inner hoop on top of the<br />
fabric, making sure that the arrow at the<br />
bottom of the outer hoop is matching<br />
up with the arrow at the bottom of the<br />
inner hoop. Essentially, you don’t want<br />
that inner hoop to be upside down.<br />
Press the inner hoop inside the outer<br />
hoop. I start at the bottom left and work<br />
my way around the hoop until I end<br />
up at the bottom right corner which is<br />
where the quick release and the screw<br />
are located.<br />
Design to stitch out<br />
Q<br />
66 .com | issue 8<br />
UILTsocial
Place the inner hoop over the outer hoop with the<br />
fabric and stabilizer sandwiched in between<br />
Once the inner hoop is secured inside<br />
the outer hoop, close the quick release<br />
and tighten up the screw. There’s no<br />
need to go crazy on tightening that<br />
screw – you want it secure, not break it!<br />
Centering lines for hooping<br />
If I’m using a larger hoop, then I can<br />
further stabilize the hoop by using clips<br />
at various points around the perimeter<br />
of the hoop. They’re easy to put on and<br />
easy to take off and I’ve never had one<br />
pop out during the stitch out process.<br />
The inner hoop is secured inside the outer hoop<br />
The outer hoop has a tendency to<br />
move around and if that is causing you<br />
problems, you can purchase a hoop grip<br />
that you can slide the hoop connector<br />
into, in order to stabilize the outer hoop.<br />
I must get one of these as I think it<br />
would solve a lot of my hooping issues.<br />
If you’re going to do your embroidery<br />
on a garment or need the design in a<br />
specific location, then find the center of<br />
the desired design position and mark<br />
two intersecting lines across it. Those<br />
two lines will be used to line up with the<br />
guide markings on the hoop.<br />
In the next sample, I just drew those<br />
lines on with a chalk pencil, while it was<br />
already hooped. I know – a big cheat,<br />
but you get the idea. And note that the<br />
center of the design is NOT the center<br />
of the hoop. There’s a reason why the<br />
top half is bigger than the bottom<br />
half. That doesn’t matter, the centering<br />
lines are what matters. Don’t eyeball it –<br />
you’ll be disappointed.<br />
Clips to help stabilize the larger hoops<br />
I’ve changed the foot to one that is<br />
appropriate for machine embroidery.<br />
Sensor Q-Foot for machine embroidery<br />
My design is ready to be stitched out. I<br />
can now proceed to the Embroidery<br />
Stitch Out mode. I get a screen<br />
reminding me how I need to set up the<br />
Designer EPIC for the stitching. Easy to<br />
follow instructions, easy to select the<br />
options and now I’m ready!<br />
Reminder of settings for machine embroidery<br />
Remember I told you that the Designer<br />
EPIC wouldn’t let you stitch if you didn’t<br />
have the correct hoop? The design I’m<br />
stitching out recommends a 200 x 200<br />
hoop. That’s the minimum size required<br />
to stitch the design. I don’t have a 200<br />
x 200 hoop, so I choose the next largest<br />
one that I had. That was the 200 x 260. I<br />
can always go larger, but never smaller.<br />
However, I didn’t advise the Designer<br />
EPIC that I was using a different hoop<br />
and so I got a gentle reminder.<br />
Gentle reminder to attach the correct hoop<br />
Q<br />
.com<br />
UILTsocial<br />
| issue 8 67
Notice that it wasn’t just reminding me<br />
to attach the hoop, but it was looking<br />
for the 200 x 200 hoop. AHA – now I<br />
understand. Once I changed the settings<br />
in the Embroidery Edit Mode to the 200<br />
x 260 hoop, which matched the physical<br />
hoop I was using, I was good to go.<br />
The list of thread colors now appears on<br />
the screen. The size of the color block is<br />
relative to the number of stitches in the<br />
design. In the bottom right-hand corner<br />
of the screen, you can see the total<br />
number of stitches in the design and<br />
beneath that number is the number of<br />
stitches for that color.<br />
And notice on the bottom left, the hoop<br />
size is now 200 x 260.<br />
I started the stitch out and went upstairs<br />
to edit some pictures while the Designer<br />
EPIC was stitching. WAIT! I forgot a very<br />
very important step to this embroidery<br />
stitch out process.<br />
I grabbed my smart phone and<br />
downloaded an app – mySewMonitor<br />
App. I very quickly created an account<br />
with mySewnet. No machine on-line.<br />
Shoot – I’ve already started the<br />
embroidery. Can I connect the Designer<br />
EPIC while it’s stitching? The answer<br />
is YES. I brought the sewing machine<br />
online and connected to my account on<br />
mySewnet.<br />
YES – the app on my cell phone now<br />
shows me the status of the stitch<br />
out. Isn’t that just the most awesome<br />
feature? I see the status of the<br />
entire design, I see the status of that<br />
particular thread color. Basically, the<br />
same information that is on the screen.<br />
It means that I don’t have to be in the<br />
same room as the Designer EPIC, nor<br />
do I have to periodically hang my head<br />
over the staircase to hear if the machine<br />
is still stitching. I got a nice gentle<br />
reminder on the phone every time the<br />
thread needed to be changed. I think<br />
at one point, the thread broke and I was<br />
reminded of that as well.<br />
Even when I took a run to the local<br />
coffee shop and my phone was<br />
temporarily off my home network, the<br />
moment I arrived in my driveway, I<br />
got a reminder to change the thread. I<br />
LOVE this feature!!!<br />
Setting up mySewnet account while the Designer<br />
EPIC is stitching out a design<br />
There’s my account on mySewnet. Since<br />
I’ve just opened the account, there<br />
are no files to sync. BUT – look what<br />
happened next.<br />
The thread color changes are represented on the right<br />
Starting the stitch out<br />
mySewnet account is synced<br />
Status update on the phone app<br />
Q<br />
68 .com | issue 8<br />
UILTsocial
The plan now is to make something with<br />
those coorindating fabrics. I more or less<br />
chose the colors from those two fabrics.<br />
Notification to change the thread<br />
I love that the “thread” on the spool<br />
in the forefront “emptied” to show the<br />
progress of that color in the stitch out.<br />
You have to remember that it doesn’t<br />
take much to amuse me.<br />
The color on the thread spool shows the progress<br />
of that color<br />
Complete!<br />
The stitch out is complete!<br />
The finished stitch out. He’s pretty cute.<br />
Notice that I didn’t follow the colors<br />
suggested in the thread color chart. Since<br />
it’s my stitch out, I can do what I want!<br />
Fabric to make a zippered tote with my<br />
embroidery design<br />
My plan is to make a zippered tote.<br />
I barely scratched the surface of what I<br />
want to show you with the Husqvarna<br />
Viking Designer EPIC. There are many<br />
more exciting things we can do with this<br />
sewing/embroidery machine.<br />
I hope you enjoyed this little adventure<br />
and that you learned some tips along<br />
the way. The capabilities of the Designer<br />
EPIC and the attention to detail has my<br />
head spinning.<br />
If you’re into serious machine<br />
embroidery, the Designer EPIC is your<br />
machine. I don’t think there’s anything<br />
that this machine can’t do.<br />
Close to finishing the stitch out<br />
Pretty cute design!<br />
Elaine Theriault<br />
www.crazyquilteronabike.blogspot.ca<br />
Q<br />
.com<br />
UILTsocial<br />
| issue 8 69
Autumn Harmony<br />
within a Log Cabin quilted sampler<br />
Nancy Devine<br />
“There is a harmony in autumn,<br />
and a luster in its sky, which<br />
through the summer is not heard<br />
or seen, as if it could not be, as if<br />
it had not been!”<br />
– Percy Bysshe Shelley<br />
I love autumn, that season of color. As quilters, we appreciate the vivid hues of<br />
changing leaves, set against the intense cyan skies. These postcard-pretty days<br />
are often bathed in the pure sunshine. It’s like a big finale before the greys and icy<br />
whites of winter.<br />
That saturation of colors is the inspiration behind my Autumn Harmony wall quilt.<br />
Made up of four large log cabin blocks in low volume creams and neutrals, the<br />
fanciful batik foliage dances across the surface.<br />
And it all starts with scraps and strings. This is the ultimate frugal art piece.<br />
I’ve begged batik scraps from quilting friends, and prepared some lightweight<br />
quilting muslin flat in preparation for some string pieced foliage.<br />
Let’s get this color party started by creating a cozy quilted canvas to showcase our<br />
wild autumnal colors.<br />
Q<br />
70 .com | issue 8<br />
UILTsocial<br />
Photos by Nancy Devine
finished measurements 31” x 31”<br />
materials<br />
••<br />
Various quilting fabric remnants in<br />
neutrals (creams, beiges, very light<br />
yellow)<br />
••<br />
Green batik scraps and pieces<br />
••<br />
Yellow, red, gold, pink batiks<br />
••<br />
Bias binding in brown batik<br />
••<br />
Binding strips<br />
••<br />
Bias binding maker<br />
••<br />
Tailor’s awl<br />
••<br />
Finger pressing tool<br />
••<br />
Batting<br />
••<br />
505 basting spray<br />
••<br />
Template plastic<br />
••<br />
Spray Starch<br />
••<br />
Freezer paper<br />
••<br />
Small paint brush<br />
••<br />
Clever Clips (large and small)<br />
••<br />
Marking pen<br />
••<br />
Flatter pressing spray<br />
••<br />
Quilting muslin<br />
••<br />
Gütermann silk thread<br />
••<br />
Size 10 hand quilting needles<br />
••<br />
24” quilting hoop<br />
••<br />
Thimble<br />
••<br />
Birch branch<br />
••<br />
Curtain rings<br />
We’re going to make four 14½” log cabin<br />
blocks.<br />
The log cabin is a beginner block that<br />
requires a lot of cutting. It’s a perfect use<br />
for jelly roll pre-cuts, since they are 2½”<br />
wide strips. Unfortunately, you might not<br />
have a jelly roll bundle of neutral fabrics.<br />
No worries.<br />
Let’s whip out our rulers and rotary<br />
cutters and make some 2½” strips.<br />
I cut seven strips from eight different<br />
neutrals. It helps to have some Clever<br />
Clips around to clip the strips together as<br />
you go. It just keeps everything tidy.<br />
After you’ve cut your strips, you then<br />
cut them (which is called sub-cutting in<br />
quilting lingo) into varying lengths, but<br />
the width stays the same.<br />
For one block, cut:<br />
Two 2½” squares<br />
Two 4½” strips<br />
Two 6½” strips<br />
Two 8½” strips<br />
Two 8½” strips<br />
Two 10½” strips<br />
Two 12½” strips<br />
Two 14½” strips<br />
Start piecing by joining the two 2½”<br />
squares, followed by the 4½” strip, all<br />
around the block, pressing with each<br />
addition. Try to get the strips to lay as flat<br />
as possible after piecing them. I’ll make<br />
for easier time later when you’re quilting<br />
the sandwich.<br />
Make four 14½” blocks. (Please see the<br />
layout diagram above).<br />
Join these two blocks together, then join<br />
the resulting half square to form a 28” x<br />
28” quilt top.<br />
Make a quilt sandwich spray baste layers<br />
together, using safely pins to secure the<br />
corners.<br />
Free motion quilt in wavy vertical lines.<br />
I added leafy squiggles along the lines.<br />
Set aside.<br />
Spray baste the quilt sandwich to prepare it<br />
for free motion quilting, pinning the corners<br />
to prevent shifting.<br />
Completed blocks are pressed flat before being<br />
joined together to create a large quilt top.<br />
Cut out 2½” strips from a variety of cream,<br />
beige and low volume neutral fabrics to create<br />
a log cabin canvas.<br />
Log Cabin block diagram<br />
Use Flatter pressing spray and a finger pressing tool<br />
to make the Log Cabin blocks as flat as possible.<br />
Q<br />
.com<br />
UILTsocial<br />
| issue 8 71
How to coordinate color-soaked batiks<br />
to make fanciful fall foliage<br />
Stacks of green strips come together in a string piecing<br />
symphony of color.<br />
Group the strips together to make it easier to mix up<br />
the colors when string piecing the leaves.<br />
Start by placing one green strip at a bit of an angle in<br />
the center of a muslin rectangle.<br />
Next… creating the fabulous leaves<br />
that will be a focal point on our Autumn<br />
Harmony quilted sampler.<br />
Begin by cutting 2” wide strips from<br />
various green batik scraps. These should<br />
be at least 10” long.<br />
I cut about 80 strips from the scraps I’d<br />
scrounged from my quilting buddies.<br />
You can take a more design-oriented<br />
approach, but I kind of enjoyed the<br />
randomness of it all.<br />
There was some order to it, honest.<br />
When I cut strips from one fabric, I<br />
grouped them all together in the same<br />
pile. I found it easier to have the scraps<br />
grouped when I began putting the<br />
leaves together.<br />
String-piecing method for each leaf:<br />
Cut eight pieces of thin quilter’s muslin,<br />
9” wide by 13” long.<br />
Start at the center of the muslin<br />
rectangle, placing a scrap right side up<br />
and a slight angle.<br />
Pin into place.<br />
Place a the next strip on top of the<br />
pinned one, right sides together, making<br />
the raw edges align as best you can.<br />
Use a short stitch length and sew<br />
through the fabric and muslin, using a<br />
¼” seam.<br />
Finger press the seam allowance,<br />
using the handy finger presser. Add<br />
the next strip, continuing until the<br />
muslin is covered.<br />
You’ll be doing eight stringpieced<br />
rectangles.<br />
Press the finished rectangles on the top<br />
(right side) of the fabric with a generous<br />
spray of Flatter. It smells heavenly, and<br />
will provide a smooth surface for next<br />
project – the fabulous fall foliage on the<br />
Autumn Harmony quilted sampler.<br />
Sew another strip onto the first one, and use a finger<br />
pressing tool to make it as flat as possible.<br />
Q<br />
72 .com | issue 8<br />
UILTsocial
don't miss these<br />
projects & tutorials online!<br />
Q<br />
UILTsocial<br />
.com<br />
5 tips<br />
for<br />
sewing<br />
with<br />
jelly<br />
rolls<br />
READ NOW<br />
READ NOW<br />
1 simple<br />
trick for<br />
perfect<br />
curved<br />
piecing<br />
every<br />
time<br />
READ NOW<br />
Fussy<br />
cutting<br />
printed<br />
fabric<br />
using<br />
Sew Easy<br />
templates<br />
READ NOW<br />
Making a Fidget Quilt with the<br />
Brother NQ900 machine<br />
and there's so much more!<br />
Q<br />
.com<br />
UILTsocial<br />
| issue 8 73
How to make needle turn applique easier<br />
This part is about is about preparing<br />
leaves for needle turn applique and<br />
making bias strips for tree branches.<br />
Let’s get this color party started with the leaves for<br />
the Autumn Harmony wall quilt.<br />
Let’s get started on the leaves. Trace<br />
the templates provided onto quilting<br />
template plastic and cut out.<br />
Download the templates and trace them onto<br />
quilting template plastic.<br />
The plastic will allow you see the green<br />
striped fabric underneath. I decided to<br />
cut out the leaves a a bit of an angle<br />
to create some visual interest. I added<br />
a ¼” seam allowance, and then traced<br />
around the template. Cut out the<br />
shapes on the fabric.<br />
Preparing for needle turn applique<br />
seems like a daunting process, and it’s<br />
time consuming, but I prefer to have a<br />
firmly pressed edge before I begin, rather<br />
than trying to turn under the raw edge<br />
as I applique the pieces to the main quilt.<br />
This is particularly important in this<br />
project, since the leaves are made<br />
up of two layers of fabric. To do this,<br />
I create a very strong freezer paper<br />
foundation.<br />
Iron four layers of freezer paper together.<br />
Ironing the shiny side down onto fabric<br />
is a way to create a reusable template.<br />
Ironing the paper together creates a<br />
tough but flexible iron table surface that<br />
doesn’t pull apart.<br />
Clip the edges of the leaf shape. Spray a<br />
generous amount of spray starch into a<br />
small container. (I use an egg cup.) Use<br />
a small paint brush to soak the edges of<br />
the leaf shape with starch, then turn the<br />
edges onto the freezer paper template.<br />
Press the edges into the shape.<br />
I found working with the top points of<br />
the leaves first helped the other edges<br />
to form more easily around the rest of<br />
the shape.<br />
Repeat for all the leaves.<br />
For the berries, trace the circle templates<br />
on the plastic and then create it also<br />
onto the bonded freezer paper. Trace<br />
each circle shape onto fabric. Knot a<br />
double length of thread and sew a<br />
running stitch close to the edge of the<br />
fabric circle. Pull the thread tight around<br />
the freezer paper circle. Paint some<br />
starch around the inside edge of the<br />
circle and press. When the circle has<br />
cooled, clip the knot and remove the<br />
gathering thread and then the paper<br />
template. Give the circle a final press.<br />
Repeat for all the berries.<br />
This step will take a bit of time, but take<br />
your time and you’ll be rewarded with<br />
applique-ready shapes.<br />
Fabric tape cut on the bias is fed through a<br />
bias tape maker to create branches that will<br />
gentle curve.<br />
For the bias binding branches –say that<br />
five times fast – you’re going to cut out<br />
three 1¾” strips of brown batik cut along<br />
the bias. To do this, fold down one corner<br />
of the brown batik diagonally to the<br />
opposite edge. Cut the strip to the width<br />
on the diagonal.<br />
Feed the resulting strip through the wide<br />
edge of the bias tape maker, pushing it<br />
through to the starting point with the<br />
point of the tailor’s awl. Pull the fabric<br />
through the bias tape maker, pressing<br />
with the iron. Go slowly and steadily to<br />
create a single fold bias strip.<br />
When the strips have cooled, wind them<br />
in around some flat card, securing with a<br />
Clever Clip, for safe keeping.<br />
Create a crisp edge for the needle turn applique<br />
by painting the fabric edges with starch before<br />
pressing around a freezer paper template.<br />
Gather and press the berry appliques, using spray<br />
starch to create crisp curves for applique.<br />
Q<br />
74 .com | issue 8<br />
UILTsocial
LARGE<br />
BERRY<br />
finished measurements<br />
leaf 10”<br />
berries 4”, 3”, 2”<br />
SMALL<br />
BERRY<br />
MED<br />
BERRY<br />
Q<br />
.com<br />
UILTsocial<br />
| issue 8 75
How Unique fabric glue stick<br />
can help your applique work<br />
As we continue our sewing work on<br />
the Autumn Harmony wall quilt. We’ve<br />
created all the elements for the quilt –<br />
four branches, eight leaves and 19 berries.<br />
Now it’s time to put it all together.<br />
This quilt began life as a doodle on a<br />
scrap of paper. I find it easier to draw on<br />
a small scale. I enlarged the doodle on a<br />
photocopier until it was almost to scale<br />
and then I colored with pencil crayons. I<br />
used this drawing to guide my layout.<br />
You can use my layout or use one that is<br />
more pleasing to you.<br />
Start by adding the bias branches. These<br />
can be encouraged to bend because<br />
they’re cut on the bias. Use Unique<br />
fabric glue stick to temporarily position<br />
the branches into a curve. I turned the<br />
raw edges under and use a glue stick to<br />
secure this tiny hem. Pin the branches<br />
into place.<br />
Once they’re in place, pin the leaves and<br />
the berries in place.<br />
Using one strand of thread in a<br />
contrasting color, baste all the elements<br />
to the quilted base. Since the hand<br />
stitching will take several days, and<br />
much movement in and out of a quilting<br />
hoop, thread basting seemed a better<br />
option than spray basting. If you prefer<br />
to machine applique the elements, spray<br />
basting will work just fine.<br />
When stitching the appliques, use a tiny<br />
applique stitch and try to keep an even<br />
tension. This will help avoid puckers in<br />
the finished product. You’ll also notice<br />
that the applique stitches show on the<br />
back of the wall quilt. Don’t fret. No one<br />
will ever see them. It will be on a wall.<br />
The colors are so vibrant, who cares<br />
what’s on the back?<br />
We’ll walk through finishing up our fanciful<br />
fall wall hanging. Continue reading.<br />
Unique fabric glue stick and several well-placed pins will ensure the bias branches<br />
curve properly.<br />
Stitch the appliques to the quilted base using a tiny applique stitch in coordinating<br />
silk thread colors.<br />
Q<br />
76 .com | issue 8<br />
UILTsocial
How to create an embroidered quilt label<br />
using your sewing machine<br />
We laid out and appliqued all the<br />
elements of our Autumn Harmony wall<br />
quilt and now we’re going to bind the<br />
finished piece, as well as create a label<br />
and a hanging system for it.<br />
Press the quilt on the top side with lot of<br />
steam. Don’t iron it. Press with the iron<br />
up and then down, move the iron off the<br />
quilt and then down to the next area.<br />
Ironing could create a crease exactly<br />
where you don’t want one. It’s been my<br />
experience that these surprise creases<br />
stay stubbornly in place, so I do my best<br />
to avoid them. Trim the borders so that<br />
everything is straight and even.<br />
Create six 2½” binding strips, or use the<br />
strips left over from those cut for the log<br />
cabin blocks.<br />
Bind the wall quilt using this excellent<br />
and straight forward method by<br />
<strong>QUILTsocial</strong>’s own Elaine Theriault.<br />
I like to slip stitch the binding onto the<br />
back of the quilt by hand, and pressing the<br />
binding well once it is all stitched in place.<br />
A few years back, a winter ice storm<br />
gifted us with several white birch<br />
branches. It was sad for the tree, but<br />
good for me. I salvaged the branches<br />
and used them for some landscaping<br />
projects. There was one that was fairly<br />
straight, so I decided to use it as a rustic<br />
hanging rod for my quilt.<br />
I found some coordinating clip curtain<br />
rings at my local fabric store. I attached<br />
eight of them to the top of the quilt, and<br />
threaded them onto the birch branch.<br />
I’m going to put up two curtain rod wall<br />
brackets so I can Autumn Harmony it<br />
in my living room, where I’ll enjoy the<br />
colors of fall – ALL year 'round<br />
Until we meet again, remember to make<br />
a mess and create some fun!<br />
A fabulous fall finale for our Autumn Harmony<br />
wall quilt<br />
Press the quilt on the top side with lot of<br />
steam. Don’t iron it. Press with the iron<br />
up and then down, move the iron off the<br />
quilt and then down to the next area.<br />
Ironing could create a crease exactly<br />
where you don’t want one. It’s been my<br />
experience that these surprise creases<br />
stay stubbornly in place, so I do my best<br />
to avoid them. Trim the borders so that<br />
everything is straight and even.<br />
Trim the quilt so that the edges are straight and even.<br />
Set up your machine for free motion quilting,<br />
and then stitch on the drawn lines to create an<br />
embroidered quilt label.<br />
I created the label using a bit of fabric<br />
from a previous project. See this post for<br />
how I created a lined paper label.<br />
I wrote my details using UNIQUE<br />
SEWING Air Erasable Fabric Marker. Then,<br />
I threaded my machine with brown<br />
thread, dropped the machine’s feed<br />
dogs, switched to my embroidery foot,<br />
and traced over the ink lines with the<br />
machine, going over the lines to create a<br />
sketchy bold pen and ink look. I cut out<br />
mini replicas of the leaves and berries<br />
and stitched them down in the same<br />
way. It’s a fun technique that takes some<br />
practice, but I love the look.<br />
Use HeatnBond Lite to adhere the label<br />
to the back of the wall quilt.<br />
Nancy Devine<br />
nancywhiskeynancyo.blogspot.com<br />
This label is finished, and like the rest of the quilt,<br />
colorful and fun.<br />
Just hanging out!<br />
Q<br />
.com<br />
UILTsocial<br />
| issue 8 77
A Calm Winter<br />
a body pillow wrap<br />
An adventure in stenciling & machine embroidery<br />
Q<br />
78 .com | issue 8<br />
UILTsocial
In this article, we explore embroidery stenciling technique<br />
using fabric dye to create your one of a kind wrap for your<br />
favourite body pillow. These pillows are generally larger<br />
than most standard pillows. These can be used for an<br />
existing pillow you already have, or you can sew your own<br />
body pillow to co-ordinate with your pillow wrap. For this<br />
issue our focus is everything about slopes, snow, wintery<br />
highlights. And this was achieved by selecting embroidery<br />
of that nature, with snowflakes, trees, and decorative<br />
snowflake like stitches.<br />
Imagine this pillow displayed in an entrance to a<br />
kitchen, a mudroom, in any room of the house on the<br />
longer bench style chairs.<br />
Also visualize colour and room variations and beds,<br />
rattan or wicker furniture. Make seasonal versions.<br />
Choose embroideries which are open and with lighter<br />
stitch counts, trace outlines, sketch-like embroideries,<br />
all of which can also be found or created in the<br />
Premier+ embroidery software.<br />
The idea is to experiment. The techniques can be<br />
applied to any project for home decorating, fashion<br />
or quilting. Another creative idea is to explore dyeing<br />
process with an assortment of methods.<br />
There’s a multitude of ways to use the embroidered blocks,<br />
to include wall hangings stretched over canvas, quilts,<br />
handbags, pillows, home decorating accessories.<br />
This pillow wrap can be pieced and then quilted. You<br />
may choose to line it or make it reversible. Or it can<br />
be left as just pieced and no quilt batting. There are so<br />
many possibilities.<br />
Fabric dyes can be used for this stenciling technique,<br />
or bleach dyeing using bleach and water, or tie dye, or<br />
dip dyeing or even tea dyeing. Fabric dyes come in a<br />
multitude of variations as well. The one selected for this<br />
project was a dye using hot water.<br />
The reason this is considered embroidery stenciling,<br />
is because the stencil is created using machine<br />
embroidery, with a special stabilizer on the surface.<br />
When the stabilizer is removed in different areas it<br />
creates a dye specific area. Essentially the embroidery<br />
combined with the removal of the special stabilizer in<br />
different areas is creating an embroidery stencil.<br />
Like many forms of stencils on plastic materials, the<br />
embroidery itself becomes the stitch out pattern for the<br />
stencil. And the stabilizer with its repellency during the<br />
dye process prevents the dye from penetrating specific<br />
areas of the embroidery.<br />
As you’ll see later in the steps, of creating these blocks,<br />
the sky really is the limit to endless possibilities.<br />
If you wanted to experiment with rubber bands and tie<br />
specific areas of the embroidery, or background fabric,<br />
or fade areas using bleach and water method, the<br />
effects are very interesting.<br />
The theme of this project is fabric dyeing.<br />
Different fabric types are affected in the dye process.<br />
Depending on the composition of the animal, plant or<br />
synthetic fibres, each one reacts differently. Some fabrics<br />
have to be saturated longer than others, or additional<br />
applications of spray or soaking may be necessary.<br />
It’s very important when selecting the dye to read and<br />
follow all manufacturer’s instructions.<br />
As mentioned in previous articles, it’s important to<br />
remember that a mix of assorted fabrics gives surface<br />
interest, and in this case cotton is used, but silks, linens,<br />
wools, or synthetics, can all be dyed. Embroider a lace piece<br />
to co-ordinate and dye it to co-ordinate or contrast with<br />
your artistic piece.<br />
Q<br />
.com<br />
UILTsocial<br />
| issue 8 79
PFAFF ® provided the following sewing<br />
machine and products to make the sample:<br />
PFAFF® creative sensation pro II sewing<br />
and embroidery machine<br />
PREMIER+ ULTRA Embroidery Software<br />
Design by PFAFF® Holiday Line Art Collection #477<br />
INSPIRA® Stabilizers<br />
INSPIRA® Machine Needles<br />
INSPIRA® Scissors<br />
Robison-Anton® Embroidery Threads<br />
Sulky Threads®<br />
Hoops<br />
Photo courtesy of PFAFF<br />
skill level expert<br />
finished measurements<br />
19” x 33” [48.5 x 84cm]<br />
materials<br />
fabric<br />
• 2 jelly roll strips solid cotton<br />
• 2 jelly roll batik cotton print to coordinate<br />
with theme<br />
• 2 batik and 3 solid cotton fat quarters<br />
for dye process<br />
• 20” x 34” [51x 86.5cm] cotton batik<br />
backing piece cut to size of completed<br />
front<br />
sewing feet used<br />
• embroidery foot<br />
• perfect ¼” foot with guide<br />
• bi-level topstitching foot<br />
• general sewing foot<br />
• adjustable guide foot for IDT system<br />
cutting tools<br />
• rotary cutter<br />
• cutting mat<br />
• INSPIRA® Scissors<br />
embroidery requirements<br />
PFAFF® Embroidery Collection Holiday<br />
Line Art #477<br />
needles<br />
• New INSPIRA® microtex needle size 90<br />
• New INSPIRA® embroidery needle size<br />
80 or 90<br />
threads<br />
• 40wt Robison-Anton® rayon thread for<br />
machine embroidery and decorative<br />
sewing<br />
• Sulky ®cotton blendables 30wt for<br />
construction<br />
• All-purpose thread for construction<br />
stabilizers<br />
• 1 piece of Stabilizer Fast & Easy Tear<br />
Away for decorative stitches and<br />
embroidery<br />
• INSPIRA® Aqua Magic stabilizer for<br />
embroidery<br />
• INSPIRA® Clear N’ Melt stabilizer for<br />
embroidery stenciling<br />
other<br />
• creative Quilters Hoop 200 x 200<br />
• extension table for your machine<br />
• assorted trims ¼” wide<br />
• marking tools<br />
• SINGER® Steam Press<br />
• Hot Touch tool and mini iron with<br />
assorted accessory ends<br />
• assorted buttons, hot touch crystals<br />
• grosgrain ribbon wide for ribbon<br />
technique background and 1⁄8” ribbon<br />
for technique in assorted colours<br />
• 1pkg. Dylon Fabric Dye for hot water<br />
dyeing<br />
• rubber gloves<br />
• spray bottle<br />
• newspapers or cardboard<br />
Q<br />
80 .com<br />
| issue 8<br />
UILTsocial
Front piece: down arrows indicate folded 6” and 4” cotton printed squares, 6 in total. Side arrows indicate solid and batik strips as in diagram.<br />
g<br />
g<br />
g<br />
g<br />
g<br />
Embroidery<br />
Embroidery<br />
Embroidery<br />
g<br />
g<br />
instructions<br />
Preparation steps<br />
It’s also important to measure the<br />
intended body pillow, or create a size that<br />
can be used for a multitude of pillow sizes<br />
to include standard sizes.<br />
1. Prewash and dry your fabrics if desired.<br />
2. Creating your pattern using INSPIRA®<br />
Tear N’ Wash stabilizer with graph is<br />
always great if you need a pattern<br />
guide. Adjust your pattern according<br />
to the size of your body pillow.<br />
3. The front and back of this pillow wrap are<br />
different. The front is using an assortment<br />
of cotton blocks exploring fabric dye<br />
techniques. The back is one large batik<br />
piece to co-ordinate with front.<br />
Cutting<br />
Pillow Wrap Front<br />
16” x 16” from each 3 solid white cotton fat<br />
quarters for machine embroidery<br />
(4 – 6” x 6”) and (2 – 4” x 4”) from 2 printed<br />
cotton fat quarters<br />
3 – 16” x 16” INSPIRA® Aqua Magic pieces<br />
3 – 16” x 16” INSPIRA® Clear N’ Melt pieces<br />
Borders<br />
4 – 2” x 11” cotton strips for sashing<br />
2 – 2½” x 34” batik for outside border<br />
2 – 2½” x 34” solid for inside border<br />
Back Piece<br />
Cut to the size of the pillow front when<br />
complete.<br />
Front Piece<br />
Note: Technique blocks are cut to size after<br />
the techniques have been completed.<br />
Machine Embroidery<br />
1. Layer the INSPIRA® Aqua Magic<br />
stabilizer, and 16” x 16” Cotton on<br />
top of that layer. Then add a layer<br />
of INSPIRA® Clear N’ Melt on the top<br />
of the cotton and hoop. Load the<br />
desired embroidery design. In this<br />
case it’s PFAFF® Holiday Line Art<br />
Collection #477. You may choose to<br />
pick a built in embroidery design.<br />
2. Always look at your embroideries and<br />
decide which suits the theme.<br />
3. Thread the machine with white cotton<br />
30wt thread and 60 wt bobbin thread.<br />
The cotton thread will easily dye with<br />
the cotton fabric.<br />
4. Explore the placement of the<br />
embroidery.<br />
5. Placement of the embroidery onto the<br />
white cotton fabric is a personal choice.<br />
6. Embroider the snowflakes or trees or<br />
design of choice on each block. There<br />
will be 3 blocks.<br />
7. This block measures 16” x 16” at<br />
the start, but will be cut to 14” x 14”<br />
after embroidery and dyeing. The<br />
embroidered block was cut larger<br />
originally to have more area to explore<br />
the preferred dyed surface area.<br />
Embroidery using Clear N Melt<br />
Embroidery with Clear N Melt<br />
Instruction photos this page by Cheryl Stranges<br />
.com Q<br />
UILTsocial<br />
| issue 8 81
Details of the quilt blocks<br />
Embroidery Stencil Preparation<br />
1. When embroidery is complete<br />
remove the embroidered fabric from<br />
the hoop. Decide which areas on the<br />
embroidered piece you would like to<br />
dye. Tear away the INSPIRA® Clear N’<br />
Melt from those areas. It can also be<br />
trimmed away or melting away with<br />
the hot touch tool in intricate areas. If<br />
you have a choice of tips for your hot<br />
touch tool, choose a tip that is closest<br />
in size to the design area for stabilizer<br />
you’re melting away. Stilettos are great<br />
for pulling it up out of small areas.<br />
This stabilizer tears away quite easily.<br />
Just hold the fabric on the stitches to<br />
support them and then tear upwards<br />
quickly. When finished the stabilizer<br />
should only be left on areas, that you<br />
don’t want the dye to penetrate.<br />
2. On this specific project, the outer<br />
boundaries of the embroidery design<br />
were removed for the dyeing process<br />
and any areas where light colour is<br />
visible is essentially where the Clear<br />
N’ Melt was left behind. There are<br />
hot touch tools available crystal<br />
applications and embellishment and<br />
mini irons for appliqué. Either of these<br />
tools work for the melt away stabilizer.<br />
Follow manufacturer’s instructions for<br />
using them.<br />
Dye Preparation<br />
1. Using the dye packet instructions,<br />
follow the water temperature<br />
information. Wear Rubber gloves<br />
for all of dye procedure and<br />
rinsing procedure.<br />
2. Boil water in kettle and mixed it in<br />
an open container with dye and<br />
manufacturer’s recommendations<br />
of adding salt. Use water amount in<br />
relation to size of project.<br />
3. Work in an area that’s totally covered<br />
with newspaper or aany absorbent<br />
material that will take on the extra<br />
dye as it’s sprayed. Use multiple<br />
layers of newspaper to prevent any<br />
dye from bleeding through onto the<br />
work surface.<br />
4. Let the dye cool. And then add it to<br />
the spray bottle. This project was<br />
done outdoors but can easily be<br />
done indoors as well. Have a test<br />
sample piece to test the spray bottle<br />
and dye application on the fabric.<br />
Let the dye sit for about 10 minutes.<br />
Spray again if needed in areas. When<br />
happy with the result of the test<br />
piece proceed to spray the dye onto<br />
your embroidered fabric blocks using<br />
the same method.<br />
Note: The dye application will be lighter than<br />
it appears once the block is rinsed and dry.<br />
5. It’s possible that the dye does<br />
not completely penetrate the<br />
embroidered area with the stabilizer<br />
on top. There may be muted colour<br />
in these areas, which adds interest,<br />
and the cotton thread colour<br />
that was used for embroidery has<br />
absorbed the colour of the dye.<br />
6. Rinse each block until the water<br />
turns clear. At this point the INSPIRA®<br />
Aqua Magic Stabilizer washes away.<br />
The reason we use INSPIRA® Aqua<br />
Magic water soluble stabilizer is to<br />
not only stabilize the embroidery, but<br />
it doesn’t trap the dye between the<br />
layers. It rinses away and so does the<br />
excess dye.<br />
7. Let each block dry. The blocks can be<br />
hung to dry or laid on a surface that<br />
has something to protect the surface.<br />
Maybe an old towel that you no<br />
longer plan to use.<br />
Assembling the blocks<br />
1. When the blocks are completely<br />
dry, press the embroidered fabric<br />
blocks according to stabilizer<br />
instructions and the stabilizer will<br />
melt away. Simply brush away the<br />
stabilizer off of the surface. This also<br />
helps set the colour.<br />
2. Wash the blocks with mild detergent<br />
and dry flat or hang dry.<br />
3. Cut the blocks to 14” x 14” or desired size.<br />
4. Fold each of the 6” cotton print<br />
blocks in half diagonally to form<br />
triangles and place them into<br />
desired corners of each embroidered<br />
block with the fabric fold facing<br />
the embroidery. Pin into position.<br />
Some blocks were cut smaller at 4” x<br />
4” and folded to accommodate the<br />
large snowflake shape. However this<br />
depends entirely on the size of the<br />
chosen embroidery. Cut them to the<br />
desired size.<br />
5. Add the sashing pieces between<br />
the blocks, right side of sashing to<br />
Q<br />
82 .com | issue 8<br />
UILTsocial
ight side of block and using ¼” seam<br />
allowance, and the perfect quarter<br />
inch foot with guide stitch each<br />
sashing to block. The PFAFF® IDT<br />
feeding system works tremendous<br />
well for piecing.<br />
Decorative Stitches<br />
1. Cut desired length strips of the trim,<br />
and on this project ¼” Battenberg<br />
lace tape was used to decoratively<br />
stitch the small snowflake stitches<br />
onto the lace. You will find many<br />
beautiful decorative stitches that<br />
work well with this technique.<br />
2. Tear away stabilizer was also used<br />
underneath the lace tape. Choose<br />
the desired stitch. Adjust the<br />
length and width of the stitches<br />
to accommodate the width of the<br />
lace. 40wt rayon thread was used to<br />
decoratively stitch each strip with a<br />
60wt bobbin thread.<br />
3. When the stitches are complete, tear<br />
away the excess stabilizer. Using a<br />
fusible tape, place strips into the<br />
desired areas of the projects, in this<br />
case the sashings.<br />
4. Press and fuse them into position,<br />
and follow this with a straight stitch.<br />
Another choice may be to fuse the<br />
lace first to the project and then<br />
stitch the decorative stitch. Both<br />
applications work well. It’s always<br />
wonderful to create your own trim<br />
and add it to any desired project.<br />
5. This trim was added to the outer<br />
border, and the sashing in the middle<br />
of the project. This trim can also be<br />
dyed to desired colours as it is cotton<br />
and absorbs dye very well.<br />
6. Continue sewing all pieces together,<br />
to include borders. Use your perfect<br />
¼” foot with guide if you choose<br />
straight stitching.<br />
7. Use a grass-like decorative stitch<br />
and a stabilizer backing stitch black<br />
borders for embellishment.<br />
8. If you’re stitching decorative stitches<br />
change to a decorative stitching<br />
foot. The opening in the foot is<br />
much larger and the foot has been<br />
designed specifically for decorative<br />
stitching on the underside.<br />
9. Stitch free motion on pieces with<br />
quilt batting in areas of interest<br />
using decorative thread. There are a<br />
number of free motion feet available<br />
to do this step. Or choose to use<br />
channel quilting, decorative stitches<br />
sporadically or leave the wrap as it is.<br />
10. Clean up and trim all edges of the<br />
pillow wrap front using cutting tools.<br />
Ribbon Stitches<br />
1. Single and double ribbon stitches are<br />
a beautiful addition to any project.<br />
A double ribbon stitch was used<br />
with two different colours of narrow<br />
ribbons, and stitched on a wide piece<br />
of grosgrain ribbon, and a tear away<br />
stabilizer was used behind the ribbon.<br />
2. When this ribbon stitching is<br />
complete, tear away the stabilizer,<br />
and then add the additional<br />
Battenberg lace trim all around the<br />
edges to frame the ribbon stitches.<br />
This is in turn stitched to the border<br />
of the wrap.<br />
3. Choose a single or double ribbon<br />
stitched across the entire border<br />
directly onto the fabric as well. Using a<br />
tear away or cut away stabilizer yields<br />
great results.<br />
4. Embellish the wrap with buttons and<br />
hot touch crystals.<br />
5. When the front of the Embroidery<br />
Stenciled pillow wrap is complete,<br />
proceed to cut the back fabric the<br />
same size.<br />
6. Place them right sides together and<br />
stitch a seam down each long edge.<br />
7. Press and fold under each short end<br />
twice approximately ½” with each fold.<br />
8. Stitch using a straight stitch along each<br />
side and a Bi-level topstitching foot.<br />
9. Choose to stitch on the right side or<br />
the wrong side of this hem.<br />
10. Turn right side out. Basically it’s a large<br />
tubular piece.<br />
11. Insert the body pillow inside the wrap.<br />
Cheryl Stranges<br />
Product & Event Specialist, Husqvarna Viking<br />
husqvarnaviking.com<br />
seecherylsew.blogspot.com<br />
Auditioning corner pieces<br />
Decorative stitches on trim<br />
Decorative grass like stitch on border<br />
Decorative stitches around ribbon stitches<br />
Instruction photos this page by Cheryl Stranges<br />
Q<br />
.com<br />
UILTsocial<br />
| issue 8 83
Quilted Hand Muff<br />
Hand muffs are a vintage item. But if you<br />
think about it, there could be times when<br />
you’re sitting in a chilly arena, outdoor<br />
skating rink, watching people skiing down<br />
the hills or maybe you enjoy the outdoors,<br />
sitting admiring the winter view? Then, the<br />
hand muff could be useful again. This hand<br />
muff has sewn-in Therm Fleece and pockets<br />
to accommodate hand warmer products like<br />
Grabber Warmers®, for extra warmth, to<br />
keep your hands toasty warm.<br />
Another benefit of making this project<br />
is that it's an easy pattern with straight<br />
seams giving the opportunity to learn how<br />
to sew using Therm Fleece and Stitch-N-<br />
Steam products. These products can be<br />
used on other sewing projects, like a tea<br />
cozy or anything that needs insulating.<br />
Furthermore, the Stitch-N-Steam can be<br />
used on quilted items as well as fibre art<br />
projects for an easy textured effect.<br />
skill level Intermediate<br />
finished measurements<br />
13” x 16½” (circumference) [33 x 42cm]<br />
materials<br />
• Fabric 1 – 29½” [75cm] cotton<br />
• Fabric 2 – 20” [50cm] cotton for pockets<br />
• 19” x 22” [48 x 56cm] Stitch-N-Steam<br />
• 14” x 16” [35.5 x 40.5cm] Therm Fleece<br />
• 14” x 16” [35.5 x 40.5cm] quilt batting<br />
• 10” x 16” [25.5 x 40.5cm] quilt batting<br />
• Dress It Up Snow Flake buttons<br />
• 19mm slide for strap<br />
suggested notions<br />
• Gütermann Sew All polyester thread<br />
• Sulky Sliver Metallic color 8040<br />
• 30 wt Sulky Cotton Blendables thread for topstitching<br />
• Quilting Ruler 6” x 24”<br />
• Komfort 45mm cutter<br />
• Heirloom Air-erasable marker<br />
• Kai Scissors 4½”<br />
• Glass Head Pins<br />
• Universal needle size 80/12<br />
• Topstitch needle size 90/14<br />
• 505 Temporary Adhesive or Sulky KK2000<br />
• Clever Clips<br />
Donna Housley & Cathy McClean<br />
www.hakidd.com<br />
Q<br />
84 .com | issue 8<br />
UILTsocial
instructions<br />
Cutting<br />
Fabric 1<br />
Cut 1 – 19” x 22” (outer layer)<br />
Cut 1 – 14” x 16” (lining)<br />
Cut 1 – 2” x WOF (strap)<br />
Cut 1 – 2” x 8” (strap)<br />
Fabric 2<br />
Cut 1 – 16” x 20” (inner pocket)<br />
Creating Textured Fabric<br />
A textured fabric gives a special touch to<br />
many projects. Add depth and richness to<br />
the project by using specialized thread.<br />
Machine set up<br />
Sewing Foot: Regular Sewing foot<br />
Thread: Metallic or decorative thread on<br />
top, polyester invisible or bobbin thread<br />
in bobbin (such as Sulky)<br />
Needle: Topstitch size 90/14<br />
1. Pin Stitch-N-Steam to back of 19” x 22”<br />
outside fabric. Using approximately a<br />
3mm stitch length randomly sew lines<br />
all over fabric. Lower the top tension<br />
to ensure a smooth stitch. Sew as<br />
many or as few lines as desired. The<br />
closer the lines are to each other the<br />
finer the texture of the finished fabric.<br />
Photo 1<br />
Photo 1<br />
Note: When using metallic thread<br />
remember that it is flat and needs to<br />
come straight off the spool to avoid<br />
twisting. Use a vertical spool pin or feed<br />
the thread up through a thread tree.<br />
2. Place the finished fabric right side<br />
down on an ironing surface. Using<br />
steam, steam the entire area of Stitch-<br />
N-Steam without touching the iron<br />
to the fabric. Let the steam do the<br />
work of shrinking the Stitch-N-Steam.<br />
3. Trim textured fabric to 14” x 16”.<br />
Instruction photos courtesy of Donna Housley<br />
Inner Pocket<br />
Machine set up<br />
Sewing Foot: Regular Sewing foot or ¼”<br />
foot<br />
Thread: Gütermann Sew All thread top<br />
and bobbin<br />
Needle: Universal size 80/12<br />
1. Fold 16”x 20” fabric in half right sides<br />
together to get a 10” x 16” rectangle.<br />
Place 10” x 16” piece of batting on<br />
top of pocket fabric. Use a small<br />
amount of basting spray to hold layers<br />
together if necessary. With a ¼” seam<br />
stitch the long side.<br />
2. Turn right side out and press.<br />
3. Top stitch both 16” sides.<br />
Strap<br />
1. Fold each strap in half lengthwise<br />
right sides together and sew long<br />
edge to create a long tube. Turn right<br />
side out and press.<br />
2. Turn under raw edges at one end of<br />
the long strap and topstitch.<br />
Lining<br />
Machine set up<br />
Sewing Foot: Regular Sewing foot<br />
Thread: Sulky 30 wt Blendable Cotton top<br />
and bobbin<br />
Needle: Topstitch size 90/12<br />
1. Lay 14” x 16” quilt batting on table.<br />
Place 14” x 16” lining right side up on<br />
top of batting. Use basting spray to<br />
hold layers together.<br />
2. Center pocket on top of lining. Use an<br />
air erasable marking pen to draw lines<br />
down the center both horizontally<br />
and vertically. Topstitch on these lines.<br />
3. Insert short strap through slider.<br />
Fold strap in half lengthwise<br />
matching raw edges.<br />
4. Position straps: Using the lines drawn<br />
in step 2 place the raw edges of<br />
straps on the line drawn on one of<br />
the 16” sides. Baste in place. Place the<br />
raw edge of long strap in the center<br />
of the opposite side of the lining.<br />
Baste in place. The straps will now<br />
be laying across the pockets. Roll up<br />
excess strap and pin or clip to ensure<br />
it doesn’t get caught up when sewing<br />
the muff together.<br />
Assembly<br />
Make a sandwich<br />
1. Lay lining and pocket right side up.<br />
2. Place 14” x 16” textured fabric on top<br />
right side down.<br />
3. Place Therm Fleece shiny side up on<br />
top of textured fabric.<br />
4. Pin and sew one 16” side through all<br />
layers.<br />
5. Lay muff open with right sides facing<br />
up. The textured fabric and Therm<br />
Fleece will be on one side and the<br />
Photo 2<br />
Photo 3<br />
lining and pocket on the other side.<br />
Fold in half; right sides together<br />
matching textured fabric to textured<br />
fabric and lining/pocket to lining/<br />
pocket. The piece is 28” long and 8”<br />
wide. Pin the long edge and stitch<br />
with a ¼” seam backstitching at the<br />
beginning and end of the seam.<br />
Photos 2 and 3<br />
6. Fold the textured fabric back<br />
and over the lining and pocket,<br />
creating the muff. Turn under raw<br />
edges ½” (making sure that the<br />
strap isn’t caught inside) and clip<br />
the edges together.<br />
TIP<br />
With all of the batting and Therm Fleece it's<br />
much easier to use clips instead of pins.<br />
7. Topstitch around edge making sure<br />
all layers are sewn. Topstitch the other<br />
end of the muff to match.<br />
8. Embellish muff with Snowflake Dress<br />
It Up buttons. Thread long strap<br />
through slider and adjust the length.<br />
Insert 2 or 4 heat packs into the<br />
interior pockets and enjoy the warmth<br />
after a cold day on the slopes.<br />
Q<br />
.com<br />
UILTsocial<br />
| issue 8 85
BUSINESS DIRECTORY To list your business in this space please call 1.866.969.2678.<br />
Brenda Franklin Designs<br />
7570 Mapleton SR 18 RR 1, Alma, ON N0B 1A0<br />
519.638.9958 bfdesigns.on.ca<br />
help@bfdesigns.on.ca<br />
More than 500 charts available for counted<br />
needlework, latch hook rugs, beadwork, beaded<br />
knits and knitting patterns. Mail/fax order or ask<br />
for our products at your local shop. Contact us for<br />
custom designs or needle felted sculpture.<br />
Brampton Sew & Serge<br />
289 Rutherford Rd S, Unit 7, Brampton, ON L6W 3R9<br />
905.874.1564 sewnserge.com<br />
monique@bramptonsewnserge.com<br />
Welcome to Your One Stop Sewing Centre! We are<br />
authorized dealers of Baby Lock, Husqvarna Viking,<br />
and Singer sewing machines and sergers. We also<br />
offer a full schedule of sewing classes for everyone.<br />
Bytowne Threads - Ottawa, ON<br />
1.888.831.4095 bytownethreads.com<br />
mlj@bytownethreads.com<br />
Featuring AURIfil® thread from Italy. Extra-long<br />
staple Egyptian cotton threads: 12wt, 28wt, 40wt &<br />
50wt - 252 colours. Bobbin threads, black & white:<br />
60 and 80wt. Polyester threads 240 high-sheen<br />
colours. Wool threads 180 colours.<br />
Country Concessions<br />
1 Dufferin St, Cookstown, ON L0L 1L0<br />
705.458.4546 or toll-free 1.888.834.4407<br />
countryconcessions.com<br />
quilting@countryconcessions.com<br />
Visit our lovely and unique quilt shop in the quaint<br />
village of Cookstown. We have over 7000 bolts of<br />
cotton fabrics plus a wide selection of patterns, books<br />
& notions. You will be so glad you came for a visit.<br />
Evelyn's Sewing Centre / The Quilt Store<br />
17817 Leslie St, Unit 40, Newmarket, ON L3Y 8C6<br />
905.853.7001 or toll-free 1.888.853.7001<br />
thequiltstore.ca<br />
Evelyn's Sewing Centre in Newmarket is your Quilt<br />
Store Destination! The staff here at Evelyn's is always<br />
on hand to provide Quilt Wisdom, Quilt Inspiration<br />
and most of all we pride ourselves as the place to<br />
make... All Your Quilt Dreams Come True!<br />
Gitta's<br />
271 Lakeshore Rd E, Mississauga, ON L5G 1G8<br />
905.274.7198 gittas.com<br />
questions@gittas.com<br />
Gitta's, named after owner Gitta Al-Basi, nestled in<br />
the east village of Port Credit, is the place where<br />
stitchers meet with their stitching friends, shop for<br />
stitching supplies and see the new stitching designs<br />
from Europe and the United States.<br />
Hardanger House<br />
47<strong>08</strong> 52 St, PO Box 1223, Stettler, AB T0C 2L0<br />
403.742.2749 or toll-free 1.866.742.2749<br />
tnplisting.com/hardanger-house.html<br />
Patterns from Canadian, American and European<br />
designers, linen and evenweave fabrics from Zweigart,<br />
DMC pearl Cottons, Caron Collection threads, and<br />
all the related stitching accessories are kept in stock.<br />
Many additional items can be special ordered.<br />
Haus of Stitches<br />
626 Main Street, Humboldt, SK S0K 2A0<br />
306.682.0772 or toll-free 1.800.344.6024<br />
hausofstitches.ca<br />
Our one of a kind store offers everything you need<br />
for sewing, quilting, knitting, rug hooking and<br />
needlework. Authorized dealers for Janome and<br />
Elna.<br />
Impressions Embroidery & Engraving<br />
#8-449 Mayor Magrath Dr S, Lethbridge, AB T1J 3L8<br />
403.942.3934 impressionslethbridge.ca<br />
impressions22@shaw.ca<br />
Our shop does embroidery and laser engraving.<br />
Laser engraving is a beautiful process for fabric,<br />
as nothing cuts cleaner and more precisely than a<br />
laser. We now carry a nice array of fabric as well to<br />
compliment the abilities of the laser.<br />
Joyce's Sewing Shop<br />
325 Wortley Rd, London, ON N6C 3R8<br />
519.433.5344 joycessewingshop.com<br />
joycesewingshop@bellnet.ca<br />
Our mission is to make sewing fun by providing<br />
professional training to teach the benefits of sewing,<br />
to provide excellent service and quality products<br />
to make your sewing easier and to provide friendly<br />
customer service to make you a happy sewer.<br />
My Sewing Room<br />
148-8228 MacLeod Trl SE, Calgary, AB T2H 2B8<br />
403.252.3711 mysewingroom.ca<br />
Queenofeverything@mysewingroom.ca<br />
Canada's Largest Independently Owned Quilting<br />
Store with fabric, patterns, kits, notions, sewing<br />
machines and more! My Sewing Room boasts over<br />
10,000 bolts of 100% cotton fabric from designers<br />
and manufacturers from around the world.<br />
Needles & Knits<br />
15040 Yonge St, Aurora, ON L4G 1M4<br />
905.713.2066 needlesandknits.com<br />
Fabulous selection of yarns. Extremely<br />
knowledgable and expert help. Cozy and friendly<br />
atmosphere. Classes. Guild night every first Tuesday<br />
of the month. Tea with Tove, the owner, every<br />
Thursday from 6-8pm.<br />
Pine Ridge Knit & Sew<br />
17477 Hwy 2 PO Box 68, Trenton, ON K8V 5R1<br />
613.392.1422 pineridgeknitsew.com<br />
yvette@pineridgeknitsew.com<br />
We have knitting machines by Artisan and Silver<br />
Reed, embroidery machines by Husqvarna/Viking<br />
& White. Sewing notions and supplies, books and<br />
software. Hands-on lessons and classes. Wide variety<br />
of yarns, threads, dress and pant zippers.<br />
Rosalie I. Tennison, Quilt Appraiser<br />
Certified by American Quilters’ Society 2005<br />
Newmarket, ON<br />
905.953.1441 R.Tennison@sympatico.ca<br />
What if something happens to your treasured quilt?<br />
Do you have written proof of its value for your<br />
insurance company? Get an appraisal now.<br />
Ruby Pearl Quilts<br />
500 King St W, Suite 8, Oshawa, ON L1J 2K9<br />
905.436.3535 rubypearlquilts.com<br />
joy@rubypearlquilts.com<br />
We are your full service source of professional quilting<br />
equipment, products, & courses. Led by 44 years of<br />
sewing experience & more than 20 years of quilting<br />
experience, we have the experience necessary to help<br />
you push your hobby to the next level!<br />
Ruti's Needlebed<br />
10 Thomas St, Mississauga, ON L5M 1Y5<br />
905.821.9370 ruti.ca<br />
Mississauga's Finest Quilting and Knitting Store!!<br />
Come see our huge selection of yarn, fabric, supplies,<br />
sewing machines and knitting machines…a local<br />
store for all your quilting, sewing, knitting needs! We<br />
offer a wide variety of classes.<br />
The Yarn Guy<br />
15 Gower St, Toronto, ON M4B 1E3<br />
416.752.1828 or toll-free 1.800.836.6536<br />
theyarnguy.com info@sewknit.ca<br />
See us on Facebook, follow us on Twitter!<br />
Knitting machines, sewing machines, repairs, parts<br />
for Passap, Studio, Singer, Silver Reed, Superba,<br />
White. Sewing notions and supplies, books, ball<br />
yarns, coned yarns, TAMM yarns, Paton's yarns,<br />
Bernat yarns, Phentex yarns, Bernat kits & crafts.<br />
Sew Fancy Inc.<br />
Guelph, ON<br />
519.824.4127 sewfancy.com<br />
sales@sewfancy.com<br />
Your Premier Canadian Source for Specialty Sewing<br />
Supplies including Smocking, Heirloom Sewing,<br />
Goldwork, Silk Ribbon Embroidery, Needle Tatting,<br />
Swarovski Crystals, Sashiko, Quilting and more. Visit<br />
the website for the latest in sewing supplies.<br />
Stitch-It Central<br />
189 Thames Street S, Ingersoll, ON N5C 2T6<br />
519.303.1563<br />
stitchitcentral.ca sales@stitchitcentral.ca<br />
Stitch-It Central is a store to satisfy all your cross<br />
stitching needs. We have everything such as<br />
notions, books & magazines, project kits, charts,<br />
gift collections & certificates, papers & accessories,<br />
fabrics and linens, and so much more.<br />
That Sewing Place<br />
16610 Bayview Ave #10, Newmarket, ON L3X 1X3<br />
905.715.7725 thatsewingplace.ca<br />
jaret&liana@thatsewingplace.ca<br />
Introducing That Sewing Place as your sewing<br />
source and Authorized Dealers for Bernina and<br />
Brother machines. Jaret & Liana focus on placing<br />
your sewing needs first, providing outstanding<br />
support, service, and training.<br />
The Stitching Corner<br />
#2, 185 First St E, Cochrane, AB T4C 2E9<br />
403.932.3390 stitchingcorner.ca<br />
nygabe@telus.net<br />
Your Needlework Shop in Cochrane.<br />
The Stitcher's Muse<br />
99 Commercial Street, Nanaimo, BC V9R 5G3<br />
250.591.6873 thestitchersmuse.com<br />
info@thestitchersmuse.com<br />
A divine little shop with supplies for all your hand<br />
stitching needs! Friendly, knowledgeable, helpful<br />
staff. Cross stitch, canvaswork, needlepoint,<br />
embroidery, counted thread, lace making and<br />
more. Books, patterns, fabric, threads, tools.<br />
Ultimate Sewing Centre<br />
191 Bloor St East, Oshawa, ON L1H 3M3<br />
905.436.9193 ultimatesewing.com<br />
ultimatesewing@bellnet.ca<br />
For all your sewing needs be sure to call Durham’s<br />
largest one stop shop: Janome and Elna Sewing<br />
Machines, Sergers, & Embroidery machines,<br />
over 3000 bolts of first quality cottons, Floriani<br />
Embroidery supplies, the latest notions, books, &<br />
patterns, year round classes, and so much more!<br />
Upper Canada Quiltworks<br />
PO Box 64, Brockville, ON K6V 5T7<br />
613.345.3956 Fax: 613.342.3327<br />
uppercanadaquiltworks.com<br />
Visit us online for a wide selection quilt patterns<br />
and books. Techniques include felted wool, fusible<br />
appliqué, punchneedle, rag quilting and printing<br />
photos on fabric.<br />
Q<br />
86 .com | issue 8<br />
UILTsocial
<strong>QUILTsocial</strong> bloggers<br />
Christine Baker<br />
FairfieldRoadDesigns.com<br />
Christine has been designing and<br />
publishing quilt patterns for the<br />
last 10 years under the business<br />
name Fairfield Road Designs.<br />
Her patterns range from fusible<br />
applique and piecing to felted wool<br />
applique and punchneedle. You can<br />
see all her patterns on her website.<br />
Elaine Theriault<br />
crazyquilteronabike.blogspot.ca<br />
Elaine made her first quilt at<br />
the tender age of 13. The urge<br />
to quilt resurfaced when her<br />
daughter moved from a crib. The<br />
rest is history – she now teaches<br />
several days a week, makes<br />
quilts on commission and quilts<br />
for others on the long-arm .<br />
Liana Kirkey<br />
thatsewingplace.ca<br />
Liana Kirkey is an educator and<br />
self-professed gadget-girl with<br />
35 years experience in the retail<br />
sewing industry. Her favorite<br />
sewing playground includes<br />
embroidery machines, digitizing<br />
software, machine accessories and<br />
presser feet. She currently works<br />
full-time at That Sewing Place in<br />
Newmarket, Ontario.<br />
Jean Boyd<br />
patternsbyjeanboyd.com<br />
Jean has been designing and<br />
publishing patterns since 1997. Her<br />
work has been published in several<br />
magazines across North America.<br />
Jean holds a Fiber Arts Certificate in<br />
quilting and has taught extensively<br />
throughout Canada, including six<br />
national Quilt Canada conferences.<br />
She was named "Canadian Teacher<br />
of the Year" in 2003 by the Canadian<br />
Quilters Association and has won<br />
numerous awards for her quilts.<br />
Jackie White<br />
jabotquilt.blogspot.ca<br />
Jackie is a quilter who loves quilting<br />
outside the box especially when it<br />
comes to 3D and embellishments.<br />
Her work has been published in<br />
books and magazines and she<br />
currently sits on the Board of<br />
Directors for the Canadian Quilters’<br />
Association. When she's not in her<br />
studio, she's working as a Social<br />
Media Manager.<br />
Nancy Devine<br />
nancywhiskeynancyo.blogspot.com<br />
Nancy Devine is a devoted user<br />
and collector of remnants, scraps,<br />
and vintage buttons. She lives in<br />
Aurora, Ontario, and can often<br />
be found working on her latest<br />
project, and playing around with<br />
her vintage (and much loved)<br />
Bernina machine. Find more of<br />
her work and musings on her blog.<br />
Sarah Vanderburgh<br />
sewjoycreations.com<br />
Sarah loves to play with color and<br />
quilts are her playground! A selftaught<br />
quilter, She's been designing<br />
her own quilts for almost 20 years.<br />
She's inspired by happy fabrics,<br />
selvages, traditional blocks and<br />
nature. She's also a wife, mother,<br />
and elementary school teacher, and<br />
enjoy drinking coffee on my front<br />
porch in northern Ontario.<br />
Q<br />
.com<br />
UILTsocial<br />
| issue 8 87
Canada’s most trusted notions brand<br />
is getting a makeover!<br />
Our new UNIQUE ® brand packaging<br />
is as beautiful and practical<br />
as our ne products!<br />
Find all of your favourite UNIQUE ® Sewing and Quilting<br />
products in more alluring and informative packaging.<br />
With lifestyle images showing application suggestions<br />
and detailed instructional diagrams, it has never been<br />
easier to nd and use the products you need to make<br />
your very best work.<br />
Q<br />
88 .com | issue 8<br />
UILTsocial<br />
Look for UNIQUE ® Sewing and Quilting products at your favourite<br />
fabric, sewing and quilting store!


