Operator's Manual Tube Guitar Amplifier - Engl
Operator's Manual Tube Guitar Amplifier - Engl
Operator's Manual Tube Guitar Amplifier - Engl

Create successful ePaper yourself
Turn your PDF publications into a flip-book with our unique Google optimized e-Paper software.
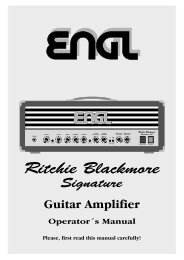
GigMaster 30<br />
<strong>Tube</strong> <strong>Guitar</strong> <strong>Amplifier</strong><br />
<strong>Operator's</strong> <strong>Manual</strong><br />
Please, first read this manual carefully!
Welcome to the GigMaster 30. This compact tube-driven amp delivers to-die-for tone in a<br />
phenomenally portable package! Either version, Combo or Head, is your perfect sidekick for playing<br />
gigs, recording in studios, and practicing at home. It comes loaded with a bevy of convenient<br />
sound-sculpting features designed to make your musical life easier and more rewarding, including a<br />
built-in spring reverb, Gain Boost, and Master Volume Boost. This M.V.B. lets you access two different<br />
master volume levels on the fly via footswitch, for example, one for rhythm and the other for leads.<br />
Four EL84 pentode power tubes serve up the amp's sweet fundamental sound, while the preamp's<br />
ECC83 double triode dishes out lashings of overdrive and distortion. What's more, the GigMaster 30<br />
sports two channels, Clean and Lead, to give you an even wider variety of tonal flavors. And its Mid<br />
Boost switch accentuates those middle frequencies that mean so much to the sound of an electric<br />
guitar. Six sound-shaping may be controlled remotely via footswitch, which gives you lots of tonal<br />
flexibility paired with utmost handling ease! This ingenious little amp is sure to delight with its warm,<br />
bluesy tone and assertive mids. But don't take our word for it - plug in, play, and enjoy!<br />
You'll find guidelines on care and maintenance of tube amps handling in certain places of this manual.<br />
Please read and heed these before operating your amp. You'll also come across boxes shaded grey<br />
throughout the manual. These are located between the descriptions of the amp's functions and<br />
contain handy tips on the preceding function. All critical information pertaining to the operation of<br />
this amp is preceded by "NOTE" or "CAUTION." Please pay particular attention to these safety tips. The<br />
ENGL team wishes you all the best—may you and your amp enjoy a "harmonically rich" future together!<br />
Front Panel Features<br />
Input<br />
Input Gain<br />
Lead Drive Bass Middle Treble Reverb Lead Volume<br />
Mid Gain Clean<br />
Boost Boost Lead<br />
1 Input: ¼" unbalanced input jack. Plug your guitar in here using a shielded cord.<br />
2 Input Gain: This knob controls the preamp's input sensitivity. Use to dial in the desired amount of<br />
gain for the Clean and Lead channels. It and the Master (12) knob determine the Clean channel's<br />
volume. Note: Turning the Input Gain knob all the way down gives the lowest input sensitivity.<br />
A tip from the designer:<br />
If you want to keep the preamp signal pristine clean, dial in a setting between 7 and 11 o'clock for<br />
active and humbucking pickups, and between 9 and 1 o'clock for single-coil pickups. The power<br />
amp provides a moderate amount of headroom, so be sure to choose a relatively low Master knob<br />
setting (lower than 12 o'clock) if you wish to avoid any kind of break-up. Even in Clean mode, you<br />
can push both the amp's preamp and power amp hard enough to overdrive the signal.<br />
3 Lead Drive: This knob controls the Lead channel's sensitivity. It and the Input Gain (2) determine the<br />
amount of preamp distortion in Lead mode.<br />
Note: The amp's noise floor will increase appreciably if you crank both the Lead Drive and<br />
Input Gain knobs!<br />
CAUTION: Extremely high gain and volume levels in Lead mode can produce powerful feedback.<br />
Avoid feedback squeals; they can lead to hearing loss and damage speakers! At higher volumes,<br />
back off the Gain (Lead Drive) and Treble levels in order to prevent unchecked feedback!<br />
A tip from the designer:<br />
Again, it's the combination of Input Gain (2) and Lead Drive (3) settings that control the amount of<br />
preamp overdrive. You can use these two knobs to set the desired amount of Gain in Clean and Lead<br />
modes, and then dial in the perfect balance between the two. Note that setting the Lead Drive knob<br />
to around 10 o'clock (Gain Boost not activated) will give you a tougher rhythm tone with a little<br />
added edge.<br />
4 Bass: Bottom end voicing control of the preamps´s passive EQ.<br />
5 Middle: Mid-range voicing control of the preamps´s passive EQ.<br />
6 Treble: Upper range voicing control of the preamps´s passive EQ.<br />
Tips from the Designer:<br />
To help you get acquainted with the amp's fundamental sounds, I recommend that you set all tone<br />
controls to the center or 12 o'clock position. If you want to dial in very soft lead, blues, or jazzy clean<br />
sounds, try setting the Treble knob between 11 and 2 o'clock. For more aggressive riffs or<br />
funk-approved tone, try a knob position between 2 and 4 o'clock.<br />
Master<br />
Power<br />
<strong>Tube</strong><br />
Fuse<br />
GigMaster 30<br />
Stand By Power<br />
1 2 3 4 5 6 7 8 9 1011<br />
12 13<br />
14 15
7 Reverb: Reverb intensity knob. Twist it to adjust the amount of reverb for Clean and Lead. Turn the<br />
Reverb control knob clockwise to increase the effect's intensity. The signal remains completely dry<br />
when the knob is set to the 7 o'clock position or if Reverb is deactivated via a footswitch. You can<br />
switch the reverb unit on and off using a footswitch connected to jack 18. The reverb unit is always<br />
on if you do not plug a footswitch into jack 18.<br />
8 Lead Volume: Volume control for the Lead channel (pre-FX loop, influences the Send level).<br />
The red LED above the channel switching selector (11) indicates Lead operating mode.<br />
Use this knob to dial in the desired balance of levels between the Lead and Clean channels.<br />
9 Mid Boost: This voicing feature operates globally, affecting both channels by boosting specific<br />
midrange frequencies when activated. The LED above the button lights up to indicate Mid Boost<br />
is activated. It may also be switched using a footswitch connected to jack 19.<br />
When a footswitch is plugged in, the front panel Mid Boost button is disabled.<br />
A tip from the designer:<br />
Mid Boost targets and shapes specific midrange bands crucial in voicing a guitar's sound.<br />
This tone-shaping option is remotely controllable via footswitch, so you can adapt the amp's<br />
fundamental sound on the fly, say to better support rhythm guitar work, singing leads,<br />
and slashing power chords.<br />
10 Gain Boost: Press this button to increase the Clean and Lead channels' amplitude. The red LED<br />
above the button lights up to indicate Gain Boost is engaged. You can also control Gain Boost<br />
remotely via a footswitch connected to port 20.<br />
A tip from the designer:<br />
Engaging Gain Boost in the Clean channel slightly increases the gain level and subtly changes the<br />
frequency response. This brings out the middle frequencies and conjures a more assertive tone for<br />
throaty riffs and gritty lead lines. Activating Gain Boost in the Lead channel kicks up the gain level<br />
considerably, saturating the preamp to give you more sustain for playing leads.<br />
11 Clean/Lead: Channel selector pushbutton for Clean and Lead modes, red LED indicate Lead mode;<br />
This function can also be activated via the respective footswitch connected to jack 20.<br />
Once a footpedal is connected, the channel selector pushbutton is deactivated.<br />
12 Master: This master volume knob controls the power amp's output (it is located post FX Loop).<br />
M.V.B. (Master Volume Boost): This feature increases the master volume level, giving you instant<br />
access to two different volume levels for different musical situations, for instance, one for rhythm<br />
parts and the other for lead lines.<br />
You can control this feature via a footswitch connected to port 19.<br />
13 Power <strong>Tube</strong> Fuse: This red LED lights up to indicate one of the internal power tube fuses has<br />
blown. You can continue playing, but the amp's performance will be diminished. Normally the<br />
loss of a power tube results in an unbalanced signal.<br />
Be sure to have a specialist look over the power amp as soon as possible; the fuse probably blew<br />
because of a defective power tube. Once a fuse has blown, it must be replaced by a new fuse.<br />
14 Stand By: Power amp standby switch: Use this switch to silence (0 position) the amp when you<br />
take a break. The amp's tubes stay warm, which means that it is ready to roll immediately<br />
when you switch it back to full power. The standby switch is also well-suited for muting the amp<br />
for brief breaks, for instance when you're switching guitars.<br />
A tip from the designer:<br />
I suggest you get into the habit of using standby during short breaks. In this mode, current is not<br />
piped through the power tubes, so they don't get as hot (due to the lack of anode dissipation) and<br />
are spared considerable wear. The amp is ready to run when you flip the Standby switch because<br />
the tubes are already warm and don't require time to heat up. For breaks of 30 minutes and<br />
longer, I recommend that you switch the amp off in order to conserve energy.<br />
15 Power: AC power on/off.<br />
Please note: ensure that the Stand By switch (14) is set to Stand By (0 position) before you switch<br />
the amp on. Let the tubes heat up for about 30 seconds before you activate the power amp. This<br />
procedure spares the tubes.<br />
CAUTION: After an extended period of operation and higher ambient temperatures the amps's<br />
chassis can become very hot, therefore avoid touching the rear panel surface !
Rear Panel Features<br />
REPLACE FUSE<br />
ONLY WITH SAME<br />
TYPE AND RATING !<br />
FX Off/On<br />
Reverb<br />
Footswitch<br />
Mid Boost Clean/Lead<br />
M.V.B. Gain Boost<br />
FX Loop<br />
<strong>Tube</strong><br />
<strong>Guitar</strong> <strong>Amplifier</strong><br />
GigMaster 30<br />
Combo: Type E300<br />
Head: Type E305<br />
Amp-Design by<br />
CAUTION ! !<br />
16 Mains Connector (AC Power Inlet; IEC - C14 connector)<br />
Plug the mains cord in here. For European models, use a standard non-heating equipment<br />
connector cable.<br />
CAUTION: Make sure you use an intact mains line cord with a grounded plug! Before you power<br />
the amp up, ensure the voltage value printed alongside the mains socket is the same as the current<br />
of the local power supply or wall outlet.<br />
Please also heed the guidelines set forth in the separately included pamphlet, Instructions for the<br />
Prevention of Fire, Electrical Shock and Injury.<br />
17 Mains Fuse Box: The rear chamber contains the mains fuse and in the front chamber, a spare fuse.<br />
CAUTION: ALWAYS make sure replacement fuses are of the same type and have the same ratings<br />
as the original fuse! Please refer to the fuse ratings table.<br />
18 Footswitch FX Off/On; Reverb: Use this ¼" Stereo jack to connect a conventional footswitch<br />
with two switching functions, for example, the ENGL Z-4 (2 x off/on - Single Pole Single Throw or<br />
SPST for short). This type of footswitch lets you switch the FX Loop and Reverb off and on.<br />
One of the two switches activates the FX Loop; the other engages the internal Reverb.<br />
The FX Loop and the Reverb system are activated by default if you do not connect a footswitch<br />
to this jack. Note also that a footswitch may be equipped with LEDs indicating the given switching<br />
status. Each of the two switches is provided with about 10 milliamperes of current, which suffices<br />
to power a standard LED. The jack's mono terminal (the tip) switches the FX Loop off and on,<br />
and the stereo terminal (the ring) switches Reverb off and on. For pin assignments, see<br />
"Wiring of Principal Connectors".<br />
19 Footswitch Mid Boost; M.V.B. (Master Volume Boost): Use this ¼" Stereo jack to connect a<br />
conventional footswitch with two switching functions, for example, the ENGL Z-4 (2 x off/on -<br />
Single Pole Single Throw or SPST for short).<br />
One of the two switches activates Mid Boost; the other engages Master Volume Boost.<br />
Plugging a footswitch into this jack disables onboard Mid Boost (9) switching. Note also that a<br />
footswitch may be equipped with LEDs indicating the given switching status. Each of the two<br />
switches is provided with about 10 milliamperes current, which suffices to power a standard LED.<br />
The jack's mono terminal (the tip) switches Mid Boost, while the stereo terminal (the ring) switches<br />
M.V.B. For pin assignments, see "Wiring of Principal Connectors".<br />
20 Footswitch Clean/Lead; Gain Boost: Use this ¼" Stereo jack to connect a conventional footswitch<br />
with two switching functions, for example, the ENGL Z-4 (2 x off/on - Single Pole Single Throw or<br />
SPST for short). This type of footswitch lets you access the two channels and Gain Boost.<br />
One of the two switches activates Clean or Lead; the other engages Gain Boost.<br />
Plugging a footswitch into this jack disables onboard channel (11) and Gain Boost (10) switching.<br />
Note also that a footswitch may be equipped with LEDs indicating the given switching status. Each<br />
of the two switches is provided with about 10 milliamperes current, which suffices to power a<br />
standard LED. The jack's mono terminal (the tip) selects Clean or Lead, while the stereo terminal<br />
(the ring) switches Gain Boost. For pin assignments, see "Wiring of Principal Connectors".<br />
A Tip from the Designer:<br />
If you want to control the amplifier via a MIDI system, use jacks 18, 19, 20, and a looper or MIDI<br />
switcher (such as the ENGL Z-11). Use three stereo ¼" cords to connect the optionally available<br />
ENGL MIDI Switcher Z-11. You can then preset the six switching functions Clean/Lead, Gain Boost,<br />
Mid Boost, M.V.B., FX Loop Off/On and Reverb Off/On via the switcher, store your custom<br />
switching setups as different MIDI programs, and activate the presets via a MIDI board such as<br />
the ENGL Z-12. For more details, see the remote control options on the last page.<br />
21 FX Loop Send: Connect the FX Loop output to a signal processor's input/return jack using the<br />
shortest possible shielded cord equipped with ¼" plugs.<br />
22 FX Loop Return: Use a shielded cord equipped with ¼" jack plugs to connect an effects device's<br />
output or send jack to this input. You can control the FX Loop remotely via a footswitch connected<br />
to port 18. The FX Loop is active (on) by default when no footswitch is connected to port 18.<br />
Remark: The FX Loop is located between the preamp and power amp in the signal path.<br />
Inserting a ¼" jack plug into the Return port interrupts the circuit between the preamp<br />
and power amp.<br />
R<br />
DO NOT OPEN !<br />
RISK OF ELECTRIC SHOCK !<br />
DO NOT EXPOSE THIS<br />
EQUIPMENT TO<br />
RAIN OR MOISTURE !<br />
Line<br />
Output<br />
Poweramp Output<br />
A B<br />
Important:<br />
Connect<br />
Send Return<br />
Horst Langer<br />
ENGL Amps<br />
Made in Germany<br />
0 dB<br />
Poweramp<br />
Signal<br />
8 Ohms 8 Ohms<br />
Combo: parallel<br />
internal speaker<br />
16 Ohms serial one 16 Ohms<br />
1 x 16 Ohms cabinet to<br />
2 x 8 Ohms output jack A!<br />
16 17 18 19 20 21 22 23 24 25 26 27
23 Line Out - 0 dB Poweramp Signal: This port taps the power amp's output to provide a line out<br />
signal configured at a level of about 0 dB. The frequency response is identical to that of the<br />
power amp output signal. In other words, its frequency response has not been compensated<br />
or corrected.<br />
You can feed this signal to another linear power amp. Another option is to patch it through an<br />
outboard filter to emulate a speaker, for example, a 4x12 cabinet simulation, and feed this<br />
externally processed signal to a recording device or PA system.<br />
24 Poweramp Output 8 Ohms, internal speaker: This 8-ohm speaker out is wired in parallel with<br />
port 25. Connect an 8-ohm cabinet or, in the case of the E300 Combo, its internal speaker to it.<br />
25 Poweramp Output 8 Ohms parallel: This 8-ohm speaker out is wired in parallel with port 24.<br />
Use it in combination with port 24 to connect two 16-ohm cabinets.<br />
26 Poweramp Output A -16 Ohms serial: 16-ohm speaker out, connected internally in series with<br />
Output B (jack 27). Connect a 16-ohm cabinet here (Output A). Two 8-ohm speakers are connected<br />
to Output A (jack 26) and Output B (jack 27), for example a combination of the internal 8-ohm<br />
speaker of the Combo E300 and an external 8-ohm cabinet, e.g. the ENGL models E112 or E412.<br />
CAUTION: If you intend to use a 16-ohm cabinet only, make absolutely certain you connect it to<br />
Output A (jack 26).<br />
Output B (jack 27) is only enabled when a speaker is connected to Output A (jack 20).<br />
27 Poweramp Output B - 16 Ohms serial: This is an auxiliary output connected in series with Output A<br />
(jack 26). This output is designed for one application for only—when you are driving a combination<br />
of two 8-ohm cabinets/speakers. This output may only be used when an 8-ohm speaker is<br />
connected to Output A (jack 26).<br />
NOTE: Never operate the amplifier without a sufficient load, otherwise you may damage or<br />
destroy the power amp!<br />
Speaker/ cabinet options:<br />
You can connect one 8-ohm cabinet (or the Combo's internal speaker) to the 8-Ohm Output (24);<br />
or two 16-ohm cabs to the two 8-Ohm Outputs (ports 24 and 25);<br />
or one 16-ohm cab to Output A (port 26);<br />
or two 8-ohm cabs to Output A and B (ports 26 and 27).<br />
<strong>Tube</strong> array:<br />
Power<br />
Transformer<br />
Output Transformer<br />
E305 Chassis<br />
(Head)<br />
Reverb Connector<br />
chassis viewed<br />
from above<br />
V 1<br />
ECC83/ V 2<br />
12AX7 EL84/<br />
6BQ5<br />
Input<br />
Output Transformer<br />
E300 Chassis<br />
(Combo)<br />
Reverb Connector<br />
chassis viewed<br />
from above<br />
V 5<br />
EL84/<br />
6BQ5<br />
V 3<br />
EL84/<br />
6BQ5<br />
V 4<br />
EL84/<br />
6BQ5<br />
V 4<br />
EL84/<br />
6BQ5<br />
V 3<br />
EL84/<br />
6BQ5<br />
V 5<br />
EL84/<br />
6BQ5<br />
V 1<br />
V 2 ECC83/<br />
EL84/ 12AX7<br />
6BQ5<br />
Input<br />
Power<br />
Transformer<br />
Reverb Connector:<br />
red plug:<br />
reverb spring input<br />
black plug:<br />
reverb spring output
Technical Data<br />
Rated power: approx. 30 watts at 8 or 16 ohms;<br />
Input sensitivity level Input, Clean channel: -20 dB<br />
Input sensitivity FX Return: -10 dB, approx. +10 dB max.;<br />
Output level FX Send, level range: -10 dB to approx. +5 dB peak;<br />
<strong>Tube</strong>s: V1: ECC 83 (12AX7) selected;<br />
V2, V3, V4, V5: EL 84 (6BQ5) matched set.<br />
Fuses:<br />
Mains fuse: 0.63 ATL (slow) for the 230 Volt model;<br />
1.25 ATL (slow) in the 100 and 120 Volt models.<br />
Power <strong>Tube</strong> Fuses (internal): 4 x 0.063 AM (63 mA medium blow)<br />
Important: Replace fuses only against same type and rating!<br />
Power Consumption: approx. 138 watts max.<br />
Dimensions: Head - E305 approx. 49.5 x 22 (24) x 25 cm; 19.5" x 8.7" x 9.8";<br />
(W x H x D) Combo - E300 approx. 49.5 x 43 (45) x 25 cm; 19.5" x 17" x 9.8";<br />
Weight: Head - E305 approx. 12 kg; 26.5 lbs;<br />
Combo - E300 approx. 18 kg; 39.7 lbs;<br />
Speaker in Combo E300: 12" Celestion;<br />
<strong>Tube</strong> replacement report:<br />
Replaced on: _ _ _ _ _ _ _ 20 _ _ _ Replaced by: _ _ _ _ _ _ _ _ _ _ _ _ _ _<br />
Replaced tubes V1: O V2: O V3: O V4: O V5: O<br />
Reason: _ _ _ _ _ _ _ _ _ _ _ _ _ _ _ _ _ _ _ _ _ _ _ _ _ _ _ _ _ _ _ _ _ _ _ _ _ _ _ _ _ _<br />
Handling and Care<br />
* Keep the amp safe from hard knocks and shocks. <strong>Tube</strong>s are fragile and tend<br />
to suffer when exposed to mechanical stress!<br />
* Let the amp cool down before you transport it. Ten minutes or so will spare the tubes.<br />
* <strong>Tube</strong>s take some 20 seconds to warm up after you switch the power on, and<br />
about two to three minutes before they are able to pump out full power. Make a habit of giving<br />
your amp plenty of time to get toasty and flipping the Standby switch for short breaks.<br />
* In order to spare the power tubes and prolong their lifetime, we recommend to set the<br />
Stand By switch to Stand By (0 position, that is) before you switch the amp on. After a period<br />
of 30 seconds you may activate the poweramp by flipping the Stand By switch.<br />
* Avoid storing the amp in damp or dusty rooms to spare jacks, switches and potentiometers.<br />
If you don't use the amp all the time, I recommend that you drape a covering over it to prevent<br />
the intrusion of dust. Even better, keep it in a transport cover or flight case.<br />
* Never use caustic or scouring detergents to clean the amp's housing, front or rear panels.<br />
Use a soft, damp cloth or sponge with diluted soapsuds or a standard brand of mild dishwashing<br />
liquid instead. Never use solvents they can corrode the amp's vinyl skin and dissolve the front and<br />
rear panel labels. Keep liquids well away from the amp, particularly the interior of the housing.<br />
* Make sure air can circulate at the rear and top of the amp to allow for adequate cooling,<br />
which increases component life.<br />
* Never operate the amp without an adequate load (a speaker, cabinet or suitable terminating<br />
resistor).<br />
* High ambient temperatures place an additional strain on diverse components; so if at all possible,<br />
avoid operating the amp at temperatures far higher than 30°C (86°F) for longer periods.<br />
Running the amp at mains voltages exceeding the nominal mains input voltage over longer periods<br />
can also shorten component life.<br />
* Replace tubes with selected tubes that satisfy ENGL selection criteria to forestall microphonic<br />
properties, undesirable noise and unbalanced power amp signals.<br />
Because power tubes' idle current (bias) must checked and possibly adjusted when replacing tubes,<br />
this is a job best left to experienced and authorized specialists.
Troubleshooting<br />
* The amp does not power-up after you have switched the power on.<br />
The control lamp inside the power switch (15) does not light.<br />
-> Is the mains cord connected to the receptacle / live power source ?<br />
-> Is the power cable you are using intact ? Try another equal mains cable.<br />
-> Is the mains lead properly connected to the AC Power Inlet (16) at the amp ?<br />
-> Possibly the mains fuse (17) has blown, unplug the mains cord from the mains connector<br />
and the receptacle and check the mains fuse.<br />
* The amp fails to respond when you try to control switching functions remotely<br />
using a footboard such as the Z-4 or a MIDI switcher such as the ENGL Z-11.<br />
-> Are the footpedals (or the switching loops) connected to the corresponding<br />
footswitch jacks (18, 19, 20) ?<br />
-> Are the cords you are using stereo, intact, and wired properly ?<br />
(Refer to "Wiring of Principal Connectors" for pin assignments.)<br />
-> If you are using footswitches other than an ENGL Z-4 or Z-11, are the switches or relays inside the<br />
boards or switching loop systems off / on Single Pole Single Throw (SPST) switches? In other words,<br />
do these switches continuously connect to GND when you wish to activate the given function?<br />
If you're unsure about the answers to these questions, consult an authorized service center<br />
or a professional specialist.<br />
* The amp is not providing an output signal / no sound is emanating<br />
from the speaker.<br />
-> Is at least one speaker connected to the speaker outputs 8 ohms (24, 25) or 16 ohms (26) ?<br />
-> Is the power amp activated (Standby switch to ON) ?<br />
-> Are all cords (guitar, effect, and speaker) connected properly and are they functional ?<br />
-> Unplug connected effectors and see if the amp works fine without these peripheral devices.<br />
-> Are the Master, Lead Drive or Lead Volume knobs set to a value greater than 0 ?<br />
If any of these knobs is fully down, no signal is routed to the amp's outputs.<br />
-> You may be looking at a faulty tube or another defect. (the internal power tube fuses blown, etc.)<br />
In this case, be sure to take the preamp to an authorized, professional service center.<br />
* The speaker is emitting humming noises:<br />
-> Is there a connection (for example, via a shielded circuit, e.g. Line Out) between the amp<br />
and another device that is grounded via a power plug of its own?<br />
Two or more circuits sharing a common electrical ground line can cause audible hum.<br />
If low-frequency noise is emanating from your rig, be sure to consult a specialist.<br />
-> The amp and mains grounds are not connected properly or are altogether<br />
disconnected. Have an experienced specialist check this.<br />
-> Cords connected to the input or effect loops may not be shielded properly.<br />
Replace them to check if this is indeed the case.<br />
-> The amp or speaker cords may be picking up interference from powerful<br />
magnetic fields (for example, of nearby power transformers or electrical motors).<br />
Reposition the amp and connector cables.<br />
-> The amp or speaker cords may be picking up radio signals, for example,<br />
from activated mobile telephones or powerful local transmitting stations nearby.<br />
Switch off mobile phones while troubleshooting noise problems.<br />
CAUTION! Please read and heed the following:<br />
You'll find an ancillary pamphlet accompanying this owner's manual entitled<br />
Instructions for the Prevention of Fire, Electrical Shock and Injury.<br />
Be sure to read it before you plug in and power up the amp!
Your options for controlling the GigMaster 30 amp remotely:<br />
REPLACE FUSE<br />
ONLY WITH SAME<br />
TYPE AND RATING !<br />
3 x<br />
<strong>Tube</strong> <strong>Amplifier</strong><br />
ON/OFF ON/OFF<br />
WRITE<br />
MIDI SWITCHER<br />
MIDI SWITCH<br />
CHANNEL LOOP 1<br />
SWITCH<br />
LOOP 2<br />
SWITCH<br />
LOOP 3<br />
SWITCH<br />
LOOP 4<br />
SWITCH<br />
LOOP 5<br />
SWITCH<br />
LOOP 6<br />
8<br />
16 16<br />
or -><br />
16<br />
8 8<br />
1. Use a dual footswitch such as the ENGL Z-4, connecting it to the amp via a stereo cord equipped<br />
with ¼" jack plugs. You can switch channels and Gain Boost via the dual footswitch connected to<br />
port 20, Mid Boost and M.V.B. via the dual footswitch connected to port 19, and FX Loop Off/On and<br />
Reverb Off/On via the dual footswitch connected to port 18.<br />
2. Use a MIDI switcher such as the ENGL Z-11, connecting it to the amp via three stereo cords<br />
equipped with ¼" jack plugs. The buttons on the switcher can serve to control Clean/Lead, Gain Boost,<br />
Mid Boost, M.V.B., the FX Loop, and Reverb.<br />
You can also program all kinds of switching setups to the various MIDI program locations. Here's just<br />
one example: You could configure MIDI Preset #1 so that the Clean channel, Gain Boost, and Reverb<br />
are on, while Mid Boost, M.V.B., and the FX Loop are off. Then you could set MIDI Preset #2 up so<br />
that Lead channel, Mid Boost, and M.V.B. are on, while Gain Boost, the FX Loop, and Reverb are off.<br />
Whatever setups you decide to program, you can easily activate the desired configuration directly via<br />
a MIDI board such as the ENGL Z-9, Z-12, or Z-15.<br />
This type of control option is extremely versatile; we recommend it highly if you intend to use the amp<br />
in conjunction with any MIDI system, including MIDI effects devices.<br />
Wiring of Principal Connectors: Footswitch (18, 19, 20)<br />
Use a stereo<br />
plug only!<br />
1. or 2.<br />
Stereo<br />
1/4" jack<br />
FX Off/On<br />
Reverb<br />
Footswitch<br />
Mid Boost Clean/Lead<br />
M.V.B. Gain Boost<br />
ring: refer to *R<br />
tip: refer to *T<br />
sleeve: Ground (Shield)<br />
FX Loop<br />
Footswitch jack (18):<br />
*R: A switch connected to this terminal controls<br />
Reverb: off on;<br />
*T: A switch connected to this terminal controls<br />
FX Loop: off on;<br />
Footswitch jack (19):<br />
*R: A switch connected to this terminal controls<br />
M.V.B. off on (low / high level);<br />
*T: A switch connected to this terminal controls<br />
Mid boost: off on;<br />
<strong>Tube</strong><br />
<strong>Guitar</strong> <strong>Amplifier</strong><br />
GigMaster 30<br />
Combo: Type E300<br />
Head: Type E305<br />
Amp-Design by<br />
CAUTION ! !<br />
Speaker / cabinet options:<br />
Stereo<br />
1/4" plug<br />
tip *T<br />
ring *R<br />
sleeve<br />
ENGL Gerätebau GmbH<br />
Internet: www.engl-amps.com<br />
Text, design, graphics and layout by<br />
Horst Langer, ENGL Amp Designer<br />
Technical specifications are subject to change without notice.<br />
R<br />
DO NOT OPEN !<br />
RISK OF ELECTRIC SHOCK !<br />
DO NOT EXPOSE THIS<br />
EQUIPMENT TO<br />
RAIN OR MOISTURE !<br />
Line<br />
Output<br />
or -><br />
Poweramp Output<br />
A B<br />
Important:<br />
Connect<br />
Send Return<br />
Horst Langer<br />
ENGL Amps<br />
Made in Germany<br />
0 dB<br />
Poweramp<br />
Signal<br />
8 Ohms 8 Ohms<br />
Combo: parallel<br />
internal speaker<br />
16 Ohms serial one 16 Ohms<br />
1 x 16 Ohms cabinet to<br />
2 x 8 Ohms output jack A!<br />
or -><br />
Footswitch jack (20):<br />
*R: A switch connected to this terminal controls<br />
Gain Boost: off on;<br />
*T: A switch connected to this terminal controls<br />
Channel switching: Clean Lead;