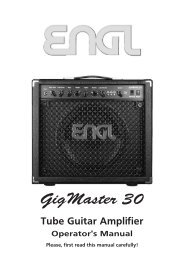
Jive 30 Guitar Combo amplifier - Engl
Jive 30 Guitar Combo amplifier - Engl
Jive 30 Guitar Combo amplifier - Engl
Create successful ePaper yourself
Turn your PDF publications into a flip-book with our unique Google optimized e-Paper software.
<strong>Jive</strong> <strong>30</strong><br />
<strong>Guitar</strong> <strong>Combo</strong><br />
<strong>amplifier</strong><br />
Operator´s Manual<br />
Please, first read this manual carefully!
<strong>Jive</strong>: 2-channel tube guitar <strong>amplifier</strong>.<br />
Features:<br />
Two basic channels Clean and Lead, common 3-Band-EQ, Accutronics reverb spring, Master<br />
controls for the power amp, serial Effects Loop. The channel Clean/Lead switching can be<br />
executed via a footswitch.<br />
You will find guidelines on care and maintenance of tube amps on the last page of the manual.<br />
Please read and heed these before operating your amp. All crucial information pretaining to the<br />
operation of this amp is preceded by "NOTE" or "CAUTION." Please read and heed these as well.<br />
Front<br />
Input: Unbalanced 1/4" input jack.<br />
Preamp controls:<br />
Volume: Input Gain control for the Clean and for the Lead channel.<br />
Bass: Bottom end voicing control for both channels.<br />
Middle: Mid-range voicing control for both channels.<br />
Treble: Upper range voicing control for both channels.<br />
Leaddrive: Gain for the Lead channel, controls the amount of preamp overdrive<br />
in the Lead mode.<br />
CAUTION: Extremely high gain and volume levels in the Lead mode can produce<br />
strong feedback. Avoid feedback squeals, they lead to hearing loss and<br />
damaged speakers!<br />
Reverb: Reverb control, adjusts the portion of the reverb signal and increases<br />
reverb intensity when you rotate it clockwise.<br />
Preamp sound switches:<br />
Gain Boost: Bass and Gain boost of the input stage.<br />
Mid Boost: Boosts the mid frequencies at 500 Hz.<br />
Bright: Alters the EQ by boosting the upper treble range.<br />
Bypass: Defeats the EQ (Bass, Middle, Treble).<br />
Clean/Lead: Channel selector switch for Clean and Lead; This feature can also be<br />
switched via the footswitch jack "Clean/Lead" located at the rear panel: the<br />
channel selector switch is deactivated once a footswitch is connected to the<br />
footswitch jack.<br />
The red LED beside this switch indicates Lead channel activ.<br />
Poweramp controls:<br />
Clean Volume: Master volume control for the Clean channel (located post FX loop). Use<br />
this control to adjust the ratio between the Clean and the Lead Volume.<br />
Lead Volume: Master volume control for the Lead channel (located post FX loop). Use this<br />
control to adjust the ratio between the Lead and the Clean Volume.<br />
Presence: This switch defines the Treble response in the poweramp stage.<br />
Stand By: Poweramp standby switch.<br />
Power: AC power on/off.
Rear Panel<br />
Fuse: External mains fuse. For values refer to "technical data".<br />
NOTE: The value must correspond to the available current.<br />
CAUTION: Ensure replacement fuses bear identical ratings!<br />
Voltage selector: This selector must be set to the correct value that corresponds to<br />
the available current, e.g. 120 Volts in the U.S., 220 Volts in<br />
Germany, etc.<br />
CAUTION: Before you power the amp up, ensure the voltage value set at the<br />
voltage selector corresponds to the available current.<br />
Footswitch: 1/4" jack for connecting a footswitch; it executes<br />
channel selection between Clean and Lead.<br />
Send: Signal output for the FX Loop. Connect this output to a signal<br />
processor’s input/return jack via a shielded cable with 1/4" plugs.<br />
Return: Signal input for the FX Loop. Connect this input to a signal<br />
processor’s output/send jack via a shielded cable with 1/4" plugs.<br />
8 Ohms: 8 ohms speaker output jack, the internal 8 ohms speaker<br />
is connected to this jack. You can connect an external 8 ohms<br />
speaker cabinet instead of the internal speaker.<br />
NOTE: Never operate the <strong>amplifier</strong> without a sufficient load, otherwise<br />
you may damage or destroy the power amp! Ensure your<br />
cabinet’s specifications match the respective output’s specs.<br />
Technical Data:<br />
rated power: approx. <strong>30</strong> Watts at 8 ohms.<br />
Tubes: V1 (Input tube): ECC 83 / 12AX7, FQ selected;<br />
V2, V3: ECC 83 / 12AX7, selected;<br />
V4: ECC 83 / 12AX7, standard;<br />
V5, V6: EL34 matched set.<br />
fused external: at 2<strong>30</strong> Volts: 1,25 A<br />
at 100 and 120 Volt: 2,5 A<br />
fused internal: 2 x 1,6 A;<br />
plate fuse: 0,5 A;<br />
CAUTION: Replace fuses only against same type and rating!
Handling and Care<br />
Protect the amp from mechanical knocks (tubes!).<br />
Let the amp cool down before you transport it (approx. 10 minutes).<br />
Tubes need about 20 seconds to warm up after you switch the power on,<br />
and furtheron a few minutes before they reach their full power capability.<br />
Avoid storing the amp in damp or dusty rooms, they are hard on jacks,<br />
switches and potentiometers.<br />
Make sure air can circulate at the rear side and the top of the amp<br />
to allow for adequate cooling (increases component life).<br />
Never operate the amp without an adequate load.<br />
Replace tubes with select replacement tubes (special selection criteria)<br />
to avoid microfonic properties, undesireable noise and unbalanced performance.<br />
Attention! Please read the following!<br />
This guitar <strong>amplifier</strong> can produce high volume levels.<br />
Exposure to high volume levels may cause hearing damage!<br />
Leave tube replacement and power amp biasing to qualified professional.<br />
Be sure the unit is switched off and unpluged!<br />
Caution! Tubes can get very hot and cause skin burns.<br />
Always use high quality cables.<br />
Never operate the amp through an ungrounded outlet!<br />
Never bridge a defective fuse and be sure replacement fuses feature<br />
identical ratings!<br />
Pull the AC mains plug before replacing fuses!<br />
Never open the chassis or attempt repairs to your own. Consult qualified<br />
service personnel!<br />
Never expose the <strong>amplifier</strong> to extreme humidity or dampness!<br />
Please read the instructions carefully before operating the unit!<br />
Only operate the <strong>amplifier</strong> in a manner it is designed for and therefore note<br />
this operational instructions!<br />
ENGL Gerätebau GmbH, Germany;<br />
Text, Design and Layout by Horst Langer<br />
We reserve the right to make<br />
unannounced technical upgrades!


