MOLAD laser and light Master - OpticsPlanet.com
MOLAD laser and light Master - OpticsPlanet.com
MOLAD laser and light Master - OpticsPlanet.com

You also want an ePaper? Increase the reach of your titles
YUMPU automatically turns print PDFs into web optimized ePapers that Google loves.
2 Harris Court, Suite A-4<br />
Monterey, CA 93940<br />
U.S.A.<br />
Tel: (831) 373-0701<br />
Fax: (831) 373-0903<br />
E-mail: Sales@<strong>laser</strong>devices.<strong>com</strong><br />
Internet: www.<strong>laser</strong>devices.<strong>com</strong><br />
Images <strong>and</strong> text copyrighted by Laser Devices, Inc. 2002<br />
<strong>MOLAD</strong> Super Power Point, TL-2 are Trademarks of<br />
Laser Devices, Inc.<br />
Part #1016<br />
December 2002<br />
Purchaser agrees to abide by all laws <strong>and</strong> regulations relating to the sale of<br />
this device. Unless otherwise agreed, purchaser is responsible for obtaining<br />
all necessary export <strong>and</strong> import licenses that may be required for this product.<br />
A U.S. Department of State Export license is required prior to export of the<br />
<strong>MOLAD</strong>. Purchaser also agrees to abide by all rules <strong>and</strong> regulations in effect in<br />
the jurisdiction where the product will be used.<br />
Optional Accessories<br />
- +<br />
6 Volt Lithium Battery (1 x 123A) 30114<br />
6 Volt Universal Las/Tac Light Head with 6-Volt Lamp Assembly 2210140<br />
Daytime Shooting Glasses, High Efficiency<br />
Daytime Shooting Glasses, St<strong>and</strong>ard Efficiency<br />
TM"<br />
Target "Accur-Aim Laser with 3 Strips<br />
Target Strips (35 Pieces)<br />
Part #<br />
30204<br />
30203<br />
30102<br />
30143<br />
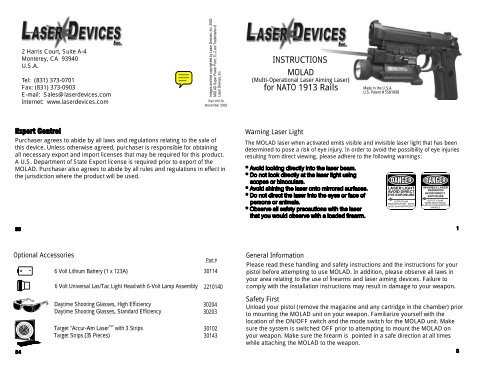
INSTRUCTIONS<br />
<strong>MOLAD</strong><br />
(Multi-Operational Laser Aiming Laser)<br />
for NATO 1913 Rails<br />
Warning Laser Light<br />
The <strong>MOLAD</strong> <strong>laser</strong> when activated emits visible <strong>and</strong> invisible <strong>laser</strong> <strong>light</strong> that has been<br />
determined to pose a risk of eye injury. In order to avoid the possibility of eye injuries<br />
resulting from direct viewing, please adhere to the following warnings:<br />
General Information<br />
Made in the U.S.A.<br />
U.S. Patent #5581898<br />
LASER LIGHT<br />
AVOID DIRECT<br />
EYE EXPOSURE<br />
OUTPUT 5mW<br />
WAVELENGTH 632 - 650nM<br />
CLASS IIIa LASER PRODUCT<br />
INVISIBLE LASER<br />
RADIATION<br />
AVOID DIRECT<br />
EXPOSURE<br />
OUTPUT
33<br />
35<br />
Tactical Thigh, Right H<strong>and</strong> USP Compact<br />
Tactical Thigh, Right H<strong>and</strong> USP Full Size<br />
Tactical Thigh, Left H<strong>and</strong> USP Compact<br />
Tactical Thigh, Left H<strong>and</strong> USP Full Size<br />
Bianchi Cobra Military Style Holsters<br />
Holster Belt, Right H<strong>and</strong> USP Compact<br />
Holster Belt, Right H<strong>and</strong> USP Full Size<br />
Holster Belt, Left H<strong>and</strong> USP Compact<br />
Holster Belt, Left H<strong>and</strong> USP Full Size<br />
OUTPUT 5mW<br />
WAVELENGTH 632 - 650nM<br />
CLASS IIIa LASER PRODUCT<br />
LASER LIGHT<br />
AVOID DIRECT<br />
EYE EXPOSURE<br />
L09151<br />
2210143<br />
Part #<br />
2210141<br />
Optional Accessories<br />
Pouch, Black Nylon for <strong>MOLAD</strong><br />
Remote Cable with right angle connector<br />
plug <strong>and</strong> button switch<br />
Remote Cable with right angle connector<br />
plug <strong>and</strong> pressure pad switch<br />
Optional Accessories (cont’d)<br />
E-mail: Sales@<strong>laser</strong>devices.<strong>com</strong><br />
Internet: www.<strong>laser</strong>devices.<strong>com</strong><br />
LASER DEVICES, INC.<br />
2 Harris Court, Suite A-4<br />
Monterey, CA 93940 USA<br />
Tel.: (831) 373-0701<br />
Fax: (831) 373-0903<br />
Designed <strong>and</strong> Manufactured by:<br />
<strong>MOLAD</strong> allows a Special Operations Team to instantly move from the visible<br />
spectrum using a Super Power Point aiming <strong>laser</strong>, the 95 lumen tactical <strong>light</strong><br />
or the <strong>com</strong>bined visible <strong>laser</strong> with tactical <strong>light</strong>; to an IR aiming <strong>laser</strong>, IR LED<br />
illuminator or with both the IR <strong>laser</strong> <strong>and</strong> LED illuminator. The unit is fully<br />
waterproof to 20 meters. Batteries can be changed without removing the unit<br />
from the weapon. Other advanced features include a single optical path for<br />
both the IR <strong>and</strong> the Visible aiming <strong>laser</strong>s, ambidextrous activation switches, a<br />
remote cable port <strong>and</strong> activation <strong>and</strong> low battery indicator <strong>light</strong>s.<br />
Product Description<br />
ALWAYS keep the gun pointed in a safe direction.<br />
ALWAYS keep your finger off the trigger until ready to shoot.<br />
ALWAYS keep the gun unloaded until ready to use.<br />
ALWAYS be sure the gun is safe to operate <strong>and</strong> the barrel is clear of any<br />
obstruction.<br />
ALWAYS use the proper factory made ammunition for your particular gun.<br />
ALWAYS know your target <strong>and</strong> what is beyond it.<br />
ALWAYS wear eye <strong>and</strong> ear protection when shooting.<br />
ALWAYS store guns <strong>and</strong> ammunition in separate locked containers so they are<br />
secure <strong>and</strong> not accessible to children or unauthorized persons.<br />
ALWAYS treat every gun as if it were loaded.<br />
NEVER use alcohol or drugs while h<strong>and</strong>ling a gun.<br />
NEVER bring a loaded firearm into a building.<br />
NEVER transport a loaded firearm.<br />
Replacing the Flash<strong>light</strong> Lamp 20<br />
User Maintenance 21-22<br />
Removing the <strong>MOLAD</strong> 23<br />
Replacing the Batteries 24-25<br />
Installation of Optional Remote Cable 26-27<br />
<strong>MOLAD</strong> Belt Pouch 28<br />
Troubleshooting the <strong>MOLAD</strong> 29<br />
Service <strong>and</strong> Repair 30<br />
Warranty 31<br />
Spare Parts List 32<br />
Optional Accessories 33-35<br />
Export Control 36<br />
Warning Laser Light 1<br />
The Comm<strong>and</strong>ments of Firearms Safety 2<br />
General Information 3<br />
Safety First 3<br />
Product Description 4<br />
<strong>MOLAD</strong> Technical Data 5<br />
Location of Major Parts 6-7<br />
Installation of <strong>MOLAD</strong> 8-9<br />
Activation of <strong>MOLAD</strong> 10-12<br />
Removing the Windag/Elevation Tool 13<br />
Adjusting the Windage/Elevation 14-18<br />
Operating Instructions 19<br />
4<br />
2
32<br />
Spare Parts List<br />
Front Cap Laser (<strong>laser</strong> aperture) 210053<br />
Elevation <strong>and</strong> Windage Adjustment Screws A03169<br />
Flash<strong>light</strong> Head Assembly with 6-Volt Lamp 221040<br />
Lamp Assembly 85019<br />
Batteries (two 3 volt lithium) 30170<br />
Switch Cover Rubber Boot FA3568<br />
Windage <strong>and</strong> Elevation Tool (right side) 3613<br />
Service <strong>and</strong> Repair<br />
<strong>MOLAD</strong> is manufactured to provide years of rugged <strong>and</strong> dependable use. In<br />
the event the <strong>MOLAD</strong> unit needs repairs, please contact Laser Devices, Inc. or<br />
its European Service Center for a return authorization number. Once you<br />
obtain a return authorization number, package the product securely <strong>and</strong> return<br />
it postage paid. In the event the product is not covered by the warranty, you<br />
will be notified of the nature <strong>and</strong> the cost of the necessary repair.<br />
<strong>MOLAD</strong> Technical Data<br />
Laser Class IIIb U.S. FDA. (Class I to 1m IEC-825-1)<br />
Optical Output
Figure 20 Figure 21 27<br />
29<br />
In the event the <strong>MOLAD</strong> unit fails to operate or appears to operate at low power,<br />
please check the following:<br />
1. Fails to operate.<br />
A. Replace the batteries (see instructions, pp. 24-25).<br />
B. Use night vision goggles to confirm that the unit is not operating in the IR<br />
Mode.<br />
C. Check the battery installation to make sure the positive (+) terminal is<br />
facing toward the flash<strong>light</strong> head. See Figure 18, p. 25.<br />
2. Laser or Tactical <strong>light</strong> is weak or dim.<br />
A. Check the front cap of the <strong>laser</strong> <strong>and</strong> tactical <strong>light</strong> to make sure that they<br />
are not covered with dirt or powder. See Figure 15, p. 22.<br />
B. Replace the batteries (see instructions, pp. 24-25).<br />
Troubleshooting the <strong>MOLAD</strong><br />
Laser Devices, Inc. (LDI) offers a one-year limited warranty (excluding batteries<br />
<strong>and</strong> <strong>light</strong> bulbs) from the date of the original purchase against failure due to<br />
defect in design, parts <strong>and</strong> workmanship. This warranty is void if the product<br />
serial number has been removed or in the event that the product has been<br />
misused, modified or abused. LDI will replace defective products at its discretion.<br />
To the maximum extent permitted by law, LDI disclaims all other warranties<br />
whether expressed or implied, including but not limited to, implied warranties of<br />
merchantability <strong>and</strong> fitness for a particular purpose. In no event shall LDI or its<br />
suppliers, distributors, dealers or agents be liable for any damages whatsoever<br />
(including without limitation damages for personal injury, wrongful death or<br />
pecuniary loss) arising out of the use or the inability to use any LDI manufactured<br />
product. This limited warranty gives the purchaser specific legal rights, which<br />
may vary from state to state or jurisdiction to jurisdiction. 31<br />
<strong>MOLAD</strong> uses a rotary mode switch on the<br />
left side of the unit to select between the<br />
tactical <strong>light</strong> <strong>and</strong> <strong>laser</strong> functions. See Figure<br />
4. A toggle switch located on the right side<br />
of the unit is used to select between the<br />
visible <strong>and</strong> IR functions. See Figure 7, p. 12.<br />
The unit can be activated either by using<br />
the toggle switches located on each side of<br />
the trigger guard or by using an optional<br />
remote cable equipped with a pressure pad<br />
or button switch.<br />
Aiming Laser Only. Rotate the Mode<br />
Switch to the Laser Only position <strong>and</strong><br />
activate using either the right or left-h<strong>and</strong><br />
switch. See Figures 5 & 6.<br />
Figure 2<br />
Figure 1A<br />
Figure 4<br />
10<br />
Activation of <strong>MOLAD</strong><br />
Installation of <strong>MOLAD</strong><br />
Step 1. Confirm that your pistol is<br />
<strong>com</strong>pletely unloaded (check the<br />
chamber <strong>and</strong> the magazine).<br />
Step 2. Install the two 3 volt batteries.<br />
(See Page 24).<br />
Step 3. Slide the <strong>MOLAD</strong> onto the<br />
accessory rail in front of the trigger<br />
guard until the unit locks into place.<br />
See Figure 2.<br />
Step 4. Make sure the <strong>MOLAD</strong> is<br />
located as far back on the weapon<br />
rail as possible.<br />
DEVICES, DEVICES, INC.<br />
MADE IN THE USA<br />
LASER LASER<br />
I/R<br />
VIS<br />
OFF<br />
ON<br />
Location of Major Parts<br />
8<br />
6
Installation of Optional Remote Cable<br />
Install the optional remote cable:<br />
Step 1. Plug the remote cable into the port<br />
located on the left side of the <strong>MOLAD</strong> unit.<br />
See Figure 19. Make sure the plug is fully<br />
seated in the port. Note: The port on the<br />
right side is used to stow the adjustment<br />
tool.<br />
Step 2. Place the pressure pad switch on<br />
the front strap of the pistol or on the side of<br />
the grip. Run the wire along the bottom of<br />
the trigger guard. See Figures 20 & 21, p.<br />
27.<br />
26<br />
Replacing the Batteries<br />
The two 3 volt (123A) batteries provide<br />
48 hours of <strong>laser</strong> or 90 minutes of<br />
tactical <strong>light</strong> use. When the red low<br />
power <strong>light</strong> stays on for more than one<br />
minute, change the batteries.<br />
Step 1. Confirm that your pistol is<br />
<strong>com</strong>pletely unloaded (check the<br />
chamber <strong>and</strong> the magazine).<br />
Step 2. Turn the unit off. Place your<br />
thumb in the center of the battery door.<br />
Using your forefinger <strong>and</strong> middle finger,<br />
pull down on the battery door latches.<br />
See Figure 17.<br />
24<br />
User Maintenance (cont'd)<br />
Clean the <strong>MOLAD</strong> unit by rinsing it with<br />
water. If it is necessary to clean the<br />
front cap (Part #210053) or flash<strong>light</strong><br />
lens, use glass cleaner or water. See<br />
Figure 15. Do not use gun oil or harsh<br />
chemicals to clean the <strong>laser</strong> front cap,<br />
as they may dissolve the silicone seal<br />
<strong>and</strong> damage the <strong>laser</strong>.<br />
If the <strong>MOLAD</strong> unit is to be stored for<br />
an extended period, remove the<br />
batteries to prevent any possibility<br />
of corrosion.<br />
22<br />
Figure 19<br />
Figure 17<br />
Figure 15<br />
Activation of <strong>MOLAD</strong> (cont'd)<br />
Figure 5 Figure 6<br />
Removing the Windage/Elevation Tool<br />
Step 1. A built-in windage <strong>and</strong> elevation<br />
adjustment tool is located on the right<br />
side just below the trigger guard.<br />
Step 2. Remove the tool by turning<br />
counter-clockwise. See Figure 8.<br />
Step 3. Once you have finished<br />
adjusting the windage <strong>and</strong> elevation<br />
(see pp. 14-16), reinsert the tool into the<br />
housing <strong>and</strong> tighten by turning<br />
clockwise.<br />
Adjusting the Windage/Elevation (cont’d)<br />
Step 4. Danger: Confirm that your pistol is <strong>com</strong>pletely unloaded (check<br />
the chamber <strong>and</strong> the magazine).<br />
Step 5. Adjust the windage or elevation by turning the windage or elevation<br />
screw by no more than one-quarter (1/4) turn.<br />
Windage: Turning the windage screw clockwise will move the <strong>laser</strong> point to<br />
the right, <strong>and</strong> turning it counter-clockwise will move it to the left. See Figure<br />
9, p. 16.<br />
Elevation: Turning the elevation screw clockwise will move the <strong>laser</strong> point<br />
down, <strong>and</strong> turning it counter-clockwise will move it up. See Figures 11 & 12,<br />
p. 18.<br />
11<br />
13<br />
15
21<br />
<strong>MOLAD</strong> does not require special<br />
maintenance other than changing the<br />
tactical <strong>light</strong> lamp, changing batteries<br />
<strong>and</strong> cleaning. Prior to use, check the<br />
following:<br />
A. Test the <strong>laser</strong> <strong>and</strong> tactical <strong>light</strong> (both<br />
visible <strong>and</strong> IR) to confirm proper function.<br />
B. Make sure the unit is properly<br />
attached to the weapon.<br />
C. Check the sight alignment by test<br />
firing the weapon, or by using LDI’s <strong>laser</strong><br />
bore<strong>light</strong>.<br />
23<br />
25<br />
Note: If the <strong>MOLAD</strong> is going to be<br />
stored for an extended period,<br />
remove the battery to avoid any<br />
possibility of corrosion.<br />
Step 2. Pull down on the two NATO<br />
1913 Rail Grabber latch assemblies<br />
located on each side of the <strong>MOLAD</strong><br />
unit. Using your thumb <strong>and</strong><br />
forefinger, pull forward on the<br />
housing. See Figure 16.<br />
Step 1. Confirm that your pistol is<br />
<strong>com</strong>pletely unloaded (check the<br />
chamber <strong>and</strong> the magazine).<br />
Step 3. Reinstall the new batteries<br />
with the positive (+) terminal facing<br />
toward the tactical <strong>light</strong> module. See<br />
Figure 18.<br />
Step 4. Shut the battery cover <strong>and</strong><br />
press down firmly until the battery<br />
door latches engage both sides of<br />
the housing.<br />
Step 5. Test the unit to confirm<br />
proper operation. See Activation of<br />
<strong>MOLAD</strong> on Page 10.<br />
User Maintenance<br />
Removing the <strong>MOLAD</strong><br />
Figure 18<br />
Replacing the Batteries (cont’d)<br />
Bullet Impact Point<br />
Use Windage Adjustment<br />
to move <strong>laser</strong> to the right<br />
Visible Aiming Laser<br />
1 2 3 4<br />
30 METERS<br />
IR Aiming Laser<br />
3 2 1 0<br />
4<br />
Figure 9<br />
Visible Aiming Laser<br />
1 2 3 4<br />
30 METERS<br />
Bullet Impact Point<br />
Use Elevation Adjustment<br />
to move <strong>laser</strong> down<br />
IR Aiming Laser<br />
3 2 1 0<br />
Adjusting the Windage/Elevation (cont'd)<br />
Step 3. If the bullet holes are clustered to one side or the other, then you will need<br />
to adjust the windage. If the bullet holes are grouped above or below the target,<br />
then you will need to adjust the elevation. See Figure 9, p. 16.<br />
Step 2. Activate the <strong>laser</strong> <strong>and</strong> aim the weapon at the target using a s<strong>and</strong>bag or<br />
steady rest. Place the <strong>laser</strong> point on the center of the target <strong>and</strong> carefully fire three<br />
rounds from the weapon. Check the target for the impact point.<br />
Step 1. Attach the <strong>MOLAD</strong> unit to your weapon (see instructions on Pages 8 & 9).<br />
Adjusting the Windage/Elevation<br />
<strong>MOLAD</strong> is pre-aligned by the manufacturer for use at 10 meters. The single optical<br />
path alignment system allows the user to easily change the alignment for use at<br />
other distances. Changing the alignment of the visible <strong>laser</strong> will automatically<br />
realign the IR aiming <strong>laser</strong>. Adjust the unit for windage <strong>and</strong> elevation as follows:<br />
Figure 7<br />
4<br />
16<br />
14<br />
12<br />
Activation of <strong>MOLAD</strong> (cont’d)<br />
Aiming Laser <strong>and</strong> Tactical Light<br />
Combined. Set the Mode Switch to the<br />
Laser & Illuminator position <strong>and</strong> activate<br />
using the right or left-h<strong>and</strong> switch. See<br />
Figures 5 & 6, p. 11.<br />
Tactical Light Only. Rotate the Mode<br />
Switch to Illuminator Only position <strong>and</strong><br />
activate using either the right or left-h<strong>and</strong><br />
switch. See Figures 5 & 6, p. 11.<br />
Infrared Laser <strong>and</strong> IR Illumintor. Select<br />
Infrared using the IR/Vis Selector Switch<br />
on the right side. See Figure 7.
Replacing the Flash<strong>light</strong> Lamp<br />
Step 1. Remove the tactical <strong>light</strong> module<br />
See Figure 13.<br />
Step 2. Carefully remove the lamp<br />
assembly <strong>and</strong> replace it with the new lamp.<br />
Do Not touch the glass bulb with your<br />
fingers. See Figure 14, p. 21. If necessary,<br />
clean the bulb with a clean, oil free cloth<br />
<strong>and</strong> glass cleaner.<br />
Step 3. Reinstall the tactical <strong>light</strong> head. Do<br />
Not cross-thread the flash<strong>light</strong> head on<br />
the <strong>MOLAD</strong> housing. See Figure 13.<br />
Figure 13<br />
Adjusting the Windage/Elevation (cont’d)<br />
IR Aiming Laser<br />
Bullet Impact Point<br />
30 METERS<br />
Visible Aiming Laser<br />
Step 6. Test fire the weapon to check the new<br />
alignment. If necessary, repeat the alignment<br />
process from Step 2, p. 14.<br />
Once the visible aiming <strong>laser</strong> is aligned, the IR<br />
beam <strong>and</strong> the visible <strong>laser</strong> point will overlap. The<br />
impact point of the bullet should be directly<br />
between the two <strong>laser</strong> points. See Figure 10.<br />
20 Figure 10<br />
17
18 Figure11 Figure 12 19<br />
DANGER: Avoid prolonged activation of the aiming <strong>laser</strong> in mist, fog,<br />
smoke, dust, high humidity, snow or rain conditions, as the <strong>laser</strong> beam may<br />
reveal your position to the opposing forces. If the system is to be stored for<br />
an extended period, remove the batteries to avoid any possibility of corrosion.<br />
Once the <strong>MOLAD</strong> is mounted on the weapon <strong>and</strong> adjusted for windage <strong>and</strong><br />
elevation, it is ready to use. Use the tactical <strong>light</strong> to illuminate the threat <strong>and</strong> the<br />
<strong>laser</strong> to confirm the point of impact of the bullet prior to firing the weapon. Use<br />
the IR selector switch to access the IR LED illuminator <strong>and</strong> the IR aiming <strong>laser</strong>.<br />
Operating Instructions<br />
Adjusting the Windage/Elevation (cont’d)