SA_VOL1 SELF-EMPLOYED
Create successful ePaper yourself
Turn your PDF publications into a flip-book with our unique Google optimized e-Paper software.
Chapter02 Interface / Basic Knowledge<br />
Interface<br />
Grasshopper’s workspace is pretty similar to other windows applications. However, as a history/algorithm editor, it has some unique<br />
features like components/parameters, which eventually will be linked to each other to make a working definition.<br />
Interface : Workspace<br />
Main Menu<br />
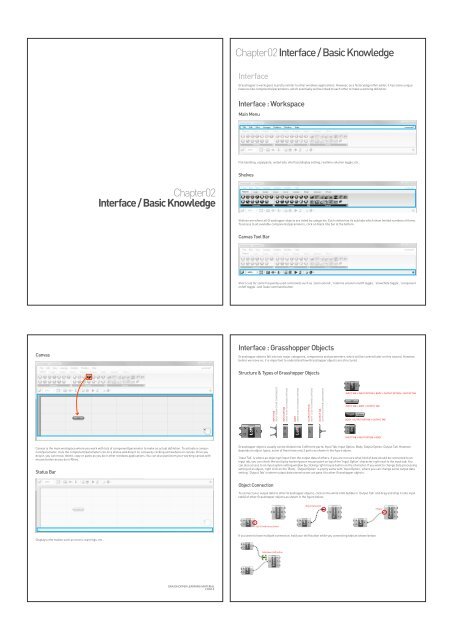
File handling, copy/paste, undo/redo, interface/display setting, realtime solution toggle, etc..<br />
Shelves<br />
Chapter02<br />
Interface / Basic Knowledge<br />
Shelves are where all Grasshopper objects are listed by categories. Each shelve has its sub tabs which show limited numbers of items.<br />
To access to all available components/parameters, click on black title bar at the bottom.<br />
Canvas Tool Bar<br />
Short cuts for some frequently used commands such as ‘zoom extend’, ‘realtime solution on/off toggle’, ‘show/hide toggle’, ‘component<br />
on/off toggle’, and ‘bake command button’.<br />
Canvas<br />
Interface : Grasshopper Objects<br />
Grasshopper objects fall into two major categories, components and parameters, which will be covered later on this tutorial. However,<br />
before we move on, it is important to understand how Grasshopper objects are structured.<br />
Structure & Types of Grasshopper Objects<br />
INPUT TAB<br />
INPUT FROM OTHER COMPONENTS<br />
INPUT OPTION<br />
RIGHT CLICK TO CHANGE OPTIONS<br />
BODY<br />
RIGHT CLICK TO CHANGE OPTIONS<br />
OUTPUT OPTION<br />
RIGHT CLICK TO CHANGE OPTIONS<br />
OUTPUT TAB<br />
OUTPUT TO OTHER COMPONENTS<br />
INPUT TAB + INPUT OPTION + BODY + OUTPUT OPTION + OUTPUT TAB<br />
INPUT TAB + BODY + OUTPUT TAB<br />
BODY + OUTPUT OPTION + OUTPUT TAB<br />
INPUT TAB + INPUT OPTION + BODY<br />
Canvas is the main workspace where you work with lots of component/parameter to make an actual definition. To activate a component/parameter,<br />
click the component/parameter icon on a shelve and drop it on canvas by clicking somewhere on canvas. Once you<br />
drop it, you can move, delete, copy or paste as you do in other windows applications. You can also pan/zoom your working canvas with<br />
mouse button as you do in Rhino.<br />
Status Bar<br />
Grasshopper objects usually can be divided into 5 different parts; Input Tab, Input Option, Body, Output Option, Output Tab. However,<br />
depends on object types, some of them have only 3 parts as shown in the figure above.<br />
‘Input Tab’ is where an object get input from the output data of others. If you are not sure what kind of data should be connected to an<br />
input tab, you can check the tool tip by hovering your mouse point on top of the ‘Input Option’ character right next to the input tab. You<br />
can also access to an input option setting window by clicking right mouse button on the character. If you want to change data processing<br />
setting of an object, right click on the ‘Body’. ‘Output Option’ is pretty same with ‘Input Option’, where you can change some output data<br />
setting. ‘Output Tab’ is where output data stored so we can pass it to other Grasshopper objects.<br />
Object Connection<br />
To connect your output data to other Grasshopper objects, click on the white little bubble in ‘Output Tab’ and drag and drop it onto input<br />
tab(s) of other Grasshopper objects as shown in the figure below.<br />
drag mouse point<br />
release<br />
click & hold mouse button<br />
Displays information such as errors, warnings, etc..<br />
If you want to have multiple connection, hold your shift button while you connecting tabs as shown below.<br />
hold down shift button<br />
GRASSHOPPER LEARNING MATERIAL<br />
CH02.3


