March 2018 YHH Mag
Farmhouse Decor and Design magazine filled with DIY projects, thoughtful articles and artisan handmade goods. Subscribe for free at yourhandmadehome.com
Farmhouse Decor and Design magazine filled with DIY projects, thoughtful articles and artisan handmade goods. Subscribe for free at yourhandmadehome.com

Create successful ePaper yourself
Turn your PDF publications into a flip-book with our unique Google optimized e-Paper software.
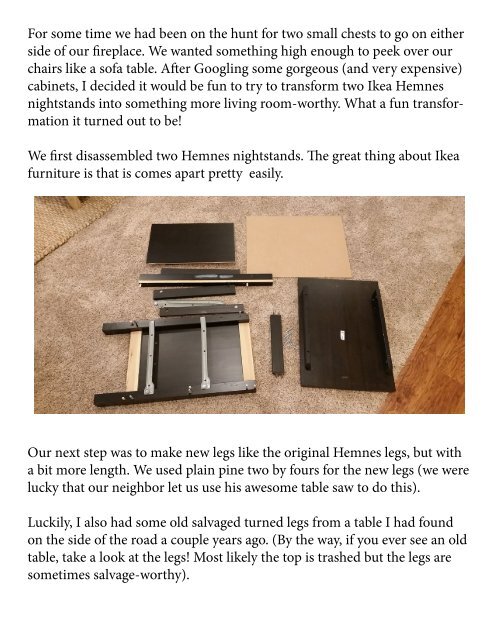
For some time we had been on the hunt for two small chests to go on either<br />
side of our fireplace. We wanted something high enough to peek over our<br />
chairs like a sofa table. After Googling some gorgeous (and very expensive)<br />
cabinets, I decided it would be fun to try to transform two Ikea Hemnes<br />
nightstands into something more living room-worthy. What a fun transformation<br />
it turned out to be!<br />
We first disassembled two Hemnes nightstands. The great thing about Ikea<br />
furniture is that is comes apart pretty easily.<br />
Anyway, to add detail to the new legs which were plain, I thought it would<br />
look great to cut the salvaged turned legs in half length wise and glue them<br />
to the front of the new legs. Happily, it was a lot easier than I thought it<br />
would be.<br />
Our next step was to make new legs like the original Hemnes legs, but with<br />
a bit more length. We used plain pine two by fours for the new legs (we were<br />
lucky that our neighbor let us use his awesome table saw to do this).<br />
Luckily, I also had some old salvaged turned legs from a table I had found<br />
on the side of the road a couple years ago. (By the way, if you ever see an old<br />
table, take a look at the legs! Most likely the top is trashed but the legs are<br />
sometimes salvage-worthy).<br />
After this, we painted all of the legs with a watered down black paint. I<br />
think the original Hemnes nightstands are stained black but we didn’t<br />
want to wait for stain to dry. It took about four coats to achieve the look we<br />
wanted.