ABT20PANEL_I_E_No1_9720342

Create successful ePaper yourself
Turn your PDF publications into a flip-book with our unique Google optimized e-Paper software.
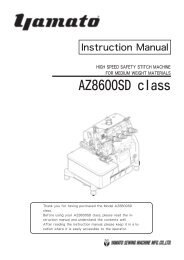
Instruction Manual<br />
AUTOMATIC BACK TACKER<br />
of CONTROL PANEL<br />
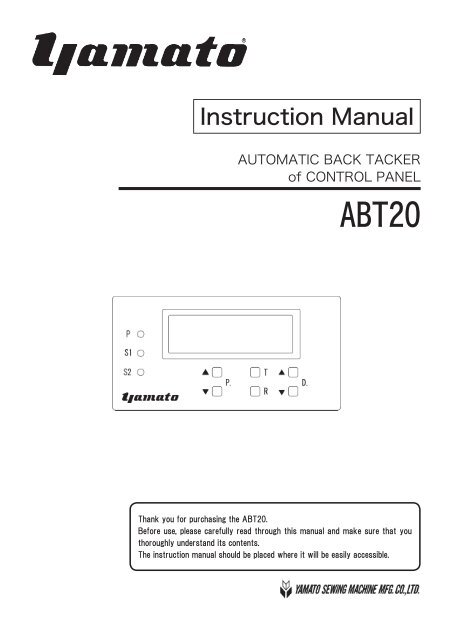
ABT20<br />
Thank you for purchasing the ABT20.<br />
Before use, please carefully read through this manual and make sure that you<br />
thoroughly understand its contents.<br />
The instruction manual should be placed where it will be easily accessible.
Contents<br />
1.Check out the following prior to use 1<br />
2.Description of control panel 1<br />
3.Screen displays and descriptions 2<br />
3. 1 Process display screen 2<br />
3. 2 Parameter settings screen 4<br />
4.Screen A displays and their descriptions 4<br />
5.Screen B displays and their descriptions 5<br />
6.Screen C displays and their descriptions 6<br />
7.Starting back-tacking (before proceeding) 7<br />
8.Starting back-tacking 8<br />
9.Troubleshooting Q & A 9
1. Check out the following prior to use:<br />
1 Is the air tubes connected properly?<br />
2 Is the air pressure set to 0.5 Mpa?<br />
3 Are the wires of the motor box and solenoid valves connected properly?<br />
2. Description of control panel<br />
The display screens include the process display<br />
screen and parameter setting screens (3 types).<br />
Power lamp<br />
Screen selector switch<br />
Sensor 1 lamp<br />
(CS sensor)<br />
Sensor 2 lamp<br />
(Fabric sensor)<br />
P ○<br />
S1 ○<br />
S2 ○<br />
P switch<br />
Display<br />
▲ □ □ T ▲ □<br />
P D<br />
▼ □ □ R ▼ □<br />
D switch<br />
The processes can be selected on the<br />
process display screen.<br />
The setting items (parameter numbers) can<br />
be called on the parameter setting screens.<br />
(Refer to section 3, 4, 5, 6)<br />
Use this to return to process 1<br />
(see section 3).<br />
The sewing paterns (codes) of the processes<br />
are set on the process display screen.<br />
The parameter settings are changed on the<br />
parameter setting screens.<br />
(Refer to section 3, 4, 5, 6)<br />
1
3. Screen displays and descriptions<br />
3.1 Process display screen<br />
"1" "2" "3" and "4"<br />
indicate the processes.<br />
P ○<br />
S1 ○<br />
Display<br />
S2 ○<br />
▲ □ □ T ▲ □<br />
P<br />
▼ □ □ R ▼ □<br />
D<br />
Press once.<br />
1: ABT ON<br />
OFF<br />
The current process and sewing pattern are displayed in the first line.<br />
The next sewing pattern is displayed in the second line.<br />
Press again.<br />
2: ABT OFF<br />
ON<br />
Press again.<br />
3: ABT ON<br />
■<br />
In the case of the example at left, the<br />
following processes are repeated.<br />
First process ⇒ Backtacking<br />
Second process ⇒ No backtacking<br />
Third process ⇒ Backtacking<br />
Press again.<br />
4: ABT ■<br />
■<br />
* Pressing the R switch returns to the<br />
first process.<br />
Press once.<br />
Backtacking at beginning of sewing (ON)<br />
1: ABT ON<br />
■<br />
Press again.<br />
No backtacking at beginning of sewing<br />
(K device stop ・ OFFK) is displayed<br />
1: ABT OFF‐K<br />
■<br />
Press again.<br />
No operation<br />
1: ABT ■<br />
■<br />
Press again.<br />
No backtacking at beginning of sewing (OFF)<br />
1: ABT OFF<br />
■<br />
2
★ Example of process settings<br />
P ○<br />
S1 ○<br />
S2 ○<br />
▲ □<br />
▼ □<br />
Display<br />
□ T ▲ □<br />
P<br />
□ R ▼ □<br />
D<br />
Press once.<br />
1: ABT ON<br />
OFF<br />
1: ABT ON<br />
■<br />
1: ABT OFF‐ K<br />
■<br />
Press again.<br />
1: ABT ■<br />
■<br />
Press again.<br />
The sewing patterns (codes)<br />
can be selected for each of the<br />
processes using the D switch.<br />
1: ABT OFF<br />
■<br />
Press again.<br />
Press P.<br />
2: ABT OFF<br />
ON<br />
2: ABT ON<br />
■<br />
Press once.<br />
2: ABT OFF‐ K<br />
■<br />
Press again.<br />
2: ABT ■<br />
■<br />
Press again.<br />
2: ABT OFF<br />
■<br />
Press again.<br />
6: ABT ■<br />
■<br />
If this ■ mark is not set after the final process, operation will not<br />
automatically return to the first process.<br />
Example: For an operation consisting of first and second processes,<br />
set the ■ mark for the third process.<br />
For an operation consisting of five processes, set the ■<br />
mark for the sixth process.<br />
3
3.2 Parameter settings screen<br />
P ○<br />
S1 ○<br />
S2 ○<br />
▲ □<br />
▼ □<br />
Display<br />
P<br />
□ T ▲ □<br />
D<br />
□ R ▼ □<br />
* Pressing the R switch returns to the first process.<br />
1: ABT ON<br />
■<br />
Screen 1: Process and sewing patterns<br />
Press T.<br />
A01 015 STITCH<br />
CHAIN LENGTH<br />
Screen A: A01 to A04<br />
Press T.<br />
B01 020 TIMER<br />
MOTOR&K CONTROL<br />
Screen B: B01 to B14<br />
Press T.<br />
C01 000 STITCH<br />
MESH COUNTER<br />
Screen C: C01 to C15<br />
4. Screen A displays and their descriptions<br />
2 Call the numbers of the<br />
parameters required.<br />
P ○<br />
S1 ○<br />
S2 ○<br />
▲ □<br />
▼ □<br />
Display<br />
P<br />
□ T ▲ □ D<br />
□ R ▼ □<br />
3 Use these buttons to<br />
enter the setting values.<br />
1: ABT ON<br />
■<br />
1 Call screen A using<br />
these buttons.<br />
A01 050 STITCH<br />
CLAMP STITCH<br />
Adjust the strength with which the thread chain is pulled in during backtacking.<br />
Press P.<br />
A02 015 STITCH<br />
CHAIN LENGTH<br />
Adjust the length of the thread chain to sew into the seamat beginning of sewing<br />
using the number of stitches.<br />
Press P.<br />
Press P.<br />
Press P.<br />
A03 035 STITCH<br />
SEW END STITCH<br />
A04 OFF ON/OFF<br />
AUTO PF UP<br />
A05 ON ON/OFF<br />
KEY LOCK<br />
Set the number of stitches to be sewn until the machine stops after the fabric<br />
sensor not detected the material.<br />
The presser foot automatically rises at the end of sewing, and the machine<br />
stands by until the next fabric is put in place. (Either ON auto or OFF manual<br />
can be selected.)<br />
In order to prevent misoperation, only screens B and C are locked when ON<br />
is selected. (Either ON or OFF can be selected.)<br />
4
5. Screen B displays and their descriptions<br />
2 Call the numbers of the<br />
parameters required.<br />
P ○<br />
S1 ○<br />
S2 ○<br />
▲ □<br />
▼ □<br />
Display<br />
□ T ▲ □<br />
P<br />
□ R ▼ □<br />
3 Use these buttons to<br />
enter the setting values.<br />
D<br />
1: ABT ON<br />
■<br />
1 Call screen B using<br />
these buttons<br />
Press P.<br />
Press P.<br />
Press P.<br />
Press P.<br />
Press P.<br />
Press P.<br />
Press P.<br />
Press P.<br />
Press P.<br />
Press P.<br />
Press P.<br />
Press P.<br />
Press P.<br />
B01 350 TIMER<br />
MOTOR&K CONTROL<br />
B02 070 TIMER<br />
PF UP TIMER<br />
B03 070 TIMER<br />
BLOW DELAY TIMER<br />
B04 090 TIMER<br />
SUC. OPEN TIMER<br />
B05 020 TIMER<br />
BLOW CHAIN TIMER<br />
B06 002 STITCH<br />
FRONT TR STITCH<br />
B07 008 STITCH<br />
REAR TR STITCH<br />
B08 005 STITCH<br />
FRONT TR S.(OFF)<br />
B09 004 STITCH<br />
FRONT TONGUE<br />
B10 008 STITCH<br />
REAR TONGUE<br />
B11 100 TIMER<br />
SUC. STOP DELAY<br />
B12 150 TIMER<br />
PF 2 DOWN TIMER<br />
B13 005 STITCH<br />
CHAIN CUT STITCH<br />
B14 030 STITCH<br />
FRONT K STITCH<br />
When sewing is finished, adjust the amount of thread chain remaining around the<br />
stitch plate tongue.<br />
When the large amount of thread chain remains around the tongue, reduce the<br />
setting value.<br />
Readjustment is necessary when changing the sewing speed.<br />
When increasing the sewing speed, reduce the setting value.<br />
Adjust whether the presser foot rises before or after the machine stops.<br />
(Time adjustment)<br />
Adjust the wait time until blowing back from K2 starts after the presser foot rises.<br />
(Time adjustment)<br />
Adjust the time during which the thread chain clamp (right) is open when the<br />
thread chain is caught. (Time adjustment)<br />
Note: Set at 50 greater than parameter B05.<br />
Adjust the time during which the thread chain is blown back from the K2 device.<br />
(Time adjustment)<br />
Note: Set at 50 smaller than parameter B04.<br />
Adjust the timing at which the thread at the beginning of sewing is tightened when<br />
backtacking is used (ABT/ON).<br />
Note: This timing differs depending on the stitch length and machine speed.<br />
(Stitch number adjustment)<br />
Adjust the timing at which the thread is loosened at the end of sewing.<br />
Note: This timing differs depending on the stitch length and machine speed.<br />
(Stitch number adjustment)<br />
Adjust the timing at which the thread at the beginning of sewing is tightened when<br />
performing plain sewing (ABT/OFF).<br />
Note: This timing differs depending on the stitch length and machine speed.<br />
(Stitch number adjustment)<br />
Adjust the timing at which the movable middle stitch plate tongue of the stitch<br />
plate moves forward at the beginning of sewing. (Stitch number adjustment)<br />
Note: This timing differs depending on the stitch length and machine speed.<br />
(Stitch number adjustment)<br />
Adjust the timing at which the movable middle stitch plate tongue of the stitch<br />
plate moves backward at the end of sewing. (Stitch number adjustment)<br />
Note: This timing differs depending on the stitch length and machine speed.<br />
(Stitch number adjustment)<br />
Adjust the time during which the suction pipe sucks in the thread chain. (Time<br />
adjustment)<br />
Adjust the time until the presser foot moves down after the thread chain is caught.<br />
(Time adjustment)<br />
Set the number of stitches the thread chain clamp (left) moves to the right so<br />
that the thread chain with the length for sewing into the seam is cut.<br />
Adjust the length of time that the K device sucks the thread chain at the beginning<br />
of sewing when performing plain sewing (ABT/OFF).<br />
Note: This timing differs depending on the stitch length and machine speed.<br />
(Stitch number adjustment)<br />
5
6. Screen C displays and their descriptions<br />
2 Call the numbers of the<br />
parameters required.<br />
P ○<br />
S1 ○<br />
S2 ○<br />
▲ □<br />
▼ □<br />
表 示<br />
□ T ▲ □<br />
P<br />
□ R ▼ □<br />
D<br />
3 Use these buttons to<br />
enter the setting values.<br />
1: ABT ON<br />
■<br />
1 Call screen C using<br />
these buttons.<br />
Press P.<br />
Press P.<br />
Press P.<br />
Press P.<br />
Press P.<br />
C01 6000 RPM<br />
SEWING SPEED<br />
C02 6500 RPM<br />
CHAIN SPEED<br />
C03 ON ON/OFF<br />
CHAIN SPEED ON<br />
C04 000 STITCH<br />
MESH COUNTER<br />
C05 OFF ON/OFF<br />
REAR BT ON/OFF<br />
C06 005 STITCH<br />
REAR BT START<br />
Sewing speed<br />
Chaining off speed<br />
(Only when parameter C03 has been set to ON)<br />
Chaining off speed selection<br />
ON: The machine runs at the speed set using parameter C01.<br />
OFF: The machine runs at the speed adjusted by the pedal.<br />
To prevent malfunction of the thread tension releaser,increase the value when<br />
sewing the mesh or lace material.<br />
Switching to backtacking at the end of sewing<br />
ON: Simple backtacking work at the end of sewing<br />
Number of stitches until the machine stops when backtacking at the end of sewing<br />
Press P.<br />
Shown below are the CS (condensed stitch device) option specifications.<br />
Press P.<br />
Press P.<br />
Press P.<br />
Press P.<br />
Press P.<br />
Press P.<br />
Press P.<br />
Press P.<br />
C07 OFF ON/OFF<br />
FRONT CS ON<br />
C08 005 STITCH<br />
FRONT CS START<br />
C09 010 STITCH<br />
FRONT CS LENGTH<br />
C10 OFF ON/OFF<br />
REAR CS ON<br />
C11 015 STITCH<br />
REAR CS START<br />
C12 010 STITCH<br />
REAR CS LENGTH<br />
C13 010 STITCH<br />
MAN. CS LENGTH<br />
C14 010 TIMER<br />
PF 1 DOWN TIMER<br />
C15 010 TIMER<br />
NEEDLE UP DELAY<br />
CS ON/OFF at the beginning of sewing<br />
Number of stitches until CS works at the beginning of sewing<br />
Number of stitches required by CS at the beginning of sewing<br />
CS ON/OFF at the end of sewing<br />
Number of stitches until CS works at the end of sewing<br />
Number of stitches required by CS at the end of sewing<br />
Number of stitches required by CS when operated manually<br />
Time until the presser foot moves down after the fabric has been placed<br />
underneath it when auto presser foot liftup has been set (valid only when<br />
parameter A04 has been set to ON)<br />
Adjust the time until the needle raise the highest point after thread chain blow<br />
back is completed. (Time adjustment)<br />
6
7. Starting backtacking<br />
Before proceeding:<br />
1 Set the power to ON. (On the motor box display, only the needle up/down lamp lights up. All other lamps are OFF.)<br />
Needle up/down lamp<br />
2 Set to OFF (manual) as shown in the figure below.<br />
P ○<br />
S1 ○<br />
S2 ○<br />
1: ABT OFF<br />
■<br />
▲ □ □ T ▲ □<br />
P<br />
▼ □ □ R ▼ □<br />
D<br />
Use these buttons to<br />
enter the setting values.<br />
3 Set the machine speed using parameter C01.<br />
4 Set the chaining off speed selection to ON using parameter C03.<br />
5 Set the chaining off speed using parameter C02. ⇒ Set the speed to 5,500 to 6,000 rpm if the machine<br />
speed (for actual sewing) is less than 5,000 rpm.<br />
6 Adjust on the stitch length and differential ratio using the<br />
fabric.<br />
7 Set to OFFK (manual, K2 air stop) as shown in the figure<br />
on the right.<br />
8 Adjust the soft thread chain using the upper thread tension<br />
spring caps as shown in figure 1 below.<br />
Note: The thread tension of the thread chain must be re<br />
adjusted because it differs depending on the type of<br />
thread used and the sewing speed.<br />
S1 ○<br />
1: ABT OFF‐K<br />
■<br />
▲ □ □ T ▲ □<br />
P<br />
▼ □ □ R ▼ □<br />
D<br />
Use these buttons to<br />
enter the setting values.<br />
1<br />
2<br />
O<br />
ON<br />
Adjust the thread chain condition.<br />
Adjust the stitch condition<br />
* This completes the preparations for backtacking.<br />
7
8. Starting backtacking<br />
Set ABT ON (auto).<br />
1 Set the material as far as the position of the upper knife.<br />
Figure 1<br />
2 Toe down the pedal and check the backtacking performance as sewing begins.<br />
Figure 2<br />
3 If the backtacking performance is unsatisfactory, reinsert the fabric underneath<br />
the presser foot, and adjust the number of stitches in the parameter A02 setting<br />
so that, at a low sewing speed, the edge of the fabric moves beyond end A of the<br />
stitch plate tongue (in the ⇒ direction; refer to figure 2) and then the thread<br />
chain clamp moves to the right. (See figure 3.)<br />
A02 015 STITCH<br />
CHAIN LENGTH<br />
A01 050 STITCH<br />
CLAMP STITCH<br />
A<br />
Note: At the time of shipment, the thread chain length (parameter<br />
A02) adjustment is set to the fixed type.<br />
Figure 3<br />
This moves to<br />
the right.<br />
* The steps below describe how to adjust the thread chain<br />
length. (Requires #000001 air switching valve; purchase it<br />
separately.)<br />
3 If the backtacking performance is unsatisfactory, reinsert the fabric underneath<br />
the presser foot, and adjust the number of stitches in the parameter A02 setting<br />
so that, at a low sewing speed, the edge of the fabric moves beyond end A of the<br />
stitch plate tongue (in the ⇒ direction; refer to figure 2) and the thread chain<br />
clamp (right) opens (thereby releasing the thread chain). (See figure 4.)<br />
Figure 4<br />
A02 015 STITCH<br />
CHAIN LENGTH<br />
This opens to<br />
the right.<br />
4 Next, adjust the clamp stitch length of the thread chain (the length the thread<br />
chain is sewn into the seam) using parameter A01.<br />
A01 025 STITCH<br />
CLAMP STITCH<br />
8
9. Troubleshooting Q&A<br />
Q A See<br />
1<br />
• The thread chain (soft<br />
chain) condition is<br />
unsatisfactory.<br />
• Have any errors been made in the threading?<br />
• Is the stitch plate or any other part damaged?<br />
• Is the speed at the end of sewing set to high-speed<br />
operation?<br />
(The timer C02 setting must be faster than the C01<br />
setting.)<br />
(The timer C03 setting must be ON.)<br />
Refer to section 7.<br />
2<br />
• The thread chain is not<br />
blown back and caught<br />
properly.<br />
• Have the speed controllers been adjusted correctly?<br />
(Check the speed controllers A, B, C and D again.)<br />
• Has the K2 device been installed in parallel with the<br />
stitch plate?<br />
• Has the K2 device been installed correctly in terms of<br />
its front-back postion?<br />
• Increase the operating time for timers B04 and B05.<br />
Refer to section 9.<br />
Refer to section 10. Refer to<br />
section 5.<br />
3 • Defective back-tacking<br />
• Does the thread chain clamp move toward the right<br />
too early?<br />
• Does the stitch plate tongue move forward too early?<br />
(Timer B09, B10)<br />
• Adjust the tighten/loose timing of the tension releaser<br />
for the material. (Timer B06, B07)<br />
• Check the thread chain condition.<br />
Refer to section 8. Refer to<br />
section 6. Refer to section 5.<br />
Refer to section 7.<br />
* Checking the timers according to the sewing to be performed<br />
A03<br />
C02<br />
C03<br />
B07<br />
B10<br />
C01<br />
A01<br />
A02<br />
B06<br />
B09<br />
See section 7.<br />
See section 7.<br />
9
4-4-12,NISHITENMA, KITA-KU, OSAKA,JAPAN<br />
TEL:81-6-6364-1321 FA X:81-6-6364-1307<br />
〒530- 0047 大 阪 市 北 区 西 天 満 4 丁 目 4 番 12 号<br />
TEL( 06)6364-1321( 代 )FAX( 06)6365-5176<br />
P/N <strong>9720342</strong>(I)<br />
No.1 Edited in 2008.11<br />
(ABT20 CONTROL PANEL)<br />
Printed in Japan 2008.11.1HY