DIGTA 415 - Grundig Business Systems GmbH
DIGTA 415 - Grundig Business Systems GmbH
DIGTA 415 - Grundig Business Systems GmbH

You also want an ePaper? Increase the reach of your titles
YUMPU automatically turns print PDFs into web optimized ePapers that Google loves.
ENGLISH<br />
<strong>DIGTA</strong> <strong>415</strong><br />
www.grundig-gbs.com
CONTENTS ________________________________________<br />
4 Notes<br />
4 Safety<br />
4 Environmental note<br />
5 Scope of delivery<br />
5 Accessories<br />
6 User controls<br />
7 Rear view<br />
8 Display<br />
8 Display information<br />
9 Preparation<br />
9 Rechargeable battery operation<br />
9 Inserting rechargeable battery<br />
10 Direct charging of the rechargeable<br />
battery<br />
11 Charging the battery - using<br />
the Digta Station 445<br />
12 Notes on <strong>Grundig</strong> rechargeable<br />
battery 465<br />
13 Mains operation via USB<br />
13 Mains operation<br />
14 Inserting and removing replaceable<br />
memory cards<br />
15 Formatting replaceable<br />
memory cards<br />
16 Switching on the<br />
machine<br />
16 Switching on and off<br />
16 Initial switching on<br />
16 Subsequent switching on<br />
17 Switching off<br />
17 Keylock<br />
17 Navigation<br />
17 Navigation in the menus<br />
18 PIN / PUK<br />
18 Entering the four digits PIN<br />
19 Entering the eight digits PUK<br />
19 Saving dictations on removable<br />
memory cards<br />
0 Recording<br />
20 Saving dictations, selecting a<br />
folder<br />
21 Dictation<br />
21 New dictation<br />
22 Recording pause<br />
22 End recording<br />
22 Modifying the dictation<br />
24 Inserting a part of a dictation<br />
25 The info function and the<br />
index function<br />
25 Inserting an info<br />
26 Inserting an index<br />
27 Dictating using the foot control<br />
9 Play-back<br />
29 Select dictation and listen to it<br />
30 Setting the volume<br />
30 Skip quickly to the start or end<br />
of a dictation<br />
30 Fast play-back<br />
31 Fast forward and rewind<br />
31 Inserting an info<br />
32 Inserting an index<br />
33 Search for info or index<br />
34 Transcription with foot control<br />
35 Automatic backspace<br />
36 Modify Menu<br />
36 Editing an existing dictation<br />
37 Setting a priority to a dictation<br />
38 Postpone a dictation<br />
39 Dictation lock<br />
40 Deleting a dictation<br />
40 Deleting an entire dictation<br />
41 Deleting the contents of a<br />
folder<br />
42 Deleting a part of the dictation<br />
43 The menu<br />
43 Functions in the menu at a<br />
glance<br />
43 Functions available if the<br />
device is connected to a PC
CONTENTS ________________________________________<br />
44 Settings of the menu at a<br />
glance<br />
45 Settings in the menu<br />
45 Setting an index during<br />
play-back<br />
46 Microphone sensitivity<br />
47 Voice activation<br />
48 Automatic power off<br />
49 Audio signals<br />
50 Illumination<br />
51 Time, date<br />
52 Typist<br />
53 Dictation type<br />
54 Group<br />
55 USB connection automatic /<br />
manual<br />
56 Speaker<br />
57 Fast forward / rewind<br />
58 Foot control<br />
58 Foot control assignment<br />
for recording<br />
59 Foot control assignment<br />
for play-back<br />
60 Automatic backspace<br />
61 Dictation counter<br />
62 Modifying the PIN<br />
63 Version<br />
64 Formatting<br />
65 Default settings<br />
66 Language<br />
67 Operation with<br />
Digta Station<br />
67 Digta Station<br />
67 USB interface<br />
67 Foot control<br />
67 Charging unit, power supply<br />
68 Communication with the PC<br />
68 The <strong>Grundig</strong> PC software<br />
68 System requirements<br />
69 Connecting and separating the<br />
dictation machine and the PC<br />
69 USB parallel operation<br />
69 PC file transfer<br />
70 PC microphone operation, USB-<br />
Audio, USB-HID<br />
71 Configuration of the dictation<br />
accompanying note<br />
7 Firmware update<br />
72 Carrying out a firmware update<br />
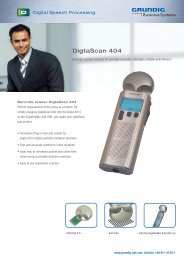
74 DigtaScan 404 Barcode<br />
reader<br />
74 Using barcodes<br />
75 Plugging in<br />
76 Unplugging<br />
77 Switching the DigtaScan on<br />
and off<br />
78 Scanning a barcode for a new<br />
dictation<br />
79 Displaying a barcode for a<br />
dictation<br />
80 Scanning a barcode for an<br />
existing dictation<br />
81 Searching for a dictation<br />
belonging to barcode<br />
82 Deleting a barcode from a dictation<br />
83 Configuring the DigtaScan<br />
barcode reader<br />
85 Setting the DigtaScan barcode<br />
reader<br />
86 Restoring the default settings<br />
87 RFID reader DigtaRFID 414<br />
87 Using RFID codes<br />
87 Connecting and removing the<br />
RFID reader<br />
88 Turning the RFID Reader on<br />
and off<br />
89 Scanning a RFID code<br />
for a new dictation<br />
90 Additional functions<br />
91 Messages, error numbers<br />
3
NOTES _____________________________________________<br />
Your Digta <strong>415</strong> is a digital portable dictation machine. It can<br />
be used as a single workstation dictation system together with<br />
the included software. It may also be integrated into a network<br />
solution (local network with several authors and typists). The<br />
dictating machine offers functions such as inserting or deleting<br />
passages that allow you to easily edit your dictations. Dictations<br />
can be transferred from your PC onto a network.<br />
Safety<br />
This digital portable dictation machine is designed to record and<br />
play-back spoken language. Protect your machine from exposure<br />
to moisture (rain, splashing liquids). Never lay your dictation<br />
machine down near a heater or directly into sunlight.<br />
Note! You must not open the dictation machine under any circumstances.<br />
Opening the machine will invalidate the warranty<br />
repair. Open only the lid to the compartment of the rechargeable<br />
battery. Use a dry cloth to clean the machine. Do not use<br />
chemical cleaning agents.<br />
Environmental note<br />
The rechargeable batteries must not be thrown away as household<br />
garbage. Please dispose of the used batteries in an<br />
environmentally sound manner by bringing them to a public<br />
collecting point or back to the dealer.<br />
This product complies with the EC regulations »89/336/<br />
CEE, 73/23/CEE, 93/68/CEE«.<br />
Technical and visual features subject to change!<br />
4
Notes _______________________________________________<br />
Scope of delivery<br />
– Digta Station*<br />
– PC software<br />
– USB cable<br />
– Rechargeable battery<br />
– Power supply<br />
– Pouch<br />
Accessories<br />
For the latest accessories like DigtaCard, plug-on microphone<br />
and earphone please visit the <strong>Grundig</strong> Website on the internet<br />
at www.grundig-gbs.com.<br />
The performance features described by <strong>Grundig</strong> only apply to<br />
genuine <strong>Grundig</strong> accessories.<br />
Please make sure to choose only genuine accessories from<br />
<strong>Grundig</strong>. Product liability and warranty service are provided<br />
only in this case. The use of non-<strong>Grundig</strong> accessories or those<br />
which are not recommended and approved by <strong>Grundig</strong> automatically<br />
void any warranty claims towards <strong>Grundig</strong><br />
* Special extras<br />
5
USER CONTROLS _______________________________<br />
Jack for external microphone<br />
Microphone<br />
LED indicator<br />
Record: illuminated red<br />
Record pause: blinking red<br />
Insert: illuminated orange<br />
Insert pause: blinking orange<br />
PC transfer: jittering red<br />
Charging of rechargeable batteries:<br />
blinking green<br />
Selection buttons*<br />
Navigation buttons*<br />
„new“ button<br />
(new dictation)<br />
* Labeled in the<br />
bottom display line<br />
Green indicator for<br />
USB connection<br />
Yellow indicator for<br />
power supply<br />
Earphone socket<br />
(output voltage max. 90 mV)<br />
Recording button<br />
Display<br />
Slide switch for fast<br />
forward,<br />
stop, start (record,<br />
play-back)<br />
and rewind<br />
Digta Station 445:<br />
Special extras<br />
6
Card slot for<br />
MMC-/SD<br />
cards<br />
Slide switch for fast<br />
forward, stop, start<br />
(record, play-back)<br />
and rewind<br />
REAR vIEw _______________________________________<br />
Compartment<br />
for rechargeable<br />
battery<br />
On/Off switch<br />
Keylock<br />
7
Dictation number<br />
� Info number<br />
Index number<br />
DISPLAy ___________________________________________<br />
Display information<br />
Recording in folder A Voice<br />
Current function<br />
► Play-Back<br />
Recording<br />
Recording pause<br />
_▼_ Insert<br />
Play-Back End<br />
►► Fast forward<br />
◄◄ Rewind<br />
Current button functions,<br />
for ex. modify dictation,<br />
select dictation, menu<br />
activation<br />
on<br />
Recording/<br />
Play-back<br />
mode<br />
Card indicator<br />
Dictation with priority (PR)<br />
Battery/USB/<br />
power supply<br />
Remaining<br />
storage time<br />
Microphone<br />
sensitivity<br />
Dictation length<br />
Status bar<br />
8
PREPARATION ___________________________________<br />
Rechargeable battery operation<br />
To allow a smooth operation of the rechargeable battery you<br />
should always switch off your dictation machine after you<br />
have finished dictations and connect it to the Digta Station*<br />
to be recharged.<br />
– Display when operating with rechargeable batteries:<br />
» «.<br />
Inserting rechargeable battery<br />
With the Digta Station 445* you only may recharge the<br />
<strong>Grundig</strong> Akku-Pack 465 rechargeable battery in the dictation<br />
machine.<br />
• Switch off the dictation machine. Move the On/Off<br />
switch upwards to »OFF/HOLD«.<br />
• Open the compartment of the rechargeable battery.<br />
• Insert the rechargeable battery. Make sure the polarity<br />
and position are right (see figure).<br />
warning:<br />
Never insert batteries into the compartment for the<br />
rechargeable batteries. This could destroy the batteries.<br />
Note:<br />
The dictation machine’s operating system is “shut down”<br />
(similar to a PC) when it is turned off. There must still be<br />
sufficient power available for this purpose. If, after the<br />
dictation machine has automatically turned off, you turn it<br />
back on again without having plugged it into a power supply<br />
(e.g. via USB cable to a PC) or without having inserted<br />
new rechargeable batteries, your saved dictations may be<br />
permanently lost.<br />
* Special extras<br />
9
PREPARATION ___________________________________<br />
Note:<br />
The rechargeable battery is charged also when the dictation<br />
machine is switched on. In this case, however,<br />
charging will take a longer time.<br />
Direct charging of the rechargeable battery<br />
• Switch off the dictation machine by moving the On/Off<br />
slide switch upwards to »OFF/HOLD«.<br />
• Plug the power supply into the mains socket.<br />
• Connect the USB plug of the power supply cable to the<br />
»PC/USB« socket of the dictation machine.<br />
– After a short time the display indicates that the batteries<br />
are recharged and the green recording indicator<br />
will be blinking.<br />
– The flat rechargeable battery will be fully recharged<br />
after about 4 hours. The charging indicator and the<br />
recording indicator then go out.<br />
• Pull the power supply from the socket and the power<br />
supply cable's USB plug from the »PC/USB« socket.<br />
10
PREPARATION ___________________________________<br />
Charging the battery – using the Digta Station 445*<br />
• Connect your USB plug from the power supply cable to<br />
the »DC IN 5V« jack of the Digta Station*.<br />
• Plug the power supply plug to the socket.<br />
– The yellow indicator of the Digta Station* blinks.<br />
• Switch off the dictation machine by moving the On/Off<br />
slide switch upwards to the »OFF/HOLD« position.<br />
• With the dictation machine switched off, plug it into the-<br />
Digta Station*<br />
– After a short time the charging indicator appears on<br />
the machine's display and the green recording indicator<br />
lights up.<br />
– After approx. 4 hours the flat rechargeable battery is<br />
recharged. The charging indicators and the recording<br />
indicator disappear.<br />
* Special extras<br />
11
PREPARATION ___________________________________<br />
Notes on <strong>Grundig</strong> rechargeable battery 465<br />
New rechargeable batteries do not reach full capacity until<br />
they have been recharged several times. For this reason<br />
the operating time for new rechargeable batteries in some<br />
rare cases is less than 3 hours.<br />
When the rechargeable battery is fully charged, you can<br />
use the dictation machine up to 7 hours.<br />
The rechargeable batteries’ charge state is shown on the<br />
dictation machine display:<br />
– » « Rechargeable battery charged;<br />
– » « Rechargeable battery partly discharged;<br />
– » « Rechargeable battery weak;<br />
– » « Rechargeable battery nearly flat.<br />
Note:<br />
The rechargeable battery must always be fully charged in<br />
the dictation machine to make sure that the real charging<br />
state is displayed.<br />
Before the rechargeable battery is completely flat a short<br />
warning beep will sound and the rechargeable battery<br />
symbol » « will flash on the display. There won't be<br />
a warning signal in the recording mode. You will still be<br />
able to dictate and play-back for a few minutes before the<br />
dictation machine automatically switches off. However,<br />
we recommend either starting the charging process after<br />
the warning beep and the flashing rechargeable battery<br />
symbol » « or to use the power supply to operate the<br />
dictation machine.<br />
The dictation machine’s operating system is ”shut down”<br />
(as for a PC) when it is switched off. Sufficient power<br />
must still be available for this purpose. If, after the dictation<br />
machine has automatically switched off, you switch it<br />
back on again without plugging in the power supply or if<br />
the rechargeable batteries have not been recharged, your<br />
saved dictations may be permanently lost.<br />
1
PREPARATION ___________________________________<br />
Mains operation via USB<br />
You can connect your dictation machine to your PC via a<br />
USB cable (included in delivery).<br />
• Switch on your PC.<br />
• Switch on your dictation machine and connect it to the<br />
PC via the USB cable. A display for rechargeable battery<br />
operation appears on the upper right edge, or the<br />
symbol » « for power supply via PC flashes if the<br />
batteries are fully charged.<br />
• If automatic PC connection is switched on, the dictation<br />
machine logs on at the PC via USB parallel operation.<br />
Open the menu with the right selection button. Select<br />
the symbol » « for dictations in PC power supply<br />
mode with the navigation buttons and confirm with the<br />
right selection button » «.<br />
Now your dictation machine is supplied with power by the<br />
PC (the rechargeable battery in the device is not discharged)<br />
and you can use it for recordings and play-back like<br />
under battery operation.<br />
Mains operation<br />
If the dictation machine has been switched on and a power<br />
supply is connected to the »PC/USB« socket, the power<br />
supply will supply the dictation machine with power. The<br />
rechargeable battery is charged.<br />
– Display for mains operation » «.<br />
Please use the Digta Station* for PC operation with power<br />
supply.<br />
* Special extras<br />
13
PREPARATION ___________________________________<br />
Inserting and removing replaceable memory<br />
cards<br />
You can use memory cards (not included in delivery) instead<br />
of the internal memory.<br />
Use DigtaCards supplied as accessories by <strong>Grundig</strong> <strong>Business</strong><br />
<strong>Systems</strong>.<br />
• Push the memory card into the slot with the side with<br />
the diagonal corner facing the direction shown on the<br />
back of the device.<br />
Note:<br />
Do not insert the card with force. Slight pressure is sufficient.<br />
To remove the card press the memory card slightly until<br />
the snapping mechanism unlocks.<br />
Do not remove the cards when recording is running or<br />
during data transfer from PC to PC. This can result in<br />
data loss.<br />
If a full memory card (e.g. with over 300 dictations) is<br />
inserted into the dictation machine with factory default<br />
settings (or with a reset dictation counter), it takes up<br />
to 20 seconds to create a new dictation. This time is<br />
required for the dictation machine to search for the first<br />
free dictation number starting from dictation number 1.<br />
This time also varies depending on the manufacturer of<br />
the memory card.<br />
If you use MultiMediaCards/SecureDigital Cards (MMC/<br />
SD) with insufficient writing speed, »Card not supported!«<br />
will appear in the display.<br />
Make sure that the electrical contacts on the underside<br />
of the memory card are not subjected to physical<br />
stress. The cards are not affected by dirt or moisture,<br />
but they may only be put into the dictation machine<br />
when they are clean and dry.<br />
14
PREPARATION ___________________________________<br />
New memory cards must be formatted before any writing<br />
can be done.<br />
It is essential that the notes in the chapter “SETTINGS<br />
IN THE MENU – Formatting” be observed.<br />
Formatting replaceable memory cards<br />
Memory cards – including those which have been preformatted<br />
– must first be formatted with the dictation machine<br />
prior to initial writing.<br />
If an error message appears after a non-formatted memory<br />
card is inserted, confirm this with the right selection button<br />
» «.<br />
The »FORMAT DELETE ALL?« display should also be<br />
acknowledged with the right selection button » «.<br />
The memory card may not be formatted as a removable<br />
disk using a PC formatting function.<br />
New memory cards may only be formatted using the<br />
“Formatting” menu function. It is essential that the notes<br />
in the “SETTINGS IN THE MENU - Formatting” chapter<br />
be observed.<br />
We recommend reformatting the memory card on a PC<br />
once it has been overwritten several times. The memory<br />
card is defragmented during formatting. Access to the next<br />
dictations is then faster.<br />
15
SwITCHING ON THE MACHINE_______________<br />
Switching on and off<br />
Initial switching on<br />
• Move the On/Off switch down to »ON«.<br />
• Confirm the default settings of the PIN* ("0000") with<br />
the right selection button » « or via the recording button<br />
» DICT«.<br />
• An authors list appears when more than 1 author (a<br />
maximum of 20 authors is possible) is configured. Please<br />
select your name and confirm with the right selection<br />
button » «.<br />
- The author‘s list is created by the administrator at the<br />
PC and transferred to the dictation machine.<br />
Note:<br />
If there are more than one author, the dictation list<br />
only shows the dictations with the author‘s recognition<br />
selected and confirmed by the user when he/she switched<br />
on the machine. This ensures that other dictations<br />
are not accidentally edited or worse deleted.<br />
• We recommend you to adjust now time and date. To do this<br />
select year, month, day, hours and minutes with the<br />
navigation buttons »▲▼« and confirm each selection<br />
with the right selection button » «.<br />
• End your adjustments with » «.<br />
• You can interrupt the time setting with the left selection<br />
button » « without saving the adjustments. Each time<br />
you switch on the device in the future, the date and<br />
time display will appear again, until the time setting is<br />
concluded with the right selection button.<br />
– Now the device is ready for operation.<br />
* Special extras<br />
16
SwITCHING ON THE MACHINE_______________<br />
Subsequent switching on<br />
• Move the On/Off switch downward to "On".<br />
• If an authors list appears please select your name and<br />
confirm with the right selection button » «.<br />
Switching off<br />
• Move the On/Off switch upward to »OFF/HOLD«.<br />
Key lock<br />
The keylock prevents you from accidentally turning off<br />
the machine while you are recording or playing back a<br />
dictation.<br />
• When making a recording or playing back a recording,<br />
push the On/Off switch upward to »OFF/HOLD«.<br />
The keys are now locked and the » HOLD « symbol<br />
appears in the display. If you wish to unlock the keys<br />
again, push the On/Off switch back to »ON«. You can<br />
stop your recording or play-back again.<br />
If you press the On/Off button in a different function, the<br />
device will turn off.<br />
NAvIGATION _____________________________________<br />
Navigation in the menus<br />
• You may select desired menu items or functions/settings<br />
with the navigation buttons »◄►«.<br />
• You activate menu items and confirm functions or parameters<br />
with the right selection button » «<br />
• With the left selection button » « you interrupt functions<br />
without saving any adjustments.<br />
17
PIN / PUK _________________________________________<br />
Entering the four digits PIN*<br />
If your dictation machine is provided with the PIN/PUK* function,<br />
you have to enter your PIN* (Personal Identification<br />
Number) each time you switch on your dictation machine.<br />
• You may confirm your entry via the navigation<br />
buttons or you move the slide switch to<br />
»◄◄REW« (smaller figures) or to »►►FFWD« (higher<br />
figures) and confirm the figures with the recording button<br />
» DICT«.<br />
- Each figure you entered in will appear as a star symbol<br />
" ٭ " to screen from view. Having entered the fourth figure<br />
you will access the main menu.<br />
If the wrong PIN was entered three times you have to wait<br />
for 30 seconds to try again. However, if in three trials the<br />
wrong PIN was entered three times, the dictation machine<br />
will be locked and only may be unlocked via entering the<br />
right PUK.<br />
Note:<br />
You may change your PIN via the menu functions described<br />
in the chapter „SETTINGS IN THE MENU – Modifying the<br />
PIN”.<br />
* Special extras<br />
18
PIN / PUK _________________________________________<br />
Entering the eight digits PUK<br />
If the wrong PIN* was entered several time the dictation<br />
machine will be locked. You then will have to enter the eight<br />
digits PUK (Personal Unblocking Key)<br />
• You may confirm your entry via the navigation<br />
buttons or you move the slide switch to<br />
»◄◄ REW« (smaller figures) or to »►►FFWD« (higher<br />
figures) and confirm the figures with the recording but<br />
ton » DICT«.<br />
If the wrong PUK was entered three times you have to<br />
wait for 30 seconds to try again. Entries may be done as<br />
often as you like. The PUK is generated from the device's<br />
specific serial number and will be supplied to you or to your<br />
system administrator when you buy the machine.<br />
Having entered the PUK the PIN* will be reset to 0000.<br />
Saving dictations on removable memory cards<br />
Dictations on external, removable memory cards<br />
(DigtaCard) can not be protected through the PIN/PUK*<br />
function.The following display appears when changing to<br />
an external memory card:<br />
- EXT NO PIN PROTECTION<br />
• Confirm with the right selection button » « that you<br />
would like to work with an external memory card without<br />
PIN* protection.<br />
* Special extras<br />
19
RECORDING ______________________________________<br />
Saving dictations, selecting a folder<br />
Dictations are stored on the internal memory of the dictation<br />
machine if no external, replaceable memory card<br />
(DigtaCard) is in use.<br />
If a memory card is inserted, all dictations are recorded on<br />
this card. The internal memory is protected against access<br />
during this. It is not possible to copy between the internal<br />
memory and the memory card.<br />
– When using an external memory card, » « appears in<br />
the display.<br />
It is essential that the notes in the chapter “SETTINGS<br />
IN THE MENU – Formatting” be observed.<br />
There are six folders available for this purpose: one main<br />
folder » « and five subfolders labeled A, B, C, D, and<br />
E. This allows you to sort your dictations (for example to<br />
separate private from business dictations).<br />
Selecting a folder<br />
• Activate the menu with the right selection button » «<br />
• Select the Folder menu command » « with the navigation<br />
buttons »◄►« and confirm by pressing the right<br />
selection button » «.<br />
• Now you can choose the folder of your choice with the<br />
navigation buttons. Confirm with » «.<br />
• You exit the menu with the left selection button » «.<br />
Your dictations will now be saved in this folder. When you<br />
turn the machine back on, the last selected folder and last<br />
edited dictation will be displayed.<br />
0
RECORDING ______________________________________<br />
Dictation<br />
• Speak in a direction just over the dictation machine.<br />
The figure illustrates the optimum position. The high<br />
precision microphone also allows you to record conversations<br />
from greater distances.<br />
New dictation<br />
• Move the slide switch to » STOP «.<br />
• Press the »new« button.<br />
– A new dictation with the next highest number available<br />
is created, display: »DICT0003« for example.<br />
– The time and date are saved together with each new<br />
dictation (displayed only on the PC).<br />
– The red recording indicator starts blinking, the black<br />
Disc symbol » « appears in the display as well as<br />
the Pause symbol » «.<br />
• Move the slide switch to »►START«.<br />
– The recording indicator blinks, the Disc symbol » «<br />
starts spinning in the display and the Pause symbol<br />
turns into a Recording symbol » «.<br />
– The device is recording.<br />
1
RECORDING ______________________________________<br />
Recording pause<br />
• Move the slide switch to » STOP «.<br />
– The recording indicator blinks, the Disc symbol<br />
» « stops spinning in the display and the Pause<br />
symbol » « appears again.<br />
End recording<br />
• Press the red recording button » DICT«. The Disc<br />
symbol turns white » «.<br />
Fast forward or rewind during a recording also ends the<br />
recording.<br />
– Each time a recording is ended, the time and data are<br />
saved along with it (displayed only on the PC).<br />
Modifying the dictation<br />
During play-back you can record over the previously recorded<br />
text at the current position or append a recording to the<br />
current dictation.<br />
Please note the time you have left in memory; this is displayed<br />
in hours and minutes.<br />
• Move the slide switch to » STOP «.<br />
• Select the dictation of your choice with the navigation<br />
buttons »◄►« (see „Select dictation and listen to it").<br />
• Move the slide switch to »►START« (play-back).<br />
• During play-back push the slide switch to » STOP « at<br />
the desired dictation position..
RECORDING ______________________________________<br />
• Press the red recording button » DICT«, the red<br />
recording indicator starts blinking, the black Disc symbol<br />
» « and the Pause symbol » « appear in the display.<br />
• Move the slide switch to »►START« and dictate the<br />
new text. The red recording indicator lights up, the black<br />
Disc symbol » « starts to spin in the display and the<br />
Pause symbol turns into the recording symbol » «.<br />
Caution:<br />
This will overwrite your old dictation starting at this<br />
point.<br />
• At the end of the dictation move the slide switch to<br />
» STOP «.<br />
• Press the red recording button » DICT« or the left<br />
selection button » «. The recording is turned off.<br />
Note:<br />
If you press the recording button immediately after<br />
selecting the dictation, your dictation will be appended.<br />
3
RECORDING ______________________________________<br />
Inserting a part of a dictation<br />
During play-back you may insert a new recording at your<br />
current dictation position.<br />
Please also note the available storage space.<br />
• Move the slide switch to » STOP «.<br />
• Select the desired dictation with the navigation buttons<br />
»◄►« (see „Select dictation and listen to it").<br />
• Move the slide switch to »►START«, to listen to the<br />
dictation.<br />
• During play-back, move the slide switch to » STOP «,<br />
once you have reached the dictation position at which<br />
you wish to insert the text.<br />
• Press the red recording button » DICT«, the red<br />
recording indicator starts blinking, the black Disc symbol<br />
» « and the Pause symbol » « appear in the<br />
display.<br />
• Confirm the function with the right selection button<br />
» « (Insert recording).<br />
• Select the "Insert Part" » « function from the menu<br />
and confirm with the selection button » «.<br />
• Move the slide switch to »►START« and dictate the<br />
text you want to be inserted.<br />
• Move the slide switch to » STOP « once you have<br />
finished inserting the text.<br />
• To stop, press the red recording button » DICT« or<br />
the left selection button » «. .<br />
4
RECORDING ______________________________________<br />
The info function and the index function<br />
As an integral part of a dictation, you can record information<br />
(» �« = Info) for your typist and mark them, or set index marks<br />
(» «= Index) for specific parts of the dictation.<br />
Info » �« or Index » « appears in the display and the number<br />
of info or index (from 01 to 16). You will hear an audible signal<br />
during play-back. These messages and indexes are transferred<br />
to the PC with the dictation.<br />
Inserting an info<br />
During recording you may insert a new info at your current<br />
dictation position.<br />
• Move the slide switch to » STOP «.<br />
• Press the red recording button » DICT«.<br />
– The red recording indicator starts blinking, the black<br />
Disc symbol » « and the Pause symbol » «<br />
appear in the display.<br />
• Move the slide switch to »►START«.<br />
– The recording indicator lightens up, the Disc symbol<br />
» « starts to spin in the display and the Pause symbol<br />
turns into the recording symbol » «. The device<br />
is recording now. The symbols for Info » �« and Index<br />
» « are displayed in the bar for the key functions.<br />
• Press the selection button » �« to insert an info at the<br />
current position.<br />
– The next highest info number, for eg. » �2«, appears<br />
in the display.<br />
• Speak the info text when the next higher info number<br />
appears in the display, e.g. » �2«.<br />
5
RECORDING ______________________________________<br />
• Move the slide switch to » STOP « once you have<br />
finished inserting the text.<br />
• To stop, press the red recording button » DICT« or<br />
the left selection button » «.<br />
Inserting an index<br />
During play-back you may insert a new index at your current<br />
dictation position.<br />
• Move the slide switch to » STOP «.<br />
• Press the red recording button » DICT«.<br />
– The red recording indicator starts to blink, the black<br />
Disc symbol » « and the Pause symbol » «<br />
appear in the display.<br />
• Move the slide switch to »►START«.<br />
– The recording indicator lightens up, the Disc symbol<br />
» « starts to spin in the display and the Pause symbol<br />
turns into the recording symbol » «. The symbols<br />
for Info » �« and Index » « are displayed in the bar<br />
for the key functions.<br />
• Press the right selection button » «.<br />
– The next highest info number briefly appears in the<br />
display, » 2« for example.<br />
• Move the slide switch to » STOP «.<br />
• To stop, press the red recording button » DICT« or<br />
the left selection button » «.<br />
6
RECORDING ______________________________________<br />
Dictating using the foot control<br />
• Connect the foot control to the » « socket of the<br />
Digta Station*.<br />
• Move the slide switch to » STOP «.<br />
• Connect the power supply to the »DC IN 5V« socket or<br />
via USB cable to the »PC/USB« socket of a PC to supply<br />
the Digta Station* and the foot control with electric<br />
power. With the dictation machine switched on, plug it<br />
into the Digta Station*.<br />
Note:<br />
If automatic PC connection is switched on, the dictation<br />
machine logs on at the PC via USB parallel operation.<br />
Open the menu with the right selection button. Select<br />
the symbol » « for dictations in PC power supply<br />
mode with the navigation buttons and confirm with the<br />
right selection button » «.<br />
• The switches on the foot control are designed for<br />
hands-free dictation (default setting). If the »Playback«<br />
setting (transcription mode) is activated, you first have<br />
to change to »Recording« in the »Foot control« menu<br />
item. See chapter "SETTINGS IN THE MENU - Foot<br />
control".<br />
Left pedal<br />
– Rewind;<br />
Middle pedal<br />
– Press shortly to switch recording on or off;<br />
– Hold down (approx. 1.5 seconds) for a new<br />
dictation. The red recording indicator lights up,<br />
a new dictation number, for eg. »DICT0003« is<br />
displayed;<br />
Right pedal<br />
– Start/stop recording and play-back.<br />
* Special extras<br />
7
RECORDING ______________________________________<br />
Note:<br />
Select the fast forward function using the slide switch<br />
function »►► FFWD« on the dictation machine.<br />
8
PLAy-BACK _______________________________________<br />
Select dictation and listen to it<br />
• Move the slide switch to » STOP «.<br />
• Select the folder in which your dictation is located (see<br />
„Saving dictations, selecting a folder“).<br />
• Select the desired dictation with the navigation buttons<br />
»◄►«. The selected dictation name appears in the<br />
display. If a dictation was renamed on the PC, or if it<br />
originates from another dictation machine, the dictation<br />
name is displayed as text, possibly abbreviated.<br />
• Move the slide switch to »►START«.<br />
– ThewhiteDiscsymbol» «startstospininthedisplay,<br />
the play-back symbol »►« appears on the left in the<br />
display and the status bar begins to move. Play-back<br />
starts at the beginning of the dictation.<br />
Note:<br />
If, after you have turned on the dictation machine, no<br />
new dictation is selected, the last edited dictation will<br />
be played back at the position it was before the machine<br />
was turned off.<br />
• If you wish to interrupt the play-back, push the slide<br />
switch to » STOP «.<br />
– The white Disc symbol » « will stop spinning in the<br />
display. The status bar stops moving.<br />
9
PLAy-BACK _______________________________________<br />
Setting the volume<br />
• During play-back, press the left navigation button to<br />
lower the volume or the right button to increase the<br />
volume.<br />
– The loudspeaker symbol in the display » « turns<br />
into the symbol for adjusting the volume » «.<br />
Skip quickly to the start or end of a dictation<br />
• Move the slide switch to »►START«.<br />
• By tapping the left selection button you can alternatively<br />
jump to the start and end of a dictation.<br />
Note:<br />
If an info or index was inserted during dictation the next<br />
info start, info end or index is jumped to. If you are at<br />
the end of a dictation you will jump to the beginning of<br />
this dictation.<br />
Fast play-back<br />
• Press the right selection button » ->1,5x « during playback.<br />
– The dictation will be played back with about 1.5 times<br />
the normal speed.<br />
• To return to the normal play-back speed, press the right<br />
selection button » ->1,0x « during fast play-back.<br />
30
PLAy-BACK _______________________________________<br />
Fast forward and rewind<br />
• Move the slide switch to »►►FFWD« or »◄◄ REW«.<br />
– The status bar in the display quickly moves forward or<br />
backward.<br />
Note:<br />
Go to the »FFWD / Rewind« menu item to switch the<br />
speed to very slow, slow or fast.<br />
Inserting an info<br />
During play-back you may insert a new info at your current<br />
dictation position.<br />
• Move the slide switch to » STOP «.<br />
• Select the desired dictation with the navigation buttons<br />
»◄►« (see „Select dictation and listen to it")<br />
• Move the slide switch to »►START«, to listen to the dictation.<br />
• Move the slide switch to » STOP « during play-back,<br />
when you have reached the dictation position where<br />
you want to insert your info message.<br />
• Press the red recording button » DICT«, the red<br />
recording indicator flashes, the black Disc symbol » «<br />
and the Pause symbol » « appear in the display.<br />
• Confirm the menu function with the right selection button<br />
» « (insert recording).<br />
• Select the info function » �« from the shown display to<br />
insert an info and confirm with the selection button » «.<br />
• Move the slide switch to »►START« and speak the info<br />
message to be inserted.<br />
31
PLAy-BACK _______________________________________<br />
- The next highest info number appears in the display,<br />
» �2«, for example.<br />
• Move the slide switch to » STOP « at the end of your<br />
recording.<br />
• To stop, press the red recording button » DICT« or<br />
the left selection button » «.<br />
Inserting an index<br />
During play-back you may insert a new index at your current<br />
dictation position.<br />
• Move the slide switch to » STOP «.<br />
• Select the desired dictation with the navigation buttons<br />
»◄►« (see „Select dictation and listen to it”).<br />
• Move the slide switch to »►START«, to listen to the<br />
desired dictation.<br />
• Move the slide switch to » STOP «, during play-back<br />
when you have reached the position where you want to<br />
insert your index.<br />
• Press the red recording button » DICT«, the red<br />
recording indicator flashes, the black Disc symbol » «<br />
and the Pause symbol » « appear in the display.<br />
• Confirm the menu function with the right selection button<br />
» « (Insert recording).<br />
• Select the index function » « from the shown display to<br />
insert an index and confirm with the selection button<br />
» «.<br />
3
PLAy-BACK _______________________________________<br />
- The next highest info number shortly appears in the<br />
display, for e.g. » 2«.<br />
• Move the slide switch to » STOP «.<br />
• To stop, press the red recording button » DICT« or<br />
the left selection button » «<br />
Search for info or index<br />
• Move the slide switch to »◄◄REW« or press the »►►<br />
FFWD« button.<br />
– At an index and at the beginning of every info message,<br />
the "winding" briefly stops and you will hear one<br />
signal. At the end of an info message you will hear two<br />
signals.<br />
– The message is shown in the display, e.g. » �2« or » 2«.<br />
Note:<br />
It is easier to find short messages and indexes in the<br />
play-back mode.<br />
33
PLAy-BACK _______________________________________<br />
Transcription with foot control<br />
• Connect the foot control* to the » « socket on the<br />
Digta Station*.<br />
• To connect the Digta Station* and the foot control to a<br />
power supply, connect the mains adapter to the »DC IN<br />
5V« socket, or use a USB cable to connect it to a computer<br />
using the »PC/USB« socket.<br />
• Push the slide-switch to » STOP «.<br />
• With the dictation machine switched on, plug it into the<br />
Digta Station*.<br />
Note:<br />
If the automatic computer connection is activated, the<br />
dictation machine will log on to the computer in USB<br />
parallel mode. Call up the menu with the right selection<br />
button. With the navigation buttons, select the<br />
» « symbol for power supply operation and confirm by<br />
pressing the right selection button » «.<br />
• The pedals on the foot control are designed for handsfree<br />
dictation in the default setting. For transcription<br />
mode, you first have to activate »Play-back« in the<br />
»Foot control« menu item. See section “Foot control” in<br />
chapter “SETTINGS IN THE MENU”.<br />
Left pedal<br />
– Reverse;<br />
Middle pedal<br />
– Fast forward;<br />
Right pedal<br />
– Start/stopplay-back.<br />
• Press the foot control.<br />
* Special extras<br />
34
PLAy-BACK _______________________________________<br />
Note:<br />
In menu setting »Foot control play-back«, it is not possible<br />
to edit an existing dictation or create a new dictation.<br />
On pressing the New or Record buttons, the “Play-back<br />
only” message appears.<br />
You can delete dictation as long as it has not been<br />
locked.<br />
Automatic backspace<br />
Every time play-back begins, the current position is rewound<br />
by the specified time, and play-back begins from there. This<br />
means that the part of the dictation most recently listened<br />
to is played back.<br />
– Automatic backspace is available in the following<br />
steps:<br />
Off, 1, 2, 4, 6, 8, 10 seconds (see menu item »Auto<br />
Backspack« in the »Settings« menu).<br />
Note:<br />
Automatic backspace is only possible in conjunction<br />
with the Digta Station and the foot control.<br />
If the device is in the Digta Station, the »Modify« menu<br />
will not appear in the display. It is not possible to delete<br />
or add dictations.<br />
35
MODIFy MENU __________________________________<br />
Editing an existing dictation<br />
You may modify an existing dictation via several menu functions.<br />
• Move the slide switch to » STOP «.<br />
• Select the desired dictation with the navigation buttons<br />
»◄►« (see „Select dictation and listen to it”).<br />
• Press the left selection button »<br />
modify menu.<br />
«, to enter the<br />
• Select between the Delete » «, Insert » «, Priorityon<br />
»PR«, Postpone » « or Lock » « functions.<br />
- According to your selection you will be guided to the<br />
menu items described in the "Deleting a dictation" or<br />
"Recording" chapters.<br />
• Press the left selection button » « to close the menu.<br />
36
MODIFy MENU __________________________________<br />
Setting a priority to a dictation<br />
Note:<br />
The dictation machine must have been configurated with<br />
the corresponding PC software. An author's name has to<br />
be transferred to the dictation machine together with a<br />
maximum priority (smaller than 16).<br />
The single-workstation installation of the PC software evaluates<br />
»no priority« with level 16 and »high priority« with<br />
the maximum author priority which you set.<br />
The optional network installation of the PC software evaluates<br />
level 16 to »no priority«. If »high priority« is set the<br />
level is set to the maximum author priority assigned to the<br />
author by the system administrator.<br />
• Move the slide switch to » STOP « during recording.<br />
• Select the chosen dictation with the navigation buttons<br />
»◄►« (see „Select and listen to a dictation).<br />
• Press the left selection button » «, to go to the<br />
Modify menu.<br />
• Select the »Priority on, PR« priority function from the<br />
display.<br />
– The dictation is marked with a »PR«, displayed above<br />
the time data.<br />
• If the selected dictation already has a priority you can<br />
erase it with the »Priority off, PR« menu item.<br />
37
MODIFy MENU __________________________________<br />
Postpone a dictation<br />
You can prevent the automatic PC transfer of a dictation (via<br />
DSS mover) with the postponed function in the Modify menu<br />
item. Postpone uncompleted dictations before transferring completed<br />
dictations to the transcription office by connecting the<br />
dictation machine via USB.<br />
• Move the slide switch to » STOP «.<br />
• Select the chosen dictation with the navigation buttons<br />
»◄►« (see „Select and listen to a dictation).<br />
• Press the left selection button » «, to go to the<br />
Modify menu.<br />
• Select the » « function (postponed on) with the navigation<br />
buttons »◄►« and confirm with the right selection<br />
button » «.<br />
– The dictation name is displayed inversely.<br />
– The dictation is postponed, that is not being transferred<br />
by the DSS mover.<br />
38
MODIFy MENU __________________________________<br />
Dictation lock<br />
The dictation lock helps to avoid that your dictations are<br />
unintendedly modified or deleted. It doesn't only work in the<br />
dictation machine but it activates the write/erasure protection<br />
in the dictation accompanying note. With such a lock the whole<br />
<strong>Grundig</strong> PC dictation system only allows to modify or delete<br />
a dictation, if this attribute is deactivated on the PC or in the<br />
dictation machine.<br />
• Move the slide switch to » STOP «.<br />
• Select the folder in which your dictation is located (see<br />
“Saving a dictation, selecting a folder”).<br />
• Select the desired dictation using the navigation buttons<br />
»◄►«. The selected dictation name appears in<br />
the display.<br />
• Press the left selection button » « to change the<br />
menu.<br />
• Select the dictation lock symbol » « on the right using<br />
the navigation buttons »◄►«.<br />
• Confirm with the right selection button » «.<br />
– If the dictation is locked you only can select the menu<br />
» « to unlock the dictation » «.<br />
39
Modify<br />
Delete<br />
DELETING A DICTATION _______________________<br />
Deleting an entire dictation<br />
• Move the slide switch to » STOP «.<br />
• Select the folder in which your dictation is located (see<br />
„Saving dictations, selecting a folder“).<br />
• Select the desired dictation with the navigation buttons<br />
»◄►«. The selected dictation name appears in the<br />
display.<br />
• Press the left selection button » «, to change the<br />
menu.<br />
• Confirm the Deleting function » « to change the menu<br />
with the right selection button » «.<br />
• Confirm the » « function in the submenu with the right<br />
selection button » « to delete the selected dictation.<br />
• Confirm the » « query for final deletion of the complete<br />
dictation with the right selection button » «. The<br />
dictation is deleted now.<br />
• If you would not like to delete the dictation, press the<br />
left selection button » «.<br />
40
Delete<br />
DELETING A DICTATON ________________________<br />
Deleting the contents of a folder<br />
Not only can you delete individual dictations but also the<br />
contents of a selected folder or the contents of all folders.<br />
• Move the slide switch to » STOP «.<br />
• Select the main menu featuring the » « symbol with<br />
the right selection button.<br />
• Select the menu command » « and confirm with the<br />
right selection button » «.<br />
• The following symbols will appear in the display:<br />
– Delete selected dictation<br />
– Delete selected folder<br />
– Delete all folders<br />
Note:<br />
If there are more than one author the symbols for<br />
»Delete folder « and »All folders « are not display-<br />
•<br />
ed. This ensures that dictations from another user are not<br />
accidentally deleted.<br />
Using the navigation buttons »◄►« select the icon for<br />
the desired function and confirm by pressing the right<br />
selection button » «.<br />
• Confirm the » « query for final deletion of the selected<br />
folder or all folders with the right selection button » «.<br />
The dictation is deleted now.<br />
• If you would not like to delete the dictation, press the<br />
left selection button » «.<br />
41
Delete<br />
Delete part<br />
DELETING A DICTATON ________________________<br />
Deleting a part of a dictation<br />
• Move the slide switch to » STOP «.<br />
• Select the folder in which your dictation is located (see<br />
“Saving a dictation, selecting a folder”).<br />
• Select the desired dictation using the navigation buttons<br />
»◄►«. The selected dictation name appears in<br />
the display.<br />
• Move the slide switch to »►START« and to » STOP «<br />
at the desired position in the dictation.<br />
• Press the left selection button » « to change the<br />
menu.<br />
• Confirm the Deleting function » « to change the menu<br />
with the right selection button » «.<br />
• Select the » « symbol in the submenu that now<br />
appears and confirm by pressing » «.<br />
• Press the right selection button » « to set the starting<br />
position of the text to be deleted.<br />
• Using the slide switch, now search for the desired end<br />
position of the text to be deleted.<br />
• Press the right selection button » « to set the end<br />
position.<br />
• Press the right selection button » « once again. The<br />
selected part is deleted.<br />
• If you would not like to delete the part of the dictation,<br />
press the left selection button » «.<br />
4
THE MENU ________________________________________<br />
Functions in the menu at a glance<br />
• Press the right selection button » «.<br />
With the navigation buttons »◄►« you may select the<br />
following functions and confirm them with » «<br />
– Selectinga folder (mainfolderand subfolder<br />
A,B,C,D or E); for sorting new dictations<br />
and playing back the dictations stored in the<br />
various folders.<br />
– Delete; delete the current dictation, delete<br />
all dictations in the current folder, delete all<br />
dictations in all folders.<br />
– Settings (see the following page).<br />
Functions available if the device is connected to a PC<br />
– USB/parallel operation (PC file transfer<br />
and PC microphone operation)<br />
The PC identifies the device as USB<br />
removable medium for dictations/file transfers<br />
to and from the PC. In addition the<br />
device is logged on for USB audio and<br />
USB HID. Therefore the dictation machine<br />
can be used as PC microphone, for ex. for<br />
direct dictation to the <strong>Grundig</strong> PC software<br />
or to a voice recognition system.<br />
– Power supply operation (USB power supply,<br />
the PC does not detect the device) for<br />
recording / play-back as in battery operation.<br />
43
THE MENU ________________________________________<br />
Settings of the menu at a glance<br />
• Press the right selection button » « and then the settings menu<br />
item » «.<br />
• Now you can select the following settings using the navigation buttons<br />
»◄►«:<br />
– Set index or change the play-back speed to 1.5 times<br />
faster with right selection button during play-back.<br />
– Set the microphone sensitivity.<br />
– Voice activation. If enabled the dictation will be automatically<br />
suspended if the dictation is interrupted.<br />
– Select the time until the power saving mode shall activate.<br />
30 minutes after this set time the Digta will completely switch off.<br />
– Switch off audio signals.<br />
– Switch display lighting on/off.<br />
– Change date/time.<br />
– Activate workflow functions (typist, dictation type, group).<br />
– USB parallel operation: automatically via USB connection<br />
or hand-operated.<br />
– Switch off the speakers for play-back with headphones in<br />
the Digta Station*.<br />
– Changing the fast forward / rewind speed.<br />
– Foot control operation for recording or play-back.<br />
– Changing the automatic backspace time.<br />
– Reset the dictation counter to One.<br />
PIN* – Change the personal identification number (PIN)*.<br />
– Information about serial number and firmware version.<br />
– Reformat the data storage device. Caution data loss!<br />
All dictations and other files will be erased!<br />
– Restore the default settings. Caution data loss!<br />
All dictations, files and all settings will be erased.<br />
– Selection of the display language. * Special extras<br />
44
Settings<br />
Index in play<br />
SETTINGS IN THE MENU ______________________<br />
Setting an index during play-back<br />
You may choose whether the right selection button change<br />
the speed or sets an index during play-back.<br />
• Select the menu item »Index in play « in the settings »<br />
« menu and confirm with the right selection button »<br />
«.<br />
• Select the Index function »Index on « or Change<br />
Speed function 1,0 / 1,5 »Index off →1,5« and confirm<br />
with the right selection button » «.<br />
45
Settings<br />
Mic. Sensitivity<br />
SETTINGS IN THE MENU ______________________<br />
Microphone sensitivity<br />
You can select one of three levels of noise sensitivity for<br />
your microphone.<br />
• Go to the menu item »Microphone sensitivity « and<br />
confirm with » «.<br />
• Set the sensitivity of your microphone using the navigation<br />
buttons »◄►«. The selected function turns black.<br />
– Recommended for loud speakers. Prevents<br />
overmodulation for dictations which are processed<br />
by a voice recognition system.<br />
– Normal setting for dictations.<br />
– Conferencing. The machine can still record<br />
accurately if it is positioned on a conference<br />
table.<br />
• Confirm with » «.<br />
46
Settings<br />
Voice activat.<br />
SETTINGS IN THE MENU ______________________<br />
voice activation<br />
If the function “Voice Activation” is active, the recording<br />
will be interrupted if there is a pause in speaking in a quiet<br />
environment. If the dictation machine does not turn off,<br />
select a lower microphone sensitivity, for example for normal<br />
dictation or persons who speak loudly. As soon as the<br />
speaker starts to speak again, the recording will continue.<br />
• Go to the menu command »Voice activation « and<br />
confirm with » «.<br />
• Select »Voice activation on « or »Voice activation<br />
off «. The selected function is displayed inversely<br />
(white on a black background).<br />
• Confirm with » «.<br />
47
Settings<br />
Sleep mode<br />
SETTINGS IN THE MENU ______________________<br />
Automatic power off<br />
With the „Sleep mode“ » « function you determine<br />
whether the device turns to a power-saving "sleep mode"<br />
after some minutes or has to be switched off manually. The<br />
device will be immediately switched on again as soon as<br />
any key is pressed.<br />
Move the On/Off switch to the »OFF/HOLD« position to<br />
switch off the device completely. If you don't switch off<br />
the machine manually it will switch off itself after about<br />
30 minutes. Move the On/Off switch to »OFF/HOLD« and<br />
then again to »ON« to switch on the device again.<br />
• Select the menu item » « in the settings menu » «<br />
and confirm with the right selection button » «.<br />
• Using the navigation buttons »◄►« select the time<br />
(„never“» «, » «, » « or » «) to determine after<br />
which time the device shall turn to the power saving<br />
"sleep mode".<br />
• Confirm with the right selection button » «.<br />
– During sleep mode a starry sky appears in the display.<br />
48
Settings<br />
Signals<br />
SETTINGS IN THE MENU ______________________<br />
Audio signals<br />
The »Audible signals« function » « enables you to turn<br />
the acknowledgement and signal tones on and off.<br />
• Select the menu item »Signals « in the settings menu<br />
» « and confirm with the right selection button » «.<br />
• Use the navigation buttons »◄►« to switch on all<br />
signals » « or only the warning signals » «, or to<br />
switch off all signals » «. Confirm your choice with the<br />
right selection button » «.<br />
Note:<br />
If all signals are switched off you will not hear a signal<br />
when the memory is full or the rechargeable battery is<br />
flat.<br />
If you dictate without looking at the display, the device<br />
may switch off with no signal tone, and you may not<br />
notice.<br />
If only the warning signals are switched on there won't<br />
be any special blips, neither the readiness signal after<br />
switching on nor the info and index signals.<br />
49
Settings<br />
Light<br />
SETTINGS IN THE MENU ______________________<br />
Illumination<br />
This function enables you to turn the display lighting on<br />
and off.<br />
• To do this go to the menu item »Light « and confirm<br />
with » «.<br />
• Using the navigation buttons »◄►« select the seconds<br />
(„off“, »15 seconds« or »30 seconds«). The selected<br />
function is displayed inversely. Even in switched<br />
on mode the backlighting only remains on for several<br />
seconds, to save energy.<br />
• Confirm with » «.<br />
50
Settings<br />
Time/Date<br />
SETTINGS IN THE MENU ______________________<br />
Time, date<br />
The time and date a dictation is recorded are indicated for<br />
each dictation (PC display only).<br />
• Go to the menu command »Time, Date « and confirm<br />
with » «.<br />
• You can now enter or change the year, month, day,<br />
hours and minutes successively using the navigation<br />
buttons »▼▲«. The current function is shown on black<br />
background.<br />
• Confirm each of your settings with » «. The setting is<br />
saved, and the next point is activated.<br />
• End your settings with » «.<br />
• To change your settings, go back to the menu command<br />
» «.<br />
51
Settings<br />
Typist<br />
SETTINGS IN THE MENU ______________________<br />
Typist<br />
The »Typist« function is used to select the transcriber who<br />
will receive your dictation.<br />
• Go to the submenu »Workflow lists « in the settings<br />
menu » « and confirm with the right selection button<br />
» «.<br />
• Select the »Typist « menu item and confirm with the<br />
» « button.<br />
• Select »On request «, »No entry « or »Automatic<br />
«.<br />
– »On request«: A selection of transcribers will be<br />
offered for each new dictation;<br />
– »No entry«, no typist is chosen for the dictation;<br />
– »Automatic«, each new dictation will be assigned to<br />
the same transcriber.<br />
• Confirm your choice with the » « button.<br />
Note:<br />
If you have a new dictation, or if you have selected the<br />
»Automatic« function, you select your transcriber<br />
from the list with the navigation buttons »◄►«. »No<br />
entry « appears in the display if no transcribers were<br />
defined.<br />
Confirm with the » « button.<br />
You may create individual preallocations for the list<br />
using the PC software.<br />
5
Settings<br />
Dictation type<br />
SETTINGS IN THE MENU ______________________<br />
Dictation type<br />
The »Dictation type« function is used to select the template<br />
to be used for the dictation: for eg. fax, letter, or report.<br />
• Go to the submenu »Workflow lists « in the settings<br />
menu » « and confirm with the right selection button<br />
» «.<br />
• Select the »Dictation type « menu item and confirm<br />
with the » « button.<br />
• Select »On request «, »No entry « or »Automatic<br />
«.<br />
– »On request«: A selection of formats will be offered<br />
for each new dictation;<br />
– »No entry«, no dictation type was chosen;<br />
– »Automatic«, each new dictation shows the same<br />
dictation type.<br />
• Confirm your choice with the » « button.<br />
Note:<br />
For a new dictation, or if you have selected the<br />
»Automatic« function, you select your dictation type<br />
from the list with the navigation buttons »◄►«. »No<br />
entry « appears in the display if no dictation types<br />
were defined.<br />
Confirm with the » « button.<br />
You may create individual preallocations for the list<br />
using the PC software.<br />
53
Settings<br />
Group<br />
SETTINGS IN THE MENU ______________________<br />
Group<br />
The »Group« function is used to assign your dictation to a<br />
specific group or department.<br />
• Go to the submenu »Workflow lists « in the settings<br />
menu » « and confirm with the right selection button<br />
» «.<br />
• Select the »Group « menu item and confirm with the<br />
» « button.<br />
• Select »On request «, »No entry « or »Automatic<br />
«.<br />
– »On request«: a group may be selected for each new<br />
dictation;<br />
– »No entry«: no group selected;<br />
– »Automatic«: each new dictation has the same<br />
group.<br />
• Confirm your selection with the » « button.<br />
Note:<br />
For a new dictation, or if you have selected the<br />
»Automatic« function, you select your group from the<br />
list. »No entry « appears in the display if no groups<br />
were defined.<br />
Confirm with the » « button.<br />
You may create individual preallocations for the list<br />
using the PC software.<br />
54
Settings<br />
USB connection<br />
SETTINGS IN THE MENU ______________________<br />
USB connection automatic / manual<br />
You can choose whether the dictation machine automatically<br />
switches to USB parallel operation when connected<br />
to a PC‘s USB connection or whether you want to activate<br />
this function manually.<br />
• Select the menu item »USB connection « in the settings<br />
menu » « and confirm with the right selection<br />
button » «.<br />
• Select »Man. connect « (manual USB/parallel operation)<br />
and confirm with the right selection button » «.<br />
- The dictation machine remains in dictation mode<br />
when USB connected. The PC supplies it with<br />
power.<br />
• Select »Auto connect « (automatic USB parallel operation)<br />
and confirm with the right selection button » «.<br />
- If the dictation machine is already switched on when<br />
connected to USB the USB parallel operation » «<br />
sets up automatically. The computer identifies the<br />
device as removable medium. USB audio and USB<br />
HID are activated. Now you can both transfer data<br />
between PC and dictation machine, and use the dictation<br />
machine as USB microphone.<br />
55
Settings<br />
Speaker<br />
SETTINGS IN THE MENU ______________________<br />
Speaker<br />
You may switch off the loudspeaker of your dictation<br />
machine with this function if you want to listen to your dictations<br />
via headphones connected to the Digta Station*.<br />
• Select the menu item »Speaker « in the settings<br />
menu » « and confirm with the right selection button<br />
» «.<br />
• Select »Speakers on « or »Speakers off «.<br />
• Confirm with the right selection button » «.<br />
Note:<br />
The speaker of the dictation machine automatically<br />
switches off if an earphone with earphone connection<br />
is plugged on.<br />
* Special extras<br />
56
Settings<br />
FFWD / Rewind<br />
SETTINGS IN THE MENU ______________________<br />
Fast forward / rewind<br />
This function allows you to set the speed for fast forward<br />
and rewind. You can select very slow, slow and fast.<br />
• Go to menu item »FFWD/Rewind « and confirm with<br />
» «.<br />
• Use the navigation buttons »◄►« to select the speed.<br />
The selected function turns black.<br />
– Very slow FFWD/Rewind speed (approx. 1/3 of<br />
the fast setting)<br />
– Slow FFWD/Rewind speed (approx. 2/3 of the<br />
fast setting)<br />
– Fast FFWD/Rewind<br />
• Confirm with » «.<br />
57
Settings<br />
Foot control<br />
SETTINGS IN THE MENU ______________________<br />
Foot control<br />
The activated dictation device must be in the Digta Station*,<br />
and the » « symbol for dictation in power supply mode<br />
has to have been confirmed in the menu. The »Foot control«<br />
function allows you to select whether the foot control*<br />
is used for transcription mode or hands-free dictation.<br />
• Go to » « in the “Foot control” menu item and confirm<br />
with right-hand selection button » «.<br />
• Now choose »Recording « or »Play-back « and<br />
confirm with right-hand selection button » «.<br />
Foot control assignment for recording<br />
The pedals on the foot control are designed for handsfree<br />
dictation.<br />
Left pedal<br />
– Reverse;<br />
Middle pedal<br />
– Pressbriefly to switch recording on or off (same<br />
function as the red recording button » DICT« on<br />
the dictation machine);<br />
– Holddown (approx. 1.5 seconds) for a new dictation.<br />
The red recording indicator lights up and a<br />
new dictation name is displayed (same function<br />
as the »new« button on the dictation machine);<br />
Right pedal<br />
– Start/stop recording and play-back (same function<br />
as the slide switch on the dictation machine).<br />
Note:<br />
Select the fast forward function using the slide switch on<br />
the dictation machine.<br />
Automatic backspace settings only apply in transcription<br />
mode. In hands-free dictation mode, the right pedal<br />
does not perform automatic backspaces.<br />
* Special extras<br />
58
SETTINGS IN THE MENU ______________________<br />
Foot control assignment for play-back<br />
The pedals on the foot control are designed for transcription<br />
operation.<br />
Left pedal<br />
– Reverse;<br />
Middle pedal<br />
– Fast forward;<br />
Right pedal<br />
– Start/stopplay-back.<br />
59
Settings<br />
Auto Backspace<br />
SETTINGS IN THE MENU ______________________<br />
Automatic backspace<br />
Here you can set the length of automatic backspace to<br />
between 0 and 10 seconds. Every time play-back begins,<br />
the current position is rewound by the specified time, and<br />
play-back begins from there.<br />
Note:<br />
The »Auto Backspace» menu item is only visible if the<br />
machine is in the Digta Station*. The automatic backspace<br />
function is only available when the foot control<br />
is set to play-back. In hands-free dictation mode (foot<br />
control set to record), the right pedal does not perform<br />
automatic backspace.<br />
• Go to menu item »Auto Backspace « and confirm<br />
with » «.<br />
• Use the navigation buttons »◄►« to select the duration<br />
of the automatic backspace. The selected function turns<br />
black.<br />
– Automatic backspace off. Normal setting for<br />
play-back.<br />
– 2, 4, 6, 8, 10 seconds. Duration of play-back<br />
from the most recent dictation position.<br />
• Confirm with » «.<br />
* Special extras<br />
60
Settings<br />
Reset counter<br />
Settings<br />
Reset counter<br />
SETTINGS IN THE MENU ______________________<br />
Dictation counter<br />
Using the »Dictation counter« function, you can reset the<br />
dictation counter. The dictation counter is able to count till<br />
9999. You should not reset the counter too often to avoid<br />
conflicts with dictations having the same name and being<br />
stored on the PC.<br />
• Go to the »Reset counter « menu item and confirm<br />
with » «.<br />
• The »Reset counter « and » « symbols appear in<br />
the display.<br />
• Confirm with » «.<br />
– The next new dictation then has the lowest free<br />
number (for eg.: »DICT0005«).<br />
61
Settings<br />
Change PIN<br />
SETTINGS IN THE MENU ______________________<br />
Modifying the PIN*<br />
The personal identification number (PIN) protects the<br />
dictation machine against unauthorized use. The factory<br />
settings are 0000. Do only enter a sequence of digits<br />
known to yourself. You have to enter the PIN each time you<br />
switch on the dictation machine as well as each time you<br />
reactivate it from the "Sleep mode".<br />
• Select the »PIN«*menu item from the settings » «<br />
menu and confirm with the right selection button » «.<br />
• Enter the old PIN* via the navigation buttons » ◄►«<br />
(confirm the digits with the right selection button » «)<br />
– Each entered PIN* will be overwritten through a " ٭ "<br />
symbol for protection reasons.<br />
• Enter the new PIN* via the navigation buttons with the<br />
right selection button » «) and repeat entering the<br />
new PIN* for security reasons.<br />
* Special extras<br />
6
Settings<br />
Version<br />
SETTINGS IN THE MENU ______________________<br />
version<br />
Using the »Version« function, the version (firmware) of the<br />
machine’s software is displayed.<br />
• Go to the »Version « menu item and confirm with<br />
» «.<br />
– The serial number of your dictation machine and the<br />
version number of the firmware (software) appear in<br />
the display.<br />
Note:<br />
For information on new software versions call the<br />
»Configuration => Update Server« function in the PC<br />
software or visit us on our Website:<br />
www.grundig-gbs.com.<br />
63
Settings<br />
Formatting<br />
Settings<br />
Format., delete all<br />
Format., delete all<br />
Format., delete all<br />
SETTINGS IN THE MENU ______________________<br />
Formatting<br />
With the »Formatting« function you reformat the internal<br />
memory of your dictation machine or a replaceable, external<br />
memory card.<br />
Caution data loss! This function will delete all files and<br />
dictations on your dictation machine.<br />
• Select »Formatting « menu item in the settings menu<br />
and confirm with the right selection button » «.<br />
Note:<br />
Make sure an external memory card is plugged in if you<br />
do not want to delete the internal memory.<br />
• Confirm the complete formatting » « of the memory<br />
or the memory card with the right selection button » «<br />
– An egg-timer appears during the formatting process;<br />
the progress is illustrated by means of a status bar.<br />
Directories and files with administrative data are created<br />
on the internal memory or the external memory card<br />
as well. For this reason not the entire memory capacity<br />
is available for recording dictations.<br />
Note:<br />
The internal memory and the external memory card may<br />
not be formatted as a removable disk with a PC formatting<br />
function.<br />
64
Settings<br />
Factory setting<br />
SETTINGS IN THE MENU ______________________<br />
Default settings<br />
Using the »Factory setting« function, you restore the factory<br />
settings of the machine.<br />
Caution data loss! This function will delete all data and<br />
settings on your dictation machine!<br />
• Go to the » « menu item (see chapter „Navigation in<br />
the menus“) and confirm with » «.<br />
• The symbols » « and » « appear in the display.<br />
• Confirm with » «.<br />
Your device will be reset to the following settings:<br />
Folder – main folder;<br />
Play-back – right selection button for speed change;<br />
Microphone sensitivity – dictation low (middle sensitivity);<br />
voice Activation – off;<br />
Switch off automatically – after 5 minutes;<br />
Audio signals – 15 seconds;<br />
Lighting – automatic;<br />
Time, date – 01.01.2005, 00:00;<br />
workflow lists – Typist, dictation type, group automatic;<br />
USB connection – automatic connection;<br />
Speaker– on;<br />
FFwD / rewind – Fast;<br />
Foot control – Recording;<br />
Auto Backspace – Automatic backspace off;<br />
Dictation counter – 1;<br />
PIN* – retained, not reset to 0000;<br />
Language – English<br />
All dictations will be deleted; Preallocation for the dictation<br />
accompanying note will be reset to »No entry«. The<br />
author's name will be set to »DICT«.<br />
* Special extras<br />
65
Settings<br />
Language<br />
SETTINGS IN THE MENU ______________________<br />
Language<br />
This function makes for the language of the menu display.<br />
• Select the » « language menu item and confirm with<br />
the right selection button » «.<br />
• Select the desired language with the navigation buttons<br />
»◄►« and confirm with the right selection button<br />
» «.<br />
66
OPERATION wITH <strong>DIGTA</strong> STATION* ________<br />
Digta Station*<br />
The Digta Station* serves as communication interface<br />
between the Digta and the PC, i.e. the charging unit and<br />
the Digta stand. A foot control and an earphone may be<br />
connected to the Digta Station* (not included in delivery).<br />
USB interface<br />
You can exchange data via the USB interface (green indicator<br />
at the Digta Station*) of the PC.<br />
Additionally you may use a USB audio function to dictate<br />
into the <strong>Grundig</strong> PC software or in voice recognition<br />
systems.<br />
Foot control<br />
The connection of a foot control makes hands-free dictation<br />
and transcription mode possible.<br />
Charging unit, power supply<br />
When plugging the power supply (yellow indicator at the<br />
Digta Station*) the rechargeable battery is charged in the<br />
Digta. The foot control and the earphone are supplied by<br />
the power supply and may be used without connecting a<br />
PC via USB.<br />
* Special extras<br />
67
COMMUNICATION wITH THE PC _____________<br />
The <strong>Grundig</strong> PC software<br />
The <strong>Grundig</strong> PC software allows you to transfer your dictations<br />
to your PC. You immediately have an overview of all your work<br />
and can also listen to the dictations on your notebook. Send<br />
your dictations to a speech recognition system – or send voice<br />
mail through a connected mail system.<br />
If your office organization uses the digital dictation system from<br />
<strong>Grundig</strong> <strong>Business</strong> <strong>Systems</strong> the Digta and the <strong>Grundig</strong> PC software<br />
will make you a mobile member on the dictation network.<br />
You have all author and transcriber addresses at your fingertips<br />
for sending dictations. Your typing pool is perfectly organized<br />
with dictations identified by dictation type, deadline, and priority.<br />
If all of your dictations have the same priority, simply connect<br />
the USB cable to your Digta. All dictations will be sent to the<br />
preset transcriber and your Digta will then be immediately available<br />
for further dictations.<br />
System requirements<br />
Pentium processor (500 MHz or higher)<br />
Operating systems:<br />
WIN 2000 SP4 Rollup1<br />
WIN XP SP2<br />
WIN Vista<br />
USB 1.1 or 2.0 serial interface<br />
For e-mail connection: MAPI-compatible mail system<br />
(for eg. Microsoft Outlook)<br />
68
COMMUNICATION wITH THE PC _____________<br />
Connecting and separating the dictation machine<br />
and the PC<br />
• Use the USB cable to connect the dictation machine to<br />
the USB interface at the PC via the »PC/USB« port.<br />
– The dictation machine begins to charge the rechargeable<br />
batteries. The green LED is blinking!<br />
• Move the On/Off switch to »ON« to switch on the dictation<br />
machine.<br />
– Now you are prompted for the PIN*.<br />
warning:<br />
Disconnect the USB interface via the task bar, as otherwise<br />
the transfer may not be complete.<br />
Note:<br />
The <strong>Grundig</strong> PC software can only be connected to one<br />
dictation machine at a time. If you connect a second dictation<br />
machine to the USB interface, the PC will not detect it,<br />
i.e. Windows will only display one removable disk drive.<br />
USB parallel operation<br />
PC file transfer<br />
• Connect the dictation machine to the PC via the USB<br />
interface.<br />
– If the dictation machine is already switched on the<br />
USB parallel operation mode » « sets up automatically.<br />
The computer identifies the device as removable<br />
medium and as USB audio/HID device.<br />
Now you can transfer data between PC and dictation<br />
machine.<br />
• Select USB parallel operation » « with the navigation<br />
buttons »◄►« in the main menu if the automatic USB<br />
connection is switched off and confirm with the » «<br />
button (see chapter “USB connection automatic /<br />
manual”). * Special extras<br />
69
COMMUNICATION wITH THE PC _____________<br />
PC microphone operation, USB Audio, USB HID<br />
• Use the USB cable to connect the dictation machine to<br />
the USB interface at the PC via the »PC/USB« socket.<br />
• Move the On/Off switch to »ON« to switch on the dictation<br />
machine.<br />
– Press the » « button to do the microphone settings<br />
(the current settings are displayed on the right edge)<br />
You can set the microphone sensitivity via » « (see<br />
chapter „Settings in the menu / microphone sensitivity“).<br />
• Select a sound program on your PC now, e.g. a <strong>Grundig</strong><br />
dictation software, a voice recognition system or the<br />
Windows audiorecorder.<br />
• Start the recording in your sound program and speak<br />
the message.<br />
– The red LED at the dictation machine lights up, the<br />
disc symbol is spinning.<br />
• Press the » « button and hold on pressing it to mute<br />
the microphone.<br />
– No signal is transferred to the recording software,<br />
i.e. a voice recognition system no longer recognizes<br />
any sounds. The red LED is blinking and the disc<br />
symbol stops spinning.<br />
If play-back is running on your sound program or voice<br />
recognition program, the green light emitting diode lights<br />
up and you will listen to the recordings from the speakers<br />
of the Digta.<br />
If you are using the dictation machine as PC microphone<br />
of the <strong>Grundig</strong> DigtaSoft dictation software, the keys and<br />
slide switch of the dictation machine are programmed with<br />
functions of the dictation software (USB-HID).<br />
70
COMMUNICATION wITH THE PC _____________<br />
With the supplied software "AdapterServer" shortcuts and<br />
PC functions may be allocated to the user controls of the<br />
dictation machine for PC microphone operation. Install the<br />
Adapter server and find out more about the configuration<br />
options in its help function or its PDF instruction manual.<br />
Configuration of the dictation accompanying note<br />
The accompanying note for the dictation, as it is called,<br />
contains various information such as the author’s name,<br />
the transcriber’s name and the type of dictation which<br />
are included with each DSS dictation. You can enter such<br />
information into the completed dictation using the PC software.<br />
If you want to send all your dictations with the same<br />
information, you can configure your dictation machine<br />
accordingly.<br />
If you are a member of a pre-installed dictation network,<br />
you will find all available settings in the PC software under<br />
»Configuration«. If you are a single user without connection<br />
to a local network, you can create users, dictation types<br />
and groups in the PC software in the »Settings« menu with<br />
the function »General Settings«. You will then be able to<br />
send your name as author, the maximum author priority,<br />
ten transcribers, ten dictation types and ten group designations<br />
to your dictation machine under »Configuration«.<br />
When you turn on your dictation machine, your name as<br />
author will be briefly displayed instead of »DICT«. The<br />
accompanying note for the dictation may be individually<br />
filled in for each new dictation via the workflow lists.<br />
71
FIRMwARE UPDATE ____________________________<br />
The firmware update may be used to keep your dictation machine<br />
in step with the latest developments (firmware = device software).<br />
You will find the current firmware version in the Internet.<br />
The enclosed CD includes the firmware current at the time of<br />
delivery.<br />
Carrying out a firmware update<br />
• Switch on the PC and start Windows.<br />
• Use the USB cable to connect the dictation machine to<br />
the PC.<br />
• Switch on the dictation machine.<br />
• The » « symbol appears on the display of the device<br />
and the dictation machine is identified by the PC as a<br />
removable disk.<br />
• You will find the<br />
»gh0<strong>415</strong>.hex«<br />
file on the »www.grundig-gbs.com« website under<br />
Service/Download/Firmware/ZIP, as well as in the<br />
»Firmware\Digta0<strong>415</strong>« folder on the provided CD.<br />
Copy this file to the »System« folder in the dictation<br />
machine drive (removable disk).<br />
• The dictation machine’s recording LED flashes during<br />
transfer. Wait until data transfer is complete.<br />
• Then, from the task bar, select the function for removing<br />
removable disks, as otherwise the transfer may<br />
not be complete.<br />
7
FIRMwARE-UPDATE ____________________________<br />
• Disconnect the USB plug from the dictation machine.<br />
• Confirm »LOAD UPDATE« with the » « button.<br />
Do not interrupt the loading process for any reason.<br />
This could make the dictation machine inoperative.<br />
• Then format the memory in the dictation machine (see<br />
„Settings in the menu / Formatting").<br />
Note:<br />
If you wish to load an old firmware once again, press the<br />
»new« button and the right selection button simultaneously<br />
when switching the Digta <strong>415</strong> on.<br />
73
<strong>DIGTA</strong>SCAN 404 BARCODE READER ______<br />
Using barcodes<br />
You can scan a barcode for each new dictation. The<br />
detected codes are stored in the header of a DSS file in the<br />
“Topic” field, and thus displayed in the note which accompanies<br />
the dictation. Other programs which evaluate the<br />
DSS header (for example a database system), can classify<br />
the dictations using the codes.<br />
The scanned codes can then be displayed or automatically<br />
processed by software that analyzes the DSS header<br />
– e.g. a database system.<br />
The detected codes are displayed by the PC software<br />
supplied with the portable dictation machine and by the<br />
desktop software:<br />
– in the overview of the accompanying note for the<br />
dictation (see also “Dictation accompanying note” in<br />
the program help)<br />
– in the dictation list (if the “Topic” field is enabled, see<br />
“Sorting” in the program help).<br />
Note:<br />
We offer a software development kit (SDK) for integrators<br />
who want to evaluate the note accompanying the<br />
dictation, for example in order to create links to database<br />
entries.<br />
74
KLICK!<br />
<strong>DIGTA</strong>SCAN 404 BARCODE READER ______<br />
Plugging in<br />
Both mechanically and electrically, the DigtaScan connection<br />
is designed in the same way as a memory card.<br />
Note:<br />
Only plug in or unplug the DigtaScan when the portable<br />
dictation machine is switched off.<br />
• Plug the DigtaScan into your dictation machine as<br />
depicted below:<br />
Note:<br />
Make sure that the latch on the back of the DigtaScan<br />
snaps securely in.<br />
75
<strong>DIGTA</strong>SCAN 404 BARCODE READER ______<br />
Unplugging<br />
• Remove the locking screw (if present).<br />
• Press the latch on the back of the DigtaScan. The Digta<br />
Scan is unlocked and you can now pull it out of the<br />
memory card slot.<br />
See the illustration on previous page.<br />
76
Scanner<br />
<strong>DIGTA</strong>SCAN 404 BARCODE READER ______<br />
Switching the DigtaScan on and off<br />
• The DigtaScan must be inserted and latched into the<br />
portable dictation machine.<br />
Only when the DigtaScan is plugged in are the associated<br />
menu items available on the dictation machine.<br />
• Switch on the dictation machine.<br />
• Push the slide switch to » STOP «.<br />
• Press the » « button.<br />
• Use the navigation buttons »◄►« to select the main<br />
menu » « and then press the » « button.<br />
• Use the navigation buttons »◄►« to select the submenu<br />
» « and then press the » « button.<br />
• Use the navigation buttons »◄►« to select » « or<br />
» « and then press » «.<br />
– » «, when you create dictations with the »new« button,<br />
you are prompted to scan. You can now scan in<br />
a barcode and store it in the dictation accompanying<br />
note.<br />
– » «, when you create dictations with the »new«<br />
button, you are not prompted to scan even though<br />
the DigtaScan is plugged in.<br />
Note:<br />
The selected setting is retained even if the DigtaScan<br />
is removed from the portable dictation machine. However,<br />
you can only change the setting when the Digta<br />
Scan is attached.<br />
77
Scanner<br />
Scan 404<br />
<strong>DIGTA</strong>SCAN 404 BARCODE READER ______<br />
Scanning a barcode for a new dictation<br />
The DigtaScan must be connected to the portable dictation<br />
machine, enabled and configured for the barcodes<br />
you are using.<br />
• Switch on the dictation machine.<br />
• Push the slide switch to » STOP «.<br />
• Press the »new« button.<br />
– » « and » « appear in the display.<br />
• If you do not want to scan a barcode into the dictation<br />
accompanying note, press the »»<br />
tinue with your dictation as usual.<br />
« button and con-<br />
• If you want to scan a barcode, point the barcode reader<br />
at the barcode as pictured and press the » « button.<br />
– The device now scans the code with a red laser<br />
beam. The machine acknowledges the successful<br />
reading of the code with a single signal tone, and the<br />
laser beam shuts off.<br />
– The scanned barcode appears in the display.<br />
• If you want to include the barcode as displayed in the<br />
dictation, press the » « button.<br />
• If you do not want to include the barcode in the dictation,<br />
press the » « button and continue with your dictation<br />
as usual.<br />
78
Scanner<br />
<strong>DIGTA</strong>SCAN 404 BARCODE READER ______<br />
Note:<br />
If the machine cannot read a code, it emits a double signal<br />
and displays the message »SCAN FAILS REPEAT ?«.<br />
Confirm the error message and repeat the scan procedure<br />
with » « or cancel it and continue dictating without<br />
barcodes by pressing » «.<br />
Notes:<br />
A maximum of 32 digits (two lines) of the scanned<br />
barcode can be displayed.<br />
Barcodes that you have scanned and included in<br />
dictations with » « are stored in the “Topic” field in the<br />
new dictation’s accompanying note.<br />
Displaying a barcode for a dictation<br />
• Push the slide switch to » STOP «.<br />
• Use the navigation buttons »◄►« to select the dictation.<br />
– If the dictation has a barcode, »ID« is displayed.<br />
• Press the » « button.<br />
• Use the navigation buttons »◄►« to select the main<br />
menu » « and then press the » « button.<br />
• Use the navigation buttons »◄►« to select » « and<br />
then press the » « button.<br />
– The barcode is displayed.<br />
79
Scanner<br />
<strong>DIGTA</strong>SCAN 404 BARCODE READER ______<br />
Scanning a barcode for an existing dictation<br />
• Switch on the dictation machine.<br />
• Push the slide switch to » STOP «.<br />
• Use the navigation buttons »◄►« to select the dictation<br />
for which the barcode is to be scanned.<br />
• Press the right button » «.<br />
• Use the navigation buttons »◄►« to select the main<br />
menu » « and then press the » « button.<br />
• Use the navigation buttons »◄►« to select » « and<br />
then press the » « button.<br />
– » « and » « appear in the display, along with the<br />
•<br />
number of the dictation.<br />
Point the reader at the barcode and press the<br />
button.<br />
» «<br />
•<br />
– The device now scans the code with a red laser<br />
beam. The machine acknowledges the successful<br />
reading of the code with a single signal tone, and the<br />
laser beam shuts off.<br />
– The scanned barcode appears in the display.<br />
If you want to include the barcode as displayed in the<br />
dictation, press the » « button.<br />
– »ID« is shown in the display.<br />
80
Scanner<br />
<strong>DIGTA</strong>SCAN 404 BARCODE READER ______<br />
Searching for a dictation belonging to barcode<br />
• Switch on the dictation machine.<br />
• Push the slide switch to » STOP «.<br />
• Press the »» « button.<br />
• Use the navigation buttons »◄►« to select » « and<br />
then press the » « button.<br />
• Use the navigation buttons »◄►« to select » « and<br />
then press the » « button.<br />
• Point the reader at the barcode and press the »<br />
ton.<br />
– The scanned barcode appears in the display.<br />
«but-<br />
• Press » « to confirm the barcode.<br />
– The number of the dictation is shown under the barcode.<br />
• To listen to the dictation, press » « again and push the<br />
slide switch to »► START«.<br />
81
Scanner<br />
<strong>DIGTA</strong>SCAN 404 BARCODE READER ______<br />
Deleting a barcode from a dictation<br />
• Push the slide switch to » STOP «.<br />
• Use the Unavigation buttons »◄►« to select the dictation<br />
whose barcode is to be deleted.<br />
• Press the » « button.<br />
• Use the navigation buttons »◄►« to select » « and<br />
then press the » « button.<br />
• Use the navigation buttons »◄►« to select » « and<br />
then press the » « button.<br />
– The barcode and the dictation number are displayed.<br />
• Press » « to delete the barcode.<br />
8
<strong>DIGTA</strong>SCAN 404 BARCODE READER ______<br />
Configuring the DigtaScan barcode reader<br />
Default symbologies<br />
In the default setting, only barcode symbology EAN-13 is<br />
enabled.<br />
If you use different symbologies, you can configure the<br />
DigtaScan to work with them.<br />
If you would like to optimize the code recognition, we recommend<br />
that you enable only those symbologies that you<br />
actually use. The lower risk of confusion increases the<br />
recognition accuracy.<br />
Programming code table<br />
We provide a table with programming codes in barcode<br />
format.<br />
You can open this PDF table with Acrobat Reader*.<br />
You can print the required programming codes and then<br />
use them to configure the barcode reader. If the table is not<br />
supplied with your DigtaScan or you need codes it does<br />
not contain, please visit our Internet download centre:<br />
http://www.grundig-gbs.com<br />
Our Internet site also lists our Customer Service address<br />
and hotline number.<br />
* Download for free at http://www.adobe.de/products/<br />
acrobat/readstep.html<br />
83
<strong>DIGTA</strong>SCAN 404 BARCODE READER ______<br />
Preparing settings<br />
You can change the symbology settings (see also “Default<br />
symbologies”) as follows:<br />
• Print out the required programming codes from the<br />
programming code table.<br />
– There are usually two programming codes displayed<br />
for the usable barcode symbologies; the upper for<br />
activation (ENABLE) and the lower for deactivation<br />
(DISABLE).<br />
– Use a laser printer, for example, in order to obtain a<br />
legible printout.<br />
84
Scanner<br />
<strong>DIGTA</strong>SCAN 404 BARCODE READER ______<br />
Setting the DigtaScan barcode reader<br />
• The DigtaScan must be inserted and latched into the<br />
portable dictation machine (see also “Plugging in,<br />
•<br />
Unplugging”).<br />
– Only when the DigtaScan is plugged in are the<br />
associated menu items available on the dictation<br />
machine.<br />
Switch on the dictation machine.<br />
• Push the slide switch to » STOP «.<br />
• Press the » « button.<br />
• Use the navigation buttons »◄►« to select » « and<br />
then press the » « button.<br />
• Use the navigation buttons »◄►« to select » «<br />
– The »PROG. BARCODE« menu function appears in<br />
the display.<br />
Note:<br />
» «, see also “Restoring the default settings”.<br />
• Scan in the programming code with the » « button.<br />
– The machine acknowledges the successful reading of<br />
the code with a single signal tone.<br />
– You can scan any number of programming codes<br />
consecutively with the » « button.<br />
Note:<br />
If the machine cannot read a code, it emits a double signal<br />
and displays the message »SCAN FAIL REPEAT ?«.<br />
Confirm the error message with » «.<br />
• Once you have made all the settings, press the »<br />
button to quit the menu.<br />
«<br />
85
Scanner<br />
<strong>DIGTA</strong>SCAN 404 BARCODE READER ______<br />
Restoring the default settings<br />
You can restore the DigtaScan’s default settings.<br />
If you do so, all barcode symbologies are disabled except<br />
for EAN-13.<br />
• The DigtaScan must be inserted and latched into the<br />
portable dictation machine (see also “Plugging in,<br />
Unplugging”).<br />
– Only when the DigtaScan is plugged in are the<br />
associated menu items available on the dictation<br />
machine.<br />
• Switch on the dictation machine.<br />
• Push the slide switch to » STOP «.<br />
• Press the » « button.<br />
• Use the navigation buttons »◄►« to select » « and<br />
then press the » « button.<br />
• Use the navigation buttons »◄►« to select » «<br />
– The »PROG. BARCODE« menu function appears in<br />
the display.<br />
• Press the » « button.<br />
– »DEACTIvATE ALL BARCODES ?« appears in the display.<br />
• Press the » « button to leave only symbology EAN-<br />
13 enabled. Press the » « button if you would like to<br />
keep the other symbologies enabled.<br />
• Once you have made all the settings, press the » «<br />
button to quit the menu.<br />
86
RFID READER <strong>DIGTA</strong>RFID 414 ______________<br />
Using RFID codes<br />
RFID codes are located on RFID labels (TAG).<br />
You can scan a RFID code for each new dictation. The<br />
detected codes are stored in the header of a DSS file<br />
in the “Subject” field, and thus displayed in the note<br />
that accompanies the dictation. Other programs that<br />
evaluate the DSS header (for example a database<br />
system) can classify the dictations according to the<br />
scanned codes.<br />
The detected codes are displayed by the PC software<br />
included with the portable dictation machine and by the<br />
desktop software:<br />
– in the overview of the accompanying note for the<br />
dictation (see also “Dictation accompanying note” in<br />
the program help)<br />
– in the dictation list (if the “Subject” field is enabled,<br />
see “Sorting” in the program help).<br />
Connecting and removing the RFID reader<br />
The same procedure is used as with barcode reader 404.<br />
See the Chapter “Plugging in” and “Unplugging”.<br />
87
Scanner<br />
RFID READER <strong>DIGTA</strong>RFID 414 ______________<br />
Turning the RFID Reader on and off<br />
• The RFID Reader must be plugged into the portable<br />
dictation machine and locked.<br />
Only if the RFID Reader is plugged in will you be able<br />
to select the associated menu items available on the<br />
dictation machine.<br />
• Switch on the dictation machine.<br />
• Push the slide switch to » STOP «.<br />
• Press the » « button.<br />
• Use the navigation buttons »◄►« to select » « and<br />
then press the » « button.<br />
• Use the navigation buttons »◄►« to select » « and<br />
then press the » « button.<br />
• Use the navigation buttons »◄►« to select » « or<br />
» « and then press »OK«.<br />
– » «, when you create a dictation with the »new«<br />
button, you will be prompted to it. You can now scan a<br />
RFID code and store it in the dictation accompanying<br />
note.<br />
– » «, when you create a dictation with the »new«<br />
button, you will not be prompted to scan it, although<br />
the RFID Reader is connected.<br />
Note:<br />
The selected setting is retained even if the RFID Reader<br />
is temporarily removed from the portable dictation<br />
machine. However, you can only use or change the setting<br />
if the RFID Reader is connected.<br />
88
Scanner<br />
RFID READER <strong>DIGTA</strong>RFID 414 ______________<br />
Scanning a RFID code for a new dictation<br />
The RFID Reader is connected to the portable dictation<br />
machine and activated.<br />
• Switch on the dictation machine.<br />
• Push the slide switch to » STOP «.<br />
• Press the »new« button.<br />
– » « and » « appear in the display.<br />
• If you do not want to scan a RFID code into the dictation<br />
accompanying note, press the »<br />
continue with your dictation as usual.<br />
« button and<br />
• If you wish to scan a RFID code, hold the RFID Reader<br />
directly at the label with the RFID code (see illustration)<br />
and press the » « button.<br />
– The device will now scan the RFID code. If the RFID<br />
code was successfully scanned, the device will acknowledge<br />
this by emitting a single tone.<br />
– The RFID code appears in the display.<br />
• If you want to include the RFID code as displayed in the<br />
dictation, press the » « button.<br />
• If you do not want to include the RFID code in the dictation,<br />
press the »<br />
dictation as usual.<br />
Note:<br />
« button and continue with your<br />
If the machine cannot read the RFID code, it emits a<br />
double signal tone, and the message »SCAN FAILS<br />
REPEAT ?« appears in the display. You can now repeat<br />
the scan with the » « button or cancel it with the » «<br />
button and dictate without a RFID code.<br />
89
RFID reader<br />
RFID READER <strong>DIGTA</strong>RFID 414 ______________<br />
Notes:<br />
A maximum of 32 digits (two lines) of the scanned<br />
RFID code can be displayed.<br />
RFID code that you have scanned and included in<br />
dictations with » « are stored in the “Topic” field in the<br />
new dictation’s accompanying note.<br />
Additional functions<br />
The RFID Reader has the same functions as the barcode<br />
reader.<br />
See the chapters on the barcode reader for further information<br />
on operation. The menu is located under » «.<br />
– Displaying a RFID code for a dictation;<br />
– Scanning a RFID code for an existing dictation;<br />
– Searching for a dictation belonging to a RFID code;<br />
– Deleting a RFID code from a dictation.<br />
90
MESSAGES, ERROR NUMBERS _____________<br />
1537 »Dictation cannot be created« – Error in the file<br />
system of the internal memory or the external<br />
memory card.<br />
Remedy: Format the internal memory or memory<br />
card.<br />
1538 »Dictation cannot be created« – Error in the file<br />
system of the internal memory or the external<br />
memory card.<br />
Remedy: Format the internal memory or memory<br />
card.<br />
1570 »Index/Infofull« – The maximum permitted quantity<br />
of information or indices has been reached. It is not<br />
possible to add more information or indices.<br />
Remedy: Delete information or an index.<br />
1584 »Not supported DSS format« – A dictation<br />
in this DSS format cannot be played back.<br />
Remedy: Play back the dictation on another<br />
dictation machine or on the PC. If available load<br />
new firmware which is able to play back this DSS<br />
format.<br />
1585 »Not supported DSS format« – The folder<br />
you selected doesn‘t contain a dictation<br />
in the supported DSS format.<br />
Remedy: Select another folder with the dictation in<br />
another DSS format. Play back the dictation on<br />
another dictation machine or on the PC. If availible<br />
load new firmware which is able to play back this<br />
DSS format.<br />
1610 »Deleteother files?« – When deleting entire folders<br />
or formatting the memory, the machine finds<br />
files that are not DSS dictations and cannot be<br />
displayed (e.g. ds2, doc).<br />
Remedy: Cancel the function if you do not want to<br />
91
MESSAGES, ERROR NUMBERS _____________<br />
delete these files. Transfer the files to a computer<br />
and then perform the deletion or formatting function.<br />
1611 »PLAY-BACK ONLY« – The dictation machine<br />
is set to play-back with foot control and is in the<br />
Digta Station. Dictations are protected from being<br />
edited.<br />
Remedy: Use the »Foot control« menu function<br />
to set the device to record in the Digta Station. Or<br />
remove the machine from the Digta Station.<br />
8321 »BATTERY LOW« – Battery voltage too low for<br />
updating the firmware.<br />
Remedy: Recharge the batteries or operate the<br />
dictation machine powered from the USB port on<br />
your PC.<br />
8322 »BATTERY LOW« – Battery voltage too low for<br />
formatting.<br />
Remedy: Recharge the batteries or operate the<br />
dictation machine powered from the USB port on<br />
your PC.<br />
8323 »BATTERY LOW« – Battery voltage too low for<br />
restoring the default settings..<br />
Remedy: Recharge the batteries or operate the<br />
dictation machine powered from the USB port on<br />
your PC.<br />
9734 »FILE READ ONLY« – Dictation lock (write/erase<br />
protection) activated.<br />
Remedy: Disable dictation lock in the Delete menu.<br />
Disable write/erase protection in the accompanying<br />
note of the dictation.<br />
9746 »STARTBMP ERROR« – Defective start logo.<br />
Remedy: The start logo file is unlike startbmp.bmp or<br />
9
MESSAGES, ERROR NUMBERS _____________<br />
it contains errors. Use another revised startbmp.bmp<br />
file<br />
9749 »DELETE NOT POSSIBLE« – Error when deleting<br />
a dictation.<br />
Remedy: Delete via USB with DigtaMobile or<br />
Windows Explorer on your PC.<br />
9750 »NO MEMORY« – Memory full > Recording terminated.<br />
Remedy: Delete some dictations. Delete other files<br />
(for eg. .doc, .ppt) if existing.<br />
9751 »NO MEMORY« – Recording has not started<br />
because of a full memory.<br />
Remedy: Delete some dictations. Delete other files<br />
(for eg. .doc, .ppt) if existing.<br />
9753 »FIRMWARE INCORRECT« – The gh0<strong>415</strong>.hex<br />
firmware file contains false data (e.g. firmware of<br />
another device).<br />
Remedy: Perform an update with another<br />
gh0<strong>415</strong>.hex.<br />
9756 »NOMEMORY« – Partial deletion has not started,<br />
since there is insufficient memory for temporary<br />
storage.<br />
Remedy: Delete a different dictation first. Delete any<br />
foreign files (e.g. doc, ppt).<br />
9758 »NO PART TO DELETE« – Partial deletion is not<br />
possible.<br />
Remedy: Select a section for deletion.<br />
9762 »FILE READ ONLY« – Erasure-protected dictations<br />
are in the folder to be deleted.<br />
Remedy: Disable the dictation lock in the Delete<br />
menu. Disable write/erase protection in the accompanying<br />
note for the dictation.<br />
93
MESSAGES, ERROR NUMBERS _____________<br />
9782 »DELPART WITH INDEX« – The dictation section<br />
marked for deletion contains an index. For this reason,<br />
this section of the dictation cannot be deleted.<br />
Remedy: Delete the index and then the dictation<br />
section.<br />
9795 »NO MEMORY« – Not enough free memory.<br />
Remedy: Delete dictations to have more memory<br />
available for the desired functions.<br />
9796 »FILE READ ONLY« – The dictation lock (write /<br />
erasure protection) is activated.<br />
Remedy: Disable the dictation lock in the Delete<br />
menu. Disable write/erase protection in the accompanying<br />
note for the dictation.<br />
9801 »INSERT TO INFO FORBIDDEN« – The current<br />
position of the dictation is contained in an information.<br />
It is not possible to insert into information.<br />
Remedy: Delete the information and dictate a new<br />
one.<br />
17674 »CARD NOT SUPPORTED« – If you use<br />
MultiMediaCards/SecureDigital Cards (MMC/SD)<br />
with insufficient writing speed, »Card not supported«<br />
appears in the display.<br />
Remedy: Use a DigtaCard by <strong>Grundig</strong> <strong>Business</strong><br />
<strong>Systems</strong>.<br />
17936 »UPDATE FILE ERROR« – Error of the firmware<br />
update.<br />
Remedy: File error of the firmware gh0<strong>415</strong>.hex<br />
(false check sum). Update with another<br />
gh0<strong>415</strong>.hex file.<br />
17937 »UPDATE VERSION ERROR« – This version of the<br />
firmware file is not loadable on this Digta.<br />
Remedy: Update with another version of the<br />
94
MESSAGES, ERROR NUMBERS _____________<br />
gh0<strong>415</strong>.hex file.<br />
17944 »DOWNGRADE, NO UPDATE« – The firmware version<br />
to be loaded in the Digta is older than the current<br />
version of the Digta.<br />
Remedy: If you wish to load an old firmware, press<br />
the »new« button and the right selection button<br />
simultaneously when switching the Digta on.<br />
17990 »FAT NOT SUPPORTED« – The internal memory<br />
or external memory card has been formatted incorrectly<br />
(e.g. FAT32).<br />
Remedy: Format the internal memory or external<br />
memory card.<br />
17991 »MEDIANOT SUPPORTED« – The MMC/SD memory<br />
card is not supported, e.g. a card with more than<br />
2 GB.<br />
Remedy: Use a DigtaCard by <strong>Grundig</strong> <strong>Business</strong><br />
<strong>Systems</strong>.<br />
17992 »MEDIA DAMAGED« – The internal memory or<br />
external memory card is faulty.<br />
Remedy: Replace old MMC/SD cards with new<br />
DigtaCards. If the internal memory is faulty, the<br />
machine has to be repaired.<br />
17993 »CARD NOT SUPPORTED« – If you use<br />
MultiMediaCards/SecureDigital Cards (MMC/SD)<br />
with a too low writing speed »card not supported!«<br />
appears in the display.<br />
Remedy: Use a DigtaCard from <strong>Grundig</strong> <strong>Business</strong><br />
<strong>Systems</strong>.<br />
26181 »WRITE TOO LONG« – Writing to the internal<br />
memory or external memory card during dictation<br />
takes too long due to faulty memory cells. The<br />
memory is too old.<br />
95
MESSAGES, ERROR NUMBERS _____________<br />
Remedy:You can continue using the machine if the<br />
message does not occur frequently. Replace old<br />
MMC/SD cards with new DigtaCards.<br />
----- »EXT NO PIN PROTECTION« – Dictations on<br />
external memory cards (DigtaCard) cannot be protected<br />
using the PIN/PUK* function.<br />
Remedy: Press the right-hand selection button » «<br />
to confirm that you want to use an external memory<br />
card without PIN* protection.<br />
----- »DEVICELOCKED« – The PIN was entered incorrectly<br />
nine times.<br />
Remedy: Enter PUK.<br />
----- »NO FIRMWARE« – If an old firmware version is<br />
needed (when the machine is switched on, the right<br />
selection key and the “new” button are pressed at<br />
the same time ) no firmware file is found.<br />
Remedy: Copy a file with the name gh0<strong>415</strong>.hex into<br />
the SYSTEM folder and start the load of the old version<br />
afterwards.<br />
All messages with different numbers and the display<br />
“UNKNOWN ERROR”:<br />
Turn the dictation machine off and then back on. If the<br />
machine does not turn on normally, take out the batteries<br />
and then reinsert them. Turn the machine then back on. If<br />
the error message still appears, please contact your dealer<br />
or technical customer service. You can help the customer<br />
service solve your problem much more quickly if you report<br />
the steps taken to produce the error and the error number<br />
displayed.<br />
Hotline, Email: www.grundig-gbs.com under Support/<br />
Contact info<br />
BDA 05: from V 2.0 / 2.10, B 245 01/2009 96