NMRA RH October 2018

Create successful ePaper yourself
Turn your PDF publications into a flip-book with our unique Google optimized e-Paper software.
OCTOBER <strong>2018</strong><br />
Inside this issue:<br />
Modelling SP’s Coast Line in 1954<br />
Motive Power on the C&A<br />
A Tale of 3 Cars<br />
JMRI and DecoderPro<br />
Back2Basics<br />
Building 11th Avenue Station<br />
CN Tempo Trains<br />
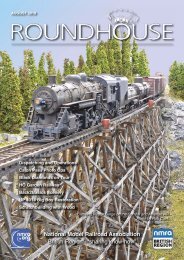
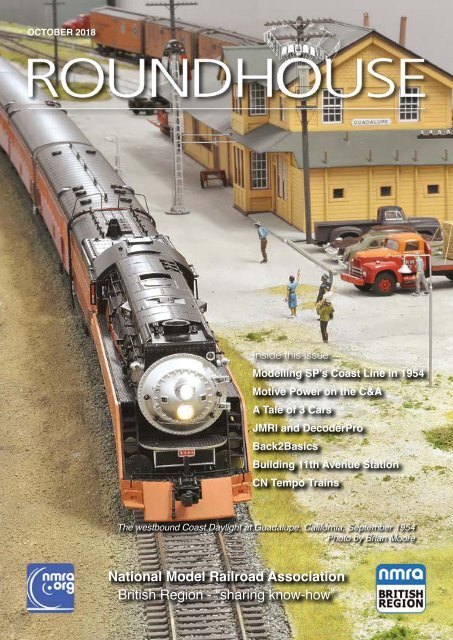
The westbound Coast Daylight at Guadalupe, California, September 1954<br />
Photo by Brian Moore<br />
National Model Railroad Association<br />
British Region - “sharing know-how”
WE WANT<br />
YOUR<br />
Model<br />
Railways<br />
We will buy<br />
almost any Railway<br />
Collection, large or small.<br />
All gauges will be taken, in any<br />
condition. We always give an honest<br />
price and will collect and dismantle any layout.<br />
Telephone: 01302 371623<br />
Mobile: 07526 768178<br />
or email: anoraksanonymous@googlemail.com<br />
2 ROUNDHOUSE - <strong>October</strong> <strong>2018</strong>
Welcome to the <strong>October</strong> issue of Roundhouse packed with feature articles from<br />
our many contributors and a warm welcome to some new advertisers. It is the<br />
latter that we should be thanking for their support of our magazine so please do<br />
let them know that you saw their ad in Roundhouse. They do rely on your feedback<br />
to let them know that you are supporting them too.<br />
Our cover story begins on page 6 with a<br />
multipart journey into how Brian Moore has<br />
transformed his railroad room into the amazing<br />
Guadalupe Subdivision: Modelling SP’s<br />
Coast Line in 1954 from the very beginning<br />
of his interest in this era and location and the research that he has done to faithfully<br />
recreate a part of railroad history in downtown Plymouth...!<br />
OCTOBER <strong>2018</strong><br />
I hope that by showing you this lovely model<br />
railroad that it will inspire you to create similar<br />
modeled scenes that come to life with the addition<br />
of scale figures and vehicles, not to forget<br />
the subtle scenery effects.<br />
Inside this issue:<br />
Modelling SP’s Coast Line in 1954<br />
Motive Power on the C&A<br />
A Tale of 3 Cars<br />
JMRI and DecoderPro<br />
Back2Basics<br />
Building 11th Avenue Station<br />
CN Tempo Trains<br />
I would like to take this opportunity to announce<br />
a new addition to the App which<br />
now has past Roundhouse magazines<br />
from January 2017 to June <strong>2018</strong> in digital format for<br />
you to enjoy. Plus the latest news and events - check it out. If you<br />
have not installed it on to your tablet or smartphone yet then head on over to the<br />
Apple store or Google Play.<br />
The dates for the <strong>NMRA</strong> 2022 National Convention<br />
in Birmingham have been announced - 14-21 August<br />
2022. The website at www.nmra2022uk.org has<br />
some preliminary details. The hosting committee will<br />
be making a presentation at the Derby convention.<br />
Russ Cook says the 25th Anniversary NTRAK UK convention will be held in Bournemouth,<br />
8-10 March 2019 with booking forms available from russcook1@hotmail.co.uk. Full details<br />
will be in the December issue of Roundhouse.<br />
The <strong>NMRA</strong> British Region 2019 convention will be held in Aberdeen. Full details to be announced at the <strong>NMRA</strong><br />
British Region <strong>2018</strong> Convention at the Derby Convention Centre.<br />
Many thanks to James Lucas for taking on the role of Membership Renewals Officer as well as being the Registrar.<br />
Please send all membership renewals to him at registrar@nmrabr.org.uk<br />
Thank you to David McLaughlin for proofreading this issue.<br />
Peter Bowen<br />
Roundhouse Publisher<br />
and <strong>NMRA</strong> BR Membership Director<br />
The westbound Coast Daylight at Guadalupe, California, September 1954<br />
Photo by Brian Moore<br />
National Model Railroad Association<br />
British Region - “sharing know-how”<br />
<strong>NMRA</strong> British Region ROUNDHOUSE is published on the 1st of February, April, June, August, <strong>October</strong>, December<br />
Peter Bowen graphic design and layout, editing, writing and publication of the Roundhouse magazine<br />
Please send all material for publication to editor@nmraroundhouse.co.uk<br />
Deadline for all copy and content is 1st of previous month prior to publication month i.e., 1st August for <strong>October</strong><br />
For commercial advertising in Roundhouse please contact:<br />
Jonathan Small, Advertising Manager advertising@nmrabr.org.uk<br />
All advertising artwork must be sent to Jonathan and paid for in advance of publication<br />
Please send all membership and Roundhouse subscription enquiries to James Lucas, Registrar registrar@nmrabr.org.uk<br />
<strong>October</strong> <strong>2018</strong> - ROUNDHOUSE 3
Welcome to the <strong>October</strong> issue of<br />
Roundhouse! In March <strong>2018</strong> National<br />
<strong>NMRA</strong> Vice President/Special Projects<br />
Gerry Leone emailed <strong>NMRA</strong> Region<br />
Presidents: …last year National <strong>NMRA</strong><br />
instituted a new award called “The<br />
<strong>NMRA</strong> President’s Award for Service to<br />
the Division.” It was awarded by Charlie<br />
Getz … to one individual in each Region<br />
who has done outstanding, “beyondthe-call-of-duty”<br />
work to make his or her<br />
local Division effective, engaging, and<br />
welcoming to members.<br />
My nomination proposing Tom Winlow:<br />
I am honored to nominate <strong>NMRA</strong> British<br />
Region member Tom Winlow for “The<br />
<strong>NMRA</strong> President’s Award for Service to<br />
the Division.”<br />
Tom Winlow has done, and continues to<br />
do, outstanding, “beyond-the-call-of-duty”<br />
work to make both his local Division<br />
and the <strong>NMRA</strong> British Region effective,<br />
engaging, and welcoming to members<br />
through his exceptional work in preparing<br />
and promoting HO Freemo specifications<br />
and Freemo events.<br />
Tom Winlow joined the <strong>NMRA</strong> at the<br />
<strong>NMRA</strong> British Region Kegworth Convention<br />
in 1987. Tom was <strong>NMRA</strong> British<br />
Region Vice President 1993 and 1994; <strong>NMRA</strong> British<br />
Region President 1995 and 1996; and, Past President/<br />
Meets Officer 1997/1998. Tom was <strong>NMRA</strong> British Region<br />
President during 1995, which covered the 50th anniversary<br />
of the establishment of the Region and helped organise<br />
the Golden Anniversary Convention.<br />
His work on what was to become Freemo began in 2009,<br />
prompted by Mike Arnold. Initial participants were Peter<br />
Lloyd-Jones, Keith Webb and Tom, but quickly expanded<br />
to a bigger team. The other key people were Geoff<br />
Tiller, Martyn Read, Mike Ruby and John Pitty but lots of<br />
others from various Region Groups were involved and<br />
Mike Arnold (as a BOD member) also provided support<br />
to the team. Tom Winlow’s role was to pull together all<br />
the ideas and write the first draft of the specification. This<br />
was released in 2012. Tom also modified it for the second<br />
(current) release in June 2014.<br />
Tom Winlow also promoted the Freemo concept by organising<br />
Freemo layouts at conventions in the early days<br />
and presenting clinics about the new modular ideas. Tom<br />
also wrote a series of articles for <strong>NMRA</strong> British Region<br />
magazine ‘Roundhouse’ covering the<br />
building of his own White Rock module.<br />
The four-article series started in April<br />
2012. Tom has written other articles on<br />
Freemo-related topics, including one<br />
on portable benchwork as part of the<br />
Region’s “Back to Basics” series. As a<br />
result of all this Tom has become the<br />
face of Freemo within the Region.<br />
In addition, Tom has volunteered for<br />
several stints as Contest Judge/AP<br />
Assessor as well as having organised<br />
a special day of clinics, drawing on<br />
presenters from across the Region. He<br />
has been part of the <strong>NMRA</strong> British Region<br />
Constitution Committee during the<br />
only two updates it has had in the last<br />
25 years and was the Atlantic Director<br />
Nominating Committee Chairman 2015.<br />
Tom avidly continues his passion for<br />
promoting Freemo through his local<br />
<strong>NMRA</strong> Club, coordinating all Freemo<br />
activity within the Bearwood Group.<br />
This involves designing a Freemo<br />
layout each month, creating the switch<br />
lists etc as well as producing the local<br />
group’s 10-page monthly newsletter.<br />
Thank you very much for this opportunity<br />
to put forward this nomination.<br />
National <strong>NMRA</strong> Vice President/Special Projects Gerry<br />
Leone responded:<br />
David – Thanks a million for this nomination. A worthy<br />
candidate indeed! - Gerry<br />
<strong>NMRA</strong> BR member Gordy Robinson is a key member of<br />
the National <strong>NMRA</strong> Social Media Team. Having posted a<br />
day by day account of the <strong>NMRA</strong> National Convention at<br />
Kansas City on Facebook, Gordy also posted a detailed<br />
decision by decision account of the National BoD Meeting<br />
from Kansas City. One of Gordy’s Facebook posts schedules<br />
all the recipients of the Presidents Award for Service<br />
to Divisions <strong>2018</strong> recipients by region.<br />
A further Facebook post by Gordy lists the Presidents<br />
Award for service to the <strong>NMRA</strong> Recipients <strong>2018</strong> including<br />
Kathy Millett MMR and Gordon Robinson.<br />
Many congratulations to each of you!<br />
David McLaughlin<br />
President <strong>NMRA</strong> British Region<br />
Contributing to Roundhouse<br />
If you have an idea for an article or have a story to tell then please, please, please send your comments, ideas,<br />
club or division news and announcements to editor@nmraroundhouse.co.uk<br />
4 ROUNDHOUSE - <strong>October</strong> <strong>2018</strong>
On Thursday 2nd August, David McLaughlin<br />
kindly hosted a BoD meeting at his<br />
home at Upton Cheyney. A wide range of<br />
topics were discussed and in particular the<br />
apparent fall in cash reserves. We also<br />
discussed upcoming events, including the<br />
National Convention to be held here in the<br />
UK at Birmingham in 2022, GDPR, Roundhouse<br />
advertising, and how to retain and<br />
increase our membership base.The full<br />
minutes will be posted on the <strong>NMRA</strong> BR<br />
Forum in due course.<br />
David McLaughlin, in his President’s Car<br />
report in the June issue of Roundhouse,<br />
said he was looking forward to going to the Ashmolean<br />
Museum in Oxford to to view the exhibition titled ‘America’s<br />
Cool Modernism’. On the strength of his enthusiasm<br />
and wishing to broaden my own knowledge of art, I<br />
decided to go too and see for myself original works of art,<br />
some of which have never before been exhibited outside<br />
the United States. So, on a very hot Friday, my wife and I<br />
travelled to Oxford from Hillingdon, on the Oxford Tube, a<br />
coach service which operates 24/7 between London and<br />
Oxford. Parking in Oxford is a challenge, although there<br />
is the park and ride, and the coach service stops in the<br />
centre of Oxford, only a short walk to the museum.<br />
The exhibition brought together some of the greatest<br />
works by American artists such as Georgia O’Keeffe,<br />
Arthur Dove, and Charles Sheeler.<br />
The Martin Boyask Award for the best photograph<br />
of a North American model railroad subject<br />
Following the announcement of The Martin Boyask<br />
Award for the best photograph of a North American<br />
prototype or model railroad subject in the August <strong>2018</strong><br />
issue of Roundhouse, there has been some very<br />
positive and helpful feedback about this new award.<br />
This has been discussed in detail by the <strong>NMRA</strong> British<br />
Region Board of Directors. The BoD has agreed<br />
that the award will now be The Martin Boyask<br />
Award for the best photograph of a North<br />
American model railroad subject.<br />
The feedback included the following<br />
comments:<br />
It’s a really good idea, as it is truly open<br />
to every member, and not just the ones who<br />
can go to conventions. And it’s Modern!<br />
It allows non-attendees of the yearly convention to take<br />
part in a regional event.<br />
It’s inexpensive, and any member can enter from<br />
home. In today’s world, access to a decent camera has<br />
never been so easy.<br />
I particularly enjoyed the paintings by<br />
Edward Hopper, 1882-1967, because for<br />
me, they represent images of the United<br />
States I could identify with as seen<br />
through the artist’s eyes. Some years ago<br />
there was a major exhibition of his work at<br />
the Tate which I attended. Paintings with<br />
a railroad interest include House by the<br />
Railroad, 1925, Railroad Sunset, 1929,<br />
and Compartment C, Car 293, 1938. If<br />
you would like to know more about Edward<br />
Hopper, there is an excellent book,<br />
Edward Hopper, ISBN 1 85437 533 4.<br />
You will be reading this, about 4 weeks<br />
before the <strong>NMRA</strong> British Region Convention, 26-28 <strong>October</strong>,<br />
hosted once again by the Black Diamonds, at the<br />
Derby Convention Centre. It may well be that you have<br />
never attended a British Region Convention for whatever<br />
reason and if that has been the case, I would urge you<br />
to come along, either for the day, or the whole weekend.<br />
There will be layouts to view, trade stands, bring and buy,<br />
conversations to be had. Please go to the website https://<br />
www.black-diamonds.org.uk/convention/ for more information.<br />
I hope to see you there...<br />
Charles Hendy<br />
Vice President <strong>NMRA</strong> British Region<br />
The competition should be limited to model photographs<br />
alone, either of the person’s own models or<br />
one s/he has photographed – taking pictures of real<br />
trains is a completely different skill. Most <strong>NMRA</strong>(BR)<br />
members will never get the opportunity to travel to<br />
North America and spend time taking pictures of real<br />
trains. There should be a level playing field. We are<br />
modelers, and I’m sure that Martin Boyask would<br />
agree with the view that a competition in his name<br />
should celebrate “raising the modeling bar”.<br />
There should be a limit on how many picture<br />
submissions each individual can make;<br />
… limiting the number really focuses the<br />
choice and ups the quality. I’d suggest a<br />
maximum picture entry of two. You’ll get<br />
a lot of entries, and the great majority via<br />
email.<br />
… the entry … should (set out) details on<br />
the subject matter, the intention of the picture,<br />
the description of the scene, and how much (if any)<br />
photo-editing was done upon it.<br />
The use of even extensive photo-editing should be<br />
permitted. This is the twenty-first century!<br />
Entries are to be submitted either digitally or by<br />
post to arrive before 18.00 on 1 December <strong>2018</strong>, to<br />
David McLaughlin, <strong>NMRA</strong> British Region President.<br />
<strong>October</strong> <strong>2018</strong> - ROUNDHOUSE 5
The Guadalupe Subdivision:<br />
Modelling SP’s Coast Line in 1954<br />
Brian Moore<br />
Part 1<br />
In the spring of 2017, there came<br />
the Big Space; and it was good.<br />
After living 25 years in the same<br />
house and the raising of two children,<br />
we finally moved in 2016.<br />
Temporarily relocating for five months<br />
to facilitate major works and refurbishment<br />
of our new residence, an<br />
“average” late-Victorian, three-bedroom<br />
mid-terraced house, we returned<br />
to our reconditioned home<br />
in March of 2017. Best of all, I was<br />
advance-gifted sole occupation rights<br />
to our new basement, which measures<br />
15 x 25 feet, almost the whole<br />
footprint of the house.<br />
The vital spark<br />
Like many of us, my model railroading<br />
journey started off in childhood,<br />
only to be abandoned for the usual<br />
hormonal reasons. It was kick-started<br />
again in 1985 when I chanced<br />
across a book in a public library in<br />
Exeter, where I was living at the time.<br />
I’d re-located there the year before,<br />
following my first quarter-century in<br />
Glasgow. The book was Modelling<br />
Historic Railways by David Jenkinson,<br />
and it enthralled me; after borrowing<br />
it for months, I finally bought<br />
my own copy. Completely “British”<br />
in subject matter, it introduced me to<br />
the concept of “planning for operation”.<br />
Jenkinson talked in fascinating<br />
detail about all the essential stuff and<br />
many of the compromises required to<br />
portray and to operate model trains in<br />
a realistic environment, including how<br />
to capture the “essence” of a real<br />
track layout when boiling it down to<br />
available space. It was a revelation;<br />
a marker was laid down, and I knew<br />
that any subsequent railway modelling<br />
I’d do would always be guided by<br />
Jenkinson’s principles.<br />
Following a move to Plymouth, I built<br />
my first layout since my early teens,<br />
a West Highland N scale BR transition-era<br />
model of Crianlarich Junction.<br />
The availability of an 8 x 18-ft.<br />
loft space saw my interest develop<br />
with a depiction of Gleneagles on<br />
the Glasgow to Aberdeen route. For<br />
various reasons, enthusiasm waned,<br />
and big temperature variations in the<br />
loft didn’t help things either.<br />
Jet-propelled to the Promised Land<br />
By the mid-nineties too, I was a<br />
regular reader of Model Railroader.<br />
As well as being impressed with what<br />
US-outline modelling could offer, the<br />
increasing wonders of DCC were a<br />
revelation. I also picked up a copy of<br />
the first issue of Kalmbach’s annual<br />
6 ROUNDHOUSE - <strong>October</strong> <strong>2018</strong>
Model Railroad Planning in 1995, and<br />
I’ve bought every MRP since; edited<br />
by Tony Koester, it’s full of exactly the<br />
same stuff that fascinated me in Modelling<br />
Historic Railways. I was well<br />
up for a change by the time we visited<br />
California on a family holiday in 2000,<br />
and within days of landing I purchased<br />
a DCC-ready HO scale Bachmann<br />
Spectrum 2-8-0 and some boxcar kits.<br />
I already knew something of the<br />
Southern Pacific Railroad from Model<br />
Railroader, and a drive from Los<br />
Angeles to San Francisco followed<br />
by another down the peninsula to<br />
Monterey alerted me afresh to the<br />
existence of SP’s Coast Line. I loved<br />
the whole notion of this mostly single-track<br />
line that ran between San<br />
Francisco and Los Angeles, with its<br />
scenic locations and the variety of<br />
trains that used to navigate it in the<br />
transition era. The process of learning<br />
about a railroad located a quarter<br />
of the world away from where I live<br />
is a continuing one, and it started<br />
almost as soon as we arrived home<br />
from our Californian holiday. In the<br />
meantime, I quickly dismantled and<br />
sold off my extensive British N Gauge<br />
equipment to fund the purchase of a<br />
decent amount of HO track, and later<br />
a Lenz DCC system.<br />
Look and Learn<br />
I also joined the Western Union<br />
division of the <strong>NMRA</strong> BR in Plymouth,<br />
where I found a further source<br />
of information about North American<br />
railroading as well as a bunch<br />
of guys who were kindred spirits.<br />
Following a few years of us jointly<br />
running Anson Yard, a portable 12 x<br />
42-ft., DCC-controlled, single-location,<br />
freelance North American layout<br />
built in the shape of a big oval with a<br />
rear hidden storage yard, we became<br />
mutually more interested in “running<br />
trains with a purpose,” and not simply<br />
to watch them go by. We had a lot of<br />
fun attempting to operate more prototypically<br />
with Anson; in the meantime,<br />
I slowly learned more about SP’s<br />
operations along the Coast Line, and<br />
I started to collect and modify locomotives<br />
and rolling stock appropriate<br />
for my favoured transition period.<br />
In 2012-13 at the club, we began<br />
to recognise the prototypical operating<br />
and switching opportunities<br />
offered by HO-modular railroading,<br />
and several members built individual<br />
modules to the agreed <strong>NMRA</strong> BR<br />
Modular Standard. I later constructed<br />
my own 24-ft. module, Quisling<br />
CA, a fictitious and proto-freelanced<br />
central-Californian small city served<br />
by the SP. I carry it to the club every<br />
month, and to the big Christow Modular<br />
event each May. Quisling allowed<br />
me to hone my modelling skills, and it<br />
served as a test bed to run, film and<br />
video my developing 1950s Coast<br />
Line stock (search for “Quisling CA”<br />
on YouTube).<br />
Brian Moore<br />
. . . to be continued<br />
<strong>October</strong> <strong>2018</strong> - ROUNDHOUSE 7
11th Avenue Station<br />
Mike Ruby<br />
Photos by Mike Ruby<br />
I<br />
have had the Walthers HO Union<br />
Station kit for many years, but<br />
had not got past opening the box,<br />
looking at the parts and making a<br />
card mockup.<br />
My 11th Avenue Freemo module was<br />
originally a double track one to the<br />
old <strong>NMRA</strong> BR standard. The station<br />
was to be mounted on a raised structure<br />
over the two mainlines and yard,<br />
there are videos on YouTube with<br />
the mockup in this position with long<br />
trains passing underneath. When our<br />
local group Western Union in Plymouth<br />
decided to change to the RS<br />
Tower single track standard, I built<br />
adaptor boards to covert the module<br />
to this standard. The station was<br />
moved to ground level on one of the<br />
adaptor boards. After a few years of<br />
use in this form I built a new module<br />
designed for single track from the<br />
start. Then 11th Avenue became my<br />
home layout.<br />
This year 11th Avenue was invited<br />
to the <strong>2018</strong> Christow, Devon Fremo<br />
event, I decided I must get around to<br />
building the station.<br />
I had always planned to fit out the<br />
interior. I’ve done this with several<br />
other buildings, but the size of this<br />
one would give a far larger space to<br />
work with. I decided the left section<br />
would be a restaurant with the centre<br />
and right still in use as the station as<br />
they open on to the platforms.<br />
8 ROUNDHOUSE - <strong>October</strong> <strong>2018</strong><br />
The first job was to do the insides<br />
of the walls, Walthers did not plan<br />
for an interior so the walls are hollow.<br />
I cut black card to fit around<br />
the window frames, the card<br />
was about the thickness that the<br />
window frames projected, black<br />
was used as I planned to light the<br />
interior and did not want it shining<br />
thought the walls. I then stuck<br />
printed texture paper to the black<br />
card but I left the paper longer than<br />
the card to allow for overlapping in<br />
the corners.<br />
Before attaching the inside<br />
walls I sprayed the outsides with<br />
Rust-oleum Limestone paint. I<br />
roughed up the inside of the walls,<br />
stuck the interiors with PVA and<br />
weighted them to keep the card<br />
flat.Next were the windows and<br />
doors, I painted the frames first<br />
Wall paper stuck to the wall finished<br />
window at left, as per the kit at right<br />
and then stuck on the glazing with<br />
Deluxe Glue ’n’ Glaze. Put a thin layer<br />
on the frame, it will stick faster and<br />
cleaner. I then cut edging strips from<br />
the textured paper and glued them<br />
around the window edges to hide the<br />
sides of the glazing, once again with<br />
Glue ’n’ Glaze. In retrospect I should<br />
have used thinner glazing than that<br />
supplied in the kit.<br />
I print the interior paper from Scalescenes<br />
dressed stone texture. This<br />
is my favourite way of doing interior<br />
walls. You can download many<br />
textures from such companies as<br />
Scalescenes, Clever Models and<br />
Team Track Models. Once you pay<br />
for the download you can print off<br />
as many copies as required. These<br />
companies also sell complete kits<br />
that can be printed out and laminated<br />
to card to make the kit. To protect<br />
the paper I sealed the printed sheets<br />
with flat acrylic spray varnish. To<br />
glue the sheets down I used Pritt<br />
Stick glue using a roller to press the<br />
paper down or double sided tape<br />
or transfer tape (this tape leaves a<br />
layer of glue but not the tape), I find<br />
liquid glue such as PVA tends to discolour<br />
the paper and I’ve read that<br />
spray on adhesive doesn’t last.<br />
The station was then built as per<br />
Walther’s instructions, without gluing<br />
the roofs on. I left the end canopies<br />
until after everything else was<br />
complete as I could then stand the<br />
building on end and not risk damaging<br />
them.
I wanted a polished marble floor and<br />
found photos of slabs on a supply<br />
company’s website. I loaded the photos<br />
into a graphics program, made<br />
them scale size, rotated copies and<br />
then laid them out to the floor plan,<br />
making sure the same images where<br />
not near each other. I printed out<br />
several copies and laminated them to<br />
give strength and the polished finish.<br />
Each of the three floors were cut to<br />
size and placed in the rooms. I then<br />
cut card to fill in the hole in the kit<br />
floor and stuck it to the laminate with<br />
double sided tape.<br />
I wanted a mezzanine floor above<br />
the main concourse to give a higher<br />
eating area. First I divided the three<br />
sections of the building with internal<br />
arched walls then cut the walls from<br />
foam core board and covered them<br />
with more dressed stone paper. The<br />
sheets include arched sections and<br />
I used those above the arched cut<br />
outs. The rear wall is wide enough for<br />
a row of tables and chairs to fit, the<br />
front is just a walkway. The mezzanine<br />
provides space underneath for<br />
the ticket office, toilets, etc. For the<br />
front walkway I made<br />
a glass balustrade<br />
from clear plastic sheet<br />
that used to surround<br />
a cake! Being clear<br />
stops it blocking views<br />
through the front windows.<br />
With the areas divided<br />
up I could start fitting<br />
them out. For the restaurant<br />
I added a kitchen<br />
and toilet block in<br />
one corner, made from<br />
foam core. I fitted it out with cooking<br />
equipment from a free Clever Models<br />
building and Scalescenes interior<br />
sheets. The floor and walls come<br />
from the Clever Models kitchen. To<br />
get lighting down to the kitchen which<br />
is visible through a window I ran the<br />
wires to a LED down an extraction<br />
pipe that runs up to the main ceiling.<br />
I made a serving bar from card that<br />
I printed my own design on. The<br />
seating booths are from Shapeways<br />
as are the bins, plates are punched<br />
from paper with food drawn on with<br />
fine markers, cups are short pieces<br />
of thin wire insulation.<br />
The centre area has Shapeways<br />
tables and chairs on the mezzanine<br />
floor along with Shapeways vending<br />
machines on both levels. I needed<br />
benches for the waiting area,<br />
after looking at photos on the web<br />
I designed them in a drawing program<br />
(Open Office). I printed them<br />
onto thin card and cut out and folded<br />
them around rectangles of foam core<br />
and stuck them to the floor, PVA will<br />
stick to the laminated floor. Finally I<br />
added a toilet block to a corner of the<br />
waiting room.<br />
To light the building I used 27 LEDs ,<br />
6 in each side room, 12 in the centre<br />
and another 3 above the columned<br />
entrance. These LEDs came from a<br />
Christmas light set I bought discounted<br />
after the holiday, they have flat<br />
fronts ideal for mounting into ceilings.<br />
I made the ceilings from foam<br />
core, cutting out the areas under the<br />
skylights, they are removable, resting<br />
on foam core blocks glued into the<br />
wall corners. The LEDs were glued<br />
into holes drilled evenly around the<br />
ceilings. They were connected three<br />
in series with a 1,200 ohm (1k2)<br />
resistor in series, with each of the 9<br />
groups paralleled together for each<br />
ceiling. The circuits were connected<br />
together with spring loaded connectors,<br />
these were small enough to fit<br />
above the entrance, allowing easy<br />
disconnection if I need to remove the<br />
ceiling from the building.<br />
The people populating the station<br />
are all cheap Chinese ones. I change<br />
hair colour, they all come black and<br />
give them a dark wash to show<br />
clothing folds and facial features.<br />
I used about 50 in the station and<br />
restaurant.<br />
The station is just about complete, I<br />
still have to fit platform canopies, with<br />
lights of course and detail them.<br />
The only thing I would change is to<br />
not use the supplied glazing. After<br />
finishing the station I decided to fit<br />
the other unfinished buildings on the<br />
layout with glazing. These kits did<br />
not come with glazing, so I decided<br />
to try laminate offcuts from making<br />
car cards etc. This worked really well<br />
and is much thinner than the styrene<br />
in the Walthers kit. This would have<br />
made the windows stand out less<br />
inside and is optically better.<br />
Mike Ruby<br />
<strong>October</strong> <strong>2018</strong> - ROUNDHOUSE 9
The Cornhill & Atherton RR<br />
Rob Clark<br />
Part 4<br />
Sometimes I make no improvements at all, as in the case of this Proto 2000 0-8-0 which is<br />
superbly detailed, painting and careful weathering are all that is required. Photos by Rob Clark<br />
Every model railroad needs<br />
motive power and the C&A<br />
is no exception. Rob Clark’s<br />
approach to satisfying this<br />
need is a simple approach to sourcing<br />
locomotives for his 1930s style<br />
railroad [ed].<br />
The C&A has a large roster of locomotives,<br />
but this is purely for my<br />
interest. Generally only five to six<br />
would be on the layout at any one<br />
time. Three locomotives are sound<br />
equipped and my aim is to move<br />
to 100% when funds permit. A train<br />
without sound is like food without<br />
flavour!<br />
can still be had, but there is a big risk<br />
of paying more than the retail price –<br />
do your research.<br />
I follow a fairly standard approach<br />
when preparing a locomotive for<br />
service. I make a decision about<br />
the running and paint condition, any<br />
extra detail I want to add and also<br />
the type of decoder and additional<br />
features (like firebox glow) to be<br />
fitted. In some cases the locomotive<br />
The whole fleet has been sourced on<br />
eBay, mostly proprietary plastic and<br />
many from years ago when prices<br />
were much more sensible. Bargains<br />
A Mantua 2-6-6-2 logger showing the grey/black colour I use. The stock<br />
model is a little bare so I followed an old Jeff Johnstone article and added<br />
a lot of brass accessories, piping and handrails.<br />
is ready to go and just needs painting<br />
and in others I strip it right down to<br />
components.<br />
This Bachmann 0-6-0 has only been slightly modified – replacement crew and<br />
an air pump with a bit of piping. Again, weathering does the hard work<br />
10 ROUNDHOUSE - <strong>October</strong> <strong>2018</strong><br />
In all cases the most important<br />
aspects are painting and weathering<br />
and this alone can transform the<br />
look of any model locomotive. I use<br />
a Badger 200 airbrush and finish all<br />
my locomotives in a weathered black<br />
that has a high grey component. This<br />
is un-prototypical, but brings out the<br />
surface detail well. Final weathering is<br />
a mixture of washes and dry powders<br />
resulting in a vastly improved look.
Photo 5 - This Bachmann USRA light<br />
2-10-2 in my opinion looks a little “toy<br />
like” as manufactured.<br />
Photo 6 - All of the paint is stripped<br />
(brake fluid) and some brass detail<br />
added – headlight, injectors, turret<br />
and generator.<br />
Photo 7 - After painting and weathering<br />
the transformation is complete.<br />
Photo above is a Bachmann 2-8-0<br />
almost stock apart from fitting a new<br />
headlight to replace the poor light<br />
pipe arrangement and a Vanderbilt<br />
tender. However the major change<br />
is fitting firebox flicker and ash pan<br />
glow effects.<br />
Photo left close up view shows two<br />
LEDs flickering at different frequencies<br />
enhance the firebox effect. In<br />
this case a TCS WOW decoder has<br />
been used.<br />
<strong>October</strong> <strong>2018</strong> - ROUNDHOUSE 11
A Tale of Three Boxcars<br />
Tom Winlow<br />
The Richmond Fredericksburg<br />
and Potomac Railroad<br />
(RF&P) was a bridge line<br />
running 113 miles south from<br />
Washington, DC to Richmond, Virginia.<br />
Through various mergers it is now<br />
part of CSX.<br />
I model the Lehigh Valley Railroad<br />
in the 70s. Many of the photos of<br />
LV trains of the period show RF&P<br />
boxcars in the train. With dull blue<br />
paint scheme and map of Virginia I<br />
thought they were a bit more interesting<br />
than most boxcars of the period.<br />
The boxcar doors were often painted<br />
silver, which added to the overall<br />
effect. There are lots of colour photos<br />
of these cars on the Fallen Flags<br />
Railroad Photos website http://www.<br />
rr-fallenflags.org/ I decided I would<br />
like one of these cars; I ended up<br />
with three!<br />
Car number 2438 a 50 ft, combination<br />
door was my first RF&P car, which<br />
I bought, a few years ago. It is an<br />
Accurail model to which I made a few<br />
modifications. The main one, which<br />
made a big difference, was to replace<br />
the solid moulded roof walk with a<br />
see-through Kadee plastic version as<br />
shown above. I prefer these to etched<br />
metal ones because you don’t have<br />
differential thermal expansion problems<br />
between the metal roof walk and<br />
the plastic shell. It is a particularly<br />
easy modification as the pegs on the<br />
underside of the Kadee unit line up<br />
exactly with the holes in the Accurail<br />
car’s roof. Referring to prototype<br />
photos, I replaced the grabs on the<br />
left hand end of the sides with short<br />
ladders that I cut down from some left<br />
over ladders from an ancient Front<br />
Range kit.<br />
The other “mechanical” changes<br />
were ones I make to most of my cars.<br />
Metal wheels, Kadee #5 couplers<br />
and Details Associate cut levers were<br />
fitted. I also fitted metal stirrup steps,<br />
in this case home-made one bent<br />
from very small stationery staples.<br />
The sliding door is a separate part in<br />
the kit and was already painted silver.<br />
However, the plug door is moulded<br />
as part of the body shell and had<br />
been painted blue, presumably to limit<br />
manufacturing costs for these basic<br />
kits. I masked the car and airbrushed<br />
the plug door, and the roof, silver.<br />
To touch up the various modifications<br />
I mixed my own paint to match<br />
the RF&P colour. It wasn’t a perfect<br />
match but it was close enough<br />
when some weathering had been<br />
added. This was done using a combination<br />
of water colour, chalks and<br />
airbrushing.<br />
Car number 2438 (50 ft. combination door)<br />
I was very pleased with this car. It<br />
started as a simple “shake the box”<br />
kit and the result stands up well when<br />
compared to more modern, and expensive,<br />
models.<br />
12 ROUNDHOUSE - <strong>October</strong> <strong>2018</strong>
Car Number 4097 a 50 ft. single<br />
door was my second car which was<br />
an “impulse buy” and was bought<br />
as it represented a “no work” model.<br />
It is a ready-to-run model by Intermountain<br />
and represents a car in<br />
the RF&P’s 4000 number series.<br />
The only work I did to this car was to<br />
lightly weather it using watercolours<br />
and airbrush.<br />
Car Number 2546 a double plug<br />
door is another Accurail car. It is the<br />
least accurate of the three. The big<br />
error is that the double plug doors<br />
are offset towards the left hand end<br />
when they should be centred. I didn’t<br />
notice this when I bought the car but<br />
decided to live with it.<br />
The modifications to the car are the<br />
same as for no. 2438, including the<br />
Kadee roof walk. The plug doors on<br />
this car are separate items. I found<br />
that they were slightly too large and<br />
stood proud of the sides rather than<br />
being flush with them. By very careful<br />
filing of the door openings I was<br />
able to fit the doors in their proper<br />
positions.<br />
I decided to weather this car more<br />
Car Number 4097 (50 ft. single door)<br />
Car Number 2546 (50 ft. double plug<br />
extensively and added rust to the<br />
top of the doors to match a photo I<br />
had. I also added rust to the edges<br />
of the roof. I used burnt sienna and<br />
burnt umber watercolours<br />
to simulate the rust.<br />
There’s a sting in the<br />
tail about this car. I had<br />
come to terms with the<br />
doors being in the wrong<br />
position until I looked at<br />
the photos of the other<br />
double plug car models<br />
on Accurail’s website.<br />
The cars for every other<br />
road name in that series<br />
of Accurail models have their doors<br />
centred. Only the RF&P one has<br />
offset doors. The RF&P did have<br />
some cars with offset doors but<br />
these had sliding doors, rather than<br />
plug ones. I wondered if these had<br />
misled Accurail, who went out of<br />
their way to get it right, but actually<br />
went out of their way and got<br />
it wrong! Whatever the reason, it<br />
is more than a little irritating! On<br />
the other hand, who in the UK will<br />
know, except me? Well, apart from<br />
the several hundred people who will<br />
read this article of course!<br />
Tom Winlow<br />
Freshly painted RF&P 50 ft. boxcars No’s. 2442 and 2923 at Acca Yard in Richmond, VA in June 1969.<br />
RF&P Railroad photograph by W. W. Young, Sr. from the collection of the RF&P Railroad Historical Society, Inc.<br />
<strong>October</strong> <strong>2018</strong> - ROUNDHOUSE 13
14 ROUNDHOUSE - <strong>October</strong> <strong>2018</strong>
Back2Basics<br />
Back2Basics<br />
You’ve built your baseboards, laid your track and now you<br />
are staring at some clean pieces of plywood or foam and<br />
wondering where to go next! Scenery can feel very<br />
daunting to a newcomer but is actually very forgiving. It’s<br />
easy to correct mistakes and redo sections so the best<br />
advice is to give it a go and not worry.<br />
Basics<br />
The first thing to do is consider your model and where it is<br />
based. Is it desert or forest, flat or mountainous, rocky or<br />
muddy, arid or wet? All of these impact on your scenery and<br />
how you build it. The good news is that the basics are the<br />
same regardless.<br />
I always think of my scenery in terms of foreground,<br />
midground and background. I try and make my foreground<br />
the most detailed. Viewers will be drawn to this first and<br />
naturally assume that the rest of the layout is as detailed.<br />
PART 13 – Scenery<br />
Section Section PART 2: Trees, 1: 13 An – Grass Scenery Introduction and Details<br />
Section 2: By Trees, Kathy Millatt Grass and MMR Details<br />
By Kathy Millatt MMR<br />
as paint or, in deserts, can be the bulk of the<br />
scenery work.<br />
4. I tend to do the water, roads and buildings at this<br />
point. The buildings are not attached and can be<br />
removed for messy work but it enables me to work<br />
out exactly where everything will fit and get it to<br />
bed down well.<br />
5. After this I add in trees, then bushes, then grass.<br />
6. The final step is the details that brings it all to life,<br />
from wildlife to people, rubbish and detritus to<br />
weathering.<br />
Substructure<br />
The first step in scenery is to start with a suitable base. This<br />
doesn’t need to be anything fancy and can build on<br />
whatever the baseboards are made from. Depending on<br />
your baseboards, here are a few thoughts to get you going<br />
so that your scenery is not totally flat:<br />
In reality, everything blurs with distance and you cannot see<br />
weeds or details after a certain point. We can use our<br />
scenery to add a feeling of depth that mirrors reality. My<br />
backgrounds are therefore more generic, quicker to model<br />
and less detailed. The midground is a halfway house with<br />
some leaves and details but not too many.<br />
In the last issue we looked at basic scenery construction and<br />
some In the last detailed issue we aspects looked of at scenic basic scenery effects construction like rivers and and<br />
roadways. some detailed This time aspects we look of scenic at what effects Mother like Nature rivers does and for<br />
us roadways. in real life, This trees, time bushes, we look grass at what etc Mother and finishing Nature off does the for job.<br />
us in real life, trees, bushes, grass etc and finishing off the job.<br />
Trees<br />
Trees<br />
Trees are not appropriate on every layout but I generally start<br />
Process<br />
the<br />
Trees<br />
green<br />
are not<br />
scenery<br />
appropriate<br />
with the<br />
on<br />
big<br />
every<br />
stuff<br />
layout<br />
like trees,<br />
but I generally<br />
working<br />
start<br />
down<br />
to<br />
the<br />
the<br />
green<br />
grass<br />
scenery<br />
at the<br />
with<br />
end.<br />
the<br />
Trees<br />
big stuff<br />
split<br />
like<br />
into<br />
trees,<br />
two<br />
working<br />
camps:<br />
down<br />
broad<br />
to the grass at the end. Trees split into two camps: broad<br />
leaved deciduous and conifers. I use a variety of methods but<br />
Here's leaved an deciduous overview and of conifers. the scenery I use process a variety I of prefer methods to use: but<br />
try and make the trees towards the back of the layout more<br />
try and make the trees towards the back of the layout more<br />
generic and the ones near the front more detailed.<br />
generic 1. and Start the with ones a near substructure the front more that acts detailed. as a firm base<br />
for your scenery. Obviously, mountains look very<br />
The most important thing to remember is that trees are large;<br />
The most different important to thing prairies to remember but you is can that use trees the are same large;<br />
they dwarf buildings and people. Most people scale them back<br />
they dwarf materials buildings for and the people. substructure Most people but just scale build them them back<br />
as they often do with buildings but you need one or two large<br />
as they often up differently. do with buildings but you need one or two large<br />
"hero" trees right at the front to show off your skills and add<br />
"hero" 2. trees At this right point at the you front need to to show mock off in your the skills roads, and rivers add<br />
some scale! The viewer's eye will rest on these and somehow<br />
some scale! and The buildings viewer's so eye that will they rest have on these correct and somehow height<br />
assume that everything else is as detailed.<br />
assume that and everything flat areas else for is as the detailed. water or road/building<br />
surface.<br />
3. Next up is an earth layer that hides the base (which<br />
is often white, blue or pink!). This can be as simple<br />
• Foam is easily worked with bread knives or hot wire<br />
tools and can be built up or subtracted from making<br />
it very versatile. If you or your friends have had any<br />
building work recently then you may have a ready<br />
supply of insulation foam. You can use the white<br />
expanded polystyrene too but it will need a hard<br />
outer layer as it is a bit soft.<br />
• Plywood needs to be built up as it is generally too flat<br />
but it is a solid start. I usually use Sculptamold which<br />
is a plaster/paper maché mix to build up slight<br />
undulations and foam for larger hills.<br />
• If you have open areas between framing you can use<br />
For the plaster generic cloth background which is easily trees, available I generally online buy or from pre-made<br />
For plastic the shops generic trees, like spray background Hobbycraft. them with trees, I put an aerosol I scrunched generally can up buy glue newspaper pre-made and sprinkle<br />
plastic on Woodland trees, underneath spray Scenics' them and lay with green the an plaster aerosol blend cloth can fine on glue turf. then and This spray sprinkle is the<br />
on constant Woodland with colour water. Scenics' through I find green this all is blend less of my messy fine layout than turf. scenery trying This to is to the tie it<br />
constant together. dunk colour plaster through cloth in all water of my and layout put it scenery in place. to tie it<br />
together.<br />
For the middle ground trees, I start adding Noch leaves into the<br />
For<br />
fine<br />
the<br />
turf<br />
middle<br />
mix to<br />
ground<br />
add some<br />
trees,<br />
more<br />
I start<br />
defined<br />
adding Noch<br />
texture.<br />
leaves into the<br />
fine turf mix to add some more defined texture.<br />
Finally, I make wire trees from scratch for the "hero"<br />
Finally,<br />
trees.<br />
I<br />
Using<br />
make<br />
very<br />
wire<br />
fine<br />
trees<br />
florists’<br />
from<br />
green<br />
scratch<br />
wire,<br />
for<br />
I twist<br />
the "hero"<br />
a bunch<br />
trees. Using very fine florists’ green wire, I twist a bunch<br />
together to create the trunk and branch structure. I use latex<br />
together to create the trunk and branch structure. I use latex<br />
rubber I bought online to get rid of the wire texture and create<br />
rubber I bought online to get rid of the wire texture and create<br />
the bark. I then use static grass, glued using spray adhesive, in<br />
the bark. I then use static grass, glued using spray adhesive, in<br />
varying lengths to add the finer twigs.<br />
varying lengths to add the finer twigs.<br />
I paint the tree with a rattle can brown and then apply Noch<br />
I paint the tree with a rattle can brown and then apply Noch<br />
leaves using the spray adhesive. You have to be careful to only<br />
leaves using the spray adhesive. You have to be careful to only<br />
spray the twigs and not the trunk. This may sound very long<br />
spray the twigs and not the trunk. This may sound very long<br />
winded, and it is, but you only need to do a few for a layout<br />
winded, and it is, but you only need to do a few for a layout<br />
and they will make all the difference.<br />
and they will make all the difference.<br />
<strong>October</strong> <strong>2018</strong> - ROUNDHOUSE 15
Bushes<br />
Next up are bushes. I use these around the trees, at edges of<br />
scenery and near buildings to add a middle height layer. I tend<br />
to go simple with bushes and use either rubberised horse hair<br />
or poly fibre as a base. I tear these into bush shapes. I use the<br />
spray adhesive followed by the Woodland Scenics' fine turf or<br />
Noch leaves to add foliage. I can create hundreds really<br />
quickly!<br />
and gives density. I choose a brighter colour as grass is<br />
normally greenest at the base.<br />
Applying the grass needs a static charge. You can use a puffer<br />
bottle (I certainly have) but the grass does not stand as<br />
upright. A static grass applicator gives better results but is<br />
pricier. You can make your own but that's a whole new hobby<br />
– building tools!<br />
There are specialist glues you can use for static grass made by<br />
the grass manufacturers. I have used thin white glue but<br />
apparently this skins more quickly. Generally, I try and glue<br />
small patches at a time to avoid this.<br />
Either remove your trees and bushes or mask them off using<br />
newspaper to avoid them becoming covered in grass. Fill up<br />
your grass applicator, brush a thin layer of the glue on to the<br />
ground, turn on the applicator, attach the grounding lead<br />
somewhere near the glue and sprinkle the grass on. You can<br />
hoover the spare grass up at this stage whilst the glue is still<br />
wet and the suction of the hoover will pull the grass more<br />
upright.<br />
Grass<br />
Nothing beats static grass to represent grass. It is short fibres<br />
that stand upright in just the way that real grass does. The<br />
danger is that if you just put static grass down on a plain board,<br />
it has no texture and looks like a bowling green. That is<br />
obviously not ideal in most cases so it can be worth gluing on<br />
a few bits of small talus or something similar if you have a<br />
completely flat surface.<br />
I generally start with a short base layer of grass. This is best at<br />
about 2mm in HO and O scale as this grass covers the ground<br />
I use tights material over the end of my hoover and I do have a<br />
dedicated small grass-only hoover. Both methods allow you to<br />
recover your grass to reuse again.<br />
Next up you need to add the main grass layer. This is the<br />
colour you want to be most obvious when you look at the<br />
area. Later summer grass will be more straw coloured and<br />
there are some great brands out there, such as WWS (supplied<br />
through Peco as well) or Noch, who mark their grass by the<br />
season it is supposed to represent.<br />
I find it best to use the WWS layering spray at this point as a<br />
glue. I have tried other spray glues (they leave little balls) or<br />
brushing on a white glue (you need to wait for it to be set<br />
16 ROUNDHOUSE - <strong>October</strong> <strong>2018</strong>
and dry before doing this) but the layering spray gives the<br />
quickest and best consistent result. It's very easy to use and<br />
you just spray the glue then apply the grass. You can build up<br />
multiple layers of grass with this technique in a matter of<br />
minutes.<br />
You can also wipe on white glue with your finger and sprinkle<br />
on small amounts of ground foam to represent leaved plants<br />
or flowers. A little can go a long way with this technique but it<br />
builds up another layer of texture and adds to the reality.<br />
Sometimes I go back with an airbrush and add a different<br />
colour, such as a vivid green in a damp hollow, just to give<br />
variety. You can dry brush the tips a pale colour to represent<br />
the grass drying in later summer.<br />
Bedding in Buildings and Structures<br />
At this point I bed in my buildings. If you have them on a base<br />
then you just need to merge the scenery. If they are individual<br />
buildings then do pay careful attention to getting them to sit<br />
in the landscape. A pet hate of mine is the dark lines around<br />
the bottom of buildings where they don't quite meet the<br />
ground.<br />
If this happens, don't panic! You can use thin rolls of plasticine<br />
to add an easily malleable gap filler which allows you to remove<br />
the building later if needed. If you are happy to glue solidly in<br />
place then do run your scenery up to the building and think<br />
carefully about the detritus that builds up against the edges of<br />
buildings, such as leaves, rubbish, dirt etc.<br />
Details<br />
The best-looking scenery has multiple layers which build up the<br />
illusion of reality. Nature is not just one colour green or one<br />
texture. We need to emulate this with our modelling.<br />
As with roads, details are a good way to add extra layers and they<br />
can be anything from weeds to rubbish. I recommend detailing<br />
the foreground more than the background. Details naturally get<br />
lost as they get further away and we can force a feeling of depth<br />
with our placement of items. Here are some ideas to get you<br />
started:<br />
• Scale newspapers - made out of fine printed paper<br />
• Rubbish – I find that cut up sweet wrappers make excellent<br />
rubbish but you can buy all sorts of details such as bottles or<br />
cans to add more layers<br />
• Leaves – as with roads or in larger scales consider using laser<br />
cut leaves for effect. They're not cheap but just one or two<br />
can look amazing<br />
• Weeds – you can use ground foam for simple weeds through<br />
to laser cut dandelions or nettles from suppliers like Noch<br />
• Animal paths – through patches of grass land<br />
• Flowers – using white or coloured ground foam<br />
• Animals or birds – dock scenes look excellent with a few<br />
seagulls<br />
• Bird mess – naturally follows the birds and easily done with<br />
fine application of white acrylic paint<br />
• Abandoned junk or cars – use up those mistakes and weather<br />
them to death so no one can see the problems!<br />
Once the basics and details are in I do recommend taking some<br />
photos and seeing where areas look flat, model-like or just plain<br />
boring. Shiny spots can be fixed with matt varnish. See overleaf<br />
for some photos of details added to aspects of models to bring<br />
them alive.<br />
That's a whistle stop tour of basic scenery. There are some<br />
excellent videos and books out there to help if you get stuck,<br />
wonder how best to achieve something or want to take your<br />
scenery to the next level. There are many reference sources<br />
today, beyond just books and magazines.<br />
A selection of my videos on YouTube can be found here:<br />
Reference Sources<br />
Static grass: https://www.youtube.com/watch?v=IiR83CikHoo<br />
River beds: https://www.youtube.com/watch?v=soMGwgm6FFI<br />
Dioramas: https://www.youtube.com/watch?v=f_UNpdJa-3U<br />
Muddy roads:<br />
https://www.youtube.com/watch?v=02Rt8If7Qes&list=PLrIRL5<br />
XIQmdmIANRZrRuIzJEdhfeTVD5S<br />
Making water:<br />
https://www.youtube.com/watch?v=Z0PtkWhANFU<br />
Clutter: https://www.youtube.com/watch?v=rd6AIisaST8<br />
Books by Gordon Gravett from Wild Swan Publications:<br />
Modelling Trees Part One – Broad Leaf Trees<br />
Modelling Trees Part Two - Conifers<br />
Modelling Grassland and Landscape Detailing<br />
<strong>October</strong> <strong>2018</strong> - ROUNDHOUSE 17
Here’s an example of scenery using the techniques described.<br />
It’s only a small scene and is actually a scenic break between<br />
two detailed sections of my layout. It’s important to give the<br />
eye somewhere to rest every now and then.<br />
Only a few inches back and we are into the middle ground of<br />
the scene. The trees are generic plastic ones that I have added<br />
ground foam to and the bushes are polyfibre or rubberised<br />
horse hair with the same ground foam and only the odd leaf.<br />
In between the foreground and the middle ground is a dividing<br />
bog area.<br />
The static grass has been painted a little but lacks the extra<br />
detailing of the foreground.<br />
The foreground starts off with high detail including hand made<br />
wire trees with Noch leaves, laser cut plants including<br />
butterflies, a detailed (or soon will be) vehicle on a weathered<br />
mud road and static grass with dandelions and other weeds.<br />
The background is just cheap wire trees with ground foam and<br />
a painted sky. The colours are limited and nothing stands out<br />
to draw your attention but you know that there is depth to the<br />
scene.<br />
18 ROUNDHOUSE - <strong>October</strong> <strong>2018</strong>
The U.K.’s Premier North American<br />
Model Railroad Store<br />
Now in stock and selling fast –<br />
Scaletrains ‘N’ scale<br />
GE Tier 4 GEVo’s<br />
We are pleased to announce that we are now the sole UK dealer for the<br />
VAN PETEGEM range of hand painted farm animals in both ‘N’ and ‘HO’ scales,<br />
these are superb models and totally new to the UK market<br />
Authorised dealer & stockist for most North American brands in HO, N & Z including:-<br />
American Z Line Athearn Atlas Bachmann USA<br />
BLMA Cornerstone Deluxe Innovations DPM<br />
Fox Valley Full Throttle Intermountain Kato<br />
Micro-Trains Red Caboose Rokuhan Roundhouse<br />
ScaleTrains Tangent Trainworx Walthers<br />
Woodland Scenics<br />
Give us a try, new stock arriving all the time<br />
Plenty of FREE parking right outside the door<br />
Friendly service (FREE tea & coffee always on)<br />
Where you can see, touch & feel before you buy<br />
If we do not have it in stock we will endeavour to get it<br />
Browse our new website – www.mech-models.com<br />
<strong>NMRA</strong> Members<br />
Open - Mon to Fri 9.00 to 5.00<br />
Sat - please ring<br />
MECH MODELS<br />
Unit 9, Lancaster Park, Newborough Road, Needwood,<br />
Burton on Trent, Staffordshire, DE13 9PD<br />
www.mech-models.com 01283-575444 admin@mech.co.uk<br />
<strong>October</strong> <strong>2018</strong> - ROUNDHOUSE 19
Mixing it with the British<br />
(Outline modellers that is)<br />
Mike and Martin Ford<br />
Going to a model railway<br />
exhibition always has its<br />
risks, whether you visit as<br />
an exhibitor, trader or as a<br />
member of the paying public.<br />
As an exhibitor you hope that some<br />
visitors will take an interest in what<br />
you’ve tried to achieve from a wide<br />
range of aspects - operation, scenery,<br />
representation of the original<br />
if one existed, or the concept if the<br />
layout is free-lanced. You are also<br />
hoping for a well organised exhibition,<br />
decent access to unload/load,<br />
reasonable operating space, copious<br />
cups of tea (or coffee) etc.<br />
As a trader you hope for a constant<br />
stream of visitors thrusting pictures of<br />
the queen into your hands or transferring<br />
money to you whether it be<br />
contactlessly or not.<br />
As a member of the public you are<br />
hoping to see some decent quality<br />
layouts, operating without too much<br />
interference from the big hand of<br />
god, without prolonged periods of inactivity<br />
and without indifference from<br />
the operators.<br />
We’ve pretty much given up going in<br />
the role of the general public, due to<br />
seeing/experiencing at first hand too<br />
much of the finger prodding, inactivity<br />
or indifference.<br />
wedges of cash that were being<br />
thrust into our palms. Pity we had to<br />
hand it over to someone else, but it<br />
was an experience none the less.<br />
It was in the role of exhibitor that we<br />
attended the Sleaford Model Railway<br />
Club’s annual exhibition on 2nd June.<br />
Although only scheduled for a single<br />
day it was sufficiently local for us that<br />
the journey was neither difficult nor<br />
time consuming (30-minute drive).<br />
We arrived early at St. Georges<br />
Academy in Sleaford having negotiated<br />
a road closure into the site<br />
(courtesy of activity from the local fire<br />
brigade). The weather was extremely<br />
humid, precipitating a torrential<br />
downpour as we pulled up to unload.<br />
Fortunately the main unloading doors<br />
were covered with a sort of veranda<br />
which prevented an unnecessary<br />
soaking. We had co-opted Richard<br />
Brooks - a fellow Black Diamonds<br />
member - to assist and Richard was<br />
already there. Having located, and<br />
communicated with one of the club’s<br />
organisers, we determined where<br />
we needed to be in the exhibition<br />
hall and began setting up. Within<br />
the hour, we were good to go - trains<br />
were ready to run, and equally<br />
(more!) importantly we had found<br />
were the tea was dispensed, and the<br />
bacon sandwiches!<br />
As is usually the case we were the<br />
only representative of the North<br />
American scene (sometimes there<br />
may be two of us but it is unusual)<br />
- we were surrounded by British layouts<br />
of various gauges, and traders<br />
catering primarily for the British modeller.<br />
The public were admitted at<br />
10.00 am and it soon started to look<br />
like it was going to be one of the better<br />
exhibitions. There was a lot more<br />
questions from the public, some genuine<br />
real interest We were visited by<br />
a variety of people ranging from an<br />
We’ve done the trader bit, more in<br />
the role of assistant - just accepting<br />
Richard Brooks Honing his DCC skills - Padden Flatts at Sleaford RailEx<br />
<strong>2018</strong> - Photo Martin Ford<br />
20 ROUNDHOUSE - <strong>October</strong> <strong>2018</strong>
We tend to act as trainee recruitment<br />
officers if someone admits to being<br />
a closet American Railroader. We<br />
always take <strong>NMRA</strong> publicity material<br />
to hand out and encourage interested<br />
parties to seek out their nearest<br />
venue/Division and go along and see<br />
what it can offer them. We returned<br />
home with our stock of ‘promo’ material<br />
seriously depleted - an unusual<br />
yet pleasant change from the norm.<br />
Holding Up the Traffic - Padden Flatts - Photo Martin Ford<br />
American gentleman who felt quite at<br />
home when seeing a snapshot of the<br />
Midwest. It turned out that his interest<br />
was in continental modelling as he<br />
was in the midst of a massive project<br />
to recreate Berlin’s main terminal<br />
and surroundings. Later in the day<br />
an elderly ex-mariner from the coal<br />
freighters which sailed between the<br />
eastern seaboard of the US (N&W,<br />
C&O, B&O piers) and Japan in the<br />
50s was drawn to a large articulated<br />
steam engine slumbering on the team<br />
track lead. Although it was not the locomotive<br />
he thought it was (A, Y, H8,<br />
EM-1), a Big Boy never fails to draw<br />
the interest - they really did have a<br />
very good press officer, although they<br />
are not the largest steam locomotive<br />
in spite of statements to that effect.<br />
To clarify we operate a small switching<br />
layout set in the Midwest in 1967,<br />
power is usually GP20’s and/or<br />
SW7’s - occasional non-era specific<br />
locomotives have been known to<br />
make an appearance (Challengers,<br />
Big Boys, Turbines, U50’s and<br />
Centennials). These locomotives are<br />
not used operationally but do provide<br />
stimuli for conversions with the public.<br />
In summary it was a really good<br />
exhibition for a lot of reasons, mainly<br />
because of the visitor quality, but<br />
organisationally also. The Railway<br />
Society had an increased visitor total,<br />
had complimentary reviews and generally<br />
were well pleased with the day.<br />
Thanks to Richard for his assistance<br />
and to the organisers for giving us the<br />
opportunity to play trains.<br />
We’ll be at the Lichfield show later<br />
this year (15th September), Soar Valley<br />
in 2019 with other bookings to be<br />
confirmed if any fellow <strong>NMRA</strong> members<br />
want to come along and chat.<br />
Mike and Martin Ford<br />
<strong>October</strong> <strong>2018</strong> - ROUNDHOUSE 21
CN Tempo Trains<br />
Peter Bowen<br />
CN RS18m 3151 at the head end of the Tempo Train Service from Windsor to<br />
Toronto with assistance from CN RS18 3104. Photos by Andy Panko<br />
June <strong>2018</strong> marked the 50th anniversary<br />
of the introduction of<br />
the Tempo, a unique Canadian<br />
National (CN) passenger train<br />
that operated between Toronto, Windsor,<br />
Sarnia and Chicago. The Tempos<br />
consisted of a fleet of 25 lightweight<br />
streamlined railway coaches built by<br />
Hawker-Siddeley Canada in Thunder<br />
Bay Ontario for the Canadian National<br />
Railway in 1968. The cars were the<br />
centrepiece of a new set of intercity<br />
passenger trains in Southwestern<br />
Ontario. The fleet passed to Via Rail<br />
in 1978 and later saw use with the<br />
Ski Train, QIT-Fer et Titane, and the<br />
Algoma Central Railway.<br />
Hawker Siddeley Canada was the<br />
Canadian unit of the Hawker Siddeley<br />
Group of the United Kingdom and<br />
manufactured railcars, subway cars,<br />
streetcars, aircraft engines and ships<br />
from the 1960s to 1980s.<br />
Unlike most other passenger cars<br />
in North America from the time that<br />
looked like a Budd or Pullman design,<br />
the Tempo cars were quite unique in<br />
their appearance and construction<br />
that had aluminium body shells.<br />
Motive Power<br />
Canadian National rebuilt six Montreal<br />
Locomotive Works (MLW) RS-18m<br />
diesel locomotives in 1968 to have<br />
a top speed of 92 MPH and provide<br />
575V Head End Power (HEP) to haul<br />
the Tempo railcars. The locomotives<br />
were painted in a unique red-orange<br />
and grey livery. The Tempo cars<br />
were built to use Canadian National’s<br />
standard 550 volt HEP; in 1982-83 Via<br />
rebuilt them to use 480 volts. The cars<br />
rode on inside bearing trucks with outboard<br />
disc brakes, GO transit’s bilevel<br />
cars have a similar truck design and<br />
were built with modern electric power<br />
rather than the old-school steam heating<br />
seen on the iconic stainless steel<br />
streamliners of North America<br />
The original fleet consisted of five<br />
club/galley cars, five coach/cafe cars,<br />
and fifteen coaches. The club cars<br />
seated 39, the cafes 16 (in the coach<br />
section), and the coaches 80. In 1969<br />
Canadian National rebuilt one of the<br />
club cars into an 80-seat coach and<br />
another into a 52-seat coach/galley<br />
car. The seating in the club car was<br />
2×1, common for parlor cars.<br />
When the Canadian National reacquired<br />
part of the fleet in 2009 it<br />
refurbished the cars, replacing the<br />
windows, carpet, and seat upholstery.<br />
Service<br />
The Tempos entered service on the<br />
Canadian National Railway in mid-<br />
June 1968. Canadian National operated<br />
the Tempos as integrated trainsets.<br />
22 ROUNDHOUSE - <strong>October</strong> <strong>2018</strong>
Routes served included Toronto–Windsor and Toronto–<br />
Sarnia. At the outset each set comprised a club/galley car,<br />
three coaches, and a coach/cafe. Travel time was four<br />
hours. The cafe/coach and the addition of luggage racks in<br />
the coaches allowed the elimination of dining and baggage<br />
cars. In 1971 Canadian National ran five daily “Tempo”<br />
trains: four to Windsor and one to Sarnia. Via Rail inherited<br />
the fleet and leased the RS-18s. By 1980 the Tempos were<br />
limited to the Windsor route. Via later placed the Tempos in<br />
service on the Chicago–Toronto International. These were<br />
pulled by LRC locomotives.<br />
remaining Via Tempo car, coach No. 370, was reported at<br />
the Toronto Maintenance Centre in 2000. After the closure<br />
of the Ski Train CN acquired its rolling stock for use on the<br />
Algoma Central Railway.<br />
Peter Bowen<br />
special thanks to Andy Panko for the photos<br />
CN Tempo logo by kind permission of Rapido Trains<br />
Via Rail stored the five cafe cars in 1986 after a regulatory<br />
change permitted it to serve alcohol in coaches. In<br />
1987 Via Rail included up to four Tempo coaches on the<br />
International. The cars ran between Toronto and Sarnia<br />
on Sundays only. The remainder of the fleet was stored.<br />
At the end of 1987 Via sold all but four of the cars. Four of<br />
the coaches went to QIT-Fer et Titane, which used them<br />
to shuttle workers. 17 cars, including the three remaining<br />
club/galleys, the coach/galley, the five coach/cafes, and<br />
eight coaches, went to the Ski Train in Denver. On the Ski<br />
Train they replaced 1915-vintage cars which had been<br />
sold to the Napa Valley Wine Train. Via withdrew its four<br />
remaining Tempos in 1990 because of budget cuts.<br />
QIT acquired three more coaches in 1998. The sole<br />
<strong>October</strong> <strong>2018</strong> - ROUNDHOUSE 23
Faux Narrow Gauge Locomotives<br />
Jason Stamper<br />
Part 2<br />
Completed locomotives 12 and 9<br />
photos by Jason Stamper<br />
Headlight Modifications<br />
I was not happy with the stock<br />
headlights. They had clear lenses<br />
with square light tubes behind them<br />
and were not very bright at all. The<br />
boiler shells were already removed<br />
for painting but removal would have<br />
been necessary for this as well. I<br />
started by popping the stock lenses<br />
out with a knife. Next, I removed the<br />
stock light tubes. This took a bit of<br />
doing as they were clipped in well.<br />
I ended up breaking the light tubes<br />
into pieces.<br />
There are a few important notes<br />
here. First, make sure the light soldering<br />
does not contact the screws<br />
because they are part of the power<br />
pickup. Second, seal everything up<br />
with liquid electrical tape to prevent<br />
shorts. To replace the stock lenses I<br />
used MV Products lenses drilled out<br />
slightly in the back and glued them in<br />
with CA. Finally, I cut small fingernail<br />
shapes of thin sheet brass to fashion<br />
hoods for the headlights and glued<br />
them on with CA. I decided to only<br />
paint the top of the lens hood as the<br />
raw brass helps reflect the light.<br />
Detailing the 2-6-0 Mogul<br />
My plan for the Mogul was to loosely<br />
base it on the Colorado and Southern<br />
#9. All nitpicking aside, the wheel<br />
configuration was right, and although<br />
the prototype was a smaller loco it<br />
seemed close enough.<br />
I unscrewed the stock light boards<br />
and de-soldered the stock LEDs.<br />
Then soldered pre-wired micro LEDs<br />
with short leads to the light boards<br />
where the lighting wires came in.<br />
To put the lights back together, I fed<br />
the micro LEDs up through the holes<br />
the light tubes once occupied and<br />
carefully replaced the boiler castings.<br />
Finally I replaced the boiler front<br />
removed earlier.<br />
I bought some detail parts from<br />
Republic Locomotive works. The first<br />
part added was the snowplow. This<br />
detail part was actually N scale but<br />
designed to fit on an Nn3 locomotive.<br />
As a result it was a bit short on the<br />
bottom so I just cut a bit of the scrap<br />
off the etching sheet that the plow<br />
came on and glued it to the bottom of<br />
the plow. I airbrushed it flat black and<br />
added a support rod from the center<br />
of the plow to a hole drilled under the<br />
headlight.<br />
24 ROUNDHOUSE - <strong>October</strong> <strong>2018</strong>
The next part added was the Ridgeway<br />
or “Bear Trap” cinder catcher<br />
that I had already airbrushed flat<br />
black. It took some fussing with to<br />
shape the down pipe to fit my loco,<br />
after which it was glued to the top of<br />
the stack with CA. This Nn3 part, like<br />
the plow was a bit short with the cinder<br />
pipe not going down far enough.<br />
I simply glued a piece of a toothpick<br />
to the front of the cylinders and painted<br />
it flat black to match. This is one<br />
of my favorite detail parts.<br />
After this I added mullions to the front<br />
cab windows which were cut out of<br />
a Grandt Line engine house window,<br />
painted red to match the existing cab<br />
window trim and then carefully glued<br />
in with CA. The last detail part added<br />
to the locomotive itself was some<br />
feed water pipes. This loco was a bit<br />
lacking on external piping details so I<br />
thought these would add to it.<br />
For the tender I added a small air<br />
tank and piping on the back like the<br />
C&S #9. This part too was airbrushed<br />
flat black before it was applied. I’ve<br />
always liked tender doghouses on<br />
narrow gauge locomotives, and<br />
although the C&S #9 did not have<br />
one, my brakemen were complaining<br />
so I gave in. This little doghouse was<br />
entirely scratch built from building kit<br />
scraps with a bit of wire for handrail<br />
details. It was painted flat black with<br />
acetone “glass” added in the windows.<br />
Now my brakemen can get<br />
out of the weather and stop complaining!<br />
Detailing the 4-6-0 Ten Wheeler<br />
I did not have a real prototype in<br />
mind for this locomotive so only a<br />
few details were added. I did decide<br />
to add a homemade spark arrestor<br />
much like those found on the<br />
Durango and Silverton’s locomotives.<br />
Some fine screen, which I also got<br />
from Republic Locomotive Works,<br />
was cut in a narrow strip test fitted<br />
to the circumference of the smoke<br />
stack and cut to length. I glued it<br />
together with a tiny bit of CA using<br />
reverse tweezers as a clamp. While<br />
that was setting, I cut a tiny circle of<br />
screen using a bamboo skewer as<br />
a guide. This was glued on the top<br />
of the mesh ring and then the whole<br />
thing was glued to the top of the<br />
stack. Next I cut another tiny strip of<br />
painter’s tape and wrapped it around<br />
the top of the stack to hide the joint<br />
between the screen and stack.<br />
Lettering and Re-lettering<br />
First I had to remove any factory<br />
lettering. Both USRA short tenders<br />
came lettered for Union Pacific. To<br />
remove the factory lettering I used<br />
a small piece of paper towel soaked<br />
in Micro Sol and brushed periodically<br />
to keep it moist. After about 5<br />
minutes I used an eraser to rub off<br />
the factory lettering. Custom decals<br />
were required since I had decided to<br />
do my own “faux narrow gauge” line.<br />
Through a Facebook connection, I<br />
found Russell at Red River Models.<br />
I designed a whole sheet of lettering<br />
for locomotives and rolling stock, and<br />
Russell printed them out. His work is<br />
outstanding so be sure to contact him<br />
if you need custom decals. I added<br />
my road name, Silver Creek Northern,<br />
to the Ten Wheeler’s tender and<br />
the number 12 to the back. On the<br />
locomotive, I added numbers to the<br />
cab, sand dome and headlight. I also<br />
added “SCN” in tiny letters to the<br />
bottom of the cab. While I did not use<br />
it as a prototype, Tweetsie Railroad’s<br />
(former ET&WNC) #12 was the inspiration<br />
for the Ten Wheeler’s number.<br />
Later 4-6-0 locomotives will follow<br />
the ET&WNC’s numbering scheme.<br />
Once the decals were applied I over<br />
sprayed the locomotives with Testor’s<br />
Dull Cote.<br />
Weathering<br />
I had actually been stressing about<br />
this quite a bit and finally decided<br />
to order Doc O’ Brien’s weathering<br />
powders from Micro Mark. These<br />
worked great and were easy to use.<br />
I added rust spots to fittings, streaking<br />
to the boiler and tender, sand/dirt<br />
to the running gear and tender trucks<br />
and other general grime. Then, I over<br />
sprayed it again with Testor’s Dull<br />
Cote. This really diminishes the color<br />
of the weathering powders but, the<br />
good news is, more weathering powders<br />
can by applied. When viewed up<br />
very close, the locos almost look over<br />
weathered but when standing back<br />
to a normal viewing distance, I think<br />
they look pretty good. Also, I forgot to<br />
mention that both locomotives got an<br />
engine crew from Woodland Scenics.<br />
Final Thoughts<br />
All in all, this was a great learning<br />
opportunity for me, and has given me<br />
the confidence to try other customizing<br />
projects. My little “faux narrow<br />
gauge” line is going to be quite a<br />
unique railroad.<br />
Jason Stamper<br />
<strong>October</strong> <strong>2018</strong> - ROUNDHOUSE 25
JMRI Programming<br />
A step by step guide to DecoderPro<br />
Ian Watton<br />
Part 1<br />
Several months ago I hosted<br />
a meet of the Kent and East<br />
Sussex Group at my house,<br />
one of the items I had on<br />
show was programming DCC locos<br />
via JMRI DecoderPro. If you’ve not<br />
used this software I highly recommend<br />
it, not only is it free, but the capabilities<br />
far outweigh any dependency<br />
on handheld DCC system where<br />
programming is required. It really<br />
comes into its own when programming<br />
sound decoders, CVs (configurable<br />
variables used to control<br />
functions/operations in the decoder)<br />
which can stretch into the hundreds<br />
and combinations of which CVs are<br />
required for which sound/light combination,<br />
run into the thousands. So<br />
here is a guide on how to make the<br />
most of DecoderPro.<br />
JMRI DecoderPro can be downloaded<br />
from their website: http://jmri.<br />
sourceforge.net/ In order to program<br />
a DCC Decoder you will need an<br />
interface unit between your PC and<br />
your DCC System. The likely cost<br />
is £45 to £70 for those systems that<br />
don’t have a computer interface<br />
already, in the case of Digitrax, the<br />
LocoBuffer (£60) enables so much<br />
more than just programming and the<br />
NCE PowerPro, Digitrax DCS240,<br />
ESU Ecos, and many other systems<br />
have the computer interface<br />
in place already - so no cost at all.<br />
The SPROG Programmer (http://<br />
www.sprog-dcc.co.uk/) currently £65<br />
comes complete with a power supply.<br />
This is the system I have - a SPROG<br />
IIv4 with JMRI version 4.12 on my<br />
PC. This version of JMRI will only<br />
run on Windows 7 and above, as it<br />
requires Java version 8 (a problem I<br />
found when hooking up an old laptop<br />
running Windows XP - it couldn’t<br />
cope!)<br />
26 ROUNDHOUSE - <strong>October</strong> <strong>2018</strong><br />
So having installed the SPROG<br />
IIv4 and reading back the COM<br />
port it’s attached to (the install DVD<br />
explained everything), it’s time to<br />
start DecoderPro. The first screen is<br />
the Preferences which gets Decoder<br />
Pro talking to the DCC System.<br />
Follow the on-screen advice for<br />
System manufacturer and System<br />
connection, and press save when<br />
done. From the above image you can<br />
see the PC has detected SPROG<br />
as being connected to serial port<br />
COM3. Once saved, this information<br />
is retained each time you load up<br />
DecoderPro. Next it’s time to put a<br />
loco on the programming track and<br />
‘read’ the decoder’s information into<br />
DecoderPro. I have a dedicated test<br />
track for just this purpose, which is<br />
independent of my DCC layout (the<br />
benefit is that I cannot accidentally<br />
program any other locos at the<br />
same time), however you may not<br />
be as fortunate as me, and whatever<br />
setup works for you is fine. Put a loco<br />
on the track and we’re ready for the<br />
next step.
To add a new loco click on the ‘New<br />
Loco’ button, you’ll then be asked<br />
to select your decoder from the list,<br />
or to get DecoderPro to ‘read’ the<br />
decoder automatically.<br />
In this example DecoderPro has<br />
successfully read the loco’s decoder<br />
and returned the decoder’s manufacturer,<br />
type of decoder and loco’s<br />
address as currently programmed in<br />
the decoder. In this case the address<br />
is 716. We can change the Roster ID<br />
to something meaningful (I usually<br />
change it to the loco’s description<br />
and running number). It is possible<br />
to change the loco’s address on this<br />
screen so let’s do it! Enter a new<br />
number in “Active Address” then click<br />
on ‘Write’.<br />
save it to the decoder. With Lenz (the<br />
system I have on my layout) it takes<br />
at least 12 key presses on the handheld<br />
controller to achieve the same<br />
result. The same method in Decoder<br />
Pro is used to make complex changes.<br />
And we will look at that next.<br />
Click on ‘Open Comprehensive Programmer’,<br />
one of the tabs available<br />
(shown above) is the Function Map.<br />
This gives details of what function<br />
is attributed to which output wire or<br />
operation. What is a time consuming<br />
process with Lenz, becomes<br />
a doddle with JMRI. Everything is<br />
displayed on screen. The first step<br />
we need to do is ‘Read Full Sheet’ to<br />
see what is already programmed in<br />
the decoder. Having done this, the<br />
default positions on the sheet change<br />
from a yellow background to clear<br />
background and the ticks may move<br />
around. I have multiple output wires/<br />
operations configured to function 1,<br />
2 and 6 (This loco has working ditch<br />
lights that flash for grade crossing<br />
simulation and there are dimming<br />
capabilities for all lights).<br />
In the example below I want to<br />
change the operation of functions 3<br />
and 4, so that F3 operates the Ditch<br />
lights and F4 operates the Dimming.<br />
For Function 3 click in the box<br />
to select Dim and deselect Ditch, and<br />
repeat this process for Function 4.<br />
DecoderPro changes the background<br />
of the changes made to yellow, so<br />
you can see<br />
which operations<br />
have change to<br />
be made.<br />
Now click ‘Write<br />
changes on sheet’<br />
and wait until<br />
everything stops<br />
flashing on the<br />
screen. The loco<br />
may move too<br />
on the programming<br />
track whilst<br />
this is happening<br />
(It does at least<br />
show things are<br />
happening!). If<br />
any of the columns<br />
stay Red then the programming<br />
has been unsuccessful. However,<br />
in our example everything worked<br />
fine and the background returned to<br />
clear.<br />
As you can see the changes have<br />
been made with 5 clicks of the<br />
mouse and none of the stress of a<br />
proprietary DCC system! Placing the<br />
loco on the layout and selecting F3<br />
now switches the Ditch lights on and<br />
F4 Dims the headlights.<br />
When you write changes to the decoder<br />
all the boxes that can be written<br />
briefly turn red then flash yellow<br />
as the changes are accepted. If I put<br />
the loco on my layout now I would<br />
be able to run it as #455. As you can<br />
see we only needed 4 mouse clicks<br />
to change the running number and<br />
Ian Watton<br />
. . . In the next part of this series<br />
we’ll look at adding another loco to<br />
DecoderPro’s roster and programming<br />
a sound loco.<br />
<strong>October</strong> <strong>2018</strong> - ROUNDHOUSE 27
BLACK DIAMONDS<br />
Meets: Saturdays all meetings at Kegworth<br />
Village Hall. DE74 2FH. from 9.30 to 4.00.<br />
The Hall will be open from 9am and help will<br />
be much appreciated with setting up and<br />
taking down. www.black-diamonds.org.uk<br />
Steve Dennison 07834 718651 stevedennison46@yahoo.com<br />
CALDER NORTHERN<br />
Meetings: 15th April, 19th May, 10th June<br />
14th July, 12th August, 15th September,<br />
7th <strong>October</strong>, 17th November,16th December<br />
(Christmas Meet) At “Crewe Heritage<br />
Centre”, Vernon Way, Crewe CW1 2DB. Terry<br />
Wynne: t_wynne@sky.com<br />
www.caldernorthern.org<br />
CENTRAL DIVISION<br />
Central (North):<br />
West Midlands, Staffordshire and Shropshire<br />
Steve Scott 07912 499430.<br />
Central (South):<br />
Northamptonshire and Warwickshire<br />
Brian Clark 01234 959326.<br />
A5 RAILROADERS<br />
“THE WATLING ROAD”<br />
(formerly Nene Valley Railroaders) Meet<br />
above Northants Model Supplies, Dunster<br />
Street, Northampton NN1 3JY every first,<br />
third, and fifth Thursdays of the month, 10am<br />
to 1pm. New members welcome. We have<br />
an operational end to end layout with a<br />
switching theme (HO DCC) and hold regular<br />
operating sessions on the second Sunday of<br />
even months from 10.30am onward. Geoff<br />
Ford, gt482284@yahoo.co.uk or tel 0208 951<br />
0198<br />
CYDER BELT<br />
THREE COUNTIES GROUP<br />
Hereford, Gloucester, Worcester<br />
Phone Rod Welch 01594 826400 or rod@<br />
worcngauge.co.uk<br />
For exhibitions contact Gavin Fry.<br />
gavin@worcsngauge.co.uk or gavinfry@<br />
btinternet.com<br />
EASTERN DIVISION<br />
Paul Purnell 01284 763701, before 9pm<br />
leave a message if necessary.<br />
pmjandlrr@talktalk.net<br />
THAMESIDERS<br />
Meets third Saturday of each month at Whitegates<br />
Farm, Frating, Essex CO7 7DG 10am<br />
to 5pm. HO and N scale modular layouts all<br />
welcome; free tea, cakes etc. Check with<br />
Geoffrey Smith-Gillard 01255 677482 or<br />
railroader48@gmail.com<br />
NORFOLK & SOUTHWESTERN GROUP<br />
Cambridgeshire, Norfolk & Suffolk:<br />
All enquiries contact Paul Purnell<br />
pmjandlrr@talktalk.net 01284763701<br />
NORTH EAST DIVISION<br />
Chris Hobbs, 8 Rosewood Close, Worksop,<br />
Notts S81 7RD tel 01909 479480 or<br />
07449938889 chrishobbs00@outlook.com<br />
Sheffield Area - No active group at this time.<br />
Contact Chris Hobbs.<br />
NORTHUMBRIA SUB DIVISION<br />
The clubrooms of the Blyth & Tyne MRS at<br />
Redpath House, 40 Saville St., N. Shields,<br />
NE30 1NT www.xclent.net John Wright<br />
0191 416 6280<br />
YORK<br />
We meet within the N Gauge Society Yorkshire<br />
area group, our American modelling<br />
is in N scale and freemo based. Full details<br />
about times and venue can be found here -<br />
http://www.tinyurl.com/ngsyag<br />
NORTHERN IRELAND<br />
Informal get-togethers on the 3rd Tuesday<br />
of each month, anyone interested please<br />
phone Desmond Browne 028 9042 5110<br />
browne151@btinternet.com<br />
RED DRAGONS (WALES) DIVISION<br />
At Conservative Club, Vere Street, Cadoxton,<br />
Barry, Vale of Glamorgan, CF63 2HU<br />
See Red Dragon page on Barry & Penarth<br />
MRC’s web site at www.bpmrc.org.uk<br />
SCOTLAND<br />
Meets at the premises of the Cupar Model<br />
Railway Club In Cupar Fife.<br />
SOUTHEASTERN DIVISION<br />
SEABOARD SOUTHERN GROUP<br />
Crawley, West Sussex Meetings every<br />
Friday evening between 18:30 and 22:30<br />
at Tilgate Park (near K2 Leisure Centre)<br />
and running sessions on Saturdays. We<br />
currently have an HO modular layout with<br />
members also interested in N, HOn3 and<br />
On30 contact Dan Spalding 07876 553211,<br />
secretary@seaboard-southern.org.uk www.<br />
seaboard-southern.org.uk<br />
SOUTH SHORE GROUP<br />
Weekly meetings, on Wednesdays at the<br />
Sompting Village Hall, in Sompting (just off<br />
the A27) between Worthing and Lancing.<br />
Meetings start 7.00 until 10.30. Tea and<br />
Coffee available. To confirm that a meeting<br />
is to take place www.southshore.org.uk or<br />
Nick Whitmarsh 01903206695 pamelawe@<br />
sky.com<br />
KENT & EAST SUSSEX GROUP<br />
The Group meets at members’ homes on<br />
a regular basis to view and run members’<br />
layouts and to hold clinics. Visit the Group’s<br />
page on the Region website at www.nmrabr.<br />
org.uk/divisions-groups/divisions-groups-list/<br />
south-eastern-division/kent-east-sussex<br />
for up to date information on events, Mike<br />
Arnold 01892 459967 tunnelmotor@tiscali.<br />
co.uk<br />
SURREY GROUP<br />
This Group meets in members’ homes every<br />
two months or so to run members’ layouts,<br />
test out locos on a DCC programming track<br />
and just shoot the breeze. Please contact<br />
Stephen Black on 07768 516487 or e-mail<br />
him on: stephenblack2@mac.com. The<br />
meets are open to all <strong>NMRA</strong> members and<br />
others thinking of joining, including those in<br />
South and West London.<br />
SOUTHERN DIVISION<br />
HO BEARWOOD GROUP<br />
Monthly meets 8.30 am to 3.00 pm at the<br />
Bearwood Community Centre, King John<br />
Avenue, Bournemouth BH11 9TF. Visitors<br />
most welcome. Tea, coffee, biscuits available<br />
all day, and excellent fish and chips at lunchtime.<br />
If you are coming from afar, please<br />
phone to confirm dates. Tom Winlow 02380<br />
261971 tom.winlow@btinternet.com<br />
SW&N (SWANS)<br />
Stanwell, Windsor & Northolt<br />
This group currently has a membership of<br />
eight with active layouts, ranging from N to<br />
G - scale and we meet in members’ homes<br />
once a month, on rotation, to run trains and<br />
enjoy a meal together. Charles Hendy 01895<br />
637043<br />
GOSPORT GROUP<br />
(SOLENT SUB-DIVISION)<br />
The Group meets on the second Friday of<br />
each month at 7:30 pm. N Scale modular,<br />
HO, and On30 layouts. Running Meets eight<br />
times a year at St. Mary’s Parish Centre,<br />
Green Road, Alverstoke, Hants PO12 2ET<br />
<strong>NMRA</strong> Members welcome.<br />
www.freewebs.com/gosportrailroadgroup<br />
Bob Norris 07846 482190. gosportrailroadgroup@gmail.com<br />
THAMES VALLEY<br />
Meets every Monday at 7.30pm. Peter Smith<br />
petersmith1942@hotmail.com 01494 864833<br />
or Dave Fryer 01494 439755<br />
READING GROUP<br />
Mike Ingham 01189 872707<br />
michael@theinghams.com<br />
Robin Swan 01189 792448<br />
robin.swan@btinternet.com<br />
WESTERN UNION<br />
Meets: Saturdays HO-modular meets each<br />
month at 1st Crownhill Scout Group, Dayton<br />
Close, Plymouth PL6 5DX. Access from<br />
8am onwards. If you wish to take part in the<br />
operational and running side of things, you<br />
are required to be at the hall by 8.30am maximum,<br />
to lend a hand in carrying-in, erecting<br />
and wiring up (or other helpful stuff within<br />
your capabilities) and to remain to dismantle<br />
and pack the layout at the end of the day.<br />
Coffee & Tea provided. Mike Ruby 01752<br />
369068 mike_rby@yahoo.co.uk<br />
OTHER GROUPS WITH<br />
<strong>NMRA</strong> MEMBERS<br />
The WUT Group (Part Of North London<br />
SME) Legion Way, off Summers Lane, North<br />
Finchley, London N12 0QQ Meets every<br />
Wednesday evening. Contact Rai Fenton<br />
020 8529 7307 rjfen@raisig.demon.co.uk.<br />
28 ROUNDHOUSE - <strong>October</strong> <strong>2018</strong>
ANNUAL REPORT <strong>2018</strong><br />
- DIVISION 12b – IRELAND<br />
Lots of activities provide interest and<br />
enjoyment at our regular monthly<br />
meetings at each other’s homes.<br />
Progress in developing our Layouts<br />
can be seen though some faster<br />
than others! Newest Member Mike<br />
Maguire (SP&S) has progressed<br />
well, his layout reflecting the tracks,<br />
jointly owned by the NP and GN. He<br />
hopes it will reflect the NW area of the<br />
US. Baseboards and most track now<br />
complete with areas of scenery progressing.<br />
Peter McVicar (UP/SP) also<br />
has track well progressed on his large<br />
permanent layout while still being our<br />
only member exhibiting a separate<br />
modular switching layout. This is scenically<br />
very full, with lots of figures and<br />
details in an industrial park. He has<br />
ideas to use it as a “peninsular” for<br />
the permanent layout. Derek Manson<br />
(BN) is still developing his rebuild. We<br />
have had a visit to Laurence Bindley’s<br />
layout at his new home. Now housed<br />
in a roomy garden shed, it has most<br />
Visit to Jeff Young’s D&RGW C&S<br />
HOn3 layout<br />
track in position with buildings saved<br />
from his previous layout carefully<br />
situated. Scenic progress at Victorville<br />
CA (ATSF/UP/SP) has stalled as I<br />
develop tracks on my S-scale layout<br />
loosely based on Phoenix AZ 1950,<br />
Jeff Young’s C&S/D&RGW progressing<br />
an H0n3 system building scenery<br />
as the track is developed. Raymond<br />
Hall (NYC) continues to build S-scale<br />
kits, helping me particularly with my<br />
HO buildings. Our other members,<br />
Norman Adamson and David Chambers<br />
continue to support our efforts<br />
and we all look forward to more enjoyment<br />
and modelling next year.<br />
Des Browne<br />
Layout Registry<br />
Jonathan Small is currently updating<br />
the Region’s list of members’ layouts<br />
available for exhibitions and displays.<br />
It was last updated in 2012-13. He<br />
will be contacting all those members<br />
currently on the list, to check that their<br />
information is correct and up to date.<br />
He invites all members with portable<br />
exhibition layouts built in the last few<br />
years, who would like to be added to<br />
the list, to get in touch with him at -<br />
jonathan.small57@gmail.com<br />
Important Achievement Program<br />
Information for the <strong>2018</strong> <strong>NMRA</strong>BR<br />
Convention<br />
Due to work commitments, I’m not<br />
sure if I’m going to be available at<br />
Derby this year. If you intend to bring<br />
models for assessment, please send<br />
me your completed SOQ’s ASAP so<br />
that I can try and organise people to<br />
be available to assess your models.<br />
I will accept partially-completed<br />
forms immediately IF you have only<br />
just started the model but will have it<br />
completed by the convention.<br />
If you do not send me your SOQs<br />
in advance (as specified in the AP<br />
Rules) and inform me ahead of the<br />
convention, I cannot guarantee<br />
that there will be qualified assessors<br />
available to assess your work.<br />
Please read all the relevant parts on<br />
the website here: https://www.nmra.<br />
org/education/achievement-program<br />
to ensure you provide what is<br />
required to avoid disappointment.<br />
There are tips and tricks there too.<br />
You can find all the forms you need<br />
here: https://www.nmra.org/forms.<br />
DO NOT use the Contest Forms.<br />
Please remember that AP assessing<br />
is not like the contest – you are<br />
expected to be there to show the<br />
assessor around your model and<br />
answer questions. However, it is not<br />
a ‘show and tell’, you still need to<br />
provide all the supporting documentation<br />
and photos showing construction<br />
and conformity (how it conforms<br />
to prototype). I would also request<br />
you to scan and email me all of your<br />
completed forms and documentation,<br />
as I have to send this on to the USA<br />
(I’m also assessed that I’m doing my<br />
job properly and fairly!)<br />
If you have any questions – call me<br />
(between 17:00 – 19:30 preferred,<br />
phone number in the Directory).<br />
One final important reminder – The<br />
AP Chairman (Keith Webb) does not<br />
run the Contests. We do not currently<br />
have a Contest Chairman, so no<br />
contest unless advised otherwise by<br />
the BoD.<br />
Keith Webb<br />
American Model Railroading in HO<br />
Locomotives<br />
Paints & Adhesives<br />
Scenics<br />
Worldwide Shipping<br />
Books<br />
Vehicles<br />
Freight Cars<br />
Passenger Cars<br />
9 Miles from Heathrow Airport<br />
DCC Systems<br />
Website Only Shows In Stock Items and Clearly Marked Advance Reservations<br />
Everything You Need To Go Model Railroading<br />
High Quality Pre-Owned Models<br />
Buildings<br />
Couplers/Trucks/Wheels<br />
Thousands Of Items In Stock<br />
Magazines<br />
Detail Parts<br />
Our Yeovil Road shop is open Tuesday to Saturday 10.00am to 4.00pm. (Closed Bank Holidays), Shop open 5 days a week - Website 24/7<br />
916 Yeovil Road, Slough Trading Estate, Berkshire, SL1 4JG<br />
www.modeljunction.info<br />
<strong>October</strong> <strong>2018</strong> - ROUNDHOUSE 29
KANSAS CITY <strong>2018</strong> NATIONAL CON-<br />
VENTION REPORT - Mike Arnold<br />
KC<strong>2018</strong> was up there with the best I<br />
have attended, and the extras we put<br />
into our itinerary made it so special.<br />
But where to start? So two preliminaries<br />
– first, plan well and book the tours<br />
you want (they do sell out) and second,<br />
arrive in style. Four of us flew into Chicago,<br />
spent one whole day railfanning<br />
Dolton Junction, then took Amtrak’s<br />
Train #3, The South West Chief from<br />
Chicago’s Union station to Kansas City,<br />
a seven hour, 427 mile pleasure in itself,<br />
all for $58! The hotel was opposite<br />
Kansas City Union Station<br />
so views of trains were not<br />
difficult but we had much to<br />
do at the Convention itself.<br />
I gave a clinic on day one<br />
(“British Railway Modelling”),<br />
repeated on day five<br />
and others to listen to tours<br />
to go on etc. The trip to see<br />
Stephen Priest’s ATSF HO<br />
layout was a joy. Visits to<br />
see Mike McLain’s HO MKT<br />
layout and Jon Percy’s N<br />
scale Buffalo & Pittsburgh<br />
on the LDSIG layout tour<br />
day were brilliant - all<br />
quality modelling. Prototype<br />
tours were good too but<br />
with security being the way it is, access<br />
at yards was very limited but expected<br />
so we were not disappointed with that.<br />
The Train Show opened on the Friday<br />
at 9.00am for <strong>NMRA</strong> members only<br />
til noon. As they say in the advertisements<br />
– it’s a candy store! Wallets<br />
were hammered with items you do<br />
not see back at home, with discounts<br />
too. As a consequence all four of us<br />
had to attend Border Control in the red<br />
channel to declare our goodies on our<br />
return. There were also visits to local<br />
hobby stores and one not so local,<br />
Spring Creek Model Trains in Deshler<br />
At Mid-America Car (loco and car re-builders) of the Brits in the<br />
tour group L-R Mike Cox, Mike Arnold, Graham Charman, Dan<br />
Spalding, Dave Griffiths, Ian Lampkin photo by Dan Munson (our<br />
tour guide and also BNSF Yardmaster, BNSF Argentine Yard).<br />
NE. They were at the Tran Show but<br />
we just had to see the shop….<br />
After the Convention closed we hit<br />
the road for a road trip through Kansas<br />
and Nebraska via North Platte’s<br />
Golden Spike Tower to Cheyenne,<br />
WY to visit the Big Boy program (no<br />
photos allowed) and Greeley, CO for<br />
the Colorado Model Railroad Museum,<br />
and then back to Chicago. We discovered<br />
some little gems along the way,<br />
purely by chance. The Rock Island<br />
may be long gone but its presence can<br />
still be found at the Depot Museum<br />
in Fairbury, NE and on the<br />
preserved passenger depot in<br />
Iowa City on IAIS. We were<br />
also spellbound by real operations<br />
and switching on the<br />
short line Nebraska, Kansas<br />
& Colorado Railroad east of<br />
Sterling, CO on what was a<br />
BNSF line. The switchman<br />
travels by pick up between<br />
each location rather the 60-<br />
plus car train reverse each<br />
time to pick him up! But then<br />
we had to come home…..well<br />
pleased with our purchases,<br />
our photos and our memories<br />
of places visited, old and new<br />
friends met, and meals and<br />
beer consumed.<br />
HO CODE 83<br />
Authentic American Track<br />
Featuring the impressive<br />
#6 Double Slip<br />
SL-U8363 UNIFROG<br />
ACCURATELY SCALED FROM A.R.E.A<br />
DRAWINGS & <strong>NMRA</strong> COMPLIANT<br />
5 0 5 0 8 8 1 0 9 9 6 8 1<br />
NEW CATALOGUE<br />
NOW AVAILABLE<br />
Main photo - a scene on Lewis Junction modelled by Roger Epps. Photo: Neil Davis.<br />
THE TRACK SPECIALIST<br />
Find 83 LINE at your favourite model shop or visit www.peco-uk.com for more information<br />
30 ROUNDHOUSE - <strong>October</strong> <strong>2018</strong>
<strong>October</strong> <strong>2018</strong> - ROUNDHOUSE 31
ALCO RS-11<br />
SP<br />
VERSION<br />
SCHENECTADY'S CLASSIC<br />
ROAD SWITCHER IN<br />
GE DasH 8-40CM<br />
w/Full SP<br />
Light Package<br />
FIRST PRE-PRODUCTION SAMPLE<br />
NEW FROM<br />
RAPIDO TRAINS<br />
The first truly accurate Alco<br />
RS-11 in its many variations<br />
A FIRST LOOK AT OUR EARLY<br />
PRE-PRODUCTION SAMPLES. NOTE: NOT<br />
ALL PARTS INSTALLED, VISIT OUR WEBSITE FOR UPDATES<br />
DC/Silent MSRP<br />
US $149.95 CAN $169.95<br />
DC/DCC/Sound MSRP<br />
US $259.95 CAN $289.95<br />
EIGHT LIVERIES, INCLUDING CN/BC RAIL VARIANTS, QNS&L & UNDECORATED<br />
With a mind boggling selection of different road-specific details and optional detail parts<br />
FIRST RUN PAINT SCHEMES INCLUDE: Alco Demo, Conrail blue, Conrail<br />
black (ex-PC patch), Lehigh Valley (as delivered), New Haven (McGinnis),<br />
Norfolk & Western (as delivered), Norfolk & Western (blue w/Hamburger logo),<br />
Pennsylvannia RR (as delivered), Penn Central (ex-PRR/ex-NH), Southern Pacific<br />
(Black Widow), Southern Pacific (Bloody Nose) & five undecorated versions.<br />
MSRP $225 (DC/Silent) and $335 (DC/DCC/Sound). Prices in USD.<br />
THE ORDER DEADLINE IS OCTOBER 15th, <strong>2018</strong><br />
DELIVERY EXPECTED IN MID-2019<br />
ORDER DEADLINE OCTOBER 15TH, <strong>2018</strong>. DELIVERY IN MID-2019<br />
QUEBEC NORTH SHORE & LABRADOR IS A CONDITIONAL ANNOUNCEMENT. IF IT DOESN'T REACH OUR MINIMUM ORDER IT WON'T BE MADE.<br />
50 years of the Tempo.<br />
New from Rapido Trains Inc.<br />
Reserve yours by <strong>October</strong> 15th <strong>2018</strong>.<br />
RAILS OF SHEFFIELD STOCKS RAPIDO!<br />
Visit railsofsheffield.com for more details<br />
rapidotrains.com<br />
RAPIDO SHIPS DIRECT TO THE UK!<br />
Order with confidence from rapidotrains.com<br />
• No VAT added • No duty or fees added • The quoted shipping cost<br />
is all you pay! • Items delivered in the UK using Parcelforce