PSIAugust2019a

Create successful ePaper yourself
Turn your PDF publications into a flip-book with our unique Google optimized e-Paper software.
TEST<br />
PRODUCT TEST<br />
Eaton i-on Compact<br />
Security System<br />
Technical Alarm, Tamper, Log Only, Perimeter,<br />
Not Used, Holdup Alarm and Fire Alarm. Attributes<br />
include Supervision, Chime, Soak Test, Force Set<br />
Omit, Omittable and Part Set B, C or D.<br />
Selectable wireless jamming detection is included<br />
for the key elements of the system.<br />
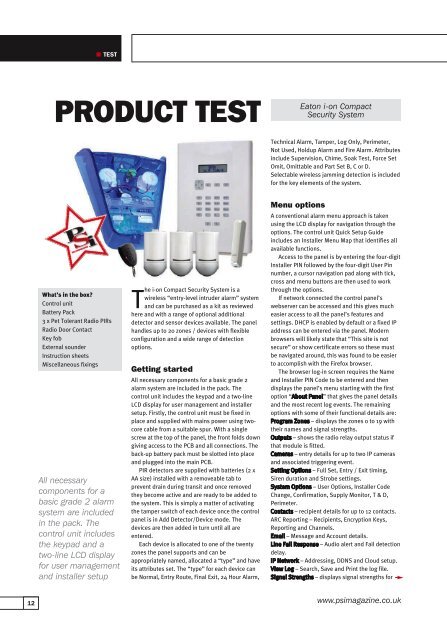
What’s in the box?<br />
Control unit<br />
Battery Pack<br />
3 x Pet Tolerant Radio PIRs<br />
Radio Door Contact<br />
Key fob<br />
External sounder<br />
Instruction sheets<br />
Miscellaneous fixings<br />
All necessary<br />
components for a<br />
basic grade 2 alarm<br />
system are included<br />
in the pack. The<br />
control unit includes<br />
the keypad and a<br />
two-line LCD display<br />
for user management<br />
and installer setup<br />
The i-on Compact Security System is a<br />
wireless “entry-level intruder alarm” system<br />
and can be purchased as a kit as reviewed<br />
here and with a range of optional additional<br />
detector and sensor devices available. The panel<br />
handles up to 20 zones / devices with flexible<br />
configuration and a wide range of detection<br />
options.<br />
Getting started<br />
All necessary components for a basic grade 2<br />
alarm system are included in the pack. The<br />
control unit includes the keypad and a two-line<br />
LCD display for user management and installer<br />
setup. Firstly, the control unit must be fixed in<br />
place and supplied with mains power using twocore<br />
cable from a suitable spur. With a single<br />
screw at the top of the panel, the front folds down<br />
giving access to the PCB and all connections. The<br />
back-up battery pack must be slotted into place<br />
and plugged into the main PCB.<br />
PIR detectors are supplied with batteries (2 x<br />
AA size) installed with a removeable tab to<br />
prevent drain during transit and once removed<br />
they become active and are ready to be added to<br />
the system. This is simply a matter of activating<br />
the tamper switch of each device once the control<br />
panel is in Add Detector/Device mode. The<br />
devices are then added in turn until all are<br />
entered.<br />
Each device is allocated to one of the twenty<br />
zones the panel supports and can be<br />
appropriately named, allocated a “type” and have<br />
its attributes set. The “type” for each device can<br />
be Normal, Entry Route, Final Exit, 24 Hour Alarm,<br />
Menu options<br />
A conventional alarm menu approach is taken<br />
using the LCD display for navigation through the<br />
options. The control unit Quick Setup Guide<br />
includes an Installer Menu Map that identifies all<br />
available functions.<br />
Access to the panel is by entering the four-digit<br />
Installer PIN followed by the four-digit User Pin<br />
number, a cursor navigation pad along with tick,<br />
cross and menu buttons are then used to work<br />
through the options.<br />
If network connected the control panel’s<br />
webserver can be accessed and this gives much<br />
easier access to all the panel’s features and<br />
settings. DHCP is enabled by default or a fixed IP<br />
address can be entered via the panel. Modern<br />
browsers will likely state that “This site is not<br />
secure” or show certificate errors so these must<br />
be navigated around, this was found to be easier<br />
to accomplish with the Firefox browser.<br />
The browser log-in screen requires the Name<br />
and Installer PIN Code to be entered and then<br />
displays the panel’s menu starting with the first<br />
option “About Panel” that gives the panel details<br />
and the most recent log events. The remaining<br />
options with some of their functional details are:<br />
Program Zones – displays the zones 0 to 19 with<br />
their names and signal strengths.<br />
Outputs – shows the radio relay output status if<br />
that module is fitted.<br />
Cameras – entry details for up to two IP cameras<br />
and associated triggering event.<br />
Setting Options – Full Set, Entry / Exit timing,<br />
Siren duration and Strobe settings.<br />
System Options – User Options, Installer Code<br />
Change, Confirmation, Supply Monitor, T & D,<br />
Perimeter.<br />
Contacts – recipient details for up to 12 contacts.<br />
ARC Reporting – Recipients, Encryption Keys,<br />
Reporting and Channels.<br />
Email – Message and Account details.<br />
Line Fail Response – Audio alert and Fail detection<br />
delay.<br />
IP Network – Addressing, DDNS and Cloud setup.<br />
View Log – Search, Save and Print the log file.<br />
Signal Strengths – displays signal strengths for<br />
12 www.psimagazine.co.uk